Kafka sink connector for IBM MQ
In this lab exercise you will connect IBM Event Streams to IBM MQ using the Kafka sink connector for MQ.
Introduction
You can use the MQ sink connector to copy data from IBM Event Streams or Apache Kafka into IBM MQ. The connector copies messages from a Kafka topic into a target MQ queue.
In an earlier lab (lab 6), you installed MQ and configured the source connector which takes messages from an MQ queue and transfers them to a Kafka topic. Running it is very similar to the sink connector. In this lab we will only be covering the sink connector. W will use the same MQ queue manager as we did in Lab 6. We will configure the sink connector to run some tests from a the eslabtester web application to an MQ queue.
At the end of this lab you should be able to install and configure the sink connector for MQ and test sending messages from Event Streams to MQ.
Prerequisites
You must have completed Lab 6 - Kafka Source Connector for IBM MQ. Lab 6 created the MQ queue manager which will be used to transfer messages from Kafka to MQ.
Part 1 - Download the sink connector for IBM MQ
-
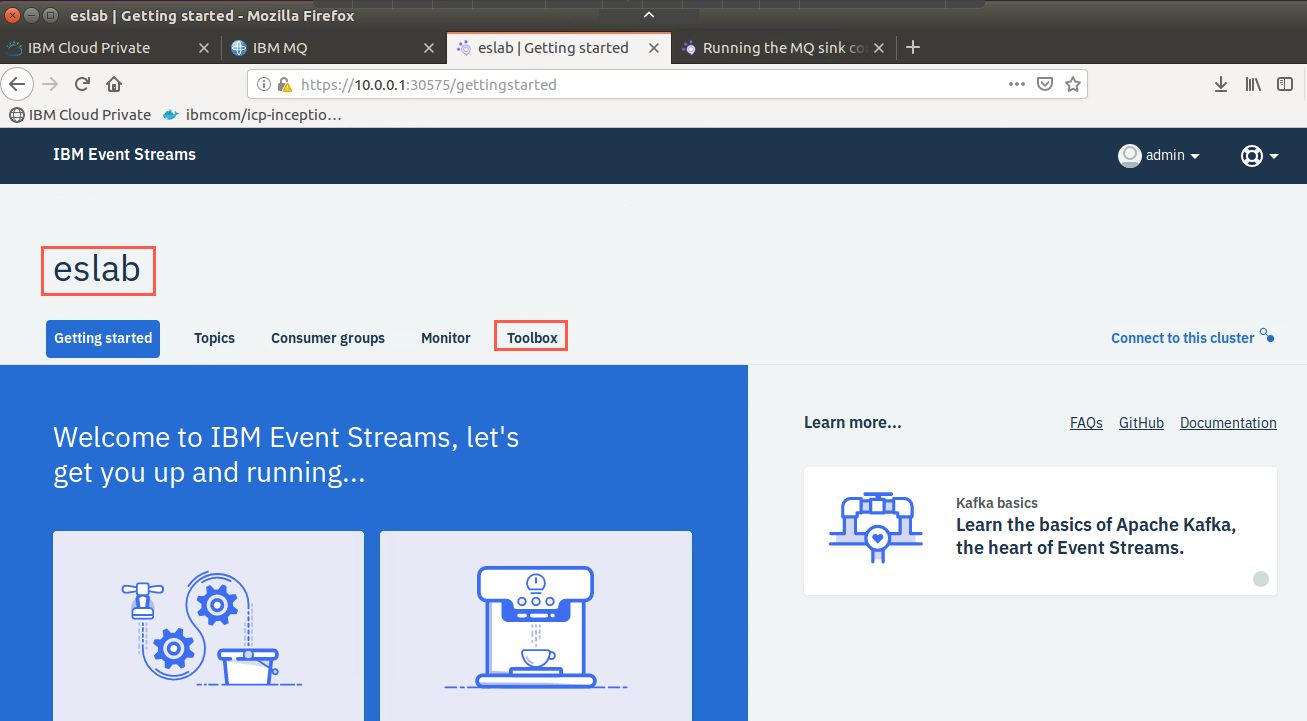
Return to the IBM Event Streams Toolbox UI.
-
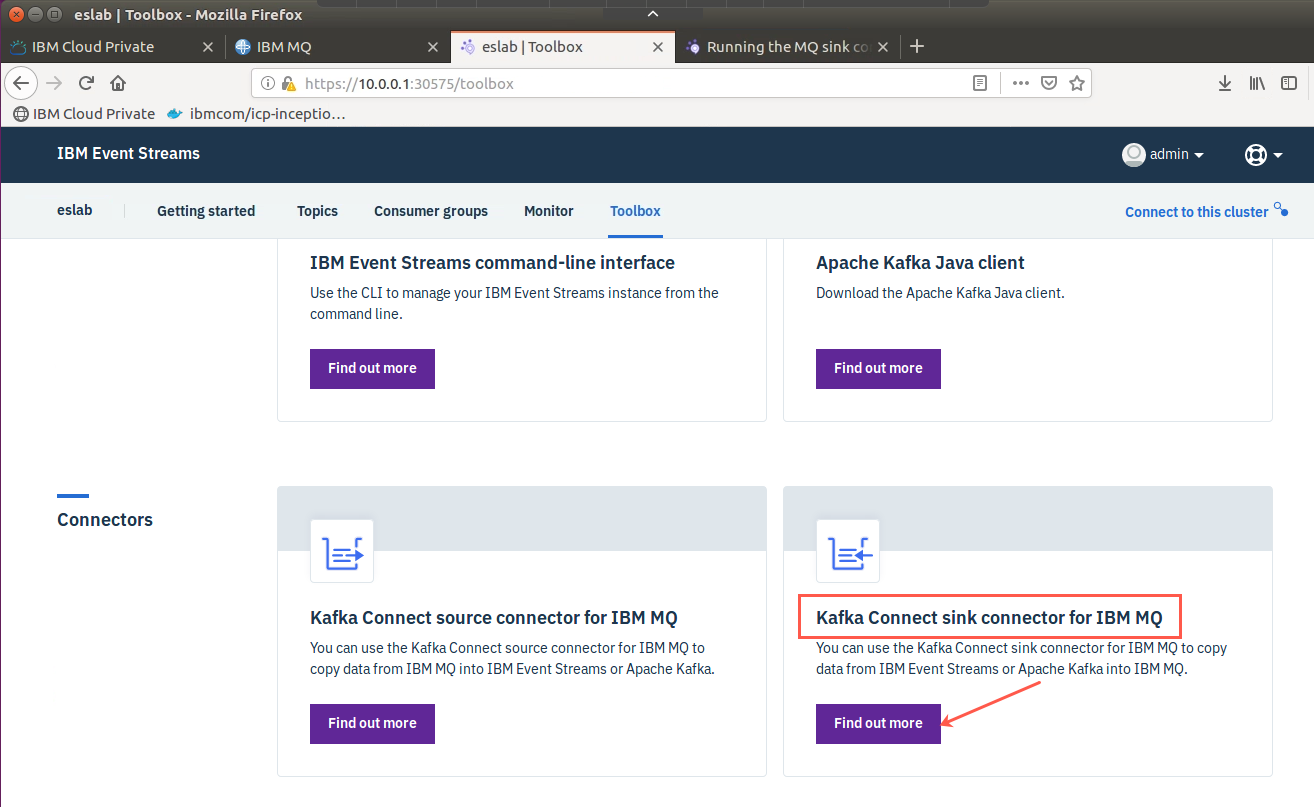
Click the Toolbox tab. Scroll down and click “Find Out More” under Kafka Connect sink connector for IBM MQ.
-
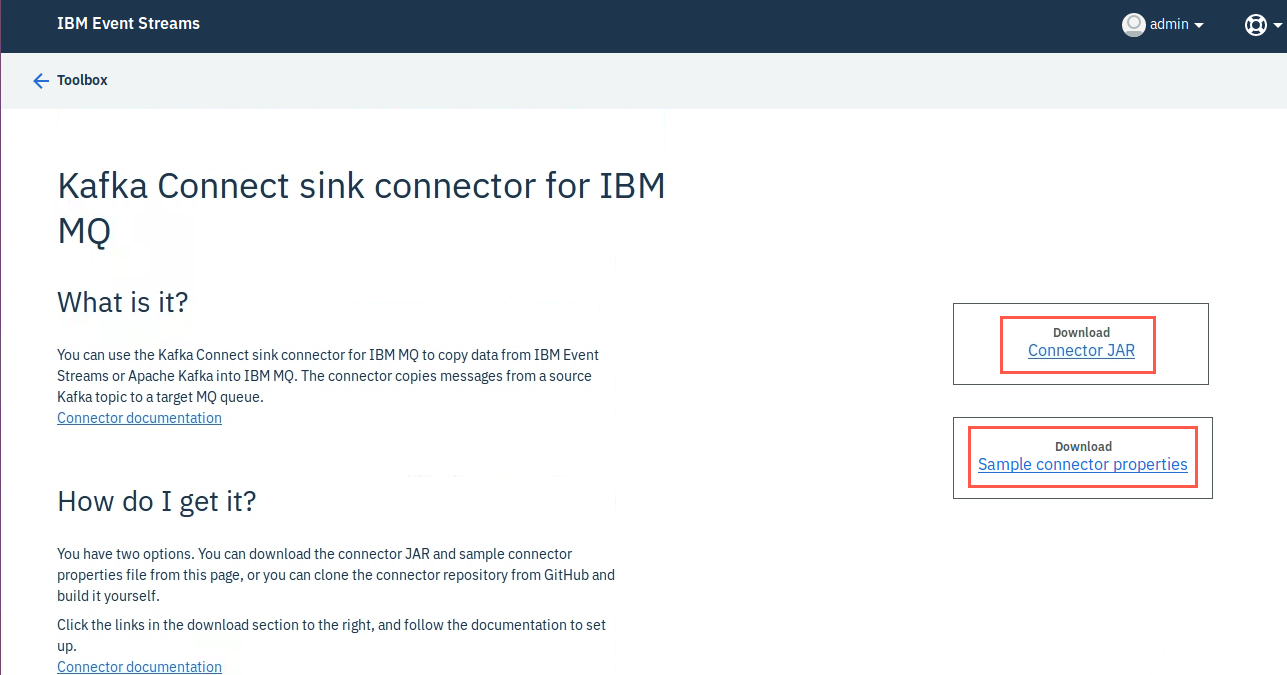
On the right hand side you will see downloads for both the Connector JAR and a Sample connector properties file.
-
Download both the connector JAR and the sample connector properties files from the page.
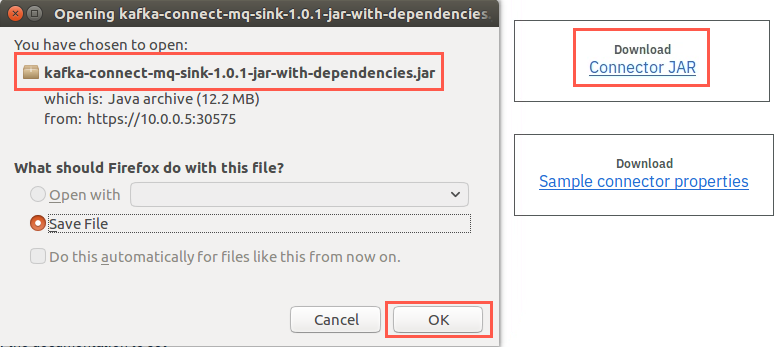
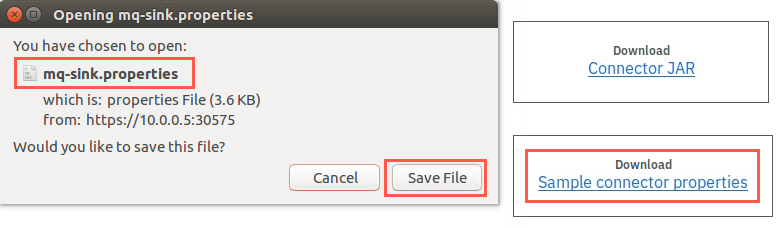
Alternatively, you can clone the project from GitHub. However, if you clone from GitHub, you have to build the connector yourself as described in the README.
Note:
The connector is also available in GitHub if you wish to build it yourself. [https://github.com/ibm-messaging/kafka-connect-mq-source]{.underline} -
Change to the /home/student/Downloads directory where you find the files. Copy the jar and mq-sink.properties to your home directory.
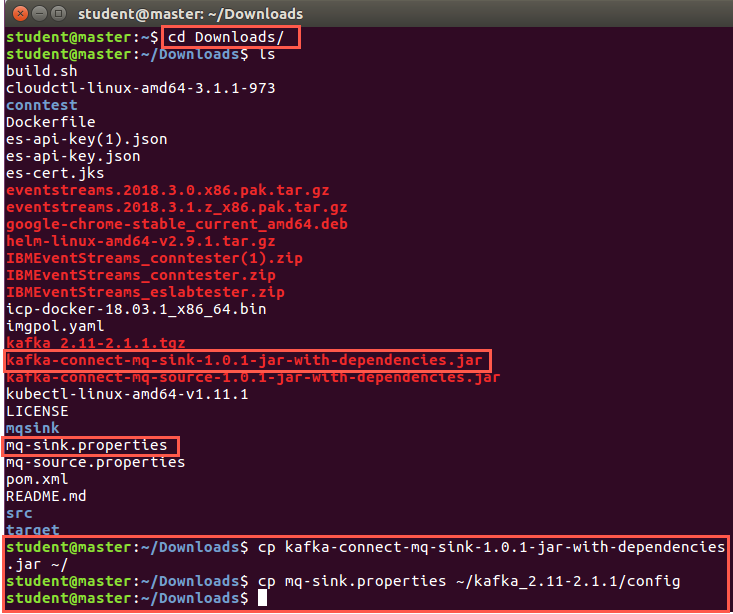
Part 2 - Configure the sink connector for IBM MQ
Kafka Connect connectors run inside a Java process called a worker. Kafka Connect can run in either standalone or distributed mode. Standalone mode is intended for testing and temporary connections between systems. Distributed mode is more appropriate for production use. These instructions focus on the distributed mode.
There are two configuration files. The worker configuration file contains the properties needed to connect to Kafka. The connector configuration file contains the properties needed for the connector. So, configuration to connect to Kafka goes into the worker configuration file, while the MQ configuration goes into the connector configuration file.
-
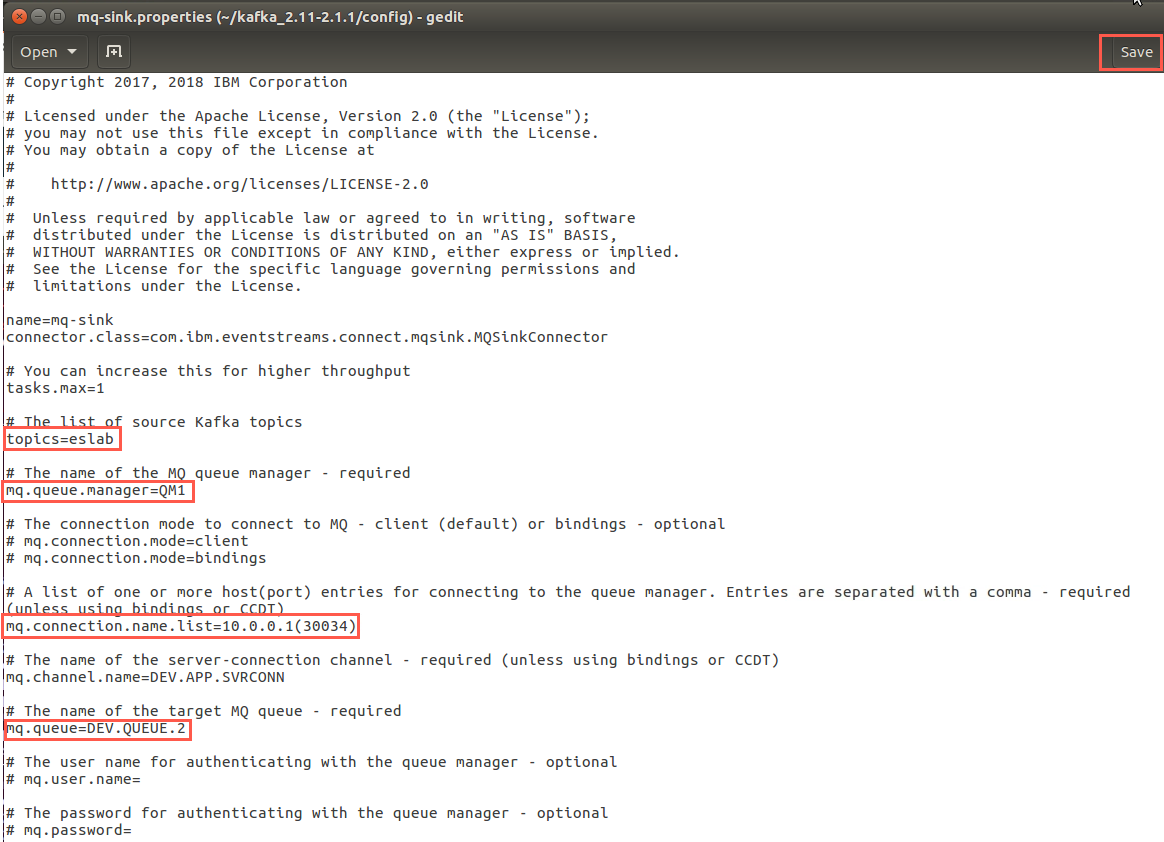
Change to the config subdirectory of the Kafka root directory. Edit the mq-sink.properties file with gedit.
a. mq.queue.manager=QM1
b. mq.connection.name.list=10.0.0.1(your mq listener NodePort)
c. mq.channel.name=DEV.APP.SVRCONN
d. mq.queue=DEV.QUEUE.2
e. topic=eslab
Click Save and close the file.
-
Copy ~/mqlab.properties to connect-standalone-sink.properties.
-
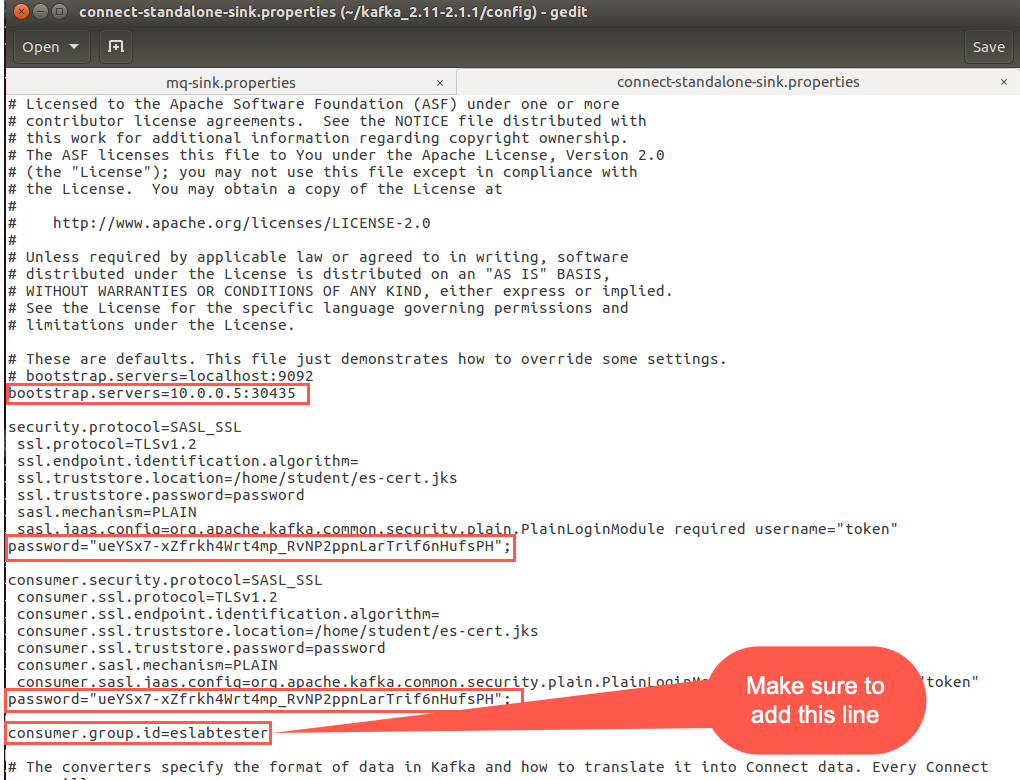
If needed, use gedit to edit connect-standalone-sink.properties. You can copy the security stanzas from the code snippet below. You must add the consumer.group.id=eslabtester line to the properties.

 security.protocol=SASL_SSL
  ssl.protocol=TLSv1.2
  ssl.endpoint.identification.algorithm=
  ssl.truststore.location=/home/student/es-cert.jks
  ssl.truststore.password=password
  sasl.mechanism=PLAIN
  sasl.jaas.config=org.apache.kafka.common.security.plain.PlainLoginModule required username="token" password="";

 consumer.security.protocol=SASL_SSL
  consumer.ssl.protocol=TLSv1.2
  consumer.ssl.endpoint.identification.algorithm=
  consumer.ssl.truststore.location=/home/student/es-cert.jks
  consumer.ssl.truststore.password=password
  consumer.sasl.mechanism=PLAIN
  consumer.sasl.jaas.config=org.apache.kafka.common.security.plain.PlainLoginModule required username="token" password="";

  consumer.group.id=eslabtester
Make sure to save any changes.
Part 3 - Start the sink connector for IBM MQ
-
From the terminal window, change to the Kafka root directory.
-
Enter the command to start the connector.

-
Start the connector ensuring that you point at the new configuration file, the new mq-sink.properties file, and the correct jar file.
CLASSPATH=/home/student/kafka-connect-mq-sink1.0.1-jar-with-dependencies.jar bin/connect-standalone.sh config/connect-standalone-sink.properties ~/mq-sink.properties -
The connector starts, establishes a connection to the MQ queue manager, and starts listening for messages on topic eslab (consumer group eslabtester).
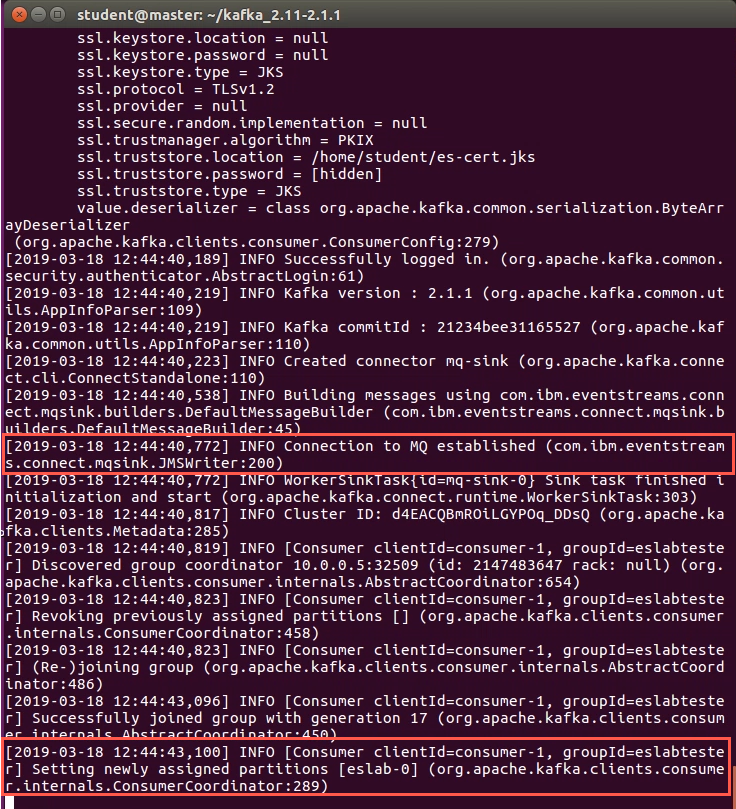
Part 4 - Verify that the sink connector for IBM MQ is putting messages on the specified queue
-
In the eslabtester web application, start producing messages again by clicking the run arrow.
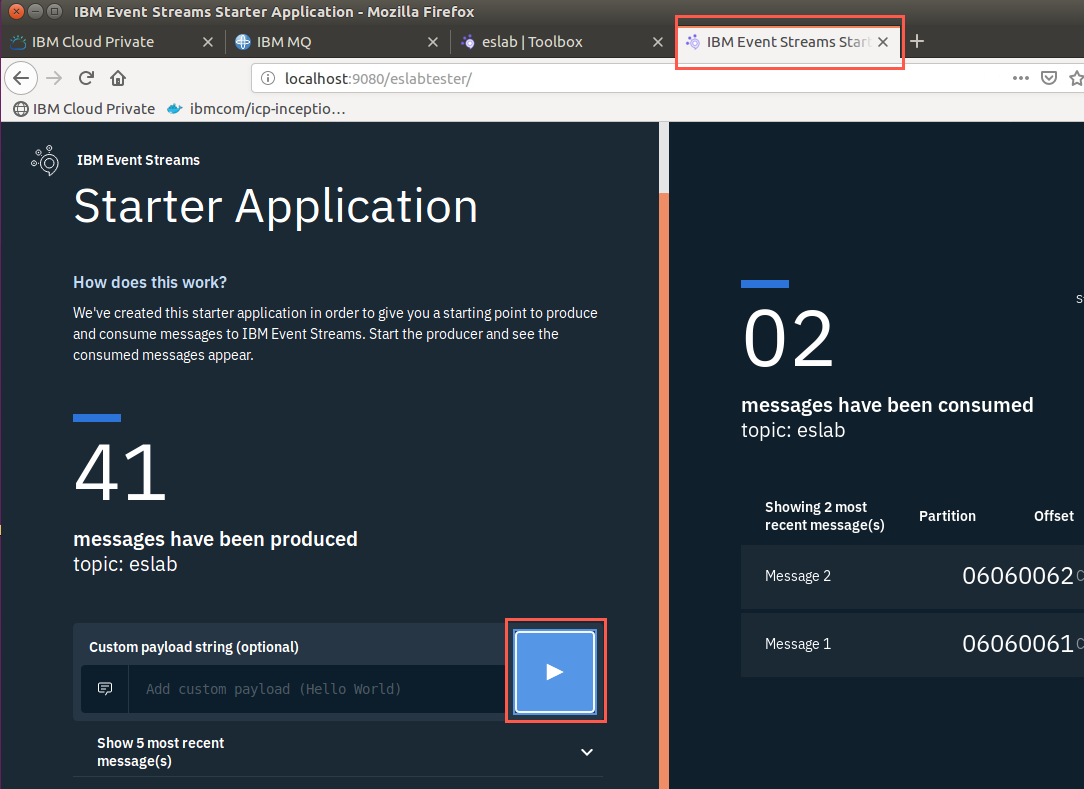
-
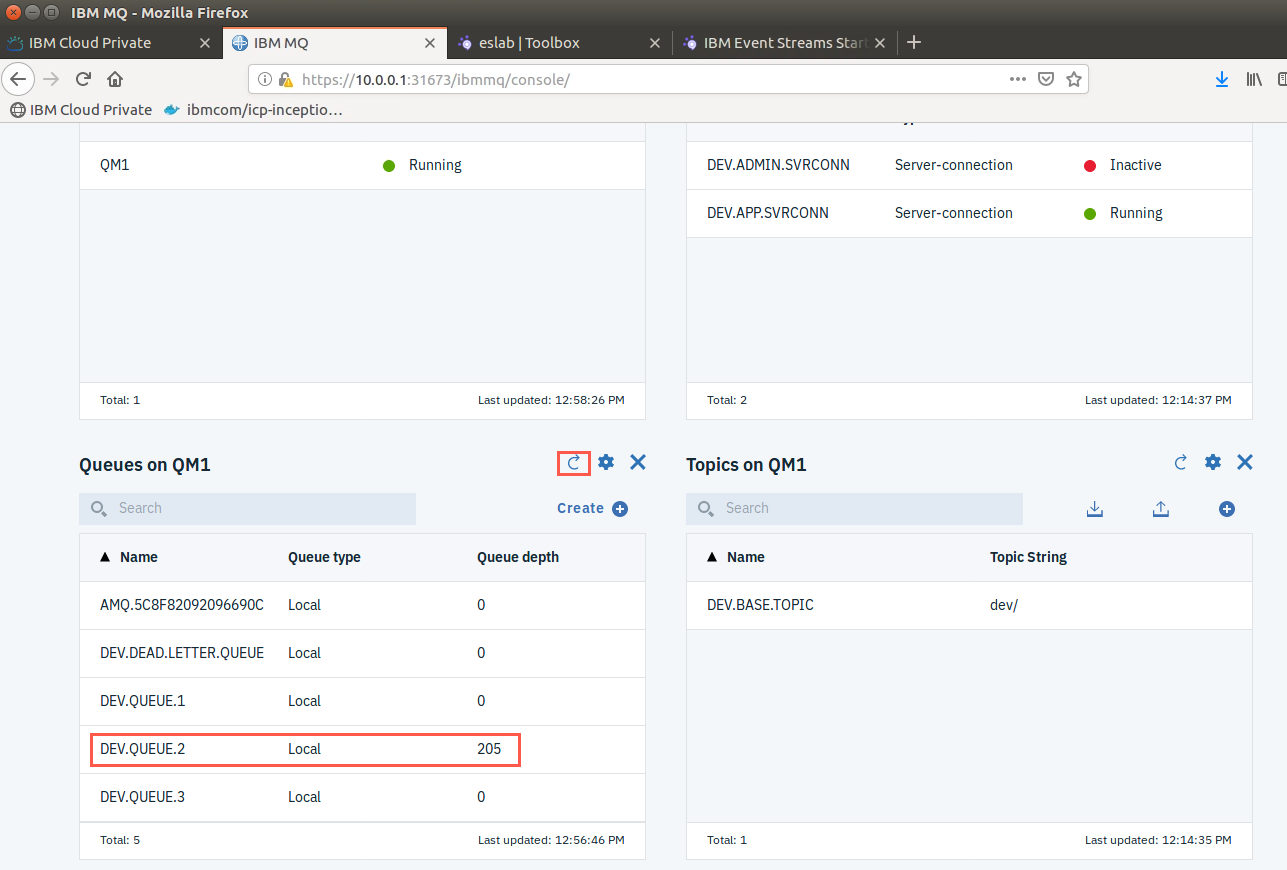
When the number of messages produced starts to increase, switch to the MQ Console browser tab. Click the refresh icon for Queues on QM1. Notice that the Queue depth for DEV.QUEUE.2 increases correspondingly to the number of messages being produced.
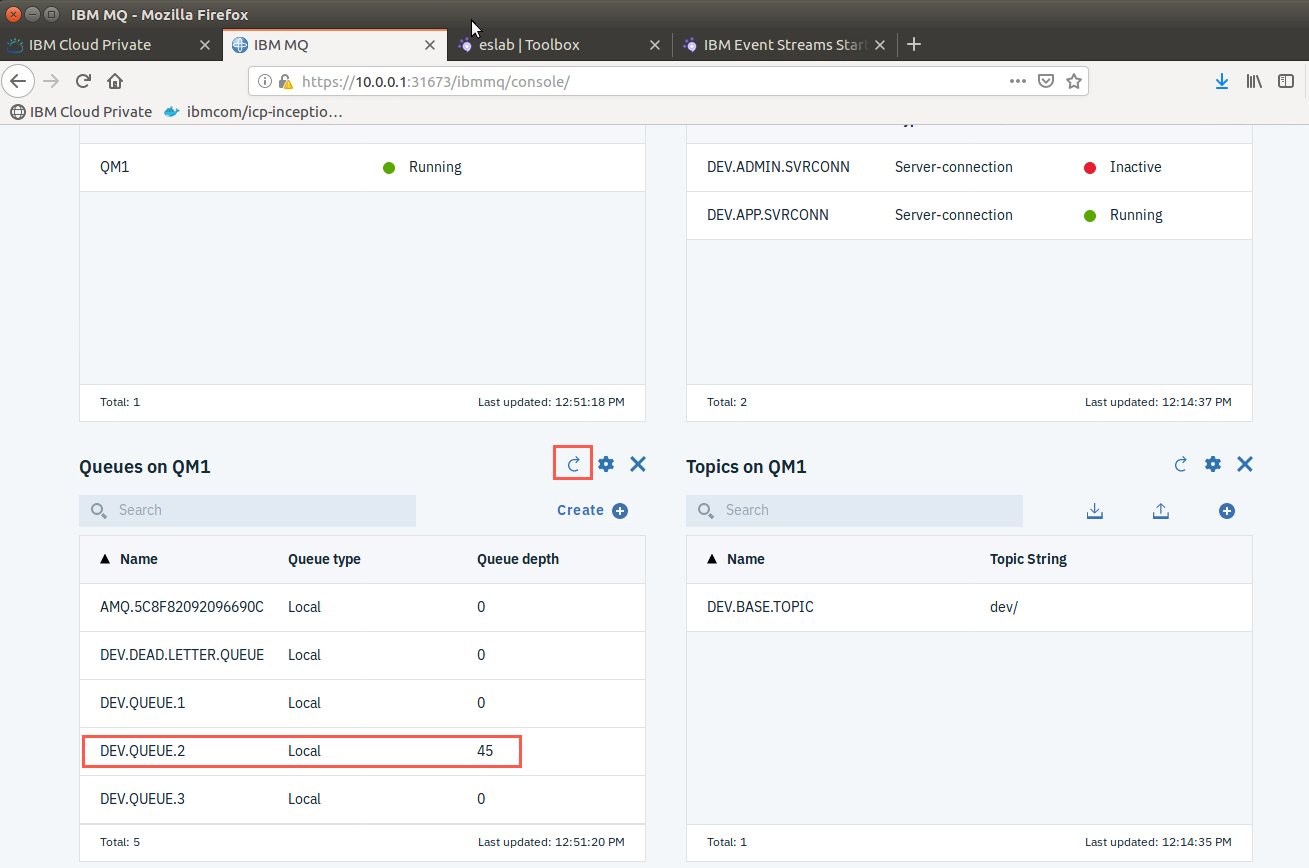
-
Stop producing messages by clicking the run button again.
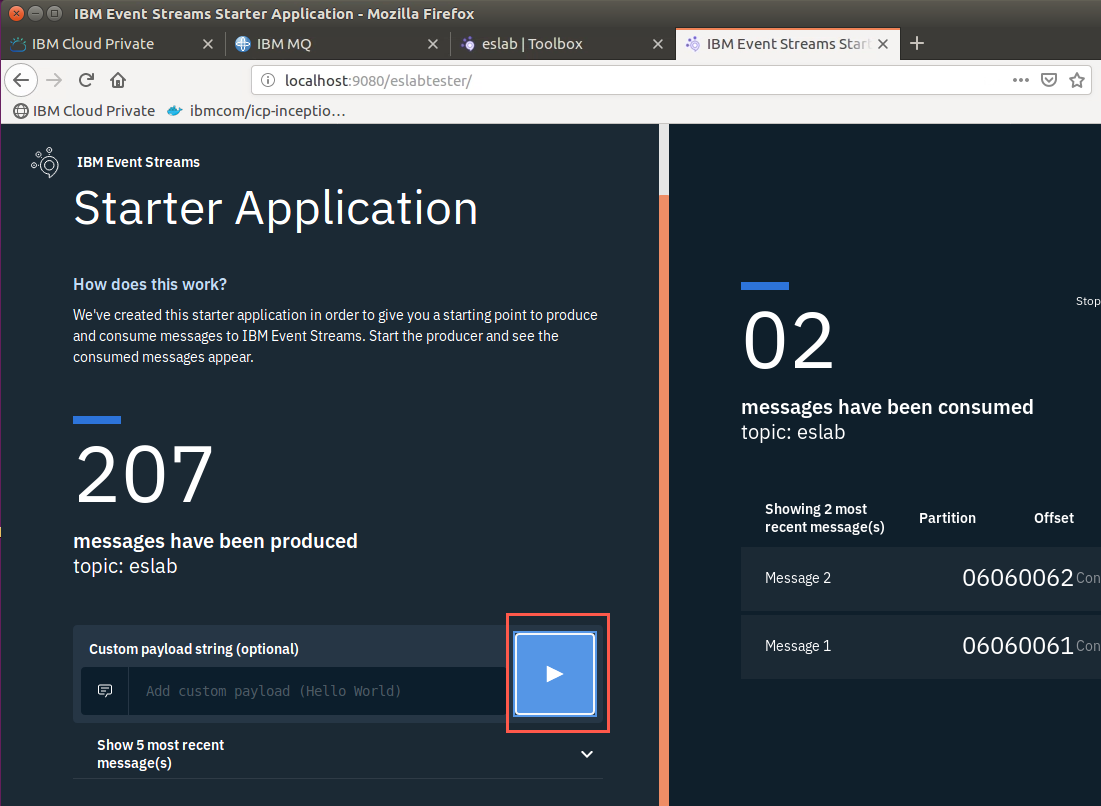
-
Switch back to the MQ Console, refresh the Queue depth again and verify that the messages have been received.
Clean up the environment
-
Stop the connector by entering <ctrl-C>.
-
Also stop the esblabtester by entering <ctrl-C>.
Congratulations
You have successfully configured the mq sink connector and moved messages from Event Streams to MQ.
You have completed Lab 9 of the Event Streams PoT.
END OF LAB EXERCISES