Lab 2 - Creating a Multiinstance Queue Manager Using YAML
Kubernetes uses replicas to keep a queue manager running. But this does not provide a full high availability environment. Multi-instance queue managers can be configured in the Cloud Pak for Integration for HA.
Lab objectives
These instructions will document the process to deploy a highly available (HA) persistent IBM MQ on the Cloud Pak for Integration (CP4I).
You will know how to set up MQ in a highly available topology where there is an active and passive container running.
Pre-reqs
You should have already downloaded the artifacts for this lab in the lab Environment Setup from GitHub MQonCP4I.
If you are doing this lab out of order return to Environment Setup to perform the download. Then continue from here.
Important points to note
The lab guide assumes you are using the RHEL Virtual Desktop Image (VDI) VM from the IBM Technology Zone. If you are using another platform, you can download the necessary artifacts from the github repo. The instructor will provide directions.
If running as part of a PoT, you will only see your project (namespace). The name will be of the form clustername + your student number. For instance if the cluster name is chopper and your student number is 10, your namespace will be chopper10. So each attendee has a unique namespace and will only be authorized to see that namespace. Within your namespace you will only find your queue manager mq10mi in this example. You will also find a previously configured queue manager qmgrxx, where xx = your student number. That queue manager will not be used in this PoT and can be ignored.
You will see other projects such as cp4i-ace, cp4i-api, cp4i-mq. Since this cluster will be shared with other PoTs those have been predefined. They are not to be used for this PoT and can be ignored. You will only use your assigned namespace and at times cp4i. cp4i-mq was used to document part of this lab. Where you see cp4i-mq, you will substitute your assigned namespace.
The screen shots were taken on a test cluster and many will not match what you see when running the lab. Particularly URL values will be different depending on the cluster where CP4I is running. Projects (Namespaces) may also vary. It is important to follow the directions, not the pictures.
Further information
Deploy the MQ Queue Manager with associated resources
Define the queue manager instance of CP4I in a yaml file
To create an MQ queue manager, you could use the UI as you did in Lab 1 to create each queue manager needed. Most administrators use scripting to define things which novice users would do with the UI.
This lab shows you how to write yaml to create the multi-instance queue manager.
-
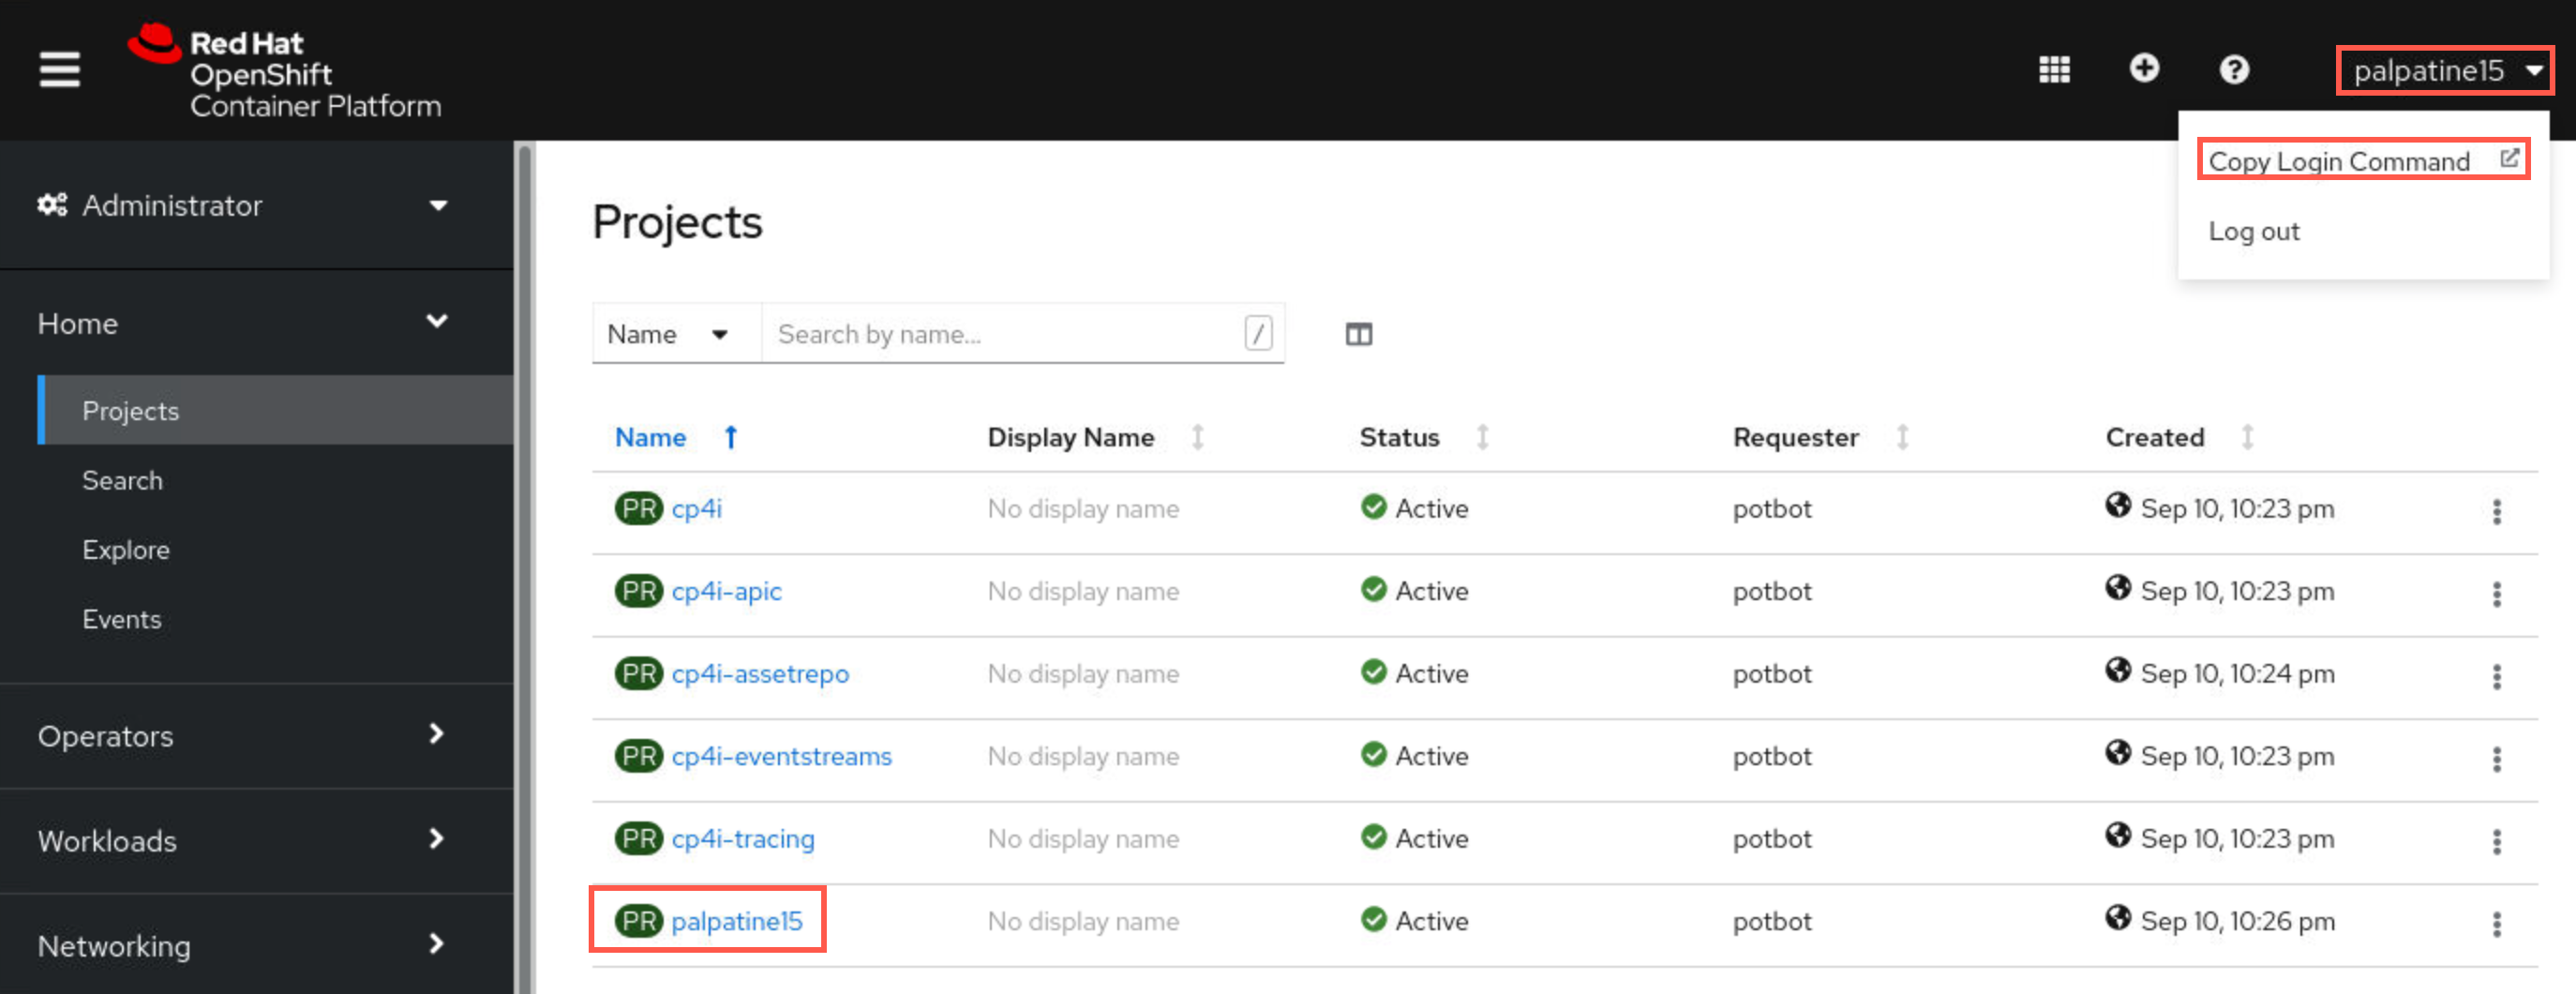
You should still be logged into the OpenShift environment. If not, click on your username on the top right menu of the OpenShift Console, then click on Copy Login Command.
-
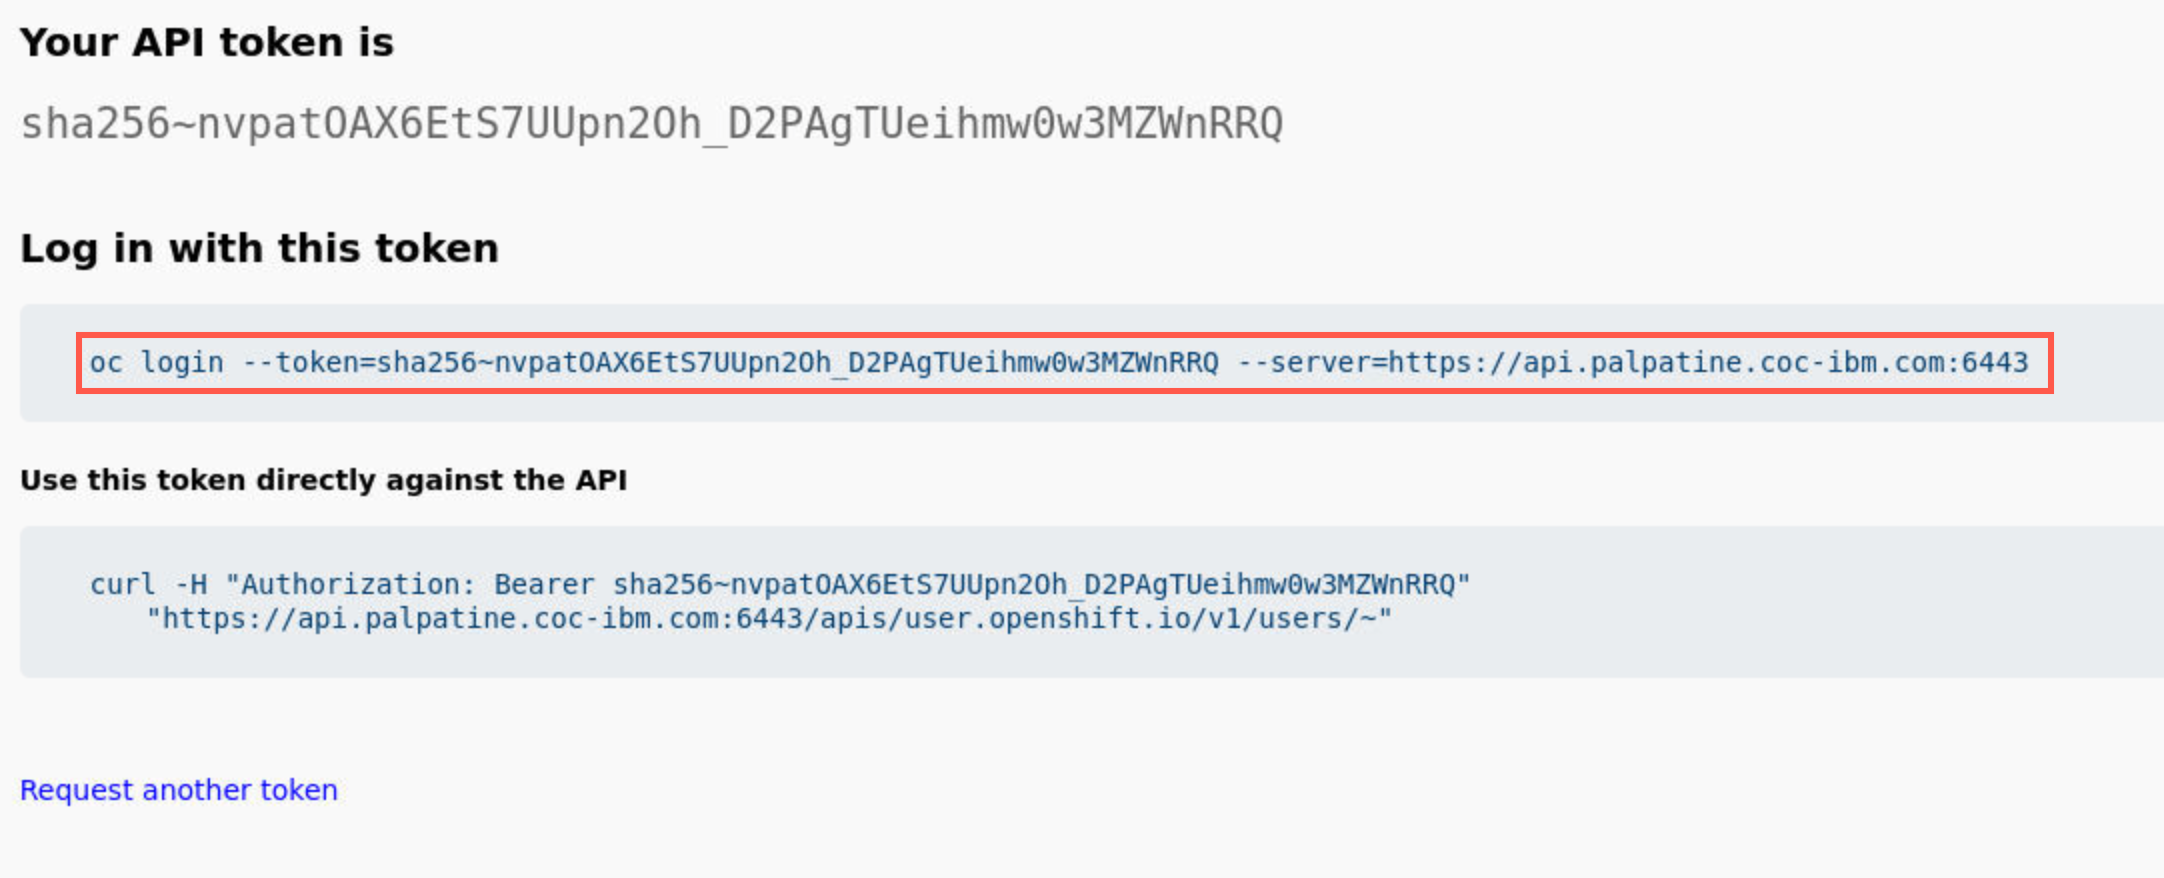
Click Display Token, copy the token and run it on your terminal.
 Note:
Note:
You should still be in your personal project so you shouldn’t need to run this command unless your login has timed out.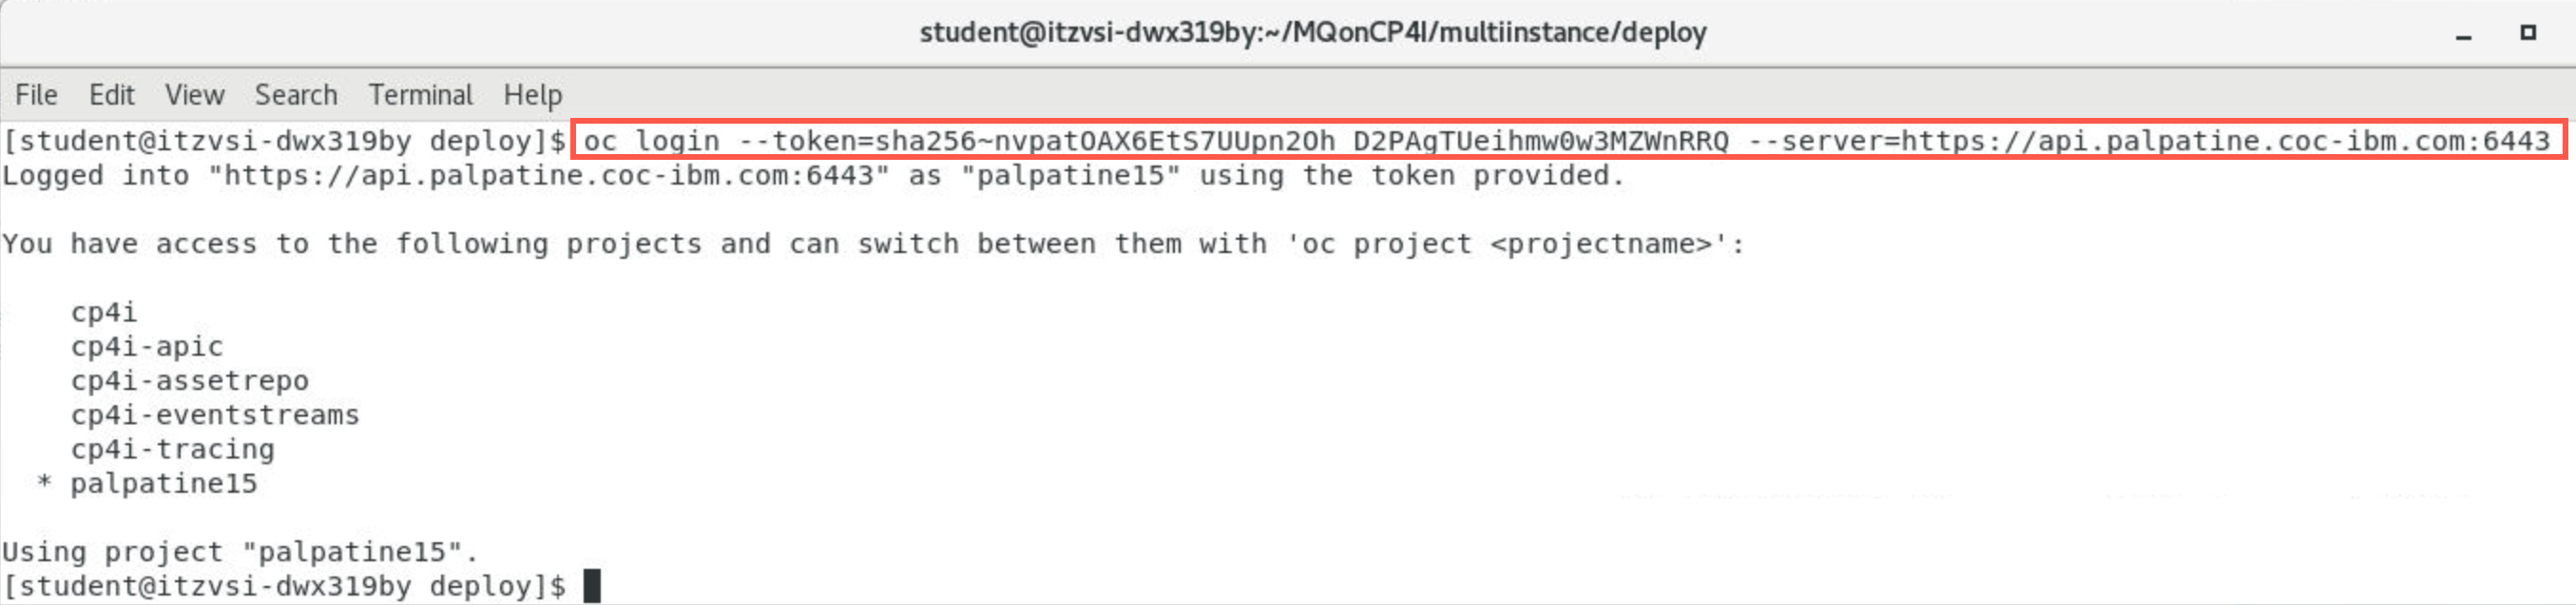 If not in your assigned project, run the following command to navigate to your assigned project substituting your personal namespace for palpatine15:
oc project palpatine15
-
Open a new terminal window by double-clicking the icon on the desktop.
-
Navigate to the MQonCP4I/multiinstance/deploy directory using the following commnand:
cd MQonCP4I/multiinstance/deploy -
Enter the following command to display the permissions for the files:
ls -al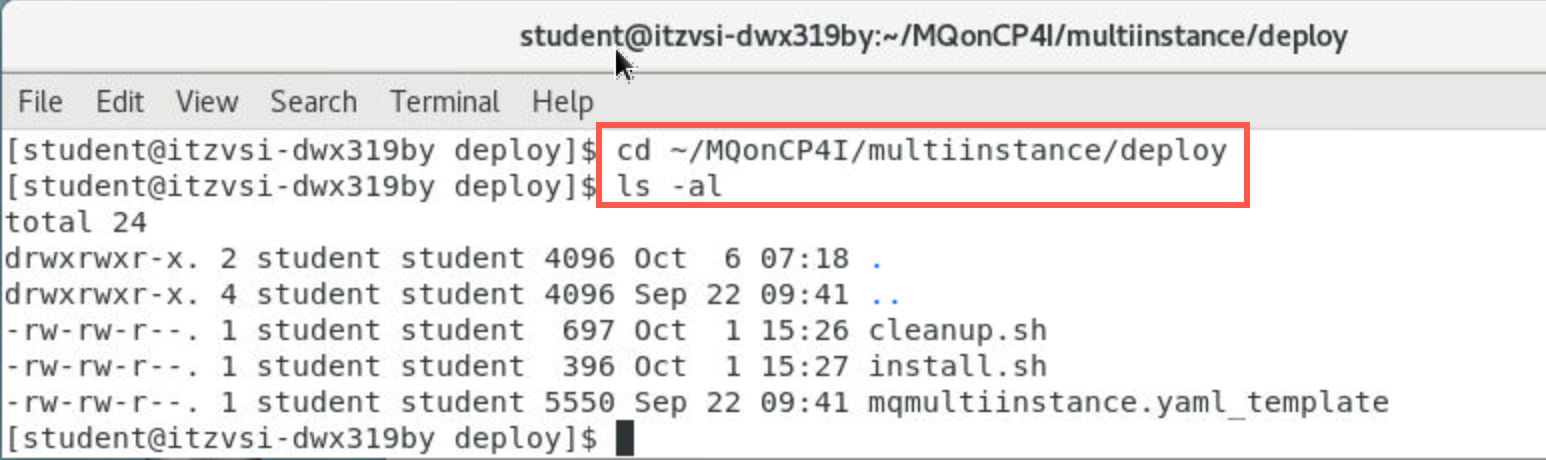
-
Make installl.sh and cleanup.sh executable with the following commands.
chmod +x install.shchmod +x cleanup.sh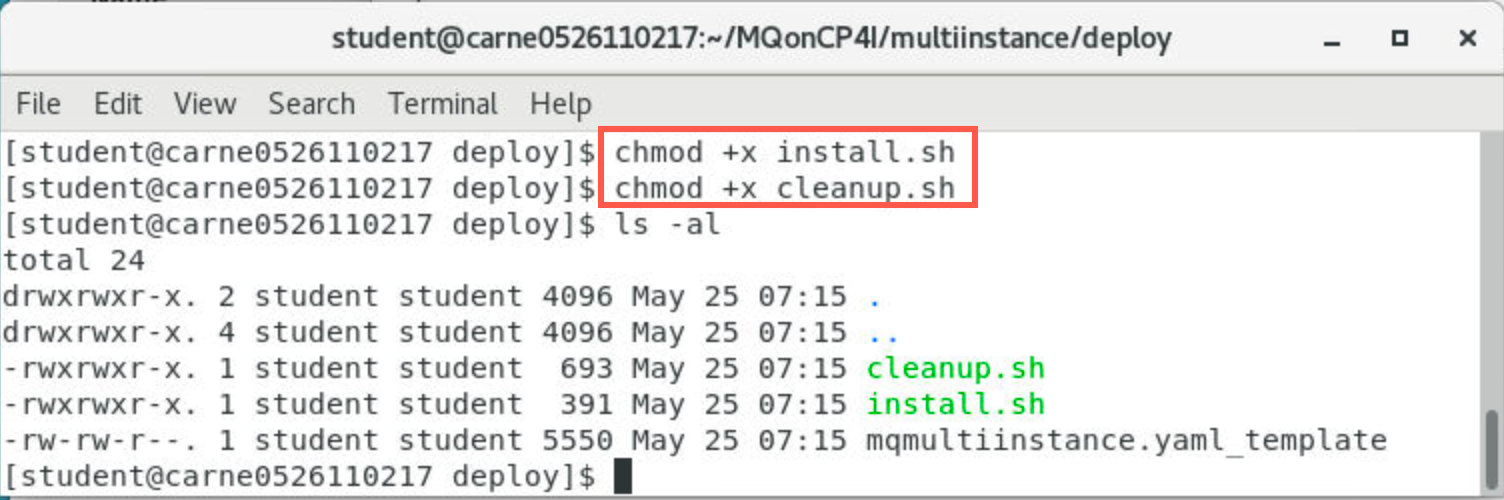
-
Enter the following command to edit the file install.sh.
gedit install.sh &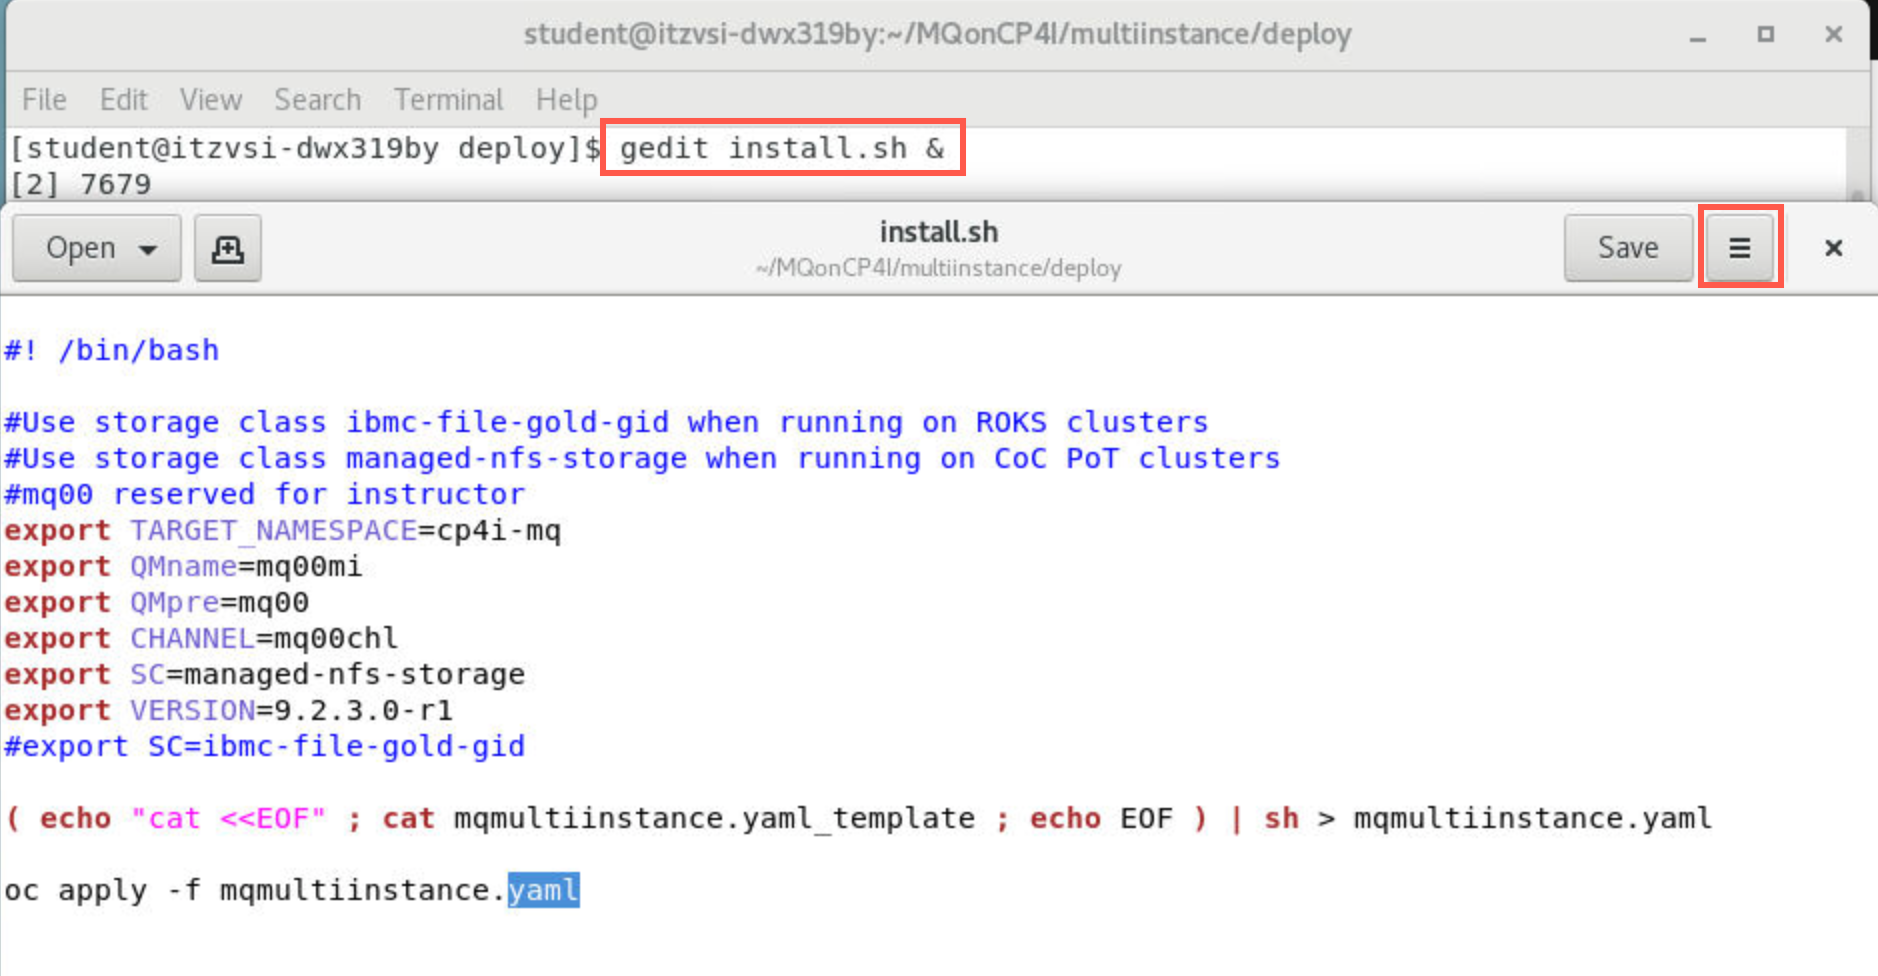 Note:
Note:
Adding & at the end of the above command will run gedit in the background freeing up your terminal. -
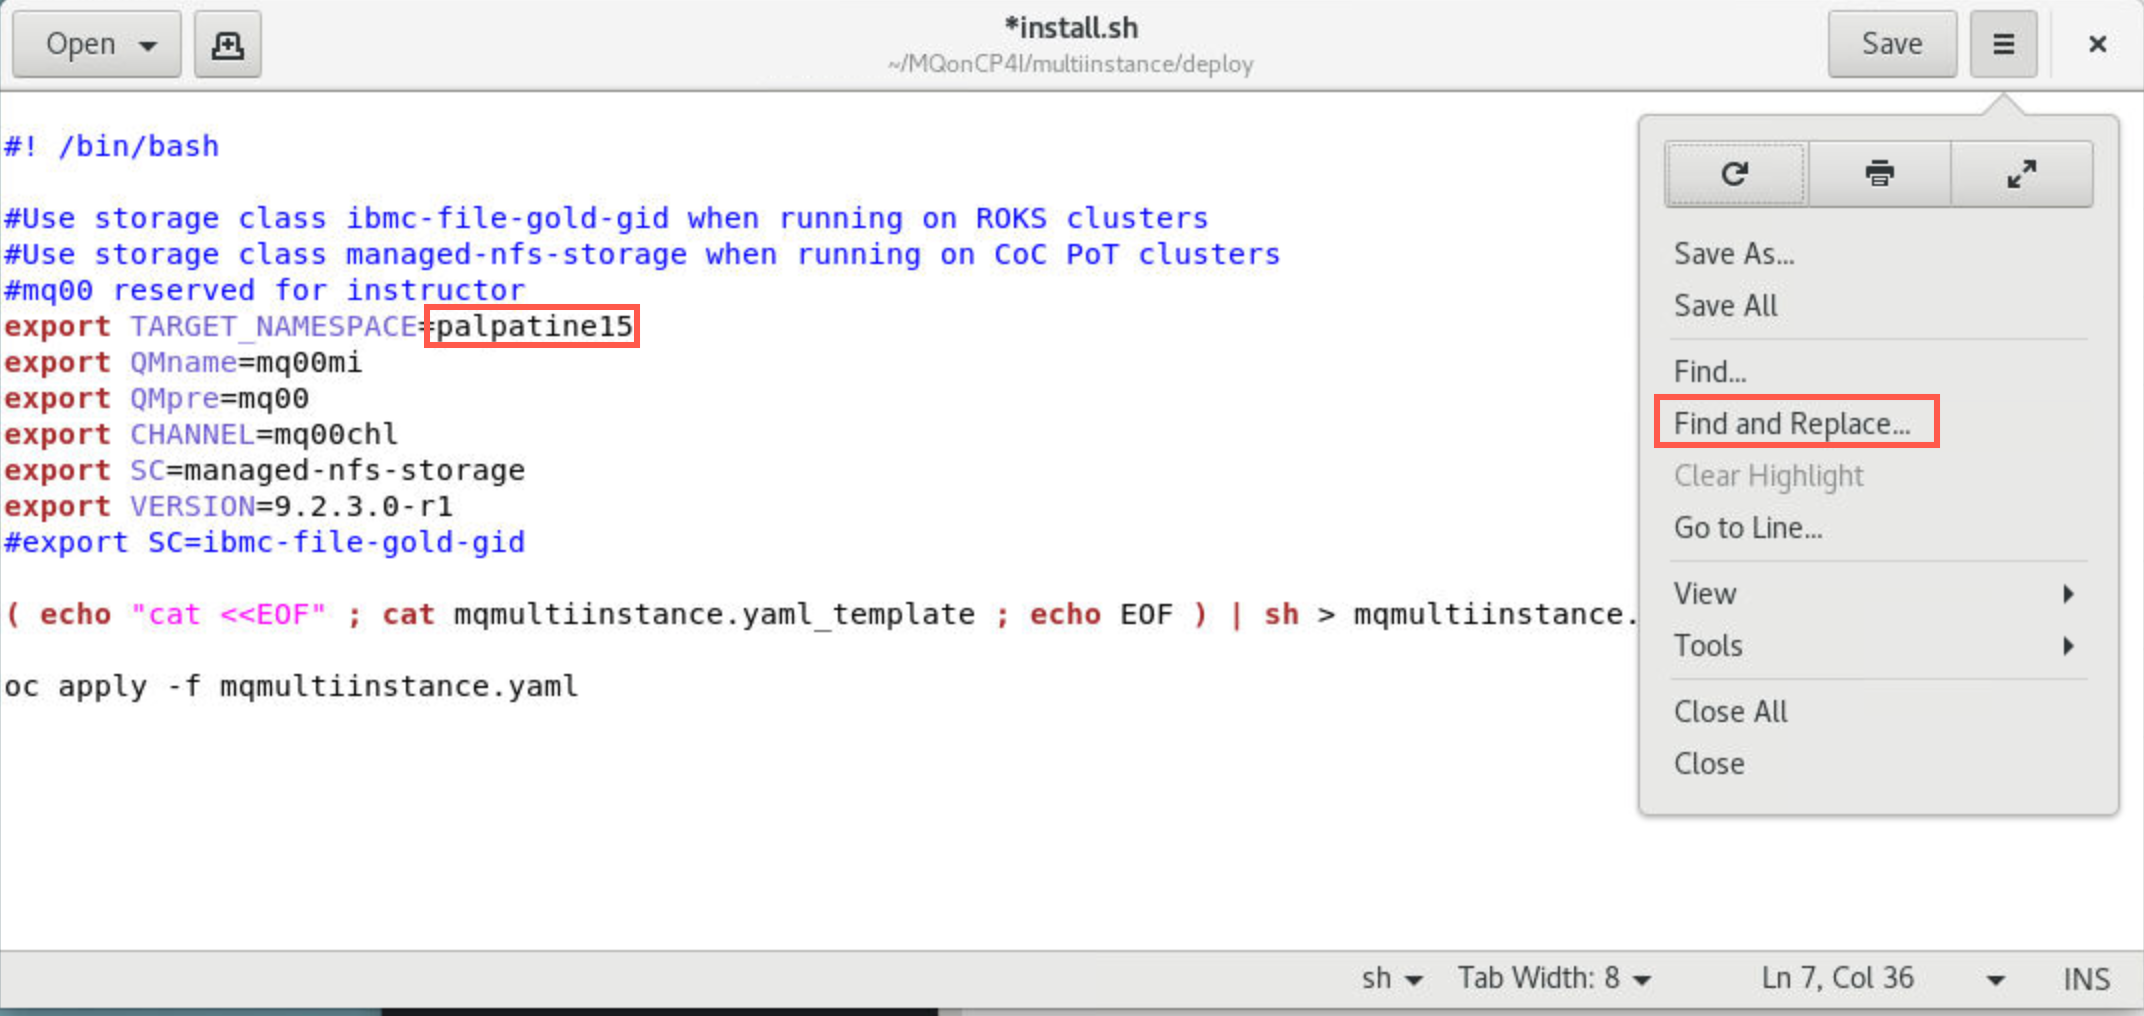
Change the value for TARGET_NAMESPACE to your project name. Click the hamburger menu in top right corner and select Find and Replace.
-
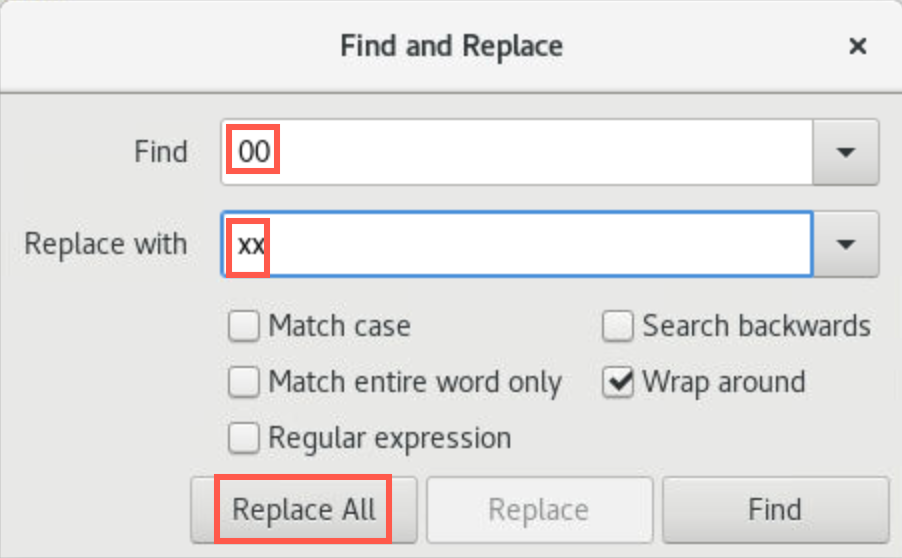
Enter 00 in the “Find” field and xx in the “Replace with” field where xx is your student number. Use your student number in place of 00. Click Replace All, then click Save.
 Note:
Note:
The storage class on the COC clusters is managed-nfs-storage. If you are an IBMer running on on ROKS then you also need to change SC to ibmc-file-gold-gid.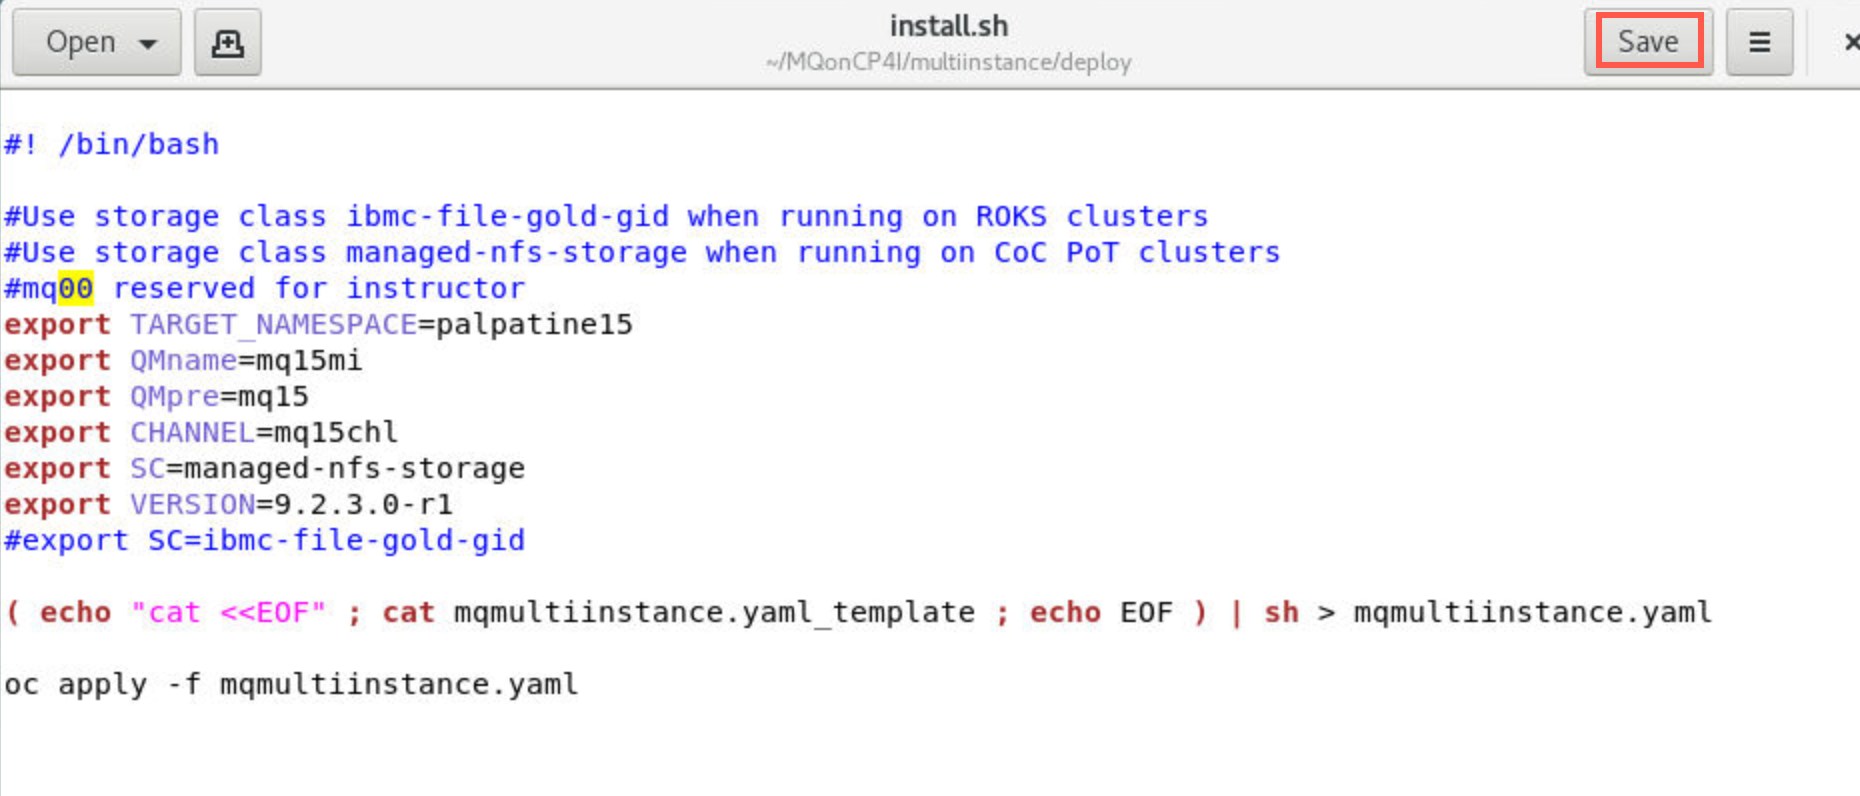
-
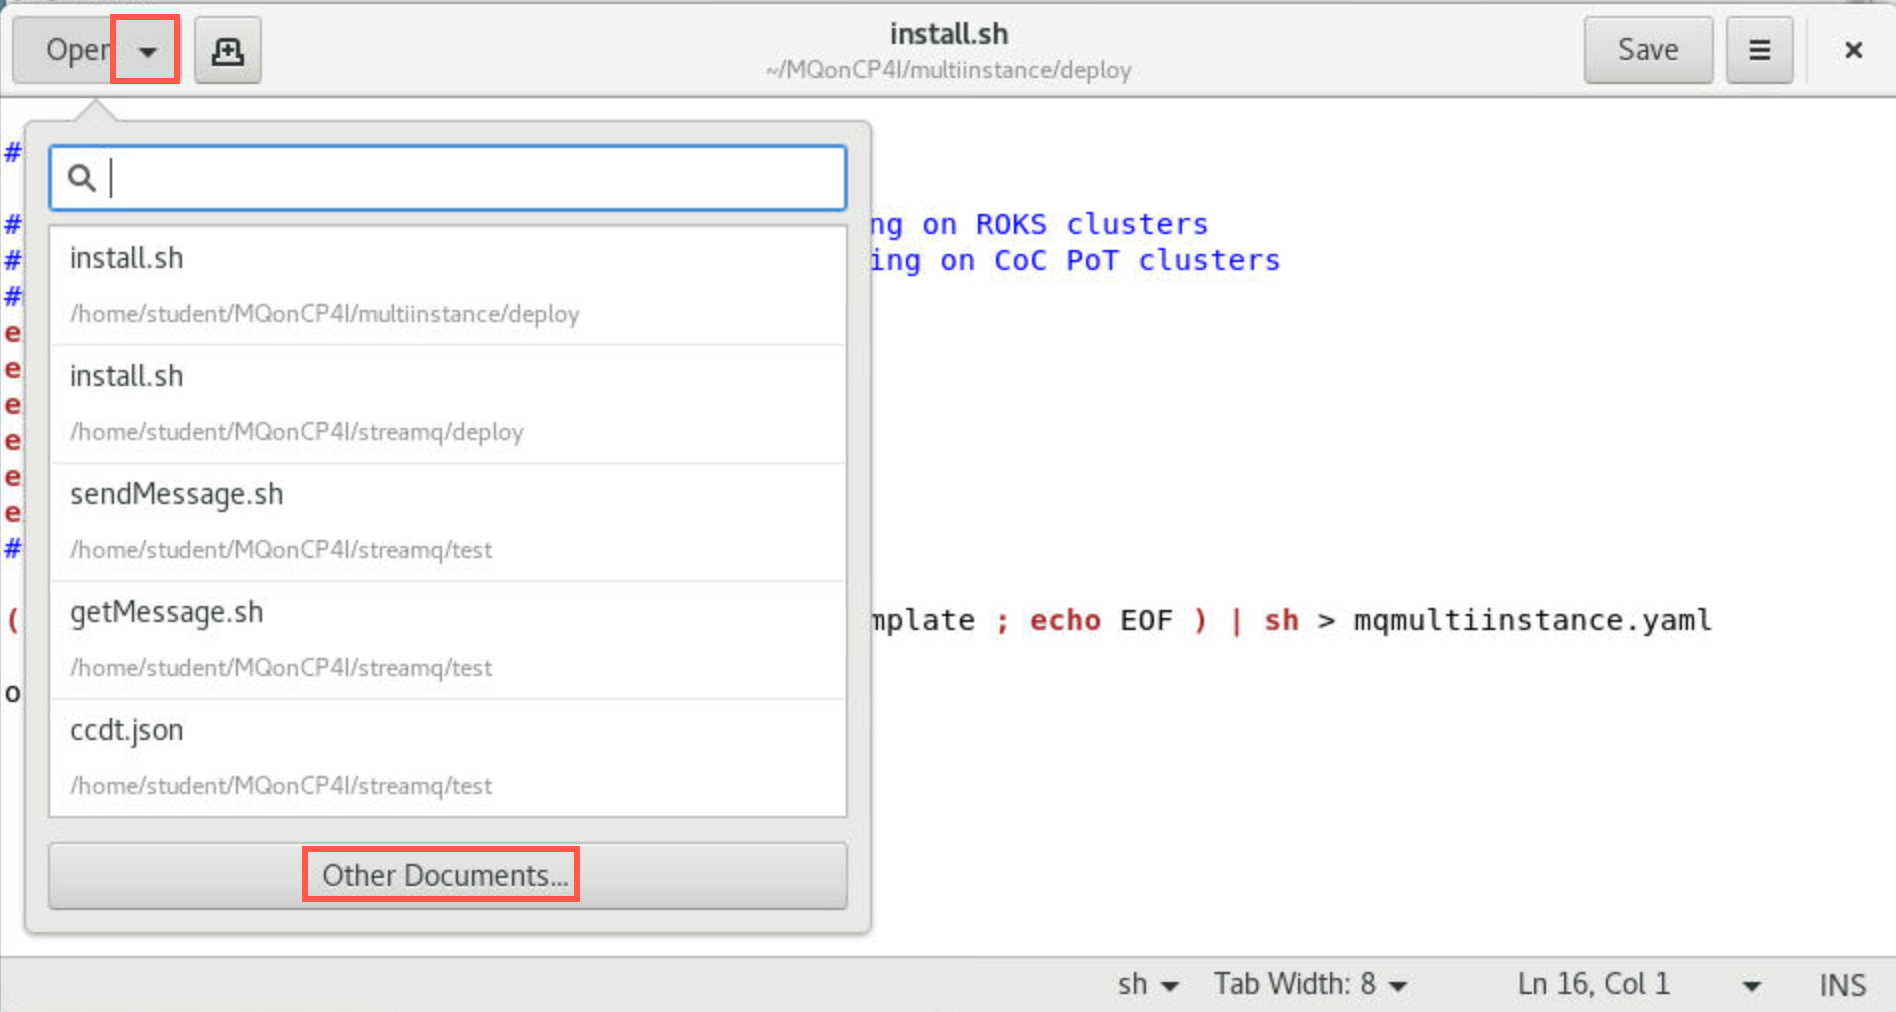
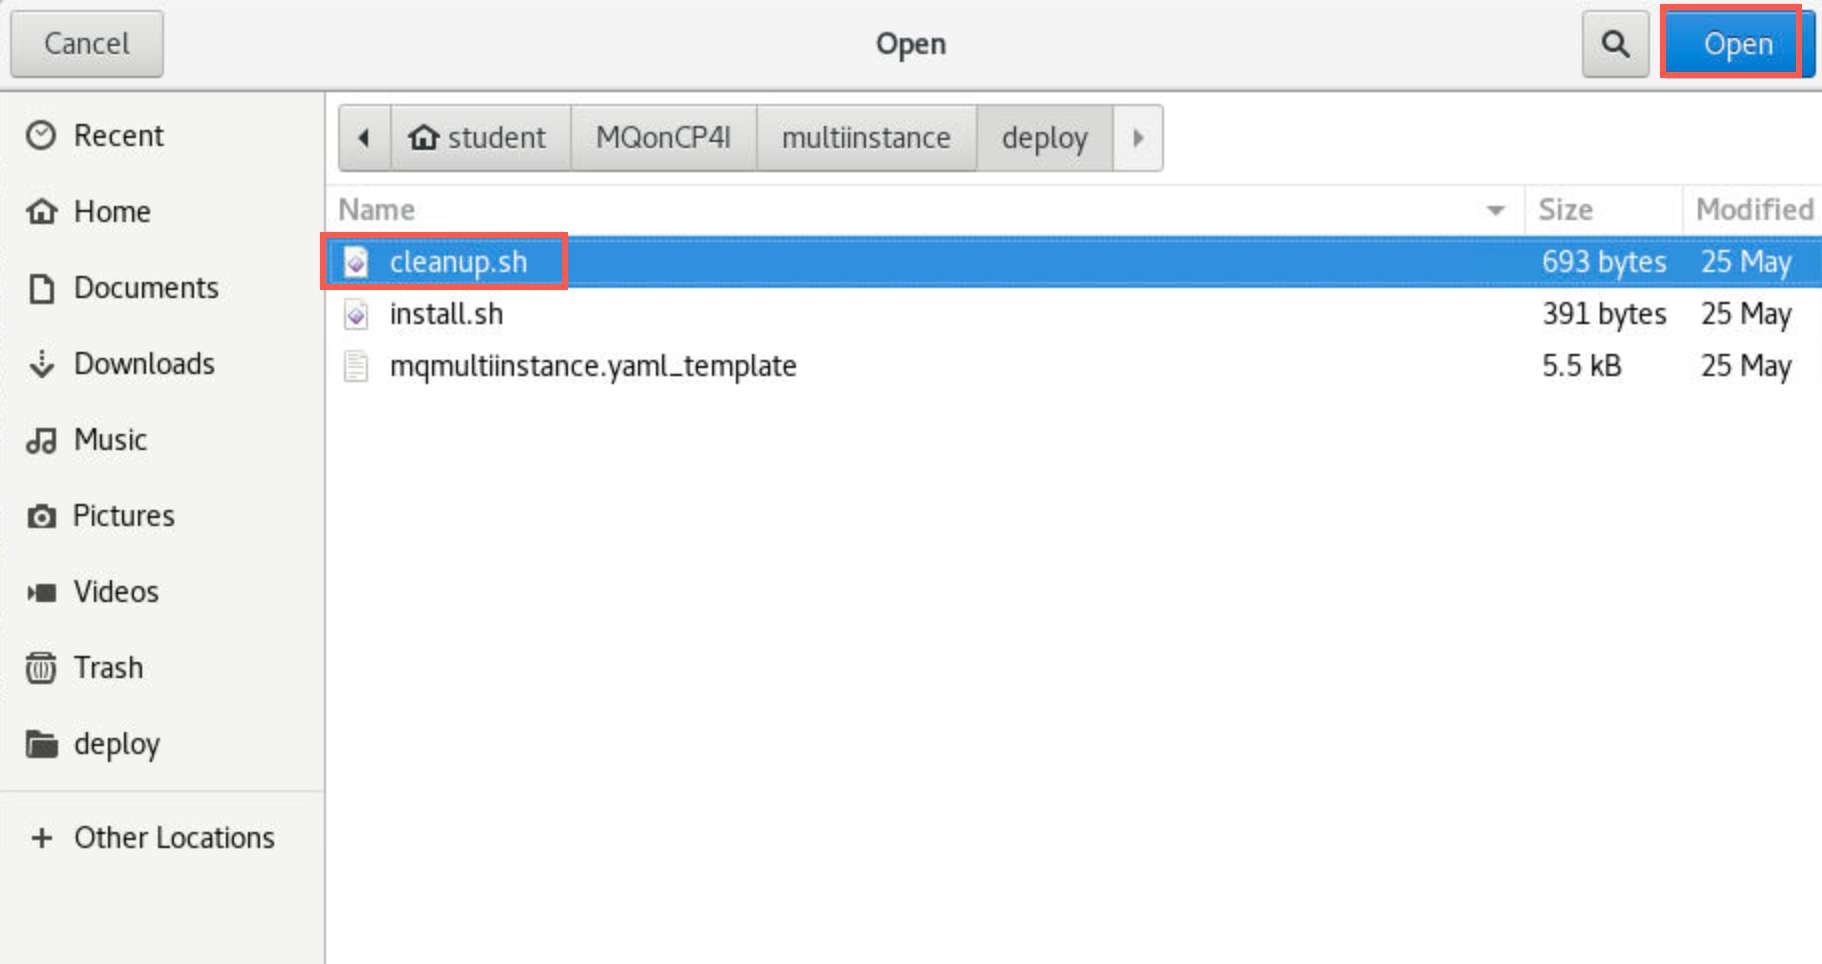
In the editor click the drop-down in the Open box, click *Other Documents, then select cleanup.sh.
-
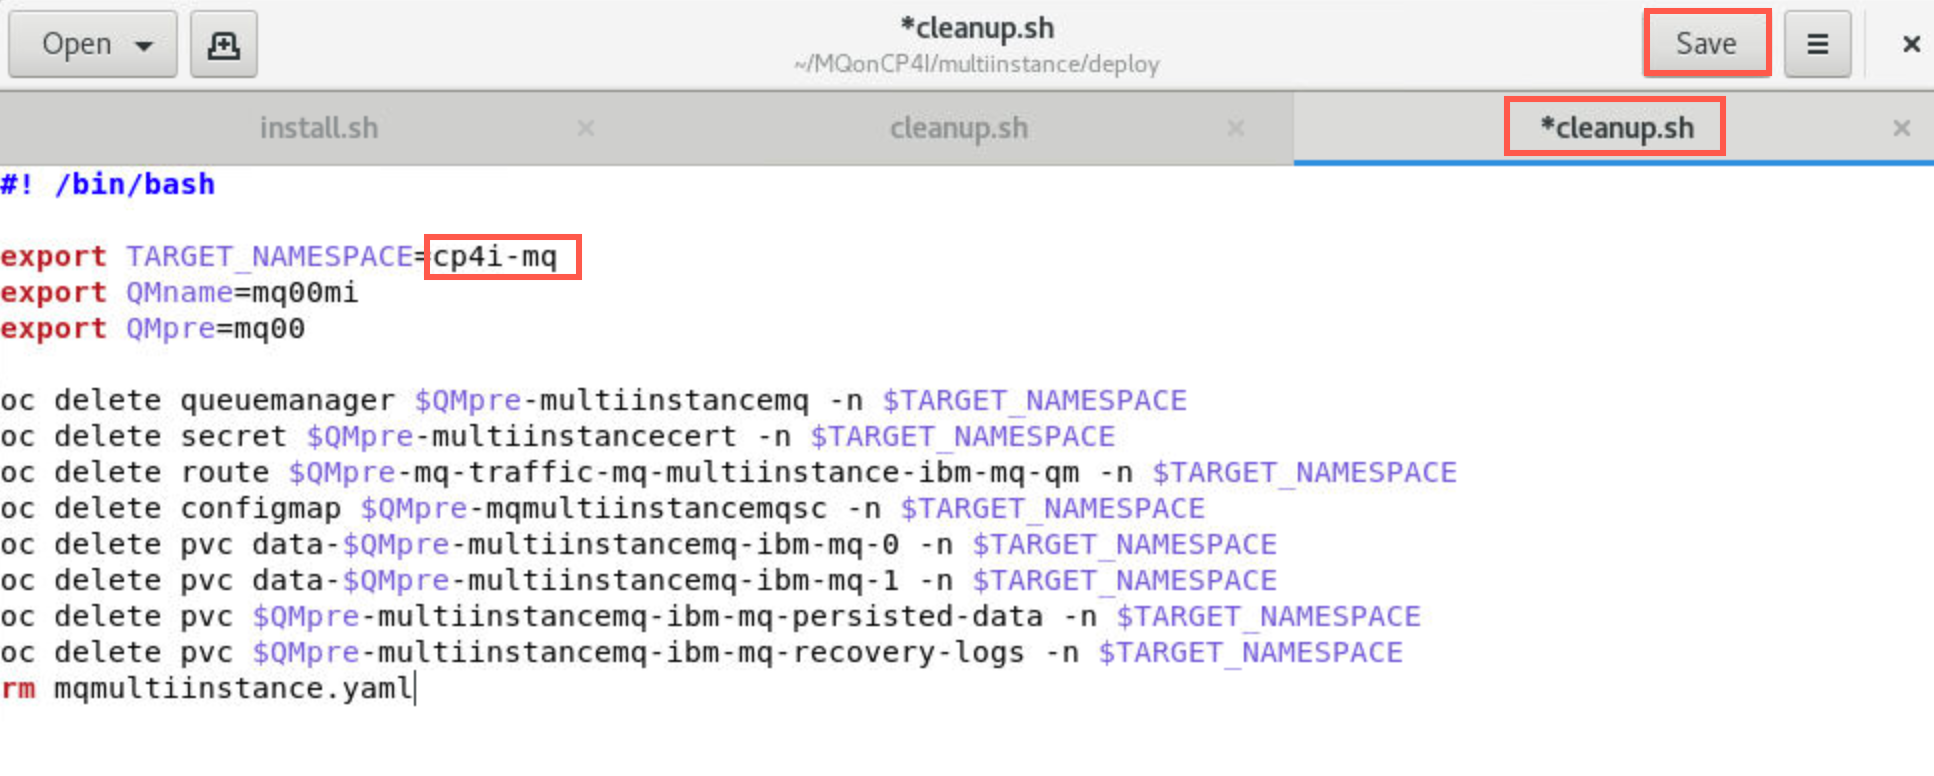
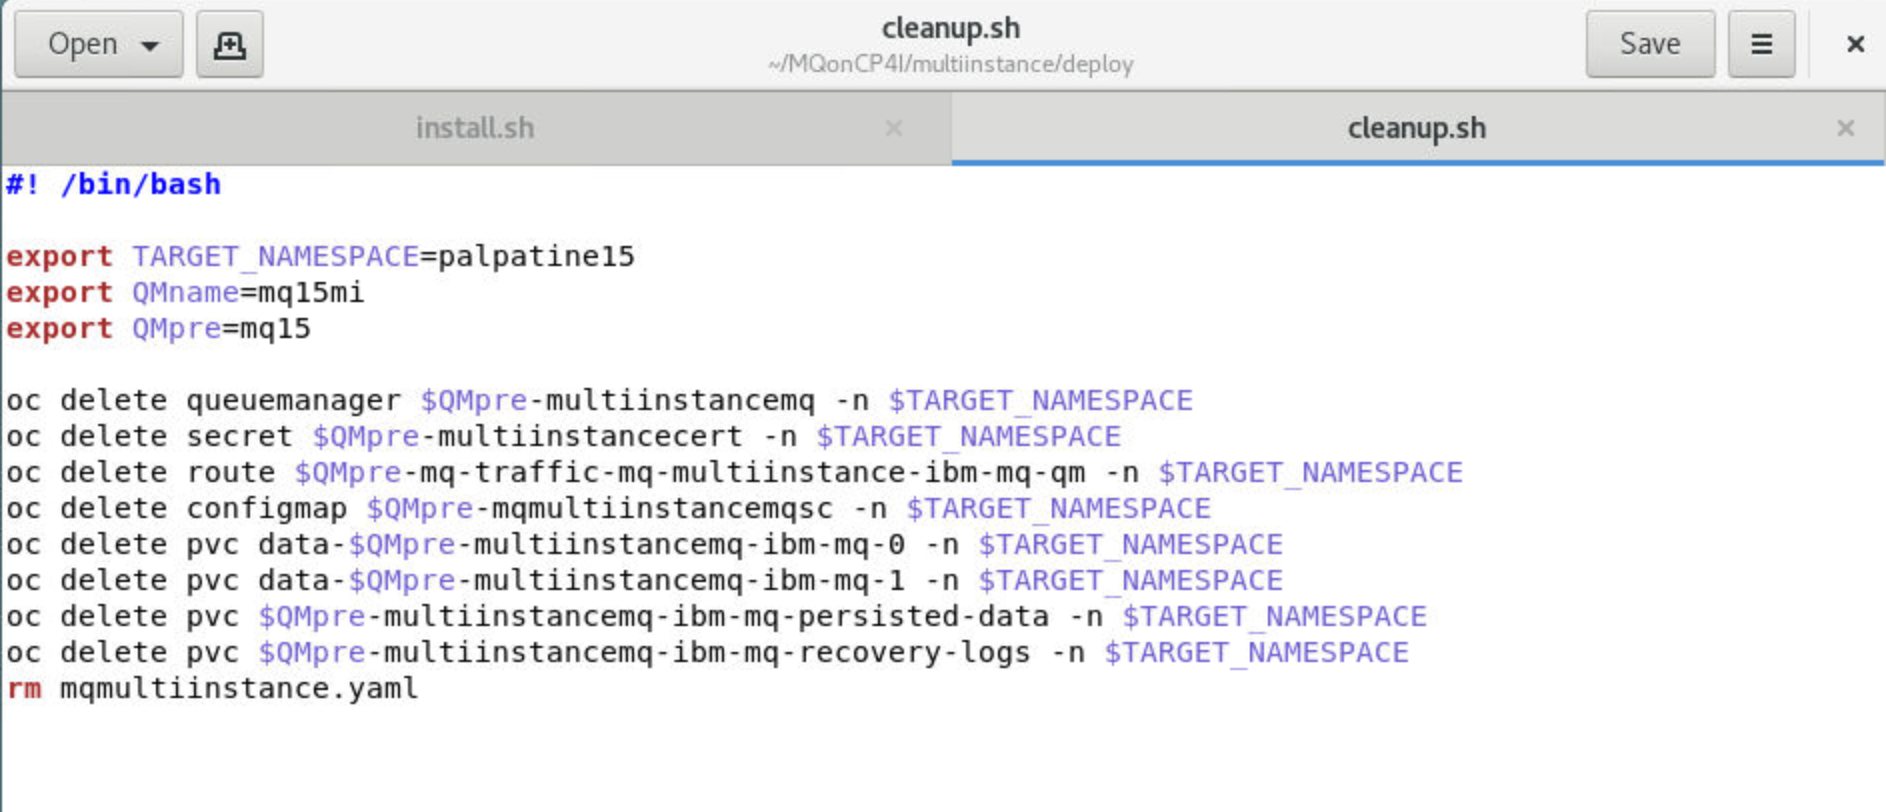
As above you did above, change TARGET_NAMESPACE to your project name, then change “00” in the export commands to your student ID. Click Save.
-
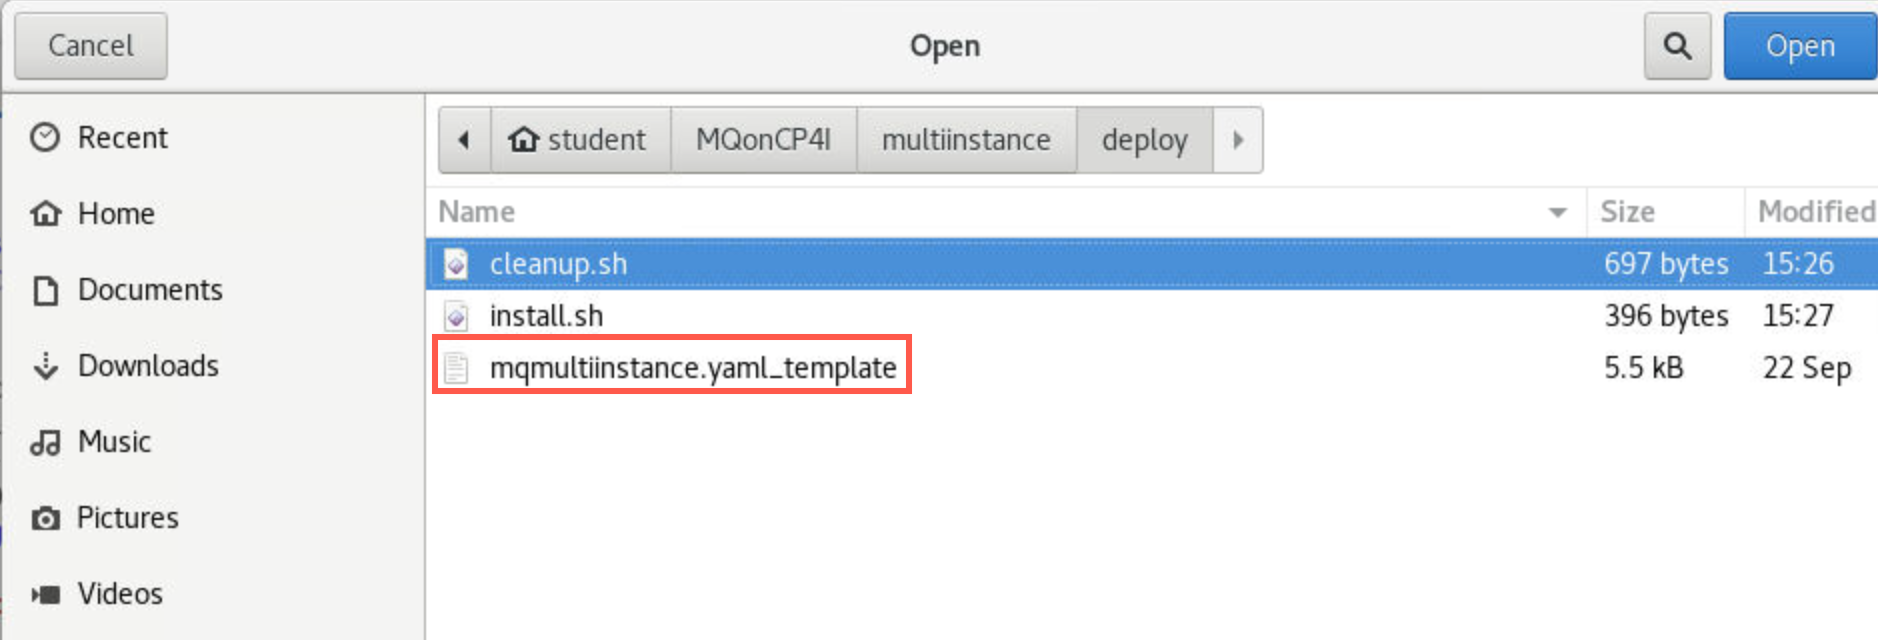
As done previously click drop-down next to Open, click Other Documents, then select mqmultiinstance.yaml_template.
-
Do not change anything in this file! The install.sh script will copy this file to mqmultiinstance.yaml, substitute your student ID in the environment varibles, and apply the yaml file to the OpenShift cluster. Review the file to understand how your queue manager will be created.
Pay particular attention to each kind stanza
- ConfigMap for mqsc commands
- Secret to define the tls certificate and key
- QueueManager to define attributes for your specific QM
- Route to accesss the queue manager from outside the cluster
In the QueueManager stanza, notice the name, the type (MultiInstance) and references to the ConfigMap and Secret.
-
Open a new terminal window and navigate to the deploy directory again with the command:
cd MQonCP4I/multiinstance/deploy -
Run the install.sh script:
./install.sh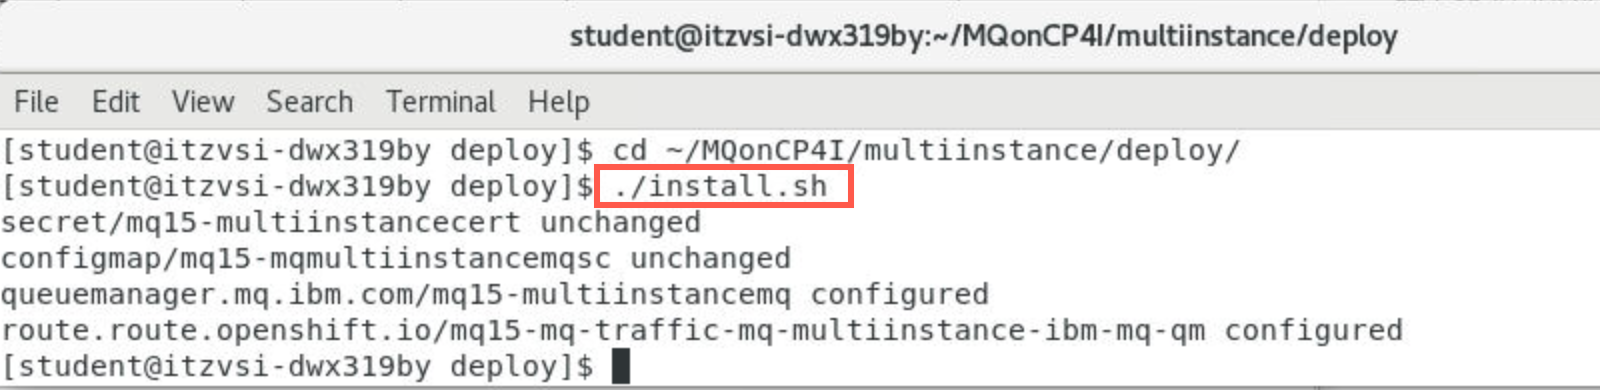
The results are displayed showing the objects (mentioned above) which were created.
-
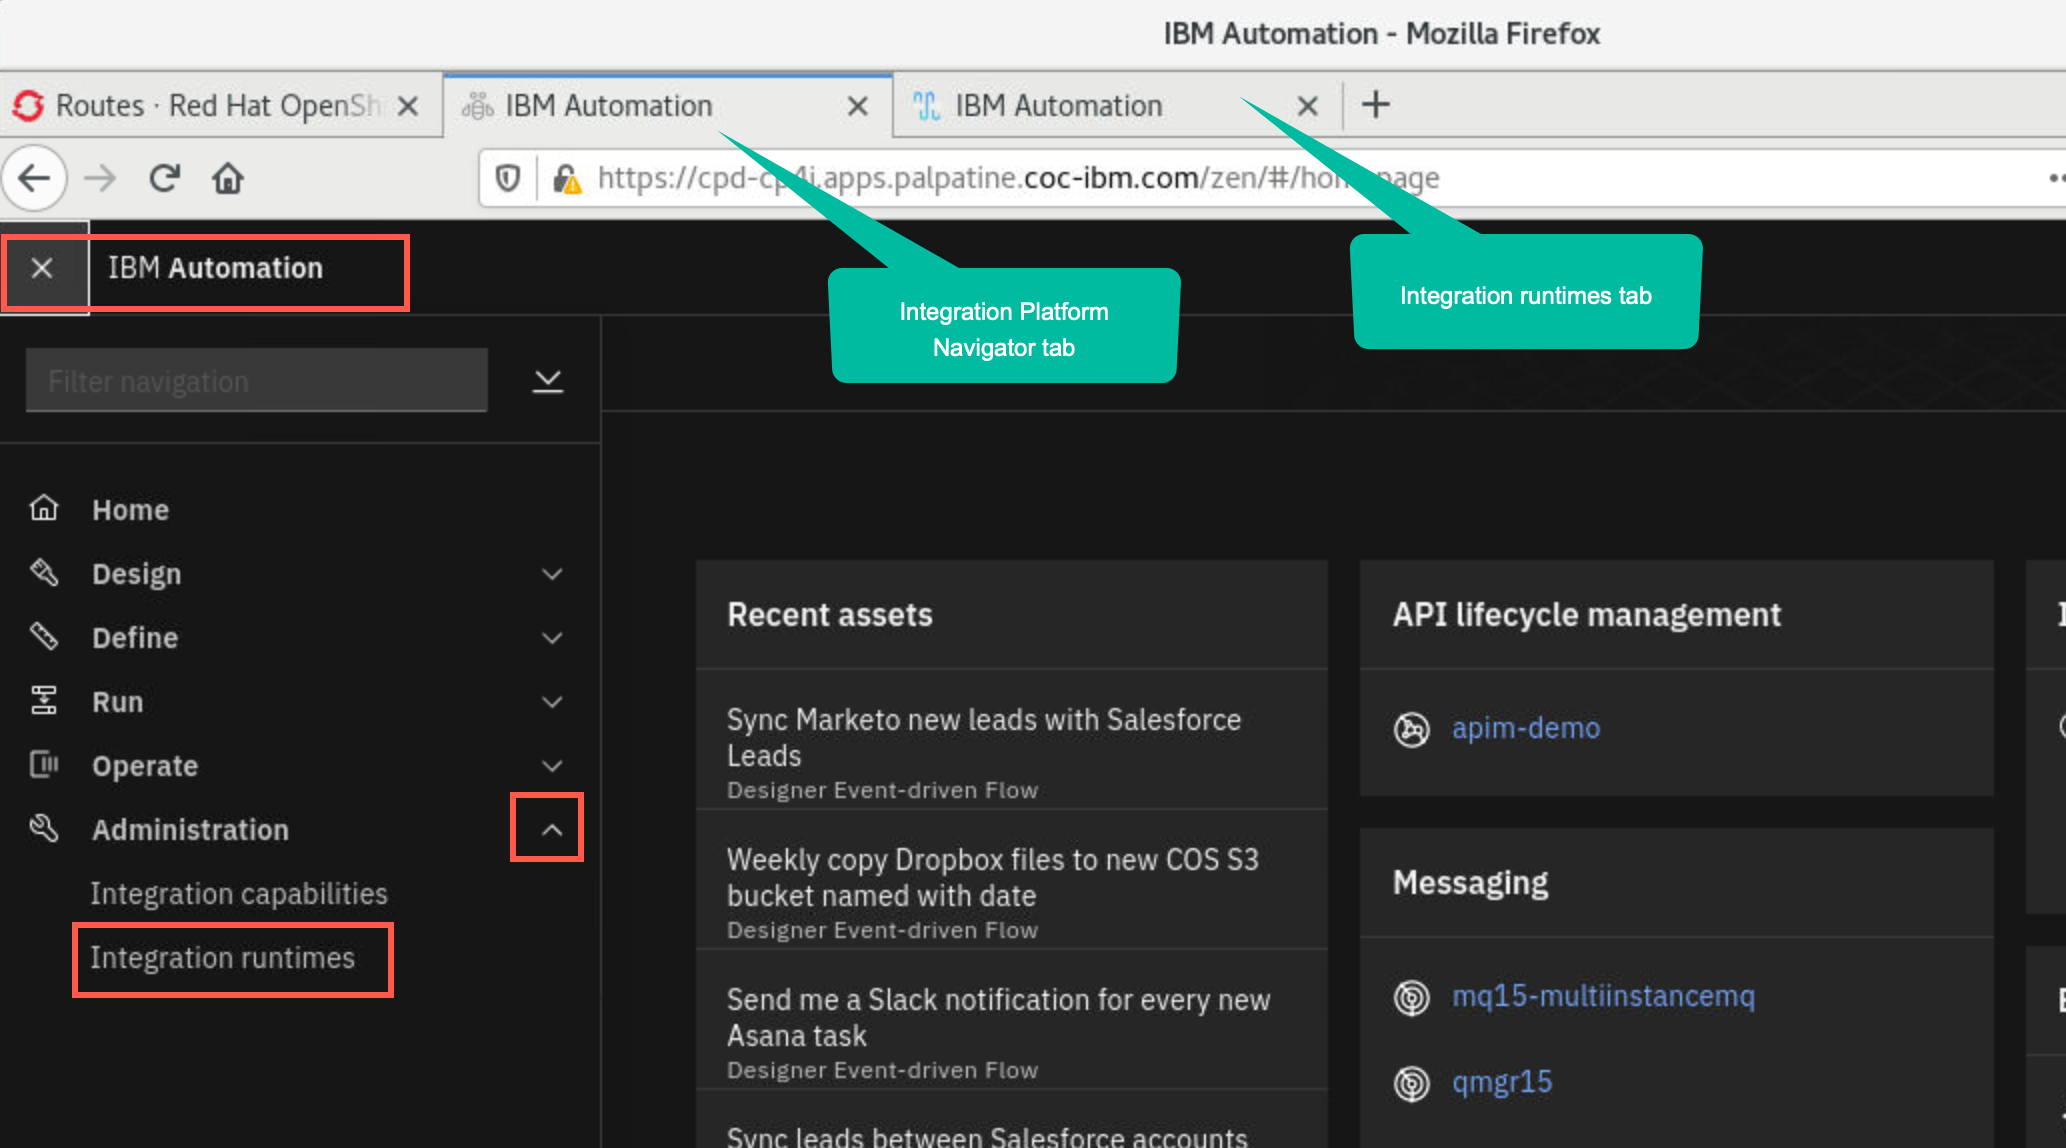
Open your web browser tab for the Platform Navigator. Refresh the page. The status for mqxx-multiinstancemq will have a status of Pending until completely deployed.
To see the runtimes only, click the hamburger menu in top-left corner, click drop-down for Administration, then select Integration runtimes.
-
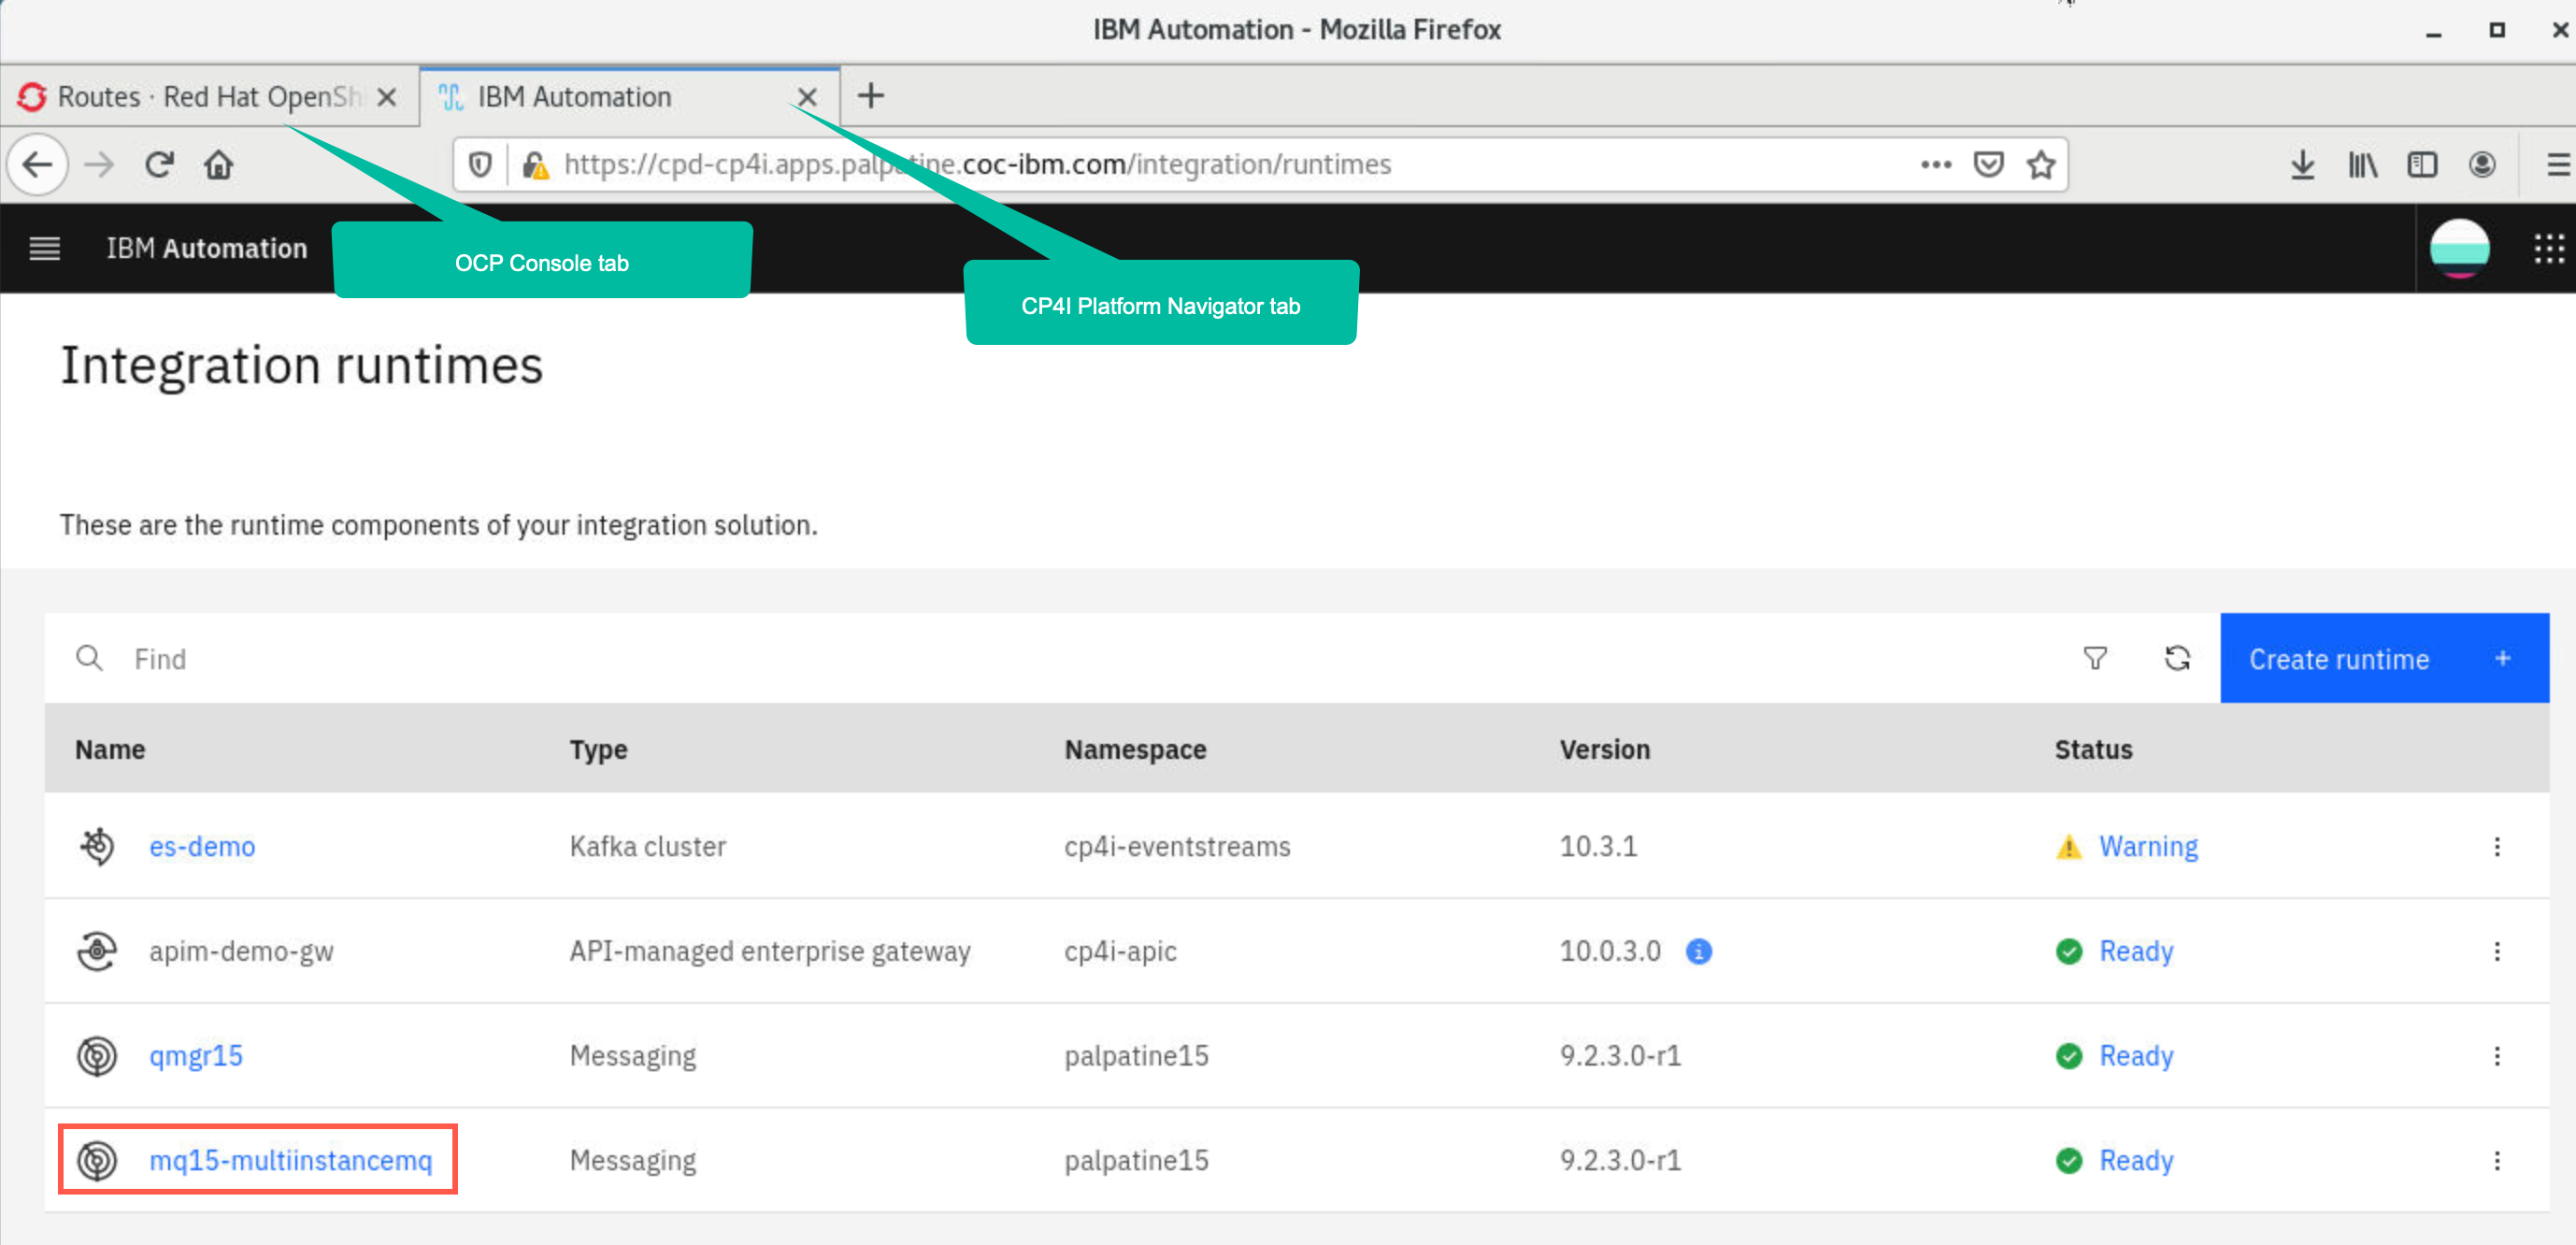
After a couple of minutes the instance is deployed and the status changes to Ready.
 Note:
Note:
If you have closed the Platform Navigator, you can change to the OCP Console > Project cp4i > Networking > Routes > cp4i-navigator-pn. See screen shots below.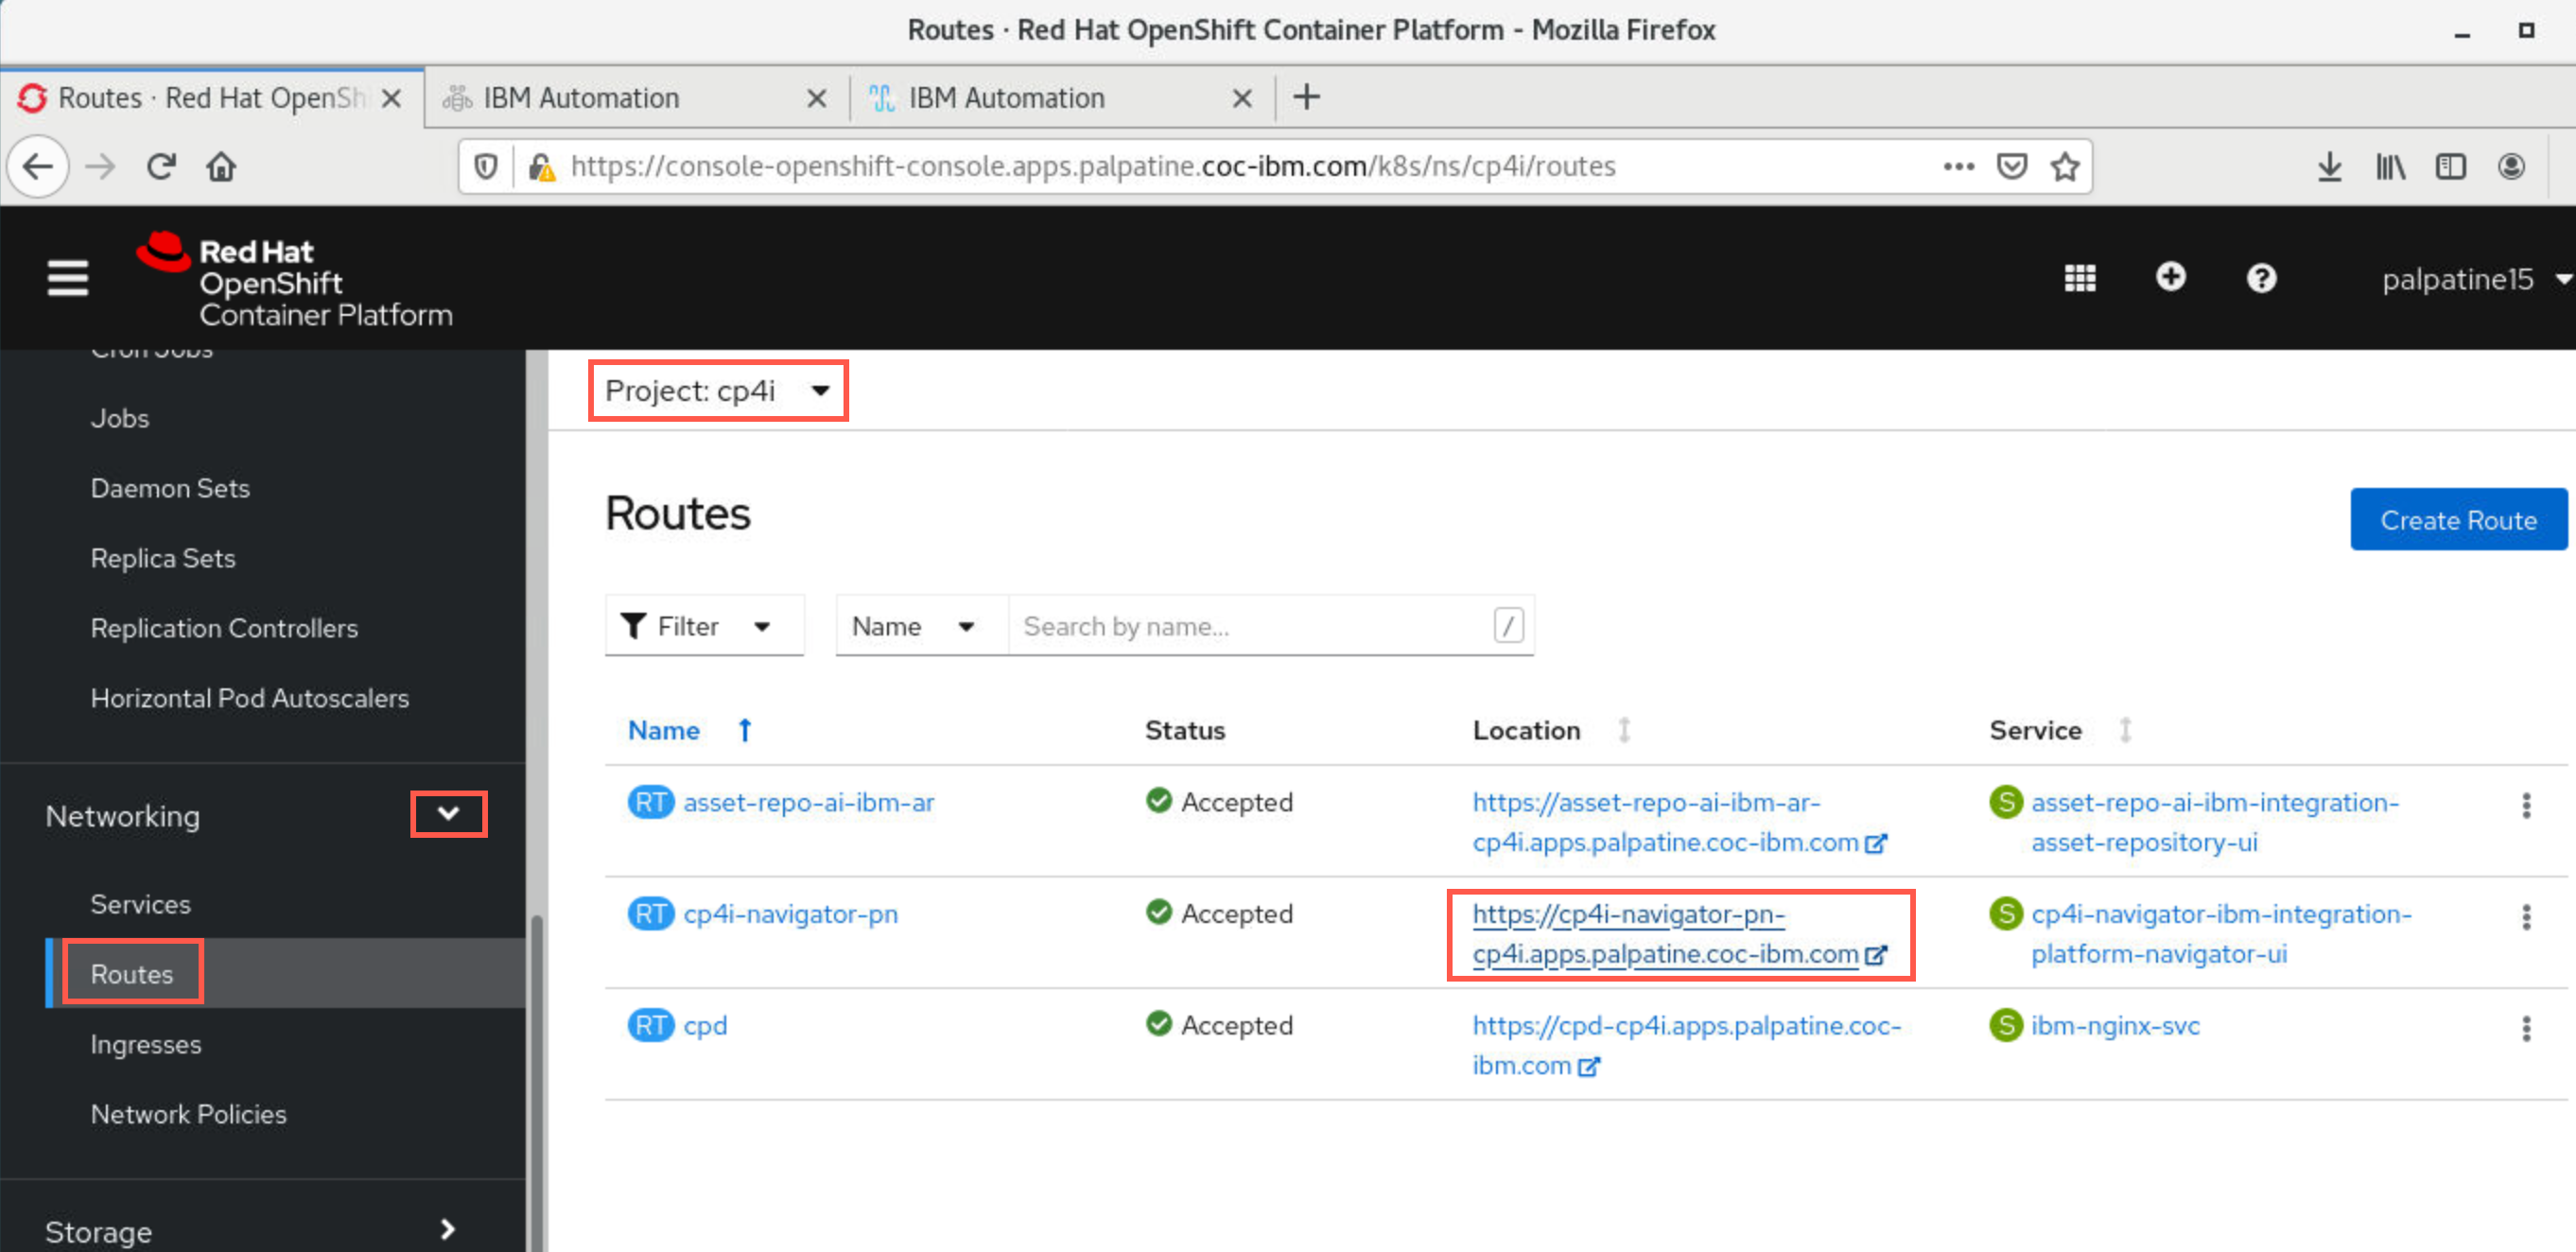
Access and display your MQ instance in the Platform Navigator
-
Click the hyperlink for your instance which will take you to the MQ Console for your queue manager, but first you must respond to the security warnings if prompted. Click Advanced then Accept thee Risk and Continue.
-
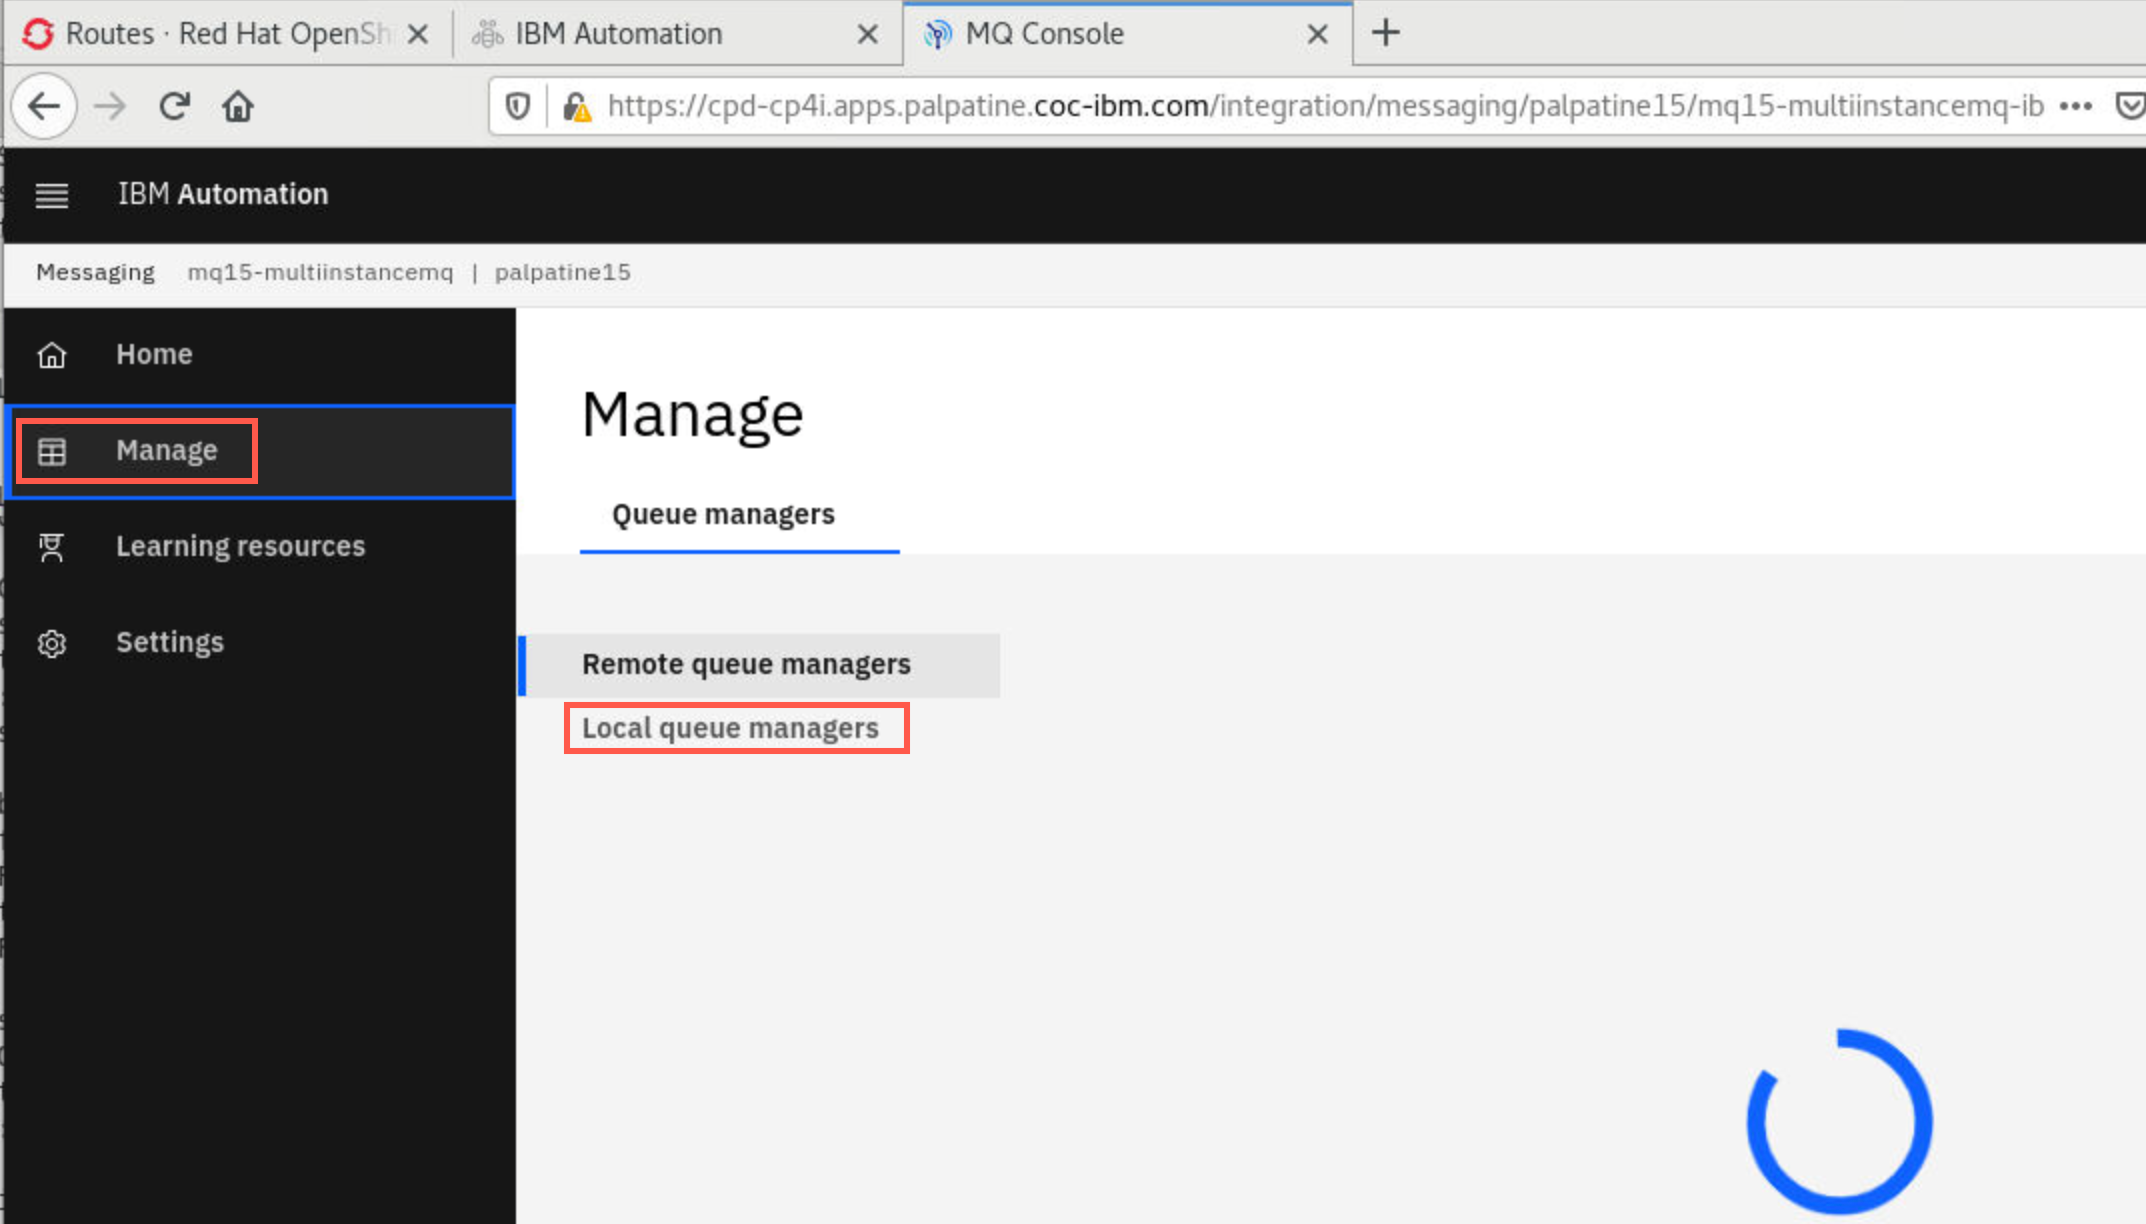
You are then taken to the MQ Console for your queue manager. Recall that you named the queue manager with your student ID prefix and mi - mq00mi. The instance name, mq00-multiinstancemq has the same prefix but we shortened it for the queue manager name. Click Manage then Local queue managers.
 Tip:
Tip:
You could easily just click Manage mqxxmi to bypass the Local queue managers step.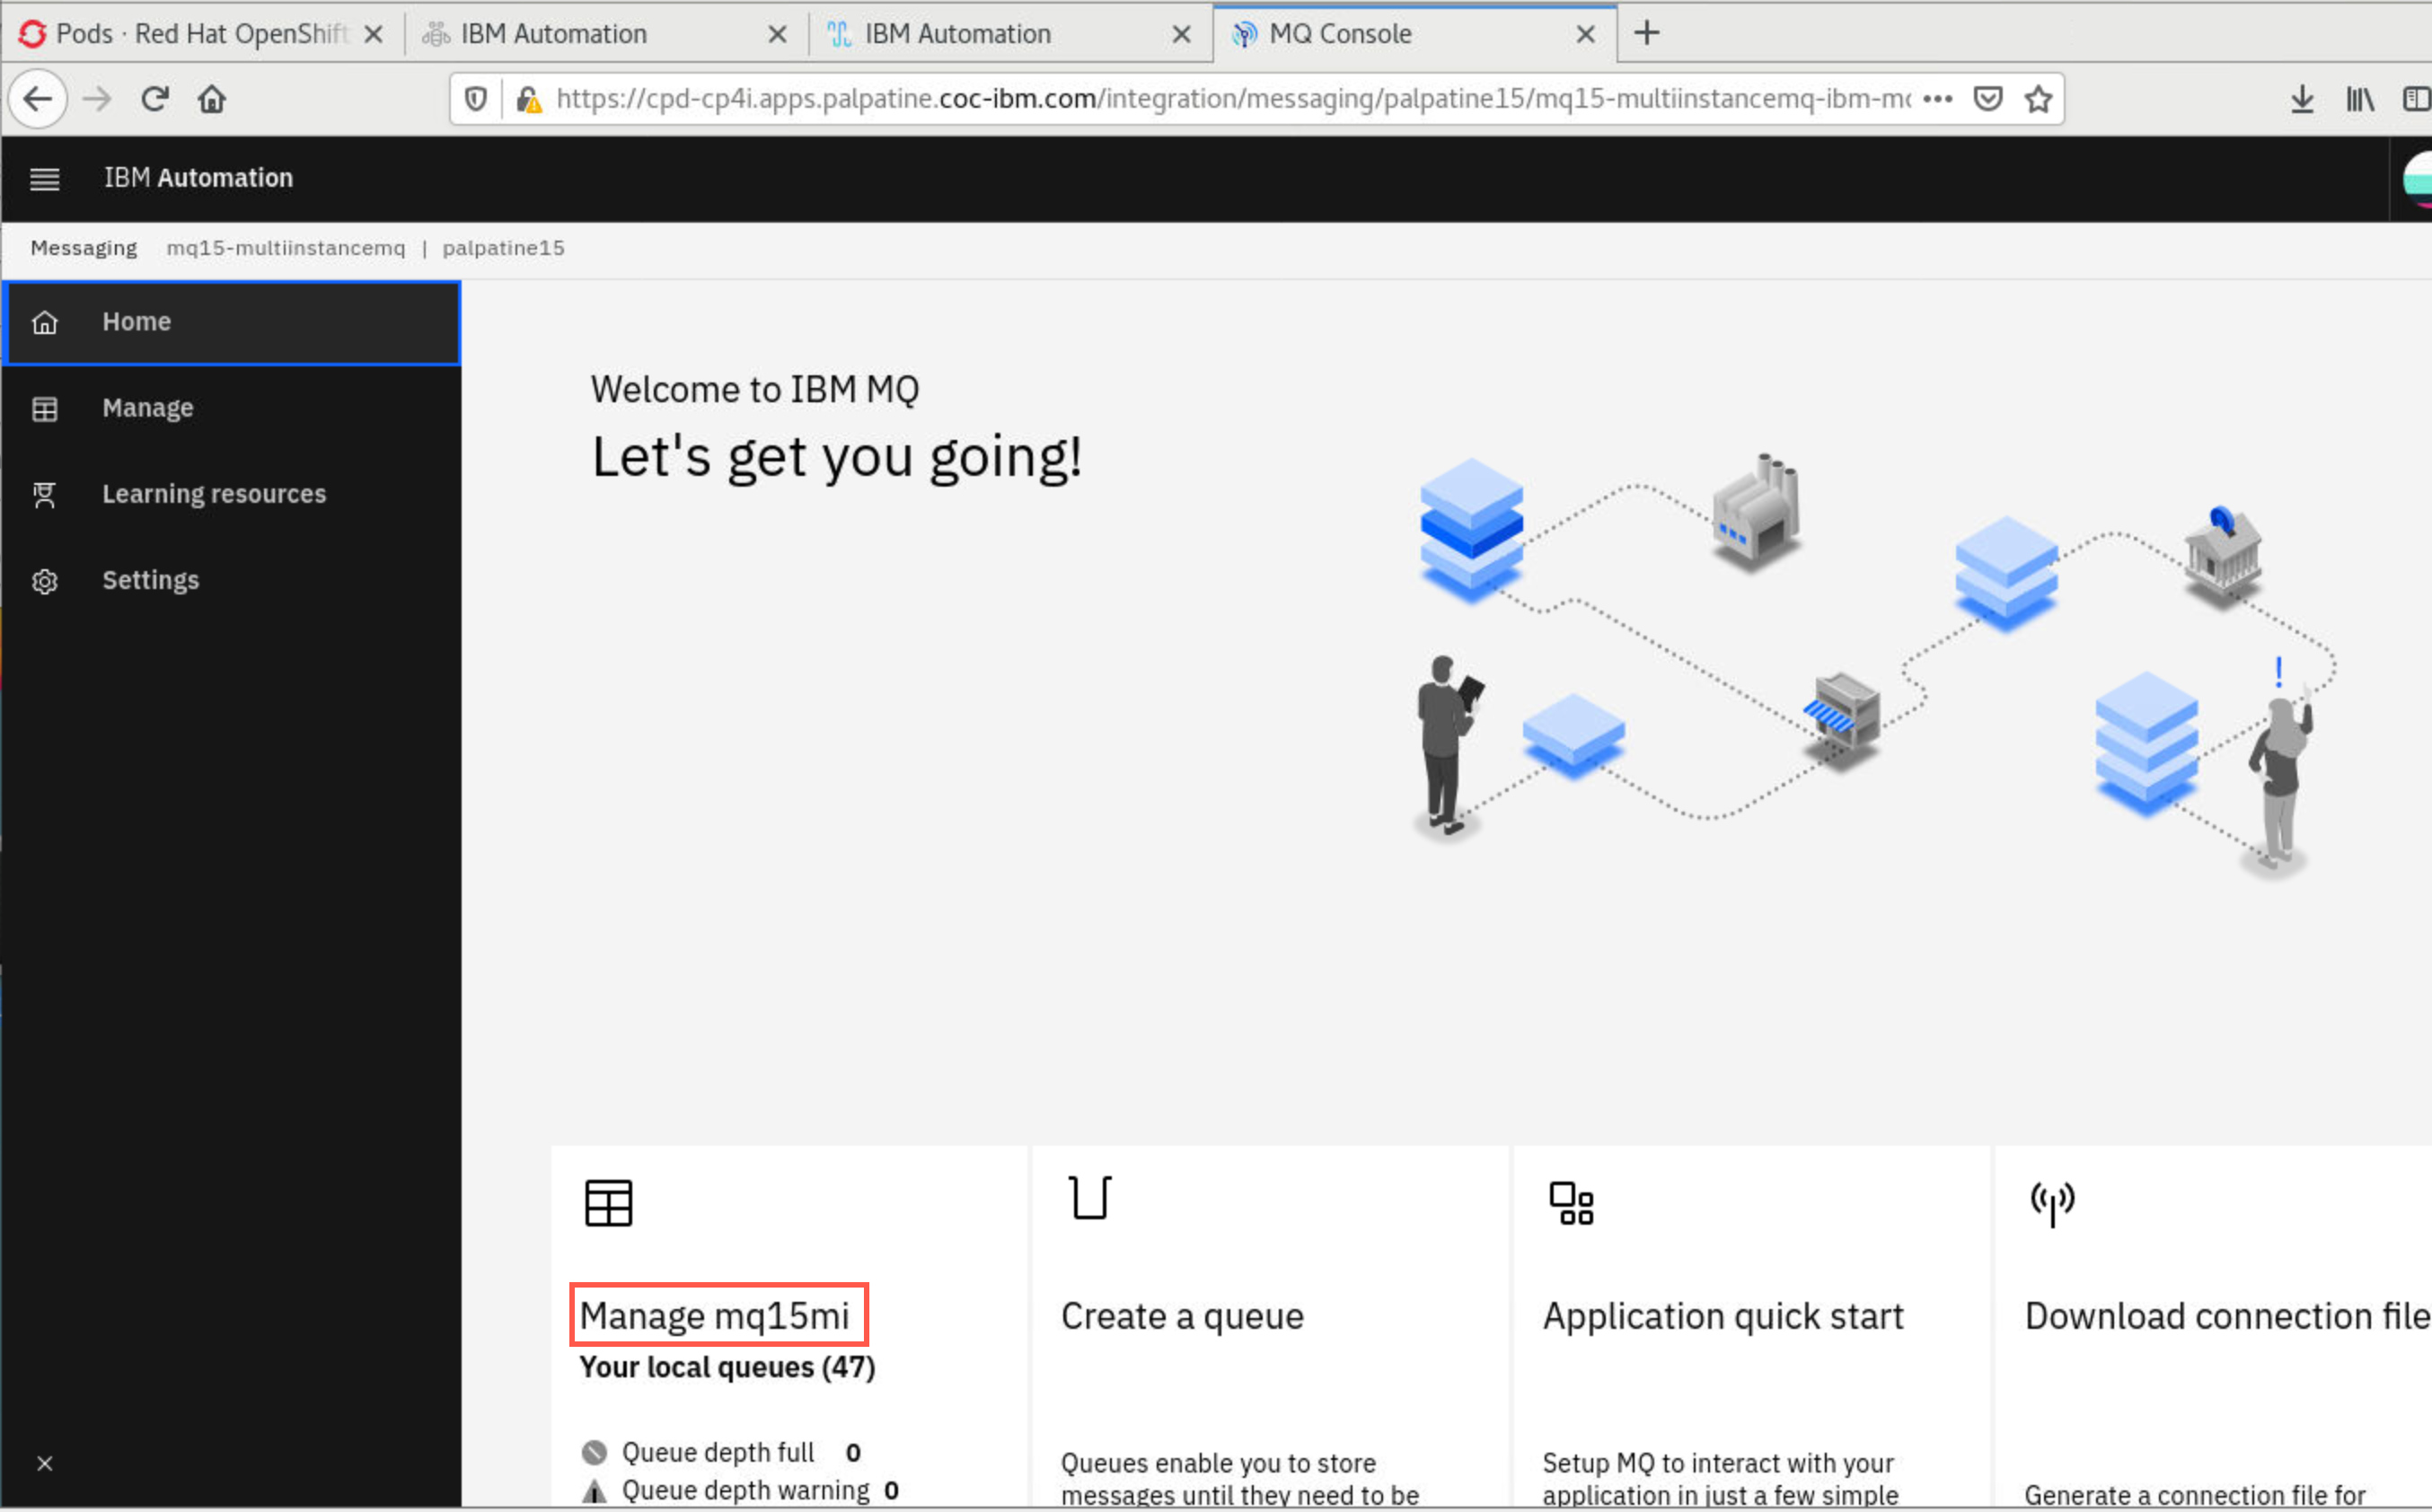
-
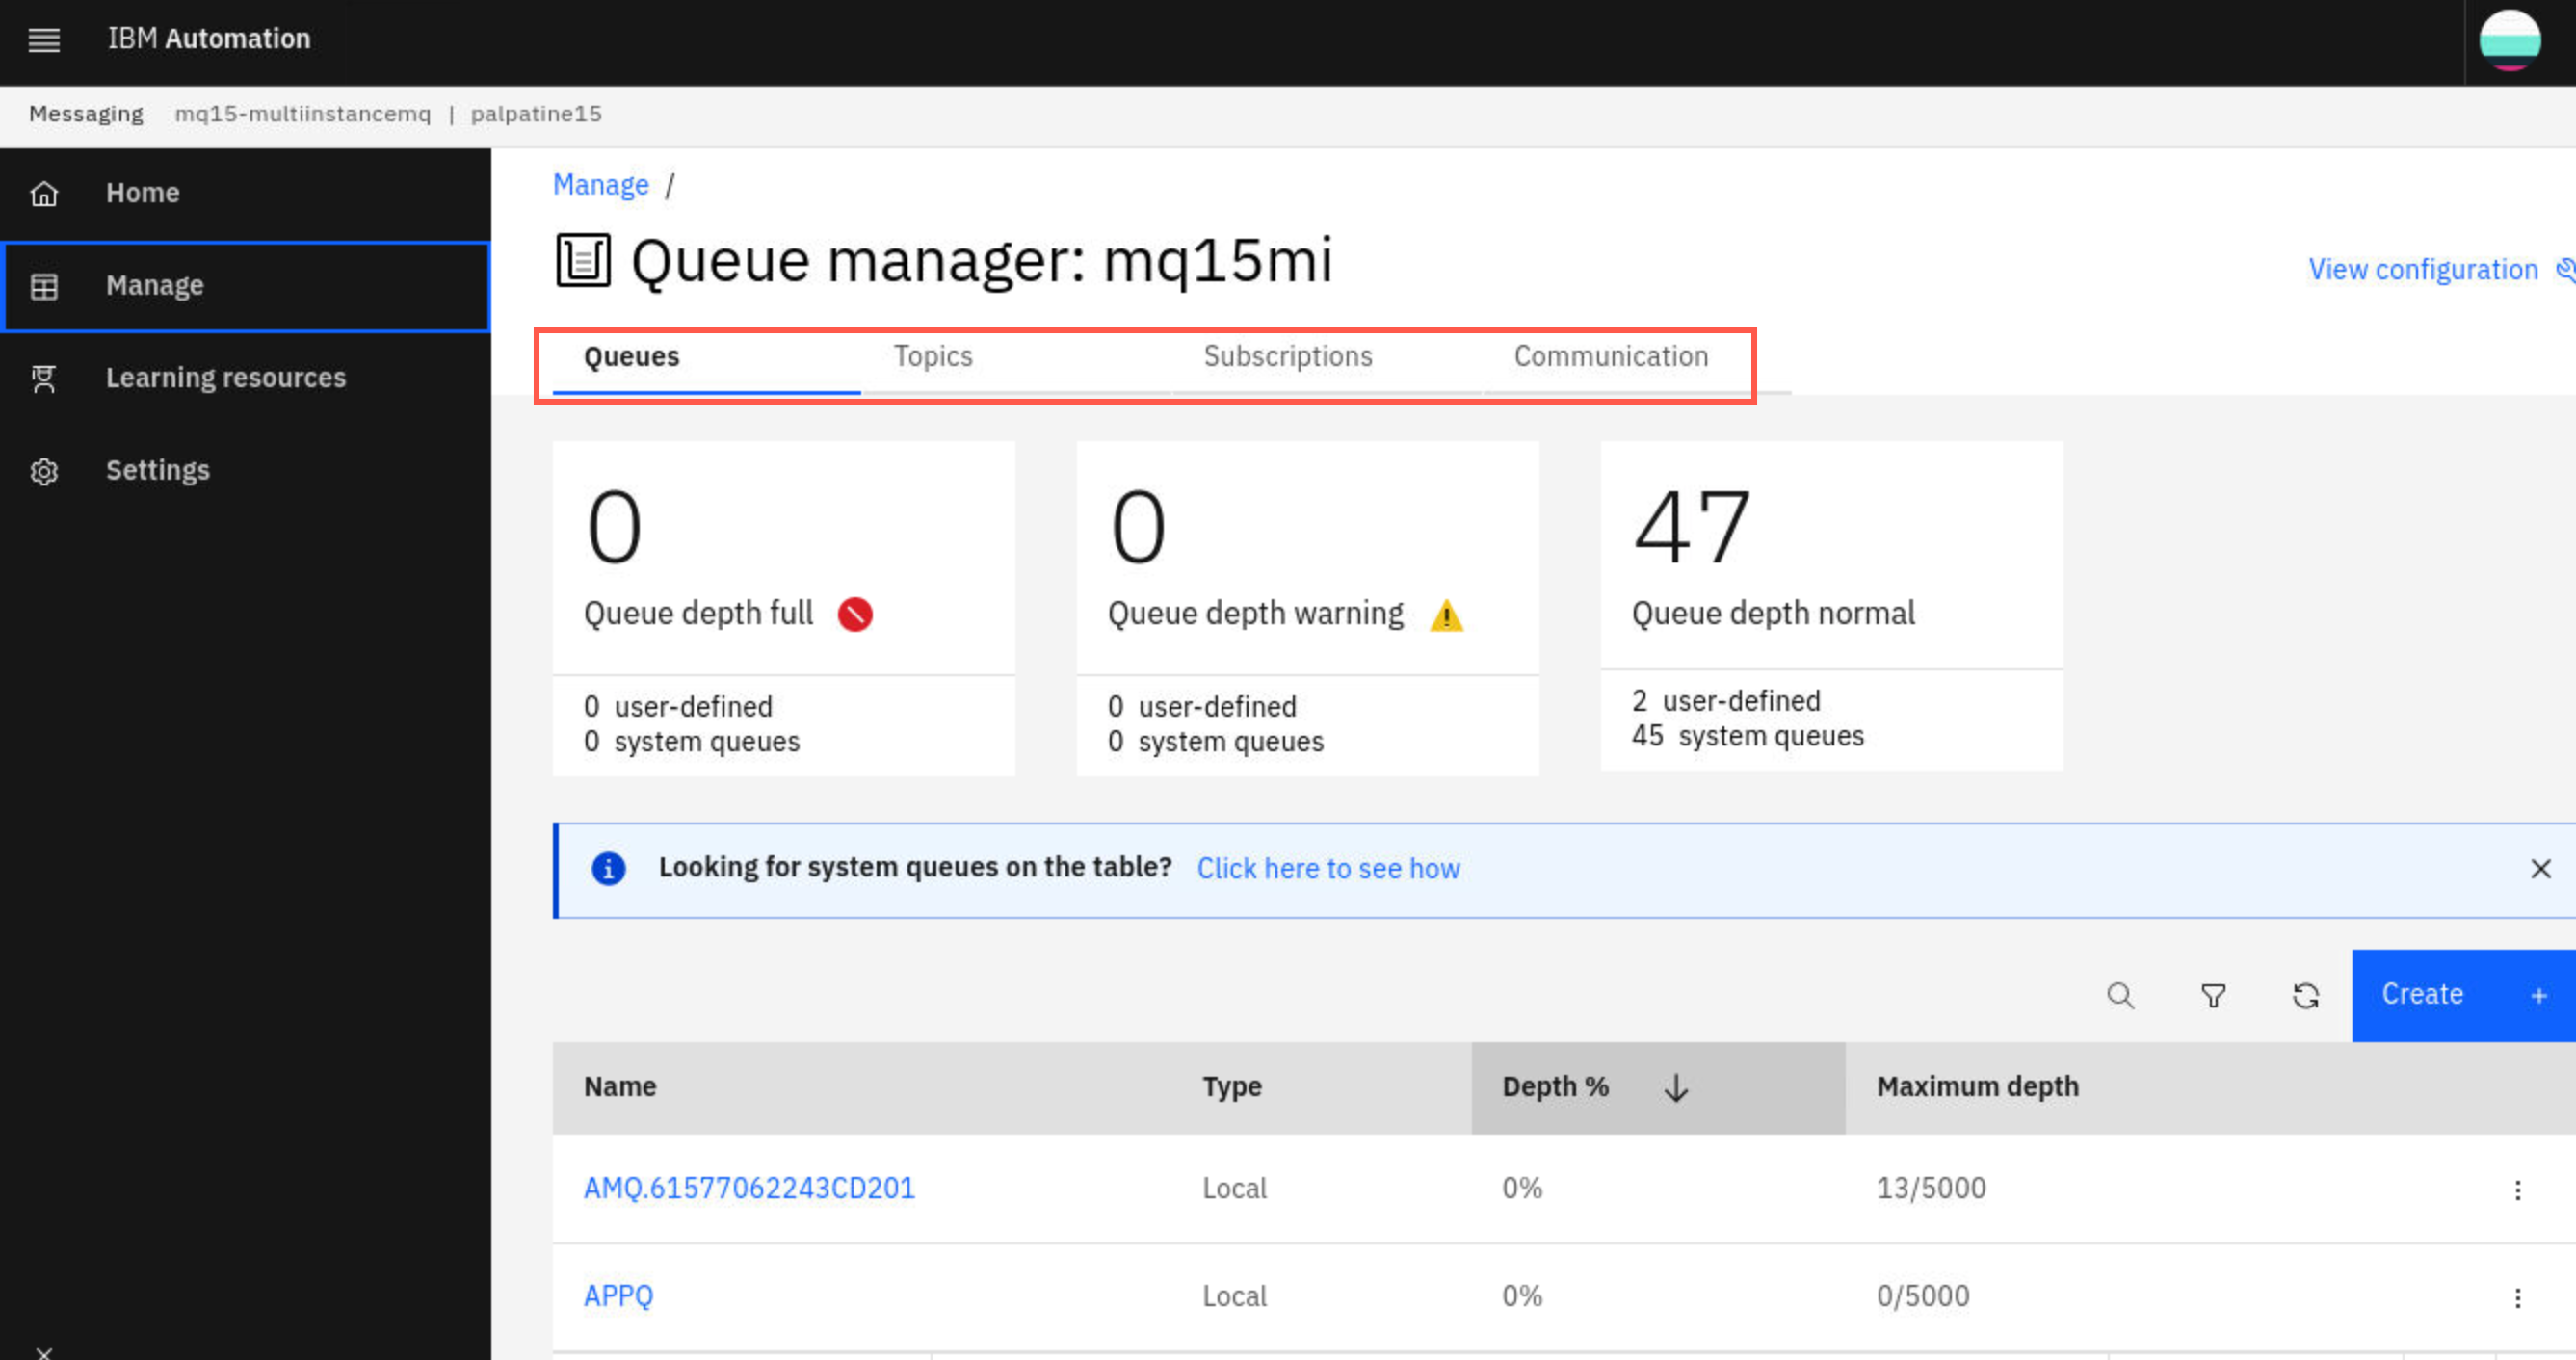
On the Manage page you will see Queues, Topics, Subscriptions, and Communications. Under Queues you will see APPQ which was defined by the mqsc commands in the yaml defined ConfigMap.
-
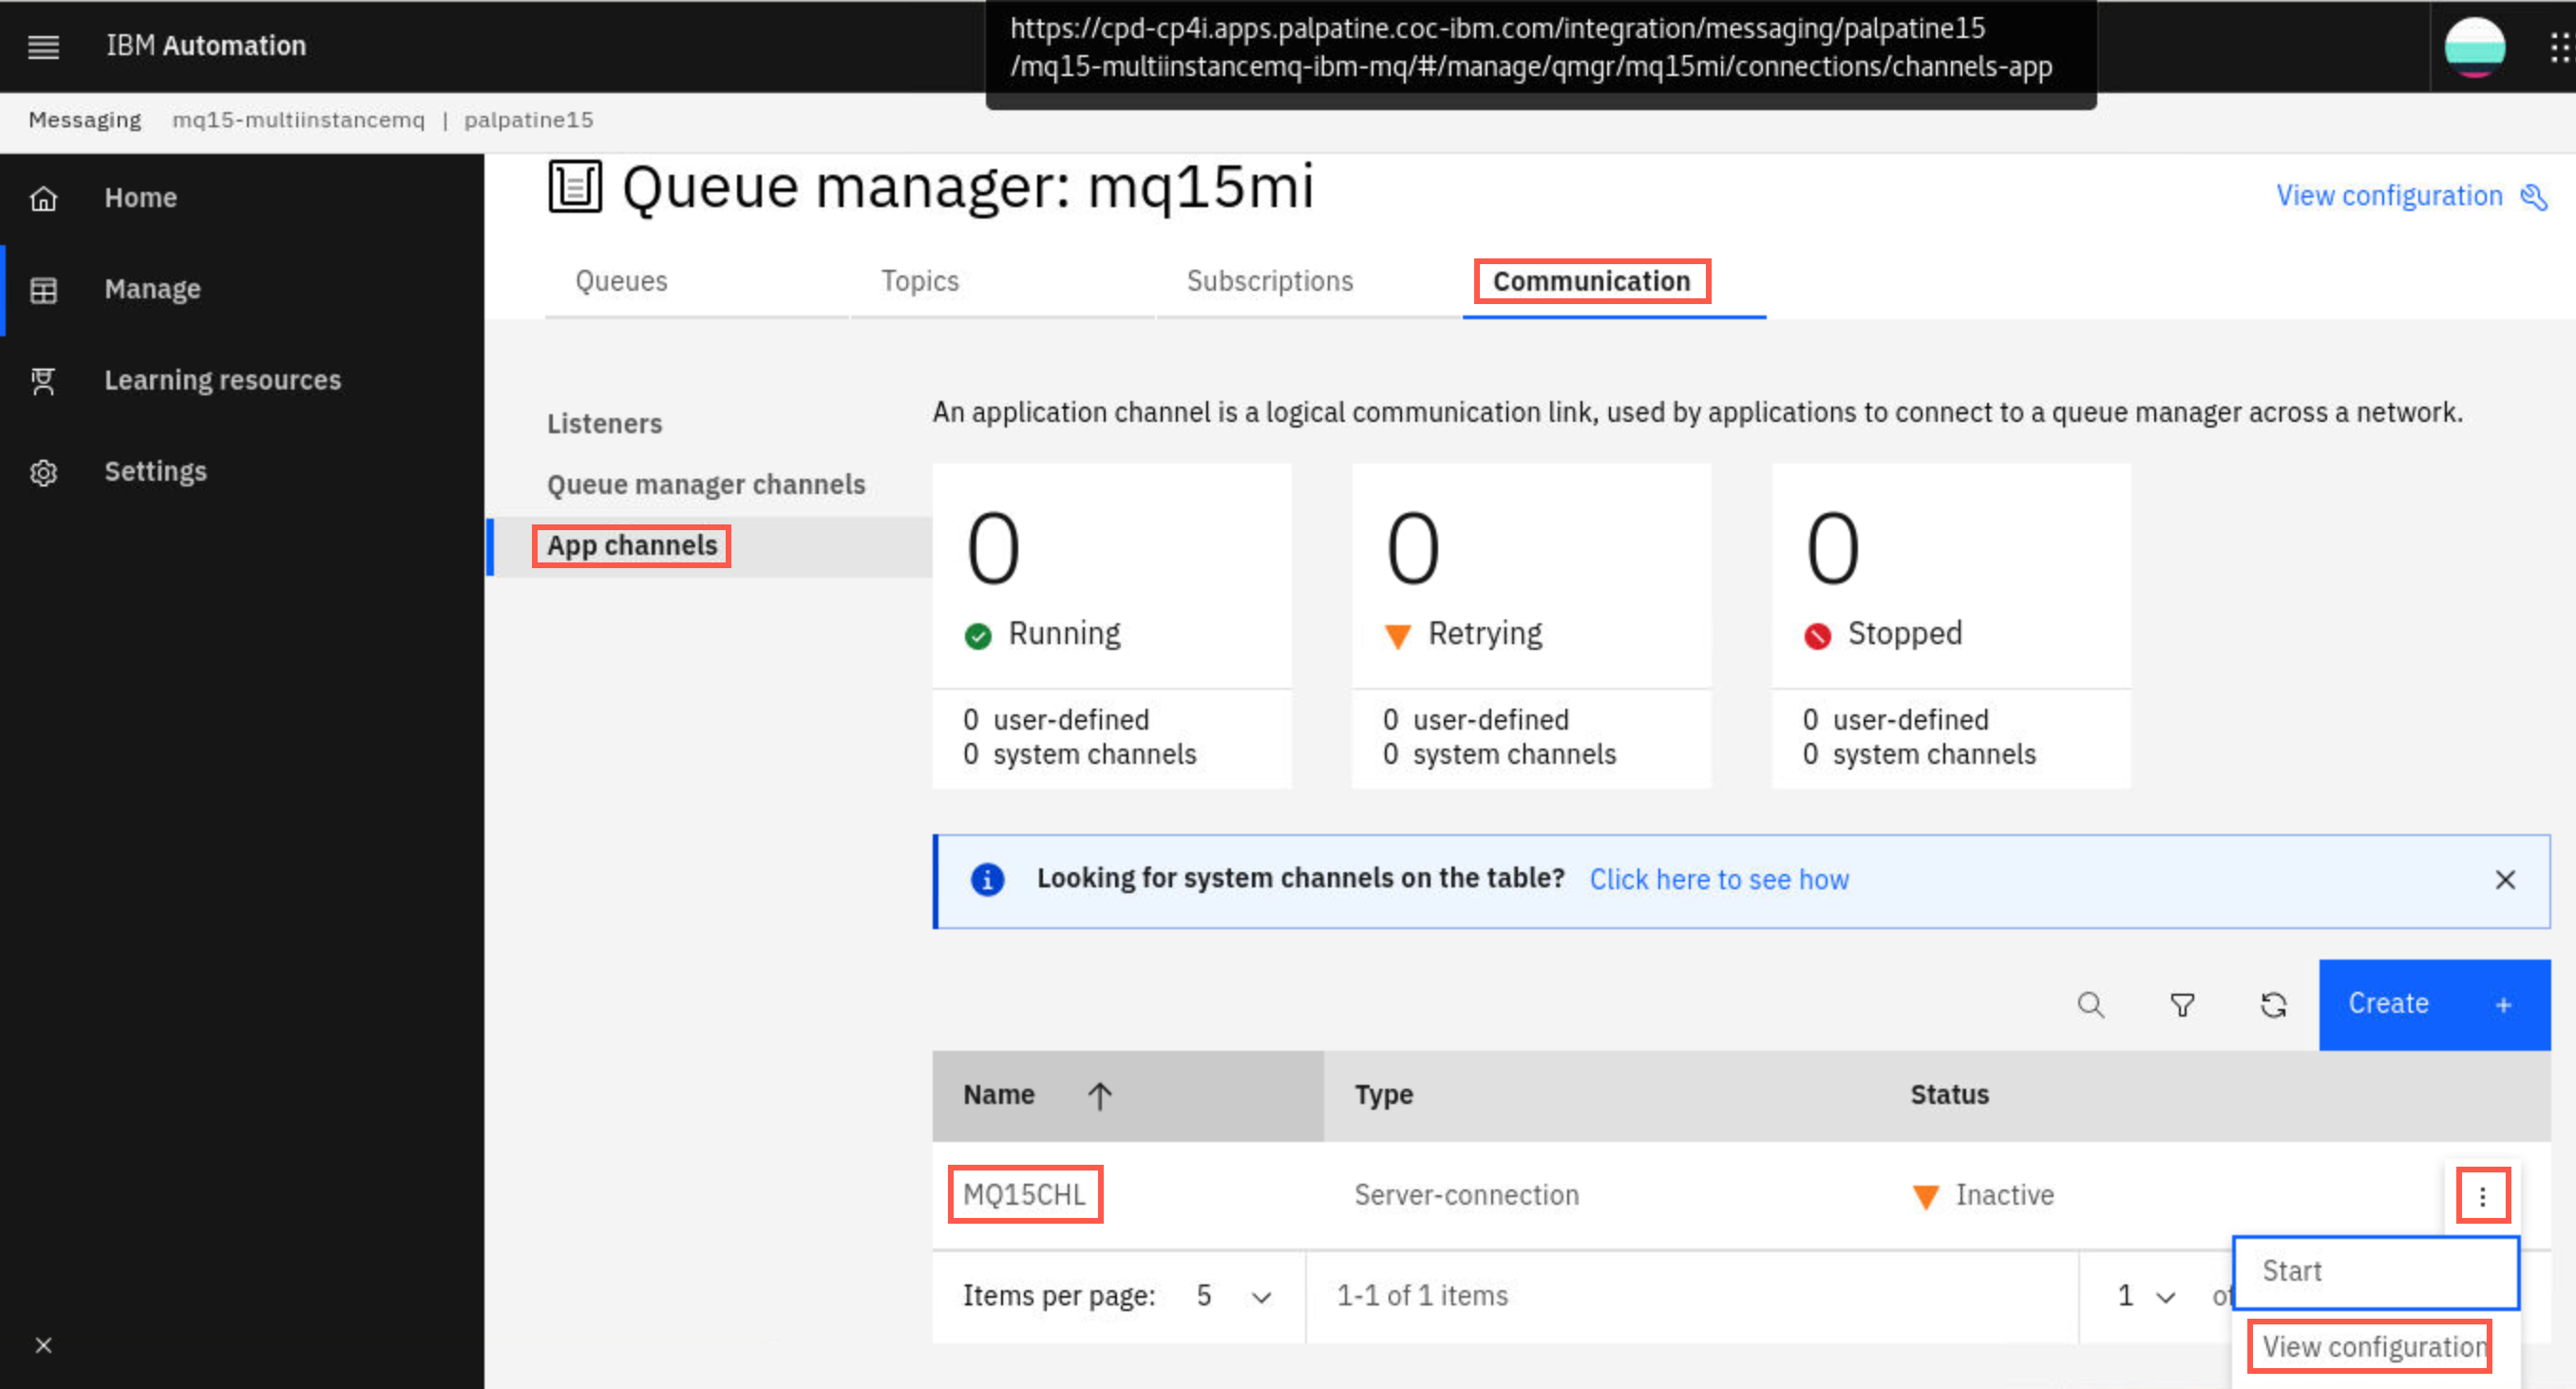
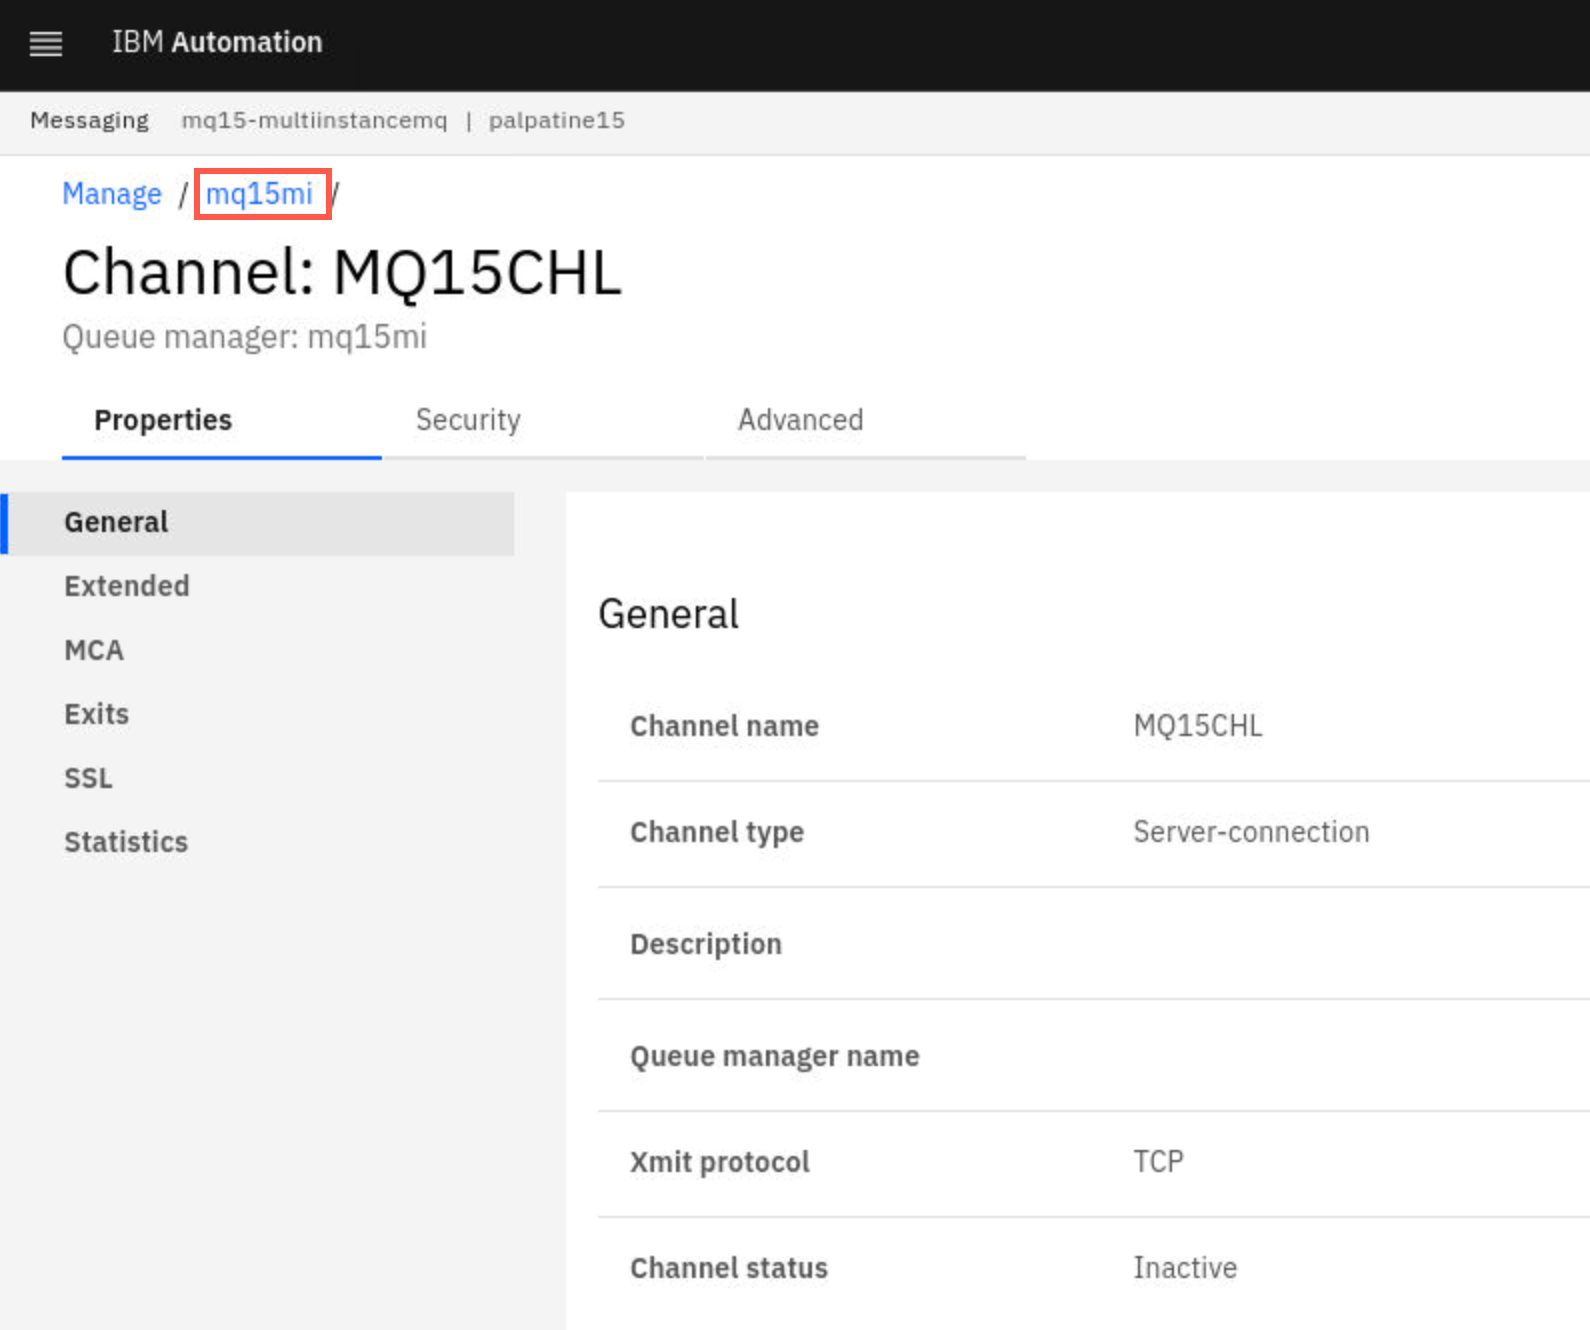
Click Communication > App Channels where you will find the channel MQxxCHL. The channel was also defined in the mqsc commands in the yaml defined ConfigMap. Click the elipsis on the right side then select View Configuration to display or edit the channel properties.
Click the breadcrumb to return to Manage page.
-
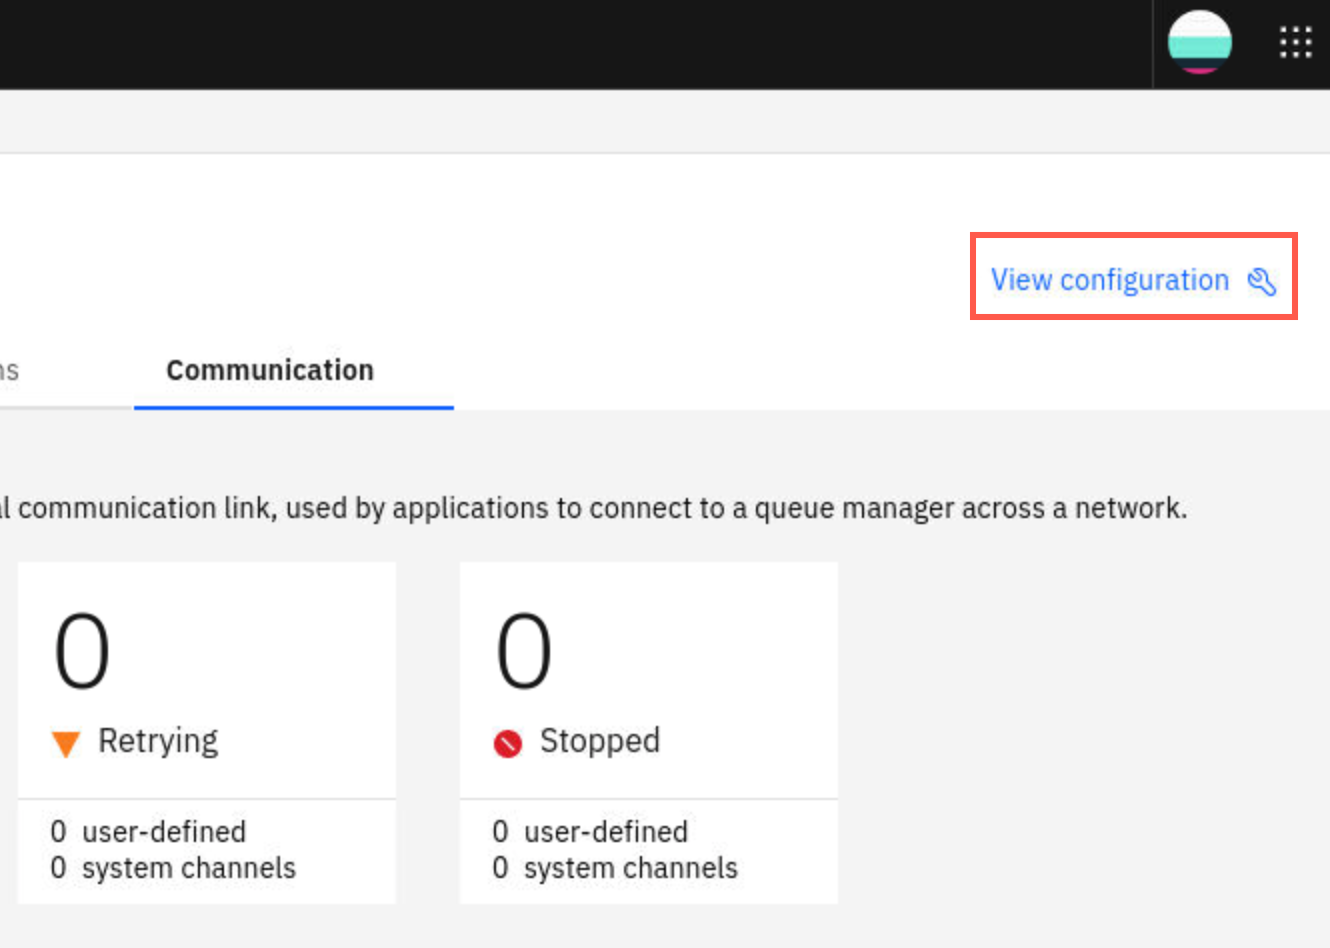
Notice the View Configuration hyperlink in the top right corner. This takes you to the queue manager properties. Click the link now.
-
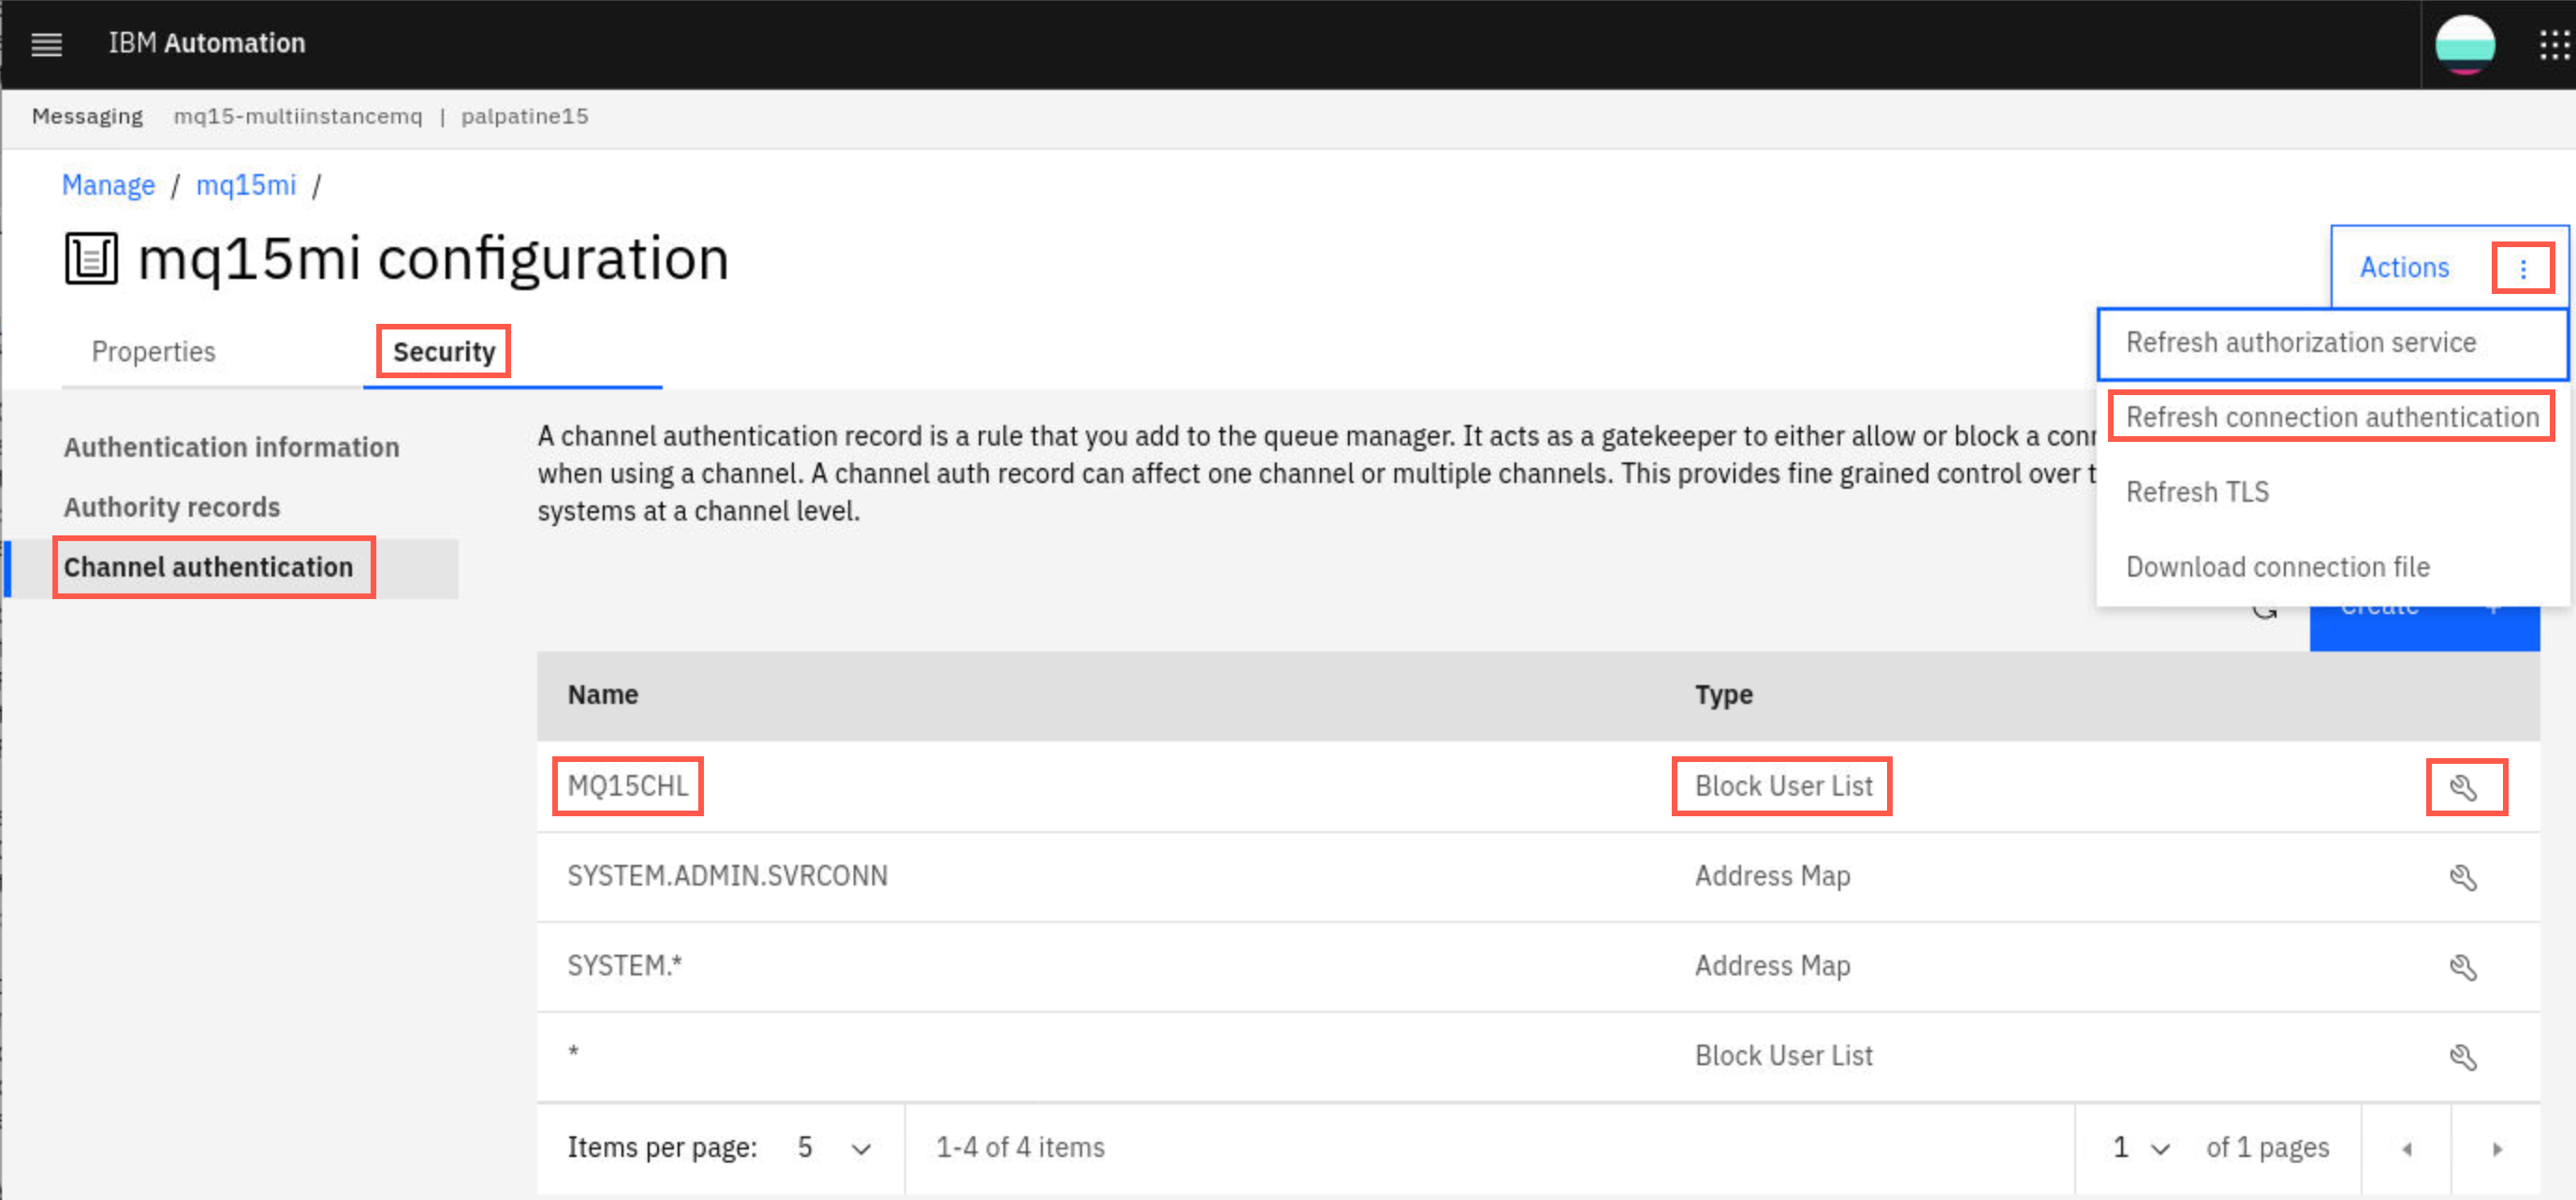
You arrive at the overall queue manager properties to be displayed or edited. Click Security > Channel authentication. Here you see the channel auth created by the mqsc commands in the yaml defined ConfigMap as well as the system channel auth records. Your yaml file defined the MQxxCHL record with a type of Block. You can click the wrench icon to display or edit the record. If you do change the properties you will then need to refresh security. To do that you simply click the Actions elipsis and select the necessary refresh option.
-
Continue to explore the MQ Console as long as you like.
Review your MQ instance in OpenShift
There is an extensive amount of detail in the OpenShift Console. The following instructions will lead you to accomplish the purpose of this lab. But feel free to explore more detail to help you understand OpenShift and CP4I.
-
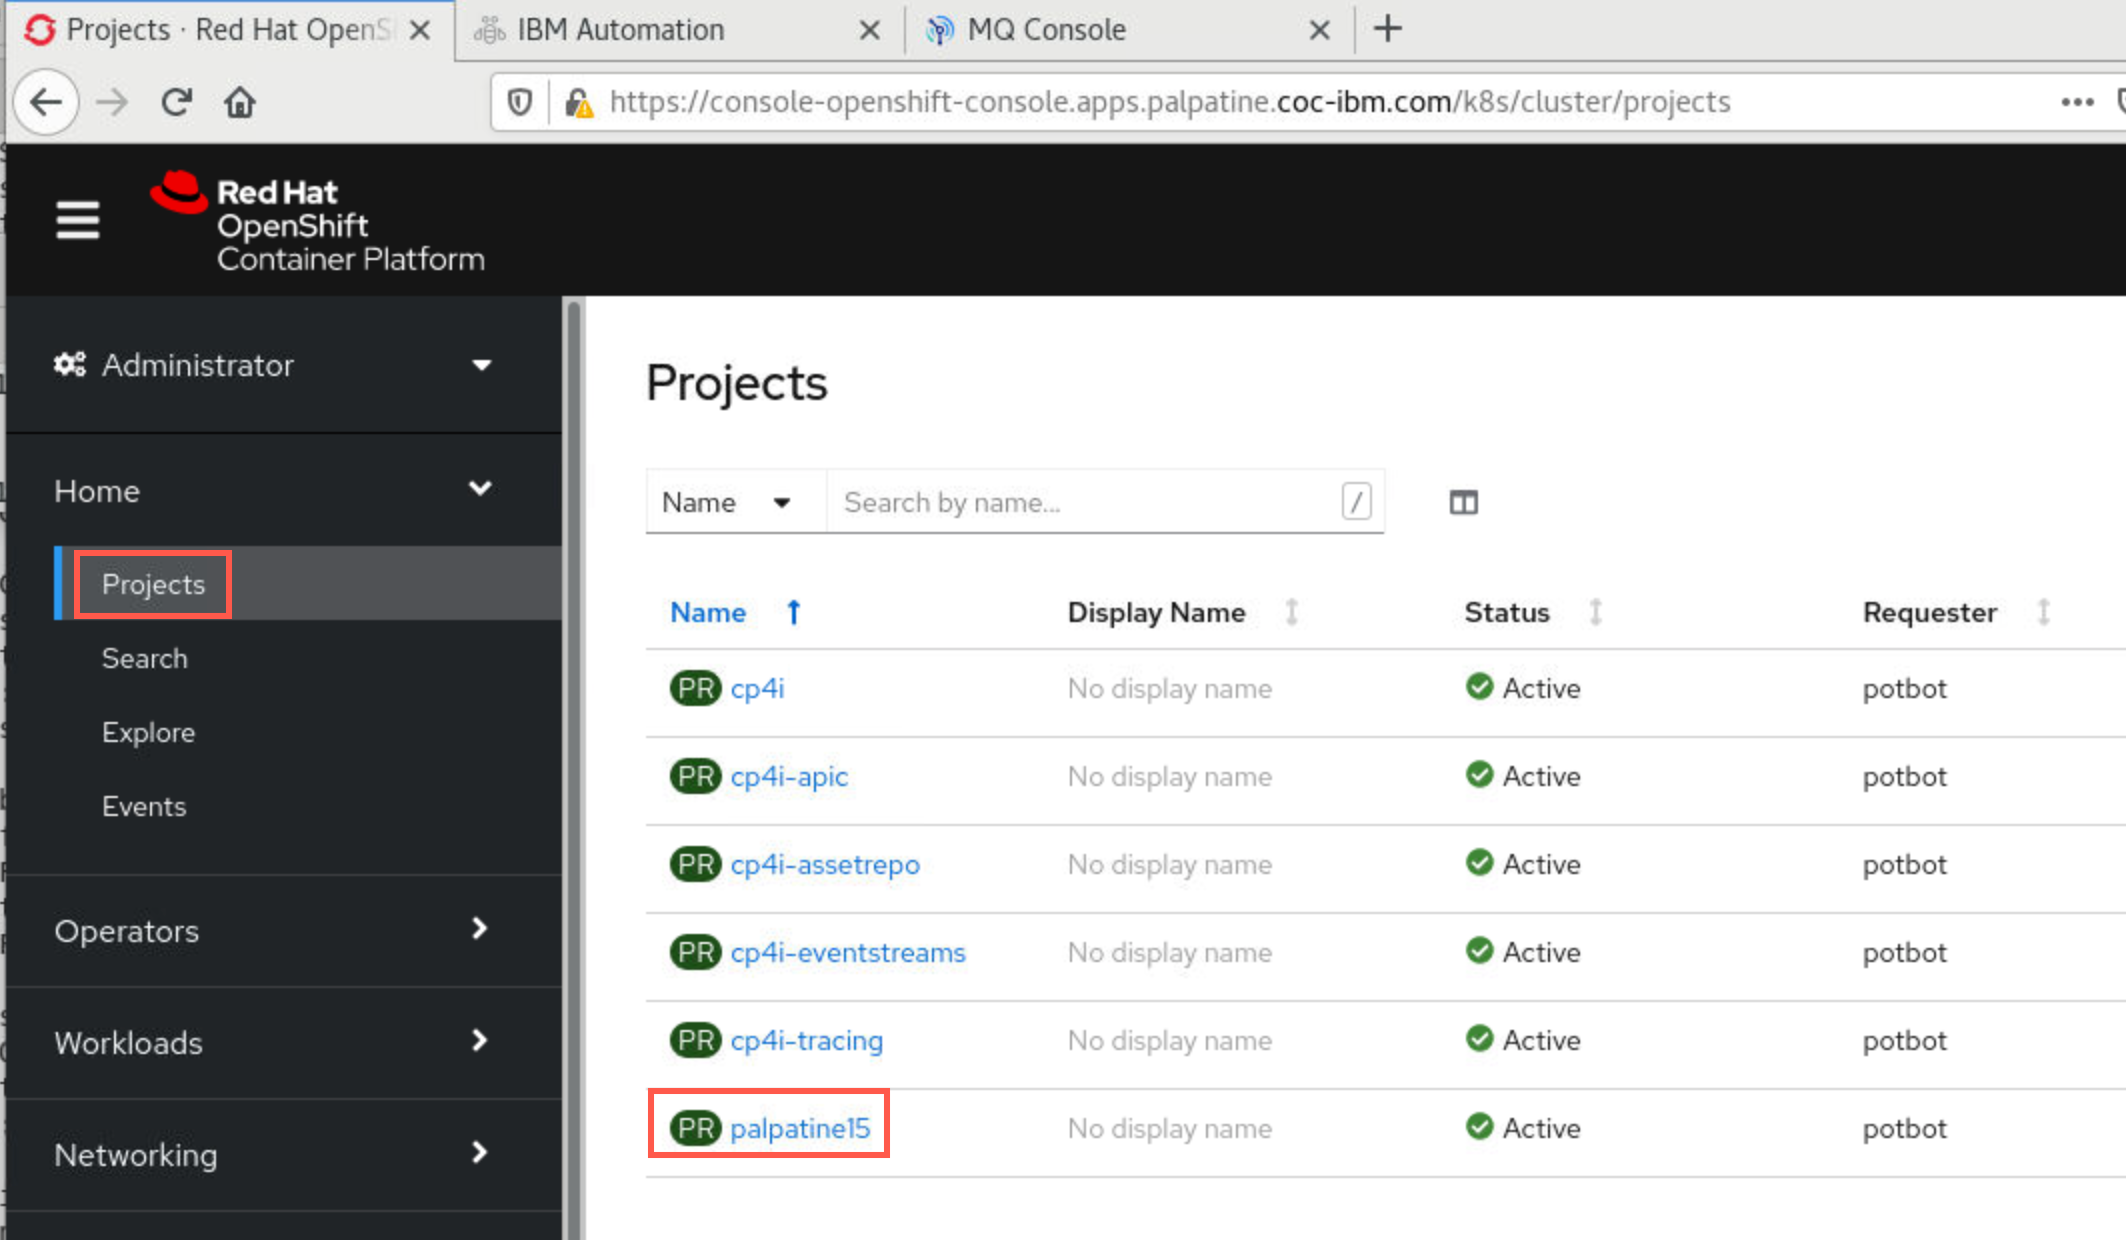
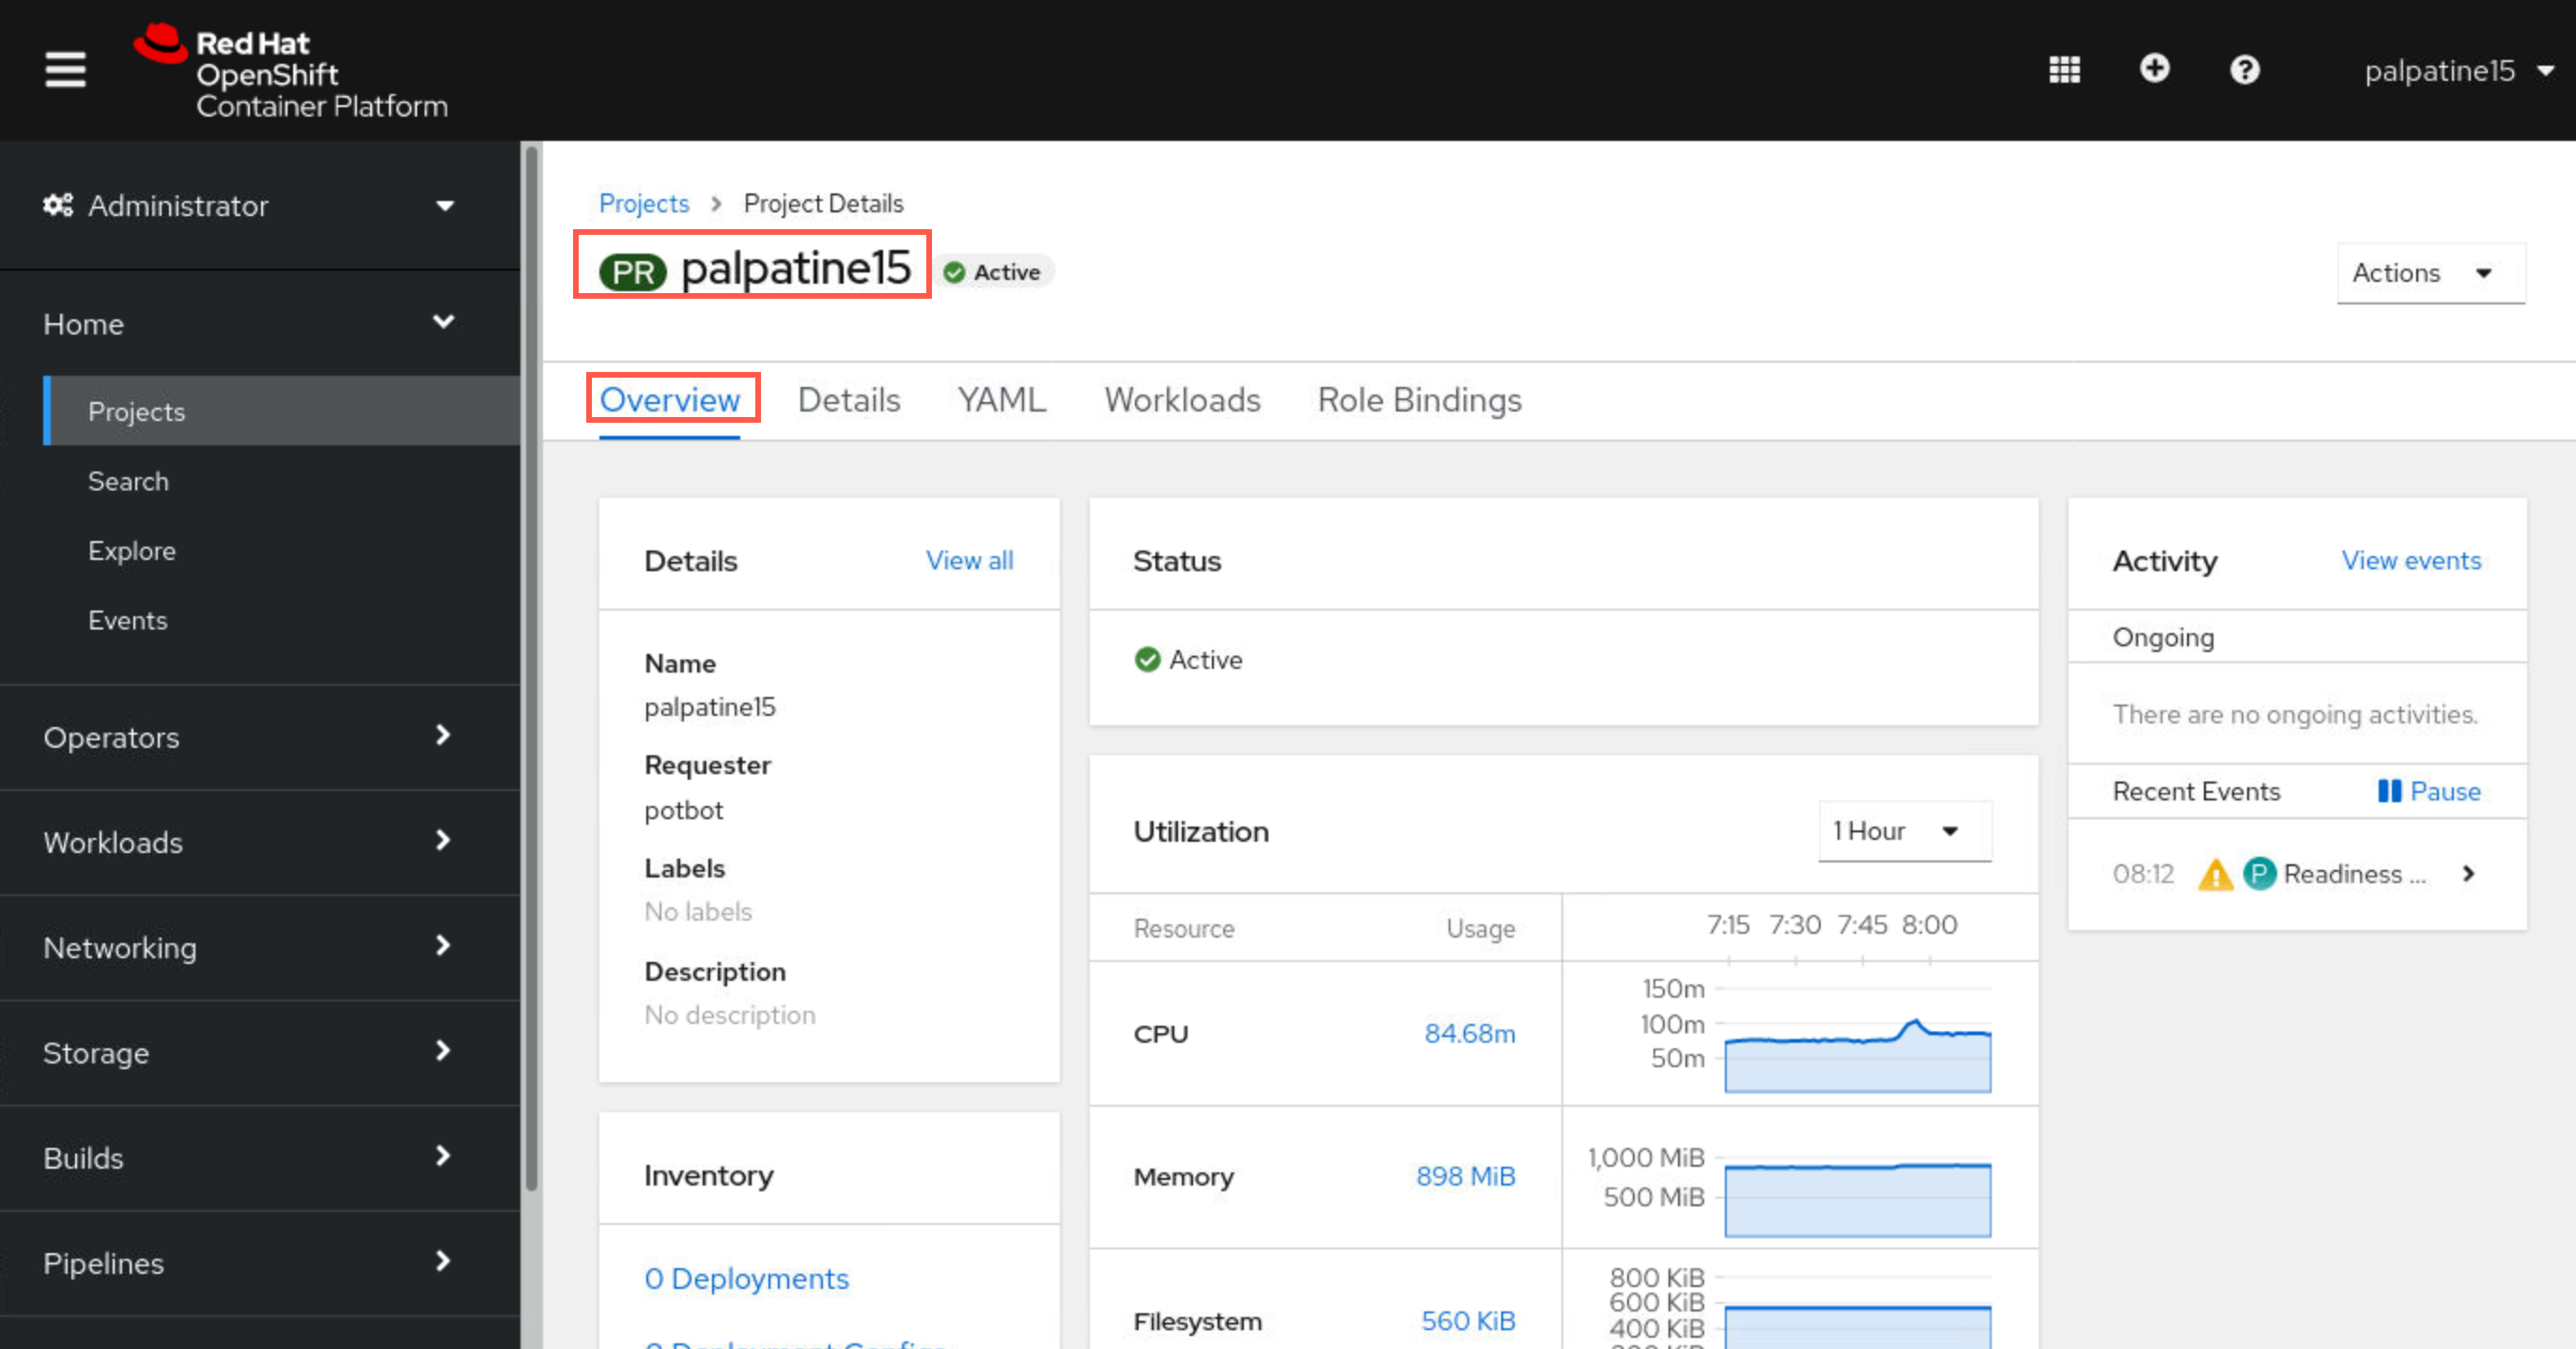
Return to the browser tab in Firefox for the OCP Console. You will be in the Administrator view. Click Projects then scroll down to find your namespace and click the hyperlink.
-
The project Overview opens where you can see the status and utilization of your namespace (project).
-
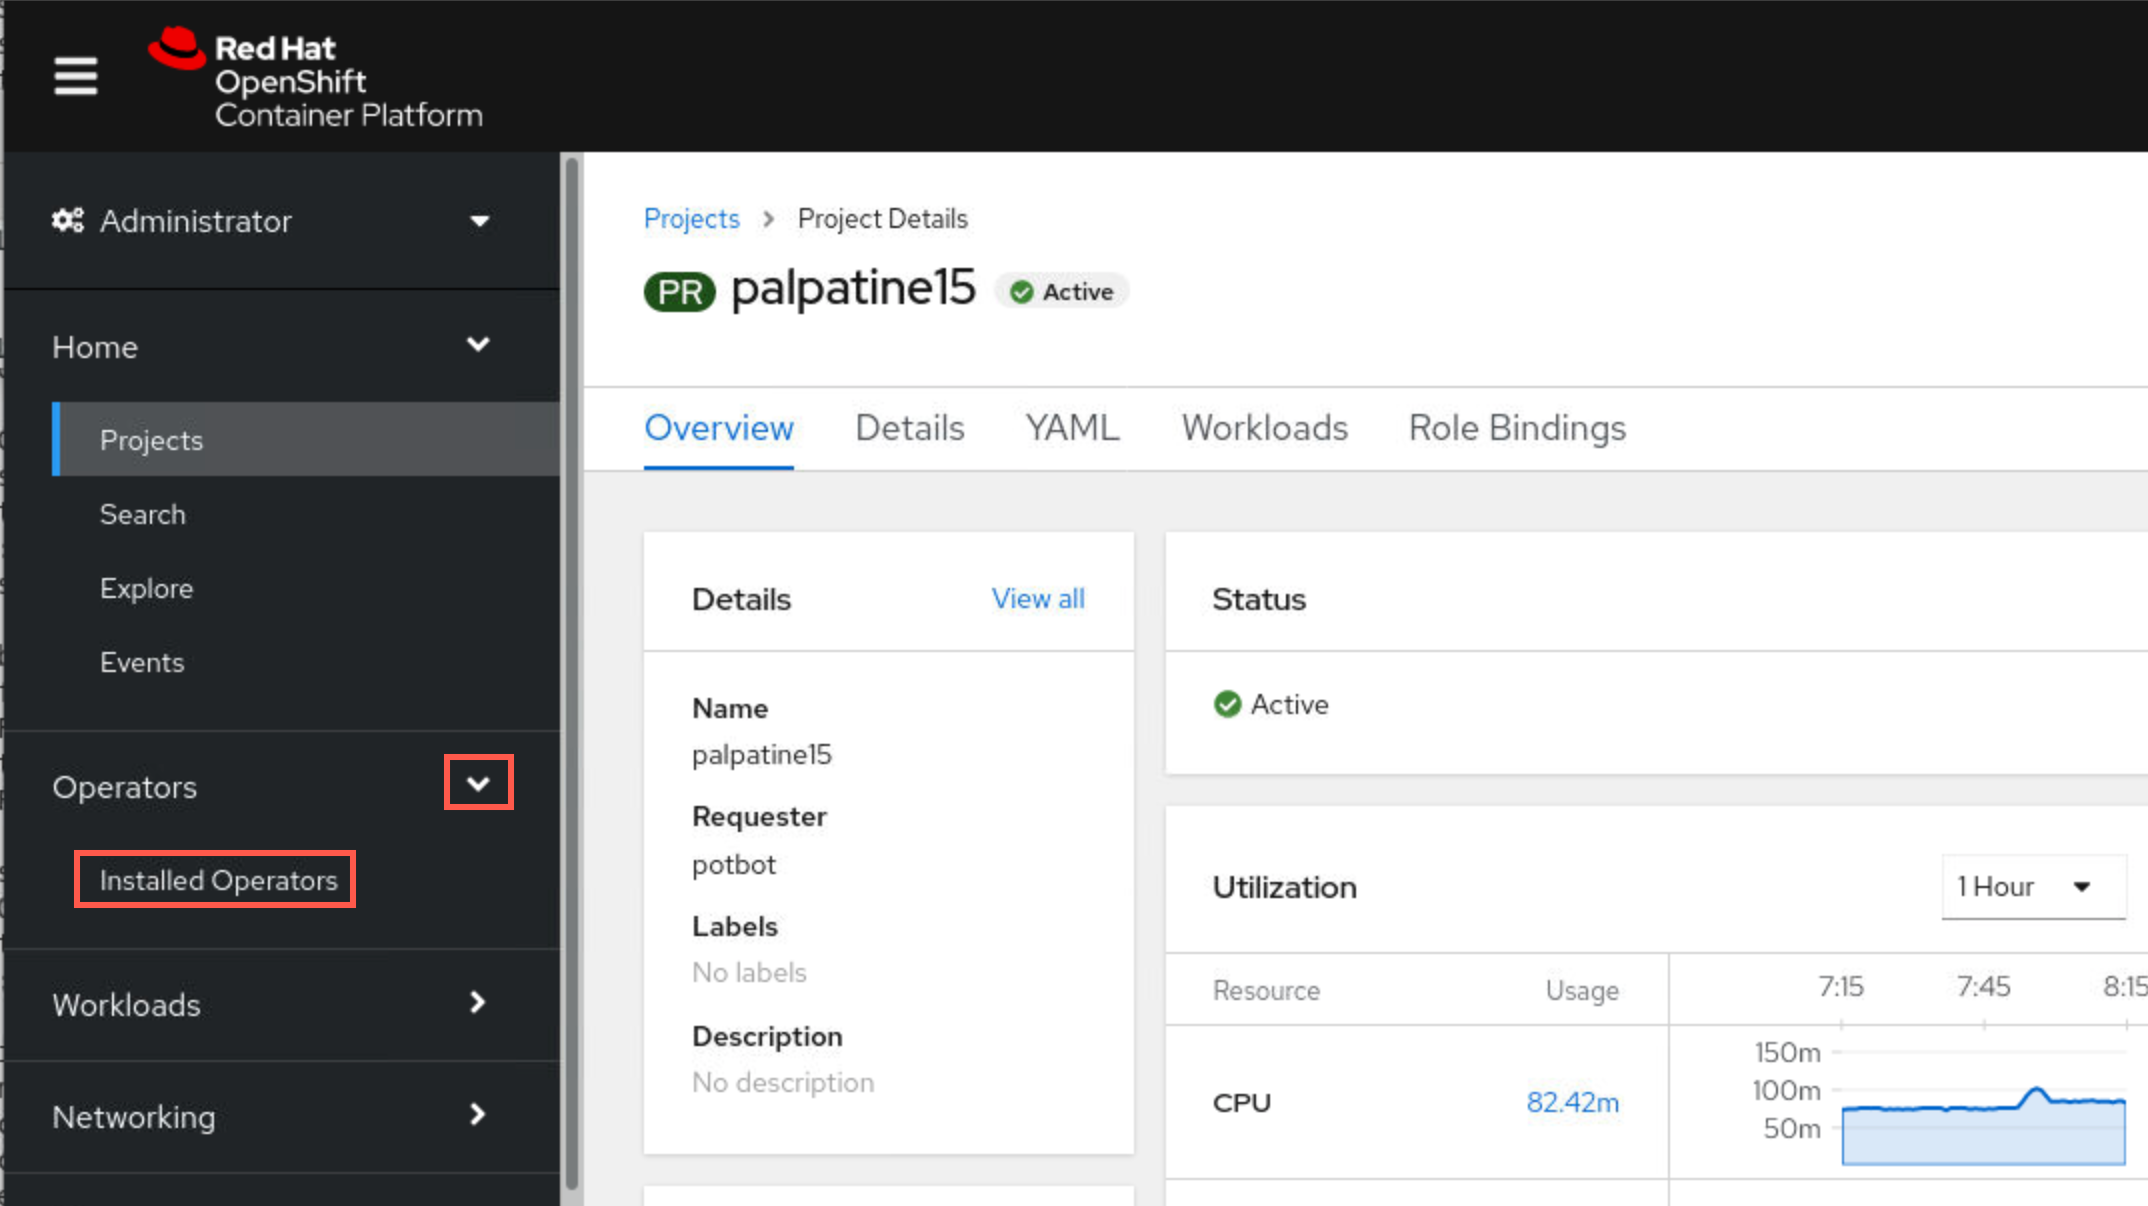
On the left sidebar expand Operators, then select Installed Operators.
-
Scroll to find IBM MQ then click the hyperlink.
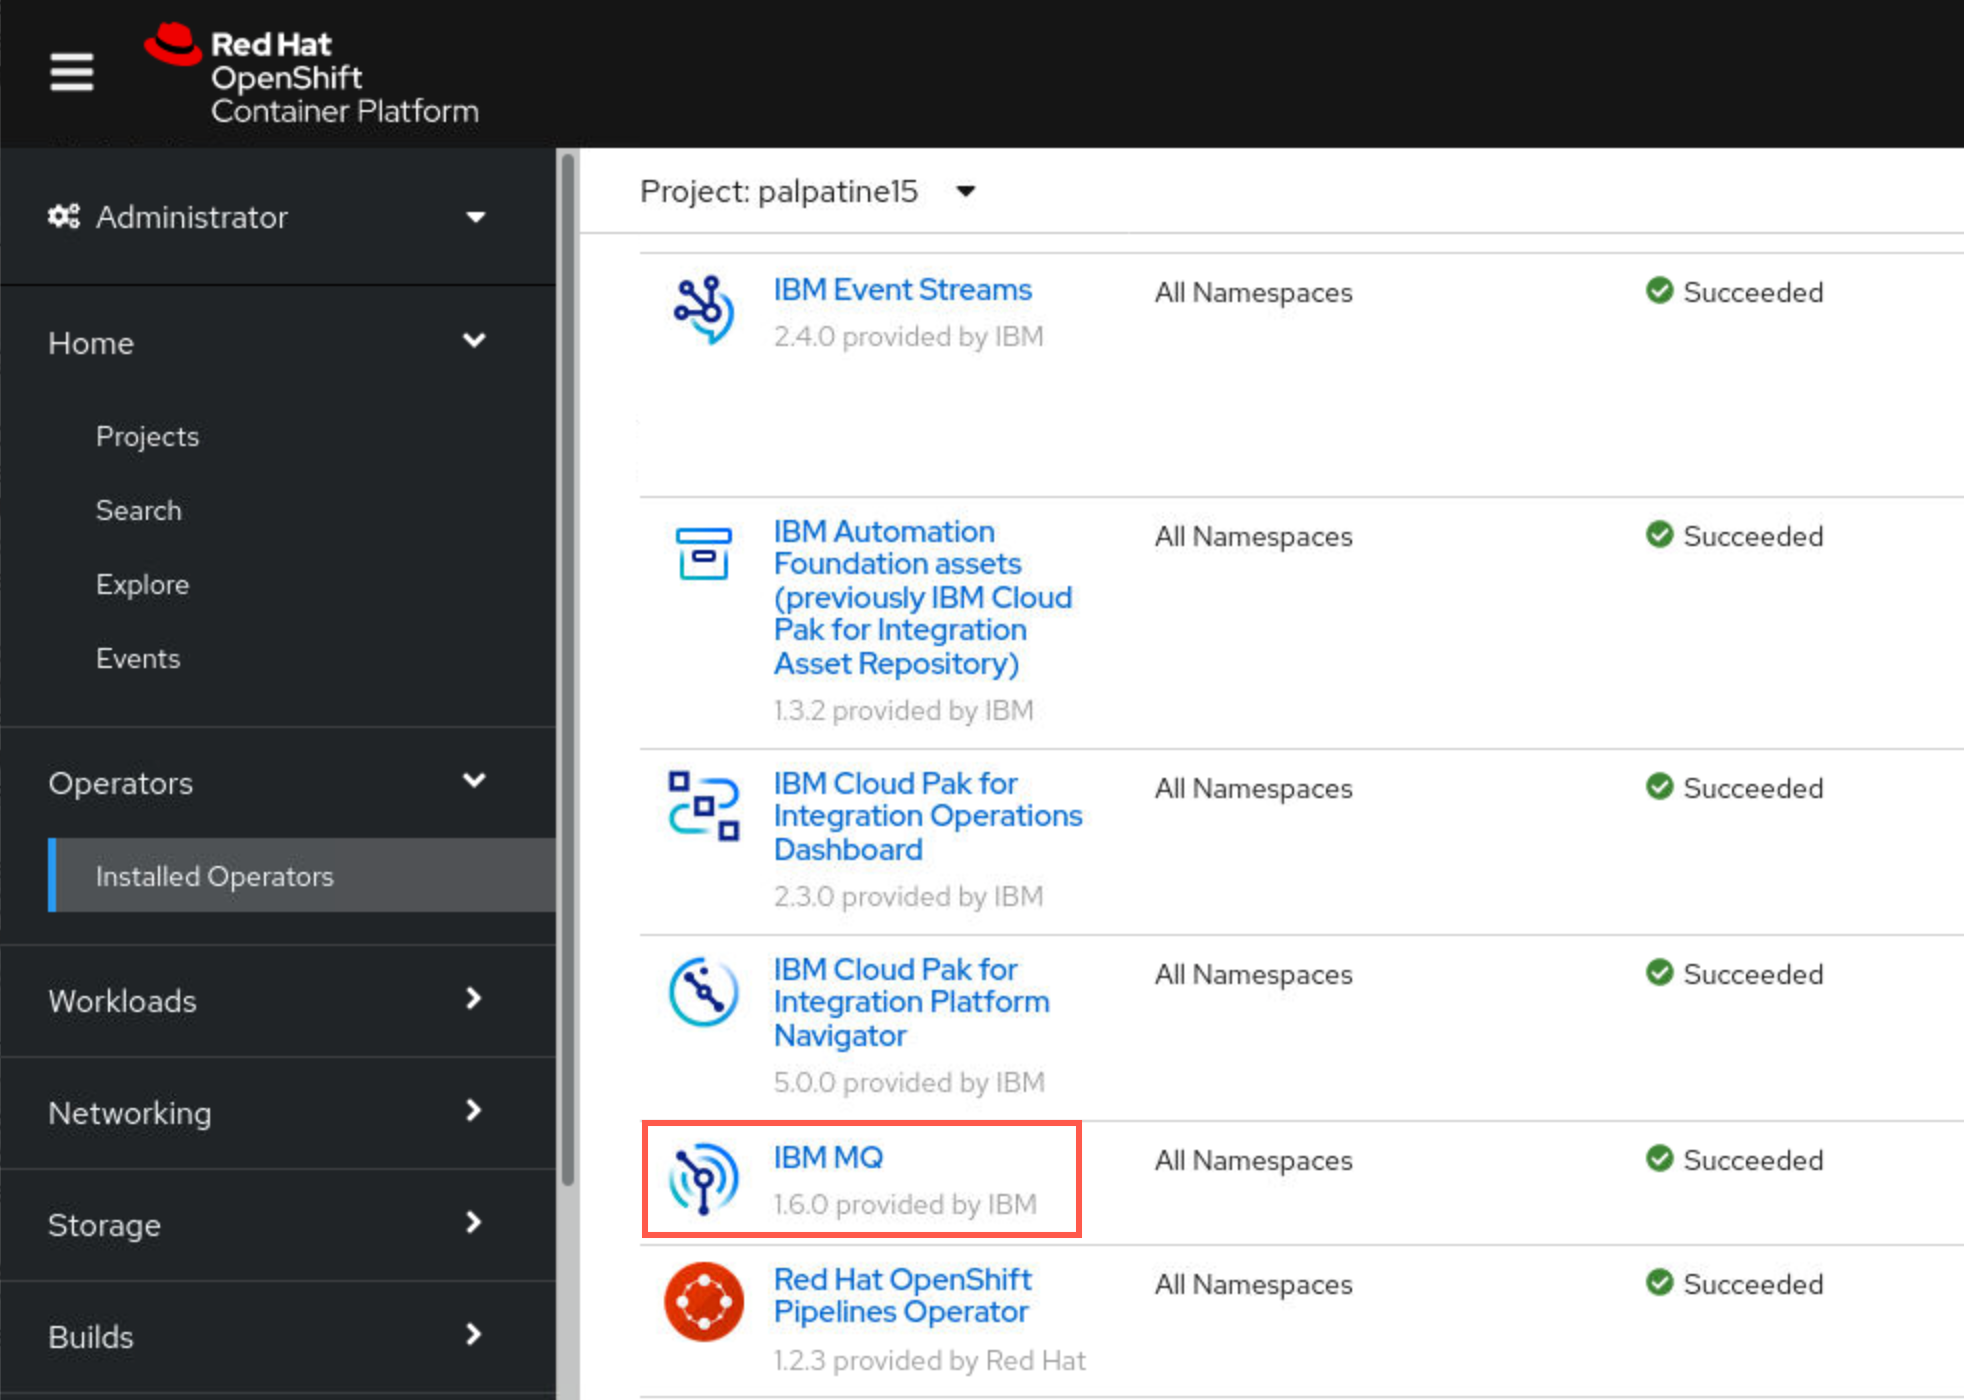
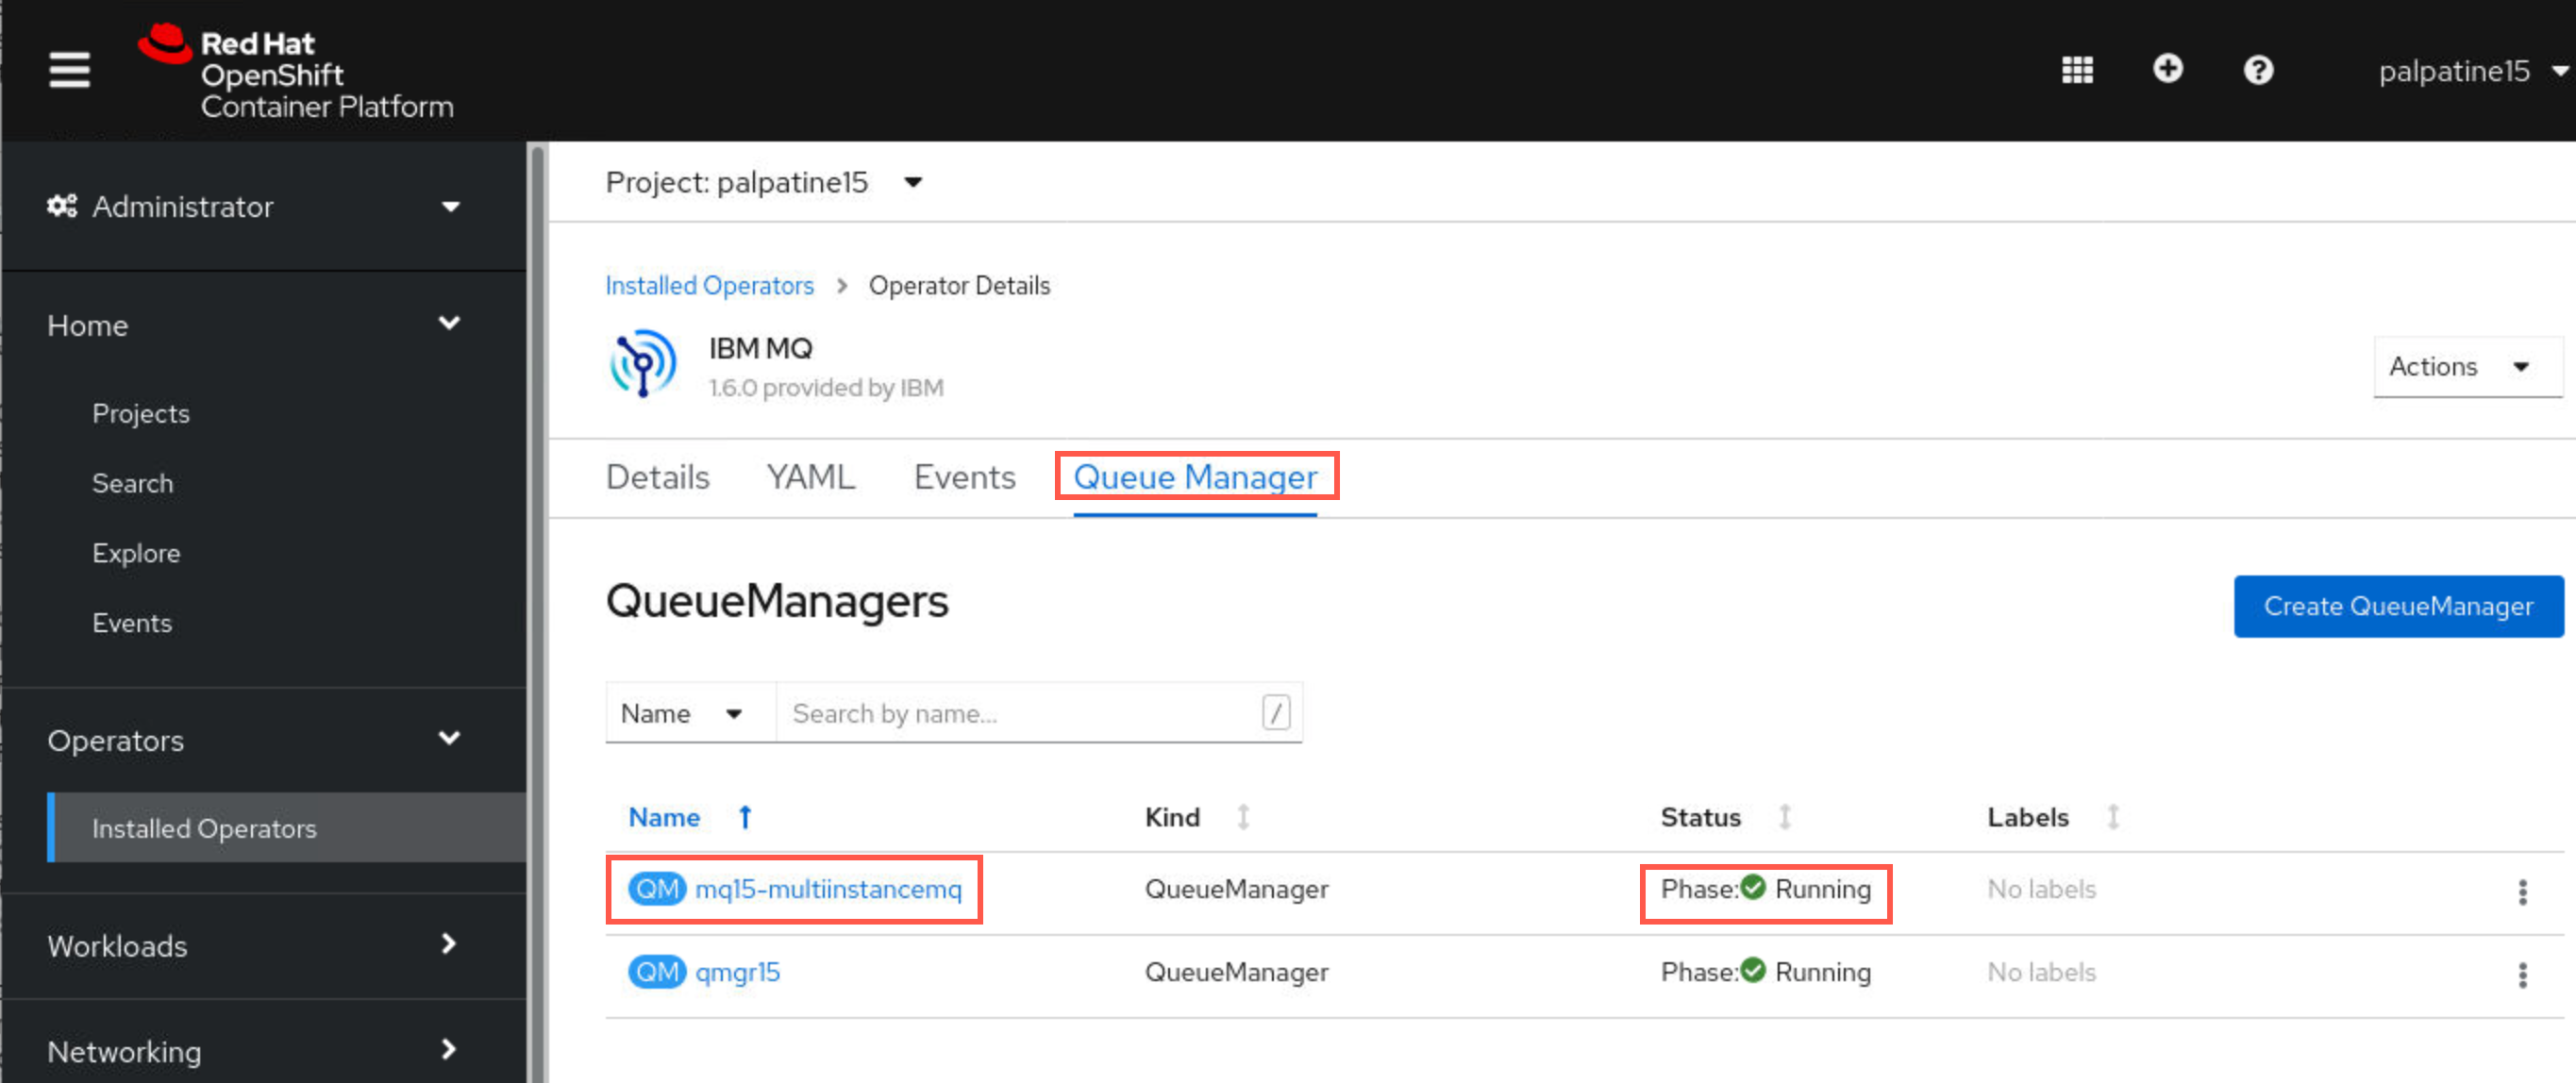
You can read about the IBM MQ operator and select the tabs to discover what information is available. Click the Queue Manager tab. You will see that your instance is running.
-
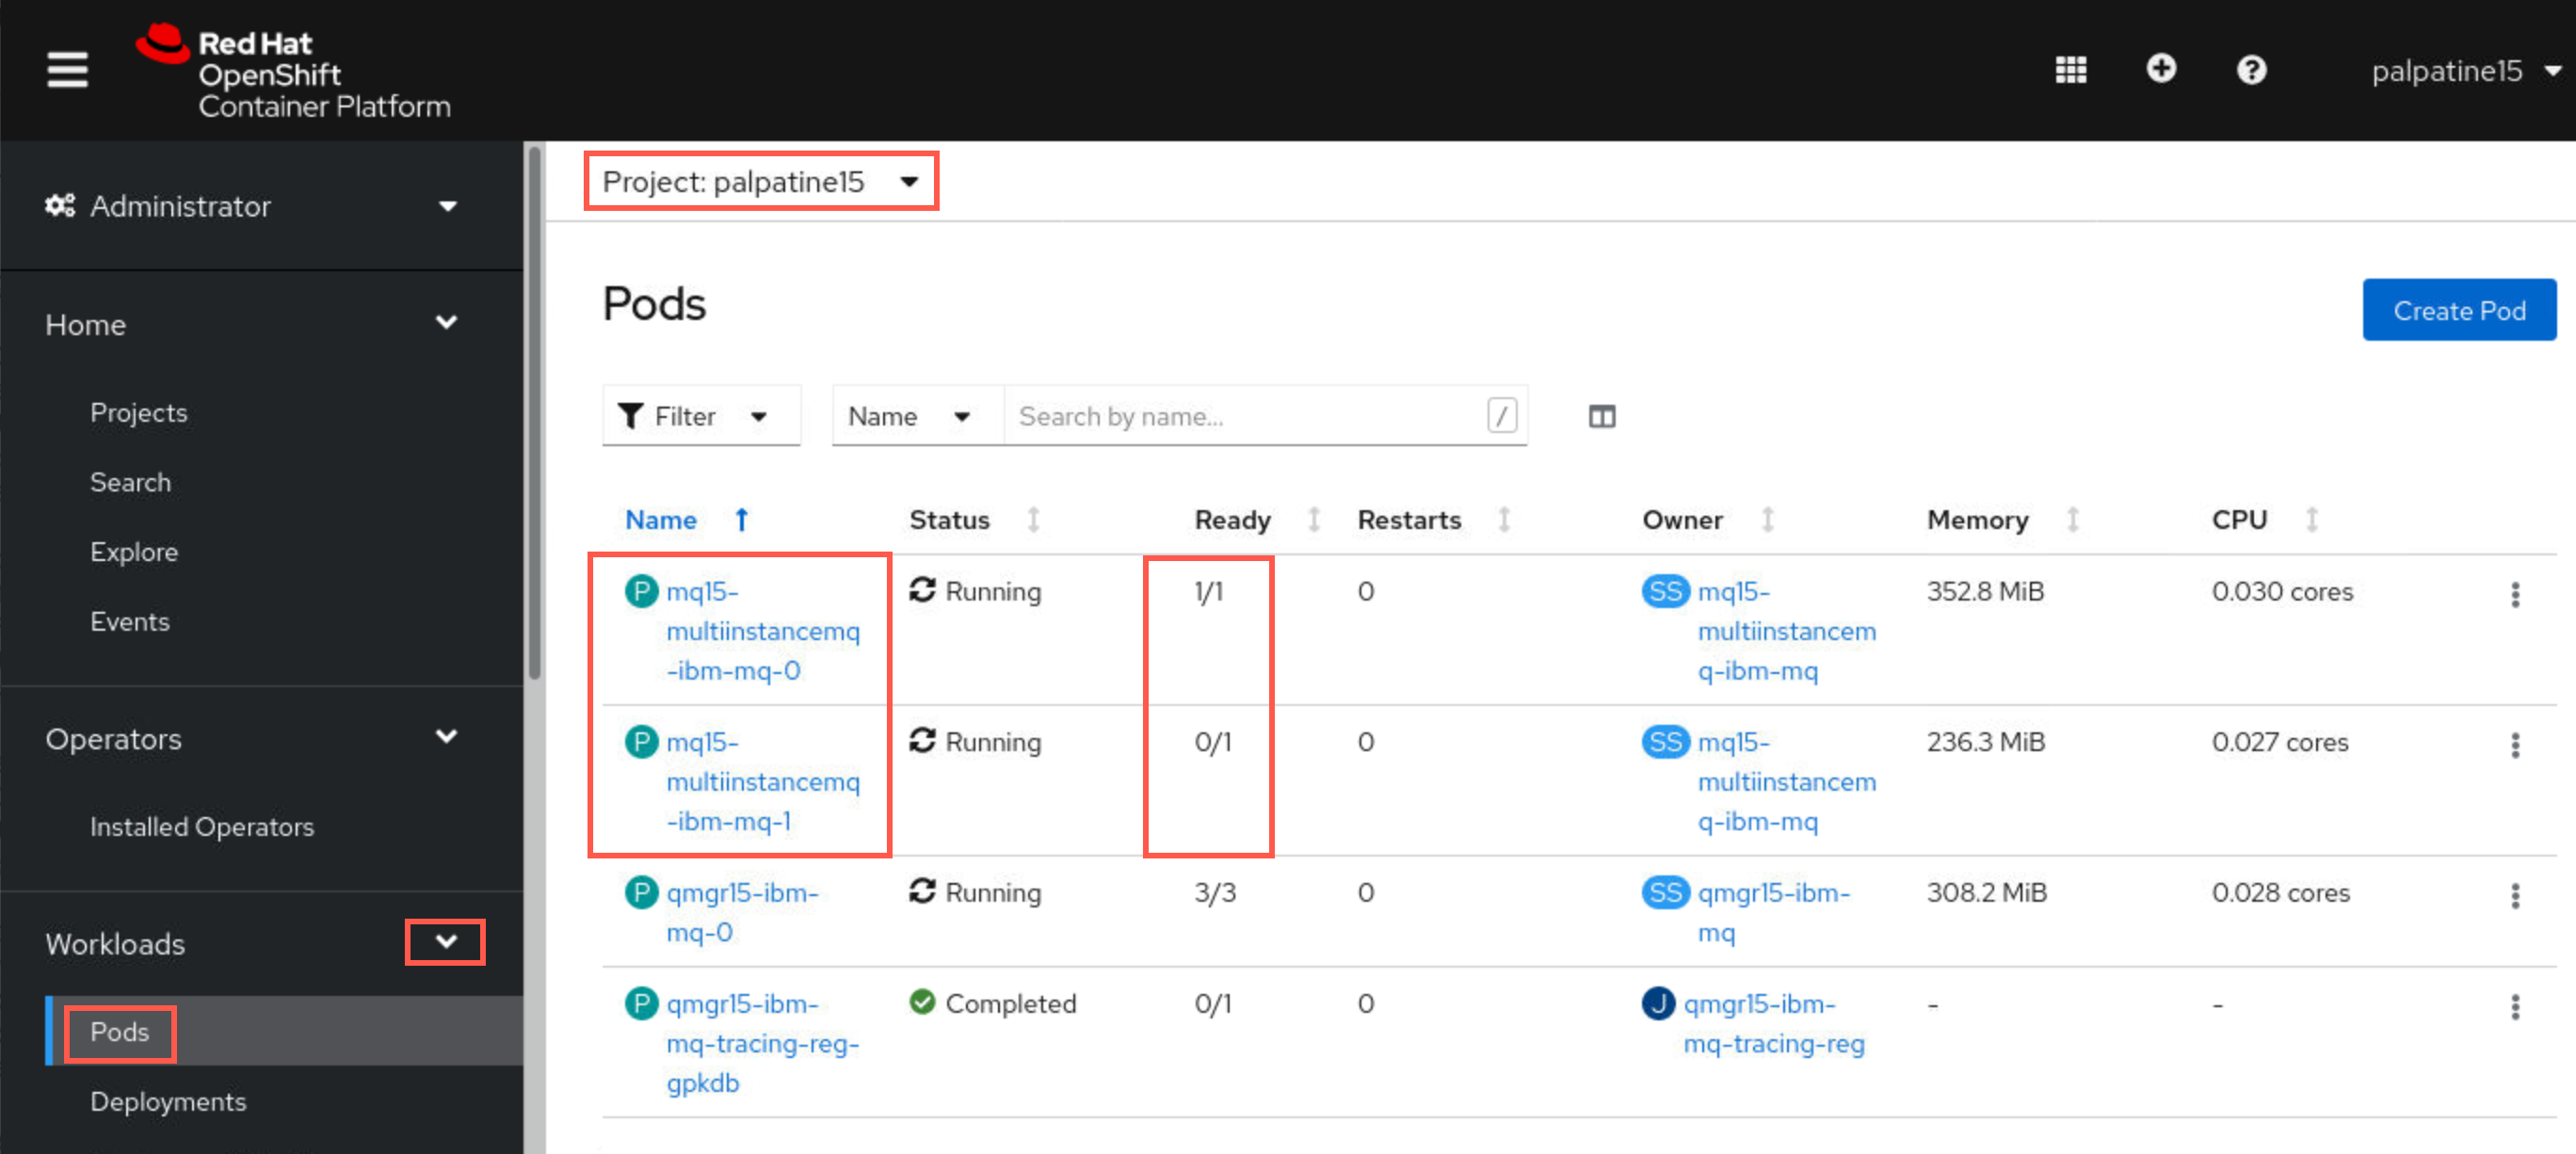
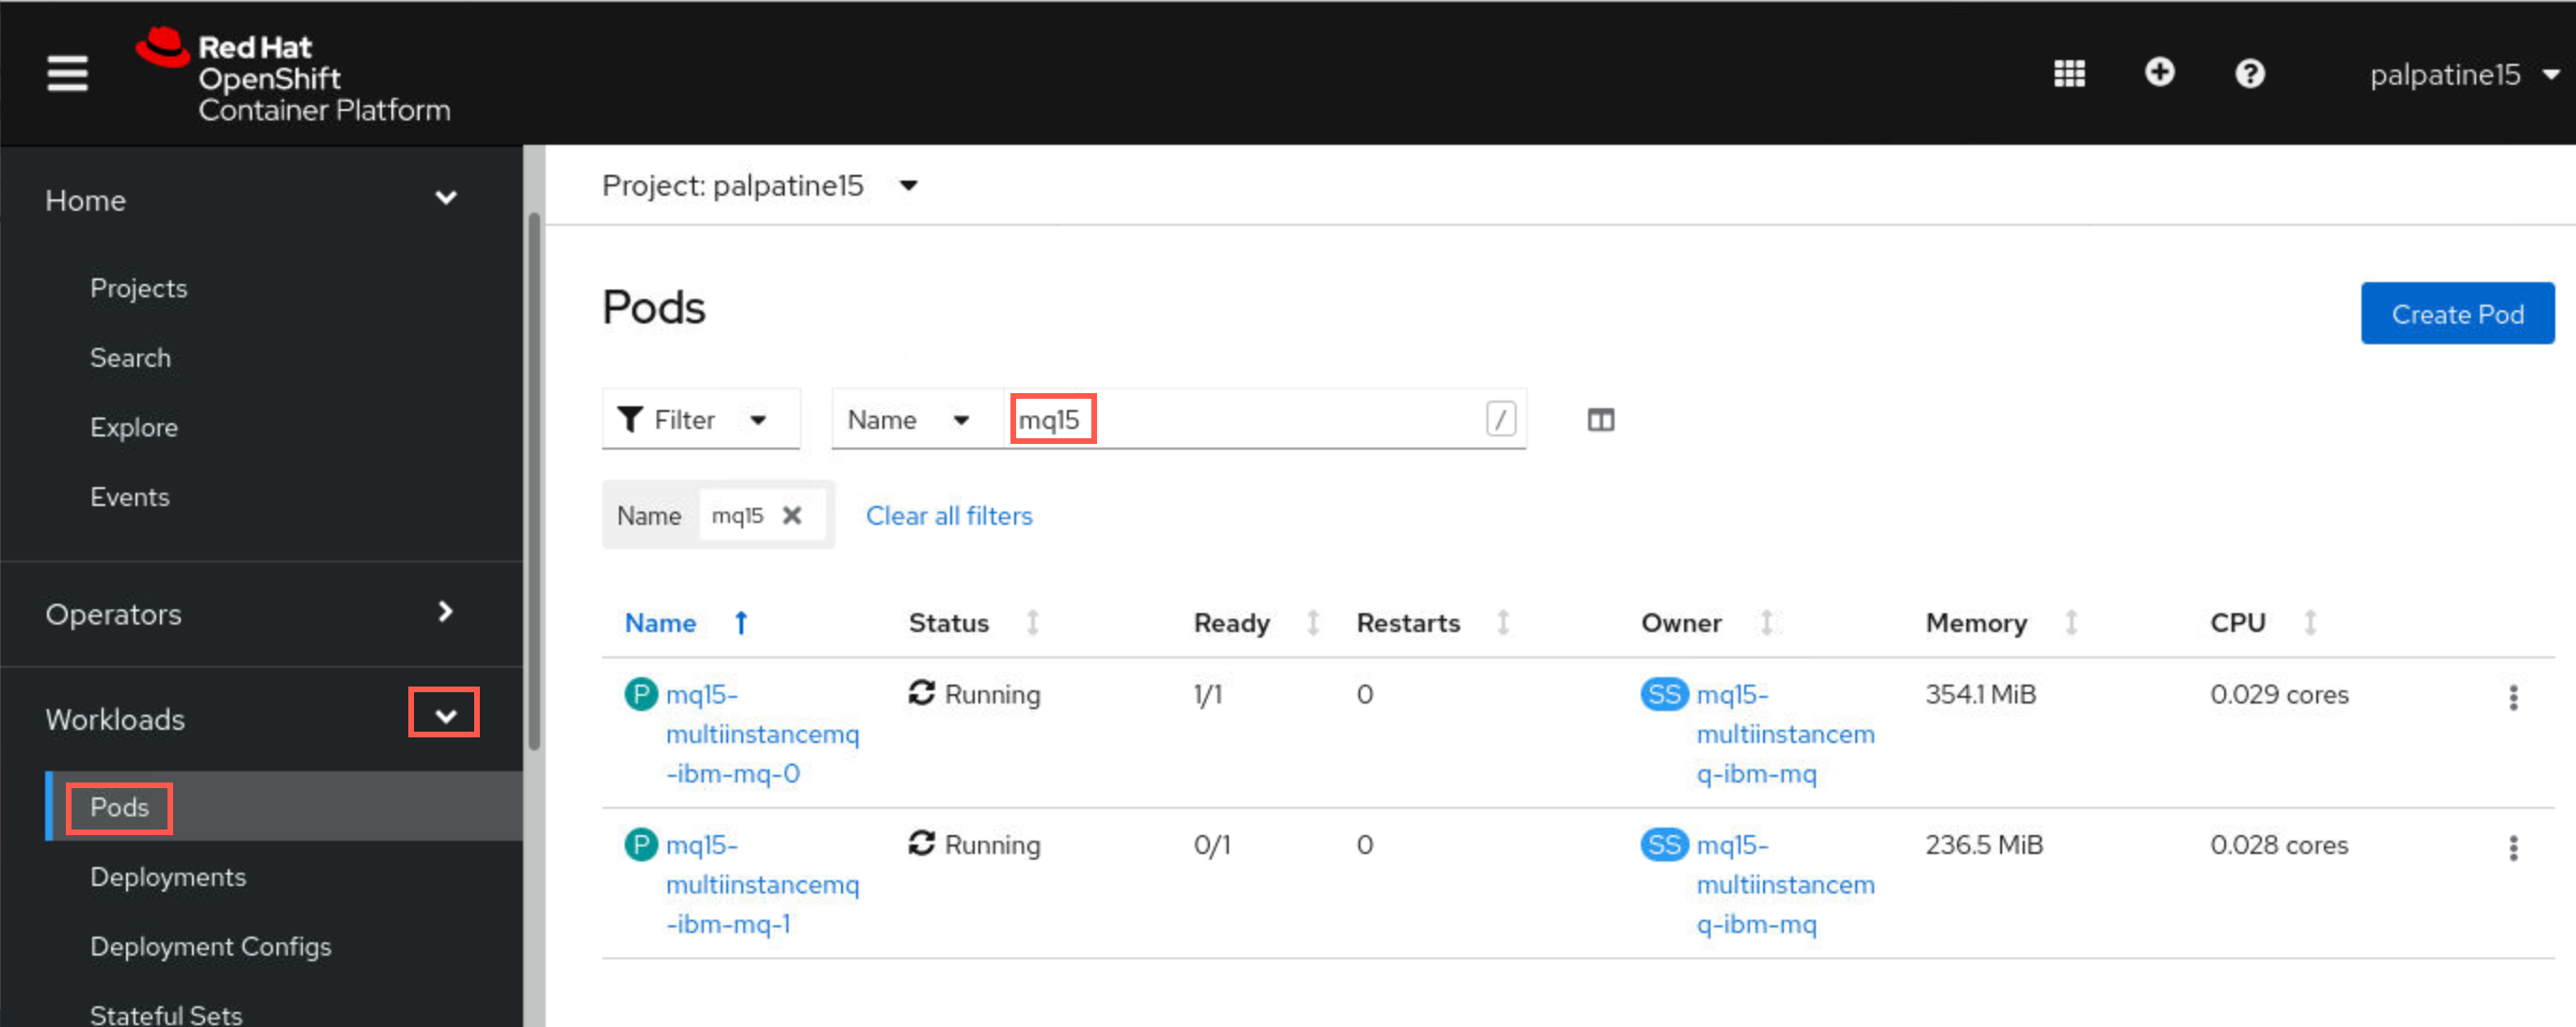
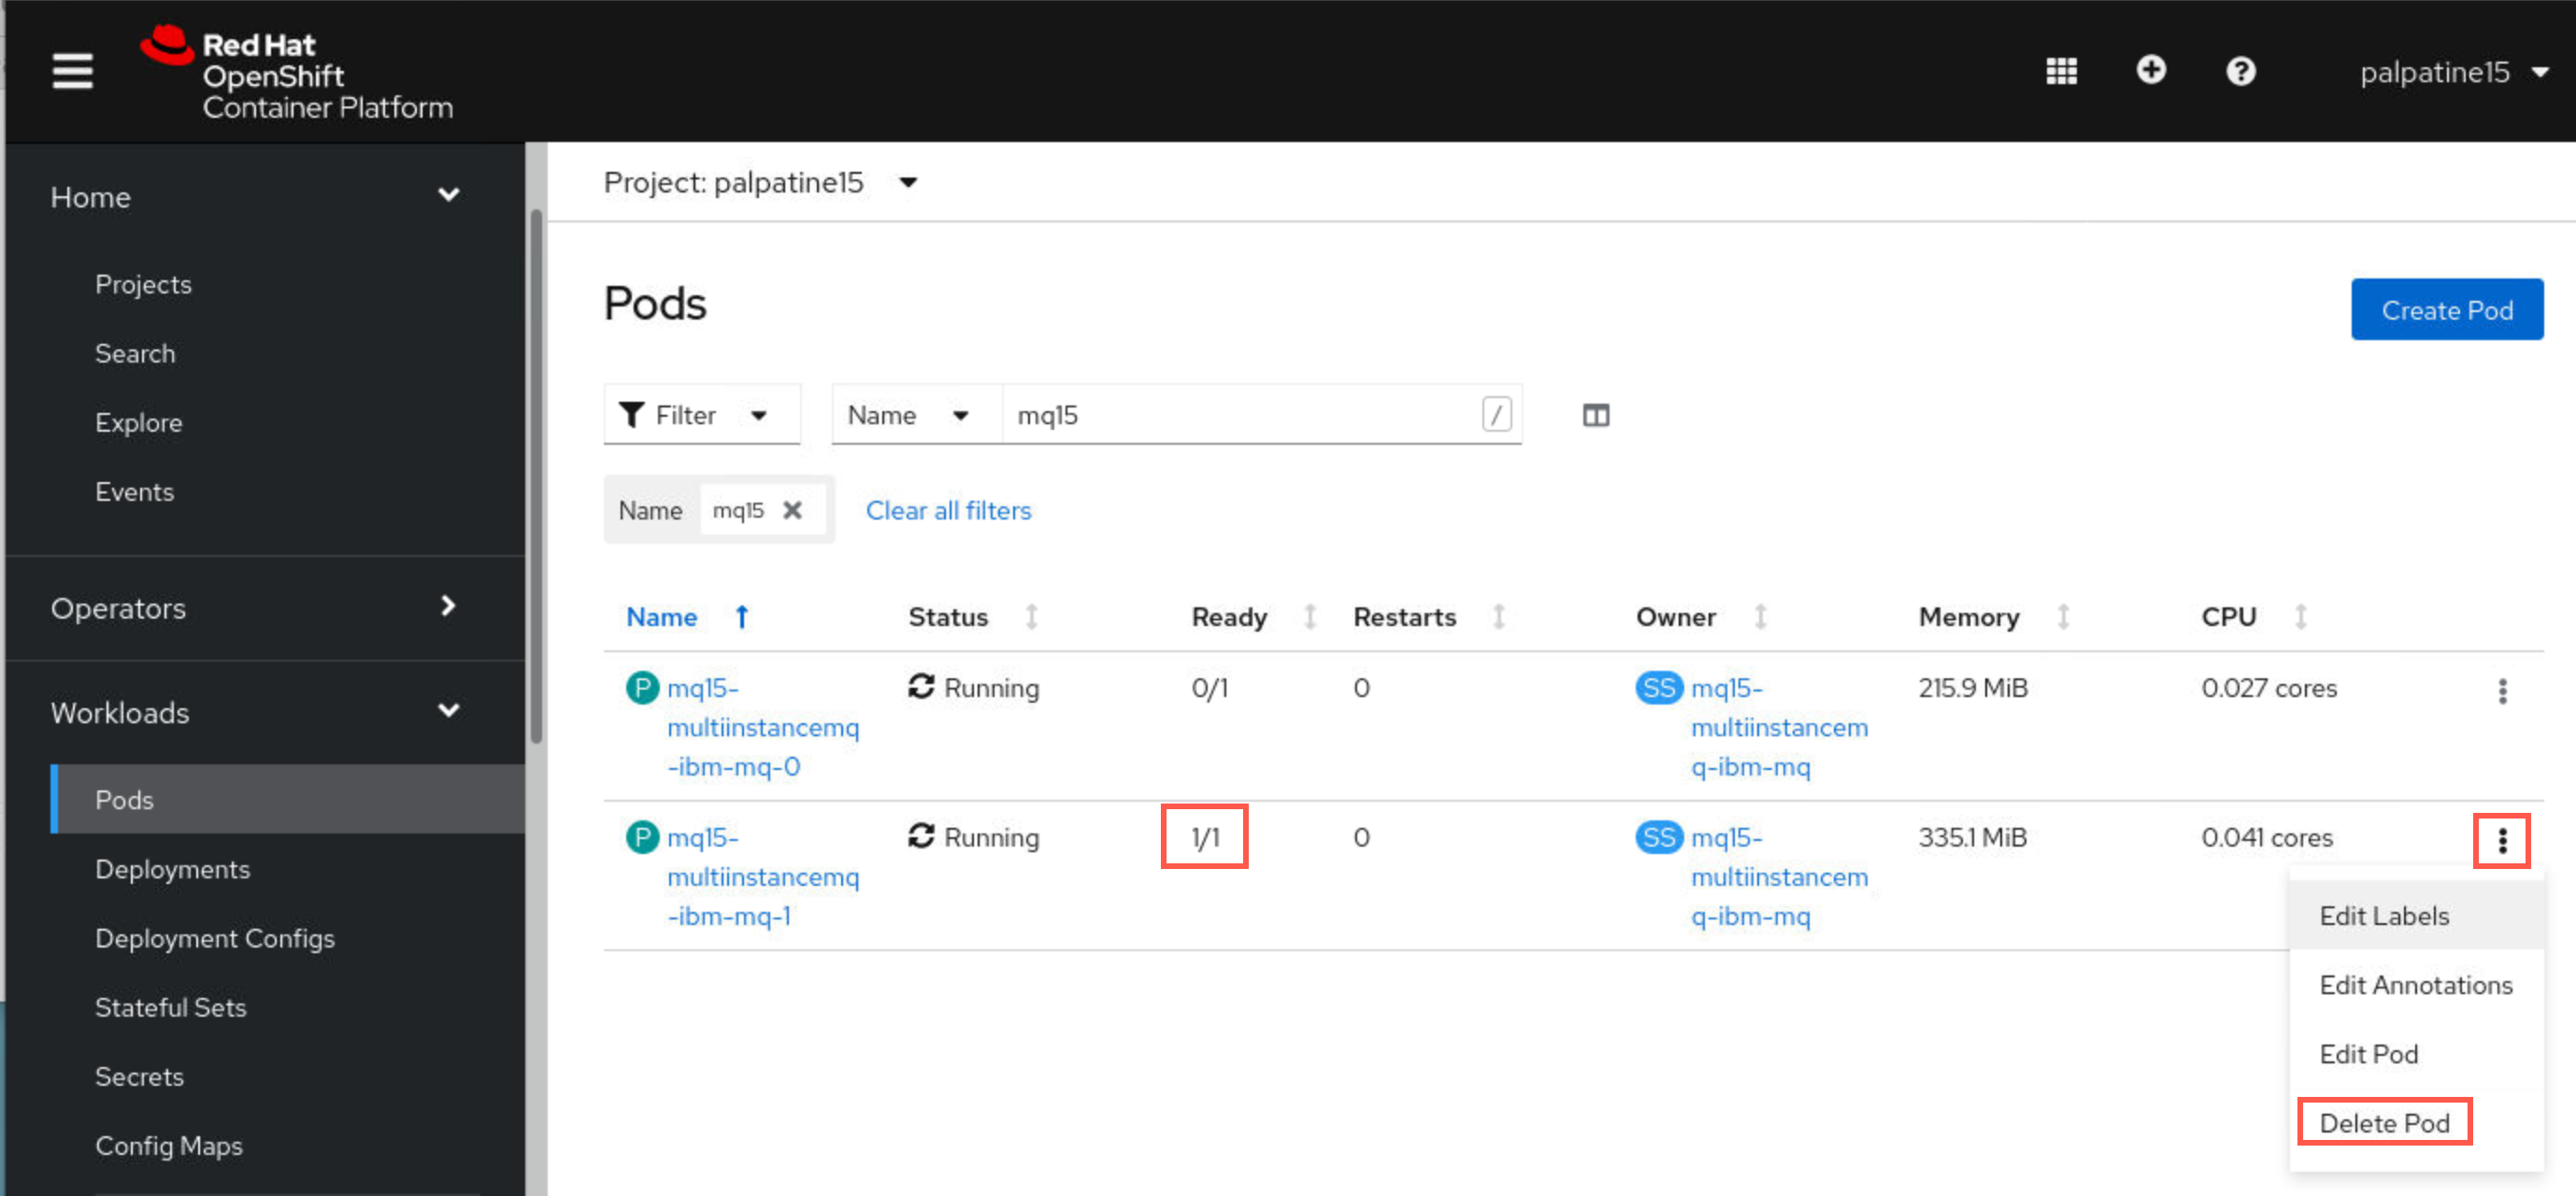
On the left sidebar expand Workloads, then select Pods. You will see two pods for your MQ instance. Each pod has a replica count of one, meaning there is one container in the pod and it is running your queue manager. Pod mqxx-multiinstancemq-ibm-mq-0 shows 1/1 while the other pod mq00-multiinstancemq-ibm-mq-1 shows 0/1, meaning there is one container in the pod but it is not ready (in standby mode).
-
You can also see this on the command line. In your terminal window enter the command using your student ID in place of xx.
oc get pods | grep mqxx
-
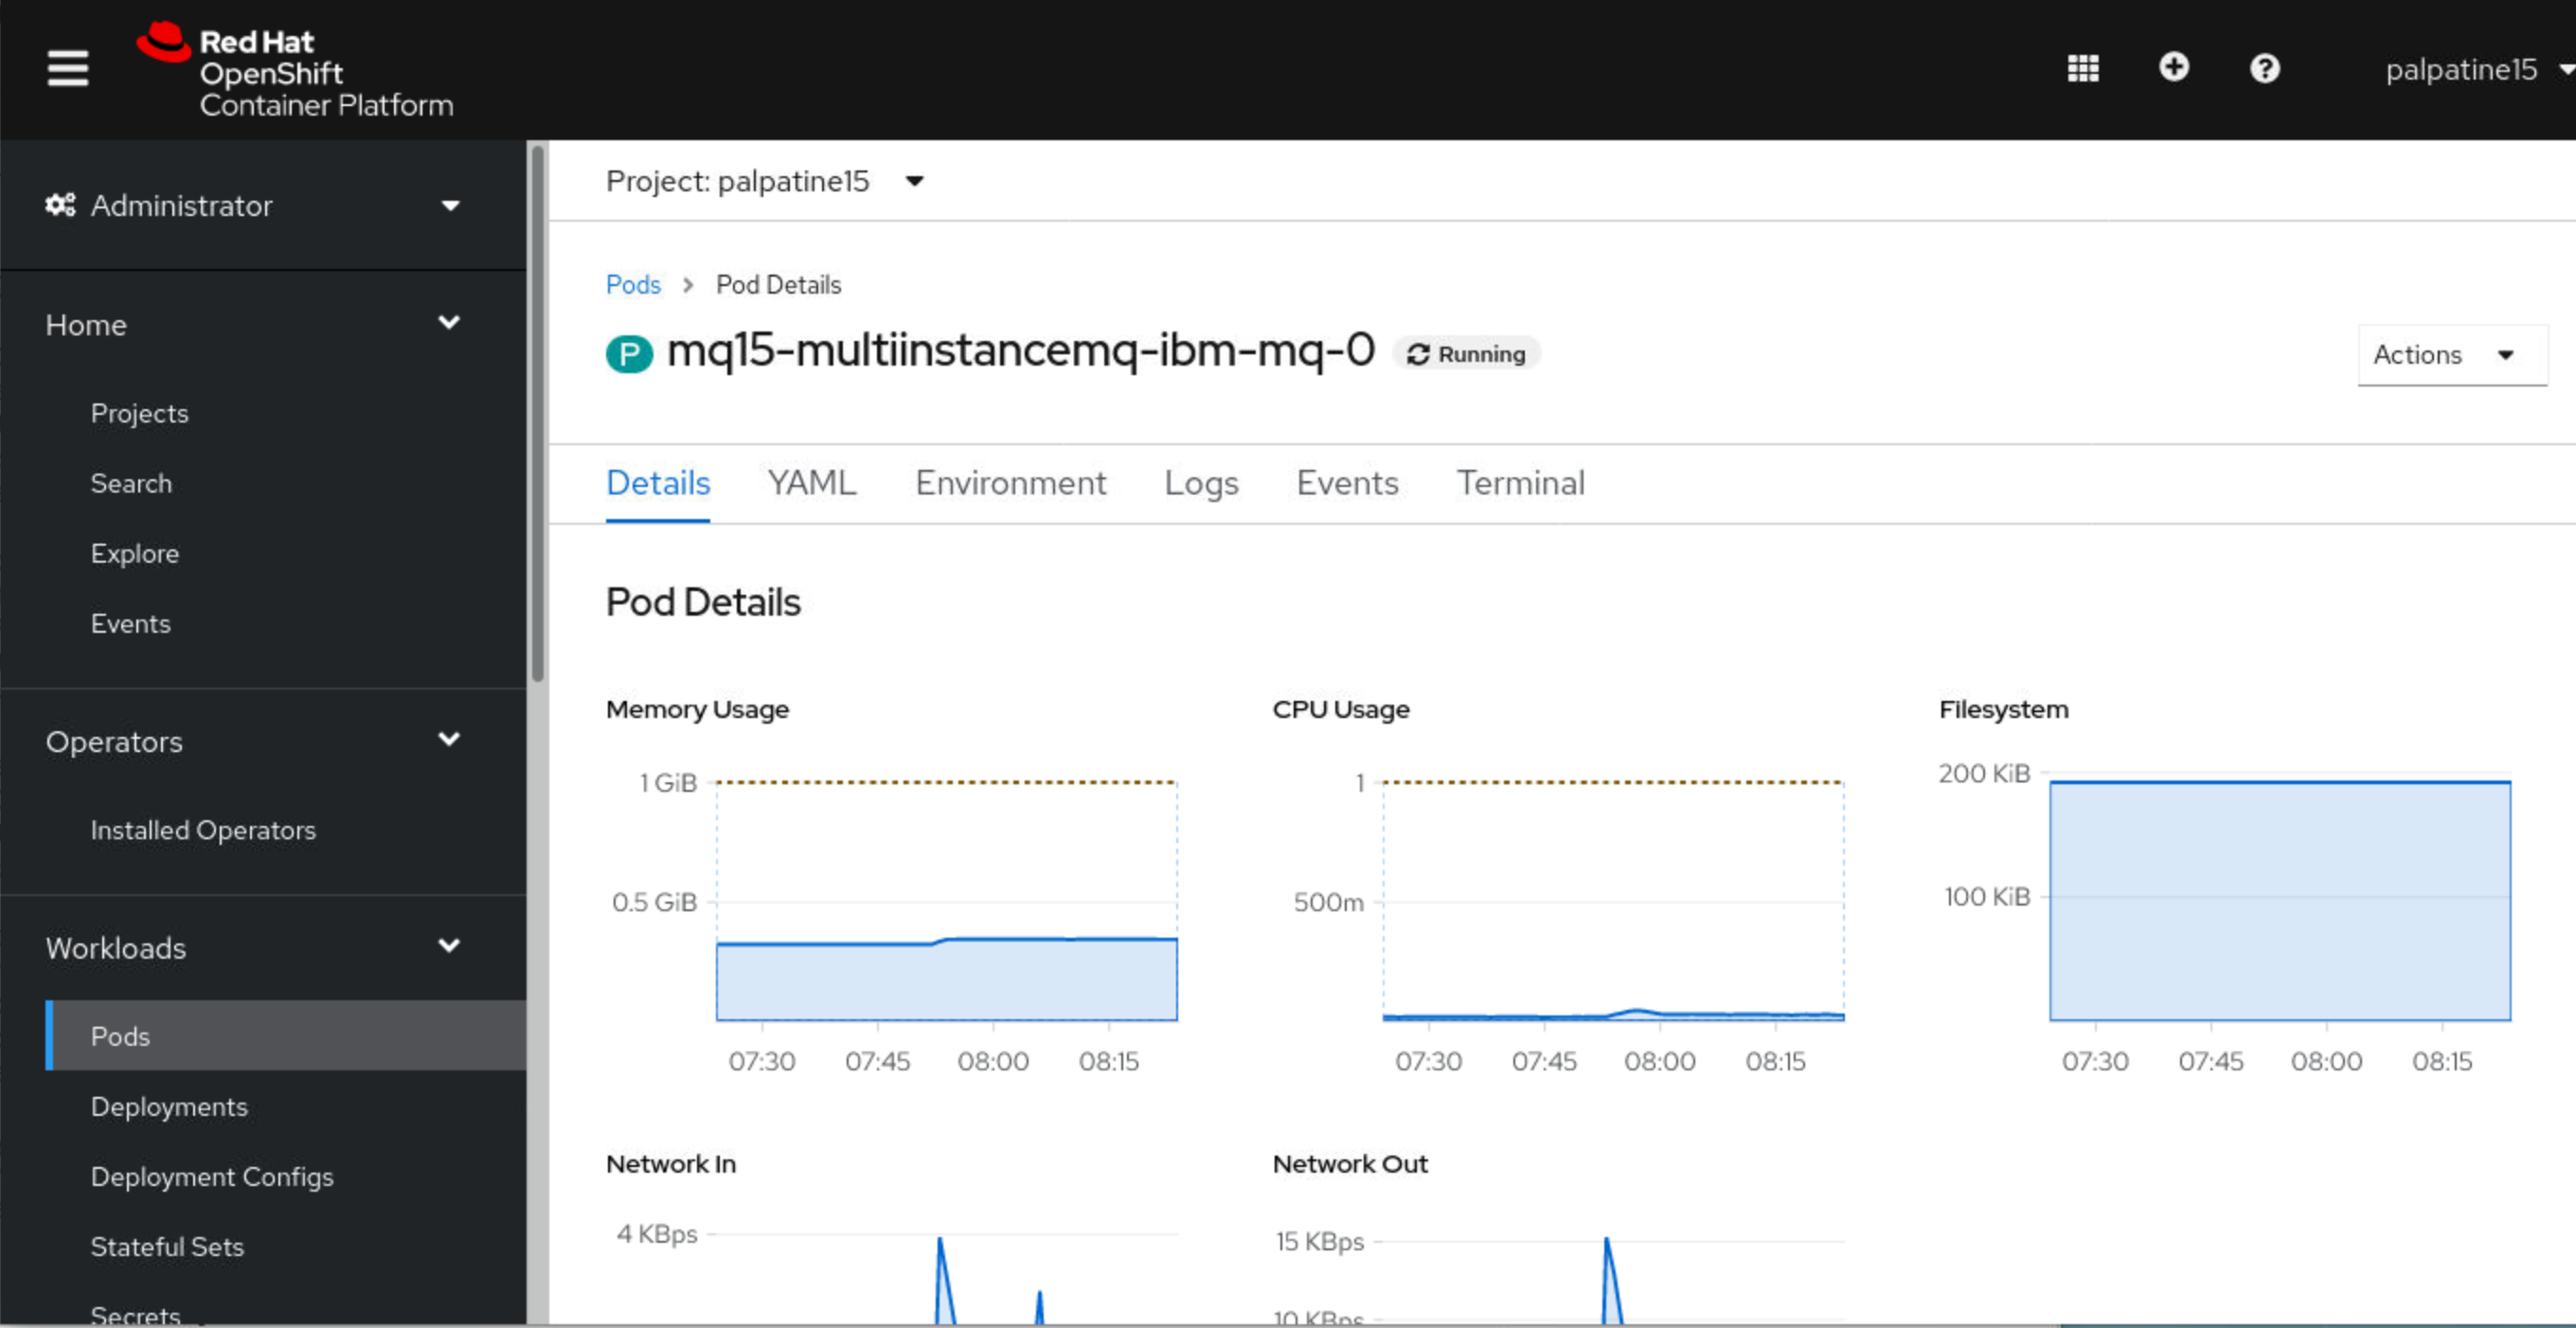
In the OCP console, click the running pod mqxx-multiinstancemq-ibm-mq-0. The Pod Details page opens showing resource utilitzation.
-
Scroll down to the Volumes section. Here you find Persistent Volume Claims (PVCs) for the pod. Notice the Mount Path. If you are familiar with multi-instance queue managers, you know that mqxx-multiinstancemq-ibm-mq-persisted-data and mqxx-multiinstancemq-ibm-mq-recovery-logs are the shared data between active and standby queue managers.
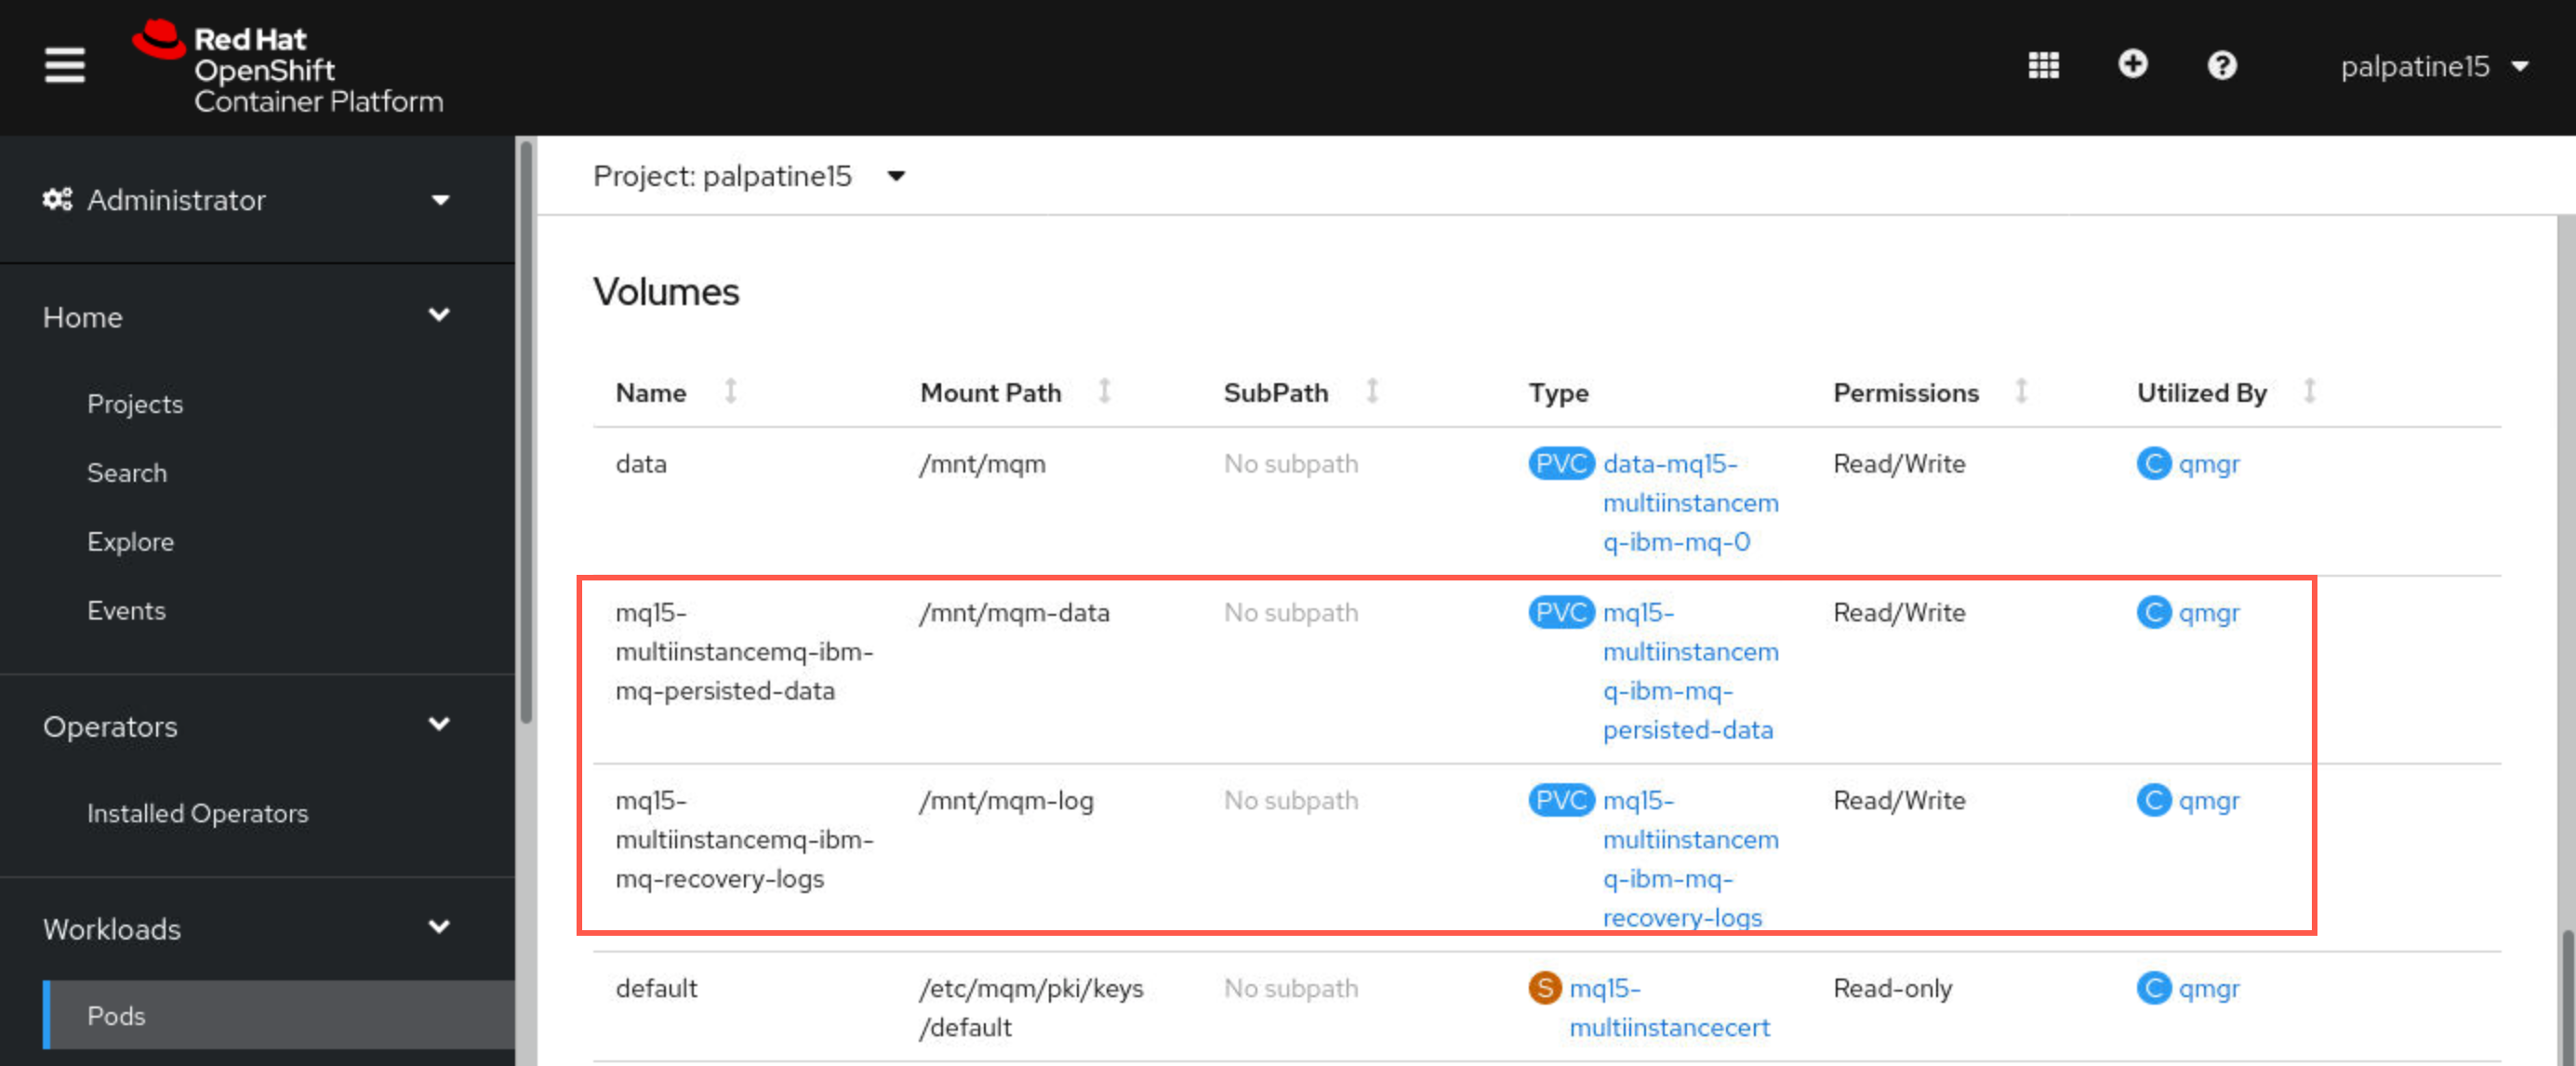
Verify this by repeating the above for pod mqxx-multiinstancemq-ibm-mq-1.
Test the deployment
-
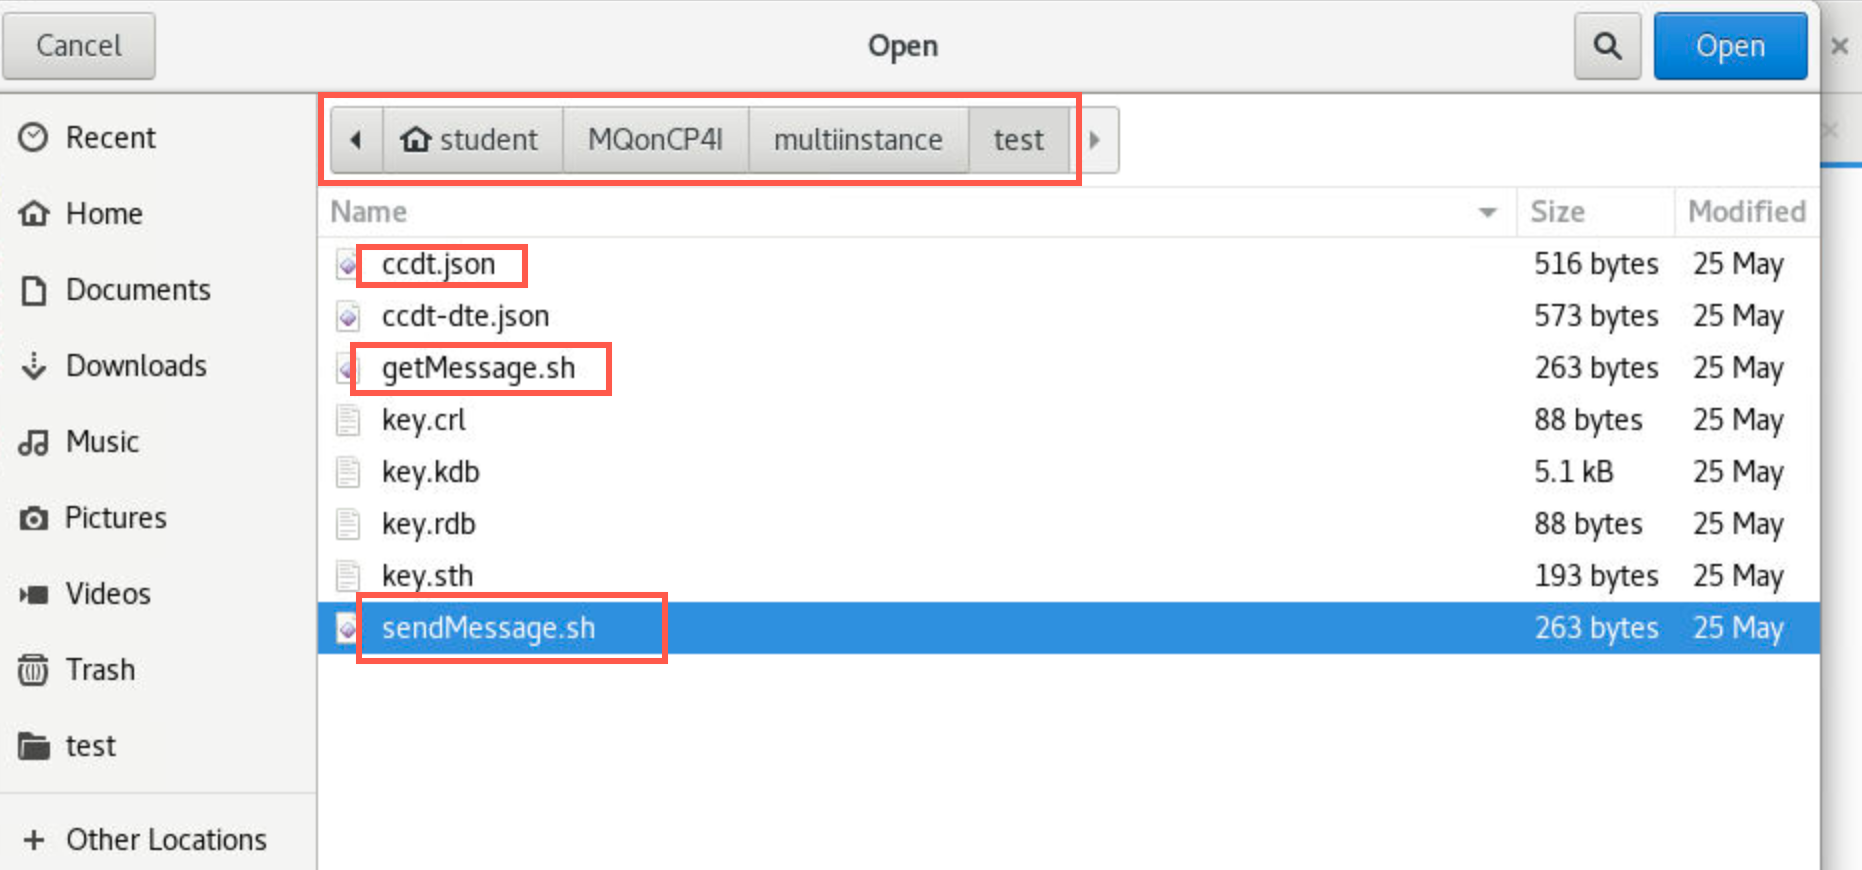
In a terminal window navigate to /home/ibmuser/MQonCP4I/multiinstance/test directory. You will find three files (and additional files for TLS):
- CCDT.JSON
- getMessage.sh
- sendMessage.sh
Open them in gedit.
-
In the ccdt.json file, you need to update the host next to host: with your host name. To get your host name, run the following command in a terminal window substituting your student number for xx:
oc get route | grep mqxxYour host name should start with mqxx-multiinstancemq-ibm-mq-qm where xx is your student ID.
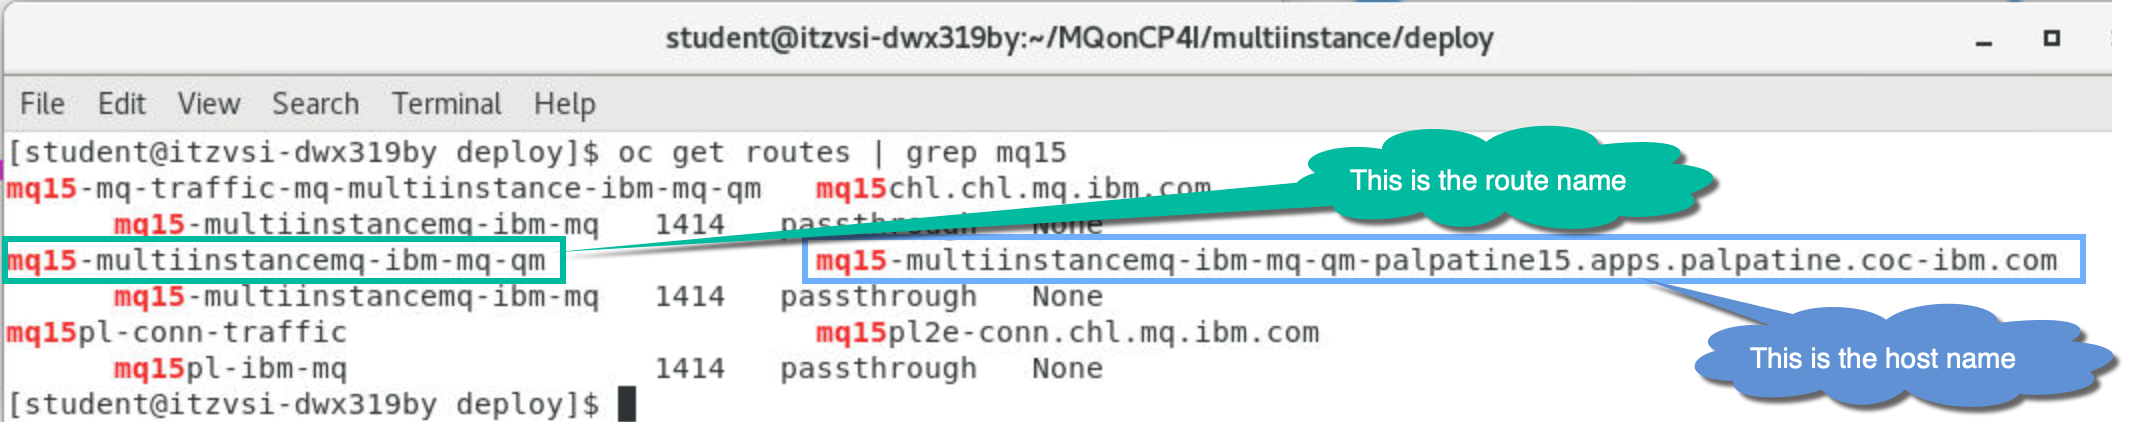
-
It is much easier to read in the OpenShift console. Return to the web browser tab where the console is open. On the left sidebar, scroll down to Networking, use the drop-down to see the options, and select Routes.
Use the filter to search for your queue manager routes to limit your search much like you did using grep with the oc command. Click the route name hyperlink for mqxx-multiinstancemq-ibm-mq-qm.
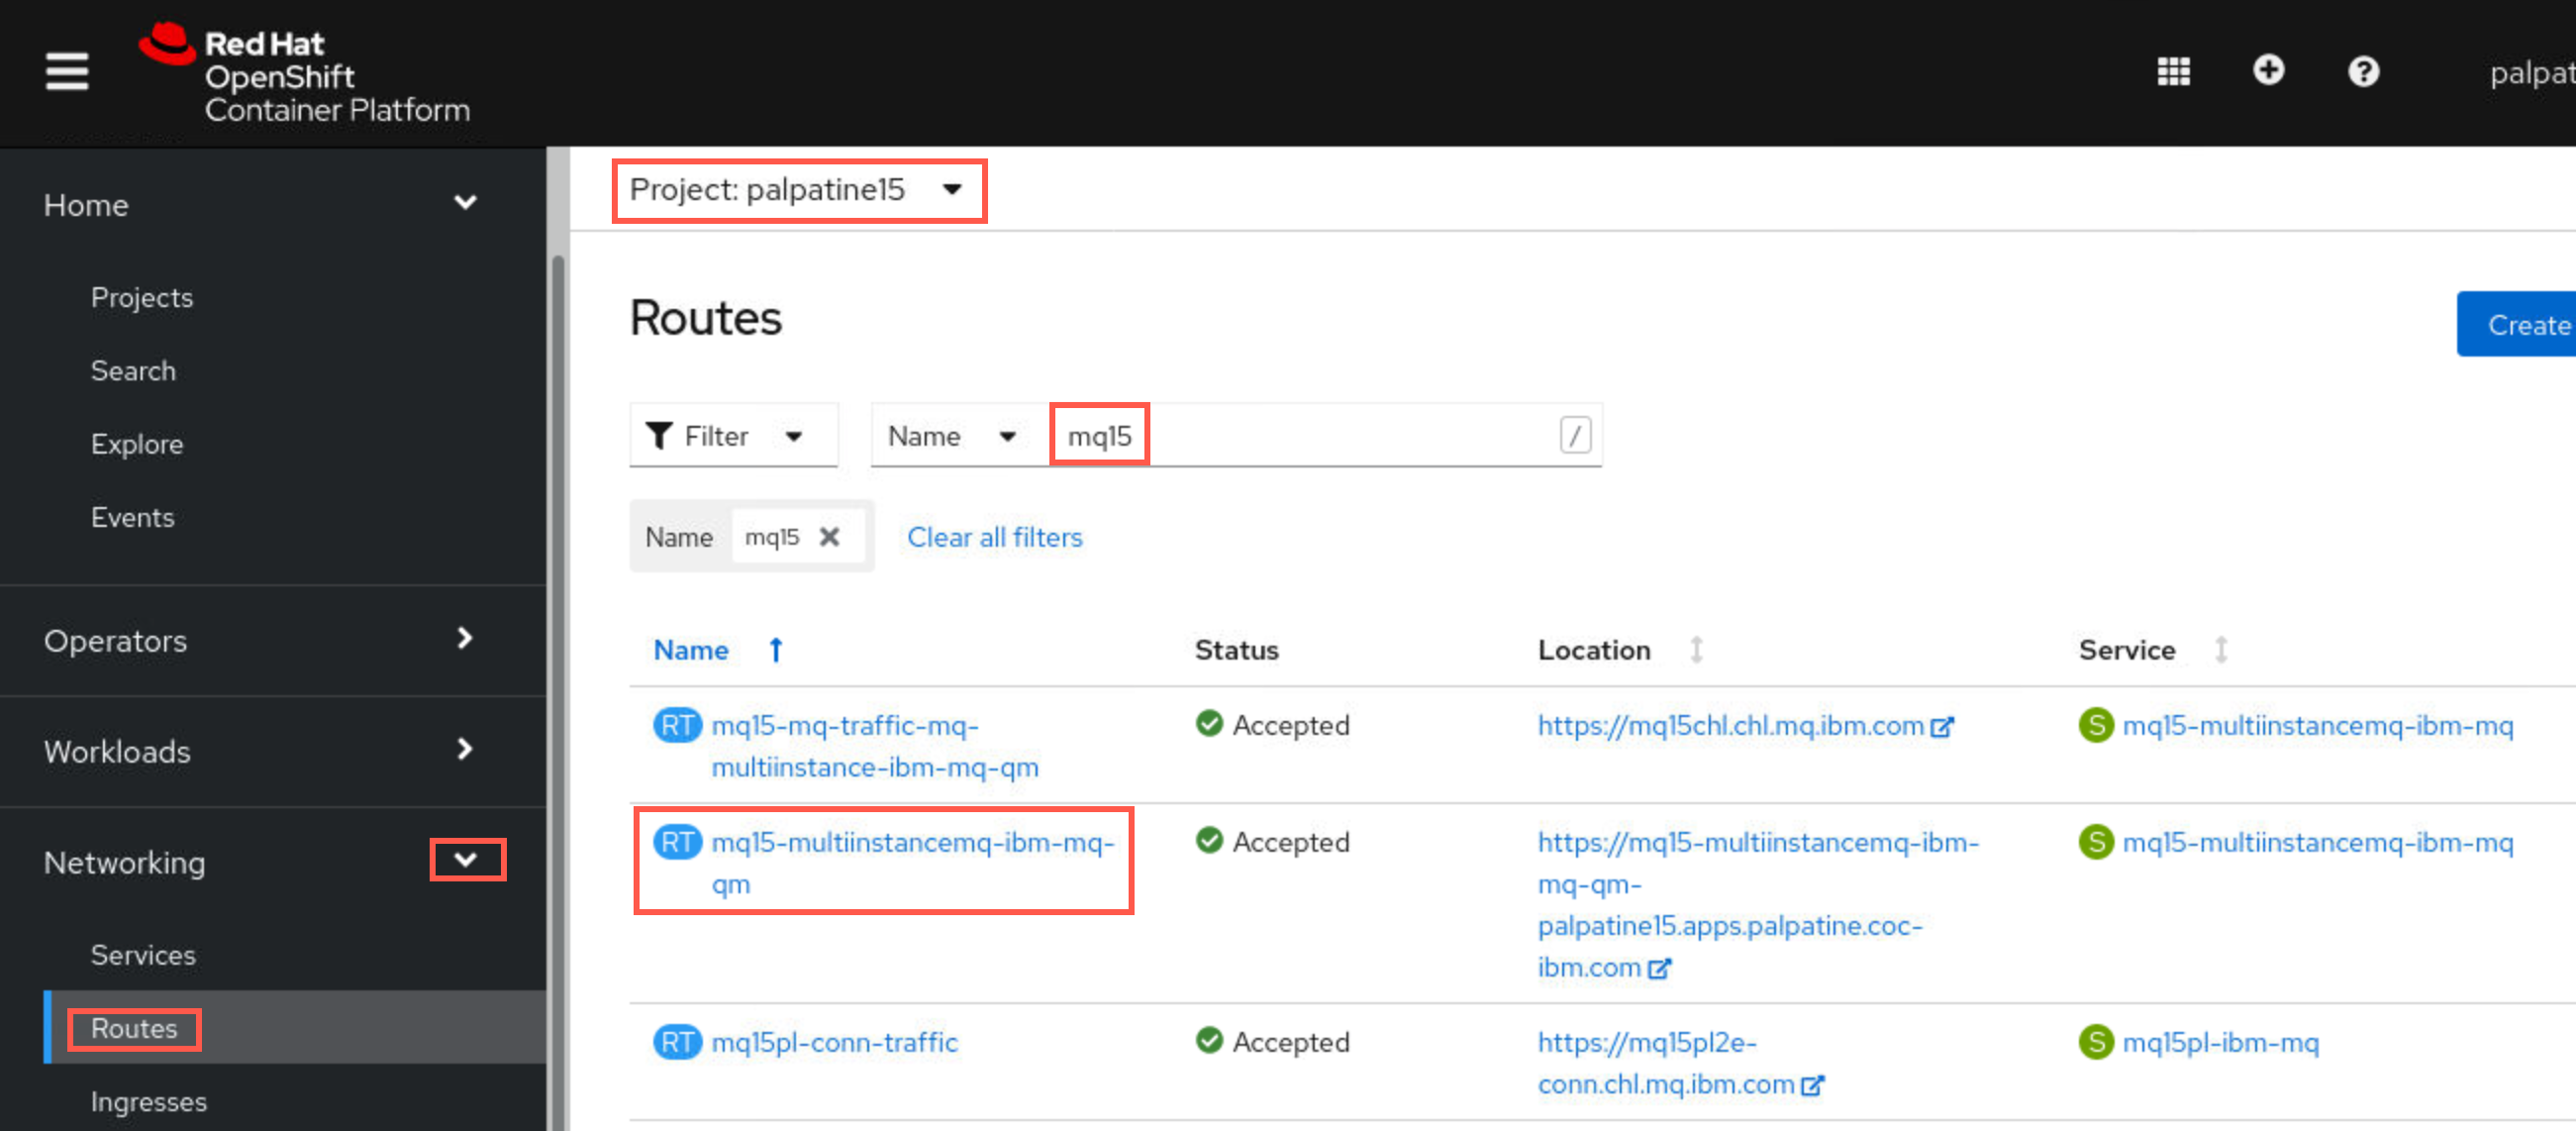
-
Under Route Details scroll down to Router:default. There you will find the Host URL. Copy the URL under Host to use in the ccdt.json file.
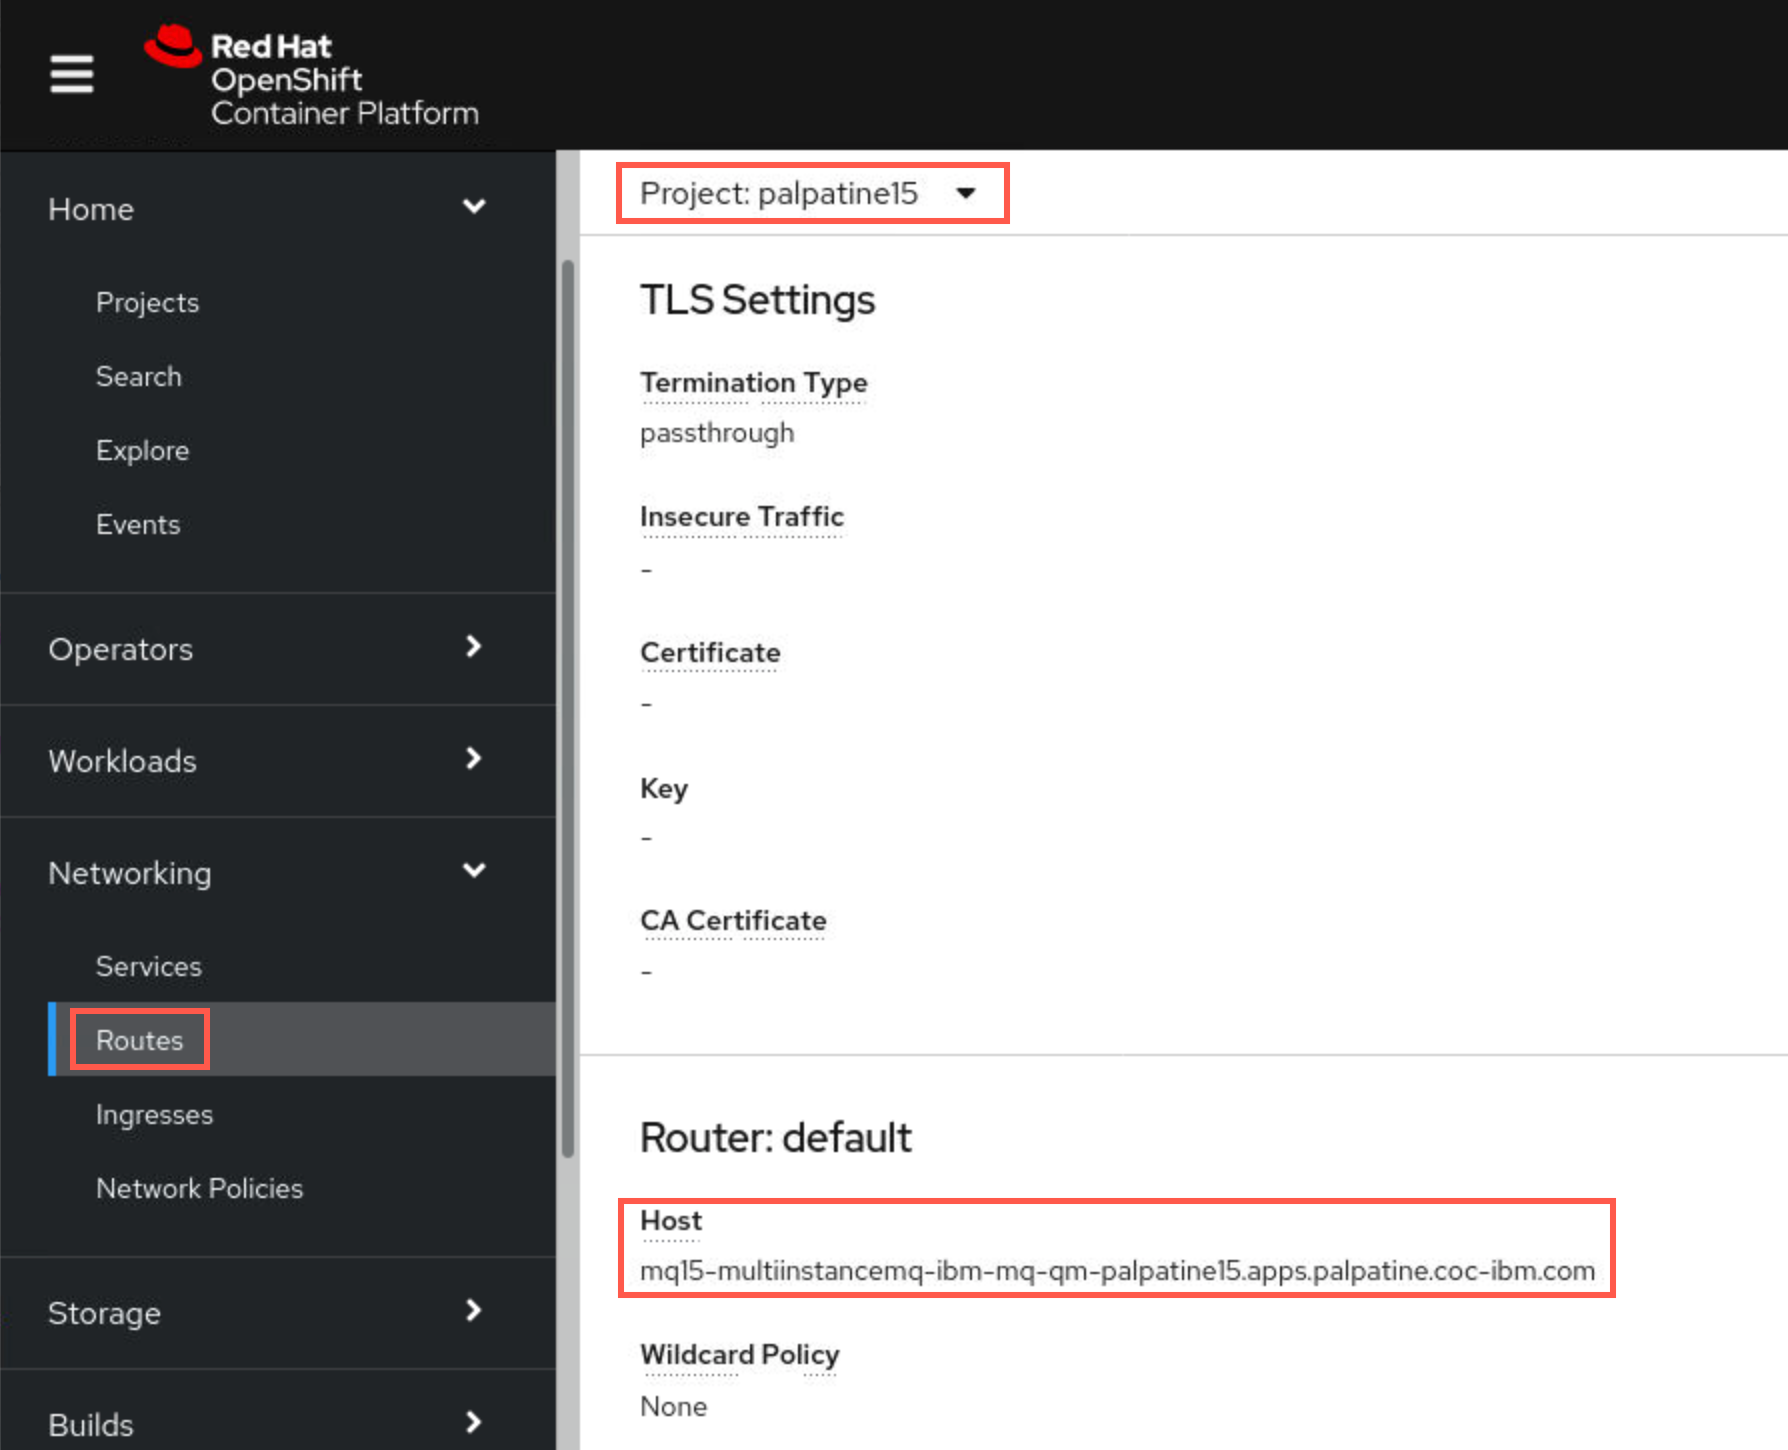
-
Return to the editor and paste the value into the host: field of ccdt.json. Under channel > name: insert the name of your SVRCONN channel (MQxxCHL). Then input the value of your queue manager in the queueManager: field.
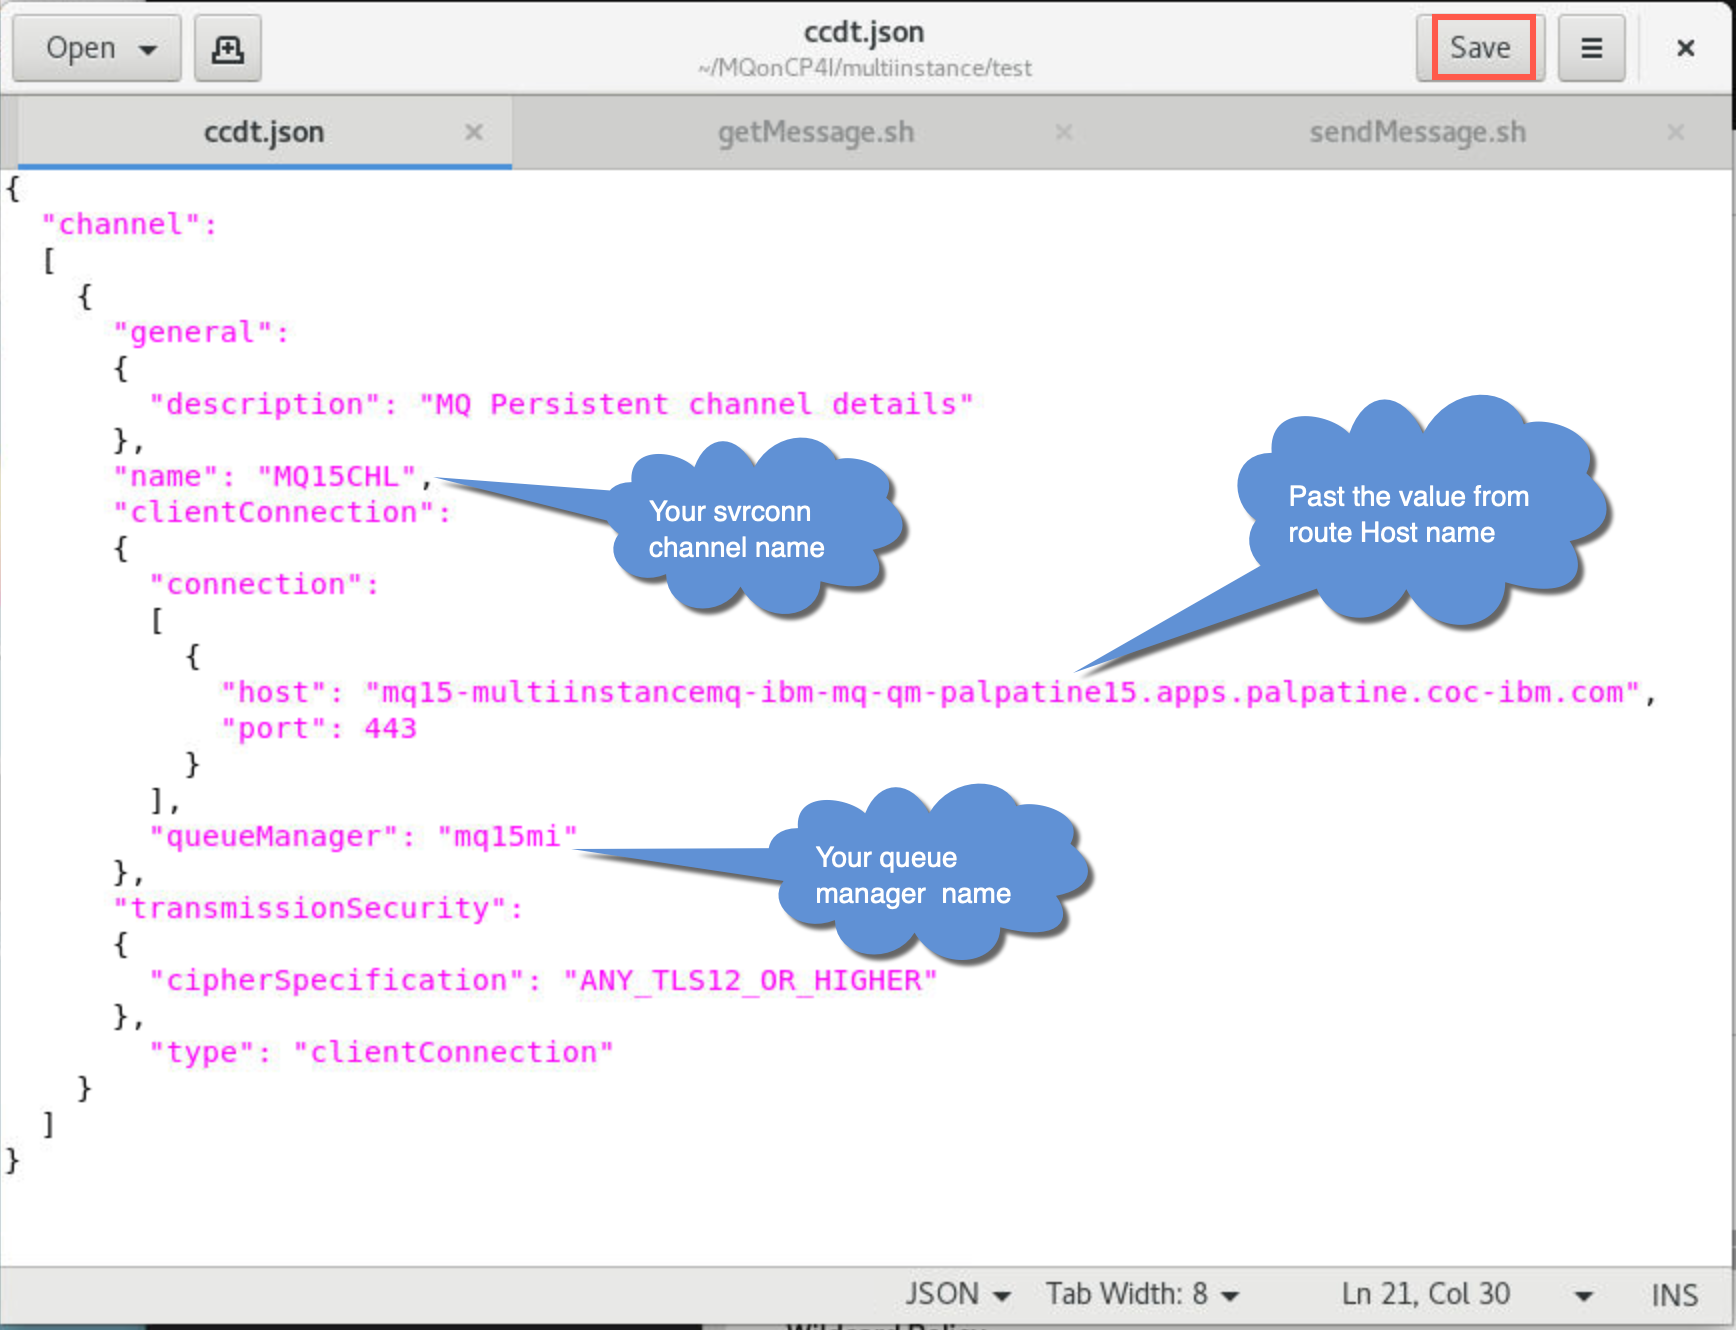
Click Save to save ccdt.json.
-
Now edit getMessage.sh and sendMessge.sh. You need to change the same values in each file. In the export statements, change 00 to your student ID. Change the paths for MQCCDTURL and MQSSLKEYR to /home/student/…. Click the Save button for each file.
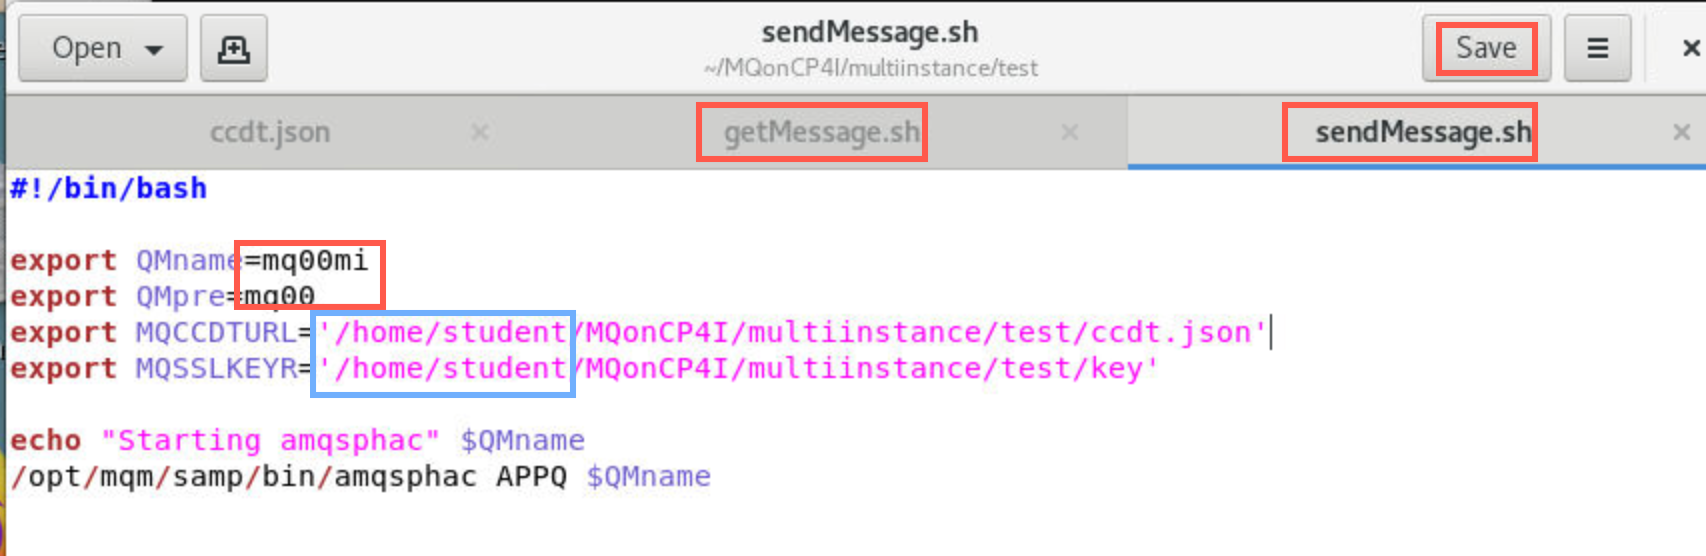
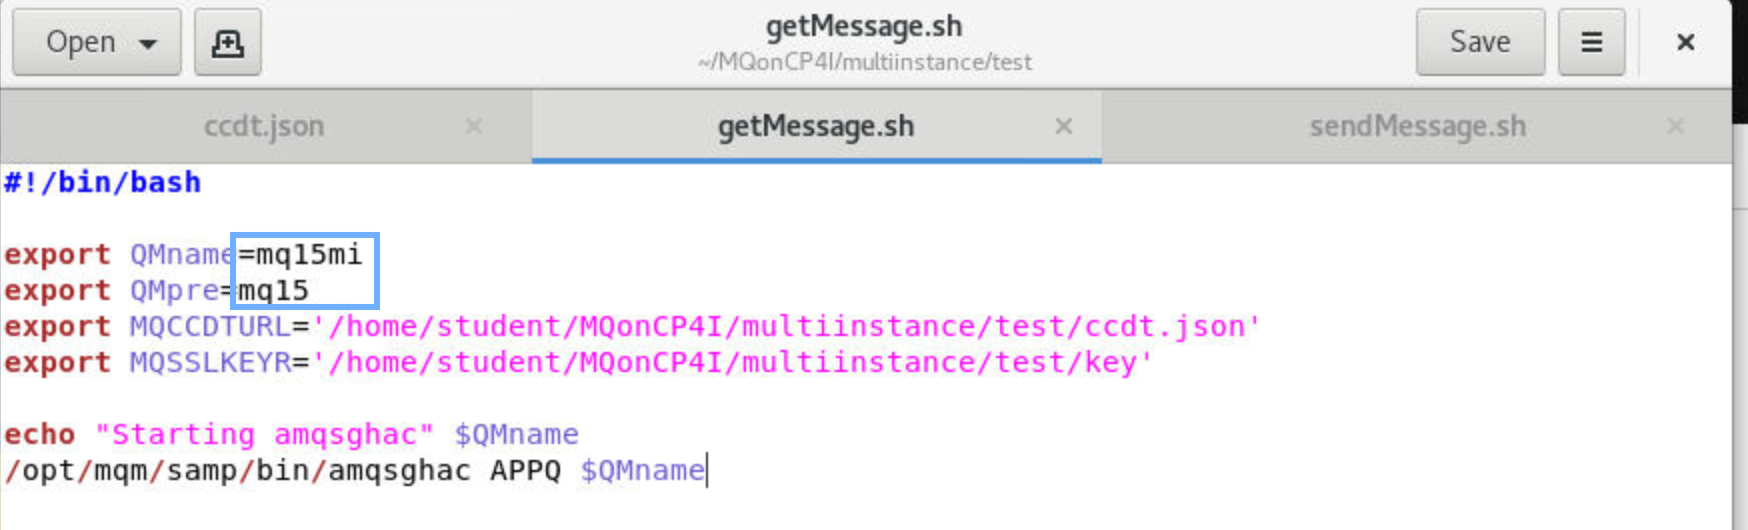
-
In the terminal window in the ./test directory make sendMessage.sh and getMessage.sh files executable with the following commnads:
chmod +x sendMessage.shchmod +x getMessage.sh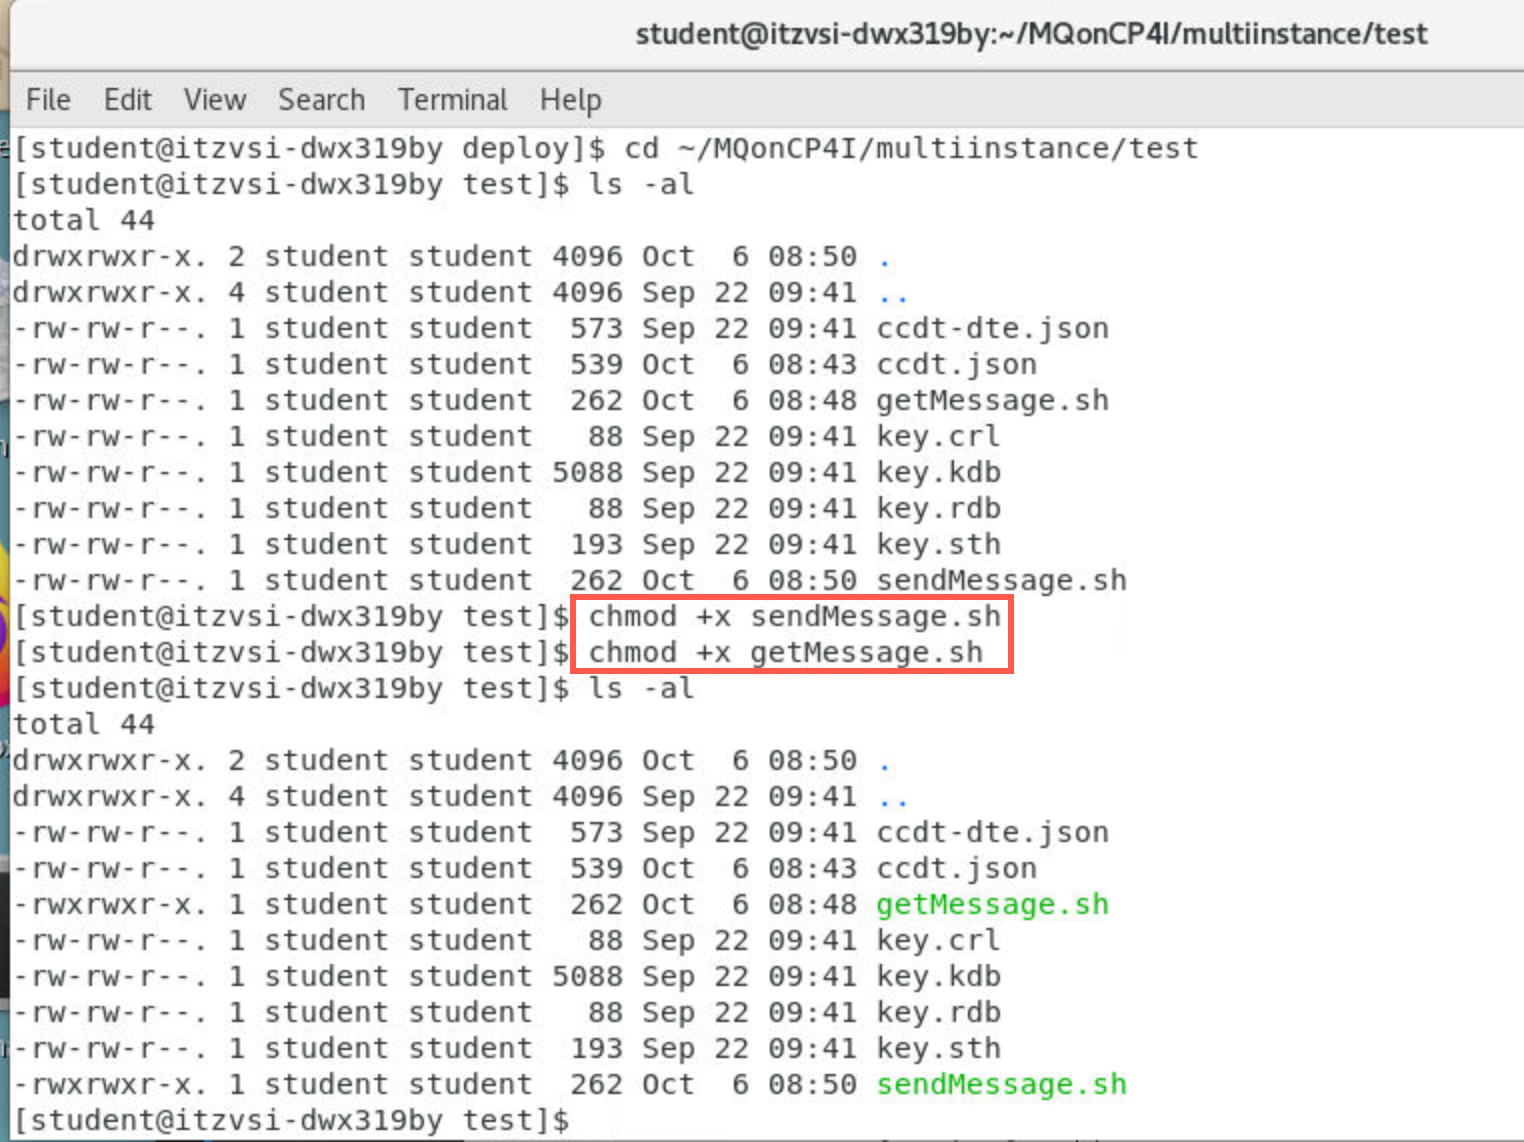
-
In the terminal window in the ./test directory initiate the testing by running the following command:
./sendMessage.shThe script will then connect to MQ and start sending messages incessantly. Leave this window open to keep sending messages.
-
Open another command window, navigate to /home/student/MQonCP4I/multiinstance/test directory and run the following command:
./getMessage.shYou should get a list of the all messages that have been previously sent before running the command and the ones that are being sent after. Leave this window open to keep getting the messages.
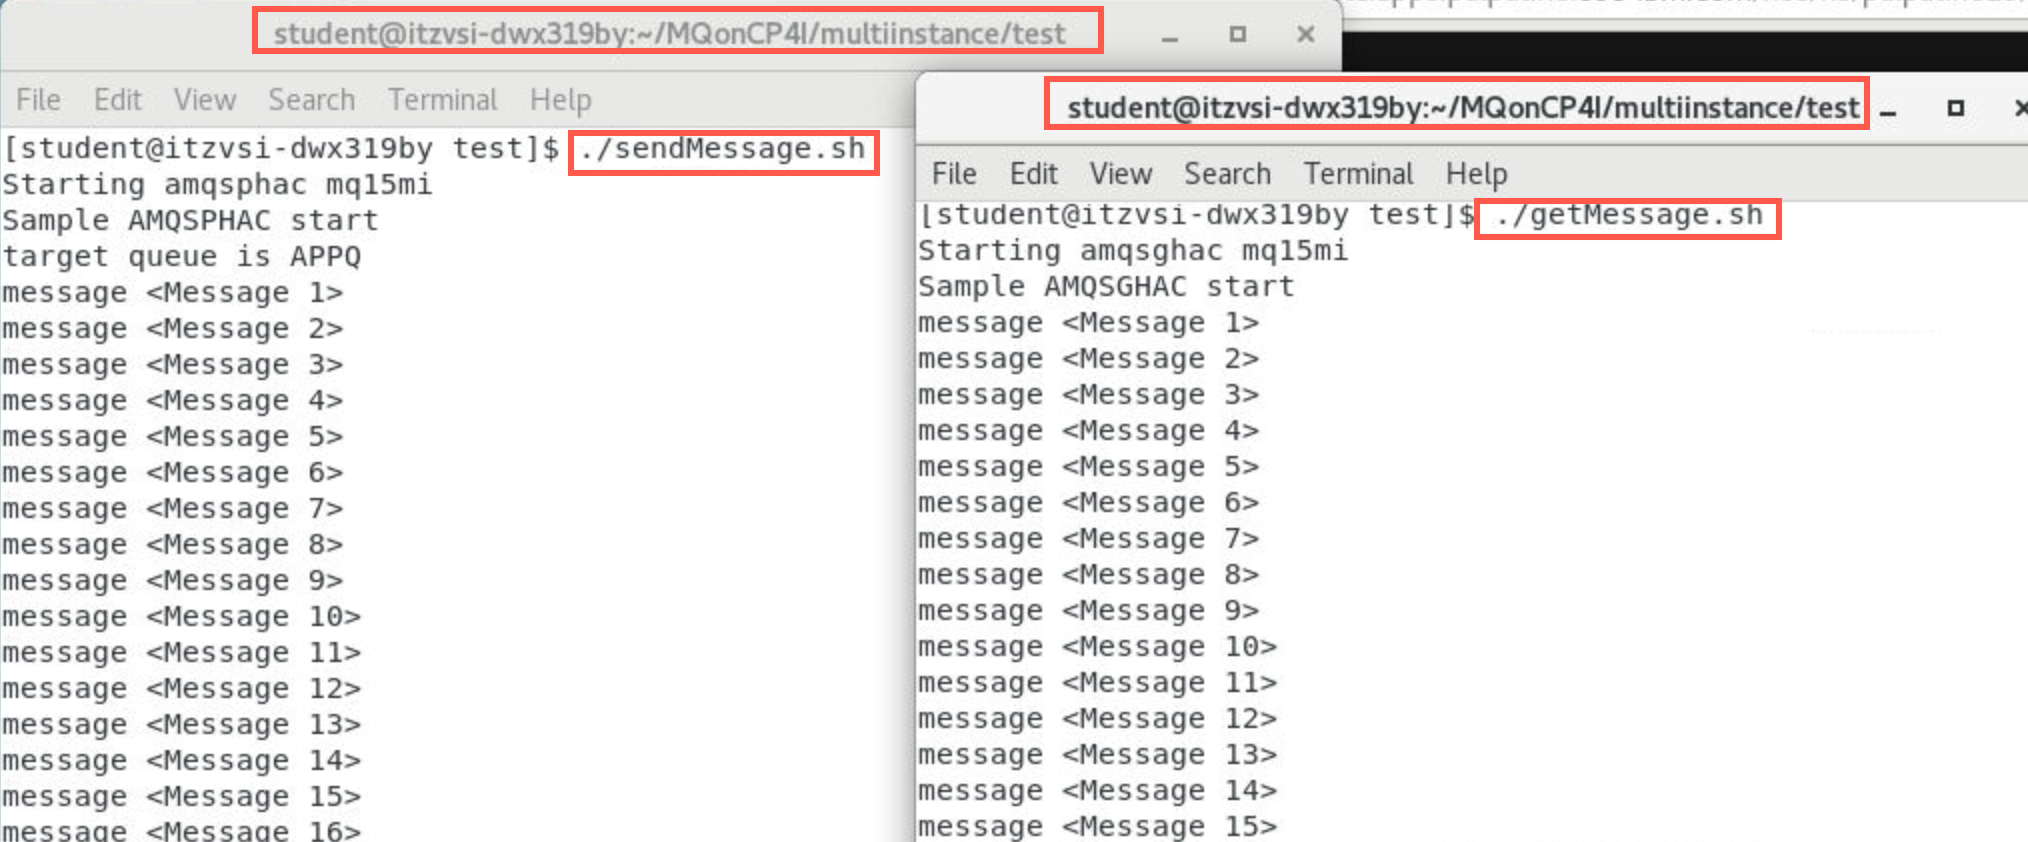
-
Return to the OpenShift Console, expand Workloads and select Pods. If necessary you can enter your prefix in the filter field so you only see your pods.
-
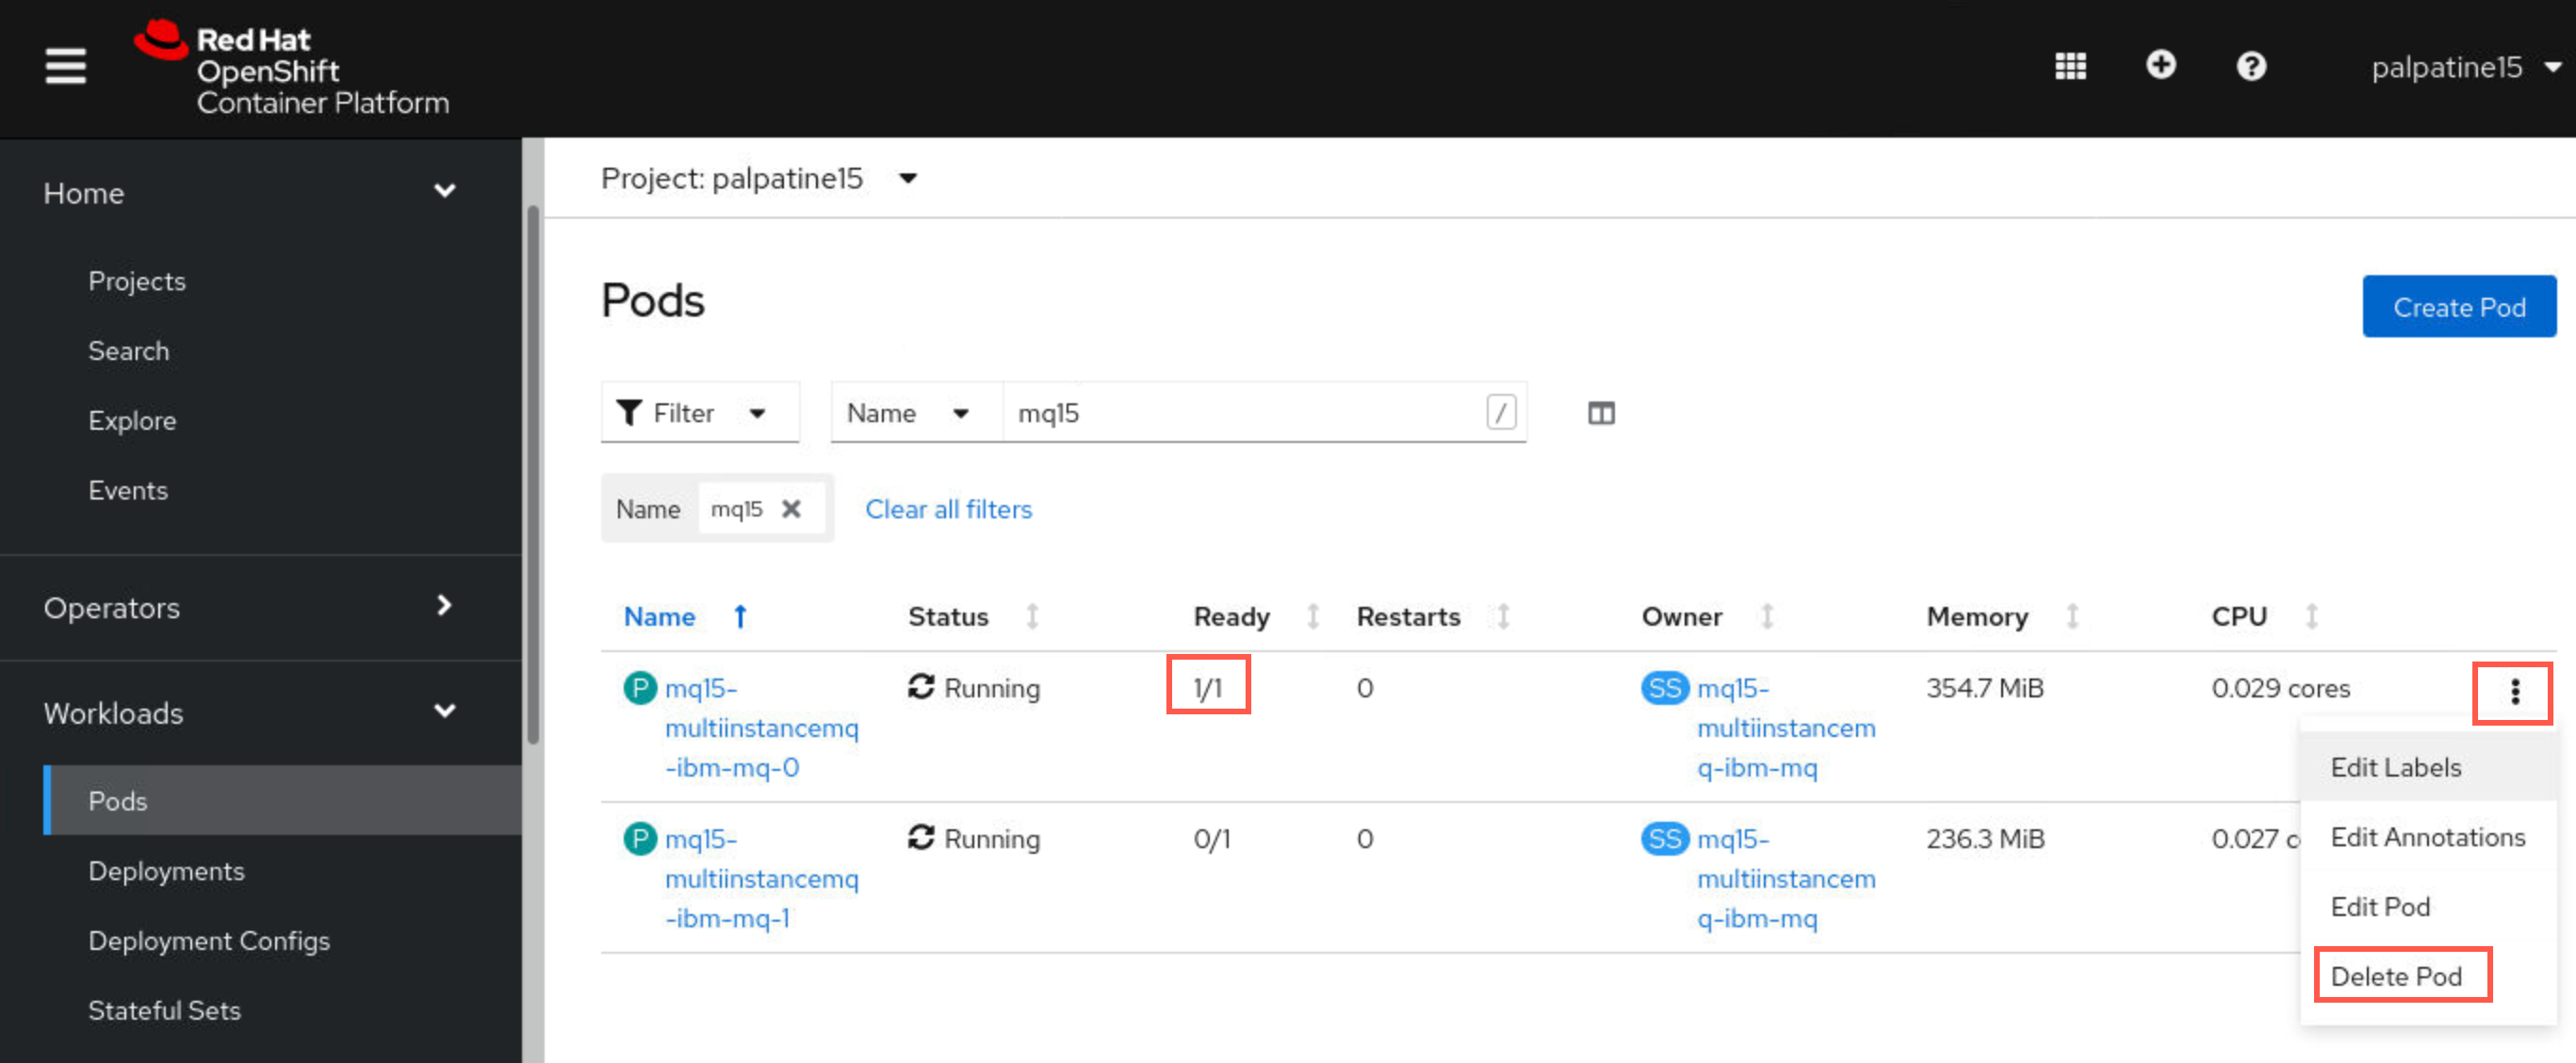
To see how the pods work together in action, delete the active pod by clicking the elipsis next to the pod with 1/1 and click Delete Pod. Respond Delete in the confirmation pop-up.
-
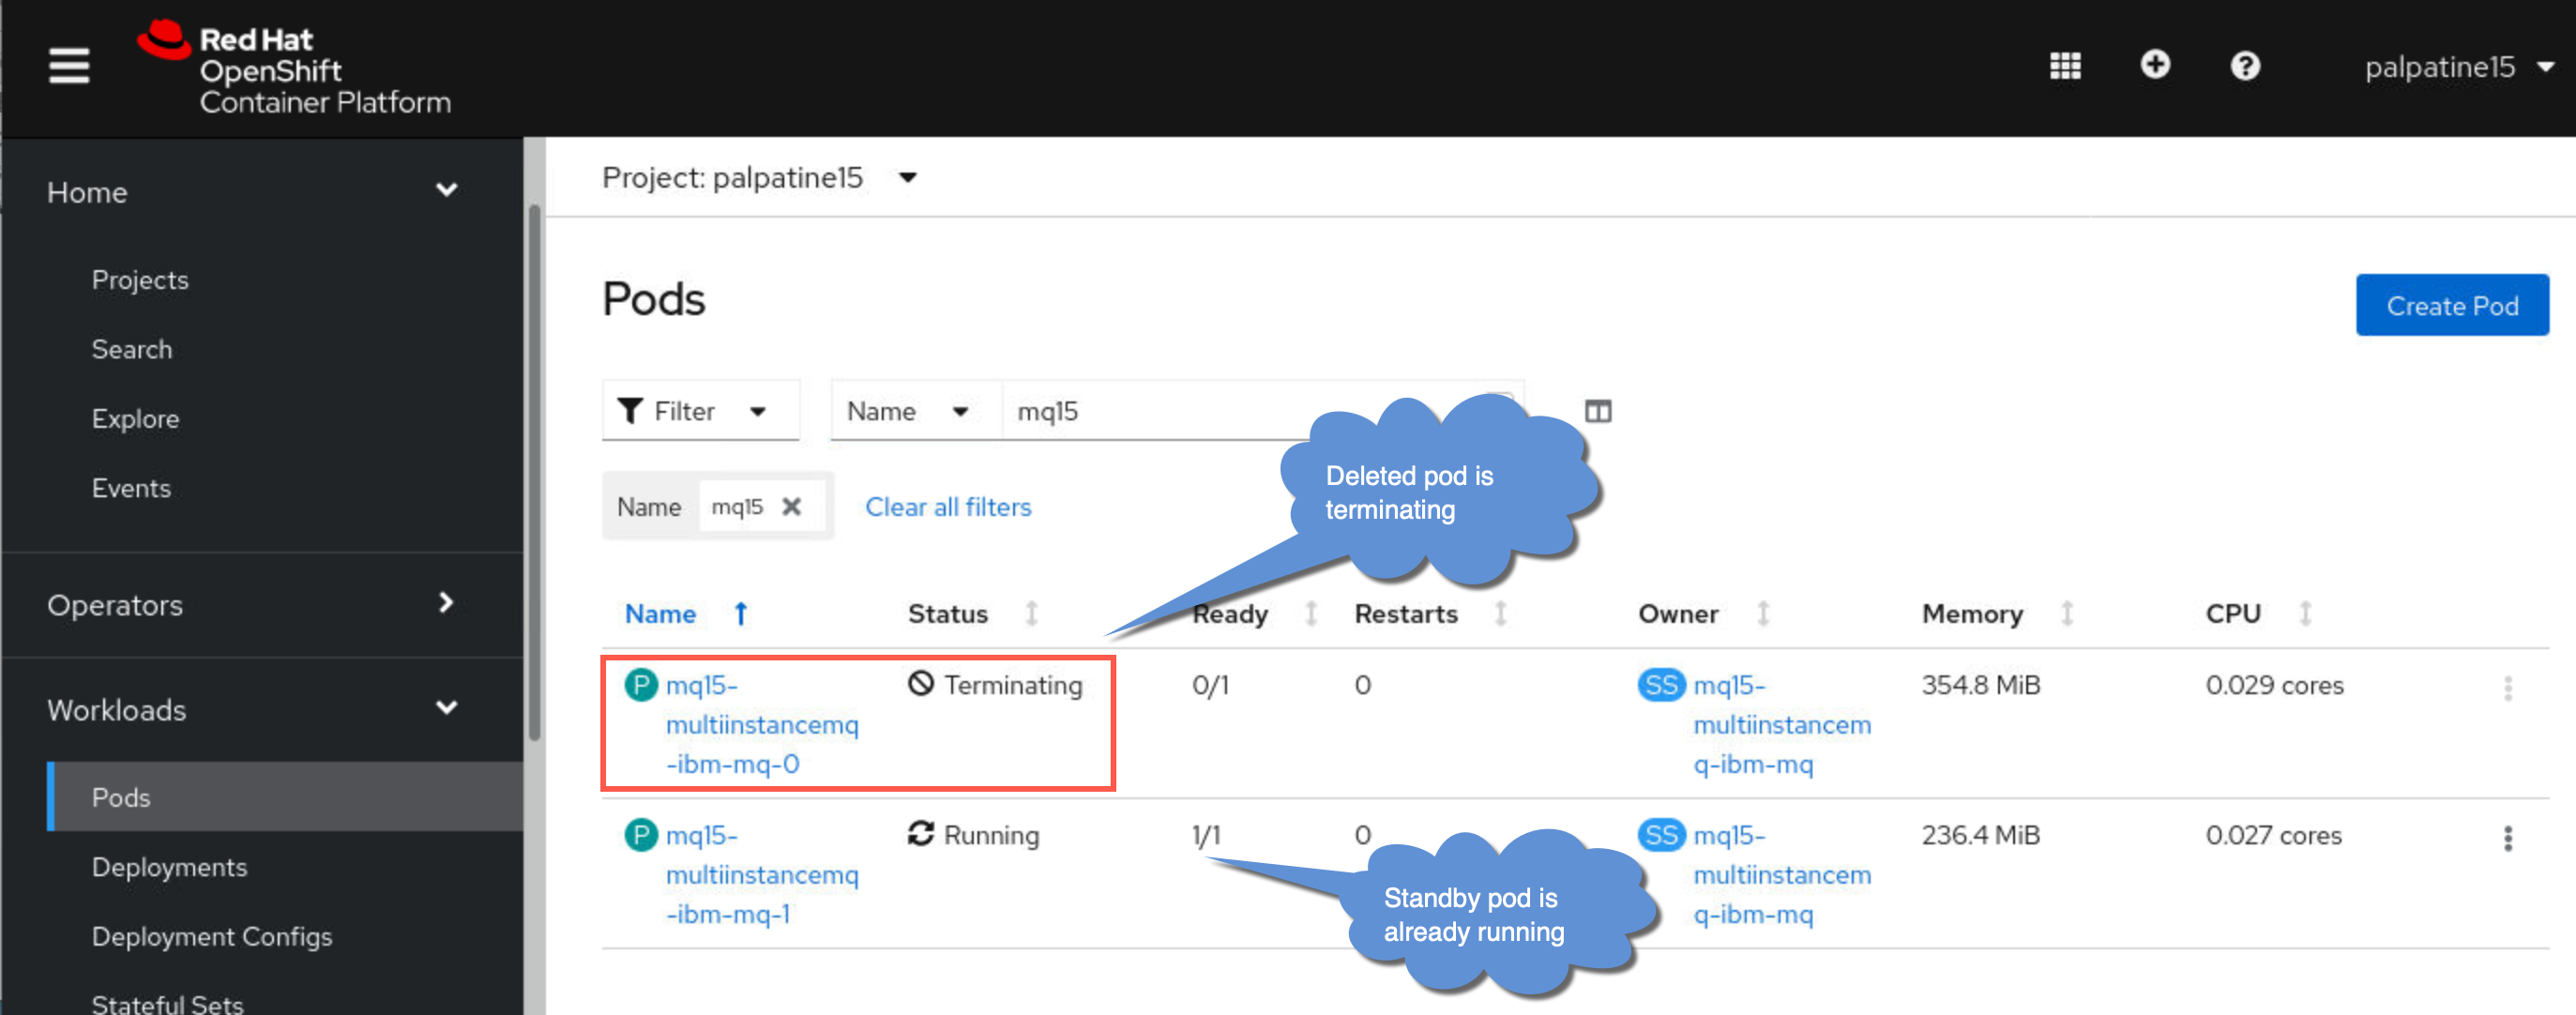
Notice that the pod which was active is now terminating and will restart because you asked OpenShift to keep at least one replica.
-
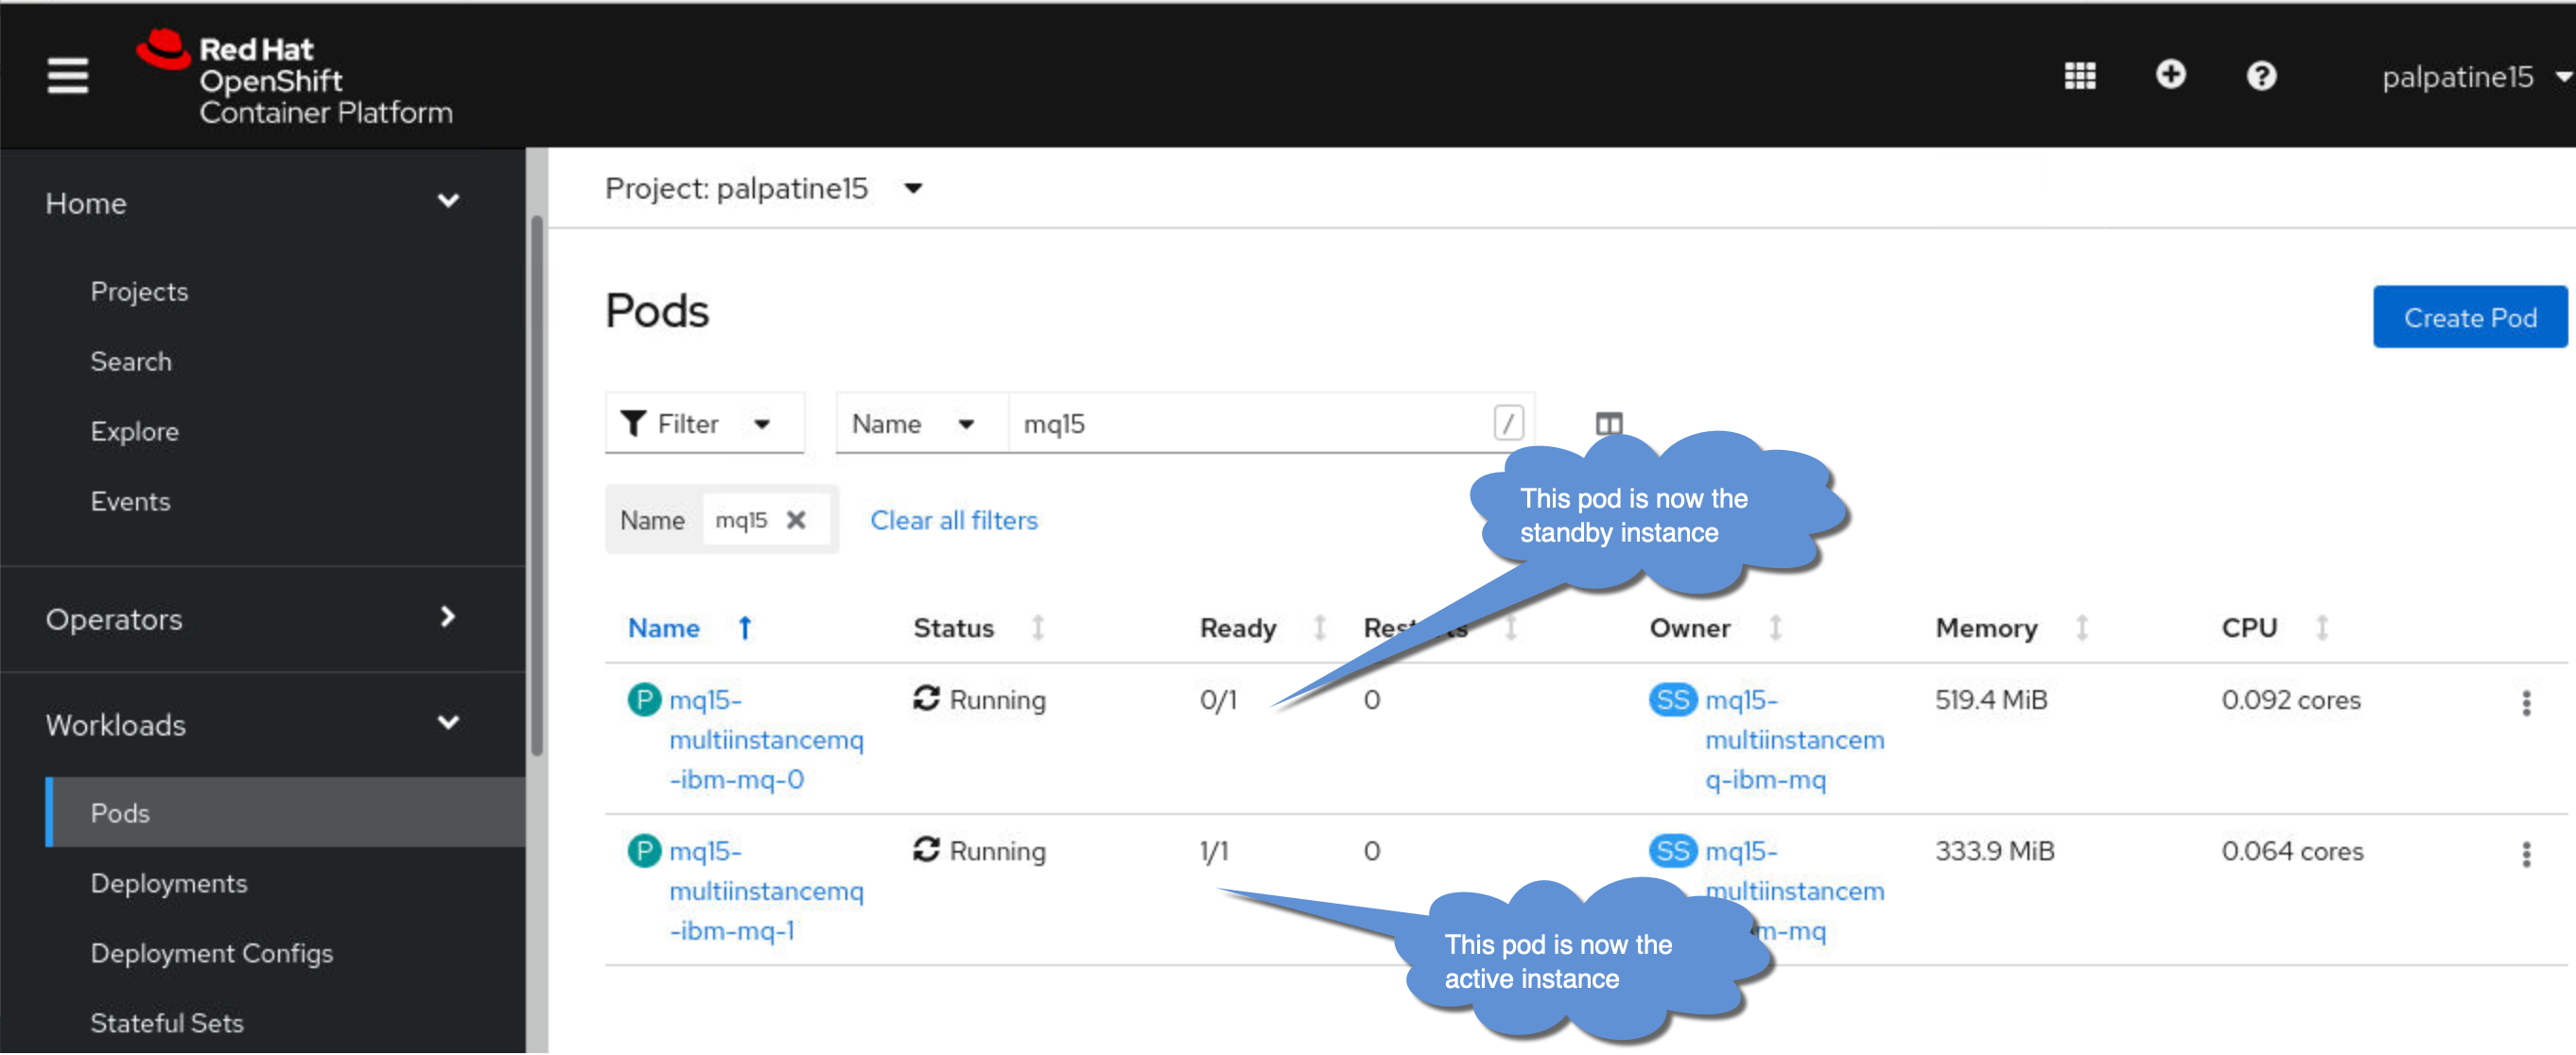
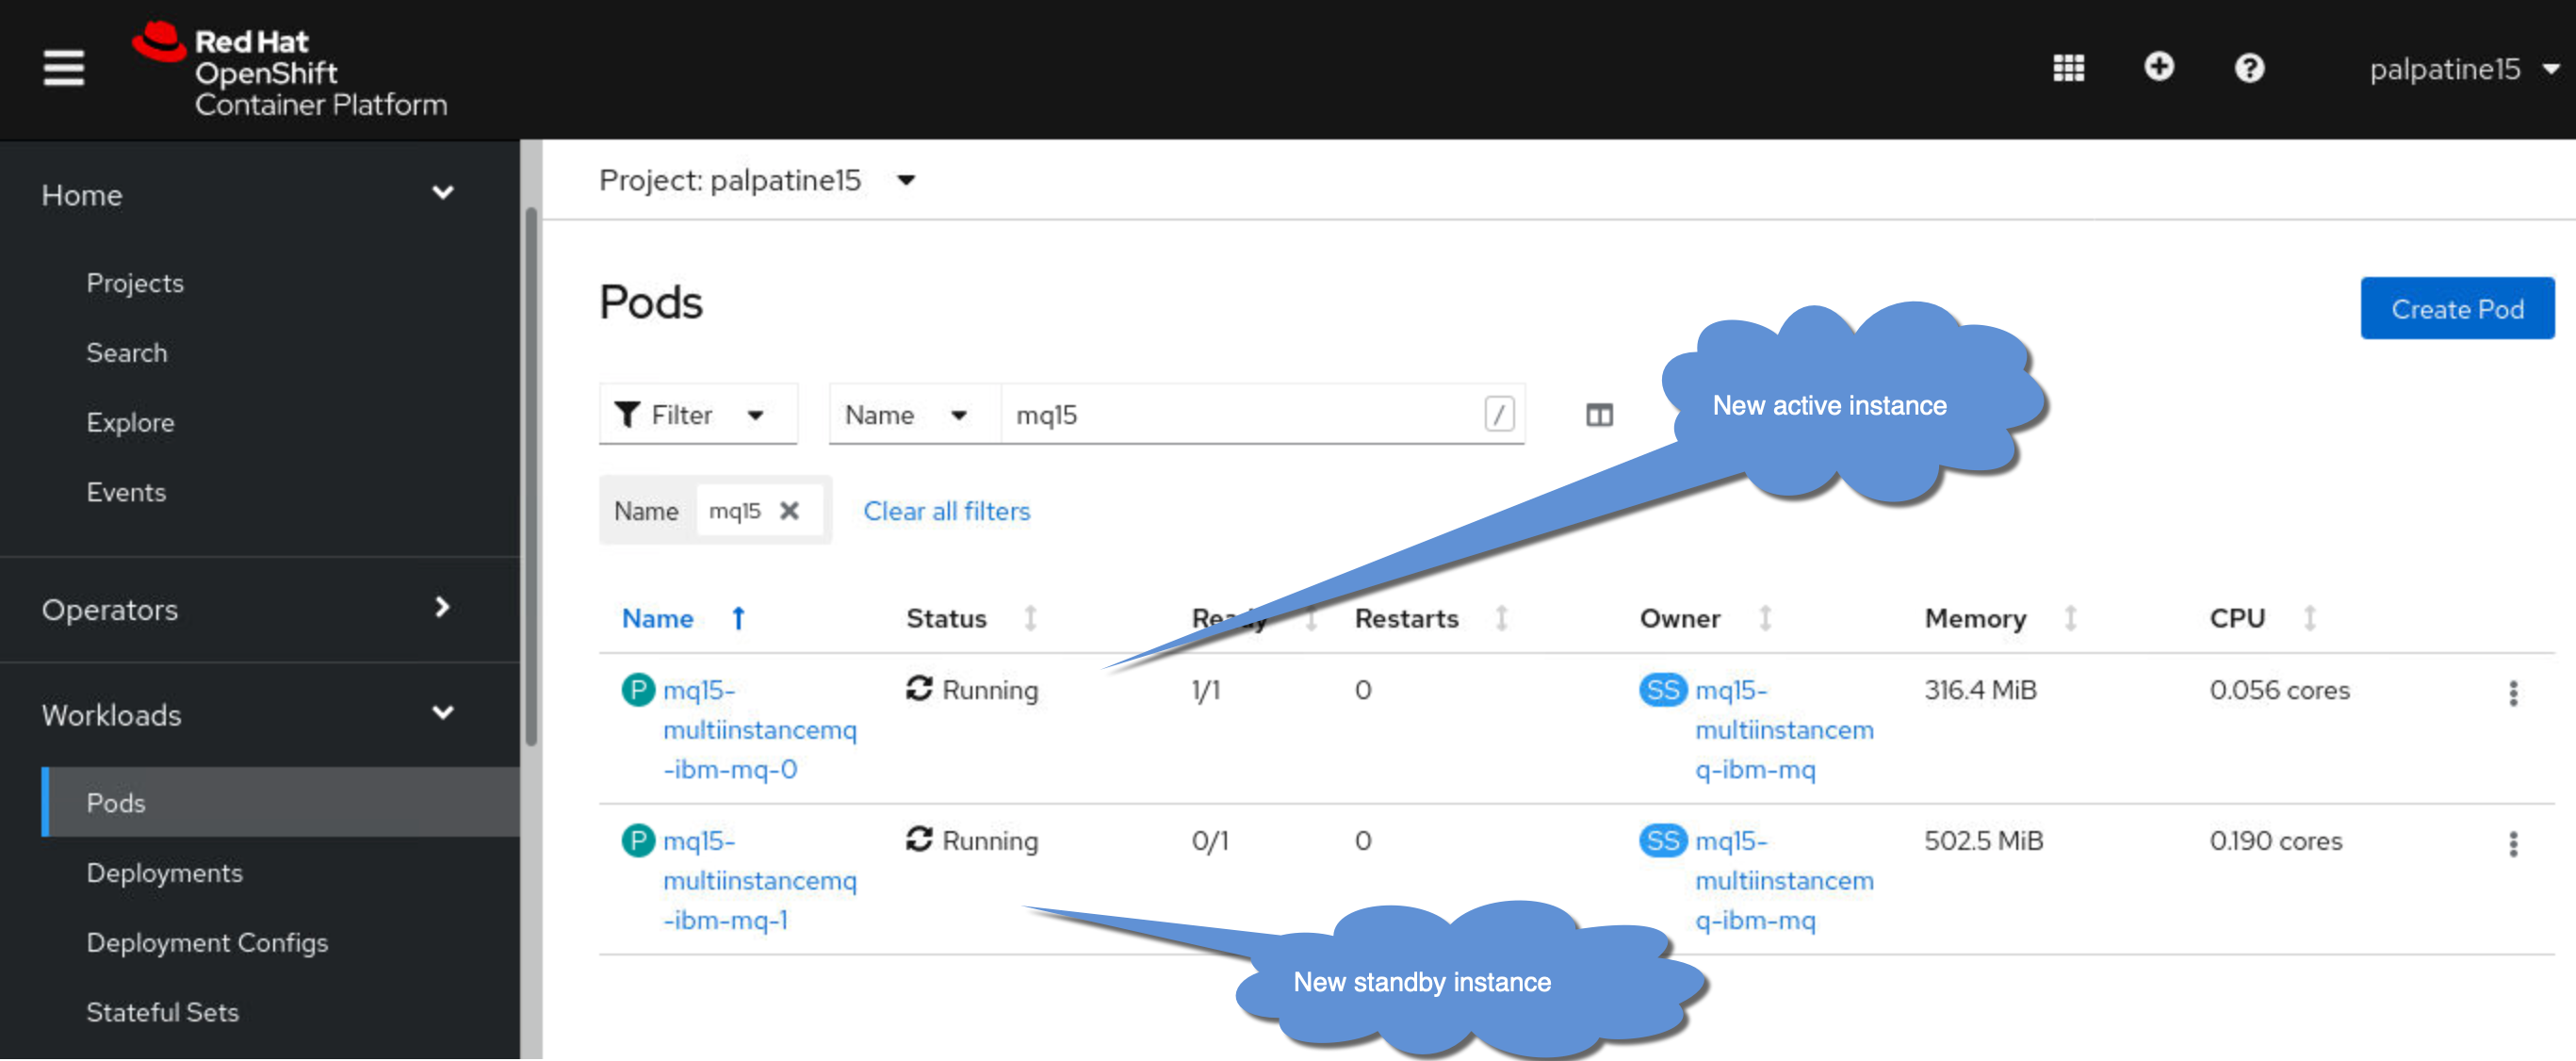
Once the active pod is deleted, the connection will then reconnect to the other pod for it to take over. Verify this by observing the active pod in the console.
-
Also observe the behavior of the running appplications in the terminals. They have reconnected to the other pod and continue to run. Notice the time to reconnect.
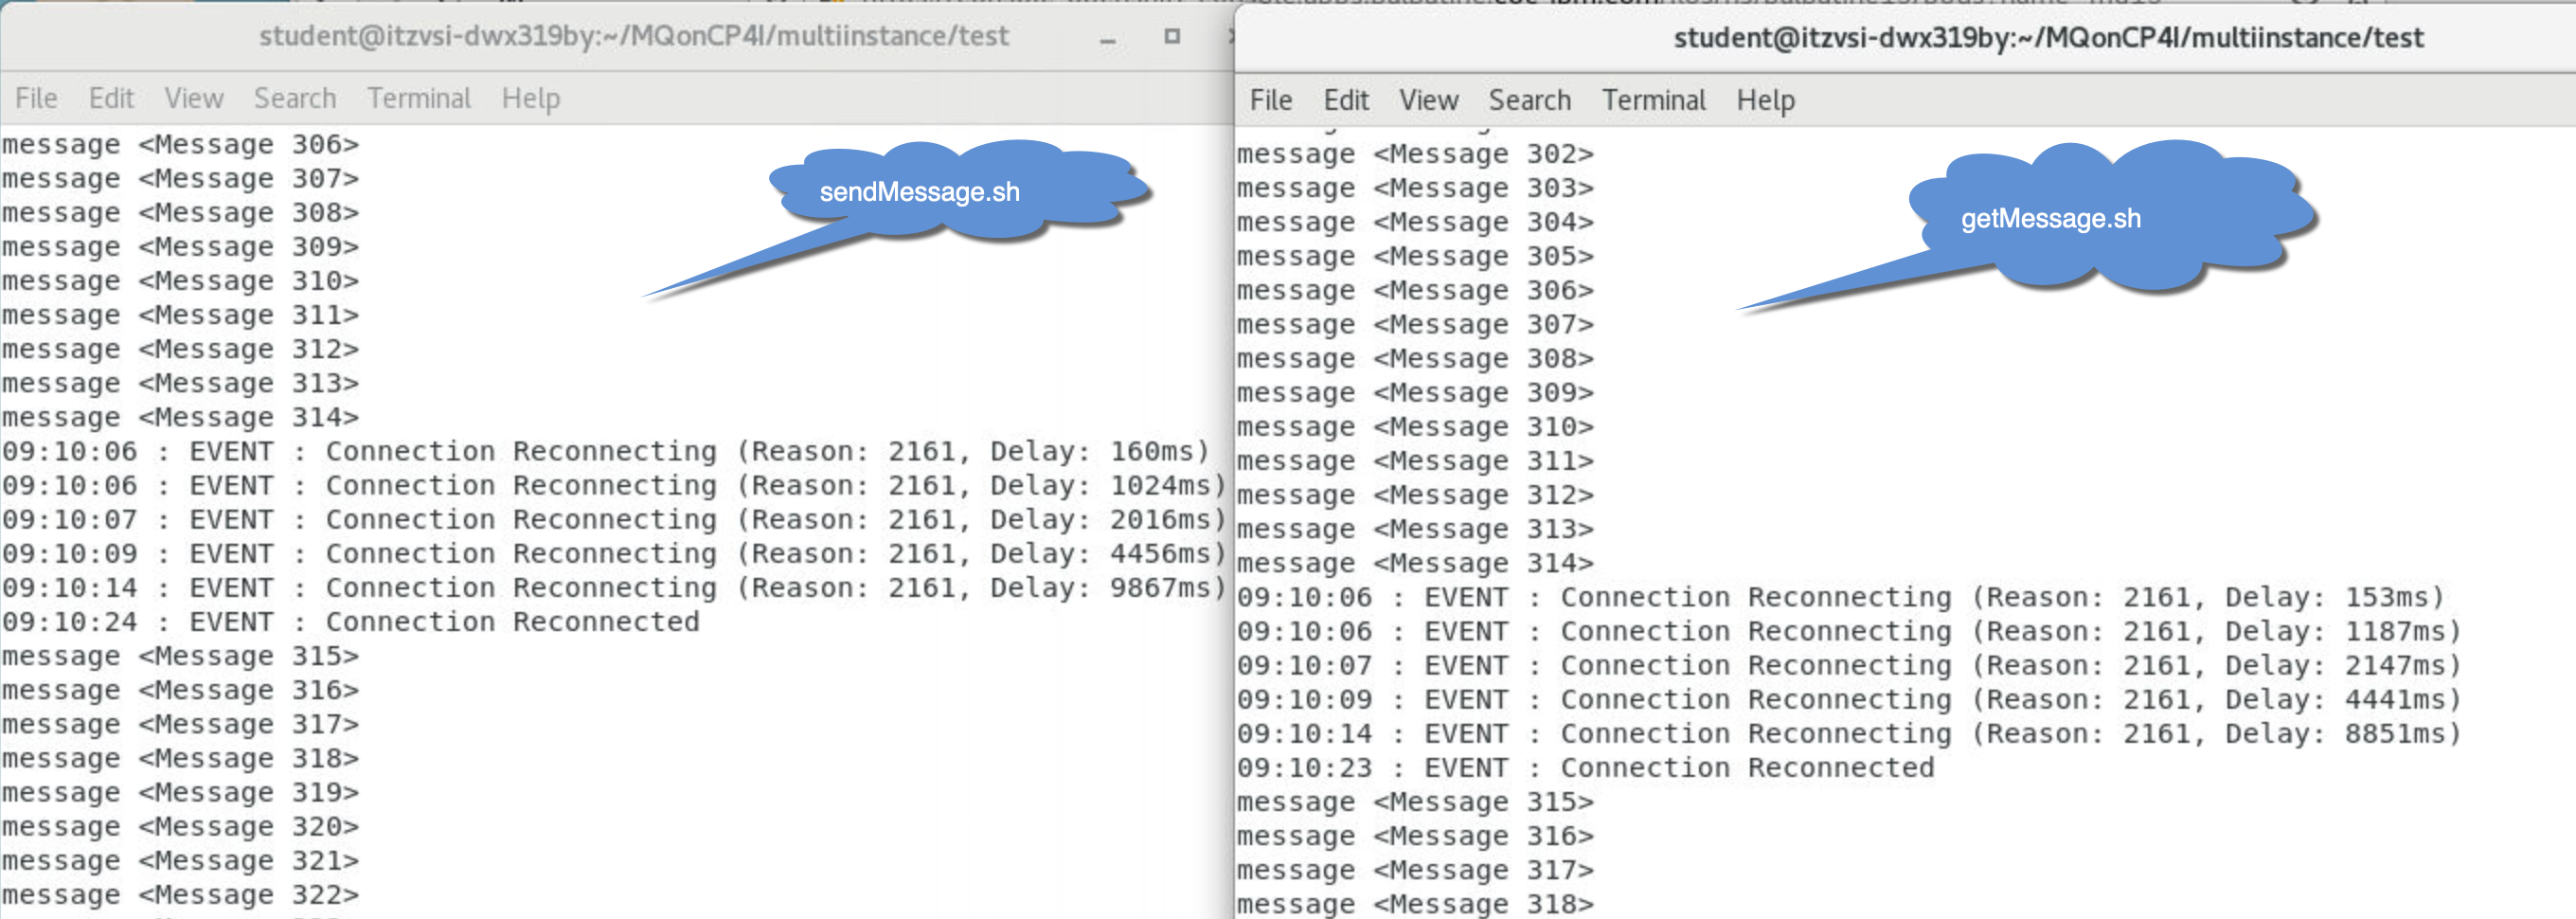
-
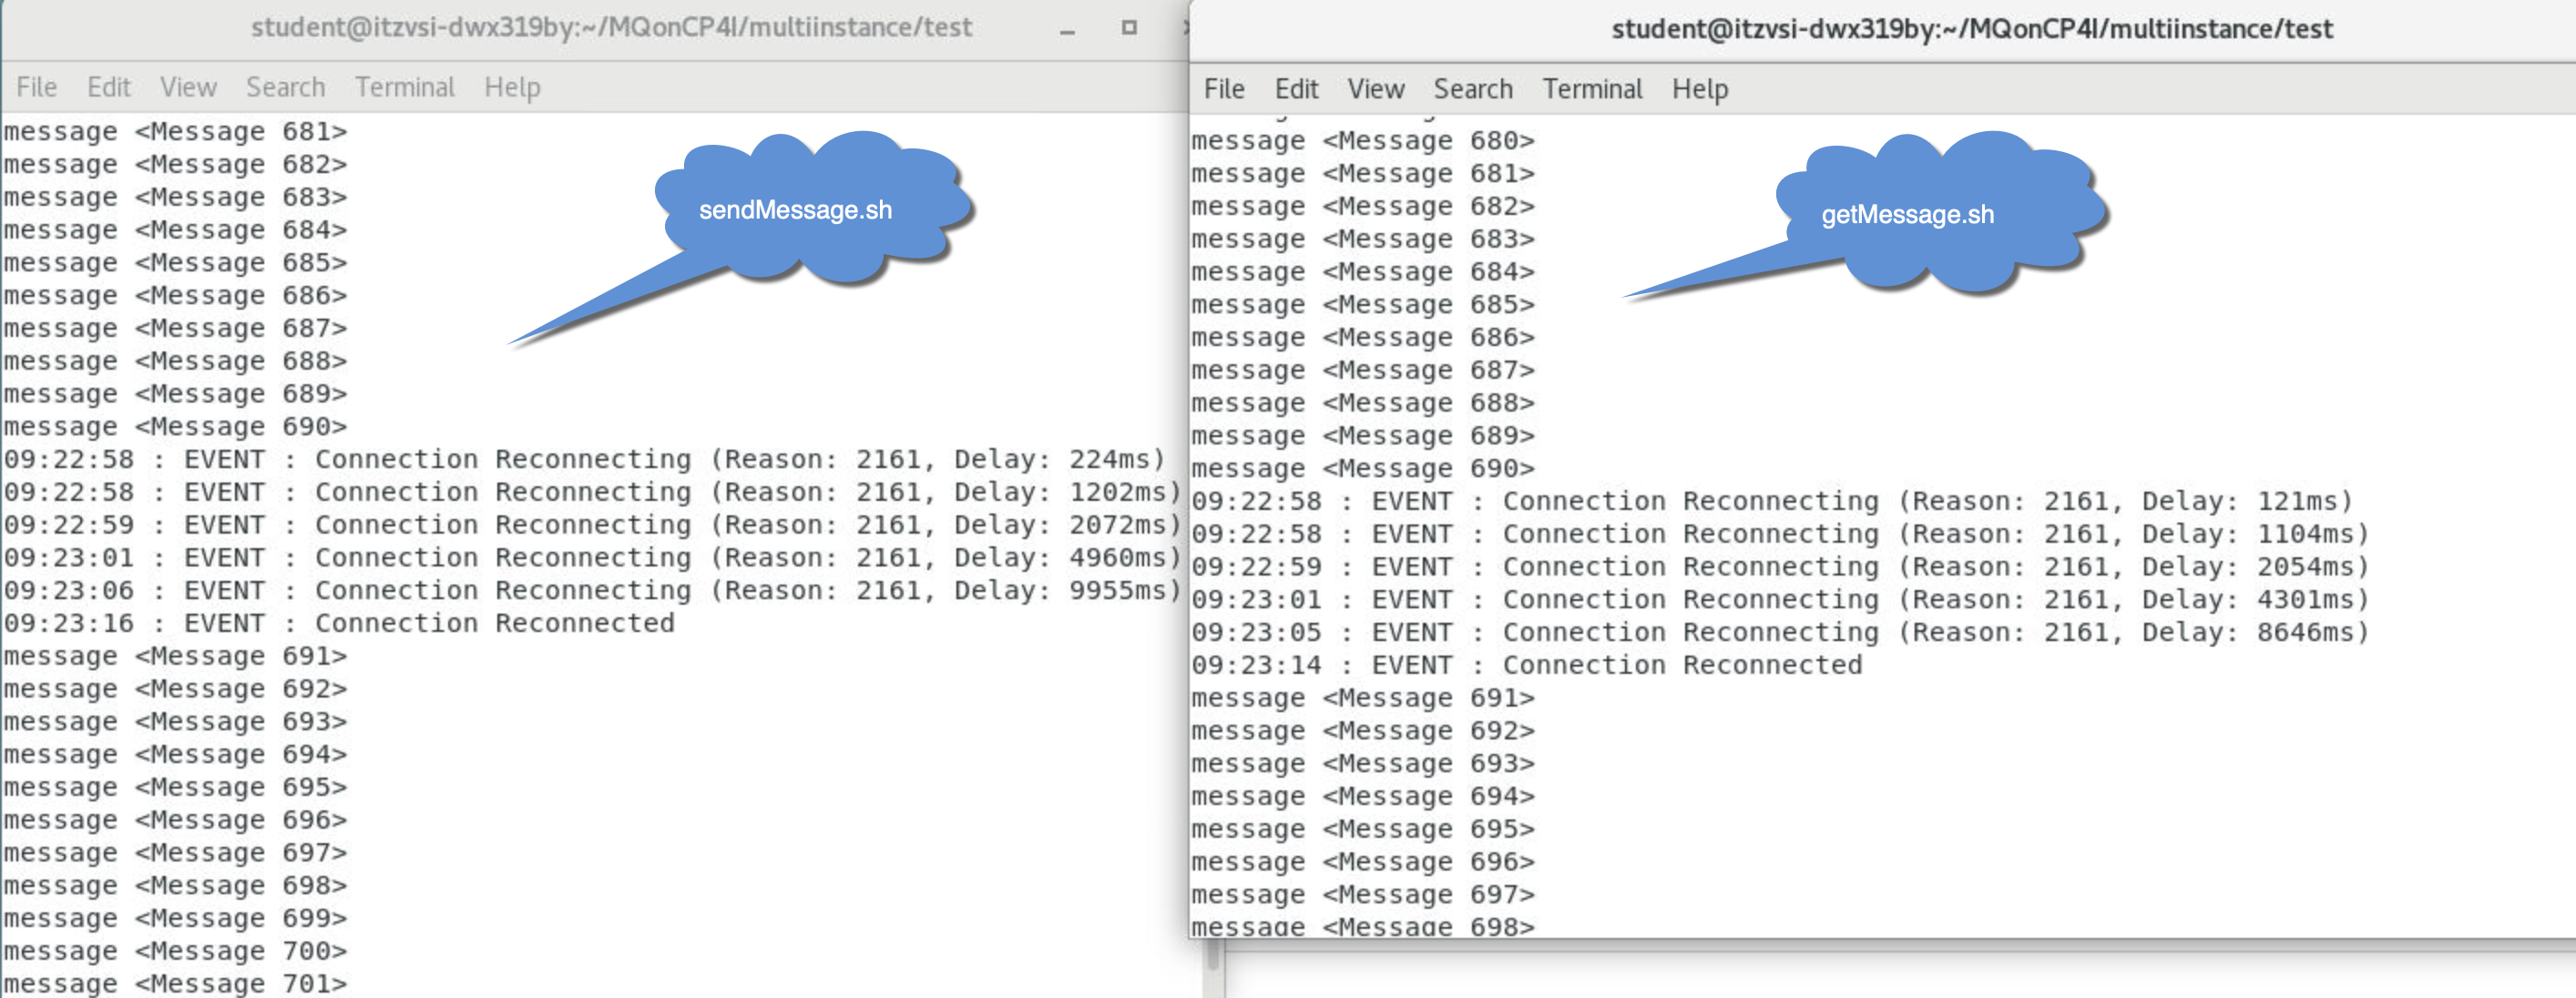
Try deleting the current active pod and observe again that the standby pod takes over and the applications reconnect and continue.
And observe the applications reconnecting again.
-
You can now stop the programs by entering Ctrl-c in each terminal window.
Connecting MQ Explorer to a deployed Queue Manager in OpenShift
These steps document how you can connect MQ Explorer to a Queue Manager running in OpenShift.
-
Open a new terminal window.
-
Enter the following command to start MQ Explorer making sure to use the correct case:
MQExplorer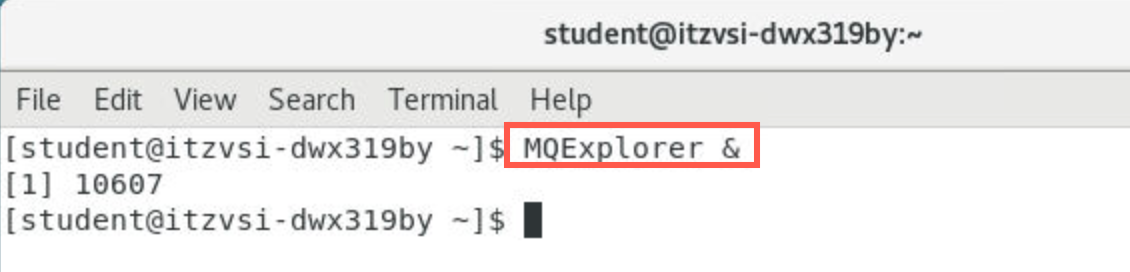
-
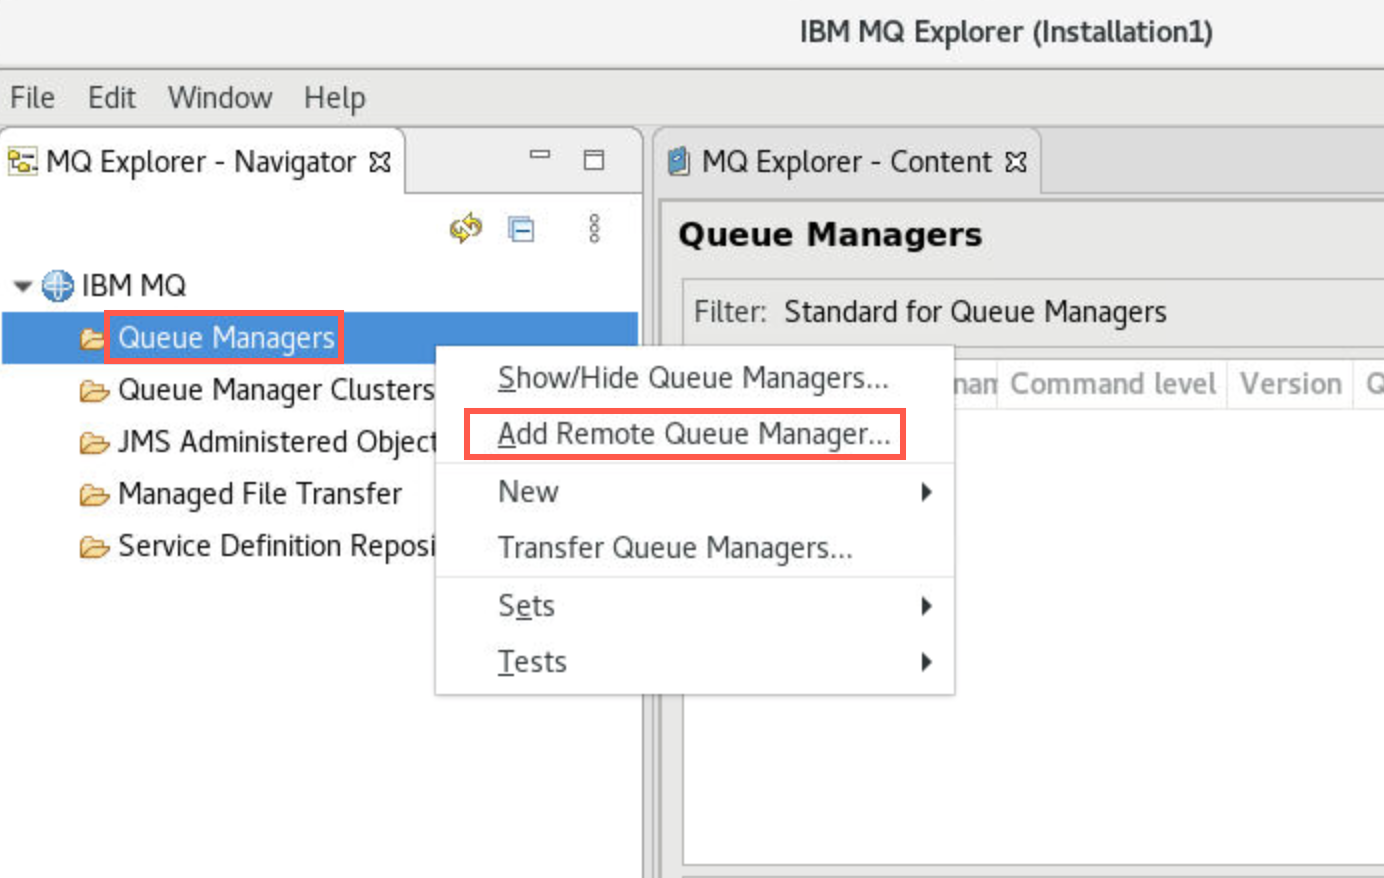
When the utility is ready, right-click Queue Managers and select Add Remote Queue Manager.
-
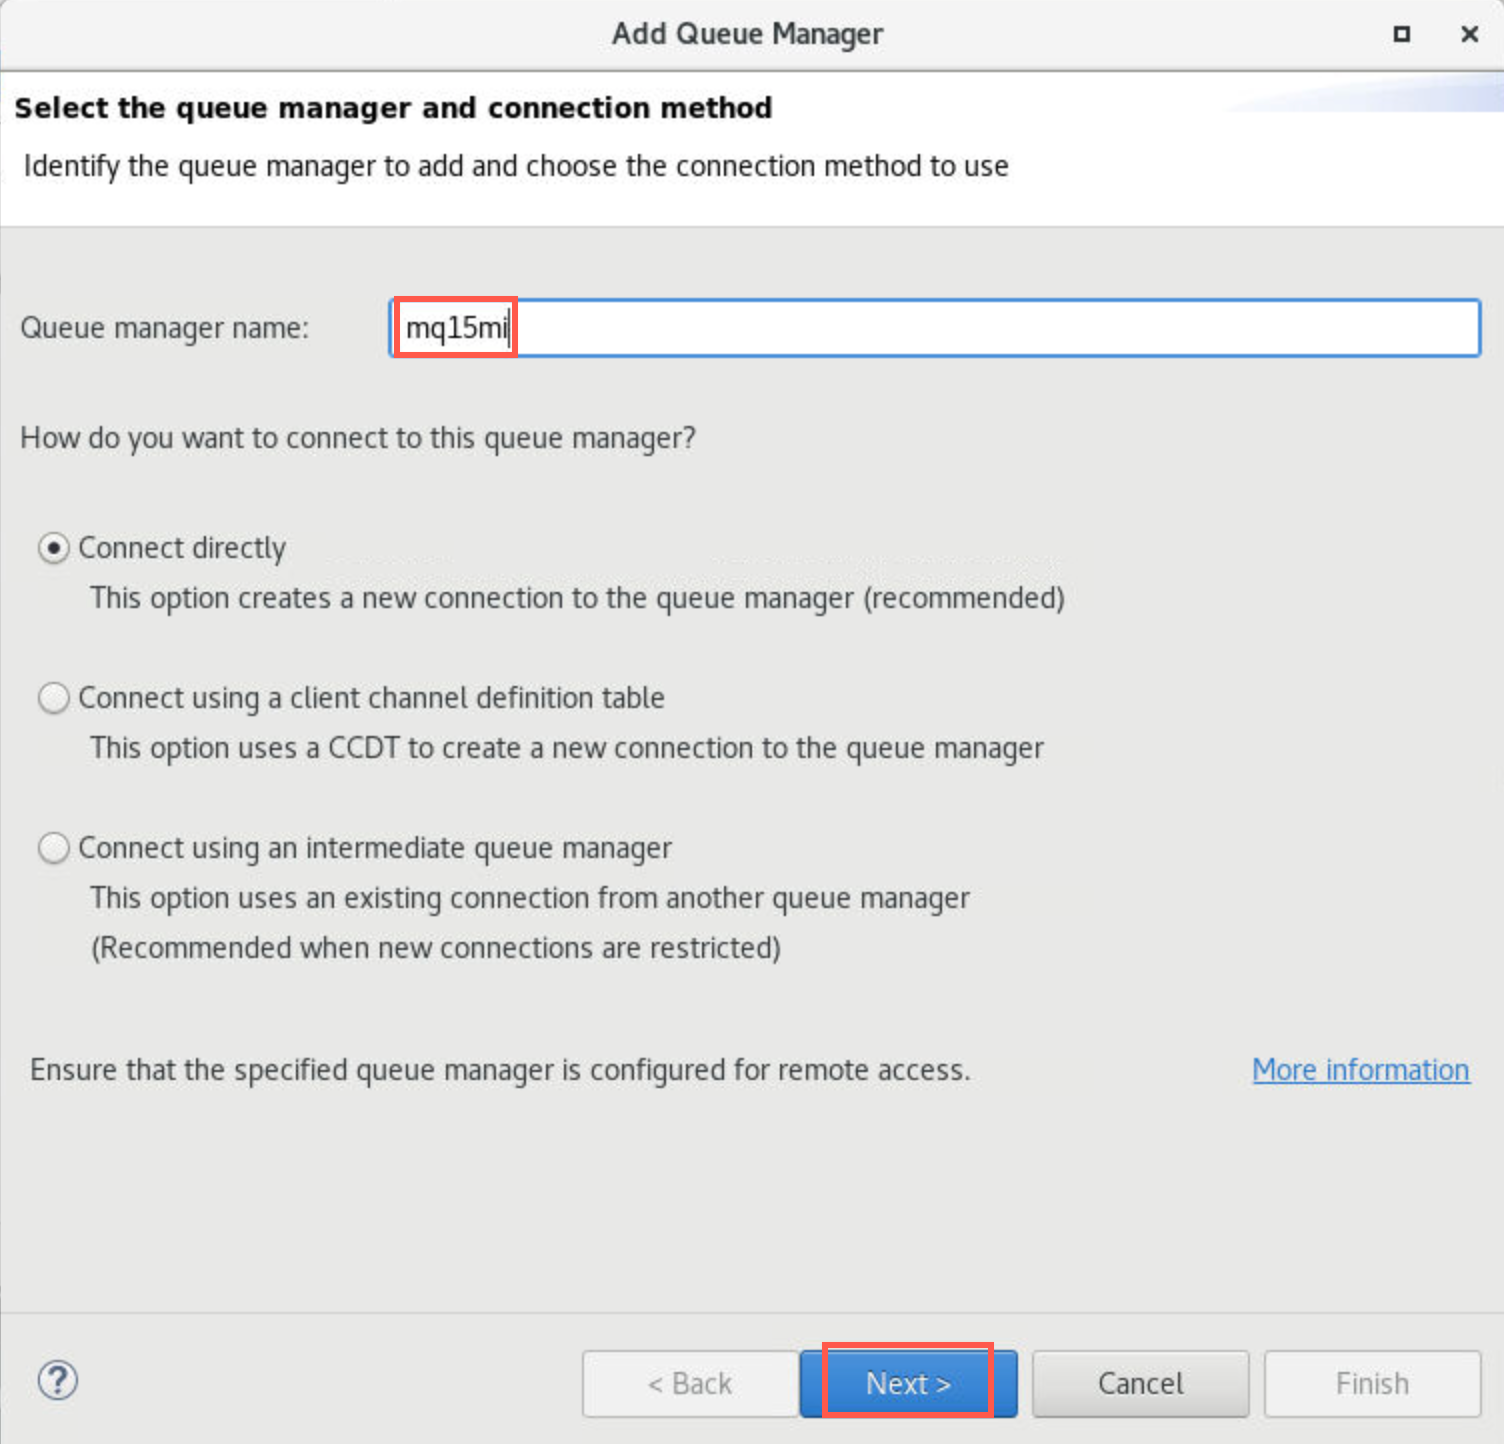
Enter your queue manager name using your student ID. Click Next.
-
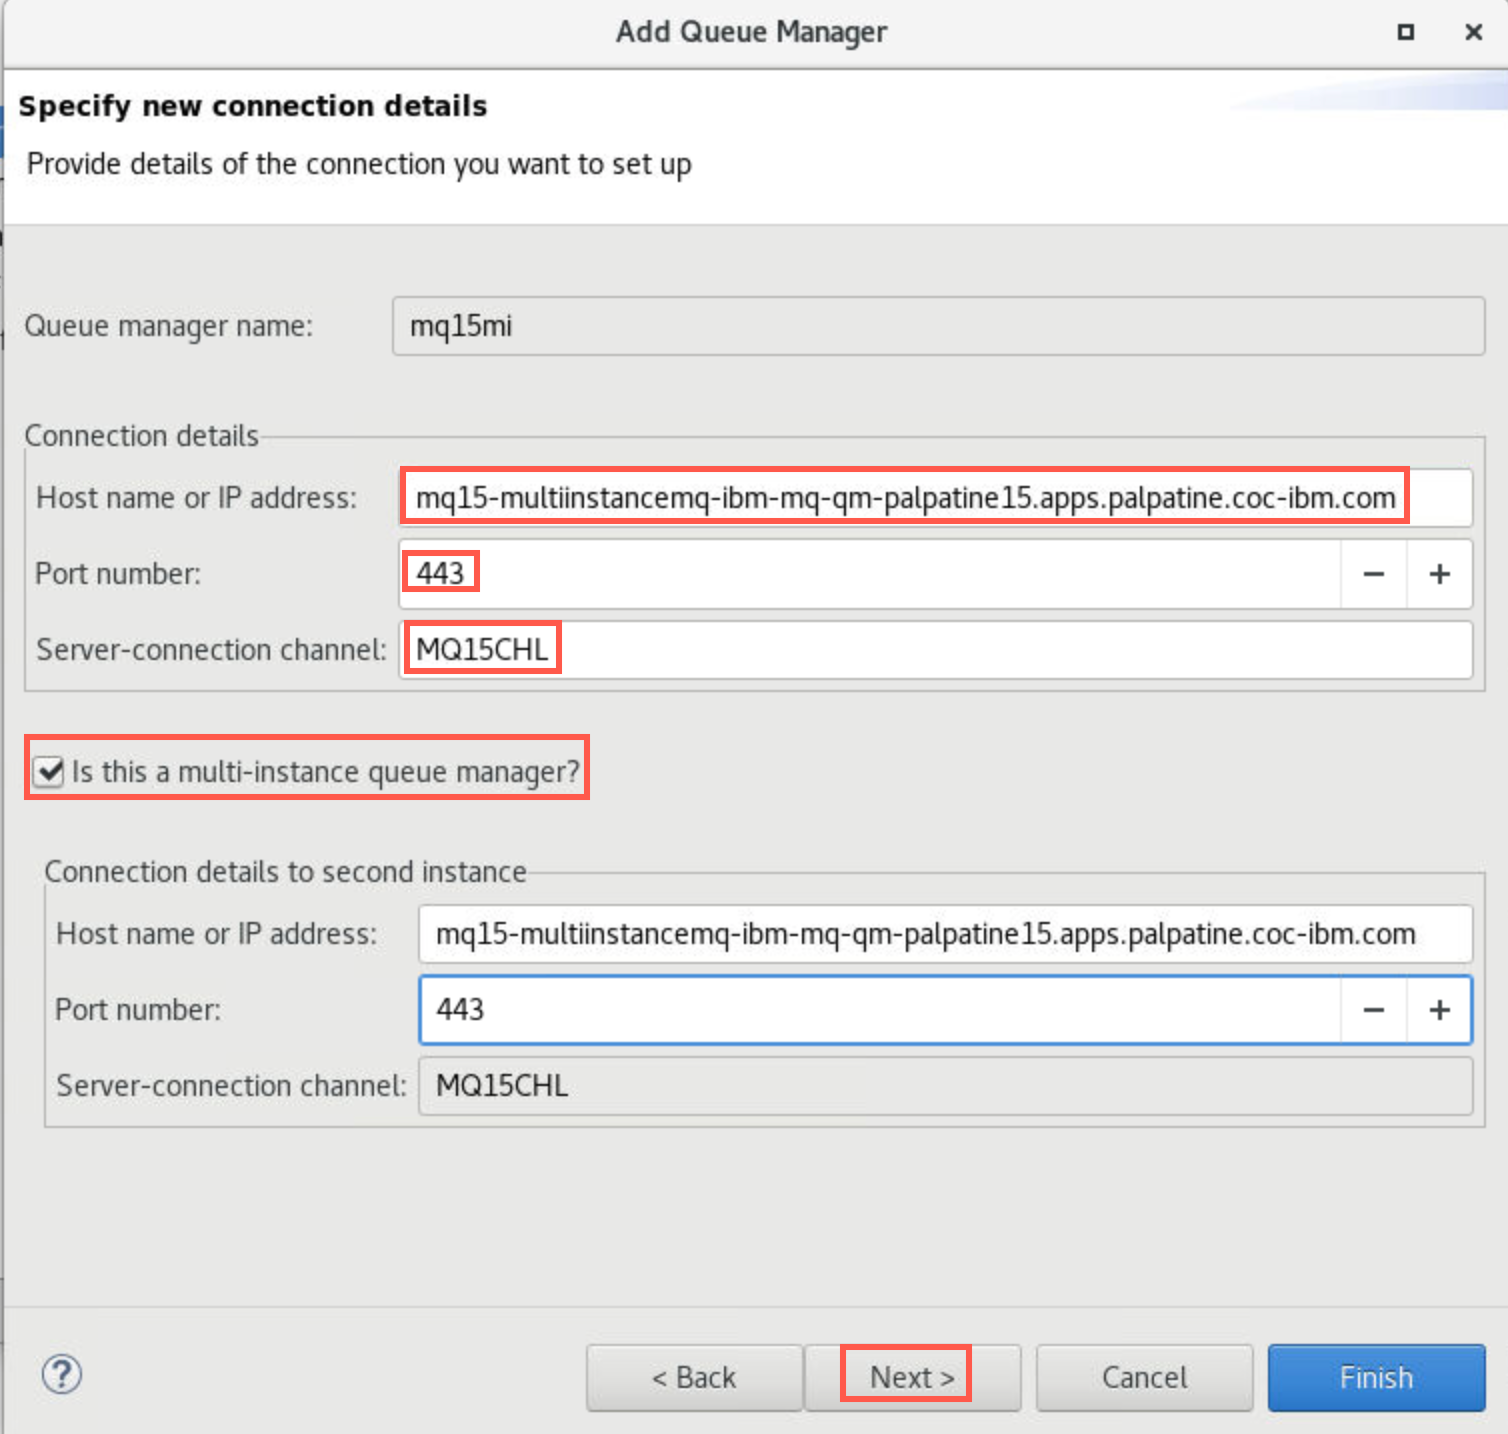
Recall the values from the ccdt.json file you previously updated. Enter the value from the host: field in the Host name of IP address. This was the URL of the Router Canonical Host from the route. Enter 443 for the Port number. Enter your SVRCONN channel name in the Server-connection channel field. Click the checkbox for Multi-instance queue manager. Enter the same details for the second instance. Click Next three times.
-
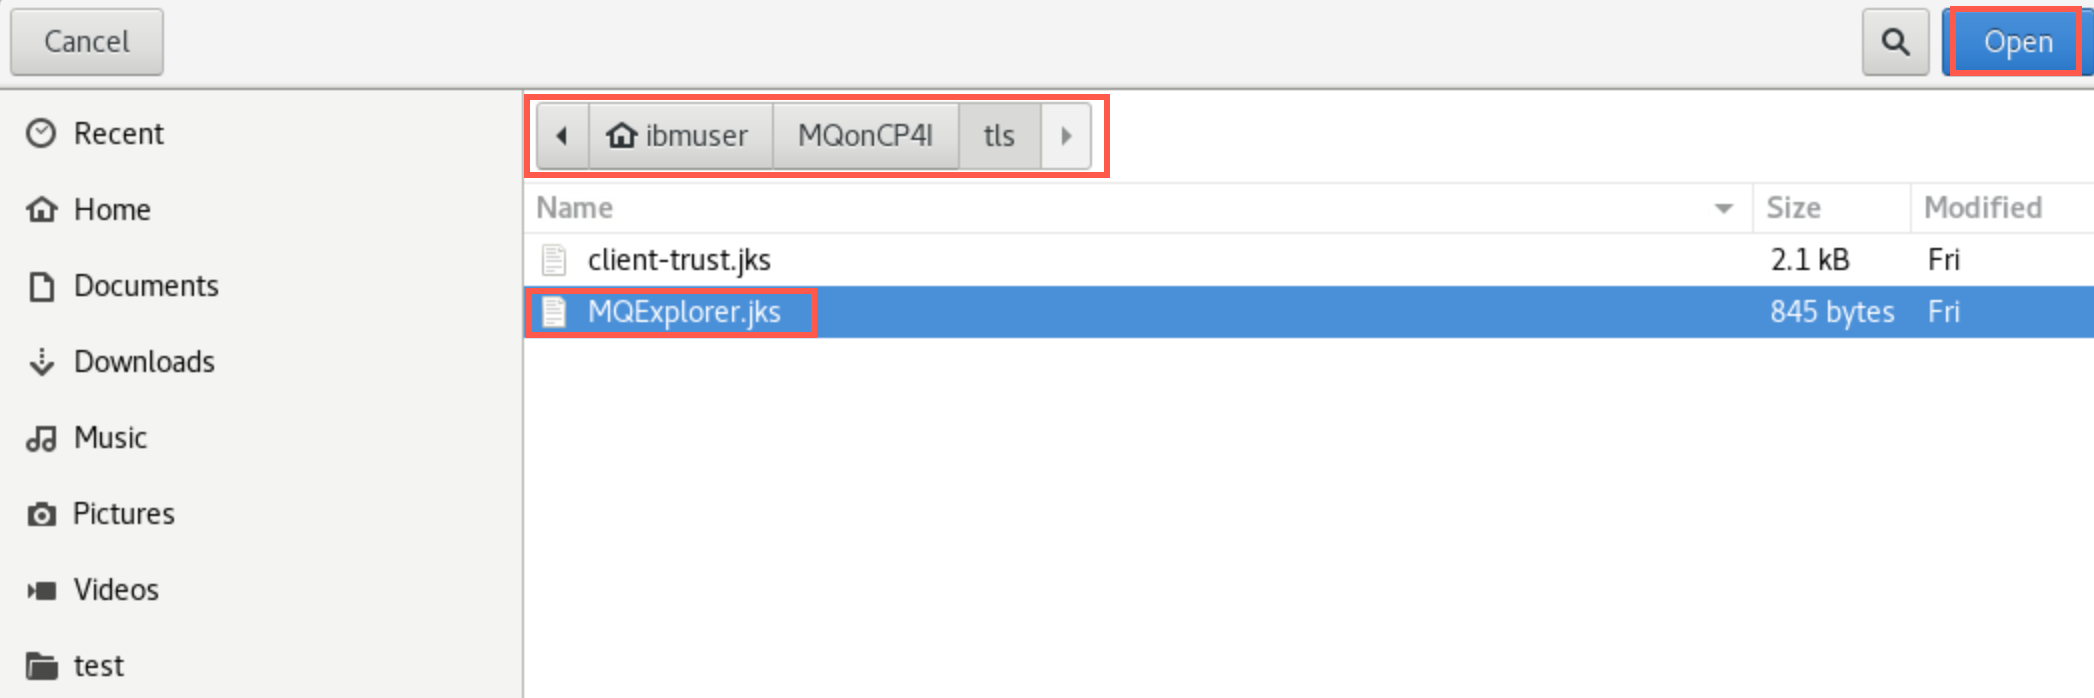
Click the checkbox for Enable SSL key repositories. Click Browse and navigate to /home/ibmuser/MQonCP4I/tls and select MQExplorer.jks. Then click Open.
-
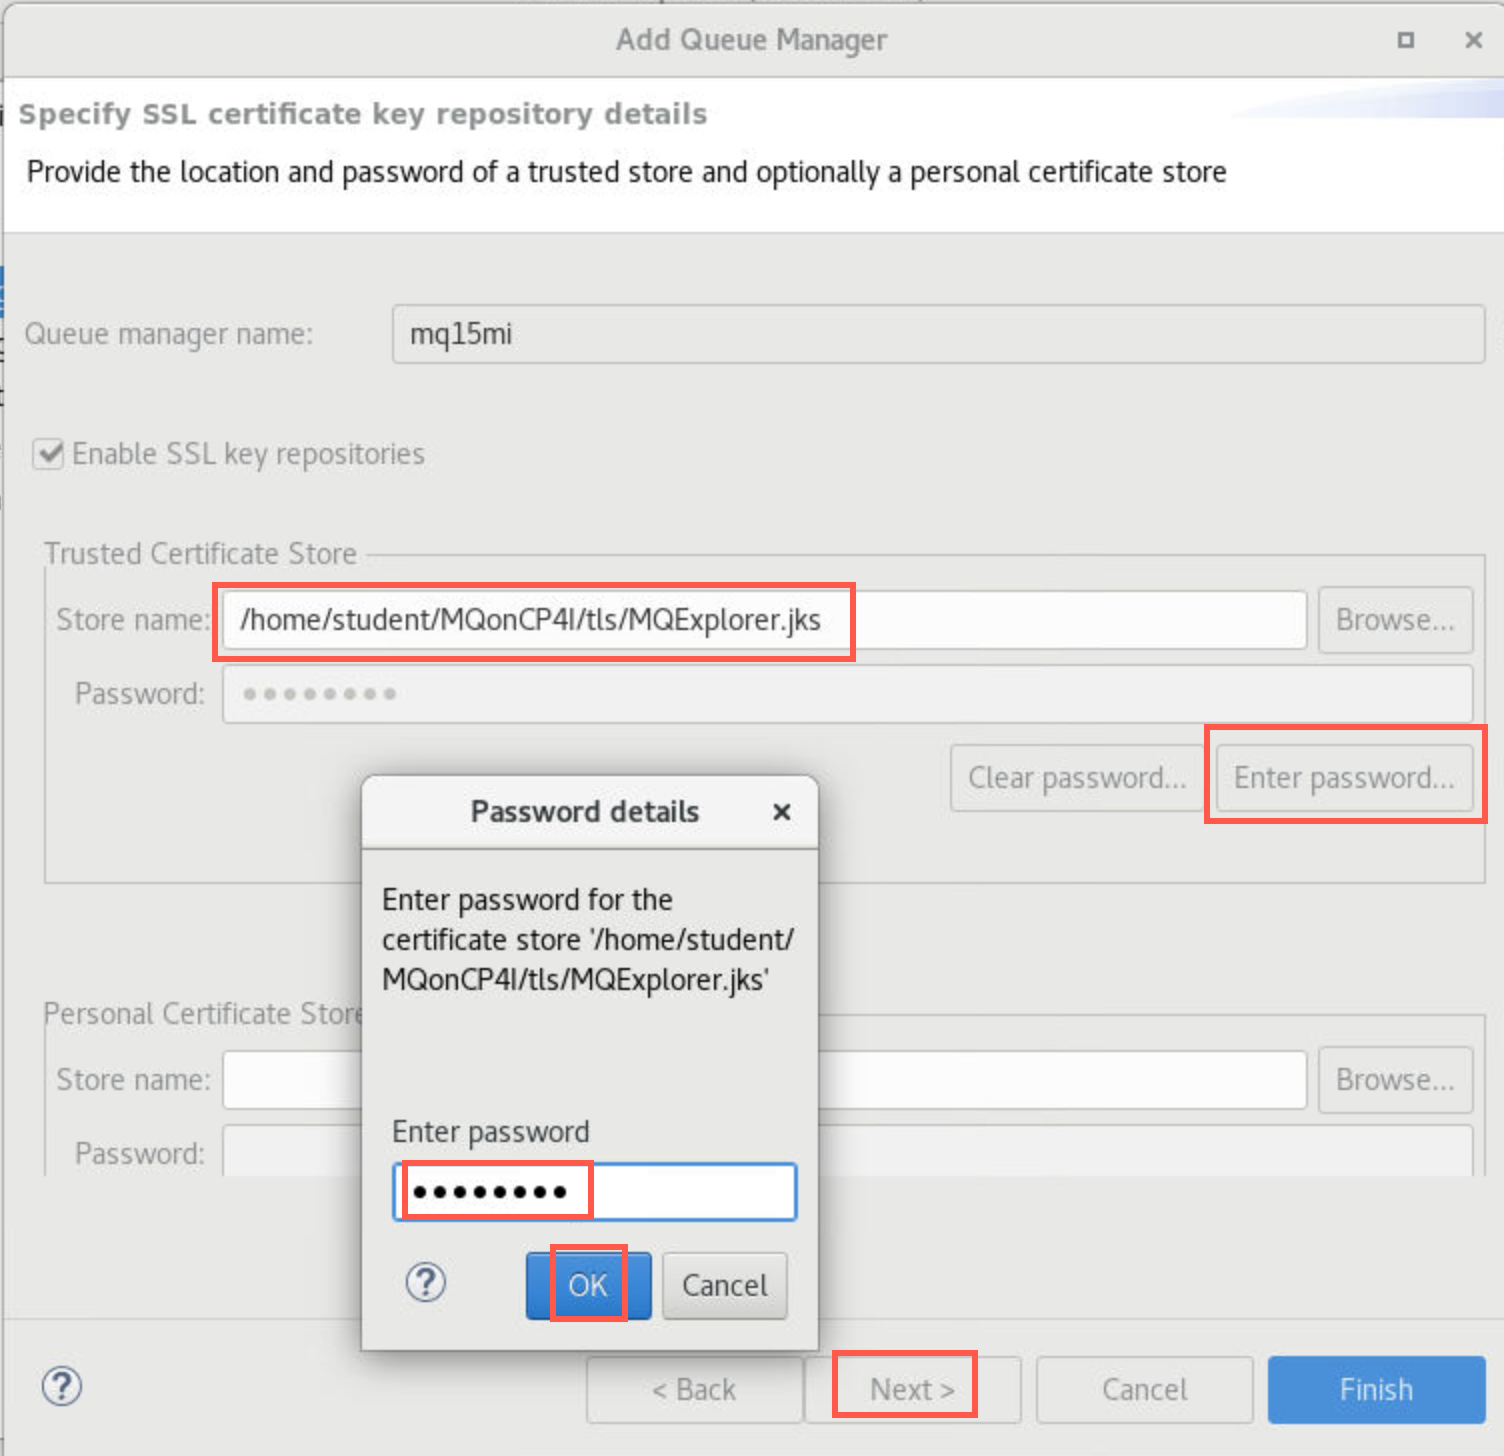
Click the Enter password button and enter password. Click OK then Next.
-
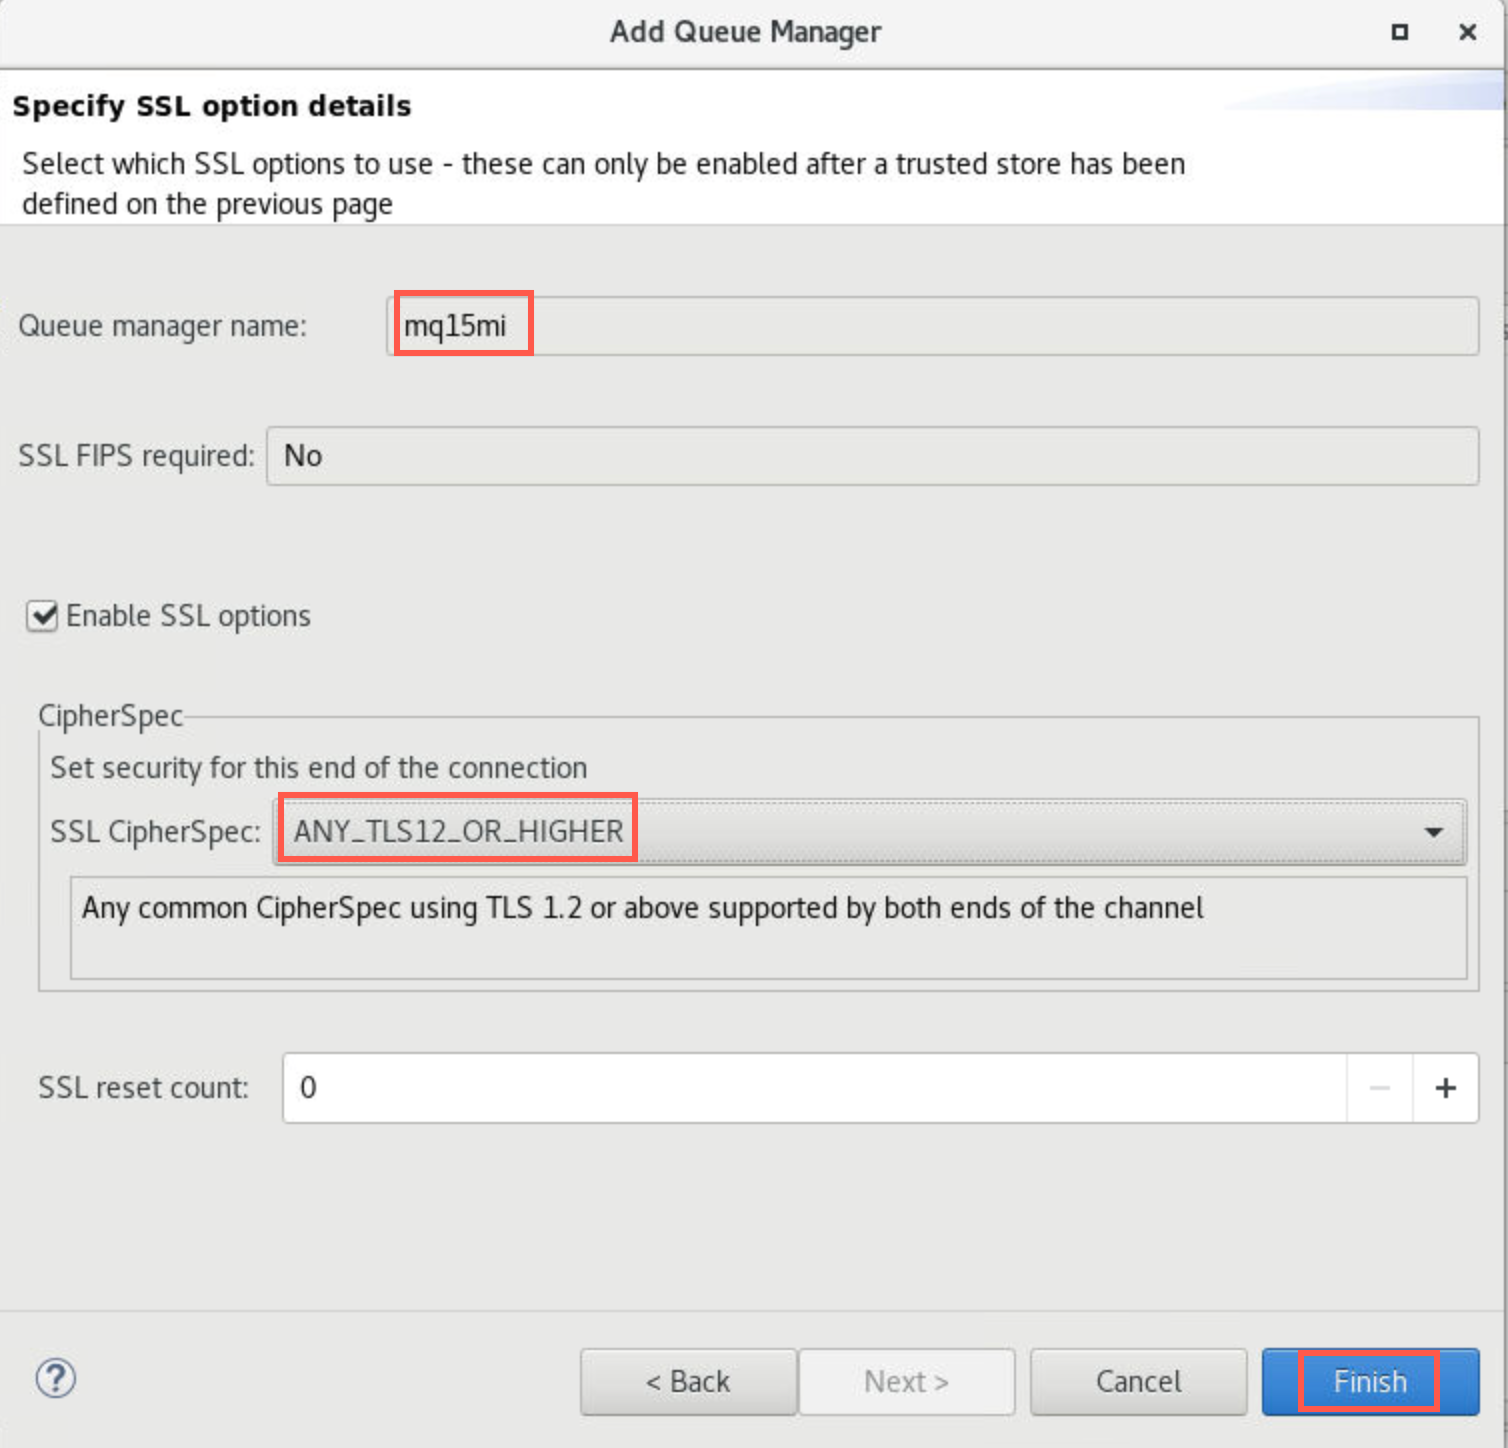
On the next screen click the checkbox for Enable SSL options. Click the drop-down next to SSL CipherSpec and select ANY_TLS12_OR_HIGHER.
-
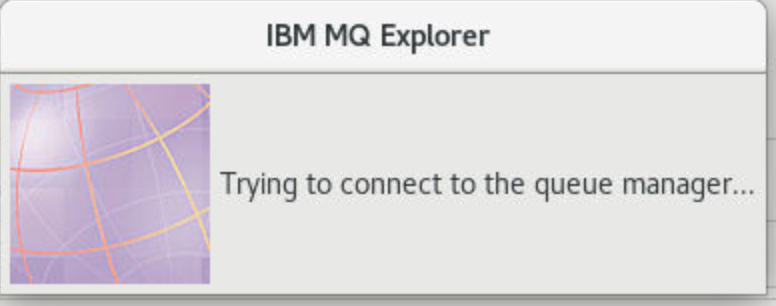
Click Finish. You will get a pop-up saying “Trying to connect to the queue manager”.
-
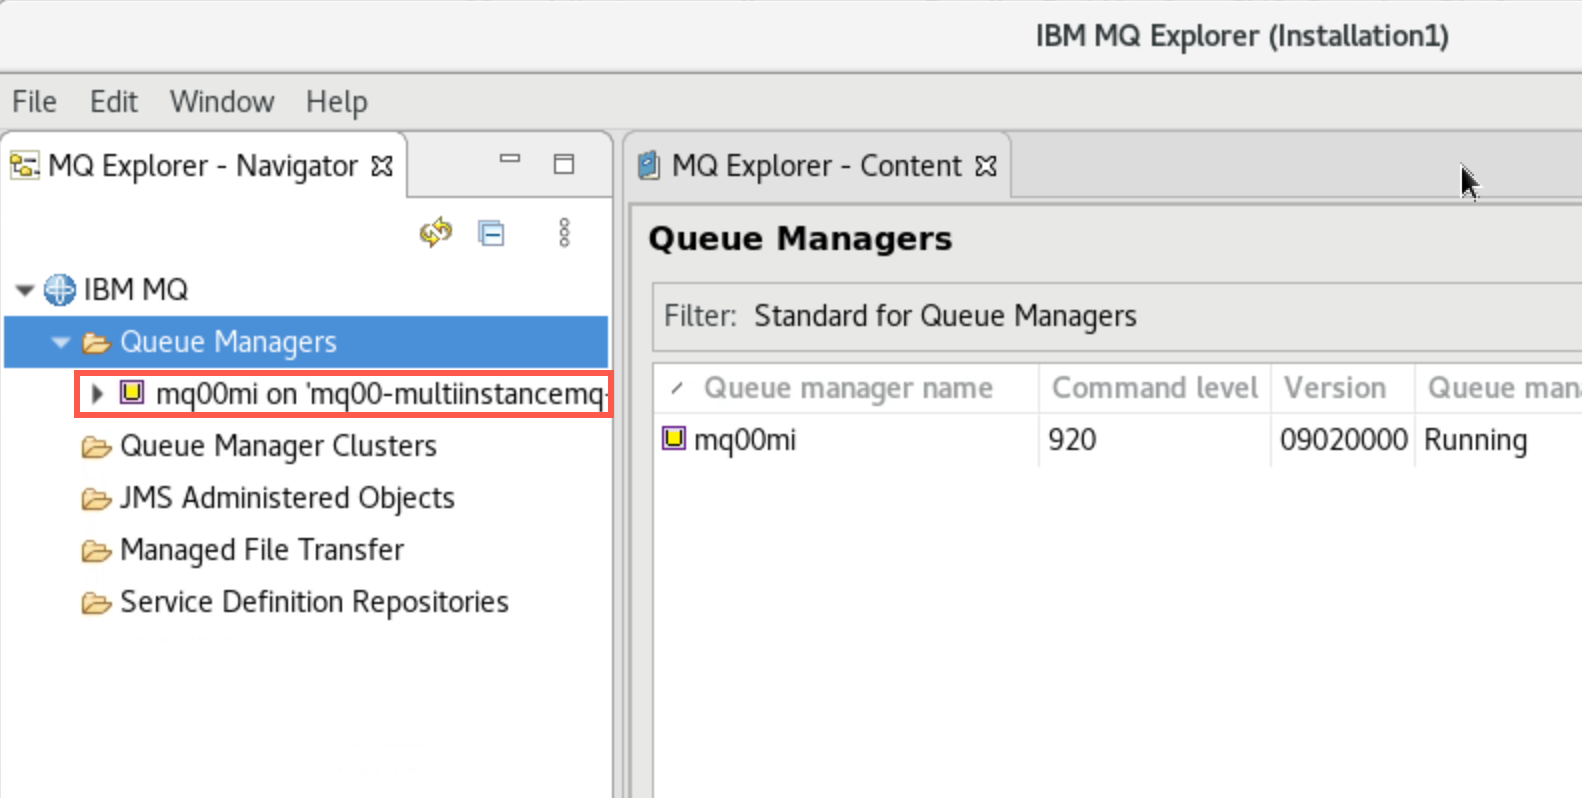
After a few seconds you see that MQ Explorer has connected. The Queue Manager will be added and shown in the navigator.
-
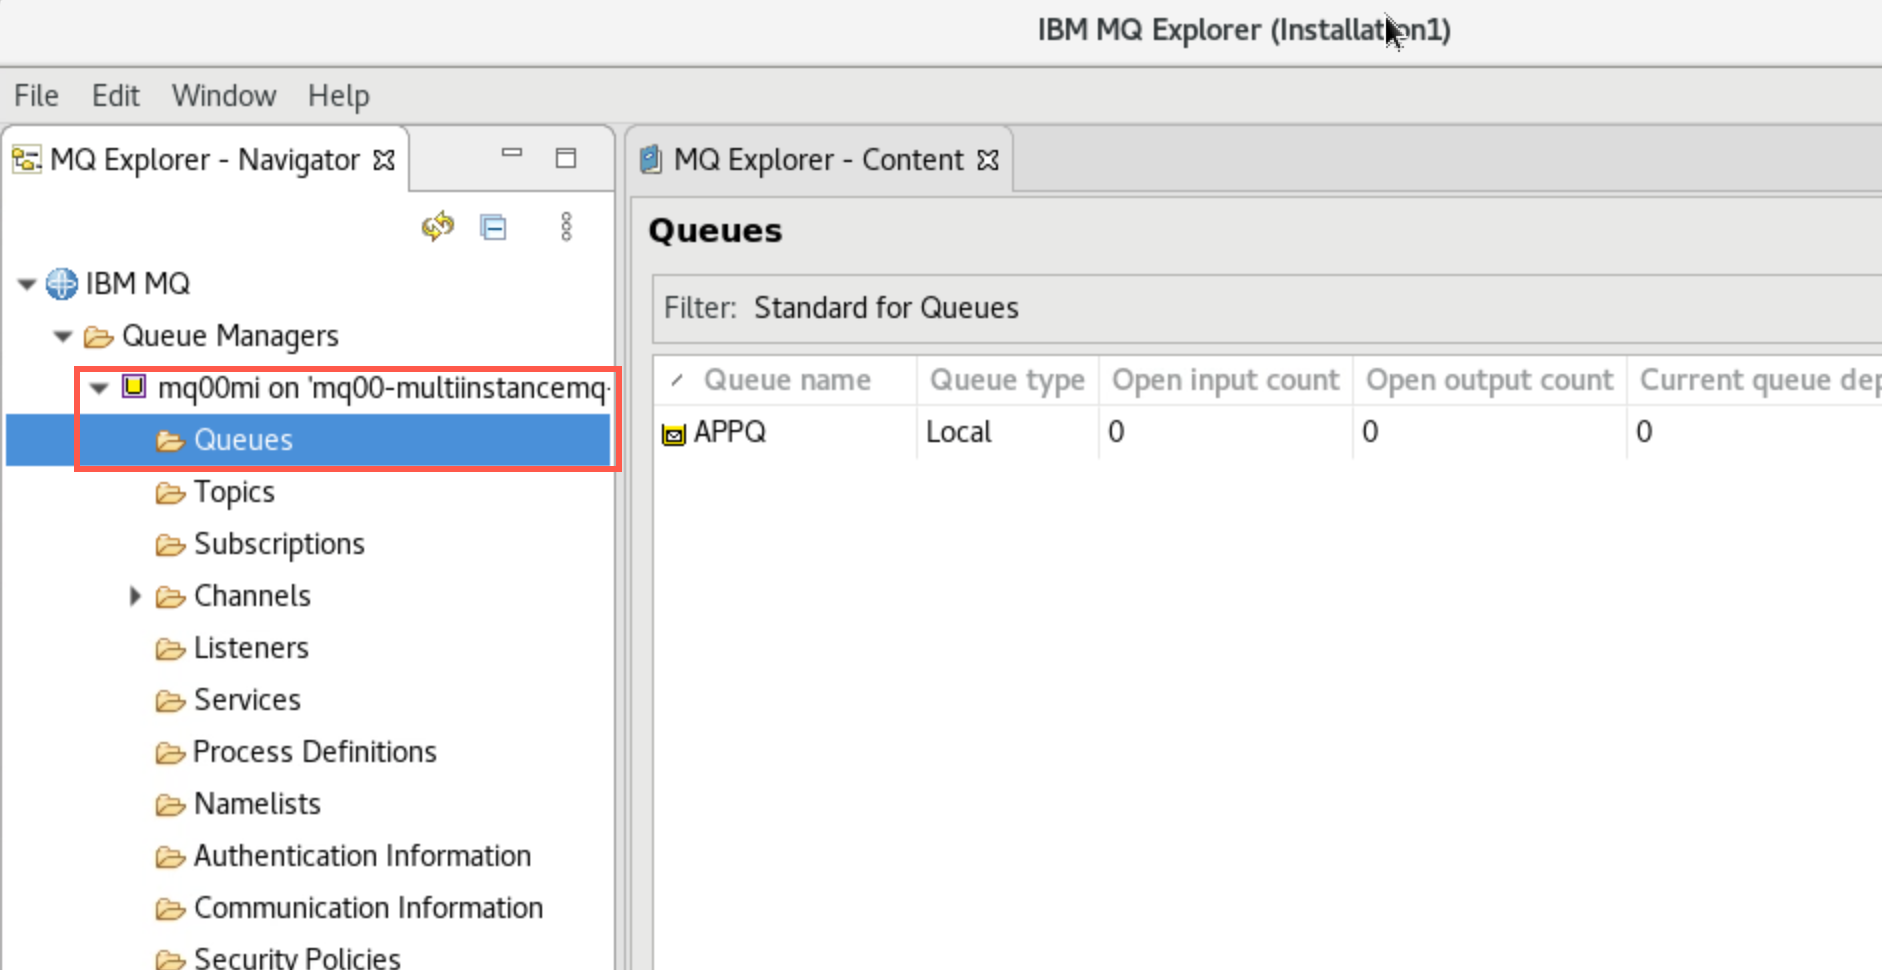
Operate MQ Explorer as you normally would. Expand the queue manager and “explore” MQ looking at queues, channels, etc.
-
When done “exploring” you may close MQ Explorer.
Cleanup
If you are doing this lab during the MQ on CP4I POT you should complete the cleanup to conserve resources on the cluster.
If you are an IBMer running the lab on your ROKS cluster it is up to you whether you want to leave this queue manager for demo purposes. If not then you should complete the cleanup.
-
Close all the applications and terminal windows.
-
In a new terminal, navigate to /home/student/MQonCP4I/streamq/deploy:
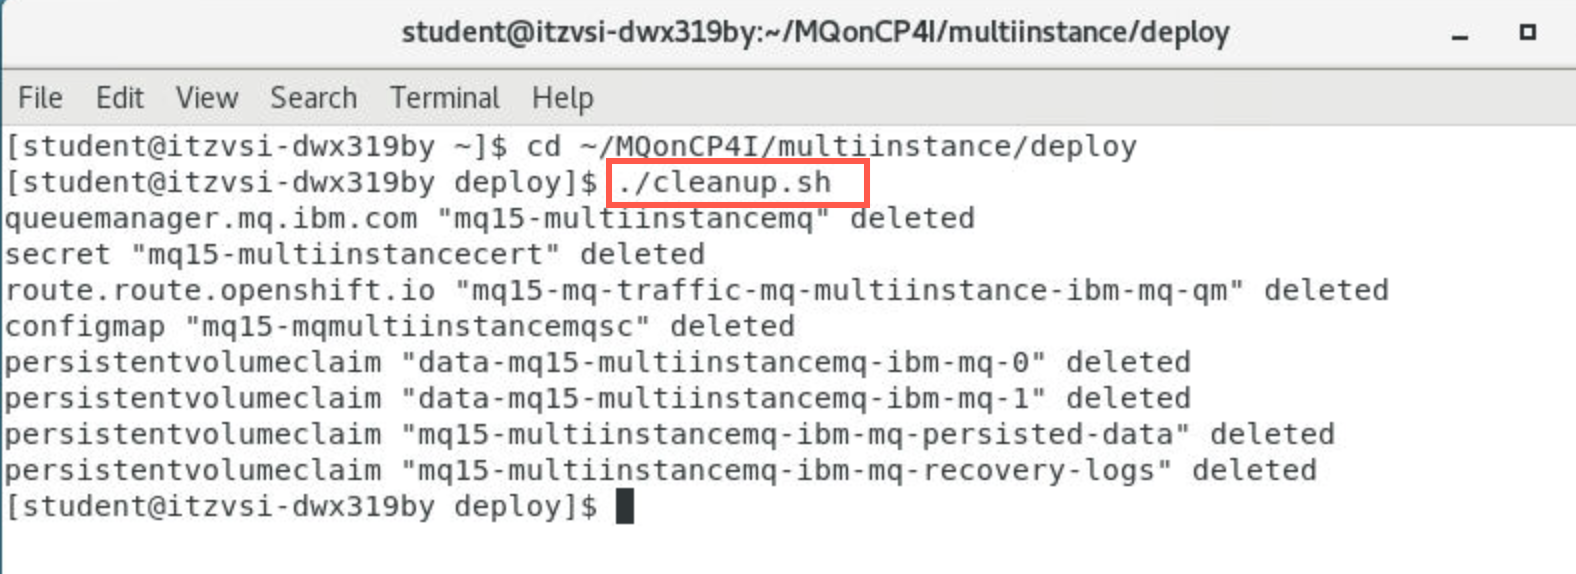
cd ~/MQonCP4I/multiinstance/deployYou should have updated the cleanup.sh script earlier in the lab. Run it now to delete the multiinstance queue manager.
./cleanup.sh