Installing IBM Event Streams on IBM Cloud Private
In this lab exercise you will complete the installation of IBM Event Streams on an existing IBM Cloud Private instance.
Step 1: Access the Lab Environment in Skytap
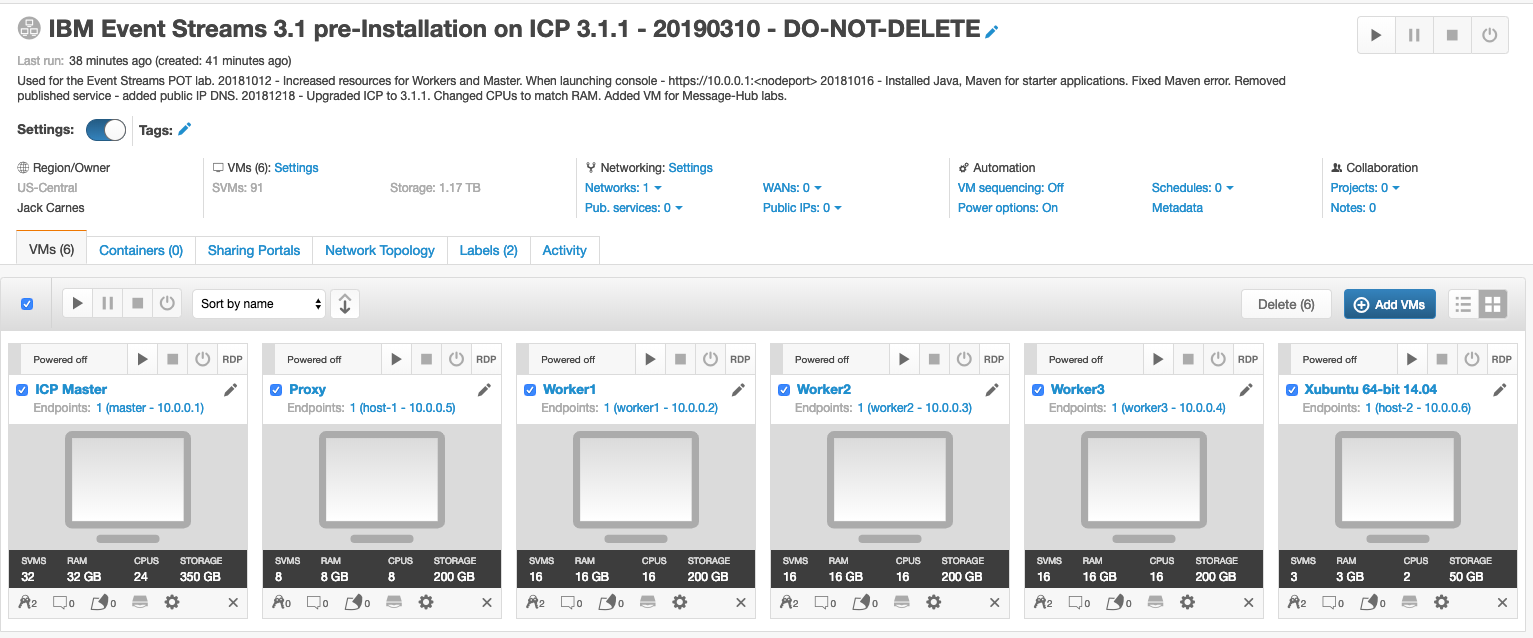
You should have already received a Skytap URL from an instructor. Open a browser and navigate to the URL, which will open the Skytap environment. The Skytap lab environment for the PoT should look similar to the screen shot shown below. There are a number of of VMWare images in this Environment. For this lab you will be using the Ubuntu 64-bit 16.04 virtual machines configured in an IBM Cloud Private cluster.
Start the Virtual Machines
-
Click the run button as shown below to start the virtual machine environment that will be used for this lab.
-
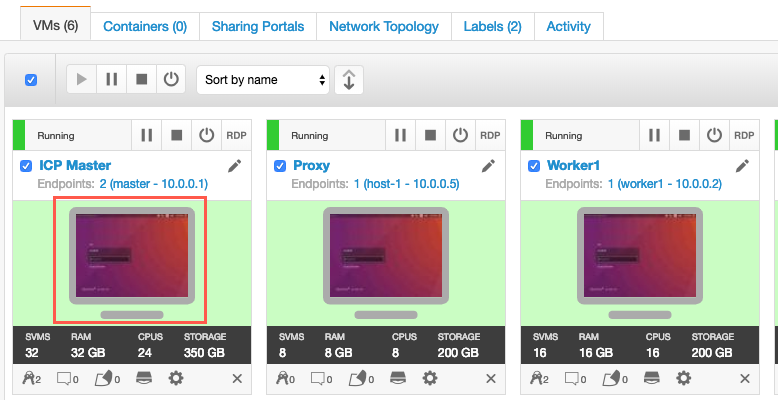
Once the virtual machine has started click on the ICP Master screen image to launch a new browser window where you can start your lab exercise.
-
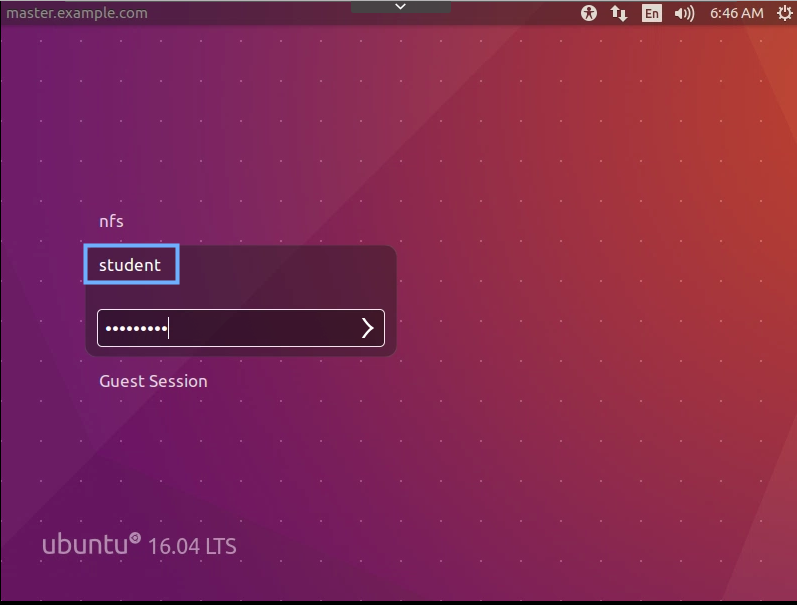
Login to the Linux desktop with userid student password Passw0rd!.
-
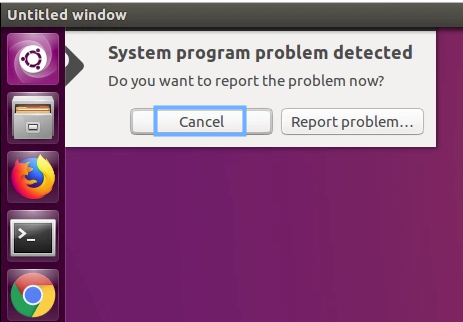
Click cancel to dismiss any pop-ups about system problems being detected. They will have no effect on the performance of your VM.
You may now proceed to begin the installation.
Step 2: Download and extract Event Streams archive
IBM Event Streams includes an IBM Cloud Private (ICP) Foundation for installing ICP or can be installed on top an existing ICP instance. Installing ICP is a long and complex process, too long for a lab exercise. So we have provided the Skytap template with ICP already installed.
Create a namespace in ICP
-
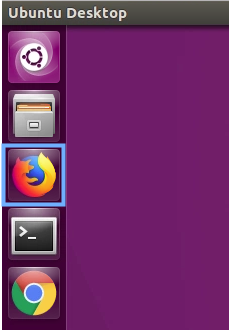
Open the Firefox browser by double-clicking its icon on the left toolbar.
-
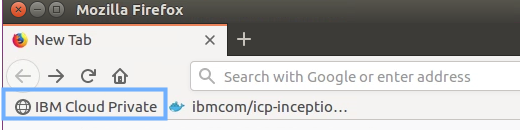
Click the bookmark for IBM Cloud Private.
-
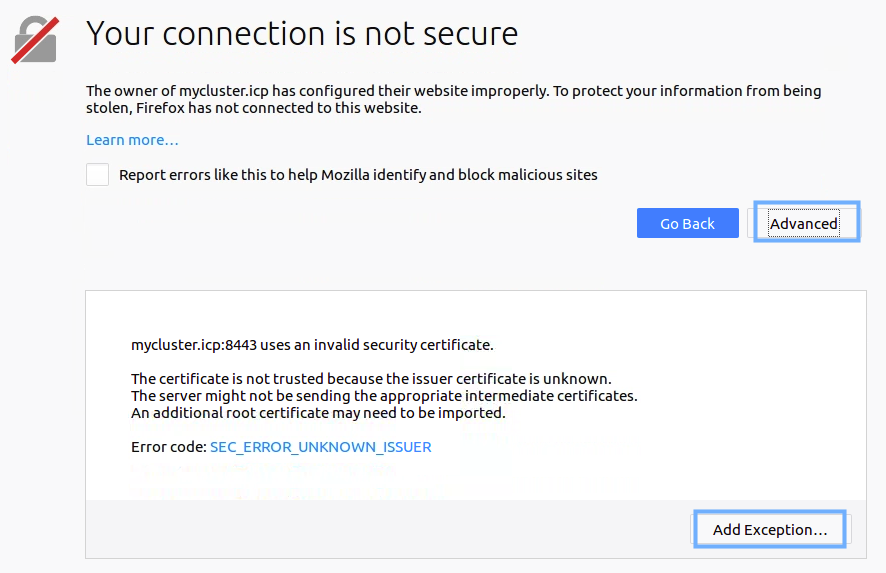
Click Advanced when prompted with an insecure connection prompt. Then click Add Exception….
-
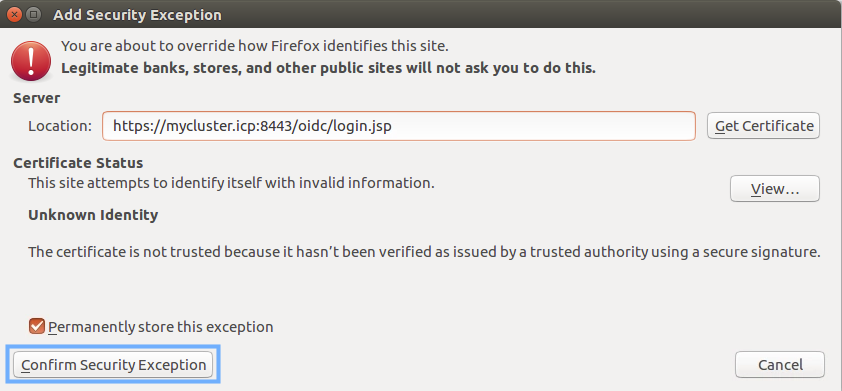
Click Confirm Security Exception on the “Add Security Exception” panel.
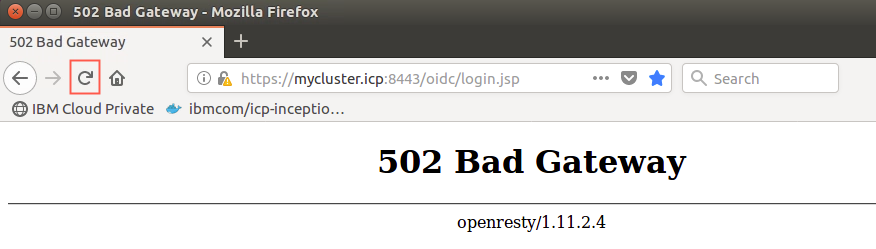
If you receive a “502 Bad Gateway” message, all the necessary ICP components are not ready. Wait a few moments and try again by reloading the page.
-
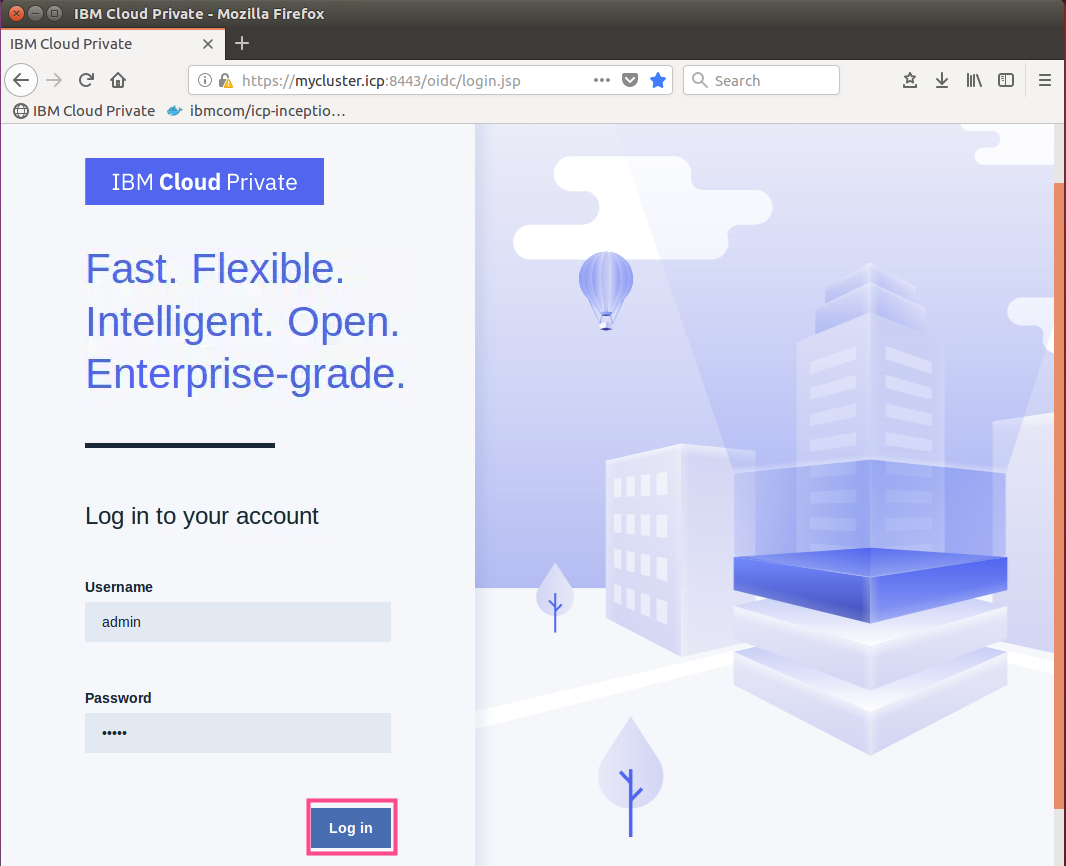
You will arrive at the IBM Cloud Private login panel. The userid and password should be prepopulated with admin/admin. Click Log in.
-
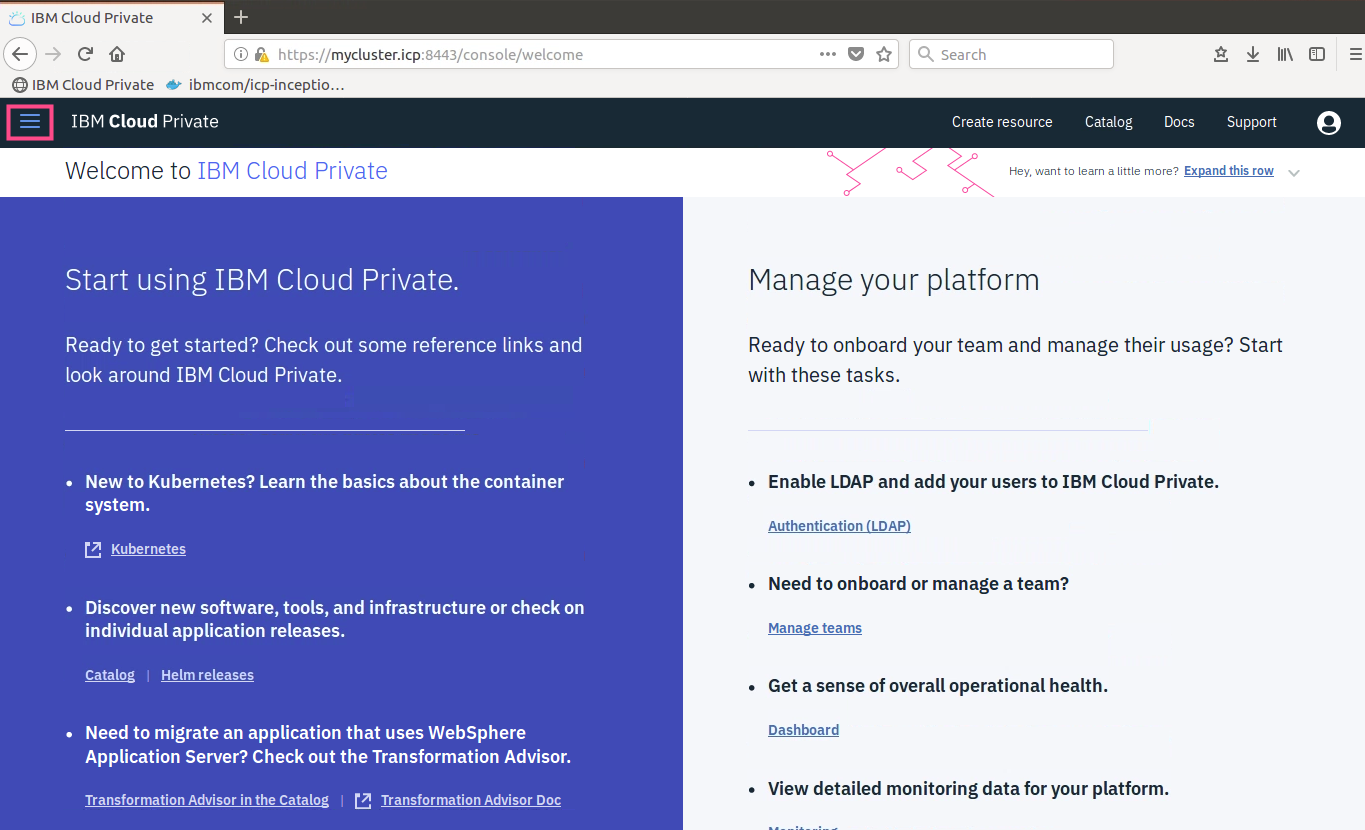
At the Welcome panel, click the “hamburger” menu to get a pull-down menu.
-
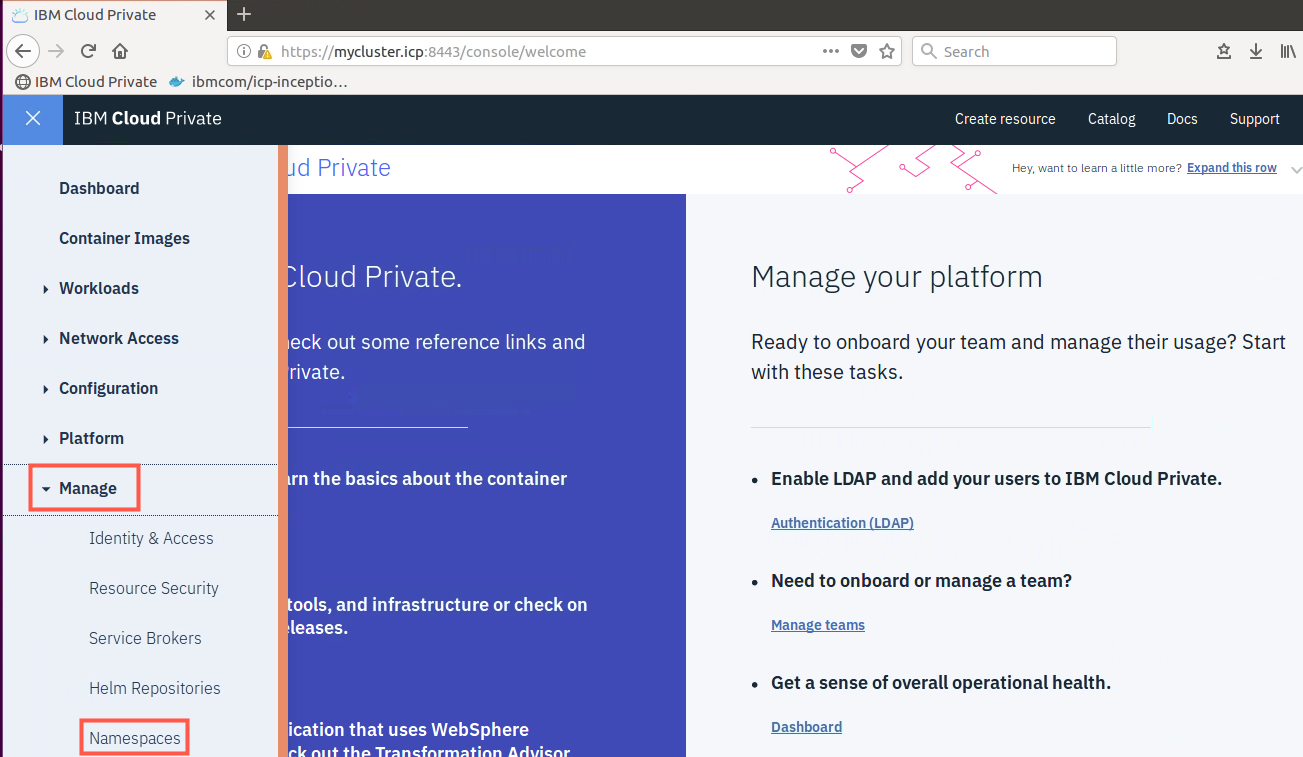
Click Manage > Namespaces.
-
On the Namespaces panel, click Create Namespace.
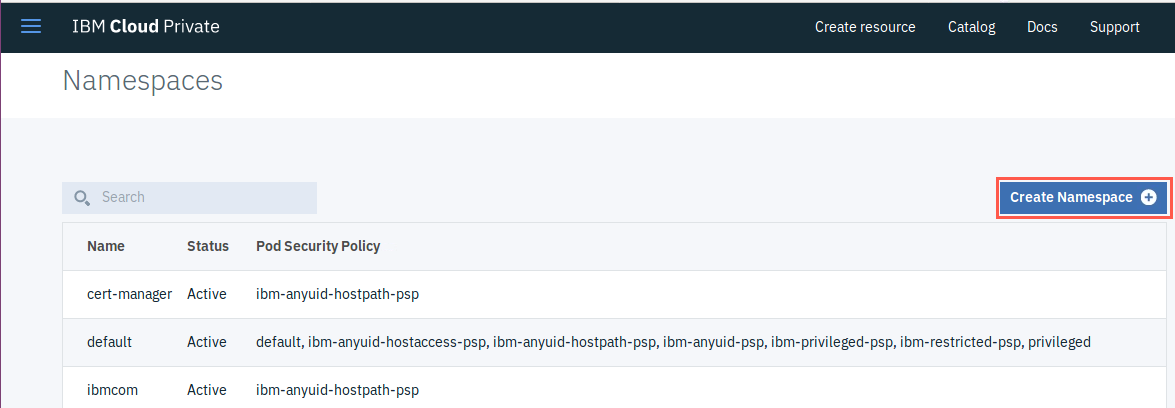
-
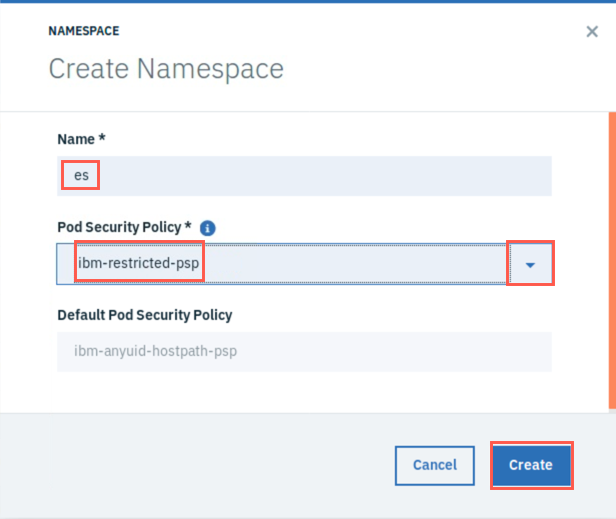
Enter a name of your liking in lower case. For this lab enter “es” for the Namespace. Click the pull-down for Pod Security Policy and select ibm-restricted-psp. Click Create.
-
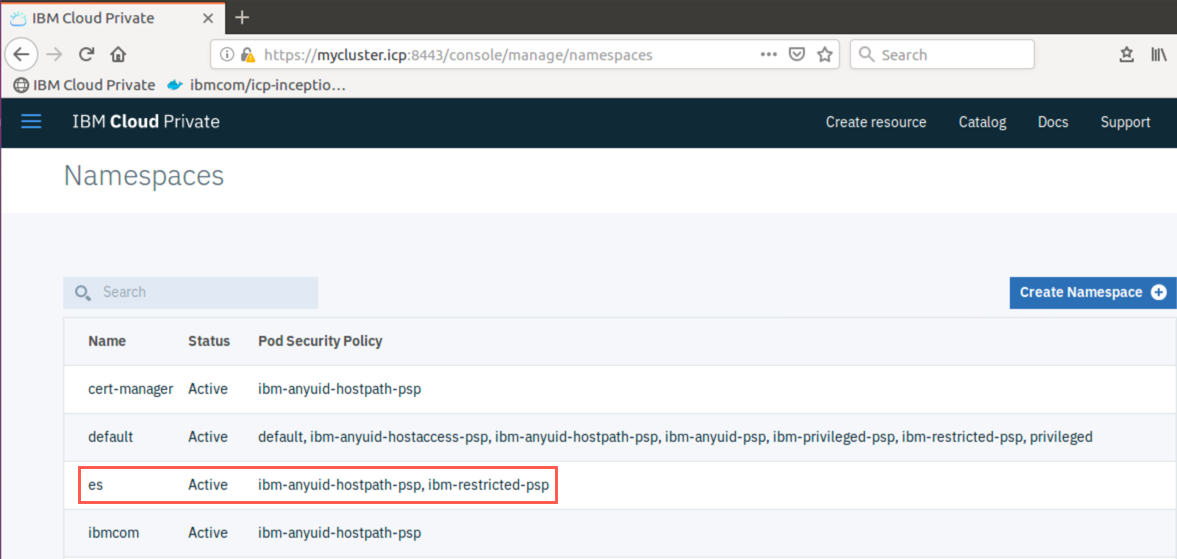
Your namespace now appears in the list of Namespaces and shows Active.
 Note:
Note:
At any time that the browser window is not painted and appears blank, you may need to reload the page.
Extract and load Event Streams archive
-
In order to install IBM Event Streams Helm charts on IBM Cloud Private, you must first download and install the IBM Event Streams archive. The installation archive has already been downloaded for you on the Skytap environment so you can now start the installation.
-
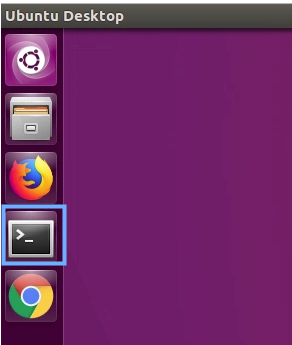
Open a command terminal by clicking its icon on the left toolbar.
-
Before running kubectl commands you must log in to your IBM Cloud Private cluster as an administrator using the CLI as follows:
sudo cloudctl login -a https://10.0.0.1:8443 --skip-ssl-validationwhere:
- -a is the address of the ICP master node
- 8443 is the default port for ICP
Note:
Most command line commands in ICP and Event Streams require root access, so use sudo when entering commands. -
Since you are using sudo for root access you will be prompted for your (student) passw0rd = Passw0rd!.
-
Next you are asked to authenticate to ICP with the user/password = admin/admin.
-
If prompted for an account, enter 1 as it is the only one available.
-
Select your Namespace - 3. You are authenticated and kubectl is configured.
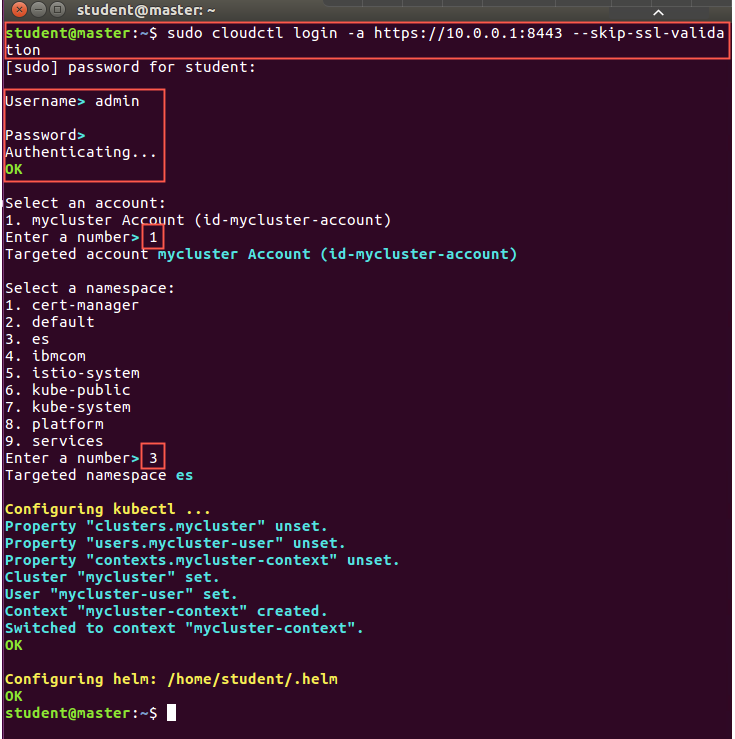
-
As well as kubectl, you need to log in to Docker also. Enter the following command to log in:
sudo docker login mycluster.icp:8500where:
- mycluster.ICP:8500 is the address and port for Docker on your ICP instance
-
Again, use admin/admin for user/password.

-
At the command line, enter the following command to go to the /home/student/Downloads directory and display the contents:
 cd Downloads
 ls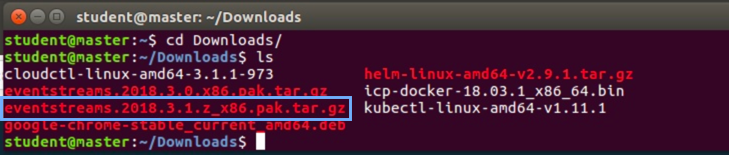
eventstreams.2018.3.1.z_x86.pak.tar.gz is the IBM Event Streams compressed installation media that was previously downloaded.
-
You install the Event Streams Helm chart by loading it into the catalog with the following command:
sudo cloudctl catalog load-archive --archive eventstreams.2018.3.1.z_x86.pak.tar.gz -
You may be prompted again for your password. If so, enter Passw0rd!.

The archive expansion starts and it will take a few minutes for it to complete. Be patient.
When the image installation completes successfully, the catalog is updated with the IBM Event Streams local chart, and the internal docker repository is polulated with the Docker images used by IBM Event Streams.
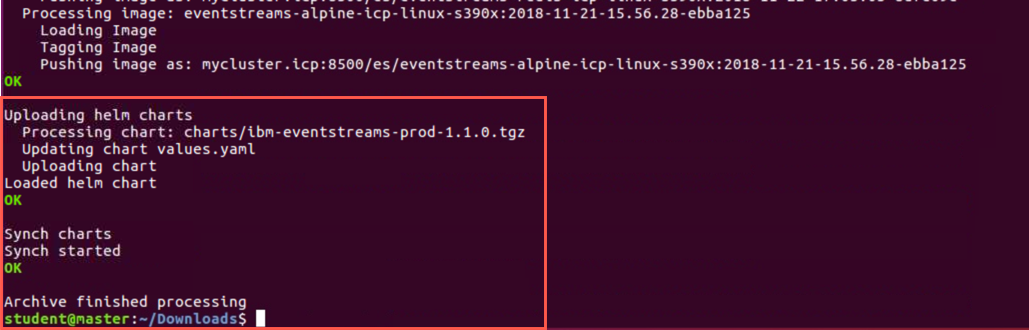
Step 3: Verify installation
-
Return to your web browser where the ICP admin window is open. Click Catalog in the toolbar at the top of the window. While you were waiting for the archive expansion, your admin window may have timed out. If so, simply log in again, then click Catalog.
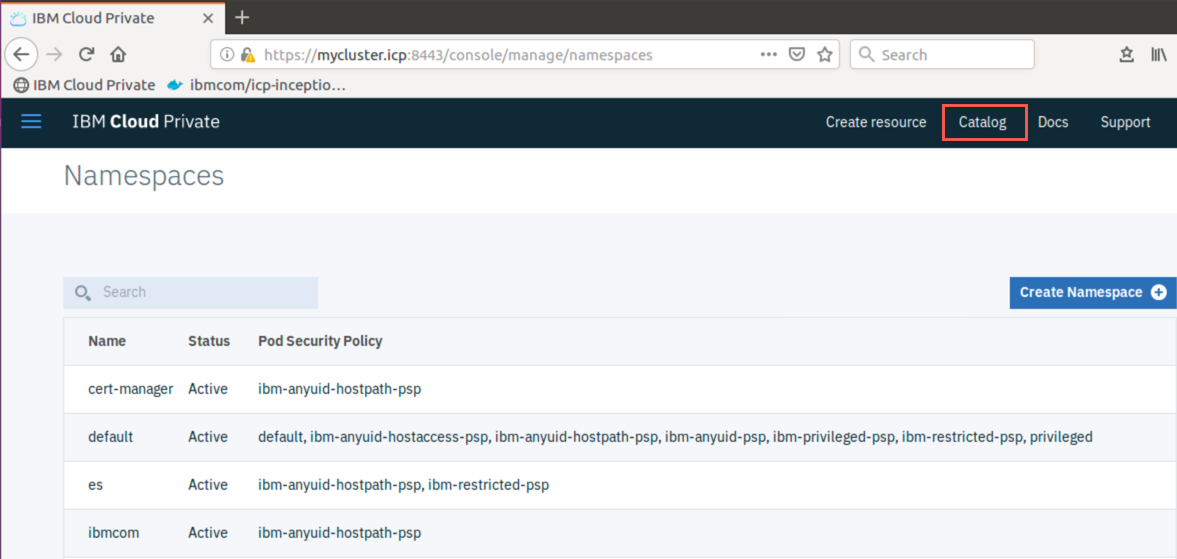
-
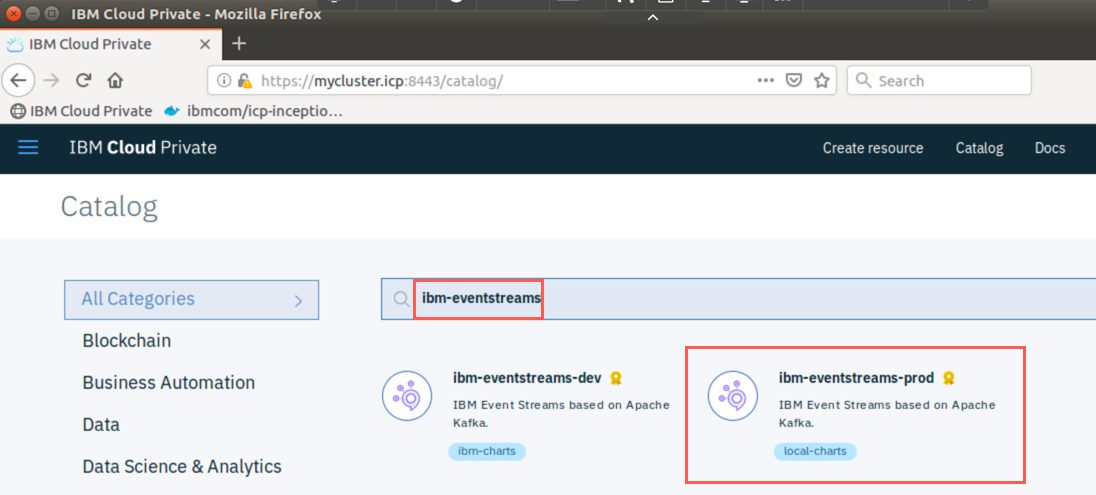
In the search bar, type in ibm-eventstreams.
-
Verify that ibm-eventstreams-prod is now in the catalog. Note that ibm-eventstreams-dev comes with ICP out-of-the-box and was already present in the catalog. The fact that ibm-eventstreams-prod now appears in the catalog verifies that your installation was successful.
Step 4: Event Streams Prerequisites
There are several prerequisites for IBM Event Streams. Those prerequisites have already been satisfied on your Skytap environment. However you may want to review them before starting the exercise.
IBM Event Streams Prerequisites
Create an image pull secret and image policy
When installing IBM Event Streams, you need to create an image pull secret for the namespace where you intend to install IBM Event Streams. The secret enables access to the internal docker repository provided by IBM Cloud Private.
-
Return to your command terminal.
-
To create a secret, enter the following command:
sudo kubectl create secret docker-registry regcred --docker-server=mycluster.icp:8500 --docker-username=admin --docker-password=admin --docker-email=john.smith@ibm.com -n eswhere:
- regcred is the name of your secret (you will use this later when installing a helm chart)
- mycluster.icp is the server name of your ICP cluster
- use your own personal email
- -n is the name of your Namespace = es
 Note:
Note:
Most command line commands in ICP and Event Streams require root access, so use sudo when entering commands.
Create an image policy
When installing IBM Event Streams you also need to create an image policy for the internal docker repository. The policy enables images to be retrieved during installation. To create an image policy, you need to create a *.yaml file and apply that file to your cluster.
-
In your terminal window enter the following command to create a new yaml file in your home directory:
gedit /home/student/Downloads/imgpol.yaml -
The editor window will open. Enter the following and click Save in the top right corner. Hint: Type it in, do not copy / paste. Make sure that apiVersion and kind are aligned.
 apiVersion: securityenforcement.admission.cloud.ibm.com/v1beta1
 kind: ImagePolicy
 metadata:
  name: image-policy
  namespace: es
 spec:
  repositories:
  - name: docker.io/*
    policy: null
  - name: mycluster.icp:8500/*
    policy: null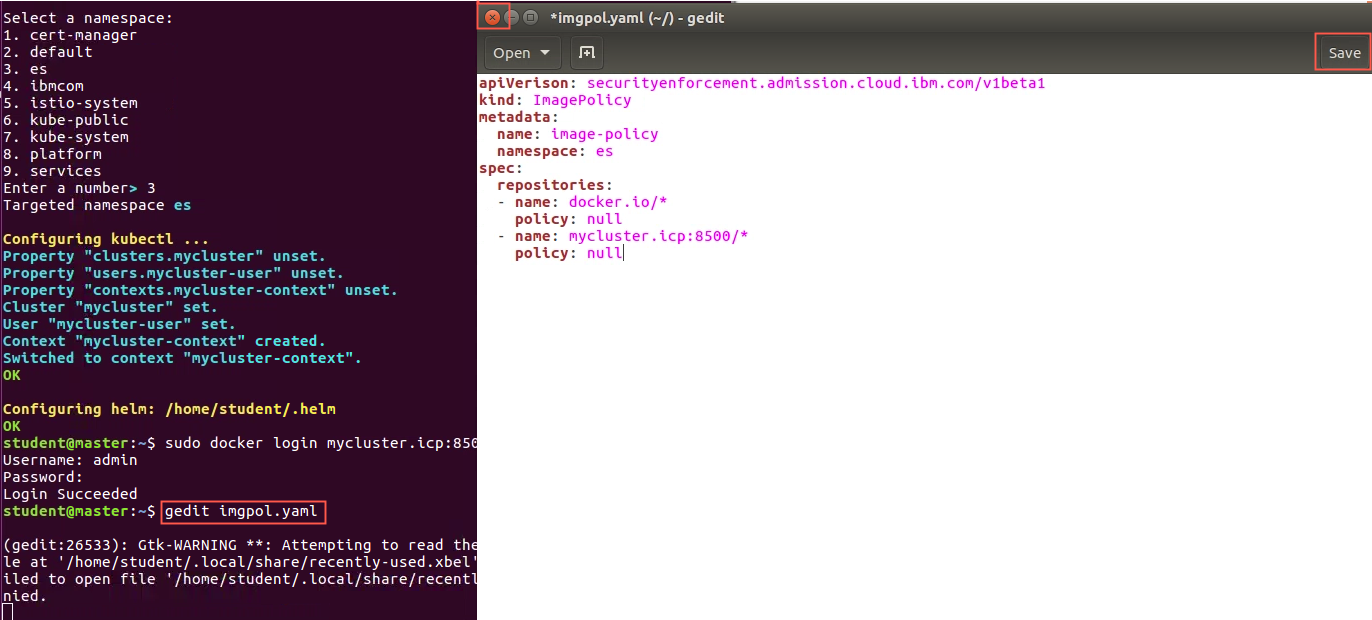
-
Close the editor by clicking the “X” in the top left corner.
-
Run the following command to apply the image policy with the yaml file you just created:
sudo kubectl apply -f imgpol.yamlwhere:
- -f indicates a file
- imgpol.yaml contains the source for the policy
Congratulations
You are now ready to install your Helm releases.