Lab Introduction
Base topology with separate coordination queue manager and one partner agent
In the base topology in the following figure, on the base server, queue manager MFT4 is shared for the command and agent roles, and queue manager MFT5 is dedicated to the coordination queue manager role.
Connectivity must exist across all queue managers in the topology, including queue managers in the base topology, MFT4 and MFT5.
On the partner server queue manager, queue manager CSM1 has the roles of agent and commands queue manager.
This topology can exchange files between the two agents. Each partner agent must connect to a queue manager, as shown in the diagram. Extra partner agents can be added in a similar way, to the way that the first partner agent was added.
The double-sided arrows in each diagram represent connections to the queue manager.
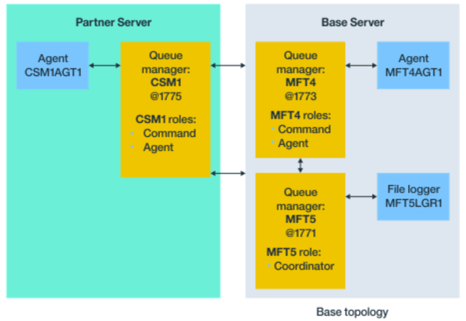
In the preceding diagram, each line across the agents and queue managers represents a connection to a queue manager. This connection might be:
- A local connection
- A bindings or message channel connection, or
- An IBM MQ client or MQI connection.
The type of connection you select in your configuration depends on the parameters you specify
- When you specify the queue manager name parameter without other connection parameters, you specify a bindings connection.
If the queue manager used is local to the Managed File Transfer configuration, it also represents a local connection, when used in the base configuration server.
- If you specify the queue manager name parameter, along with the corresponding host, port, and channel name parameters, you specify an IBM MQ client connection.
When agents are located on the same host as the agent queue manager, a bindings type specification, which results in a local connection, is more efficient.
To review other common Managed File Transfer topologies, click here:
IBM® MQ Managed File Transfer (MFT) provides a set of properties files that contain key information about your setup and are required for operation. These properties files are located in the configuration directory that was defined during product installation.
You can have multiple sets of configuration options. Each set of configuration options contains a set of directories and properties files. The values defined in these properties files are used as the default parameters for all WebSphere MQ Managed File Transfer commands, unless you explicitly specify a different value on the command line.
Configuring MFT Environment
The following have been done for you to prepare the environment:
-
Reviewed the section Connectivity considerations and understand how to influence the type of connection to queue managers in the configuration.
-
A working IBM® MQ infrastructure. See Configuring IBM MQ queue managers for information on setting up queue managers.
-
IBM MQ security tasks are completed. All system resources, such as access to files, are configured with adequate security.
For Managed File Transfer security configuration, refer to Security overview for Managed File Transfer and User authorities on Managed File Transfer actions.
-
All IBM MQ connections are tested after IBM MQ is configured by either using a sample program to send and receive messages, or using sample amqscnxc to test IBM MQ client type connections. The amqscnxc sample connects to a queue manager by defining the channel connection in the sample code, which is similar to the way that Managed File Transfer connects, when it uses an MQI or IBM MQ client type connection.
-
The instructions assume that the server you use for the base configuration has one IBM MQ version installed. If you have multiple IBM MQ installations in the base server, you must be careful to use the correct file path for the version of IBM MQ you want to use.
-
The queue managers used in these instructions do not require connection authentication. While it might be simpler to complete your first configuration without connection authentication required, if your enterprise requires immediate use of connection authentication, see Managed File Transfer and IBM MQ connection authentication for instructions on how to configure an MQMFTCredentials.xml credentials file.
Refer to the following diagram for the queue manager roles for this configuration:
- Base server
- Queue manager MFT5 is the coordination queue manager
- Queue manager MFT4 is used as the agent queue manager for agent MFT4AGT1, and also serves as the command queue manager for the MFT5 configuration on the base server.
- Partner server
- Queue manager CSM1 doubles as the agent queue manager for agent CSM1AGT1, and as the command queue manager for the MFT5 configuration on the partner server.
- Queue manager MFT5, on the base server, is the coordination queue manager.
Procedures
In the rest of the lab you will perform the following:
- Configure the coordination queue manager
- Configure the command queue manager
- Set up the agent
- Set up the logger
- Configure a partner server
Lab Environment
Your desktop should already be configured with VMs running. There should be two VMware images active as shown below.
Figure 1
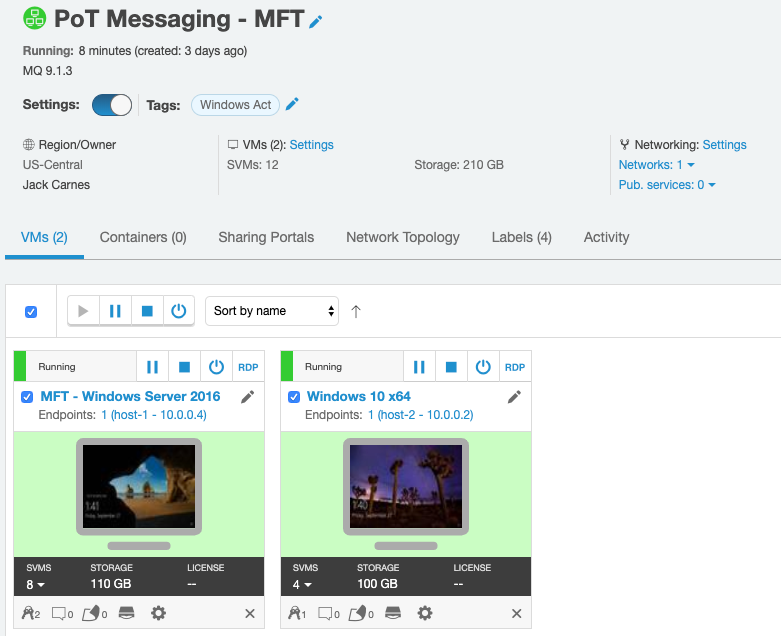
Please ask the instructor for help if your Skytap environment is not configured properly.
VMs
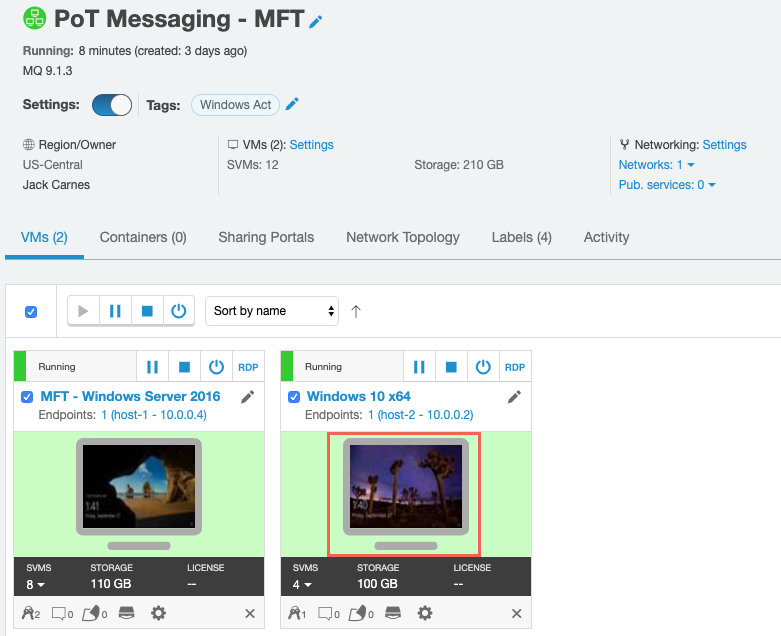
Referring to the Figure 1 and Figure 2 below, the tab labeled Windows 10 x64 is a Windows 10 system which is referred to as the “student” (Partner Server) image or the MFT Client. The tab labeled Windows Server 2016 is a Windows Server 2016 system and is referred to as the “teacher / instructor”(Base Server) image or the MFT Server.
Figure 2
Looking at Figure 1, there are a few points to understand before continuing. The teacher image is running the MFT service which would require a PVU-based license for IBM MQ Managed File Transfer. The blue boxes represent MFT Agents, which you already know perform the file transfer function. Since the teacher image is running the MFT service, there can be many agents running without any additional charge. The MFT Server also hosts the MFT coordination queue manager and MFT Logger.
Start Managed File Transfer Server – “Teacher” image
-
Start the Windows Server 2016 image if it is not started.
-
To get a desktop, click the monitor for Windows Server 2016. A new browser tab will appear with the Windows Server 2016 desktop.
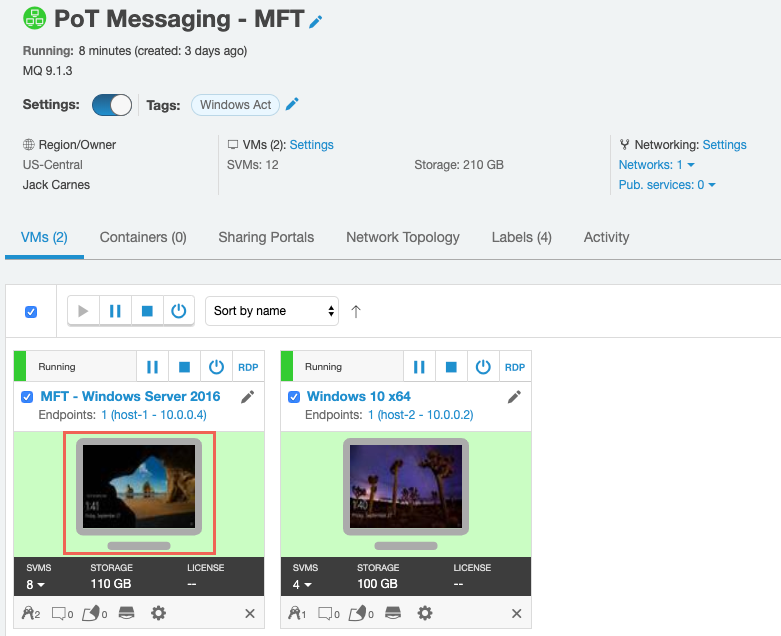
-
To log on, use CTRL + ALT + INSERT from the pull down menu.
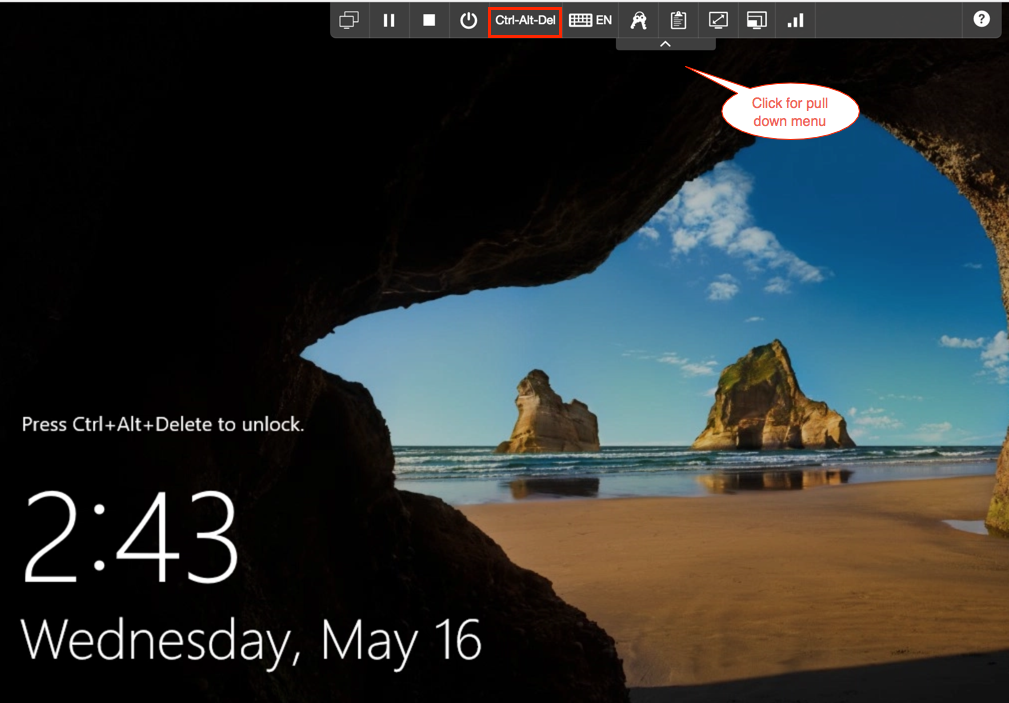
-
You will be logging on as ibmdemo. Enter MQpot2017 for ibmdemo’s password (case sensitive) and hit enter or click the blue arrow.
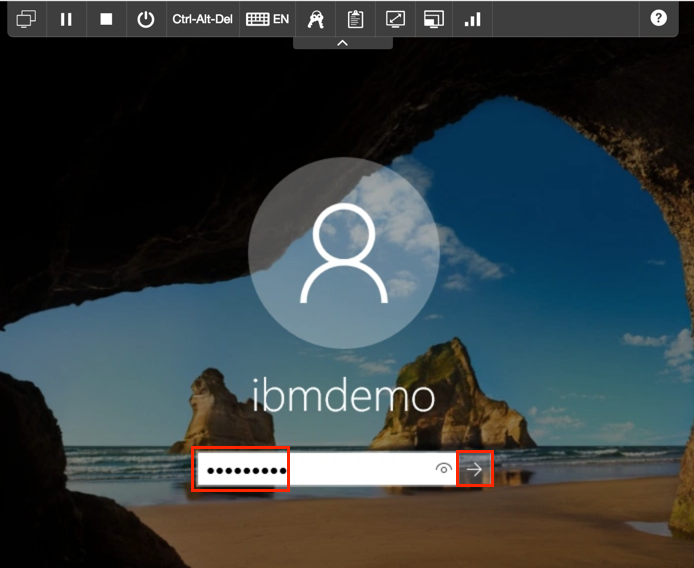
Click the pull down arrow again to hide the Skytap menu.
-
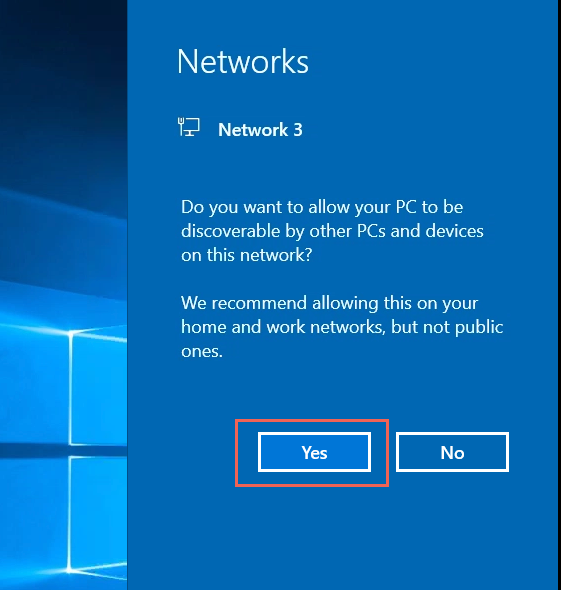
If you receive a pop-up about Networks, click Yes.
-
If you receive a Docker error pop-up just click OK. Docker is no longer supported on this platform and is not needed for this lab.
-
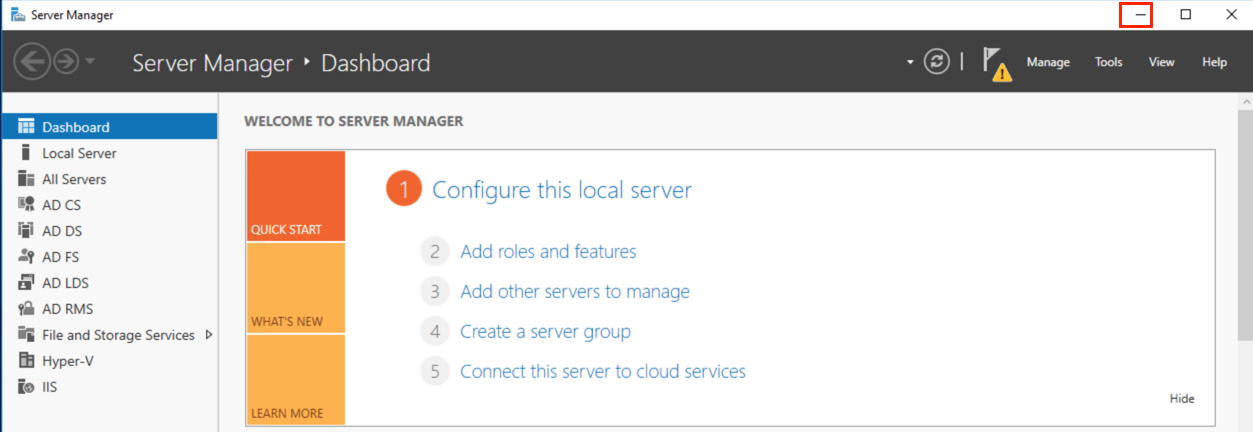
Minimize the Server Manager Dashboard window.
-
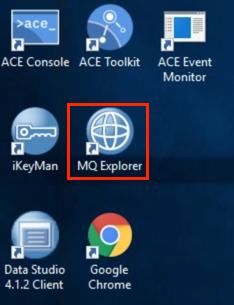
Double-click the “MQ Explorer” icon to start MQ Explorer.
-
Once the MQ Explorer initializes, notice there are two local queue managers, MFT4 and MFT5.
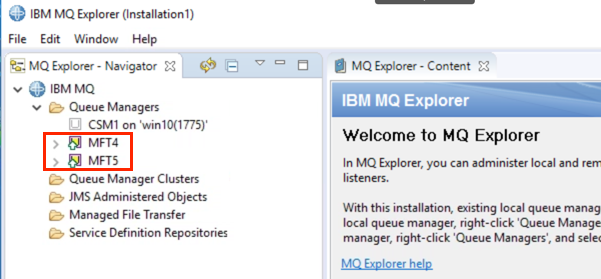
There is also a remote queue manager (CSM1) not yet connected to MQ Explorer.
Start Managed File Transfer Client – “Student” image
-
Start the Windows 10 x64 image if it is not started.
-
Click the Windowns 10 x64 monitor icon to get the desktop.
-
The Windows 10 desktop appears. Note: your desktop image may be a different picture.

-
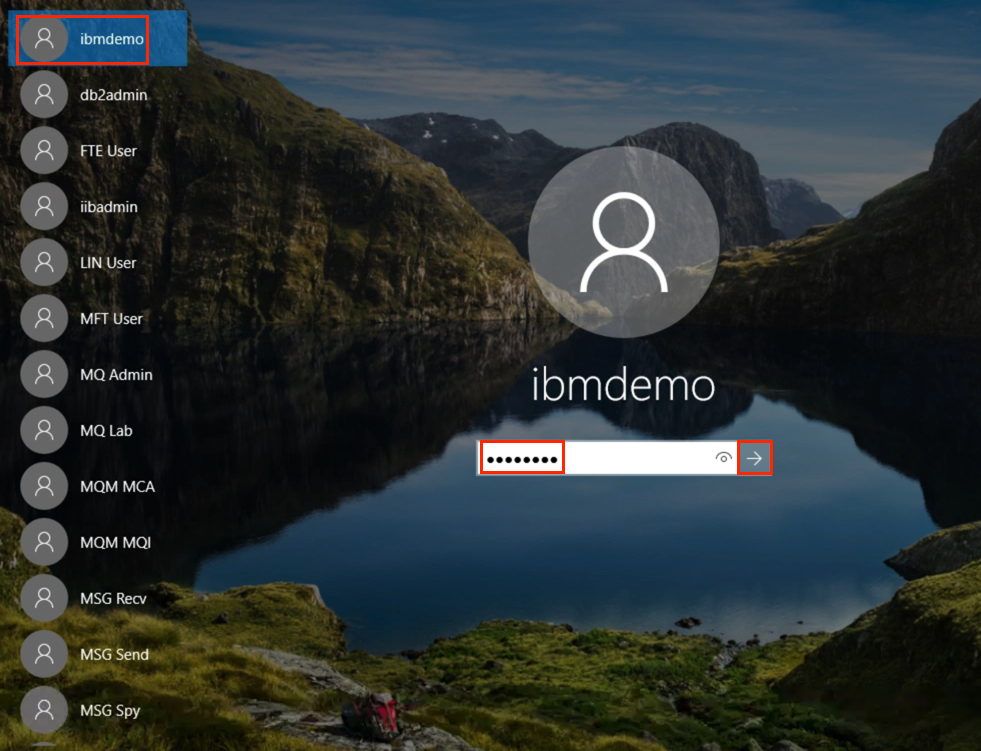
At the desktop, hit enter or click the mouse to get the user login. ibmdemo should be the user. If not select ibmdemo from the list of users on the left of the desktop.
Enter passw0rd in the password field and click the blue arrow or hit enter.
-
If you receive a pop-up about Networks, click Yes.
-
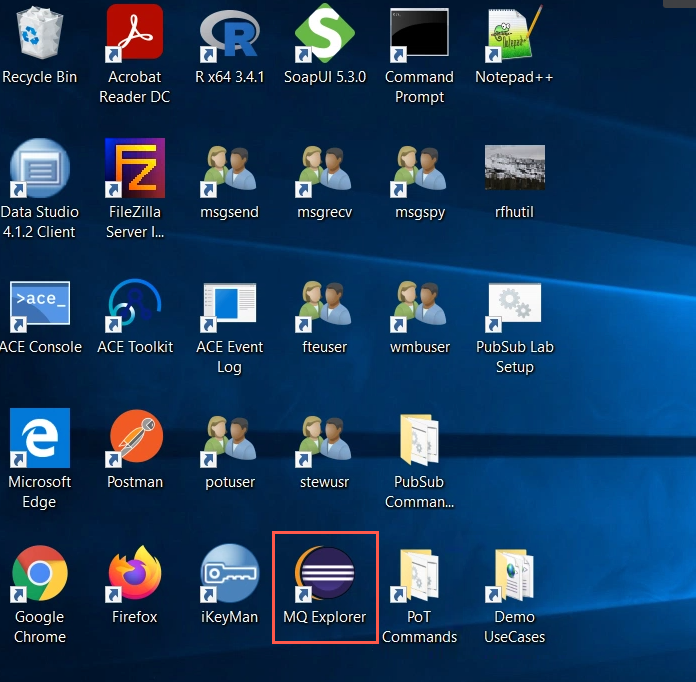
Open the MQ Explorer by double-clicking the shortcut icon on the desktop.
-
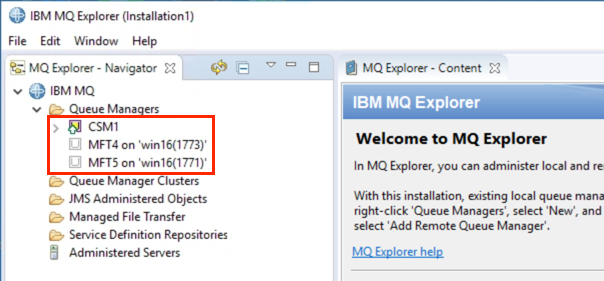
Once the MQ Explorer initializes, notice there is one local manager, CSM1 and two remote queue managers, MFT4 and MFT5 not yet connected to MQ Explorer.
Configure MFT Environment
Connectivity must exist across all queue managers in the topology, including queue managers in the base topology, MFT4 and MFT5.
On the partner server queue manager, queue manager CSM1 has the roles of agent and commands queue manager.
This topology can exchange files between the two agents. Each partner agent must connect to a queue manager, as shown in the diagram. Extra partner agents can be added in a similar way, to the way that the first partner agent was added.
Connect remote queue managers to MQ Explorer
-
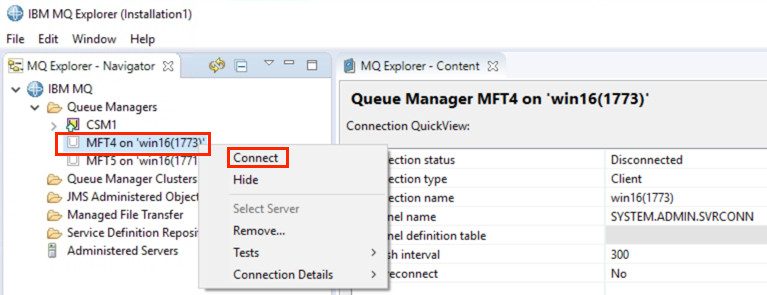
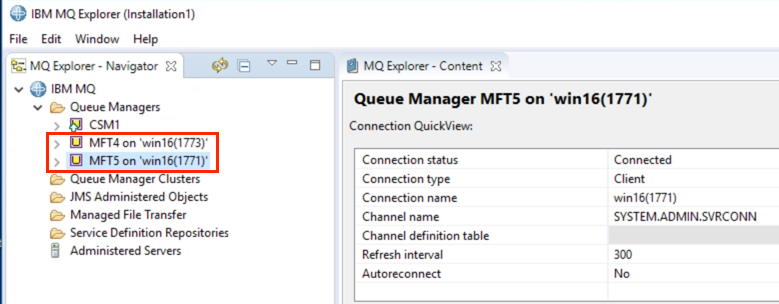
Right-click remote queue manager MFT4 and select Connect.
-
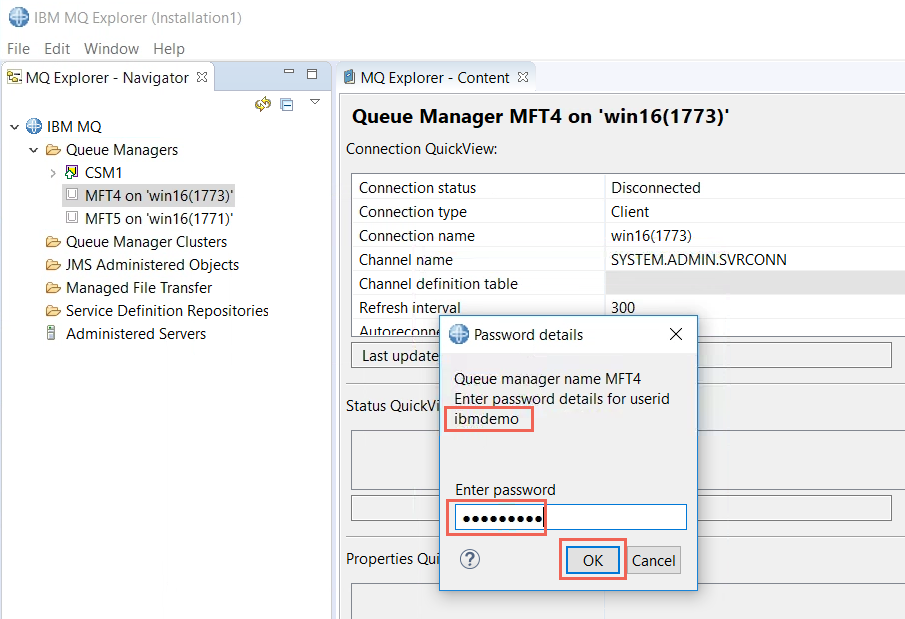
You will be prompted for a password. User ibmdemo is authorized to connect to queue managers MFT4 and MFT5. mftuser is a user on both servers. Enter the password for the MFT server MQpot2017 in the password field and click OK.
-
You are now connected to MFT4.
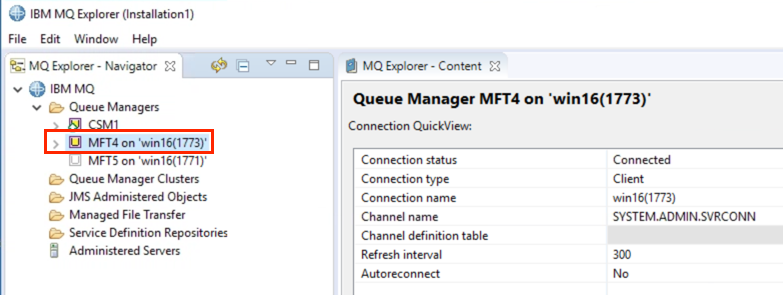
Repeat for MFT5. You should now be connected to both MFT4 and MFT5.
-
Return to the MFT server (Windows Server 2016).
-
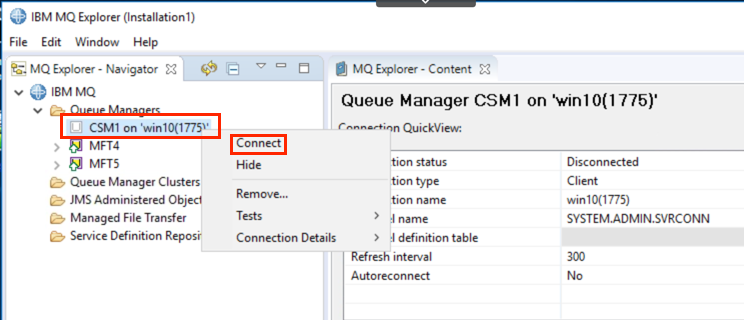
In MQ Explorer, right-click CSM1 and select Connect.
-
You will be prompted for a password. User ibmdemo is authorized to connect to queue managers CSM1. ibmdemo is a user on both servers. Enter the password for the MFT client passw0rd in the password field and click OK.
-
All queue managers now appear as connected in both MQ Explorers.
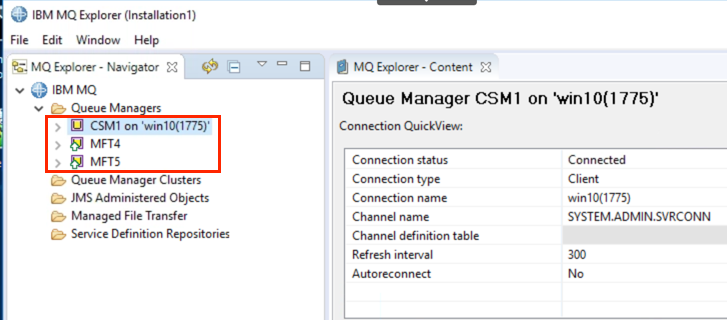
You are now ready to configure the MFT environment.
Configure coordination queue manager
You are already logged in the MFT server as ibmdemo which is a member of the mqm group and will act as the MQ MFT administrator.
-
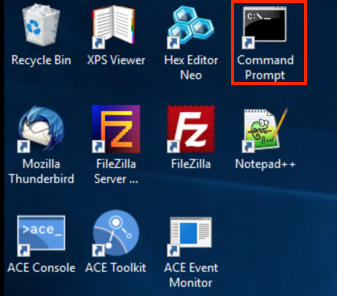
On the MFT server, open a command prompt by double-clicking the icon on the desktop.
-
Issue the following command to identify the coordination queue manager and set up the configuration directory structure:
fteSetupCoordination -coordinationQMgr MFT5 -f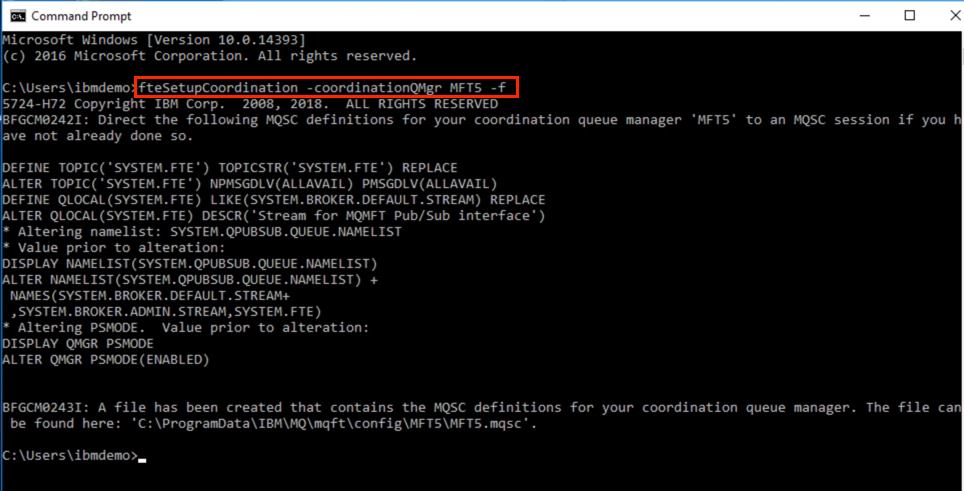
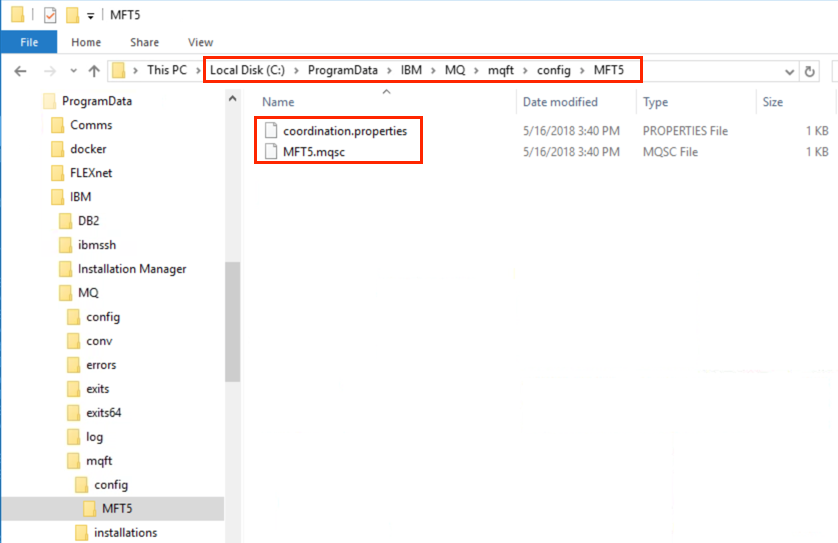
The command created the following directory structure:
Coordination queue manager directory C:\ProgramData\IBM\MQ\mqft\config\MFT5
coordination.properties file C:\ProgramData\IBM\MQmqft\config\MFT5\coordination.properties
The command also produces an MQSC command file that you must run against your coordination queue manager C:\ProgramData\IBM\MQ\mqft\config\MFT5\MFT5.mqsc.
-
In the command prompt window, change to the C:\ProgramData\IBM\MQ\mqft\config\MFT5 directory. Configure the queue manager to act as the coordination queue manager, by running the following command. You need to provide the MQSC command file, produced by the previous command:
cd C:\ProgramData\IBM\MQ\mqft\config\MFT5runmqsc MFT5 < MFT5.mqsc > MFT5.txt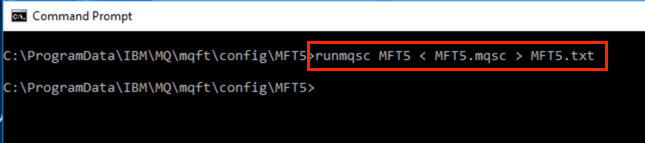
-
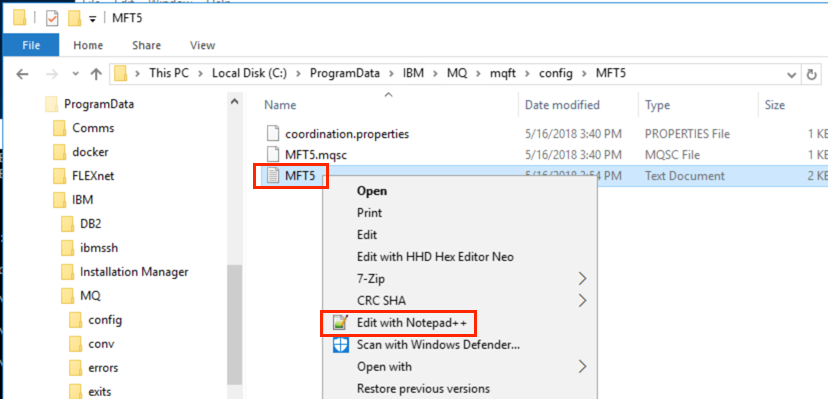
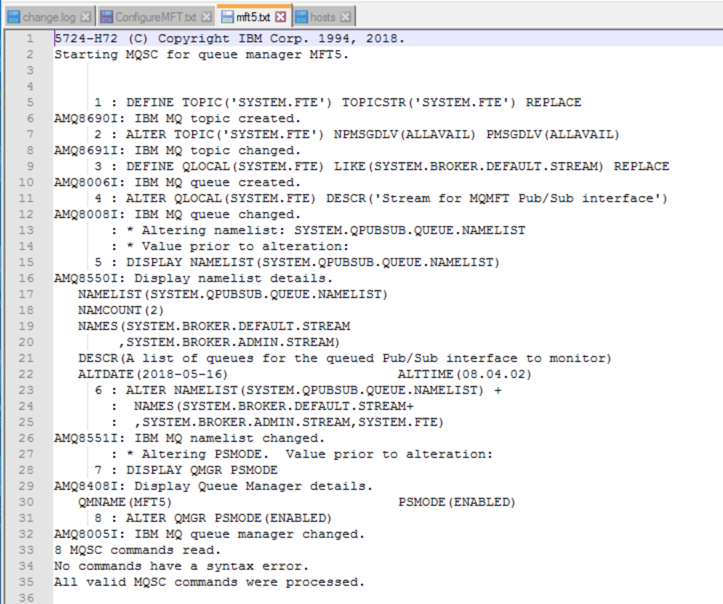
The output has been piped to the output file mft5.txt. In the Windows Explorer, navigate to C:\ProgramData\IBM\MQ\mqft\config\MFT5\, right click the MFT5.txt file and select Edit with Notepad++.
-
Ensure that the definitions have been created successfully.
Setup command queue manager
This task identifies the commands queue manager.
-
In the same command prompt window, issue the following command:
fteSetupCommands -connectionQMgr MFT4 -f -
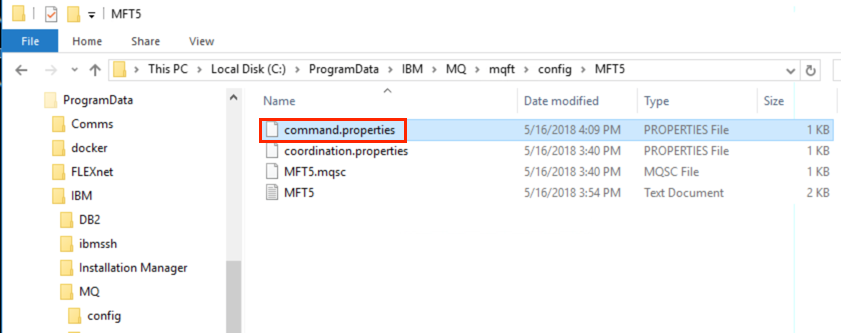
You obtain the following message BFGCL0245I: The file C:\ProgramData\IBM\MQ\mqft\config\MFT4\command.properties has been created successfully.

The command queue manager does not require extra IBM® MQ definitions. After you run fteSetupCommands, the command.properties file is created in the MFT5 configuration directory.
Set up the agent
This task prepares the Windows file transfer agent on the MFT server, MFT4AGT1.
-
Still on the MFT server and in your command prompt window, issue the following command:
fteCreateAgent -agentName MFT4AGT1 -agentQMgr MFT4 -f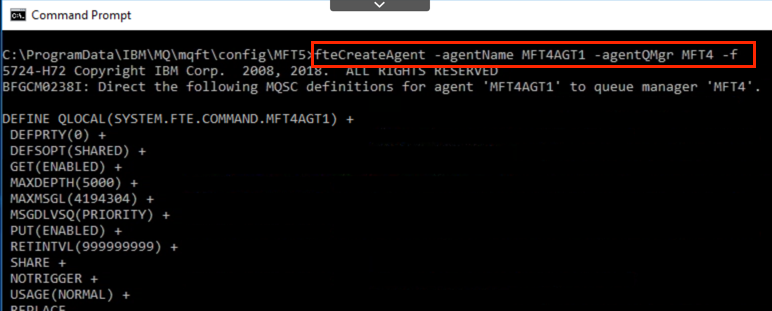
-
After you create the agent with the fteCreateAgent command, the agent’s directory, and a subdirectory for the agent, MFT4AGT1, are added to the MFT5 directory.
In the data\MFT5\agents\MFT4AGT1 directory you find the:
- agent.properties file
- MFT4AGT1_create.mqsc file, which containsIBM® MQ definitions required by the agent
-
Change to the C:\ProgramData\IBM\MQ\mqft\config\MFT5\agents\MFT4AGT1 directory, and create the required agent queue manager definitions by issuing the following command:
cd C:\ProgramData\IBM\MQ\\mqft\config\MFT5\agents\MFT4AGT1runmqsc MFT4 < MFT4AGT1_create.mqsc > mft4.txt
-
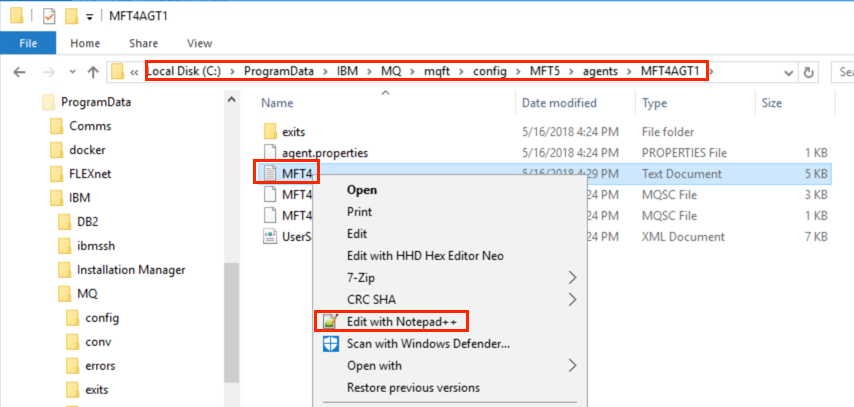
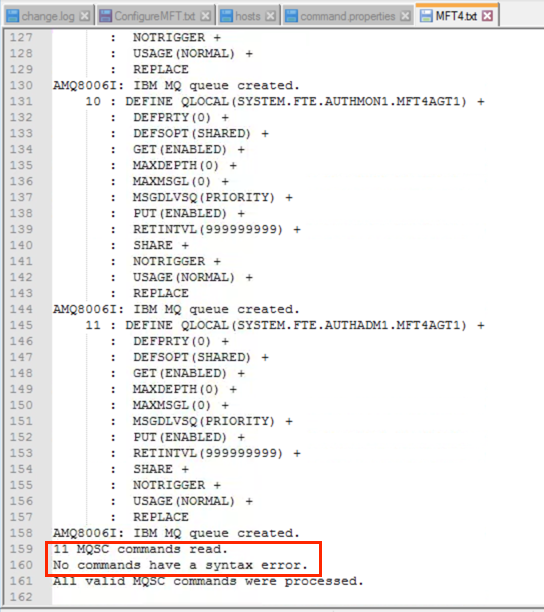
In Windows Explorer, right-click the MFT4.txt results file and select Edit with Notepad++.
-
Ensure that the definitions have been created successfully.
-
Start the agent by typing the following command:
fteStartAgent MFT4AGT1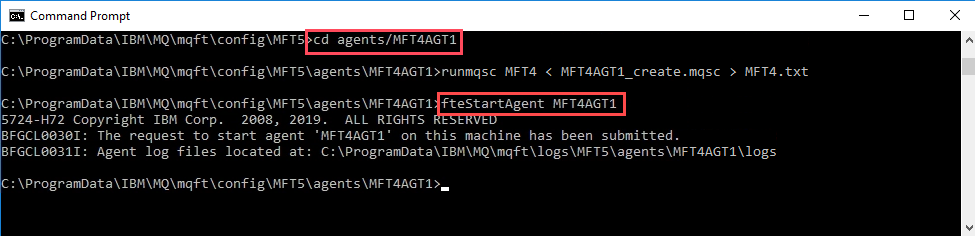
-
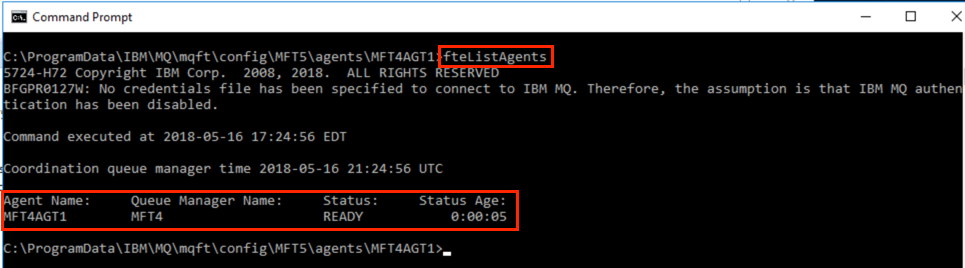
Display the agent by typing the following command:
fteListAgentsYou should see output similar to the following:
Set up the logger
A file or database logger is required to keep history and audit information about transfer activity for the configuration.
-
In the command prompt window issue the following command:
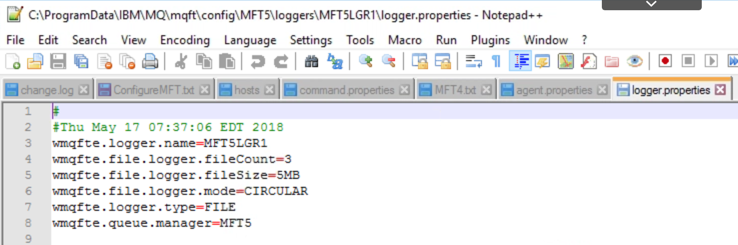
fteCreateLogger -loggerQMgr MFT5 -loggerType FILE -fileLoggerMode CIRCULAR -fileSize 5MB -fileCount 3 MFT5lgr1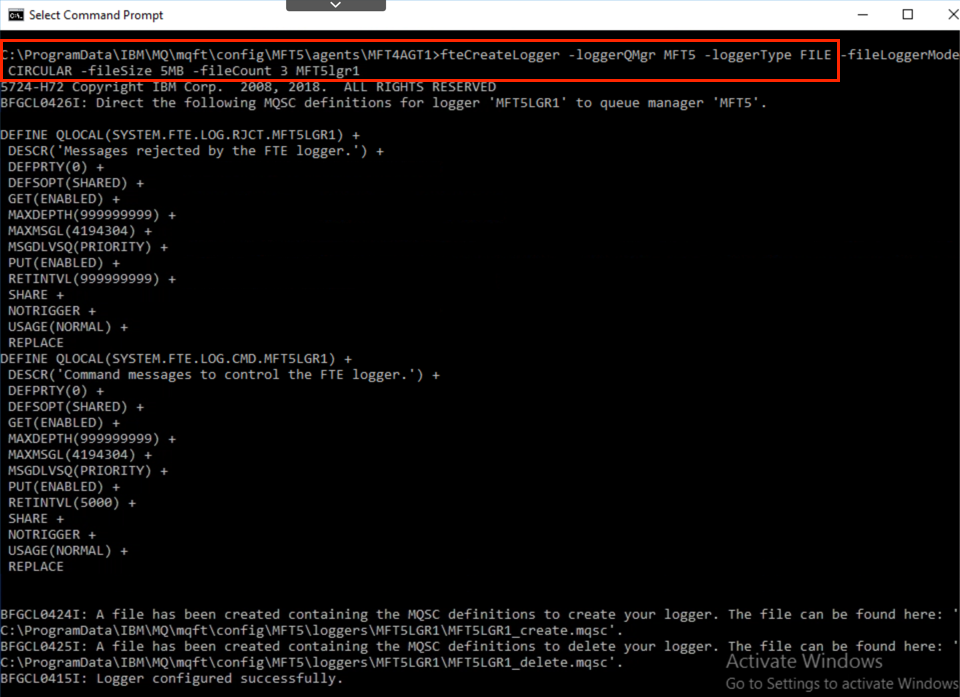
-
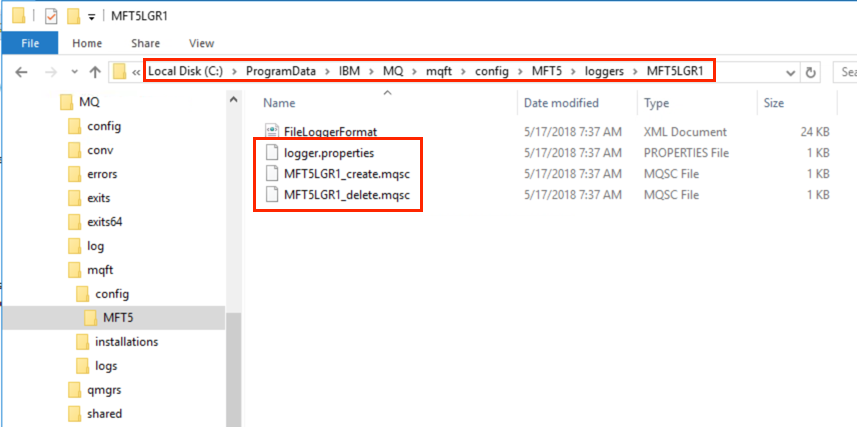
After you run the fteCreateLogger command, the C:\ProgramData\IBM\MQ\mqft\config\MFT5\loggers directory is created, with an MFT5LGR1 subdirectory.
The MFT5LGR1 subdirectory holds the logger.properties file. Also in the directory is a file called MFT5LGR1_create.mqsc with IBM MQ definitions required by the logger.
-
Right-click the logger.properties file and select Edit with Notepad++.
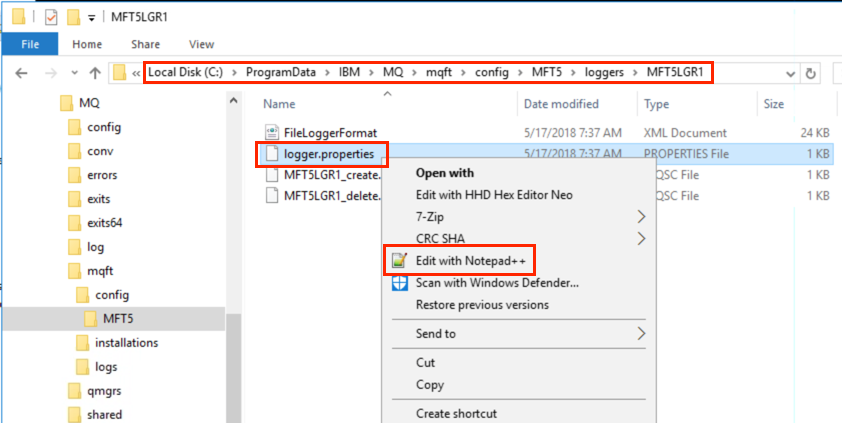
Review the properties.
-
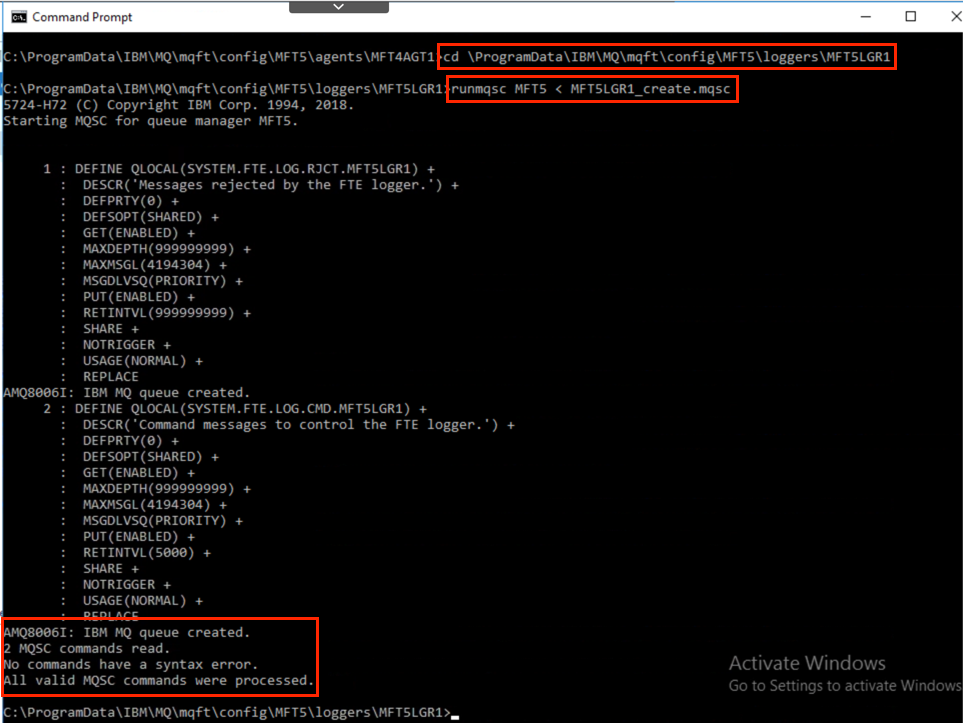
Change to the directory C:\ProgramData\IBM\MQ\mqft\config\MFT5\loggers\MFT5LGR1.
cd C:\ProgramData\IBM\MQ\mqft\config\MFT5\loggers\MFT5LGR1 -
To create the definitions required by the logger, run the associated MQSC command file:
runmqsc MFT5 < MFT5LGR1_create.mqscReview the results of the object definitions to confirm that the required objects have been created successfully.
-
Start the logger by issuing the following command:
fteStartLogger MFT5LGR1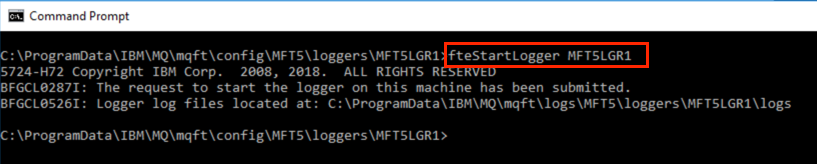
-
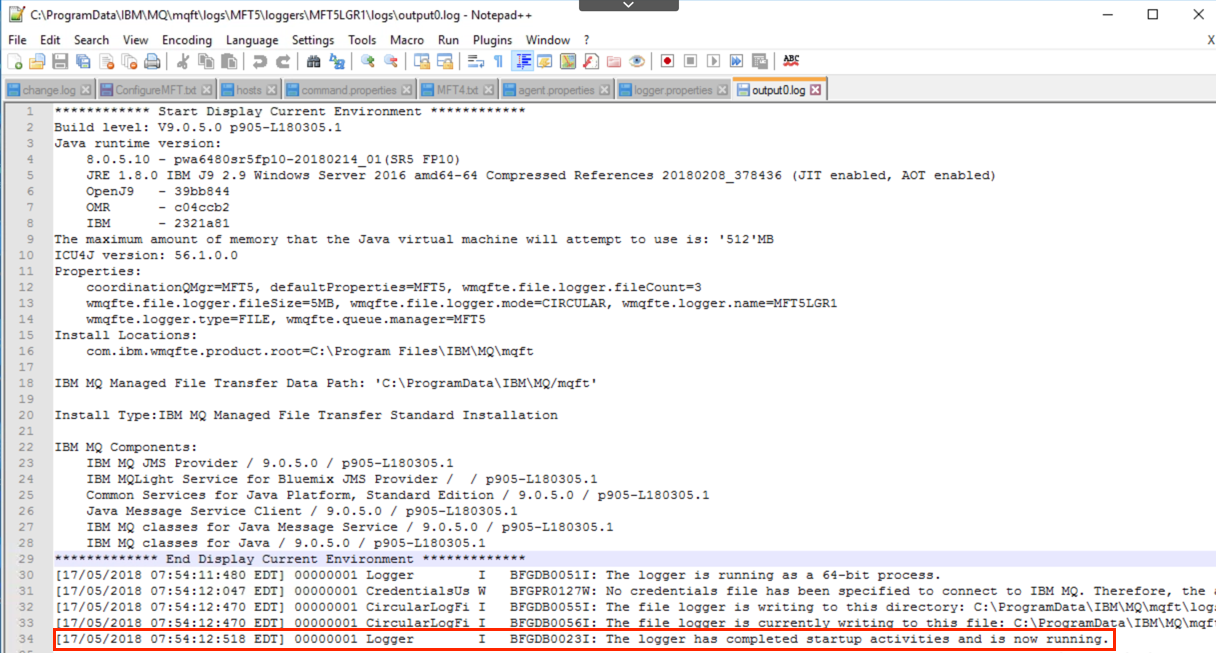
Review the contents of file output0.log at C:\ProgramData\IBM\MQ\mqft\logs\MFT5\loggers\MFT5LGR1\logs.
After some information about the logger, the last statement should contain message: BFGDB0023I: The logger has completed startup activities and is now running.
 Note:
Note:
Occasionally, log information might not be written to the output0.log the first time the logger starts. If the output0.log file is empty, restart the logger by typing fteStopLogger MFT5LGR1 and pressing the Enter key. Restart the logger by typing fteStartLogger MFT5LGR1 and pressing the Enter key. File output0.log now shows data. The same behavior extends to the agent version of the output0.log file the first time an agent is started. -
In the command prompt window, enter the command fteStopAgent MFT4AGT1 to stop MFT4AGT1, then enter the command fteStartAgent MFT4AGT1 to restart the agent.
-
Then review the agent output0.log file to see results in the log.
-
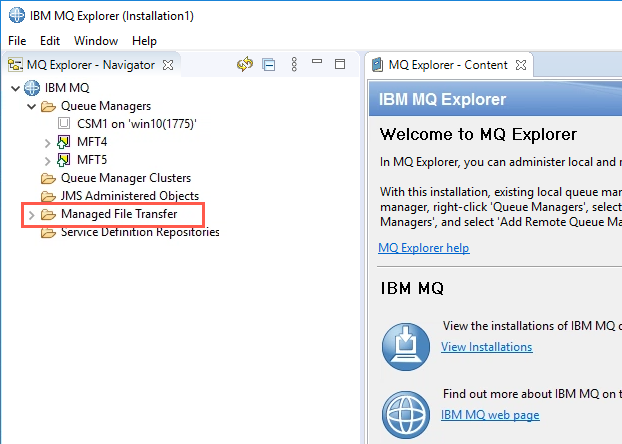
Restart MQ Explorer. You can now see that Managed File Transfer is configured.
-
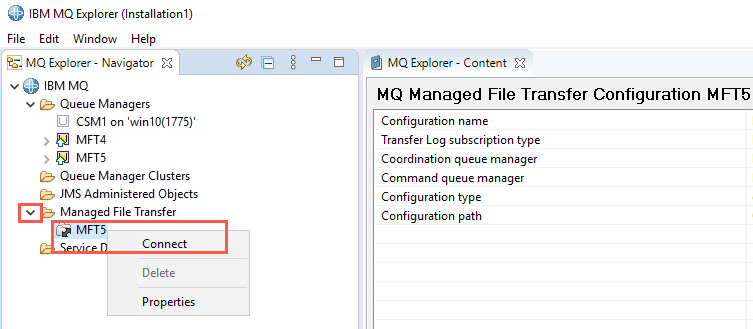
Expand Managed File Transfer, right-click MFT5 and select Connect.
Configure partner server
You will now set upt the partner on the Windows 10 x64 image. The same assumptions made about IBM® MQ and the security configuration, as well as the IBM MQ path also apply to the partner server.
-
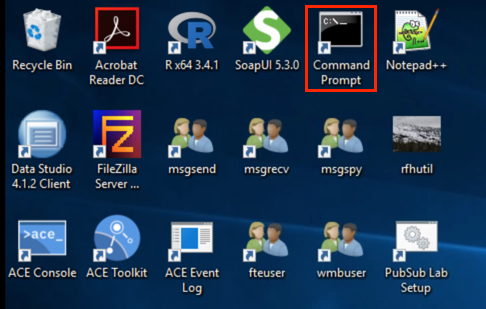
Return to the Windows 10 image. Open a command prompt by double-clicking the icon on the desktop.
-
Start by setting up the MFT5 configuration directory, and identifying the coordination queue manager by using the fteSetupCoordination command.
Issue the following command:
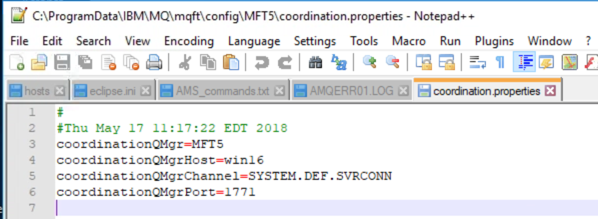
fteSetupCoordination -coordinationQMgr MFT5 -coordinationQMgrHost win16 -coordinationQMgrPort 1771 -coordinationQMgrChannel SYSTEM.DEF.SVRCONN -f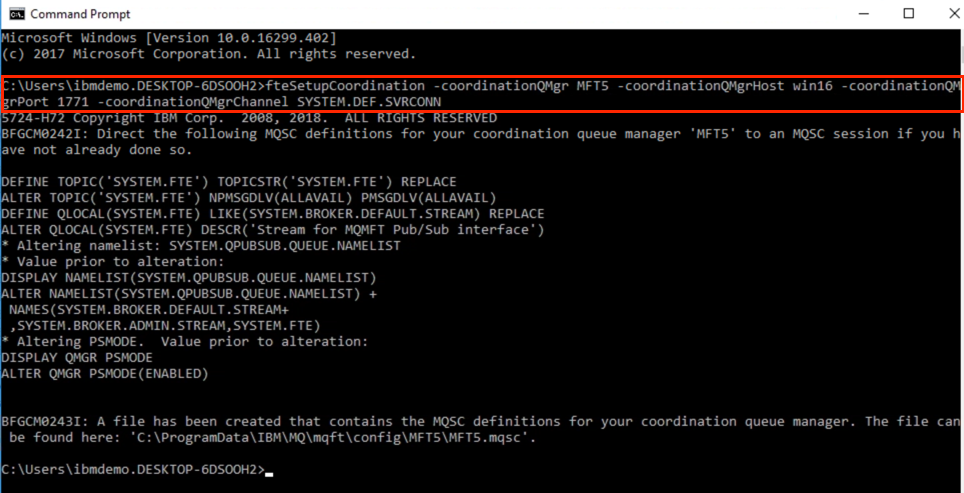
-
Open Windows Explorer by double-clicking the icon on the taskbar.

-
Navigate to C:\ProgramData\IBM\MQ\mqft\config\MFT5 to see the new directory structure.
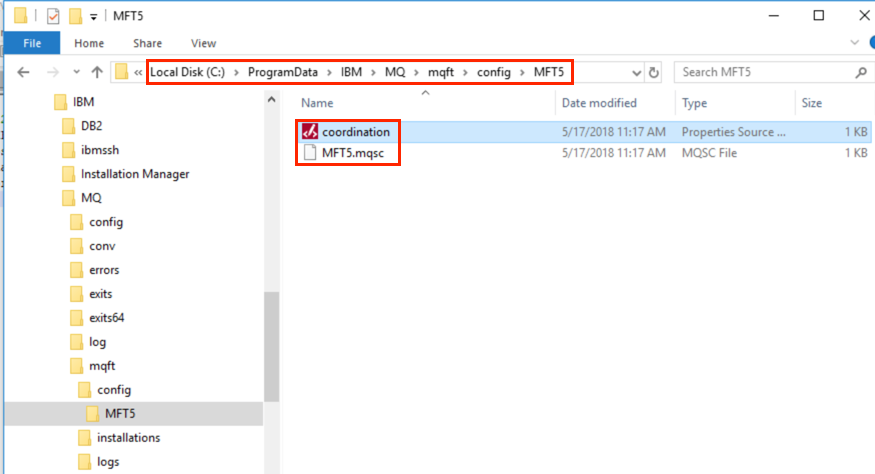 Note:
Note:
When the coordination queue manager is on a different server from the partner server, the connection to the base server coordination queue manager must be defined as a client connection. Failure to define the coordination queue manager connection as an IBM MQ client connection, on the partner server, causes any Managed File Transfer command, that connects to the coordination queue manager, to fail. An example of a command that connects to the coordination queue manager is fteListAgents. You do not need to create the IBM MQ definitions as the definitions required by the coordination queue manager were completed when you configured the base server. -
Right-click the coordination.properties file and select Edit with Notepad++.
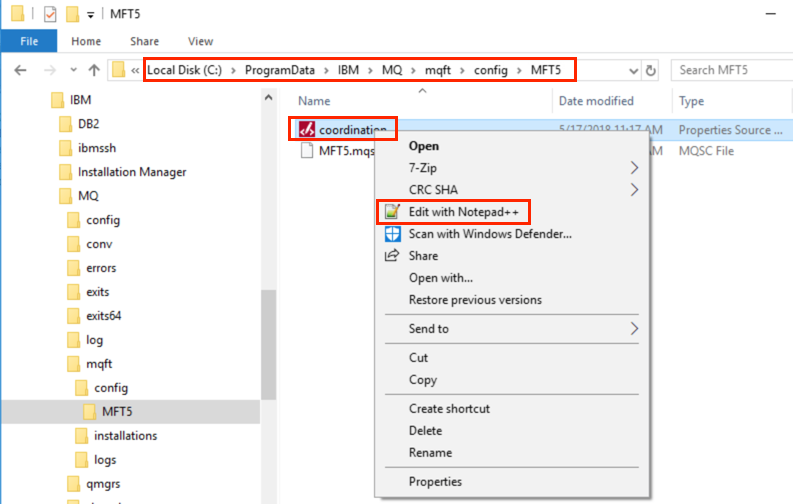
Review the properties you defined.
-
In the command prompt window, identify the commands queue manager by issuing the following command:
fteSetupCommands -connectionQMgr CSM1
The commands queue manager does not require any extra IBM MQ definitions.
-
Issue the following command to create the partner agent and identify the partner agent queue manager:
fteCreateAgent -agentName CSM1AGT1 -agentQMgr CSM1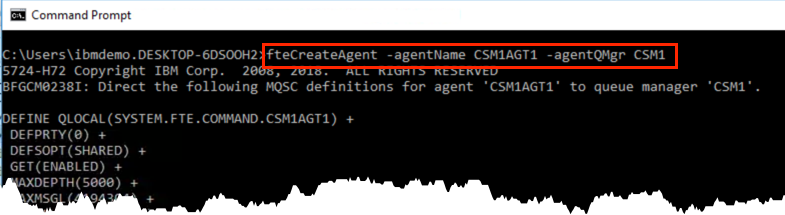
-
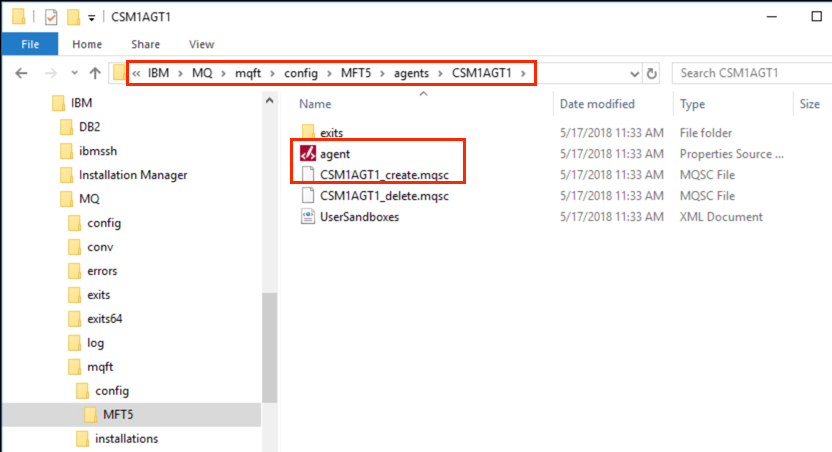
In Windows Explorer you will now see and agents subdiretory. Drill down into the agents\CSM1QAGT1 directory where you will find the agent.properties file and runmqsc command files to create and delete the agent’s MQ resources.
-
In the command prompt window, change to the CSM1AGT1 directory.
cd \ProgramData\IBM\MQ\mqft\config\MFT5\agents\CSM1AGT1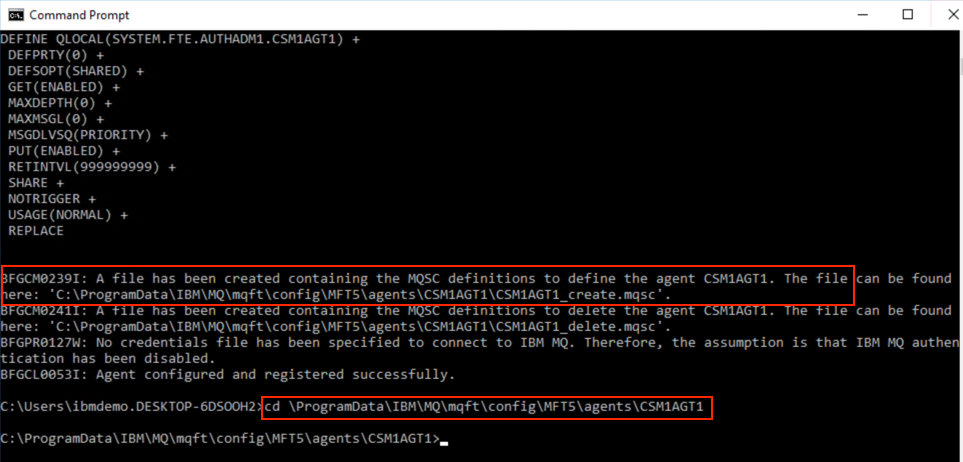
-
Create the IBM MQ definitions required by the agent, by issuing the following command:
runmqsc CSM1 < CSM1AGT1_create.mqsc > csm1.txt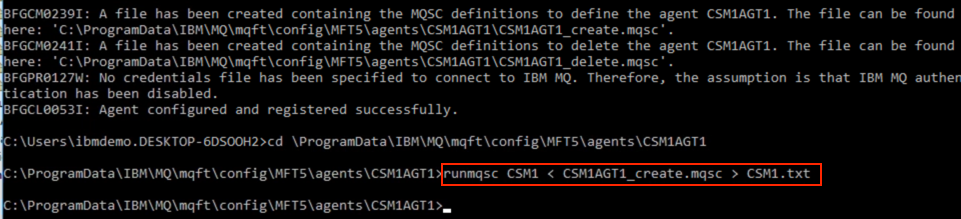
-
In Windows Explorer, right click the newly created csm1.txt file by right-clicking and select Edit with Notepad++.
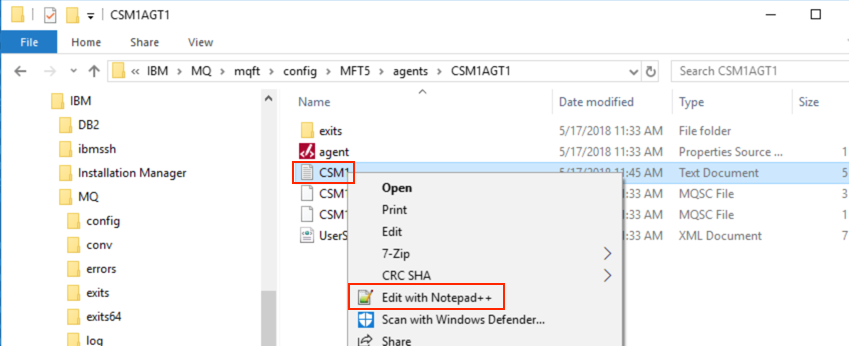
-
Confirm that all agent required definitions have been created successfully.
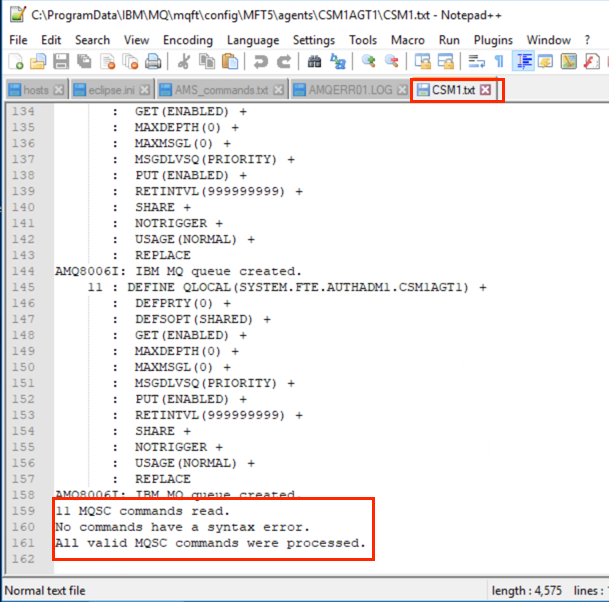
-
Return to command prompt and start the agent by issuing the following command:
fteStartAgent CSM1AGT1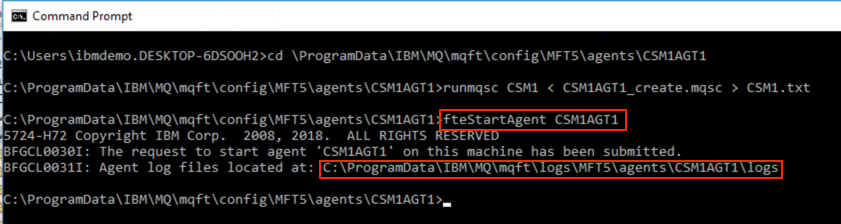
-
Display the agent by typing:
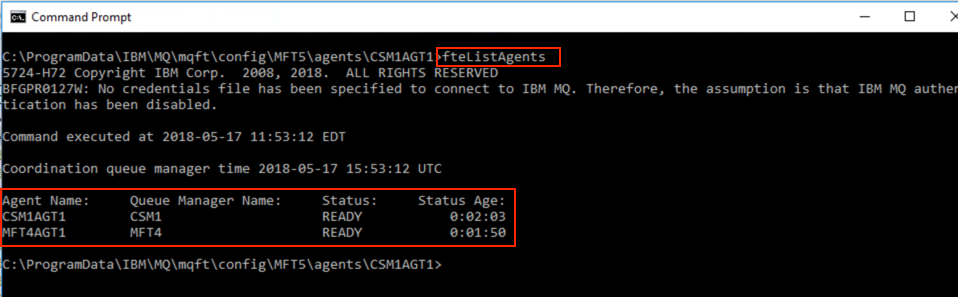
fteListAgentsYou should see output similar to the following:
-
Restart MQ Explorer to connect to the new MQ MFT configuration.
-
Then review the agent output0.log file to see results in the log.
-
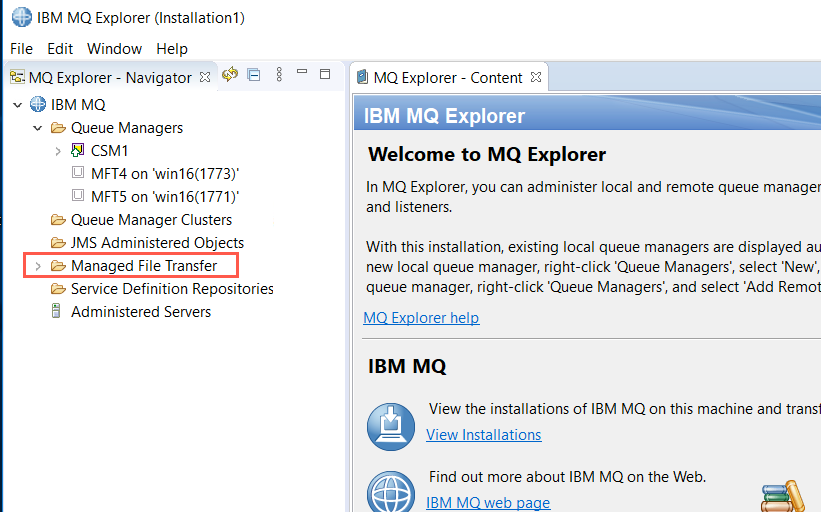
Restart MQ Explorer. You can now see that Managed File Transfer is configured.
-
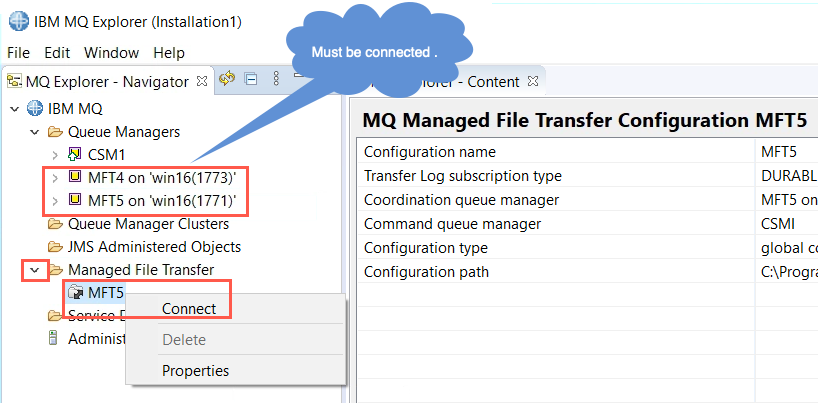
Connect to MFT4 and MFT5 queue managers as you did at the beginning of this lab. Expand Managed File Transfer, right-click MFT5 and select Connect.
-
This concludes this lab. You are now ready to continue with Lab 2.