Lab 1 - Creating Certificates Using iKeyMan
Overview
This lab introduces the student to the IBM Key Management tool (iKeyMan). The student will use the tool to create keystores for the users involved in the lab.
Using iKeyMan:
-
Create a keystore for each user involved in the lab.
-
Create a self-signed certificate for each user.
-
Exchange public keys between the users’ keystores.
The certificates and keys will be used by IBM MQ AMS to sign and/or encrypt messages on MQ queues.
Public Key Infrastructure (PKI) and Certificate
IBM MQ Advanced Message Security uses Public Key Infrastructure (PKI) identities to represent users or applications. The identities are used to sign and encrypt messages.
An identity is represented by the distinguished name (DN) of a personal X.509 (v2/v3) certificate associated with the signed and/or encrypted message. To authenticate this authority, the user or application must have access to a keystore containing a public certificate and an associated private key.
A mechanism is provided to map the OS identity of the user or application to the specific keystore file.
Lab Environment
The lab environment for the PoT is shown below. There is one VMware image,labeled as Windows 10. Details about this lab image are:
Table 1: Names used in this lab
| Host Name | IP | Purpose |
|---|---|---|
| DESKTOP-6DSOOH2 (win10) | 10.0.0.2 | Windows 10 host |
Table 2: UserIDS used in this lab
| User-ID | Group | Purpose |
|---|---|---|
| ibmdemo | Administrators, mqm, mqbrkrs | Windows and MQ administrator |
| msgsend | mqusers | IBM MQ application user-id |
| msgrecv | mqusers | IBM MQ application user-id |
| msgspy | mqusers | IBM MQ application user-id |
Important points to remember
- To login to Windows image, use the ibmdemo user-ID.
- The password for ibmdemo is passw0rd.
- The password for all other users is password.
- Use password for the password of all CMS key databases and JKS keystores.
- The userid/password for the MQ Appliance (MQAppl1) is admin/passw0rd.
Creating Key Database and Certificate
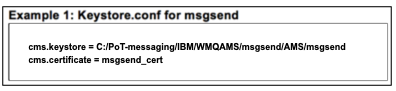
In this part, you will create the keystores for three users – msgspy, msgrecv, and msgsend. You will use the iKeyMan utility. iKeyMan stands for IBM Key Management. This general utility is provided and automatically installed with several IBM products, one of which is IBM MQ. Once the key databases and certificates are created, you must point IBM MQ Advanced Message Security interceptors to the directory where they are located. This is done via the keystore.conf file, which holds that information in the plain text form. A separate keystore.conf file has been created for each user. It is advisable to create it next to the key database. You will find it in: C:\Users\<userid>\.mqs.
Looking at, for example, the C:\Users\msgsend\.mqs\keystore.conf file, you’ll see lines such as the following:
Starting Windows VMware image
-
Click the Windows VM (Windows 10 x64) monitor icon to open the Windows desktop.
-
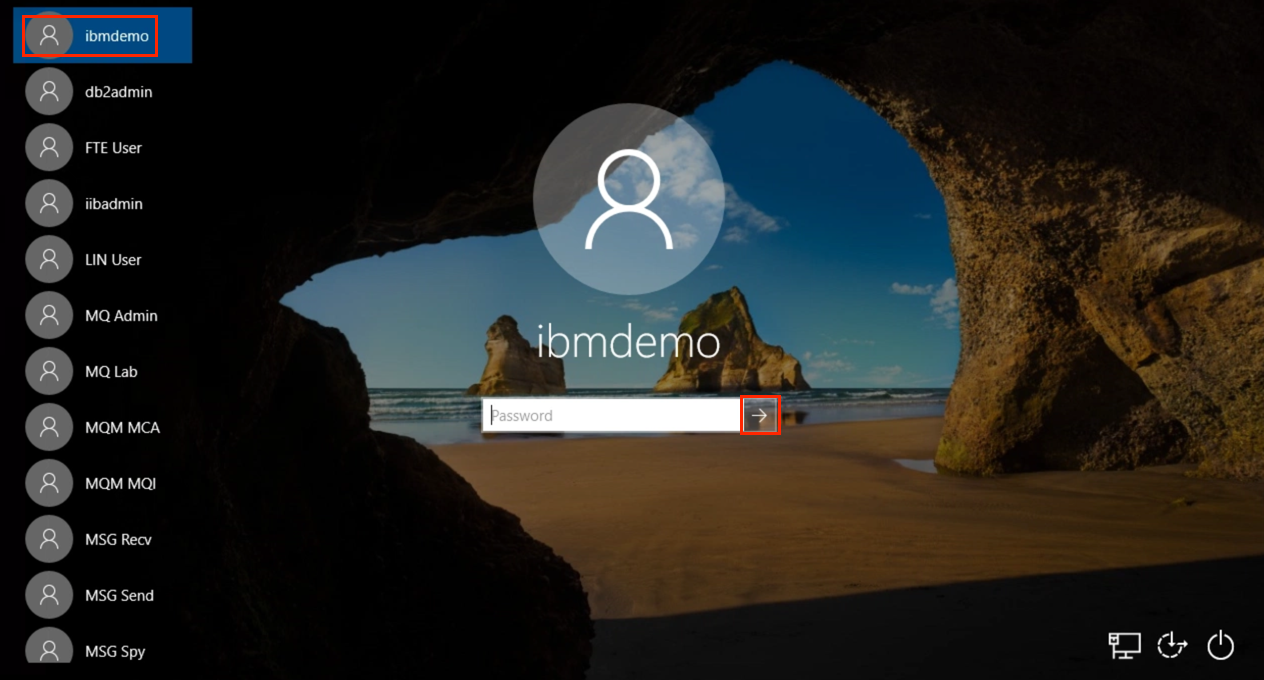
Once the Windows desktop appears, hover the mouse over the desktop image and click the mouse or hit enter. When the user list appears, click ibmdemo, enter passw0rd in the password field and hit enter or click the arrow.
-
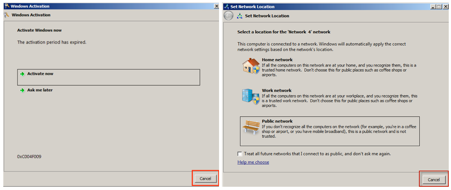
If you receive the “Windows Activation” or “Set Network Location” popup, dismiss by clicking Cancel.
-
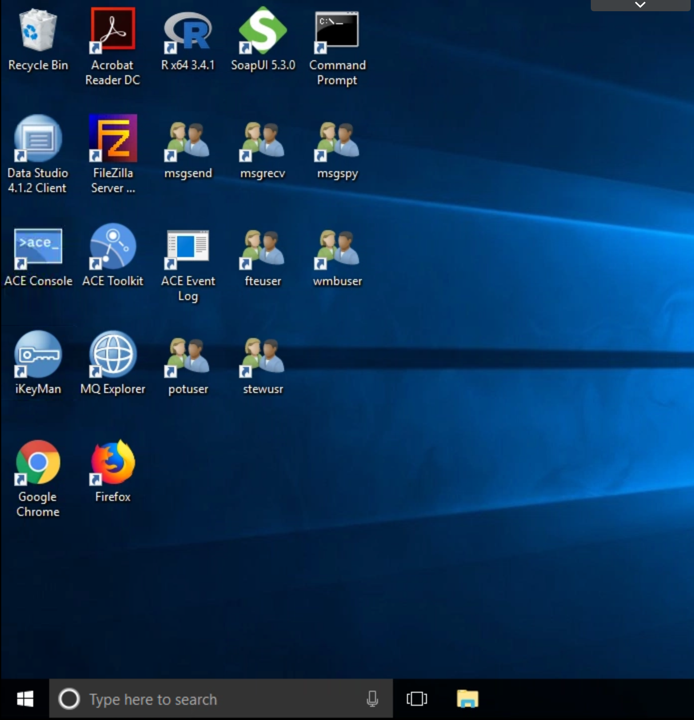
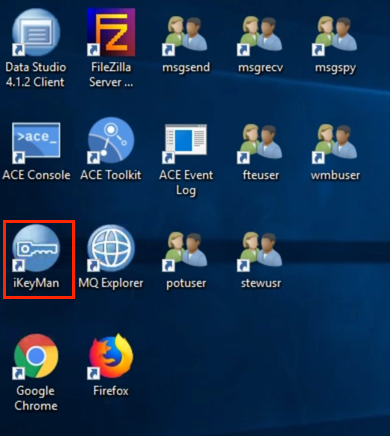
Once logged in, you should have a desktop that looks similar to the screen capture below.
-
Run IBM Key Management by double-clicking the icon on the desktop.
 Note:
Note:
You can alternatively start the tool from the IBM MQ install path by double clicking the file in Windows Explorer (C:\Program Files\IBM\MQ\bin\strmqikm.exe) -
Create a new key database file for the msgsend userID:
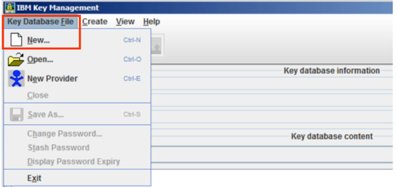
a. Click Key Database File, select New.
b. Leave the Key database type as CMS.
c. Enter msgsend.kdb for the file name.
d. Enter C:\PoT-messaging\IBM\WMQAMS\msgsend\AMS for the location.
e. Click OK.
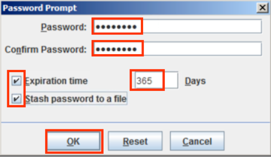
f. Enter password for Password and Confirm Password. Of course, in the real world, you wouldn’t use such a trivial password!
g. Check the Set expiration time check box and set to 365.
h. Check the Stash the password to file checkbox. This will store the password in an encrypted “stash” file that AMS will later be able to use to access the keystore.
i. Click OK.
 Note:
Note:
It is advisable to use any strong password protection to secure the database. However for simplicity, we will use password for all keystore passwords in this exercise. Also make sure that the “Stash password” to a file box is checked.j. Click the drop-down menu next to Personal Certificates. If not set to Personal Certificates, change the key database content view to Personal Certificates.
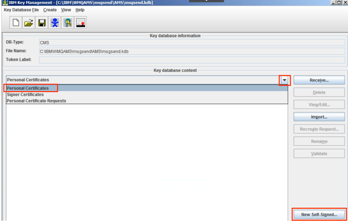
k. At this point, notice that there are no Personal Certificates present in this keystore. You’ll now create your own “self-signed” certificate. Click New Self-Signed… button.
l. Complete the required fields as shown:
     i.   Key label:    msgsend_cert
     ii.  Common Name:  msgsend
     iii. Organization: ibm
     iv.  Country:      US
Note:
You should be very careful with all of these values. It’s advisable to always specify the exact names, respecting the upper/lower case characters. AMS may not find the appropriate values otherwise.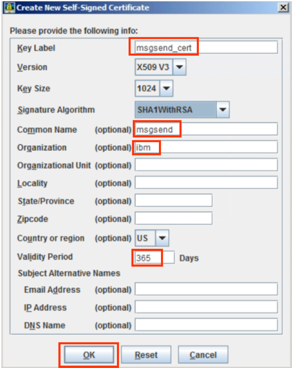 Note:
Note:
The Common Name and optional parameters are used to identify a given user of a machine, called Distinguished Named (DN) characteristics, and must be unique to allow each user to receive his own identity certificate. The Key Label identifies this particular certificate, and is specified in the keystore.conf file that was already set up for this userID.m. Click OK.
n. Click View/Edit… to view the new certificate just created. Make sure the label is msgsend_cert and the Issued to fields are as shown in the screen capture below. The Serial Number and Fingerprint will be different than what is shown.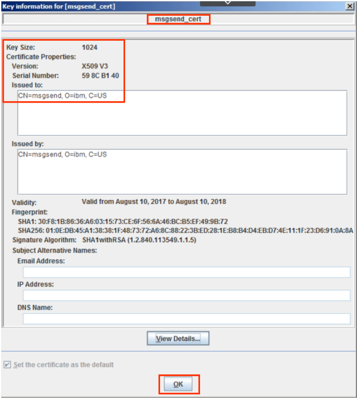
o. Click OK to close the view of the certificate.
Results
The key database and certificate for the user msgsend are created. Now, repeat the above step 4 replacing the user msgsend with the user msgrecv. Then repeat steps 4 once again for user msgspy.
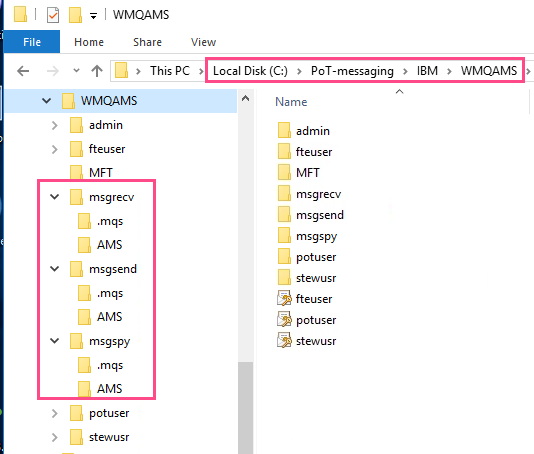
Make sure to change all occurrences of the userID including the directory path structure for each user. It should look like this:
You can now exit (close) the IBM Key Management program.
At this point, you should have three keystores, each associated with a different userID, and each containing a valid (self-signed) Personal certificate.
Exchange Keys
To safely exchange MQ messages between two MQ applications with AMS protection, you must share parts of the certificates associated with each user so that each user can successfully identify each other. This is done by directly exporting each certificate to the other user’s database using the following command line commands.
-
Open a Windows command prompt.
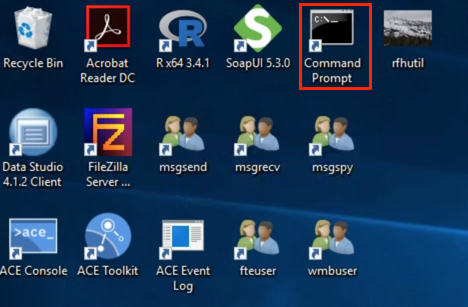
You can type the following lines, or alternatively, you may use the copy button here and paste the command on the command line.
-
Export msgsend’s certificate to msgrecv’s key database.
a. Enter the following command on the command line:
runmqakm -cert -export -db "C:\PoT-messaging\IBM\WMQAMS\msgsend\AMS\msgsend.kdb" -pw password -label msgsend_cert -target "C:\PoT-messaging\IBM\WMQAMS\msgrecv\AMS\msgrecv.kdb" -target_pw password -
Export msgrecv’s certificate to msgsend’s key database.
a. Enter the following command on the command line:
runmqakm -cert -export -db "C:\PoT-messaging\IBM\WMQAMS\msgrecv\AMS\msgrecv.kdb" -pw password -label msgrecv_cert -target "C:\PoT-messaging\IBM\WMQAMS\msgsend\AMS\msgsend.kdb" -target_pw password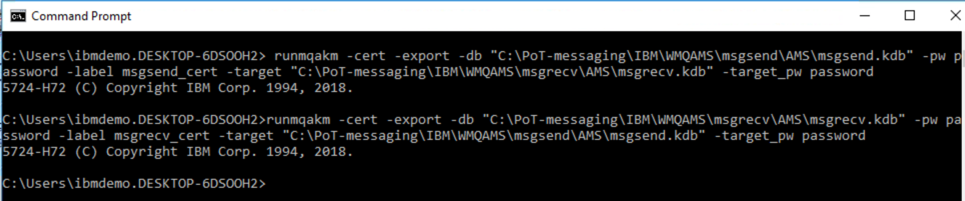
-
Verify that a certificate is in the keystore, either by browsing it using the GUI or running commands that prints its details:
a. Verify msgrecv’s certificate is in msgsend’s key database with the following command:
runmqakm -cert -details -db "C:\PoT-messaging\IBM\WMQAMS\msgsend\AMS\msgsend.kdb" -pw password -label msgrecv_cert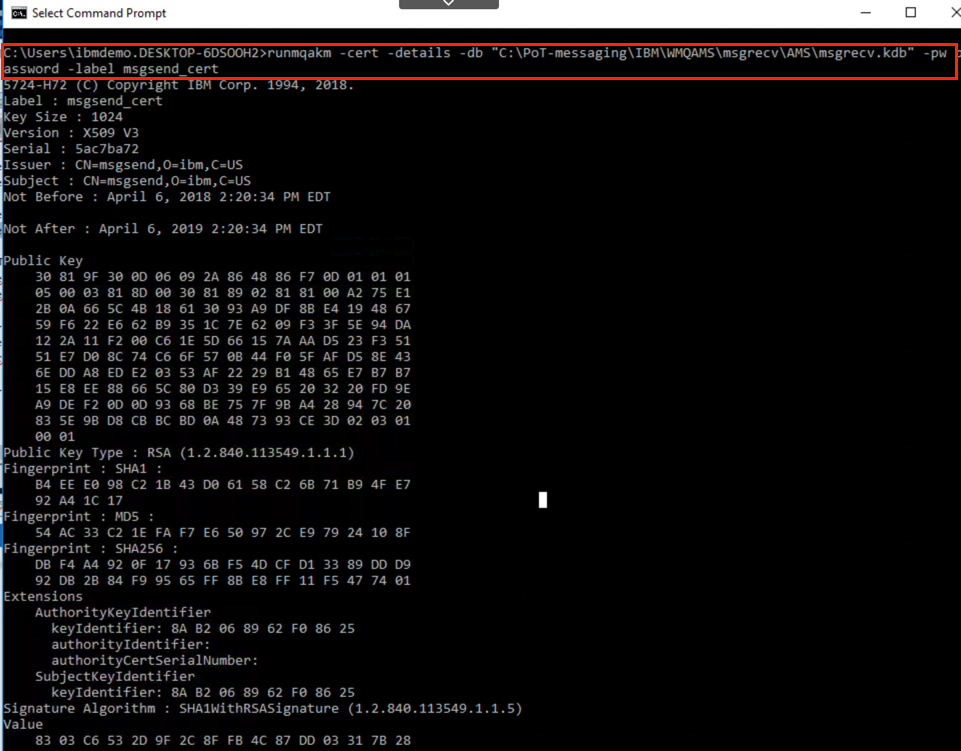
b. Verify msgsend’s certificate is in msgecv’s key database with the following command:
runmqakm -cert -details -db "C:\PoT-messaging\IBM\WMQAMS\msgrecv\AMS\msgrecv.kdb" -pw password -label msgsend_cert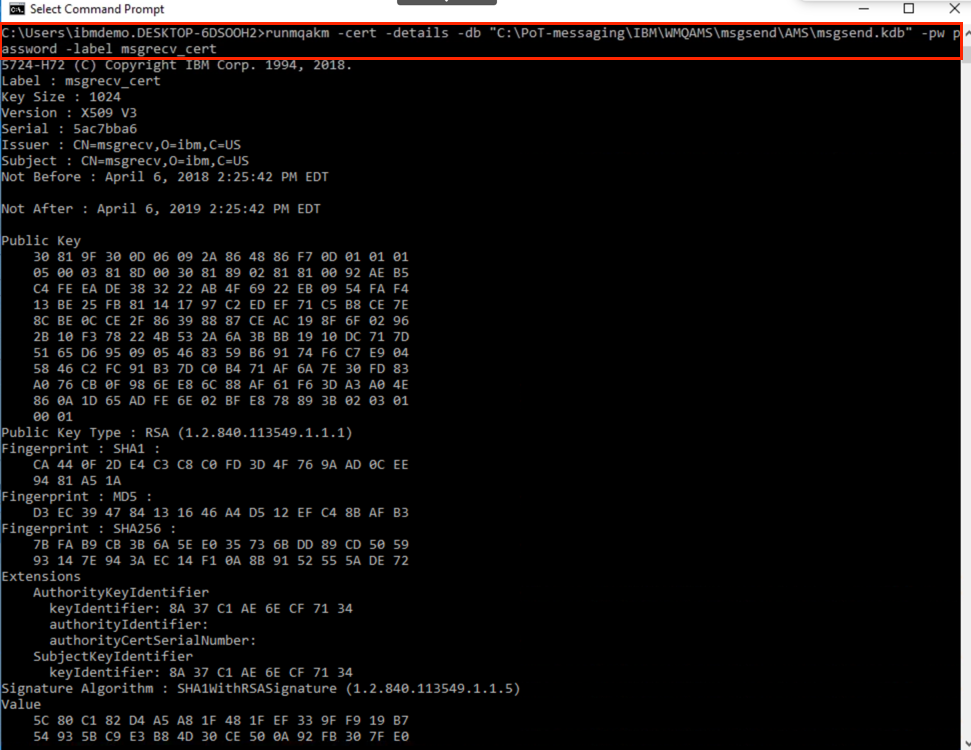
Notice that you are verifying that msgrecv’s public key is in msgsend’s keystore database and that msgsend’s public key is in msgrecv’s keystore database.
Note that in the real world, it’s unlikely that you’ll be able to export from one keystore directly into the “partner” keystore. iKeyMan provides other options to be able to export into an intermediary file. Then you’ll need to make this intermediary file available on the partner platform (perhaps using IBM MQ MFT?). Finally, import the intermediary file into the partner keystore.
Convert CMS database to JKS
The server and client interceptors use the CMS keystore database. But if you are running JMS or Java applications, then the Java interceptor will be used. The Java interceptor requires a JKS or JKSEC type keystore databases. We do not need to create a new one with the above process. We can just use the iKeyMan command runmqckm to convert an existing CMS keystore to a new JKS keystore. The certificates will not change, just the format of the database. The existing CMS database remains intact.
-
Change to the directory C:\PoT-messaging\MQ-POT\Users\Scripts.
cd \PoT-messaging\MQ-POT\Users\Scripts -
Run the setenv.cmd script to setup a Java environment.
setenv -
Convert msgsend’s CMS key database to JKS.
runmqckm –keydb –convert –db “C:\PoT-messaging\IBM\WMQAMS\msgrecv\AMS\msgrecv.kdb” –pw password –old_format cms -new_format jks -
Convert msgrecv’s CMS key database to JKS.
runmqckm –keydb –convert –db “C:\PoT-messaging\IBM\WMQAMS\msgsend\AMS\msgsend.kdb” –pw password -old_format cms -new_format jks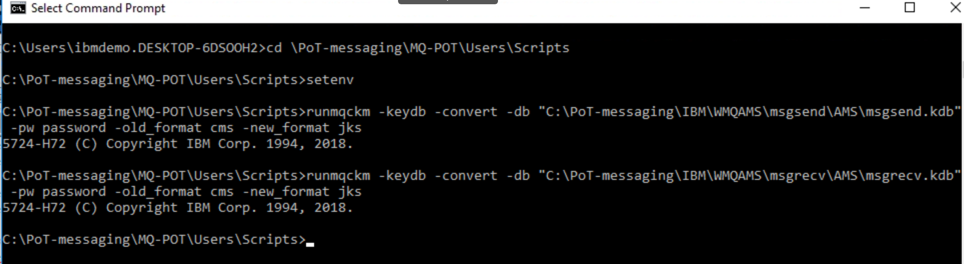
Summary
In this exercise, you created the keystores and certificates for the three users that will create messages in Lab 2. IBM MQ Advanced Message Security will use the keystores and certificates to apply protection to the messages.