Kafka source connector for IBM MQ
In this lab exercise you will connect IBM MQ to IBM Event Streams using the Kafka source connector for MQ.
Introduction
You can use the Kafka Connect source connector for IBM MQ to copy data from IBM MQ into IBM Event Streams or Apache Kafka. The connector copies messages from a source MQ queue to a target Kafka topic. There is also an MQ sink connector that takes messages from a Kafka topic and transfers them to an MQ queue. Running it is very similar to the source connector. In this lab we will only be covering the source connector.
To begin with we will install the MQ on to ICP for our MQ messages. We will then configure the source connector to run some tests to a local stand-alone worker. We will then adjust our configuration to send the messages to a topic in Event Streams and run a console consumer to consume the messages.
At the end of this lab you should be able to install and configure MQ on ICP, configure and test sending messages from MQ to Event Streams.
Part 1 - Install MQ
To deploy MQ to Kubernetes cluster, you would normally need to create a persistent volume that uses the ReadWriteOnce (RWO) access mode. Since this a lab, we will disable persistence to remove the need for this step. This is not recommended in production.
1.1 Install MQ Helm Chart
We will install MQ using a Helm chart.
-
Open Manage then Repositories in the ICP UI and sync repositories as you did in previous lab.
-
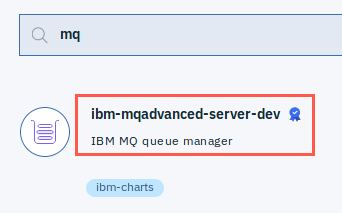
Open the Catalog and search for mq.
-
You will see a chart for ibm-mqadvanced-server-dev.
-
Click on the tile to open it.
-
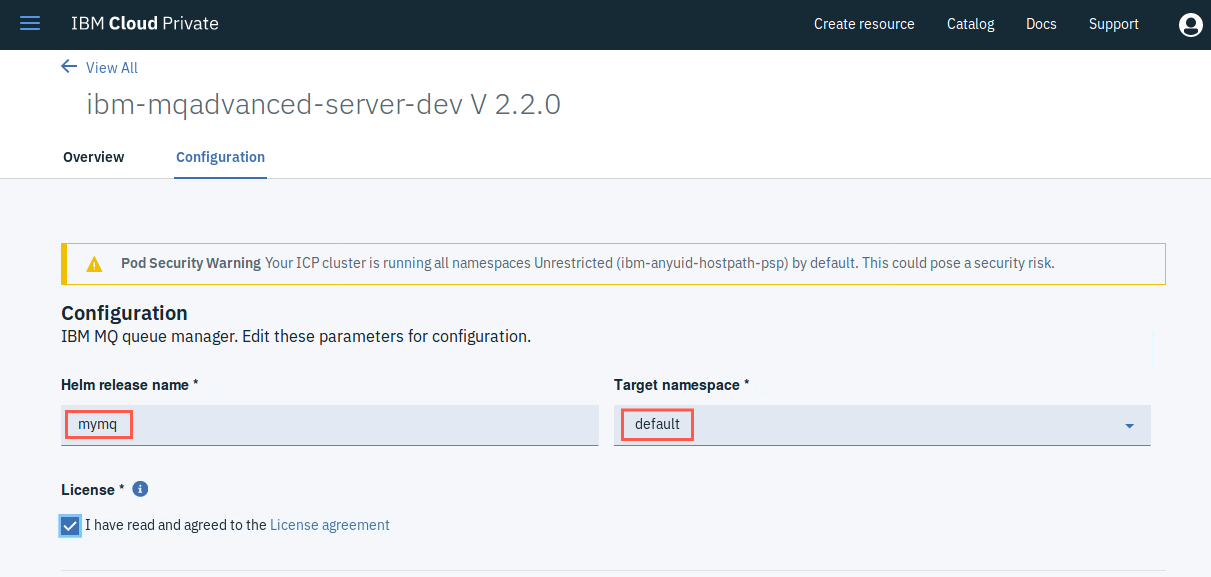
Click on the Configuration tab and enter the information as follows:
a. Helm release name = mymq
b. Target namespace = default
c. Accept the License agreement.
-
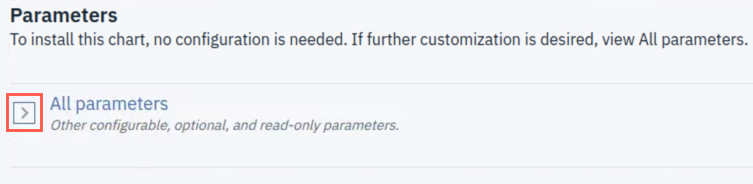
Under Parameters, expand All parameters.
-
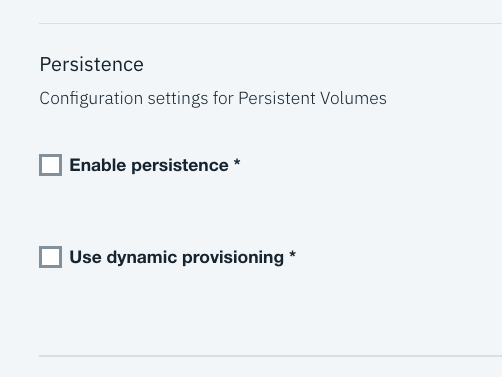
Scroll down and de-select Enable persistence and Use dynamic provisioning.
-
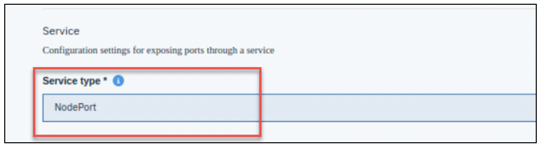
Scroll down further and select Service type of NodePort.
-
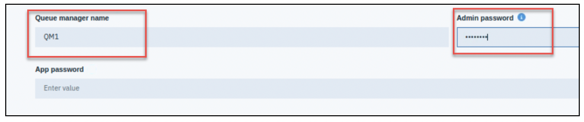
Scroll down further and enter a Queue manager name of QM1 (you can select anything here, but all of the lab instructions are based on your queue manager being QM1 so you will need to adjust as necessary).
-
Enter an Admin password (we used passw0rd but you may use anything you like – just make sure you remember what you used).
-
You do not need to change any other settings in the configuration.
-
Click Install.
-
Shortly you will see a message that the install is complete and a link to the Helm Release.
-
Alternatively you can simply go to the Helm Release (Workloads -> Helm Releases) as shown below.
-
The Helm Release name is mymq as you configured and should be in a Deployed state.

-
Click on mymq to open up the Helm Release.
-
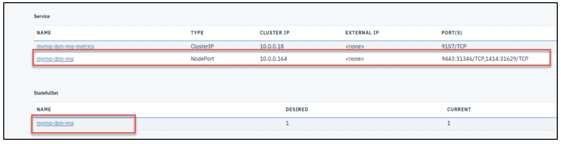
You should see the NodePort service (which will give us the admin console and mq listener ports).
-
You should also see StatefulSet with a desired count of 1 and a current count of 1.
-
Click on the StatefulSet and ensure that it is in a Running state.
Note:
Make a note of the Pod name. If you ever want to use command line access to perform any MQ operations or tail the logs, for example, you will need this. We do not cover this in the lab but for your info (after you have logged on to the kubectl client the command is as follows: sudo kubectl exec -it mymq-ibm-mq-0 /bin/bash where mymq-ibm-mq-0 is the pod name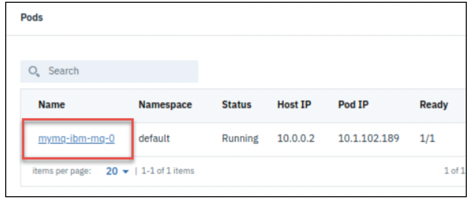
-
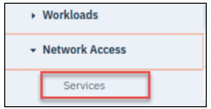
Now go to the Services (Network Access -> Services).
-
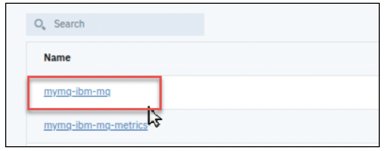
Locate the mymq-ibm-mq service.
-
Click on it.
-
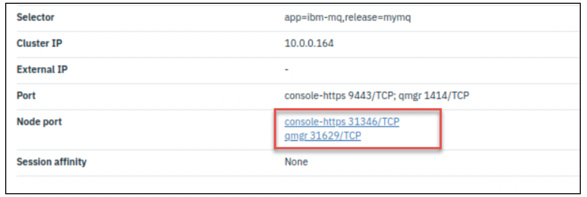
You will see a link for the MQ console and a link for the MQ traffic (the listener).
-
Make a note of the MQ listener NodePort (31629 in this example) as this will be used later.
-
Click on the link for the MQ console (console-https) to open the MQ console.
-
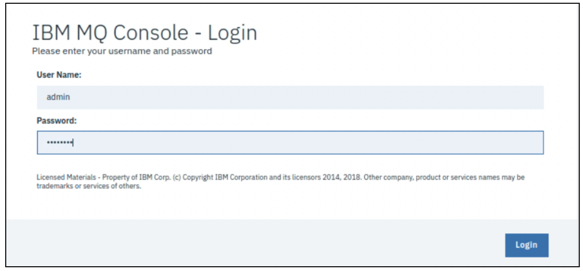
Log on to the MQ console using admin and the password you used when creating the queue manager.
-
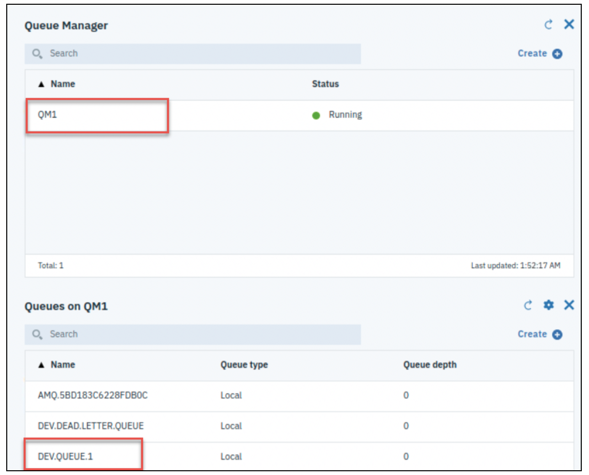
You should see QM1 in a Running state.
-
You will also see that some queues have already been created for you. We will be using one of these queues in the lab.
-
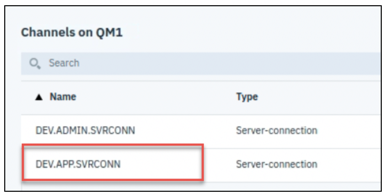
Additionally you will see that there have also been some svrconn channels created. We will be using the DEV.APP.SVRCONN for the lab.
All of the security settings are nicely the way that we need them for the lab so there is nothing more we need to do here.
Part 2 - Connector
We now move on to installing and testing the connector.
2.1 - Get the connector files
-
Go to the Events Streams UI and select the Toolbox.
-
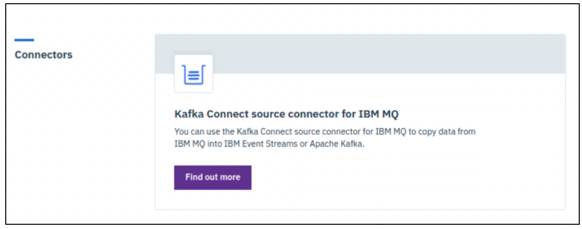
Scroll down to the Connectors tile.
-
Click on “Find out more”.
-
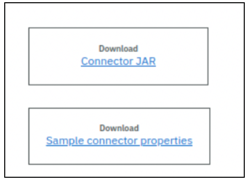
On the right hand side you will see downloads for both the Connector JAR and a Sample connector properties file.
-
Download these files and copy them to the /home/student directory.
 Note:
Note:
The connector is also available in GitHub if you wish to build it yourself. [https://github.com/ibm-messaging/kafka-connect-mq-sink
Kafka Connect connectors run inside a Java process called a worker. Kafka Connect can run in either standalone or distributed mode. Standalone mode is intended for testing and temporary connections between systems. Distributed mode is more appropriate for production use. These instructions focus on standalone mode because it's easier to see what's going on.
When you run Kafka Connect with a standalone worker, there are two configuration files. The worker configuration file contains the properties needed to connect to Kafka. The connector configuration file contains the properties needed for the connector. So, configuration to connect to Kafka goes into the worker configuration file, while the MQ configuration goes into the connector configuration file.
It's simplest to run just one connector in each standalone worker. Kafka Connect workers throw out a lot of messages and it's much simpler to read them if the messages from multiple connectors are not interleaved.
We are going to start from scratch with a local Kafka installation before moving on to Event Streams.
2.2 - Install local Kafka
-
Go to the Apache Kafka download site.
-
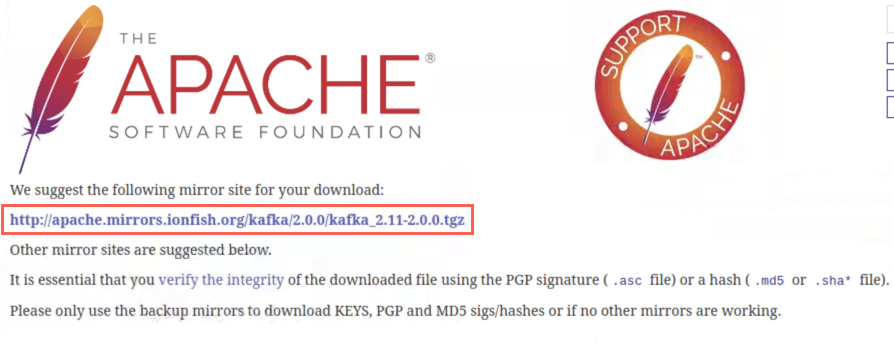
Select the .tgz file (called something like kafka_2.11-2.0.0.tgz) and unpack it (to your home directory). Kafka is continuously updated so the releases available will probably be different than what is shown in the screen shot.

-
You are given options for download mirror sites. Click the suggested site to download the .tgz file.
-
In your terminal window, make sure you are in the home directory and unpack the tar file (to your home directory) with the following command.
tar -zxvf ~/Downloads/kafka_2.11-2.0.0.tgz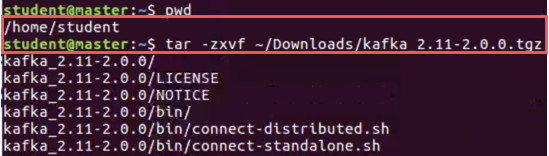
The top-level directory of the unpacked .tgz file is referred to as the Kafka root directory. It contains several directories including bin for the Kafka executables and config for the configuration files.
There are several components required to run a minimal Kafka cluster. It's easiest to run them each in a separate terminal window, starting in the Kafka root directory.
-
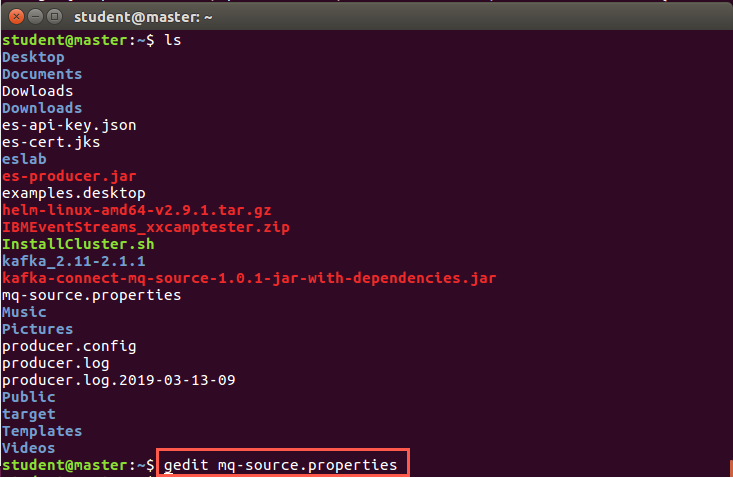
You now need to update the connector config file (mq-source.properties) for the value required to connect to your queue manager.
-
Open this file in a text editor and complete the values as follows:
a. mq.queue.manager=QM1
b. mq.connection.name.list=10.0.0.1(your mq listener NodePort)
c. mq.channel.name=DEV.APP.SVRCONN
d. mq.queue=DEV.QUEUE.1
e. topic=eslab
-
Click Save to save the file and then close it.
Note:
We could use a different topic but when we come to the Event Streams testing, we already have a producer and a consumer Service ID from previous labs, so we will reuse them to save a little time and effort.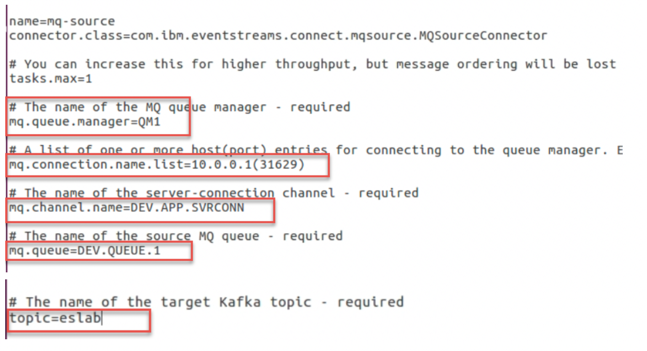
We are now ready to start some testing.
Part 3 - Test Connector from MQ to local Kafka installation
-
Open a new terminal window.
-
Change to the kafka root directory
-
Start a ZooKeeper server:
bin/zookeeper-server-start.sh config/zookeeper.properties
-
Wait while it starts up and then prints a message similar to this:

-
Open another terminal.
-
Again, change to the kafka root directory
-
Start a Kafka server:
bin/kafka-server-start.sh config/server.properties
-
Wait while it starts up and then prints a message similar to this:
“INFO [KafkaServer id=0] started”
We now need to create the topic we will use.
-
Open a terminal window (did we mention that there are lots of windows for this…)
-
Change to the kafka root directory (did we mention this before…)
-
Enter the following command:
bin/kafka-topics.sh --zookeeper localhost:2181 --create --topic eslab --partitions 1 --replication-factor 1 -
Check that the topic was created successfully:
bin/kafka-topics.sh --zookeeper localhost:2181 --describeYou now have a Kafka cluster consisting of a single node. This configuration is just a toy, but it works fine for a little testing.
The configuration is as follows:
-
Kafka bootstrap server - localhost:9092
-
ZooKeeper server - localhost:2181
-
Topic name – eslab
Note:
This configuration of Kafka puts its data in /tmp/kafka-logs, while ZooKeeper uses /tmp/zookeeper and Kafka Connect uses /tmp/connect.offsets. You can clear out these directories to reset to an empty state, making sure beforehand that they're not being used for something else.We are now ready to start the connector.
-
-
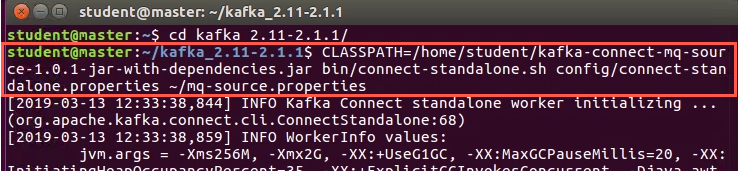
Enter the following command:
CLASSPATH=/home/student/kafka-connect-mq-source-1.0.1-jar-with-dependencies.jar bin/connect-standalone.sh config/connect-standalone.properties ~/mq-source.properties
-
If the connector is running correctly you will see two messages. The first indicates that the connector has successfully connected to the queue manager. The second will indicate that the connector is now polling for messages.
Last, but not least we need to start the console consumer to consume the messages that will be publish from MQ to the eslab topic.
-
Open (yet) another terminal window and enter the following command:
 cd kafka_2.11-2.1.1
 bin/kafka-console-consumer.sh --bootstrap-server localhost:9092 --topic eslab
You will not see anything until it starts consuming messages.
-
Go back to the MQ console.
-
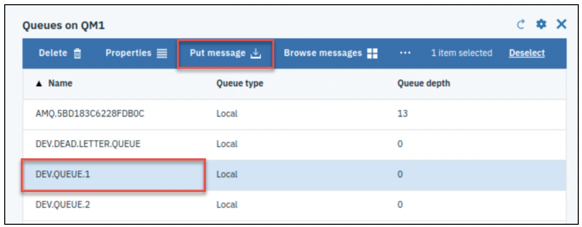
Select the DEV.QUEUE.1 (or whichever queue you used in your configuration file).
-
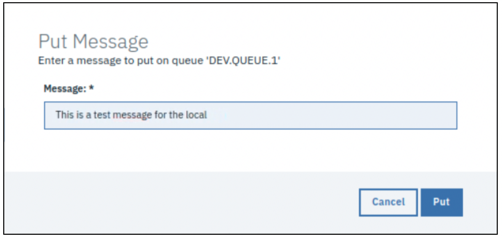
Put a sample message on the queue.
-
You should see this message in the console consumer.
-
Woohoo! You have successfully have your local Kafka consume the message that has been published from MQ.
-
You can now close the console consumer (ctrl-C).
-
You will see the number of messages that have been consumed).
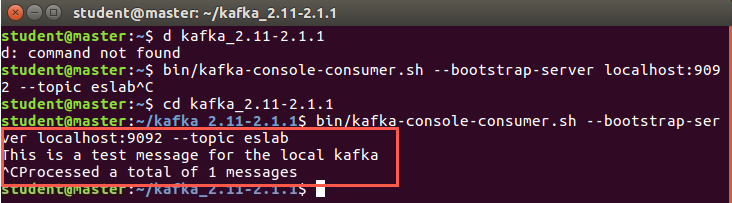
-
After you have finished experimenting with this, you will probably want to stop Apache Kafka. You start by stopping any Kafka Connect workers (ctrl-C).
-
Then, in the Kafka root directory, stop Kafka:
bin/kafka-server-stop.sh
-
And finally, stop ZooKeeper:
bin/zookeeper-server-stop.sh
-
You can close all those extra windows now.
Part 4 - Test Connector from MQ to Event Streams
If you have not consumed all the messages from the load test – you might want to go and run the consumer test app and get rid of them all before you proceed (remember that we produced A LOT of messages). Grab a cuppa while this happens.
You can use an existing MQ or Kafka installation, either locally or on the cloud. For performance reasons, it is recommended to run the Kafka Connect worker close to the queue manager to minimise the effect of network latency. So, if you have a queue manager in your datacenter and Kafka in the cloud, it's best to run the Kafka Connect worker in your datacenter.
To use an existing Kafka cluster, you specify the connection information in the worker configuration file.
You will need:
-
A list of one or more servers for bootstrapping connections
-
Whether the cluster requires connections to use SSL/TLS
-
Authentication credentials if the cluster requires clients to authenticate
You will also need to run the Kafka Connect worker (which we ran in the previous section).
Start by creating a new api key for a producer and a consumer
-
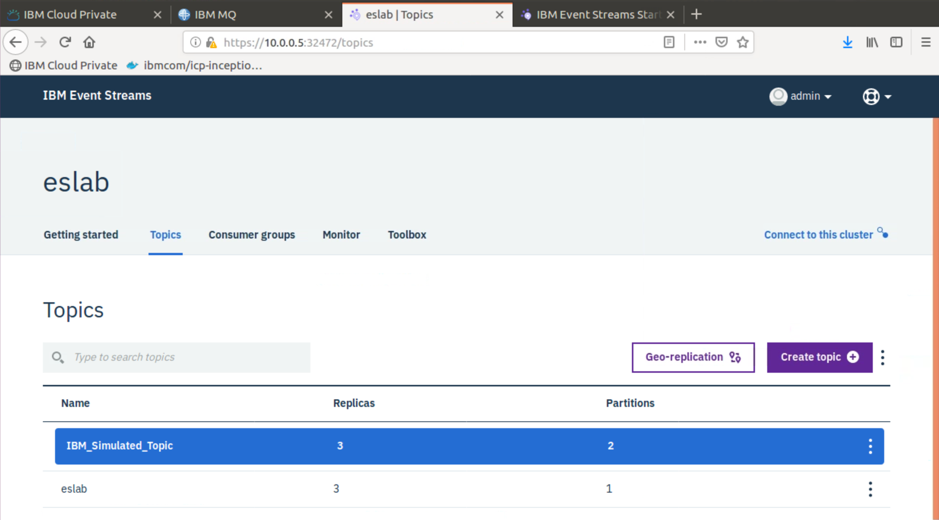
In the IBM Event Streams UI, click Connect to this cluster or Connect to this topic.
-
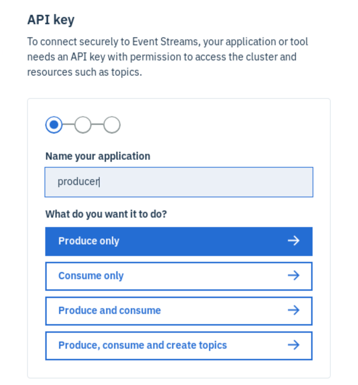
In the API key section enter producer as the name of your application and click Produce only.
-
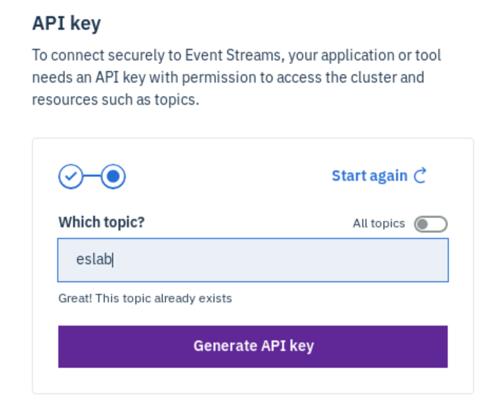
Enter the topic name eslab and click Generate API key
-
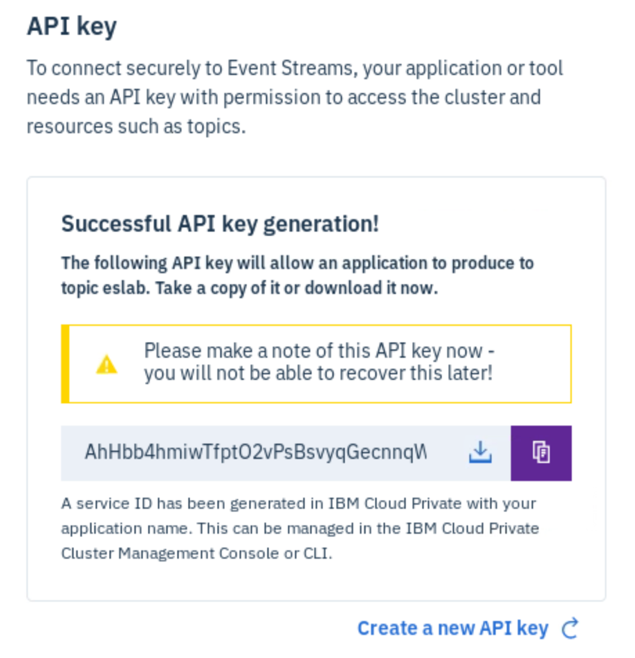
The API key is created. You need to download the json file. Notice that the file is always named es-api-key.json. Once downloaded, you rename it to producer.json.
-
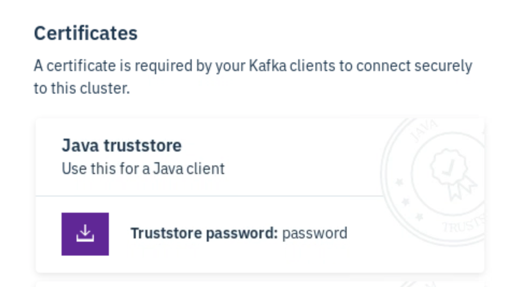
Download and save the Java truststore.
-
Repeat the above steps instead choosing Consume only. Give the application name as *consumer and dame the downloaded file consumer.json.
-
We will be using them as follows (that’s why it is a good idea to rename them appropriately).
a. Kafka connect = producer
b. Console consumer = consumer
-
Go to the config directory in the kafka (/home/student/kafka_2.11-2.0.0/config)
-
Take a copy of the connect-standalone.properties file (connect-standalone.properties). We named ours connect-standalone-es.properties.
-
Edit the properties file as follows using the following command:
gedit connect-standalone-es.propertiesa. The bootstrap server = the bootstrap server listed in the Event Streams UI in the connection panel where you created the API keys.
b. The truststore location = /home/student/Downloads/es-cert.jks
c. The truststore password = password
d. The password for the sasl.jaas.config is the API key. Copy the key from the producer.json file.
Warning:
REMEMBER THIS IS THE PRODUCER SO USE THE RIGHT KEY.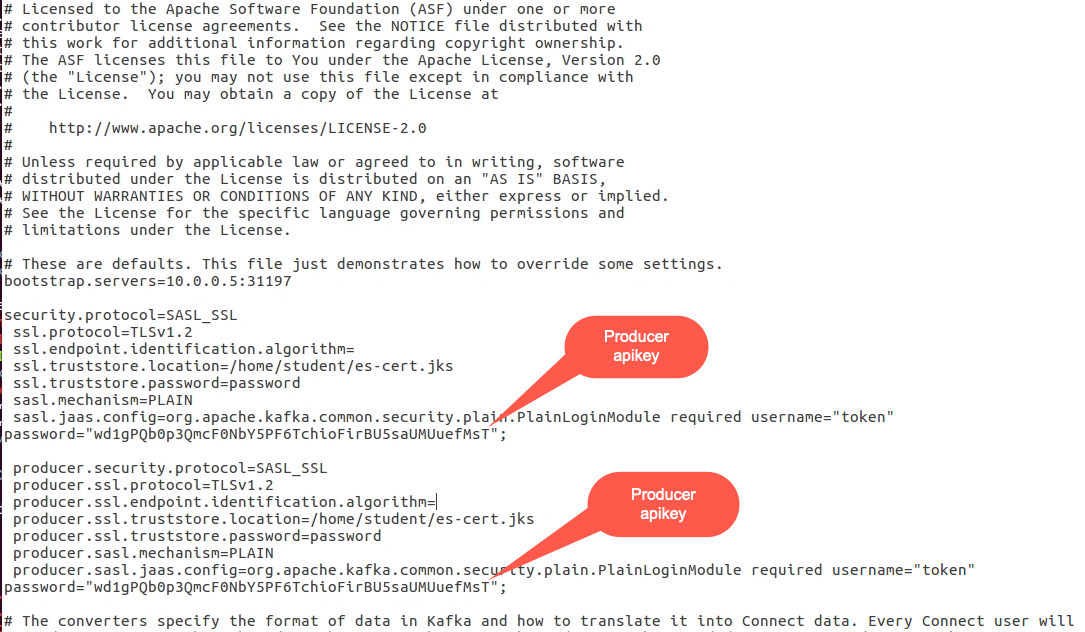
security.protocol=SASL_SSL ssl.protocol=TLSv1.2 ssl.endpoint.identification.algorithm= ssl.truststore.location=/home/student/Downloads/es-cert.jks ssl.truststore.password=password sasl.mechanism=PLAIN sasl.jaas.config=org.apache.kafka.common.security.plain.PlainLoginModule required username="token" password=""; producer.security.protocol=SASL_SSL producer.ssl.protocol=TLSv1.2 producer.ssl.endpoint.identification.algorithm= producer.ssl.truststore.location=/home/student/Downloads/es-cert.jks producer.ssl.truststore.password=password producer.sasl.mechanism=PLAIN producer.sasl.jaas.config=org.apache.kafka.common.security.plain.PlainLoginModule required username="token" password=""; -
The MQ properties have not changed so there is nothing required for that file.
-
Start the connector ensuring that you point at the new configuration file.
CLASSPATH=/home/student/kafka-connect-mq-source-1.0.1-jar-with-dependencies.jar bin/connect-standalone.sh config/connect-standalone-es.properties ~/mq-source.properties
-
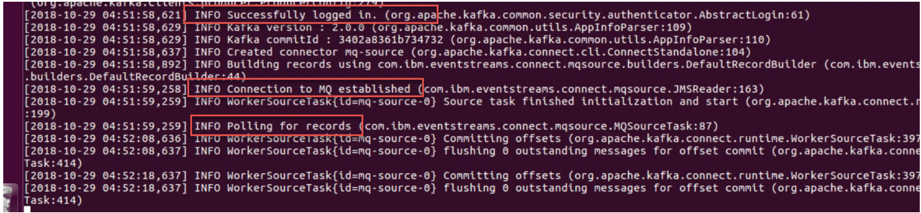
Check for the two messages as before to indicate the you are connected to the queue mamager and that the connector is polling.
-
Go back to the MQ console and put a message on the queue again.
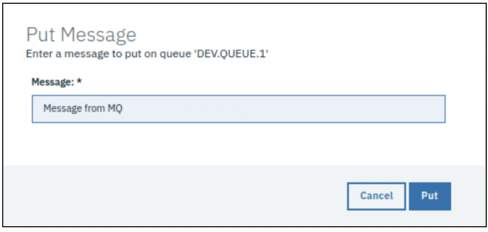
-
Return to your Event Streams UI and click on your topic in the Topics tab.
-
Under Messages you should see the message from MQ.
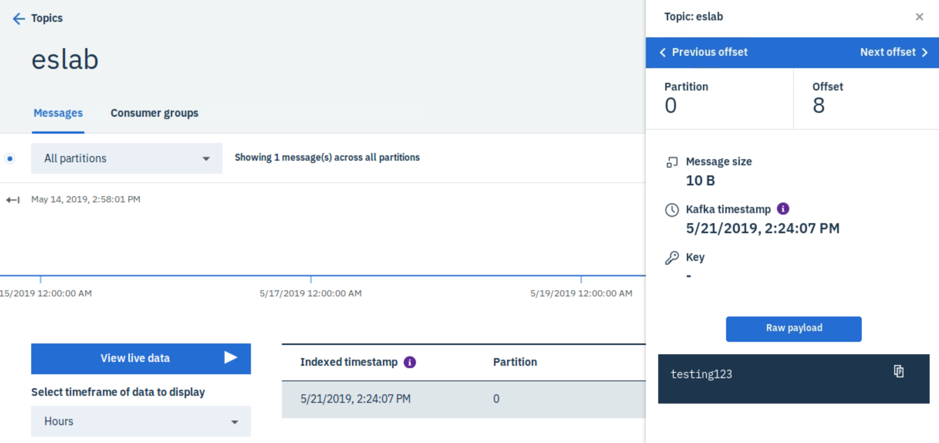
Did it work? Well done!
Part 5 - Test Connector from MQ to Event Streams Using a console connector
There is another way to test it out. You can start a console consumer.
-
Take a copy of the connect-standalone-es.properties and save it to your home directory as mqlab.properties.

-
Change to your home directory and edit the mqlab.properties file as follows using the following command:
gedit mqlab.properties -
Edit this file as shown below. The only property you need to change is the API key in the password. You can copy the snippet below, then add the consumer’s key in the password fields (copy key from the consumer.json file).
Warning:
REMEMBER THIS MUST BE THE CONSUMER APIKEY.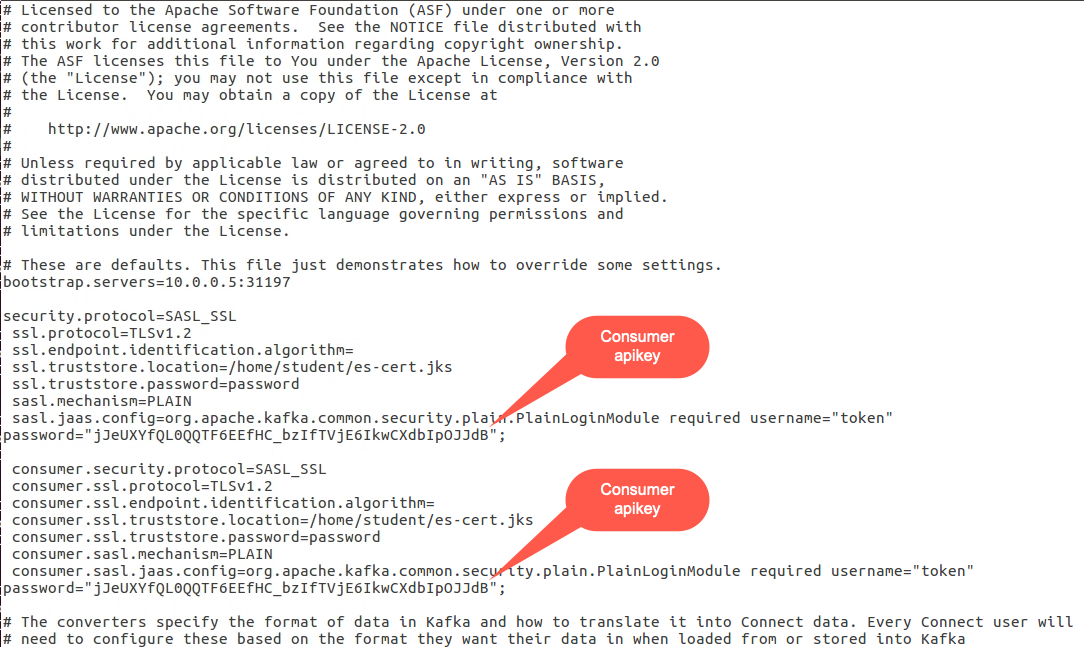
security.protocol=SASL_SSL ssl.protocol=TLSv1.2 ssl.endpoint.identification.algorithm= ssl.truststore.location=/home/student/es-cert.jks ssl.truststore.password=password sasl.mechanism=PLAIN sasl.jaas.config=org.apache.kafka.common.security.plain.PlainLoginModule required username="token" password=""; consumer.security.protocol=SASL_SSL consumer.ssl.protocol=TLSv1.2 consumer.ssl.endpoint.identification.algorithm= consumer.ssl.truststore.location=/home/student/es-cert.jks consumer.ssl.truststore.password=password consumer.sasl.mechanism=PLAIN consumer.sasl.jaas.config=org.apache.kafka.common.security.plain.PlainLoginModule required username="token" password=""; -
Enter the command for the console consumer.
bin/kafka-console-consumer.sh --bootstrap-server 10.0.0.1:30151 --consumer.config /home/student/mqlab.properties --topic eslab --group eslabtester
-
Return to the MQ console and put another message on the DEV.QUEUE.1 queue. You should see it on your console consumer.
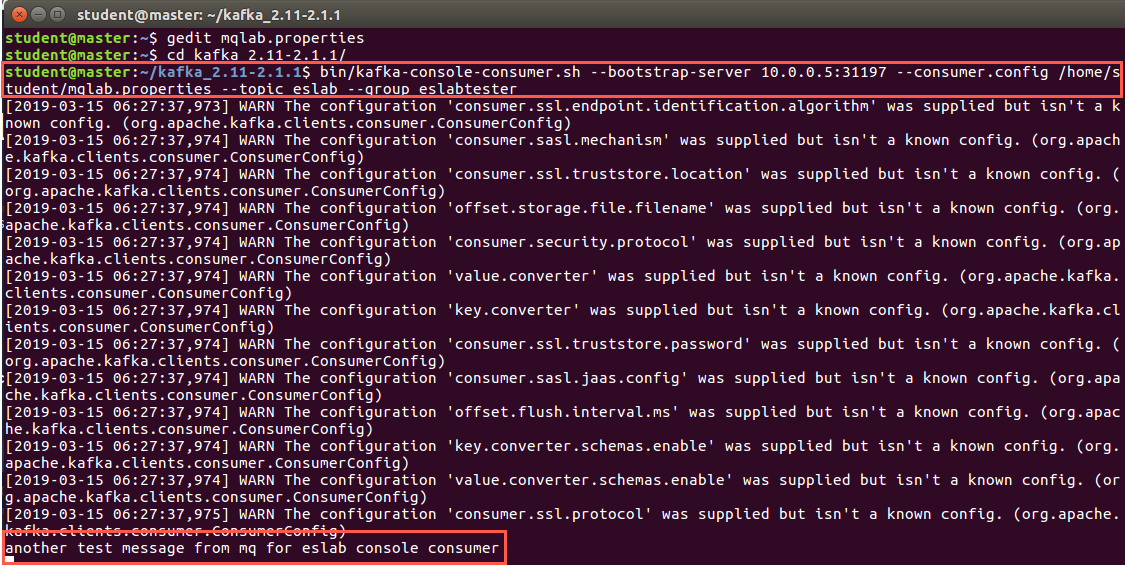
Group should be the name of your application that you use for testing your topic, so if you are not using the name (eslab / eslabtester) in this guide then yours will be different.
Did it work? Well done, this completes the MQ connector lab.
For more information on using the MQ connector (both source and sink) go to the help documentation for Event Streams or GitHub.
https://github.com/ibm-messaging/kafka-connect-mq- source/blob/master/UsingMQwithKafkaConnect.md
Congratulations
You have successfully created a workload generator application and ran some loads through Event Streams.