Getting Started with IBM Event Streams
IBM Event Streams is based on years of operational expertise IBM has gained from running Apache Kafka® for enterprises. IBM Event Streams offers enterprise-grade security, scalability, and reliability running on Red Hat® OpenShift® 4.6
Overview
Building an event-driven architecture with IBM Event Steams allows organizations to transition from traditional monolith systems and silos to more modern microservices and event streaming applications that increase their agility and accelerate their time to innovation.
IBM Event Streams builds on top of open-source Apache Kafka® to offer enterprise-grade event streaming capabilities. The following features are included as part of IBM Event Streams:
-
Identity and Access Management (IAM), fine-grain security controls to manage the access that you want to grant each user for Kafka clusters, Topics, Consumer Groups, Producers and more.
-
Geo-replication to deploy multiple instances of Event Streams in different locations and then synchronize data between your clusters to improve service availability.
-
Visually driven management and monitoring experience with the Event Streams dashboard that displays metrics collected from the cluster, Kafka brokers, messages, consumers, and producers to provide health check information and options to resolve issues.
-
Encrypted communication between internal components and encrypted storage.
In this exercise you will explore the following key capabilities:
- Prepare IBM Cloud Pak for Integration 2020.1.1 running on Red Hat OpenShift 4.3
- Install an IBM Event Streams 2020.1 instance in IBM Cloud Pak
- Create and manage Event Streams topics
- Use a Starter application to send and receive data
Step 1: Set up your IBM Cloud Pak for Integration environment before installing Event Streams
The demo runs on virtual machines that are provided by IBM Demos. An environment will be provisioned for you and the instructor will provide the details to access the environment.
Navigate to the URL provided which will open the IBM Demonstration Portal. Enter the password also included in the email. The IBM Demonstration Portal presents several Linux virtual machines configured in an IBM Cloud Pak for Integration 2020.1.1 cluster on Red Hat OpenShift 4.3.
-
If needed, click the run button to start the virtual machines.
Once the virtual machines display Running as their status, login to the cluster by clicking on the Desktop VM icon.
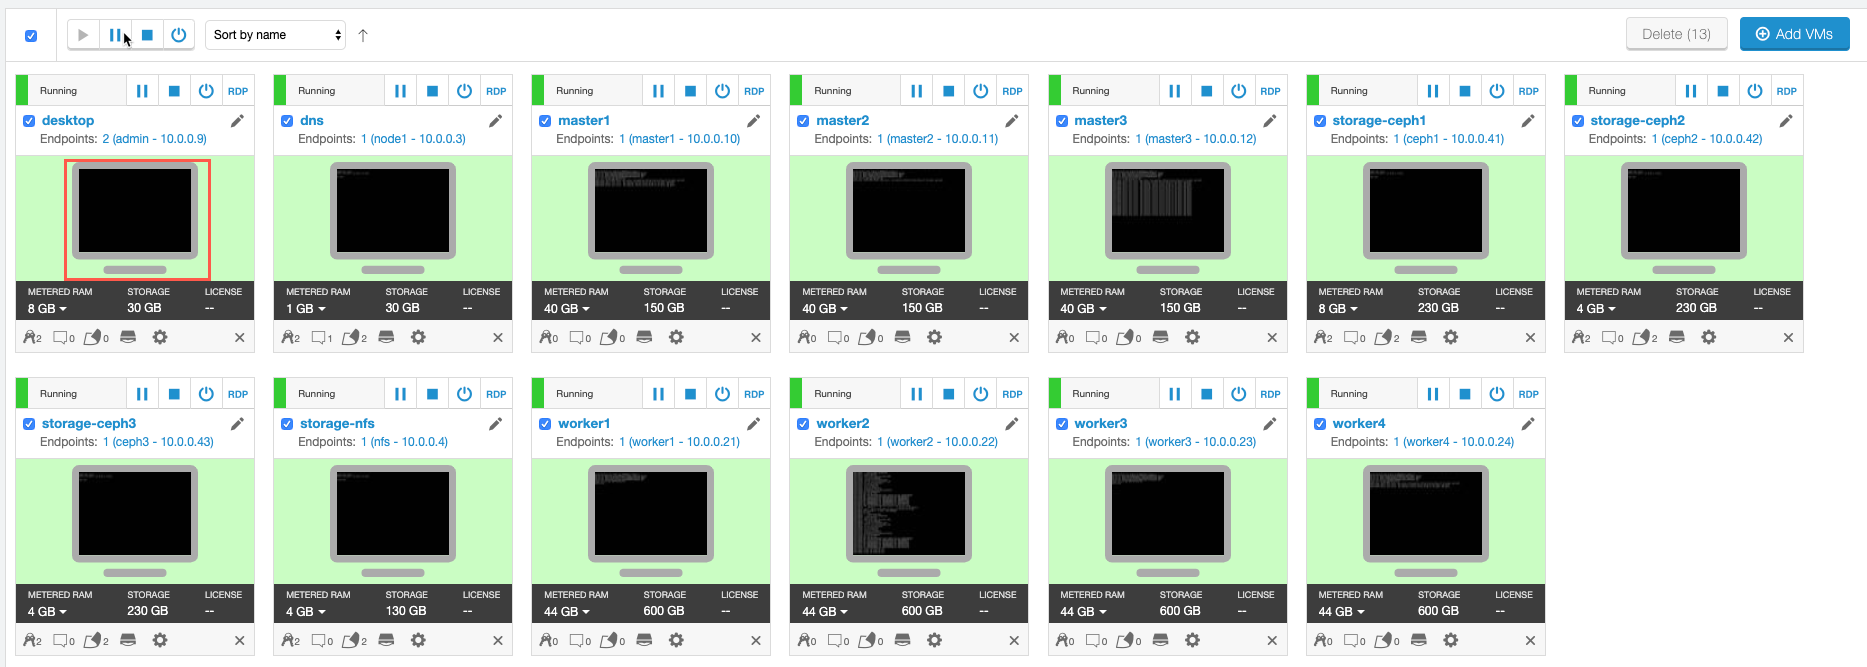
-
Log in to the Linux desktop hitting enter, then click ibmuser as the userid.
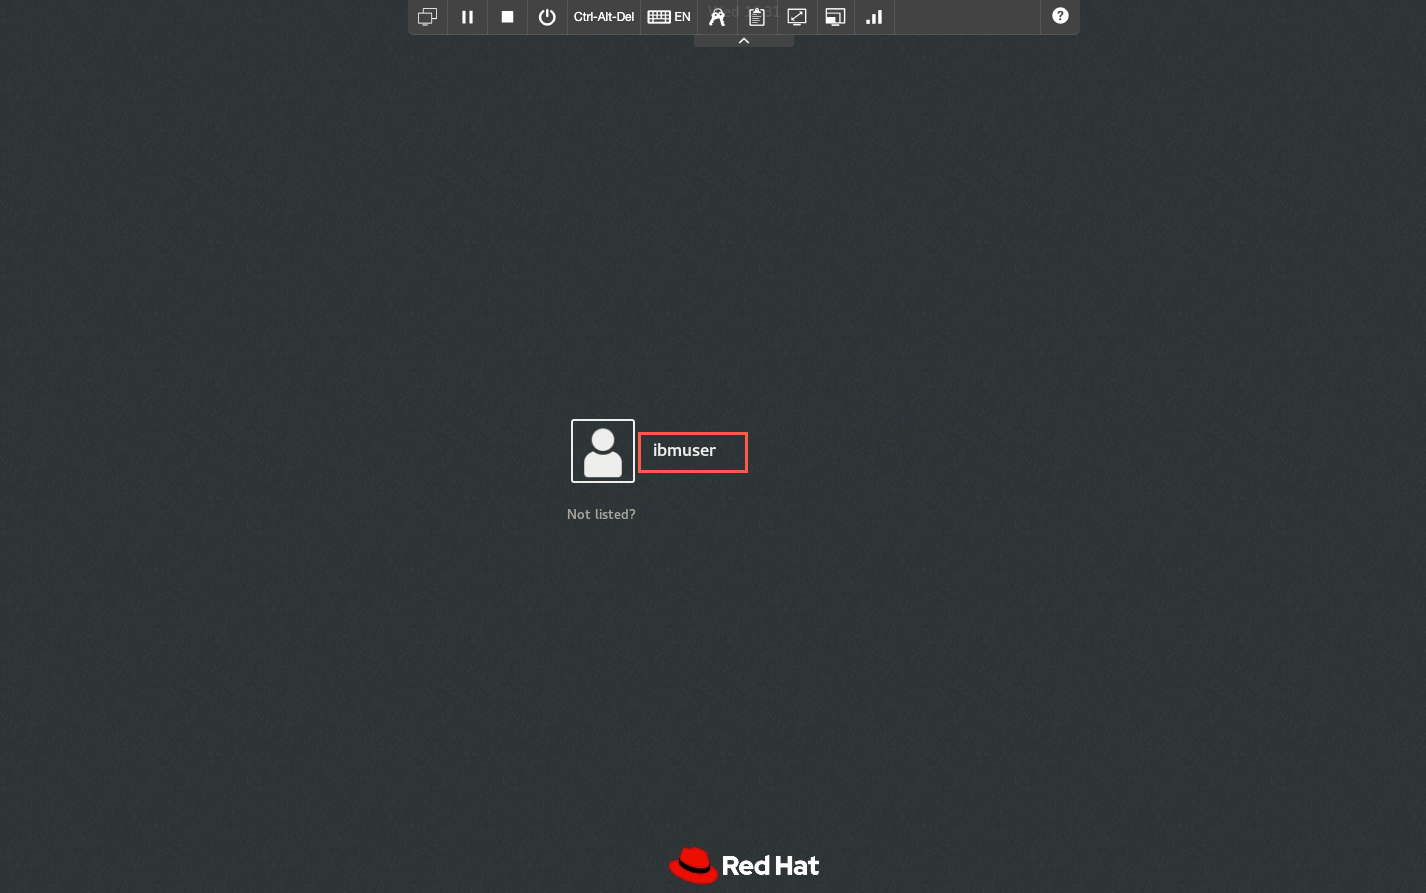
-
Enter engageibm for the password.
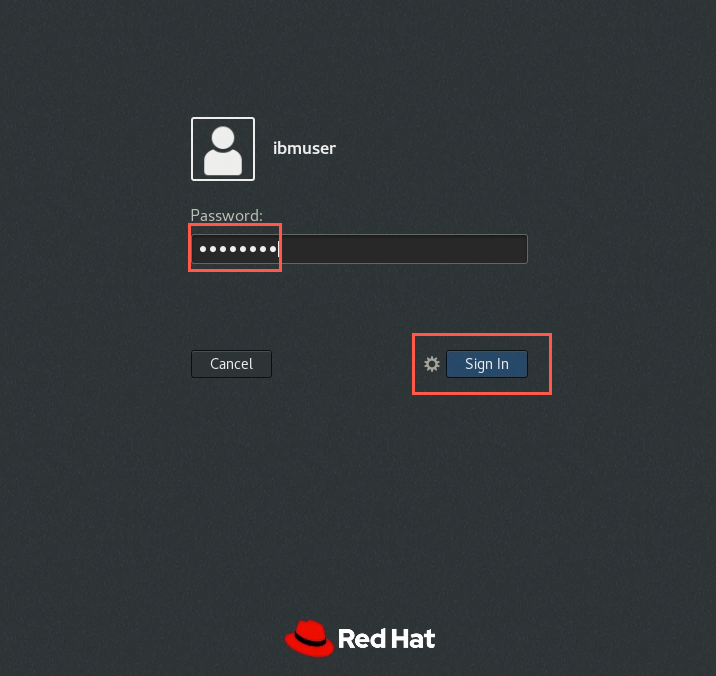
-
Open a Firefox web browser by double-clicking its icon on the desktop.
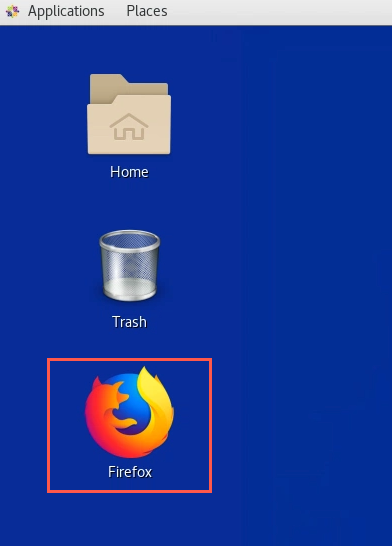
-
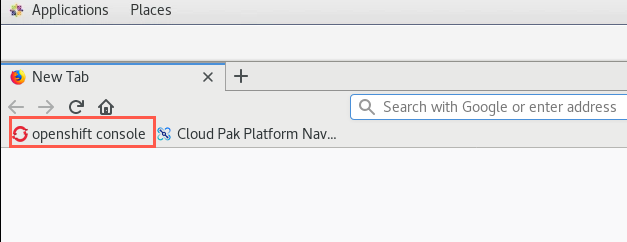
There are a few bookmarks on the Home page. Click the openshift console bookmark. bookmark.
-
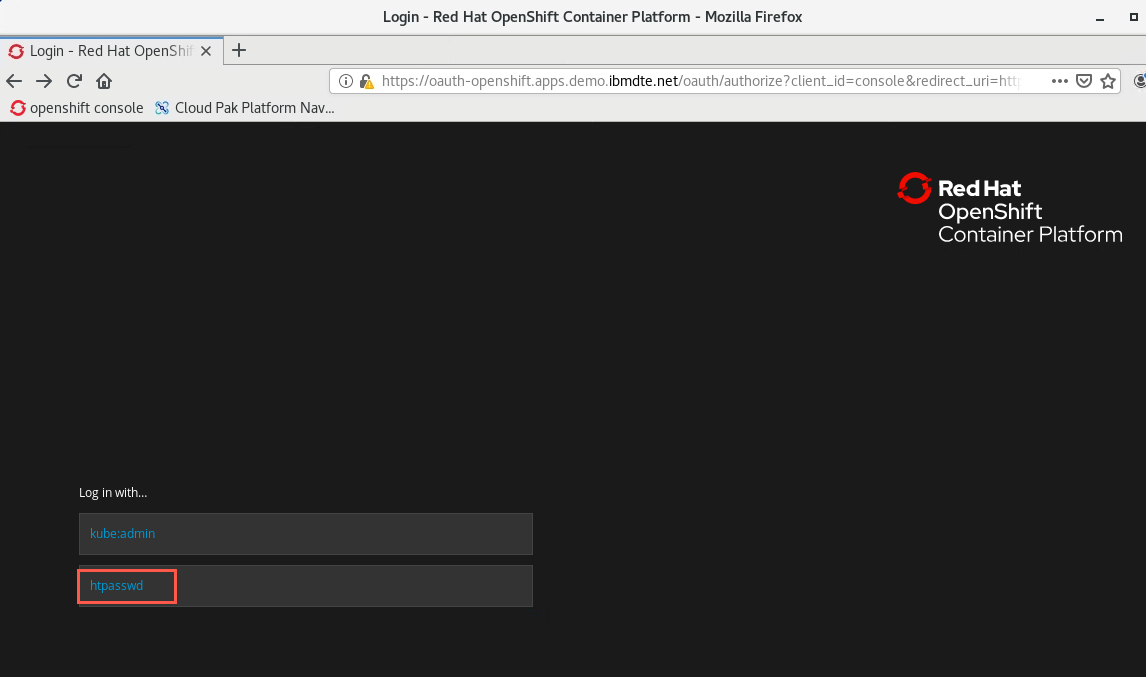
If you are not already logged in to the OpenShift cluster, you will be required to log in. Click in the htpasswd field.
-
The username and password are cached on this cluster and will be filled in, so you only need to click Log in.
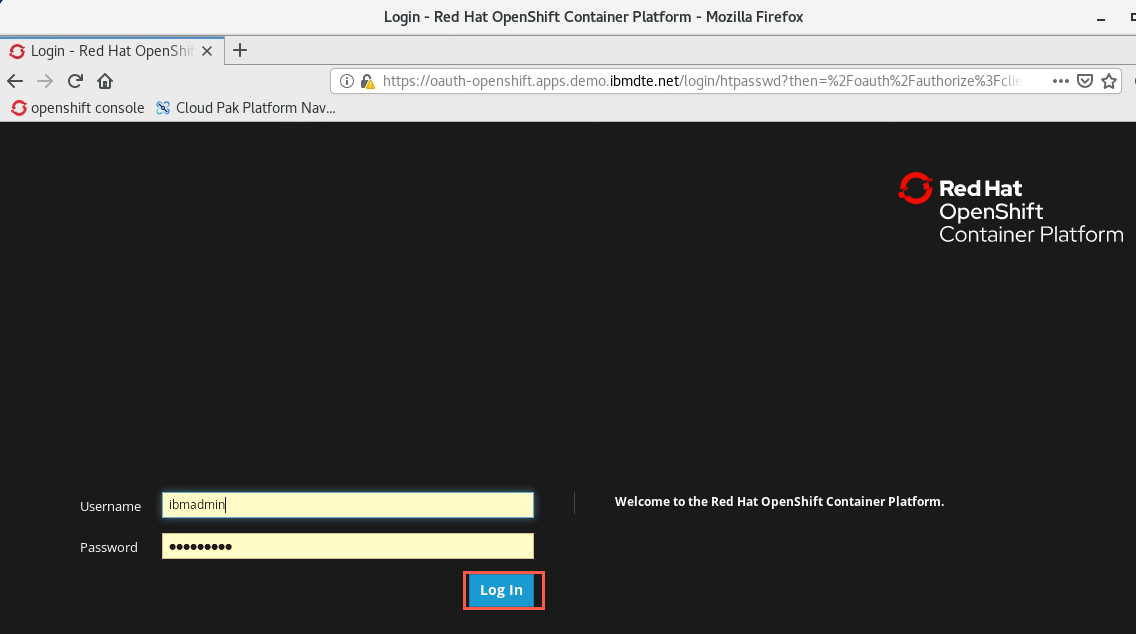
The OpenShift console will open. You do not need to do anything on the console now, but leave it open as you will be using it shortly.
Task 2 - Installing an Event Streams instance
IBM Cloud Pak for Integration offers a single, unified platform for all your enterprise integration needs. It deploys integration capabilities into the Red Hat OpenShift managed container environment and uses the monitoring, logging, and security systems of OpenShift to ensure consistency across all integration solutions.
-
Open another Firefox tab by clicking the + sign, then click IBM Cloud Pak Platform Nav… bookmark.
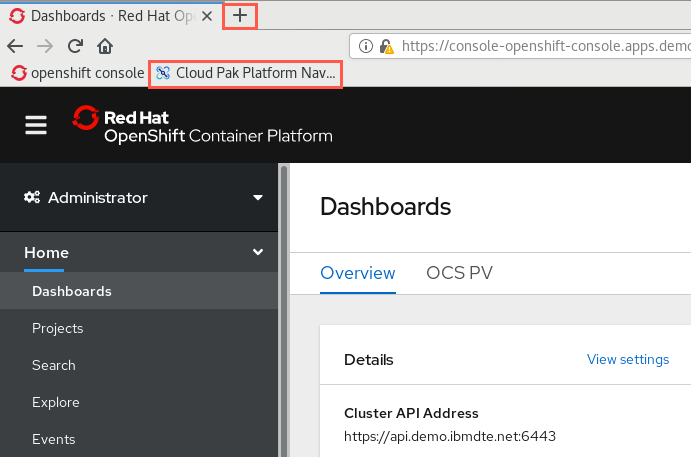
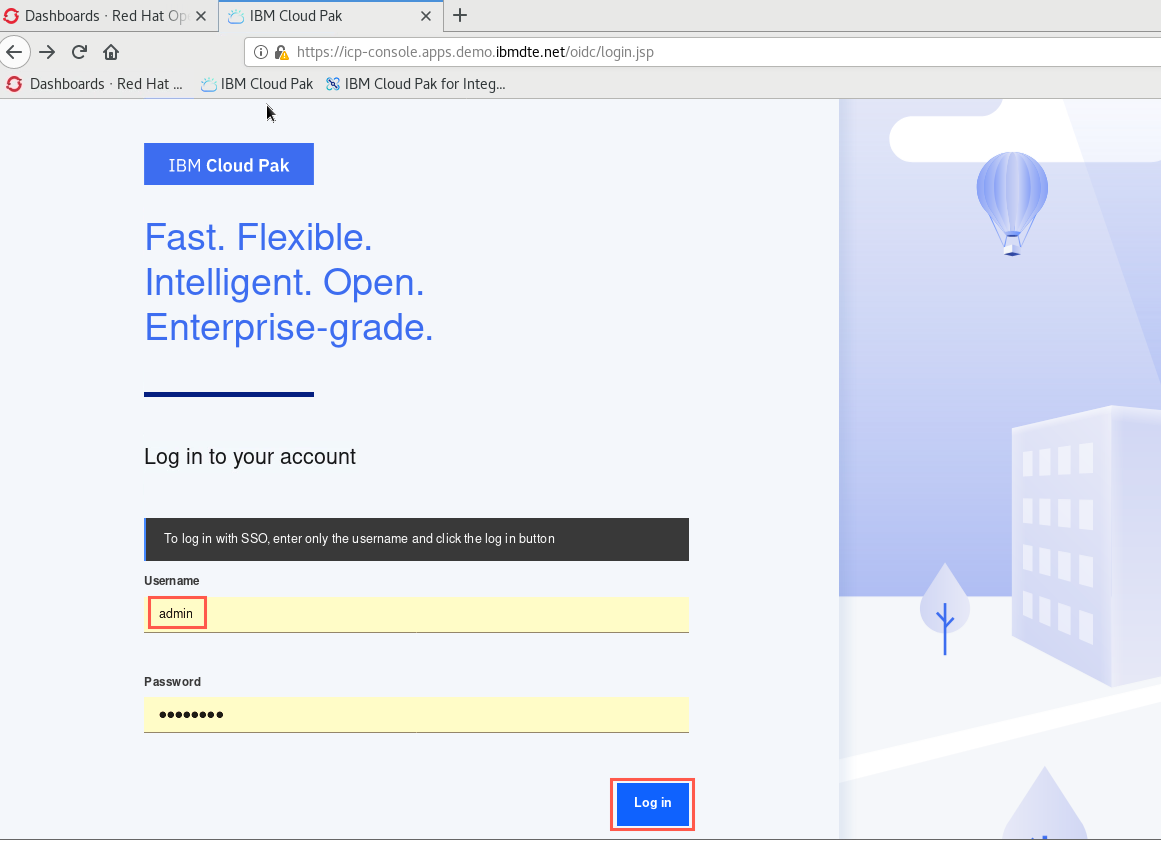
The Cloud Pak log in page opens. The admin id and password (username admin and Password passw0rd) have been cached on this page also and are already filled in for you.
-
Click Log in.
-
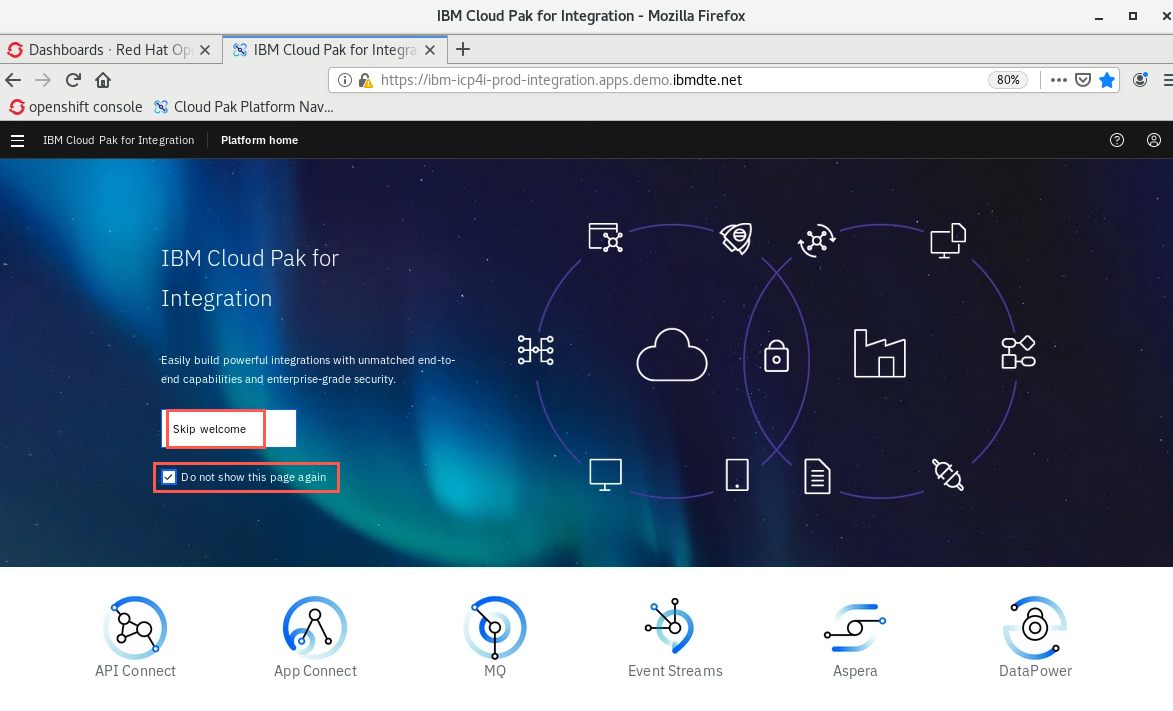
If the IBM Cloud Pak for Integration splash page appears to welcome you, you can scroll down and review this page to see what is included, but do not create any instances from this page as the instances have already been created for you. Click the check box for Do not show this page again then click Skip welcome.
Install a new instance of Event Streams in IBM Cloud Pak for Integration
-
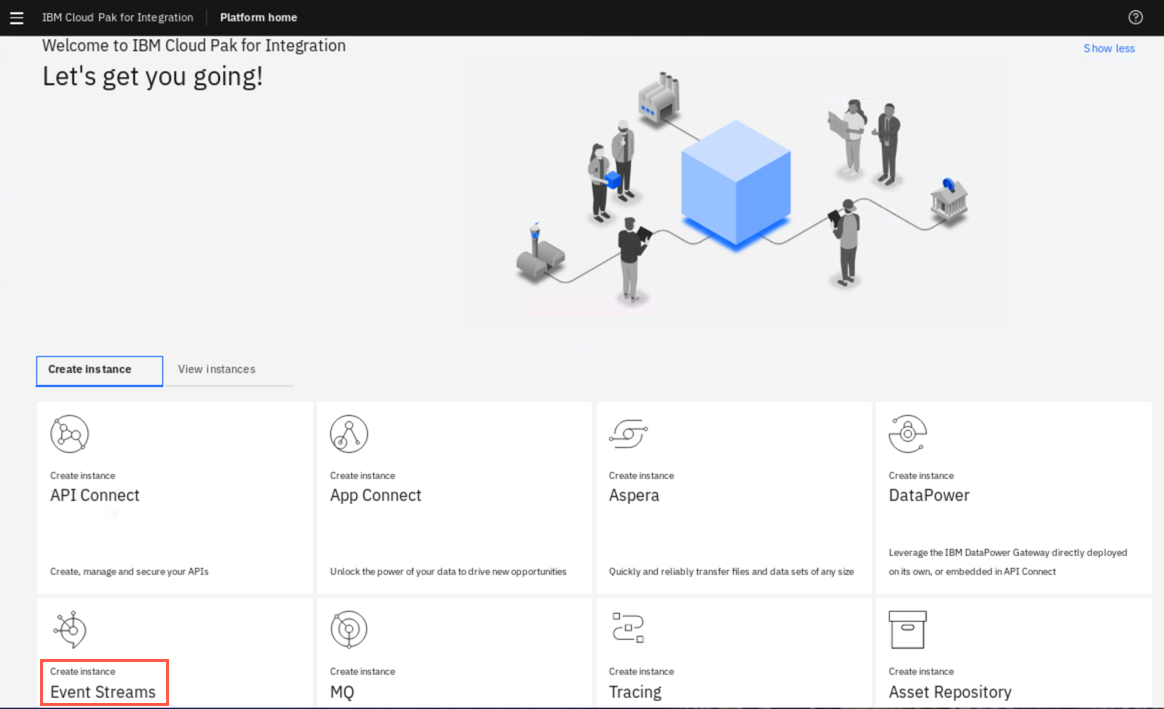
Otherwise the Integration Platform Navigator Home page will open. Click Create Instance.
-
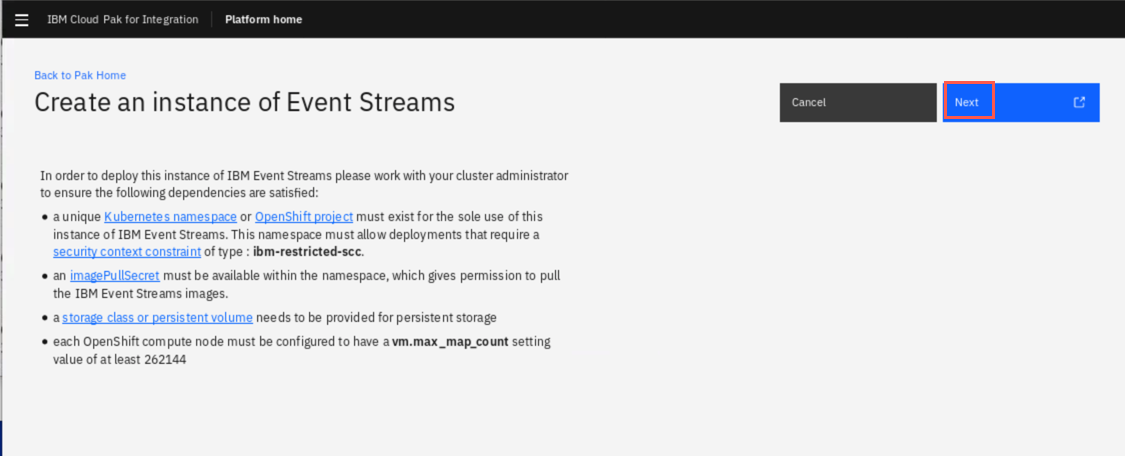
Click Next. Review the information provided about Event Streams on the overview page.
-
Configure the Event Streams chart as follows. The helm chart creates a number of IBM Cloud Pak for Integration configuration objects that can be customized.
- In the Helm release name, enter eslab.
- As the Target namespace, enter eventstreams.
- Select local-cluster as the Target cluster
- Select the License agreement checkbox.
-
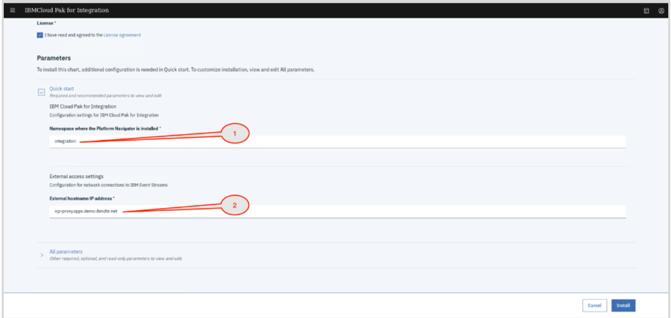
Expand the Quick start section.
- Enter integration as the Namespace where the Platform Navigator is installed
- Enter the External hostname/IP address: icp-proxy.apps.demo.ibmdte.net
-
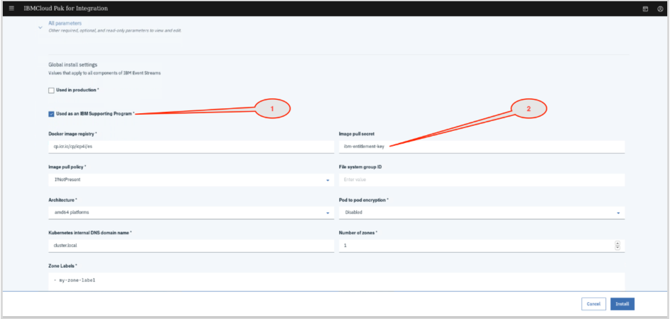
Expand the All parameters section.
- Check the Used as an IBM Supporting Program checkbox
- Enter the Image pull secret: ibm-entitlement-key
-
For this lab, scroll down and uncheck Enable message indexing. Leave all other values as the default. Click Install.
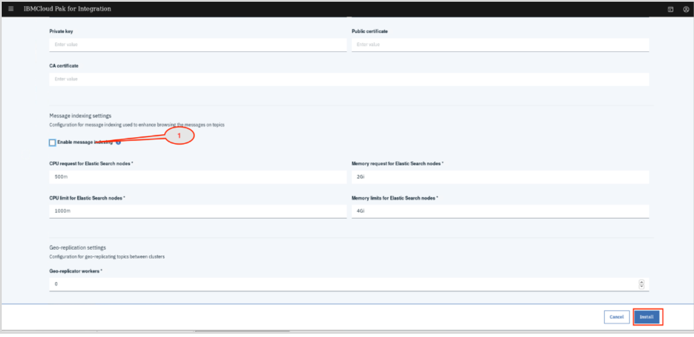
The installation process takes a few minutes to complete. A notification at the top of the page informs you that Chart deployment is in progress.
-
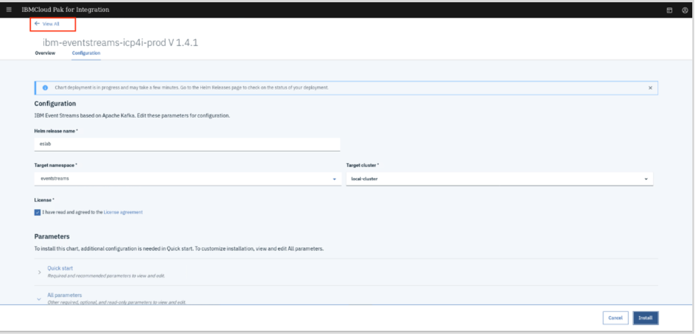
To continue to the Event Streams interface, scroll to the top of the page and click View all to leave the configuration page.
-
Click View Instances. All installed instances are displayed.
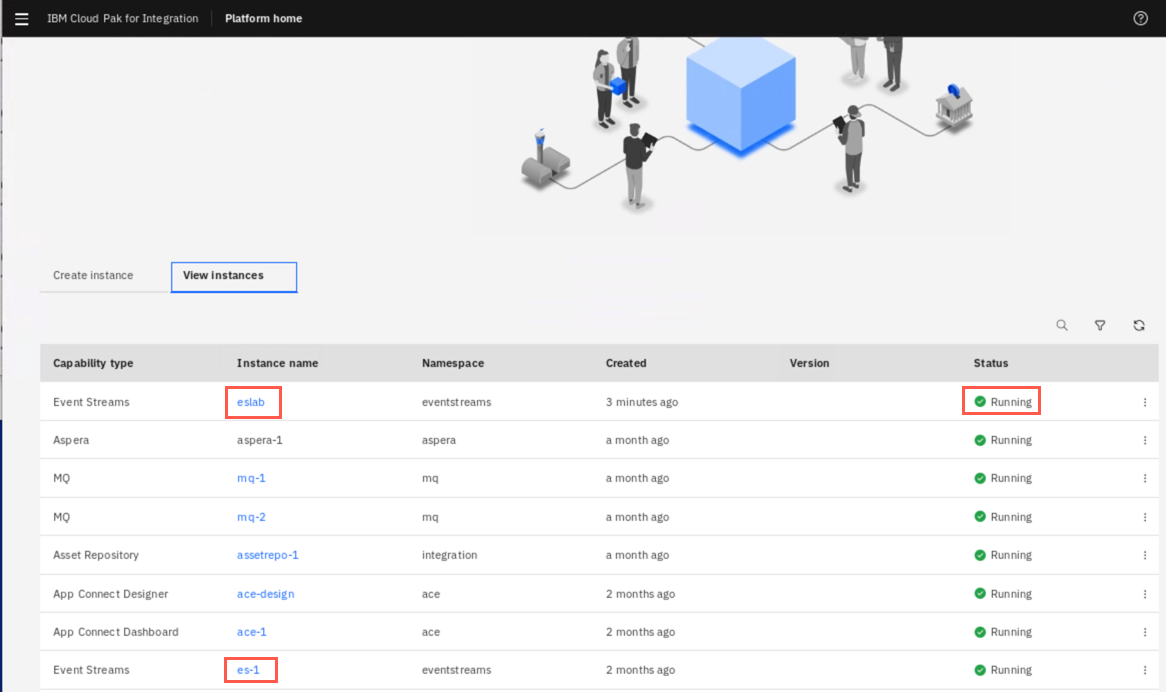
The list of all previously created instances is displayed showing the Capability type, Instance Name, Namespace, the Created time, and Status.
You may need to refresh the screen and click View instances several times until eslab appears in the list.
-
Verify if Event Streams instance eslab is running.
Explore Event Streams user interface
-
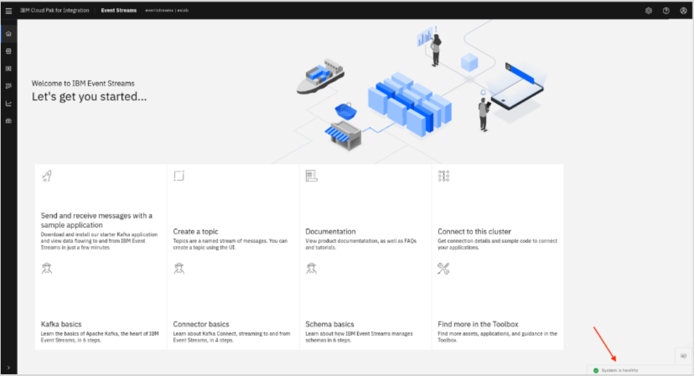
Click instance name: eslab.
-
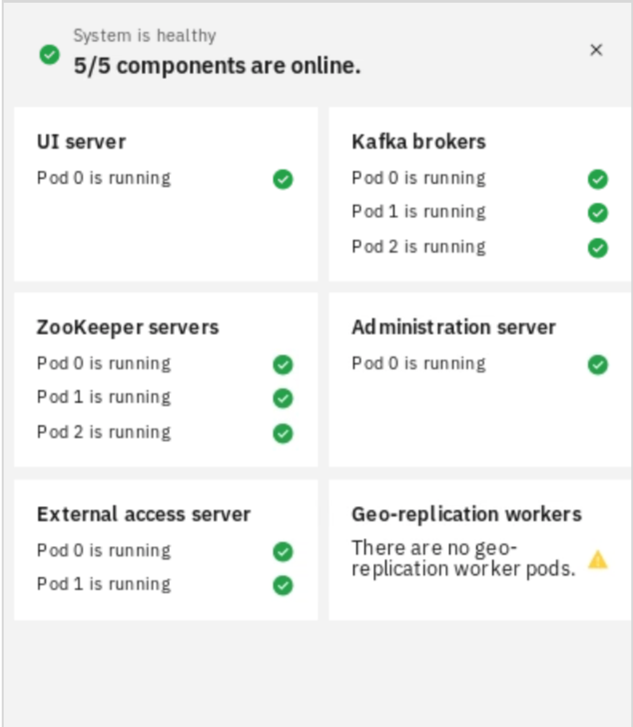
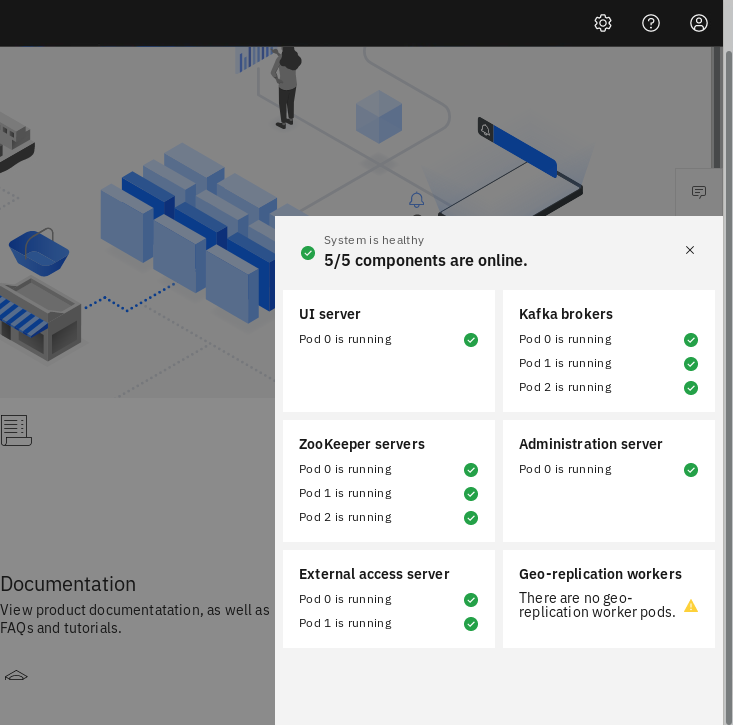
Use the System is healthy box to verify the health of each Event Streams component.
-
Click the box to see the details.
 Important:
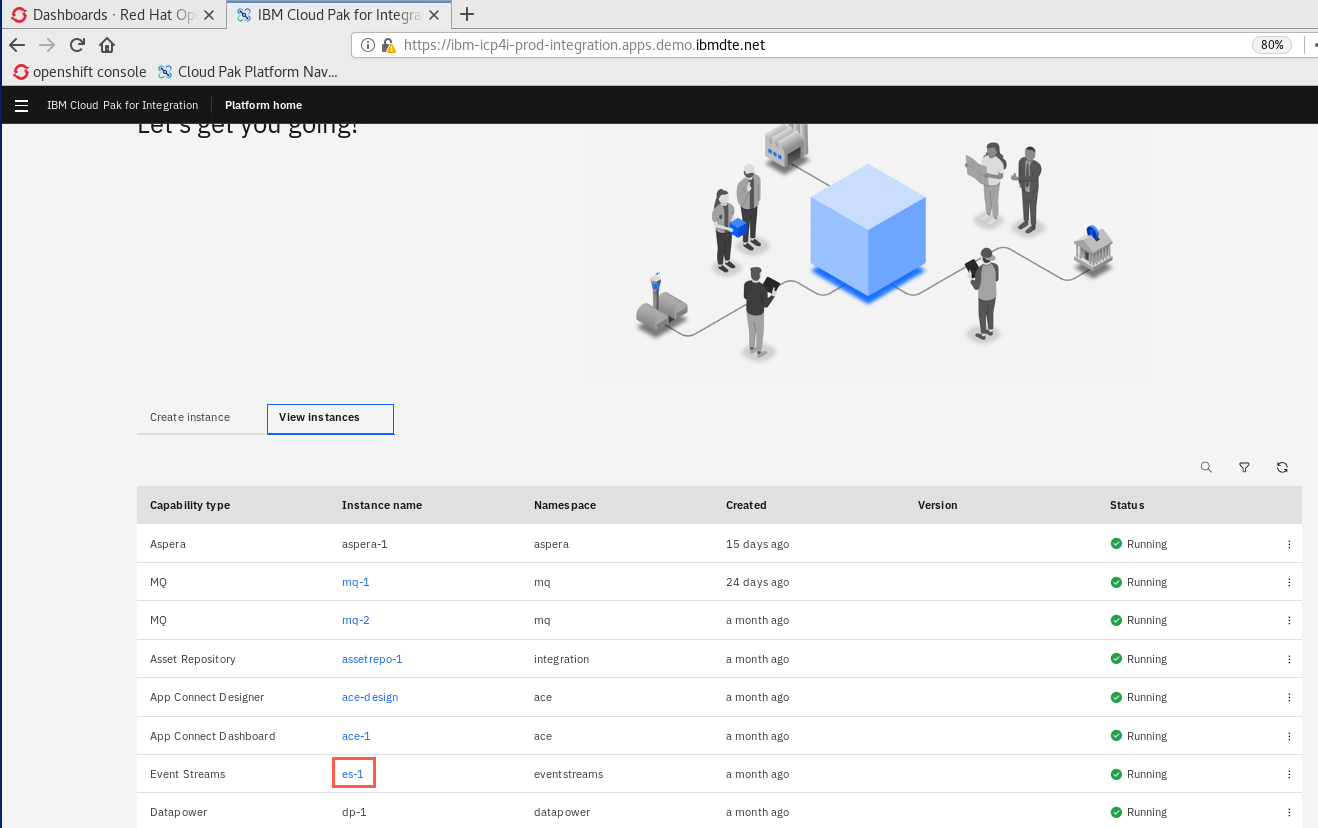
The rest of this lab guide and other lab guides were written while using the preconfigured Event Streams instance es-1. You may continue to use your eslab instance or switch to es-1 now. If you continue to use eslab, just remember to substitute it whenever you see es-1. -
Click es-1 to open the Event Streams user interface.
-
A new browser tab will open and the Event Streams admin console will appear. Note that it may take some time the first time that you access this page.
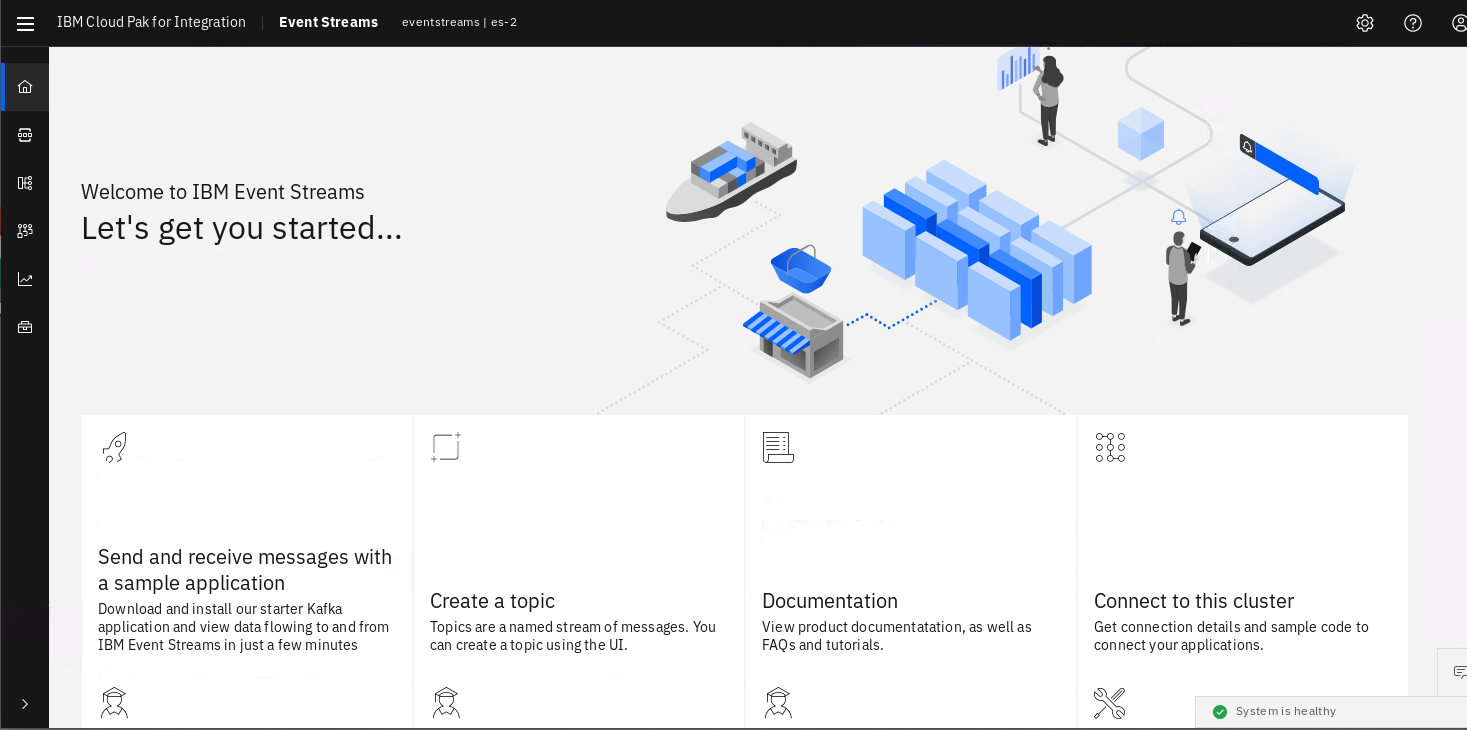
You will notice numerous links to help you learn about some of the Event Streams basics, components and functions as well as documentation. On the left toolbar are some menu items to help you navigate the console. Hover over each icon to get a feel for what is included. You will use throughout this lab.
-
Take a moment and explore the Kafka Basics tile on the main page to learn the basics of Apache Kafka. Scroll through the tutorial by clicking Next or Prev.

-
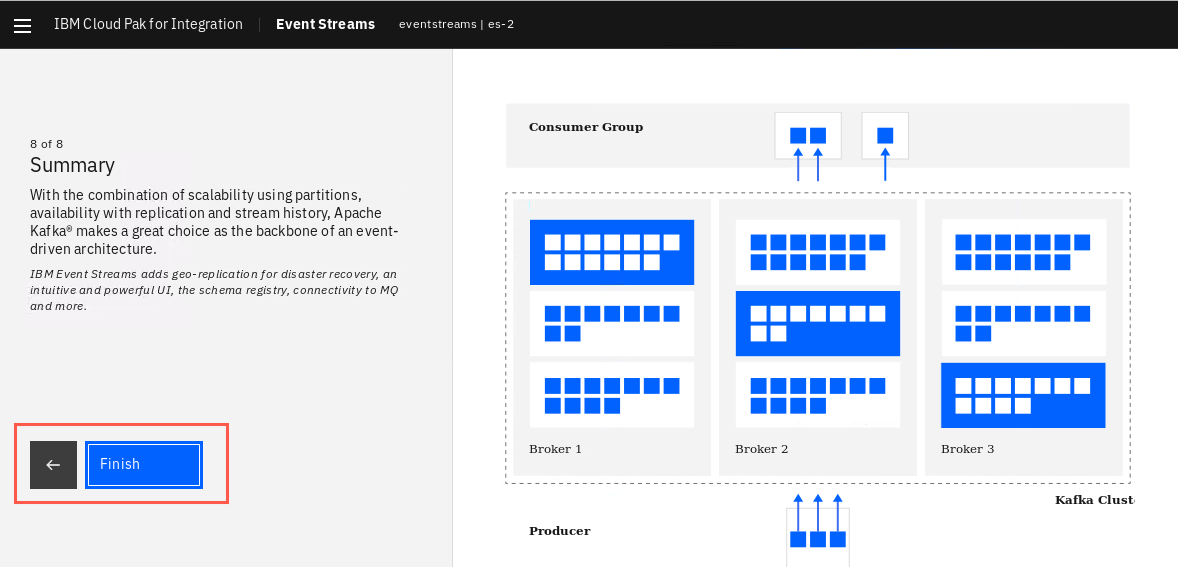
When you reach the last summary page, click Finish to return to the console. Or use the browser back button to return.
-
You should also note the System Health indicator in the bottom right corner of the page. Expand this to see the entries for each component in your Event Streams deployment. When you are ready you may proceed to Step 3: Managing Event Streams Topics.
You’ve installed IBM Event Streams on ICP4i. In the next section, learn how to manage topics, the core of Event Streams functions.
Step 3: Managing Event Streams Topics
Event Streams applications write to and read from entities called Topics, which is a grouping of related data which is known to the applications that produce and consume data. Applications connect to Topics. Topics are created and configured once only by the Event Streams administrator.
The deployment of Event Streams conveniently creates a “simulated” topic which allows you to quickly familiarize yourself with the configuration and management of topics and the messages which are stored on them, before creating any configuration yourself. Perform the following steps to work with the simulated topic that has been created.
-
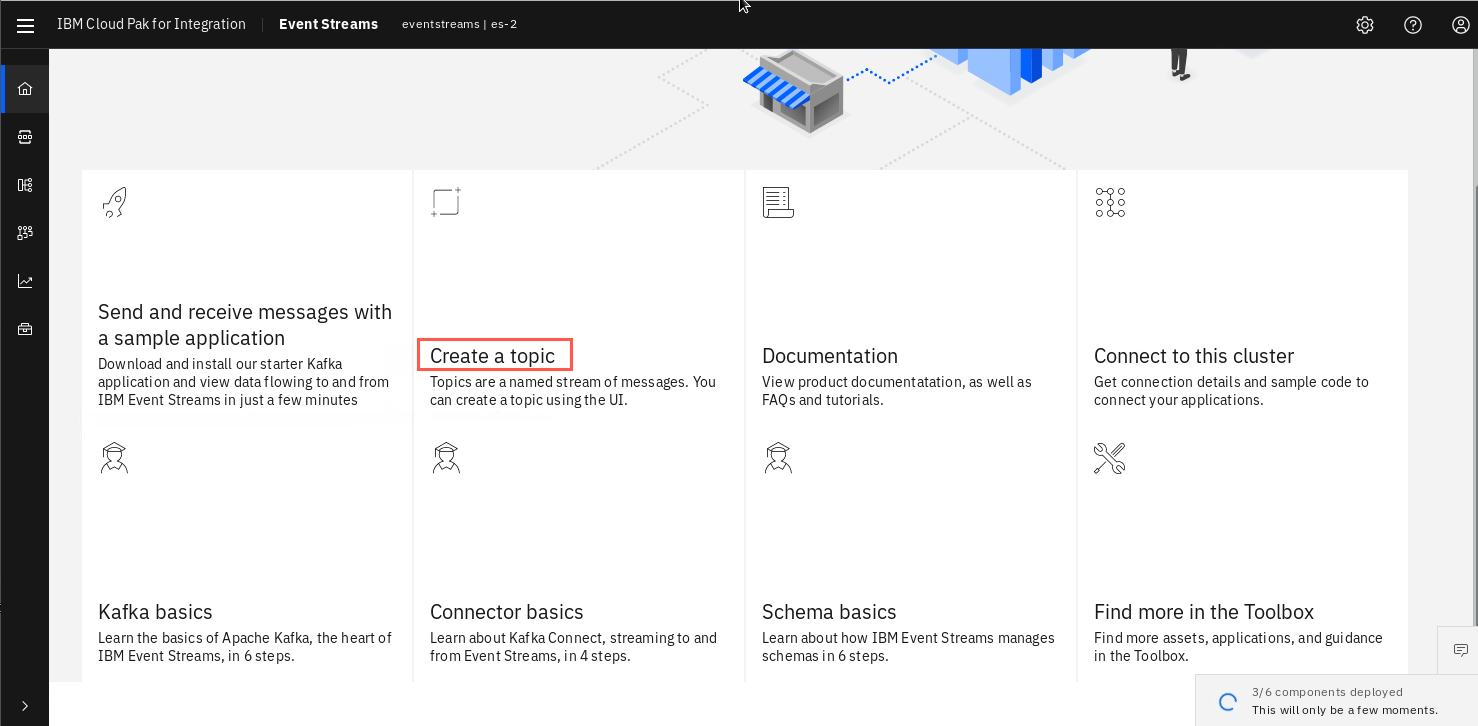
Click on the Create a topic tile to open Topics tab.
-
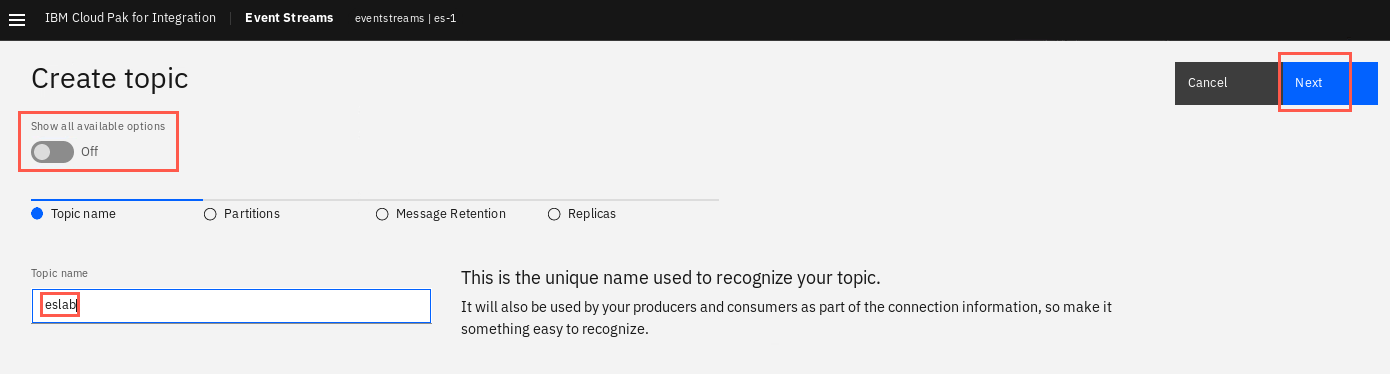
A wizard will launch to help guide you through creating your new Topic. Click the Show all available option switch to turn it off. Enter eslab as the Topic name. Note that there are restrictions on the characters that can be used in the Topic name. Click on the Next button when you are ready to proceed.
-
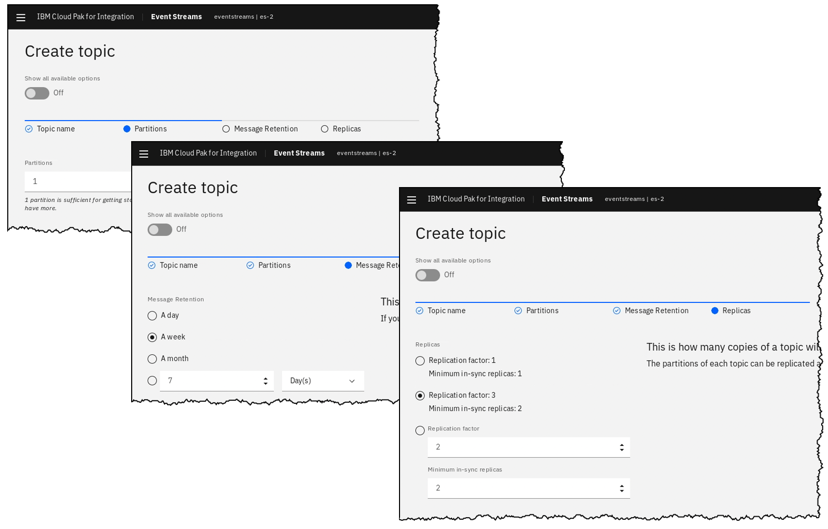
Advance through the remaining options, accepting defaults for all options. Ensure that you take time read the tips at each step to review the various options that are configurable as you finish using the wizard.
-
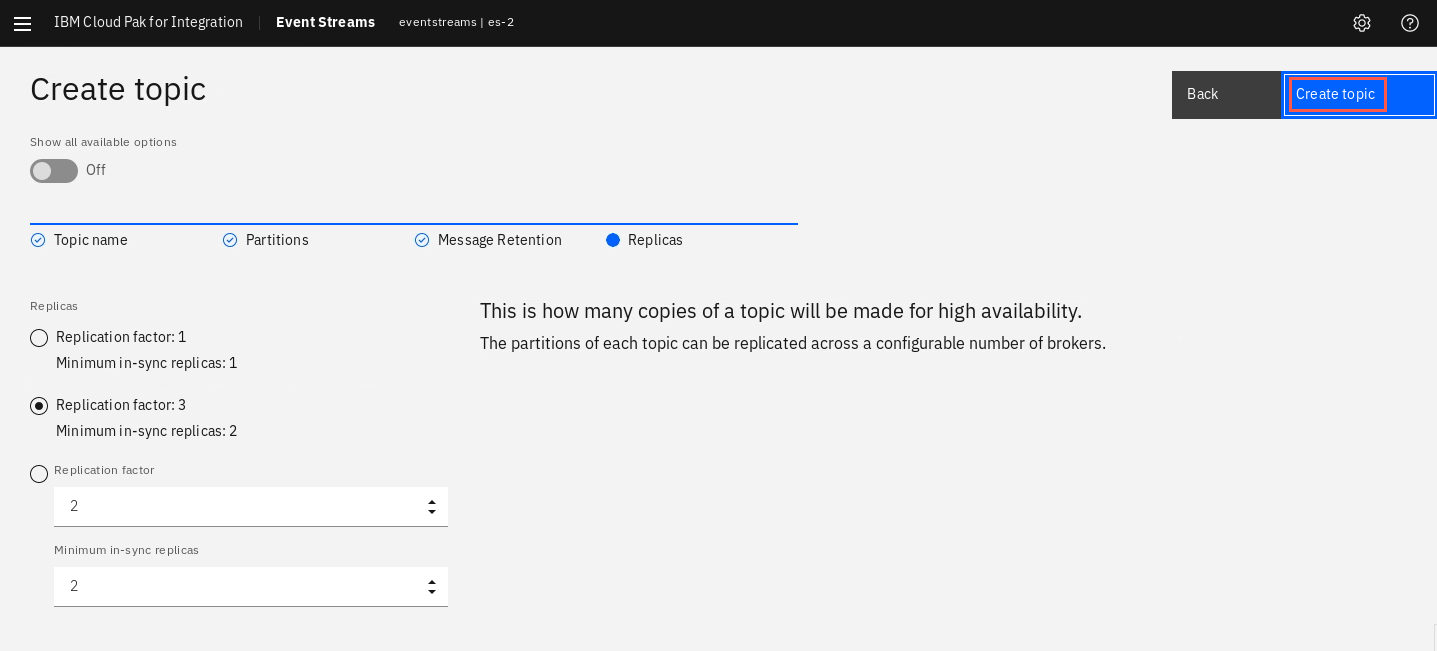
Click on the Create topic button on the final step in order to complete the wizard.
-
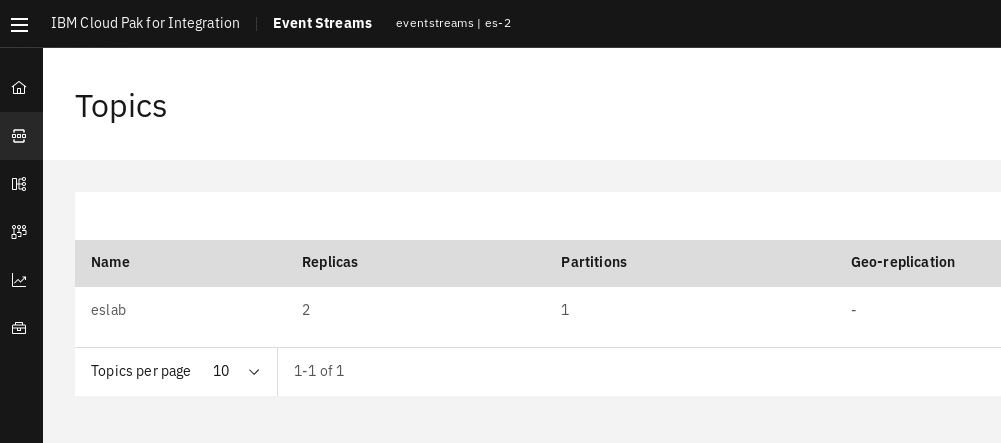
You will be returned to the Topics page. Your new Topic is now displayed along with a completion message in the upper right corner of the page. At this time you are ready to connect your application(s) to Event Streams.
When you are ready you may proceed to Step 3: Test Event Streams Operations.
Step 4: Test Event Streams Operations
Now that a functional Topic is available it is time to test sending and receiving messages. Event Streams provides a starter application that you may use as a producer and consumer of messages on your topic. Perform the following steps to generate and execute a starter application for your Event Streams installation.
-
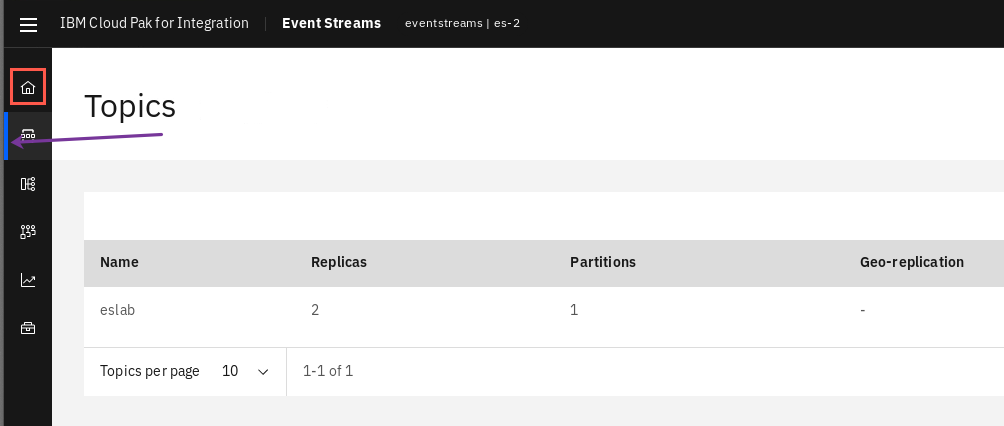
Notice the blue vertical line next to topics on the toolbar. This indicates what page you are currently processing. Click the home icon on the toolbar to return to the home page.
-
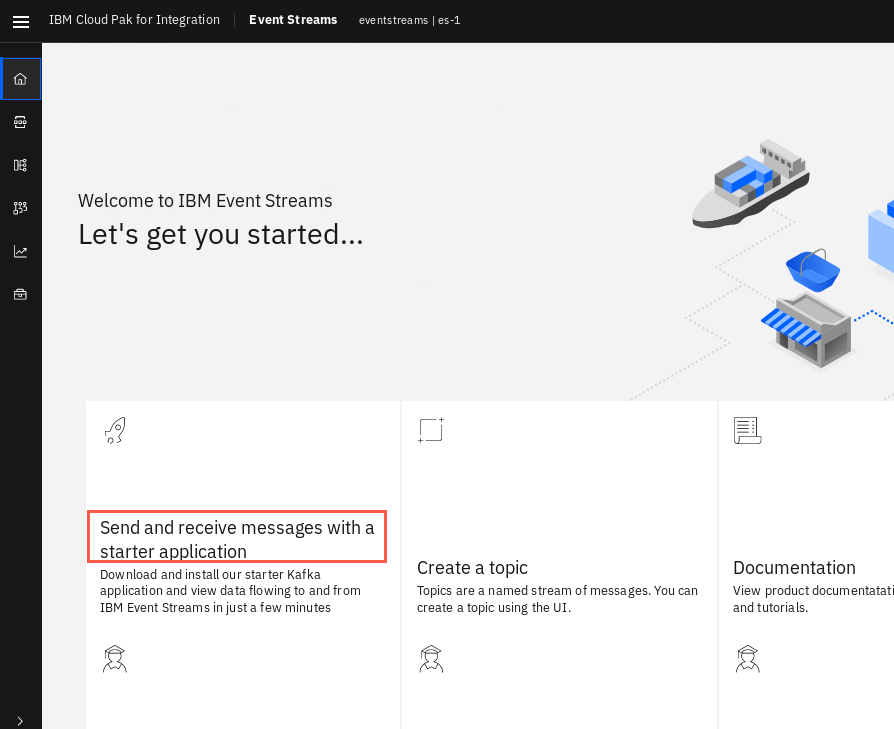
Click the Send and receive messages with a starter application hot link.
-
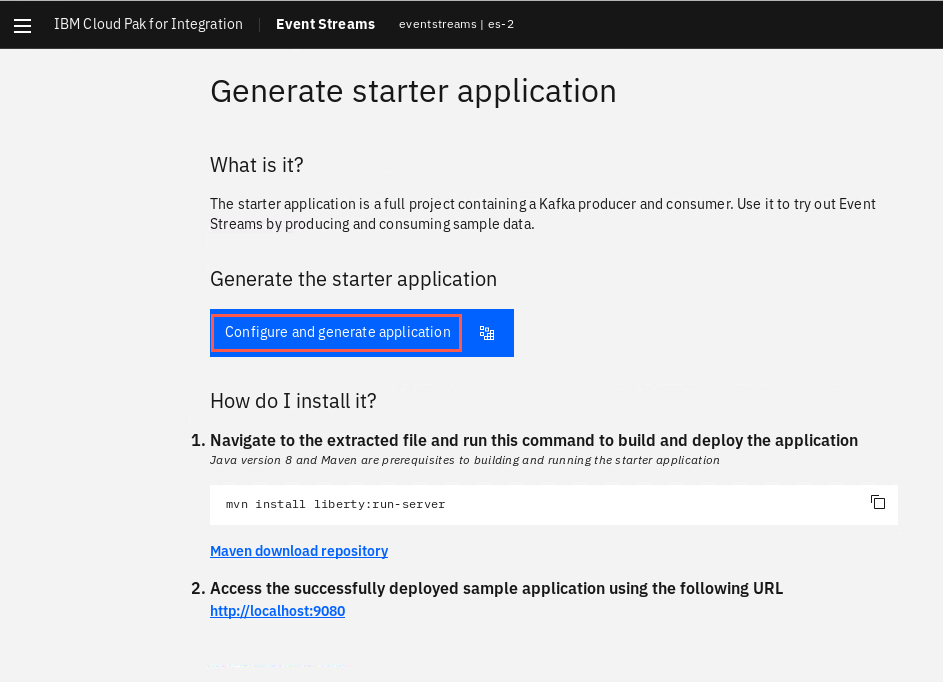
Click the Configure and generate application box.
-
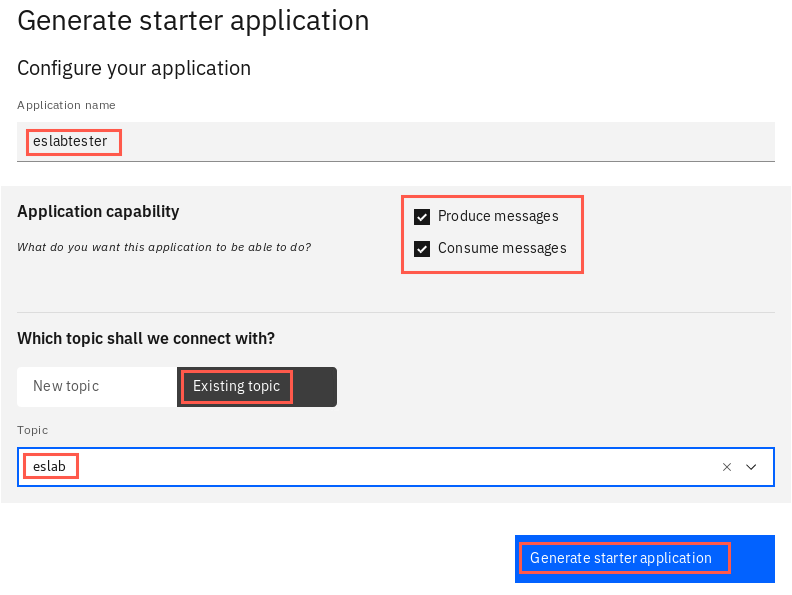
Enter eslabtester as the Application name. Leave the defaults to produce and consume messaes. Then click Existing topic and select eslab from the pulldown. Finally, click on the Generate starter application button.
-
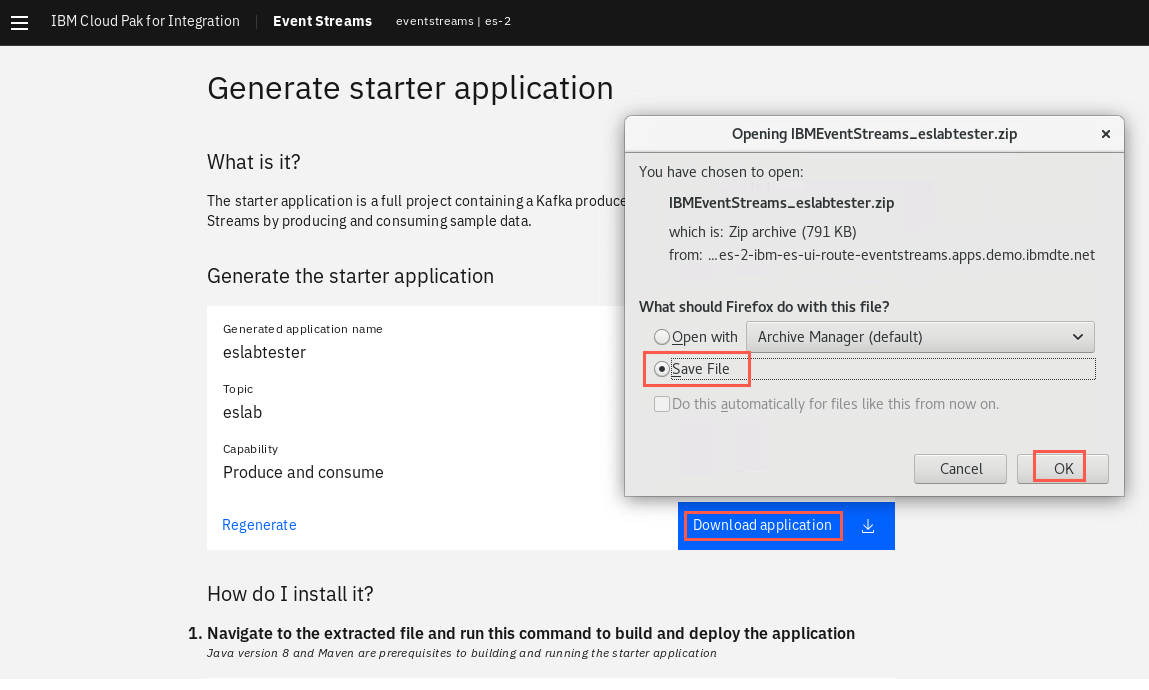
The application generation will take a couple minutes. When it is done the “Download application” box will become active. Click it to download the application. A dialog popup appears. Check the Save file radio button to save the file to your Downloads directory.
-
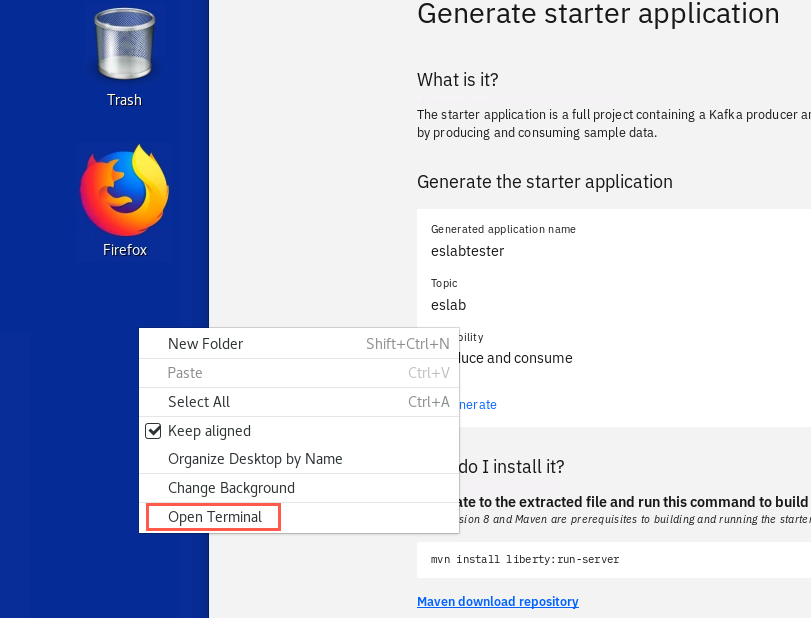
Open a terminal window by right-clicking on the desktop and select Open Terminal.
-
Your downloadeded application will be a zip file and have the IBMEventStreams_ prefix. Run the unzip command to expand the file. Enter the following commands to extract the starter application. If you are asked if you want to replace any files answer A for all.
 cd Downloads
 unzip IBMEventStreams_eslabtester.zip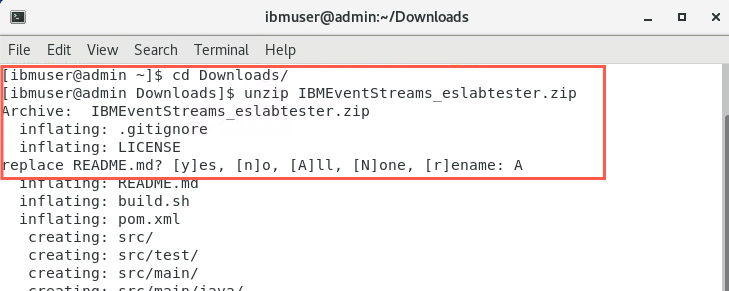
-
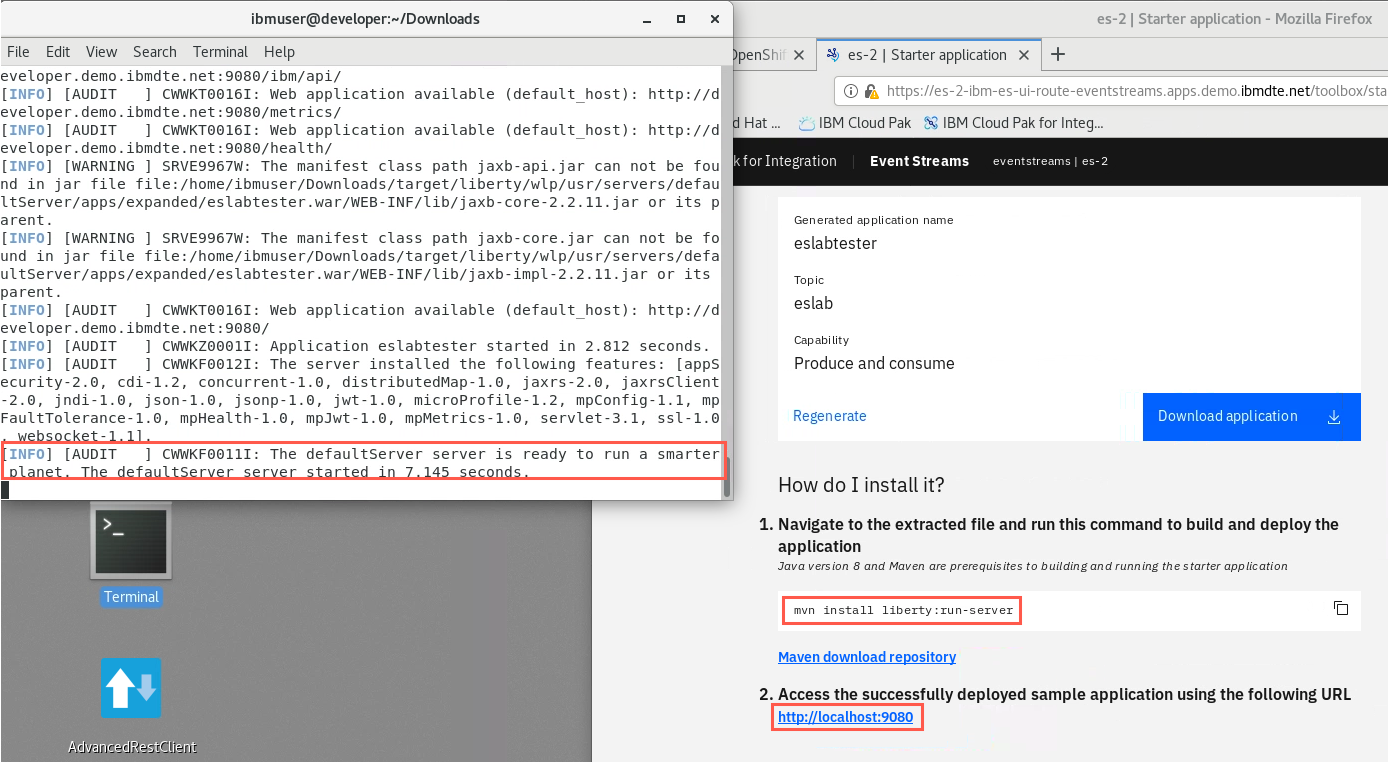
Maven is a build utility that is used to create Java applications. It has been installed, along with Java, in the virtual machine for this lab exercise. The archive that was extracted contains a pom.xml file that provides the directions for Maven to generate the Starter application. Use the following commands to build and launch the Starter application.
mvn install liberty:run-serverNote:
You do not need to download Maven. -
A large number of messages will be echoed to the screen while the Starter application is built and deployed to a Liberty app server. Wait until *The server defaultServer is ready to run a smarter planet** prompt is displayed.
-
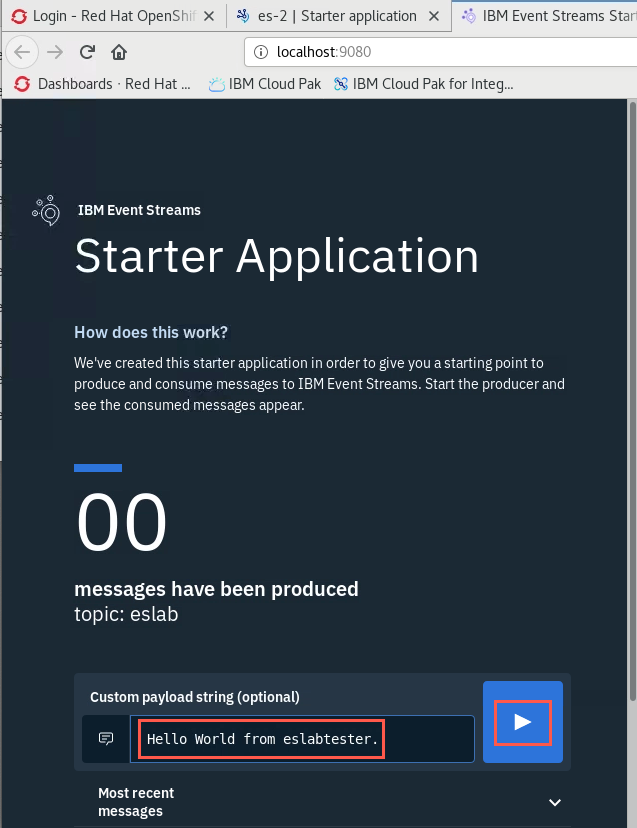
Open a new browser tab and navigate to the URL that was listed at the bottom of the Starter application page or just click the hyperlink on the page.
http://localhost:9080/eslabtester-
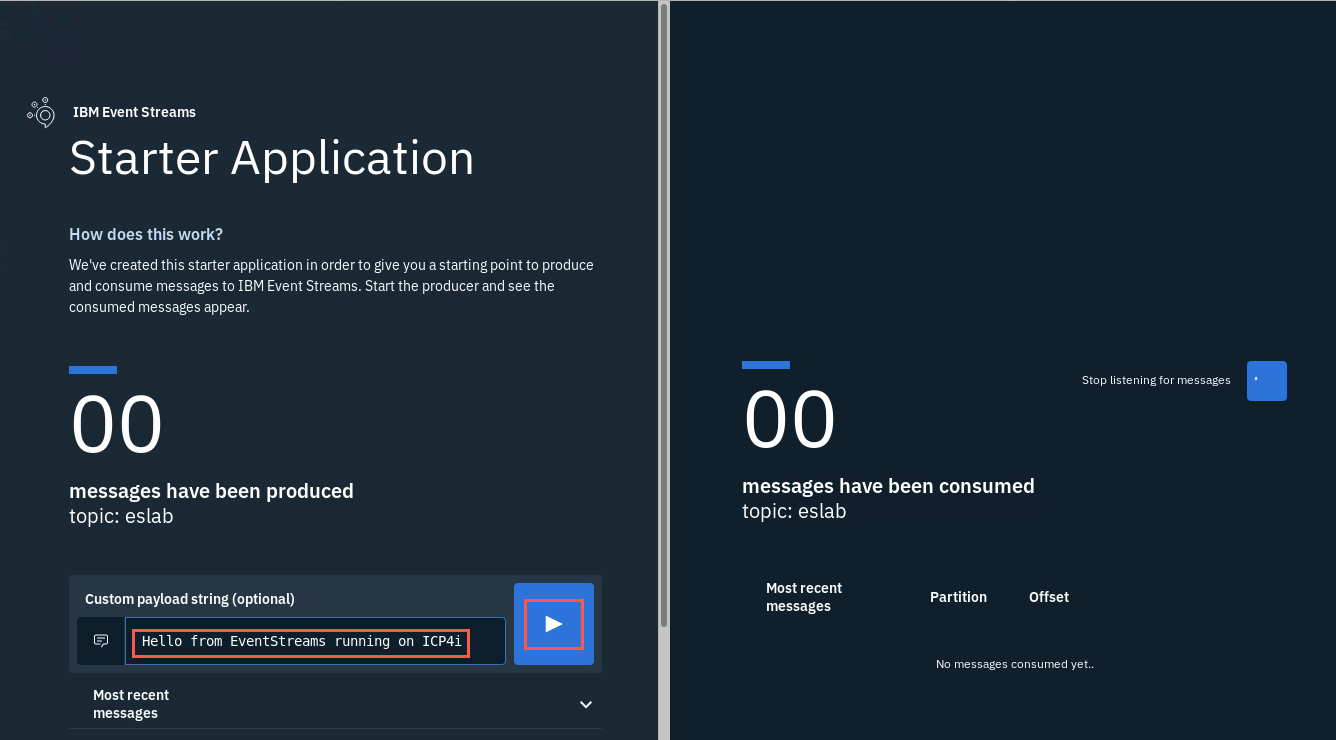
The Starter Application starts and the screen is split with a producer on the left and a consumer on the right. Notice that the consumer has already started to listen for messages. Enter a message of your choice in the custom payload field on the producer side. Click the run button to start producing messages.
-
The messages are being sent to the Topic. You can see the number of messages produced. On the consumer side, you will see messages start to populate the message list section of the page. If the consumer is keeping up, the number of messages consumed should be very close to the number of messages produced.
-
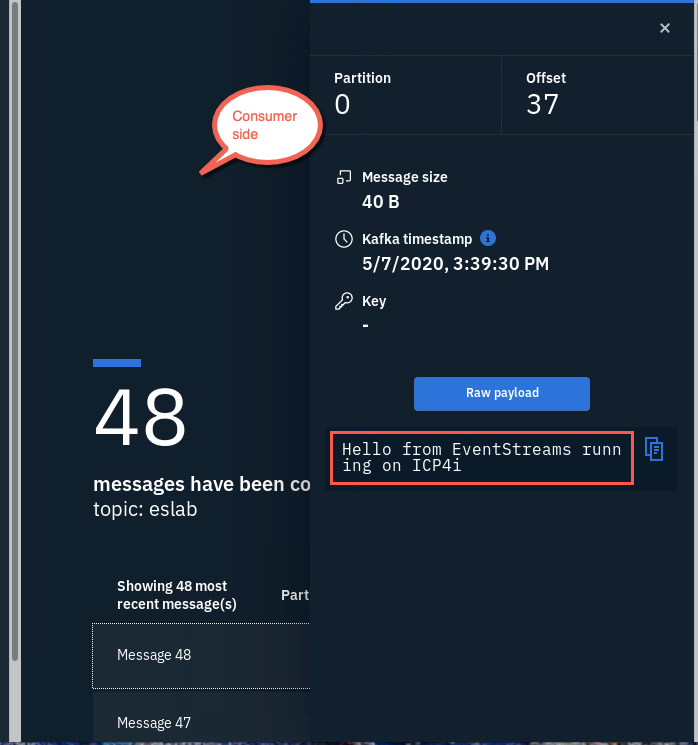
Click on one of the messages in the message list section of the page to display details of the selected message. You’ll information such as the partition holding the message, the offset in the partition, and size of the message as well as the time stamp. You can also see the payload of the message.
-
Switch back to the producer side, then click the run button to stop producing messages.
-
In the terminal window enter <ctrl-c> to stop the application.
-
Congratulations
You have successfully installed the Helm chart and tested Event Streams with the sample application. You are now ready to exercise the Event Streams Toolbox.