Producing Load on Event Streams with Workload Application
IBM Event Streams provides a high-throughput producer application you can use as a workload generator to test message loads and help validate the performance capabilities of your cluster.
You can use one of the predefined load sizes, or you can specify your own settings to test throughput.
Introduction
In this lab we will install the sample application and test running some load.
At the end of this lab you should be able to install and configure the sample application and run load tests.
-
Log on to the desktop VM as shown previously.
-
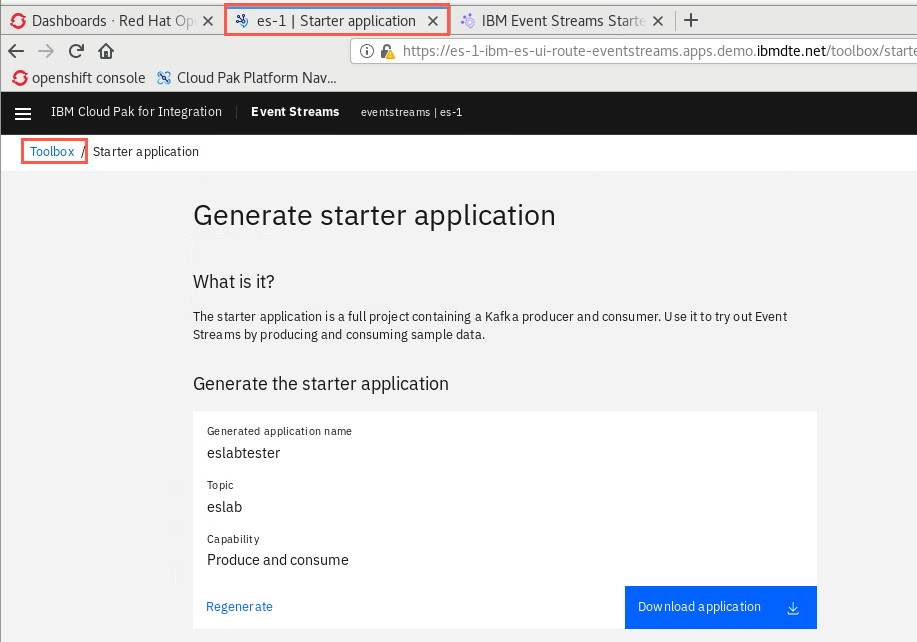
You should still have an open browser tab for EventStreams from the previous lab. Return to that tab and click the Toolbox breadcrumb.
-
If you had closed the browser, open the Firefox browser and click Cloud Pak Platform Navigator as shown previously.
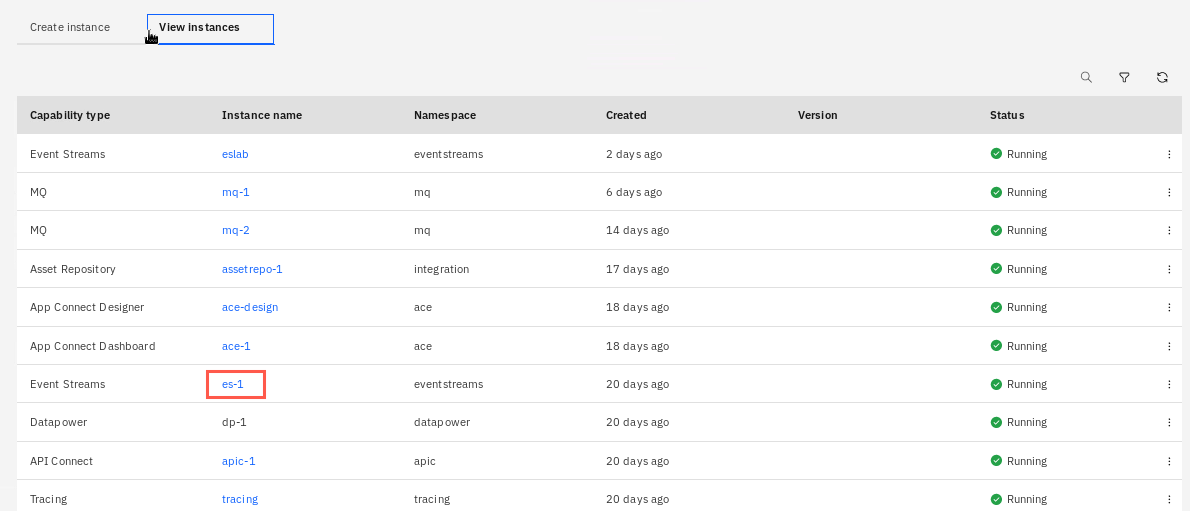
Click View instances then click the Event Streams instance es-1.
-
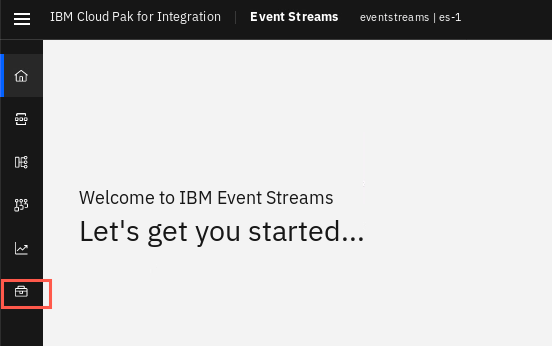
Click the Toolbox icon on the menu bar to open the Toolbox.
-
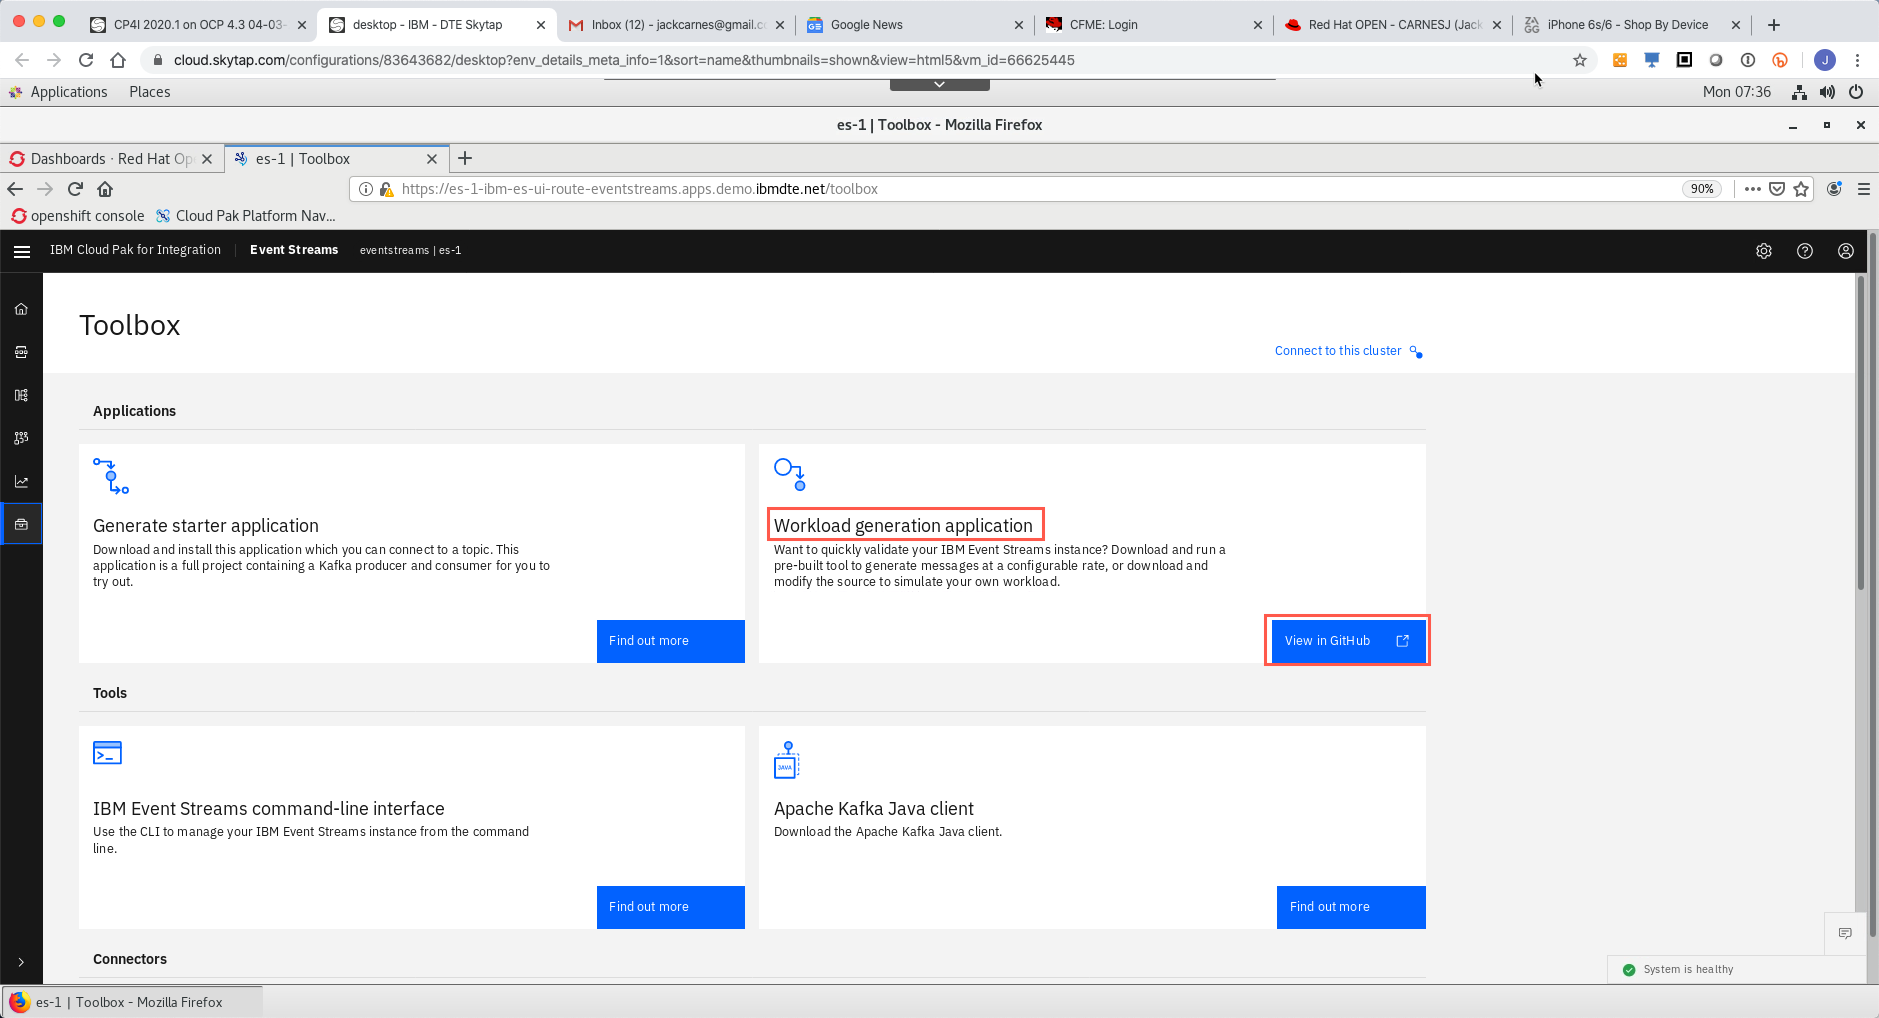
Review the Workload generation application subject then click View in Github.
-
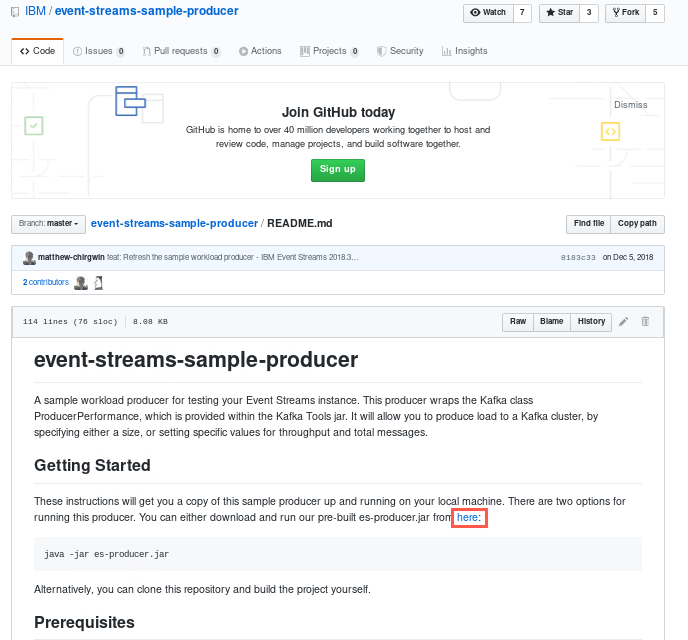
When you arrive at the github repo, scroll down to the README.md file section and click the hyperlink “here” under Getting Started.
-
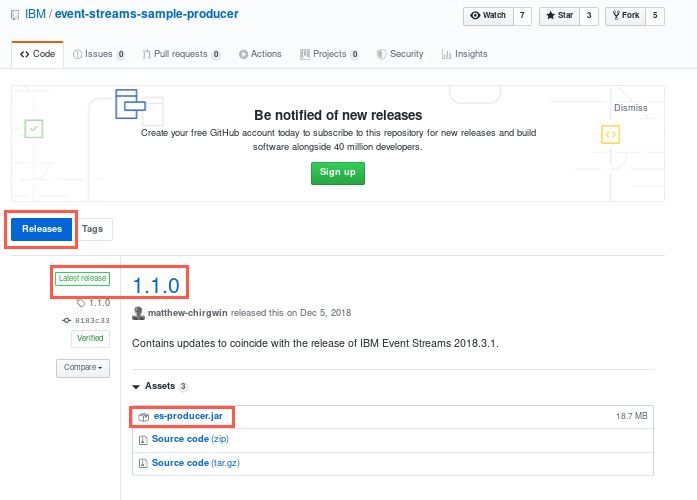
Go to Releases.
-
Download the sample application (es-producer.jar) under Latest release.
-
In the pop-up window, click Save File and click OK.
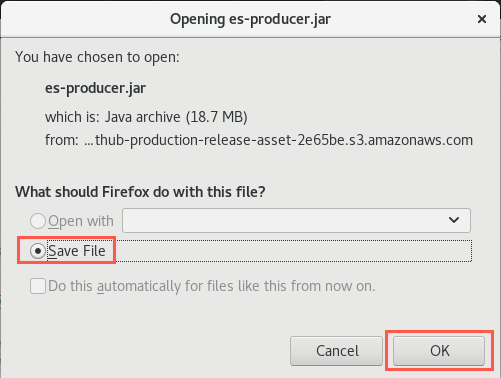
If you get a warning about the download harming your computer, click Keep.
-
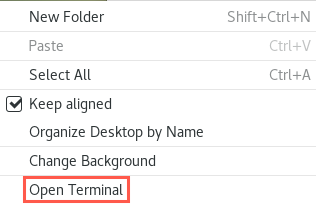
Open a command window by right-clicking on the desktop and select Open Terminal.
-
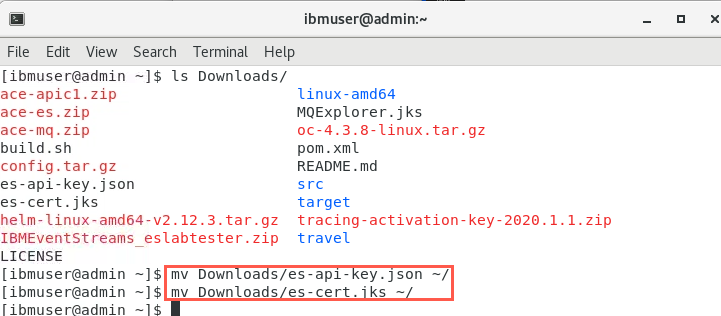
Move the downloaded file to your home directory..
mv ~/Downloads/es-producer.jar ~/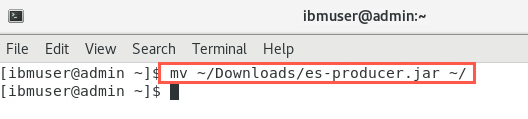
-
Enter the following command to create the config file for the application:
java -jar es-producer.jar -g -
The config file has been created (producer.config).

-
Open this file in a text editor with the following commannd:
gedit producer.config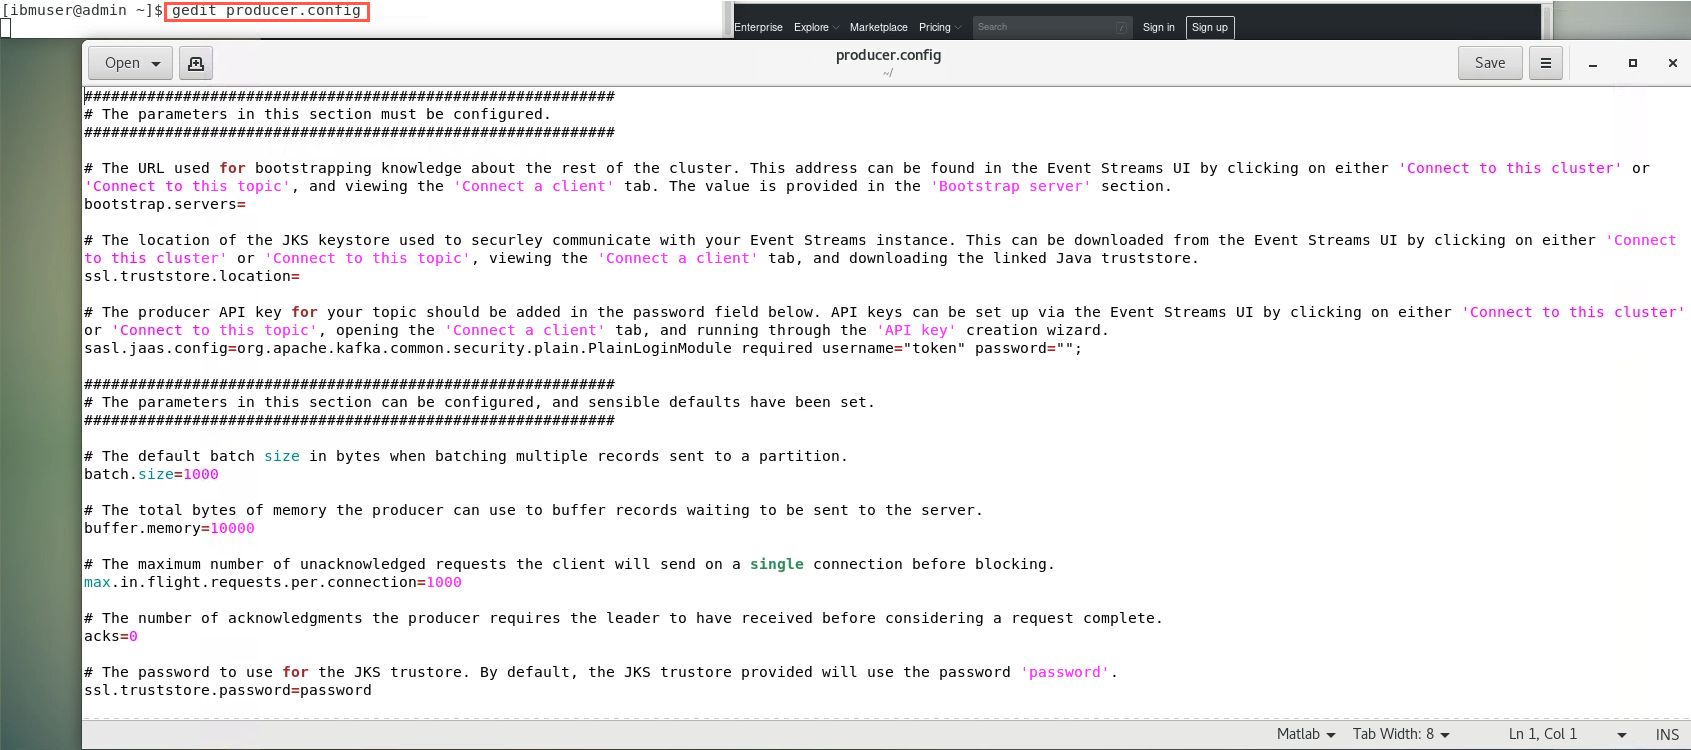
-
We now need to edit this file to add the following information:
-
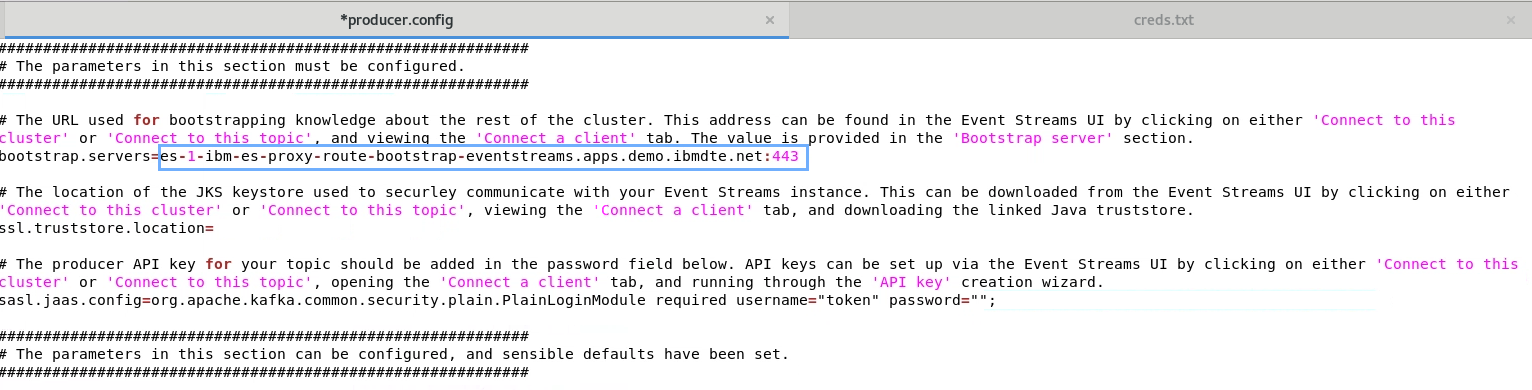
bootstrap.servers
-
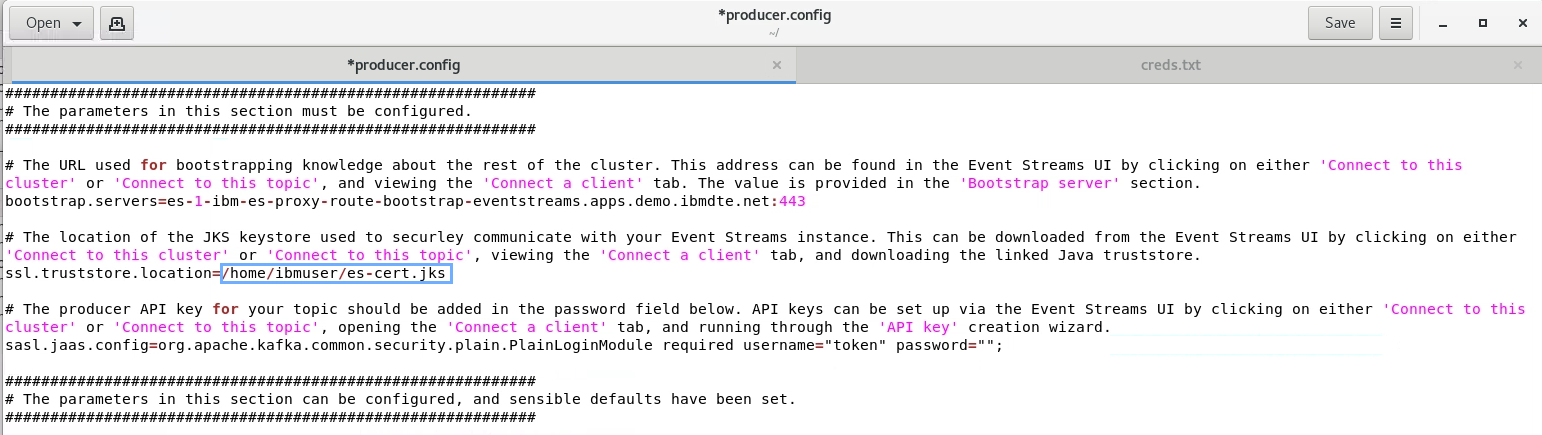
ssl.truststore.location
-
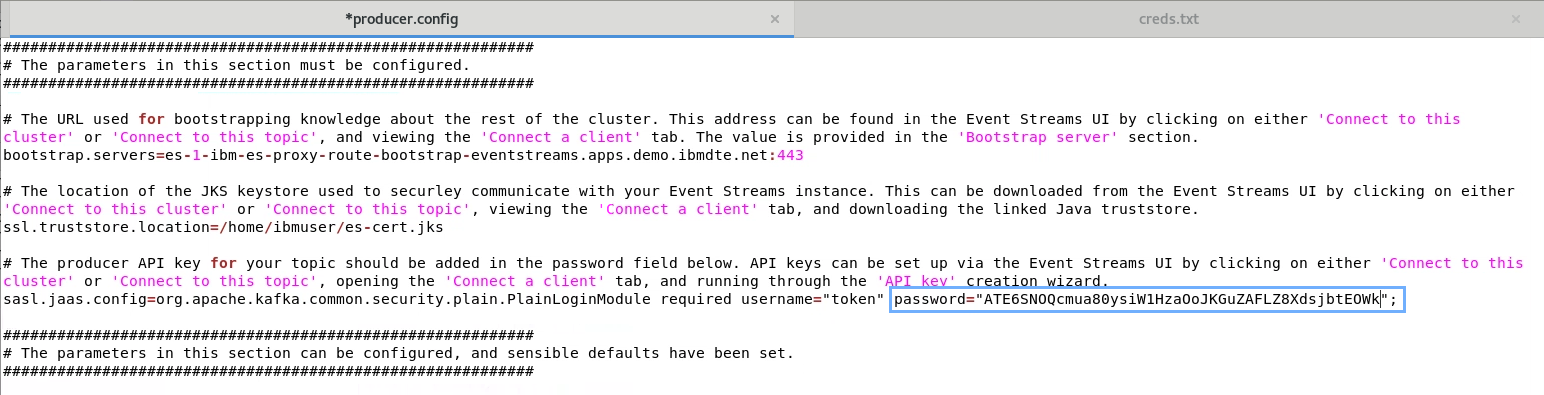
sasl.jacl.config.
To get the required information we need to go back to the Topics view. We will use the eslab topic that was created previously. Leave the editor open.
-
-
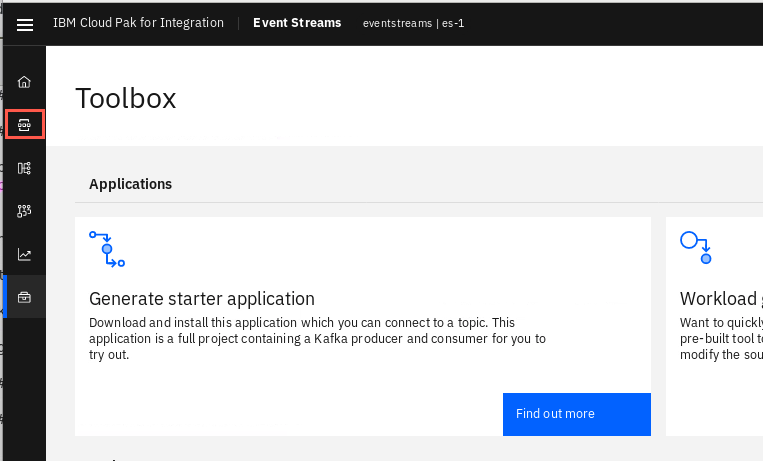
Return to the Event Streams browser tab and click the Topics icon on the menu bar.
-
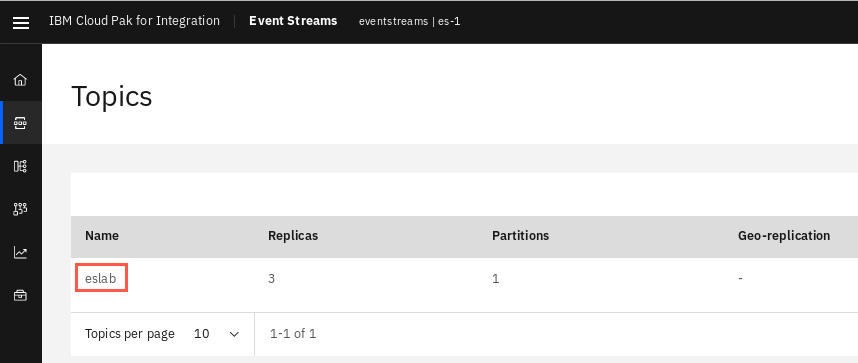
In the Topics view, click on the eslab topic to open it.
-
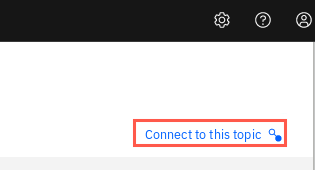
Click on the Connect to this topic link.
-
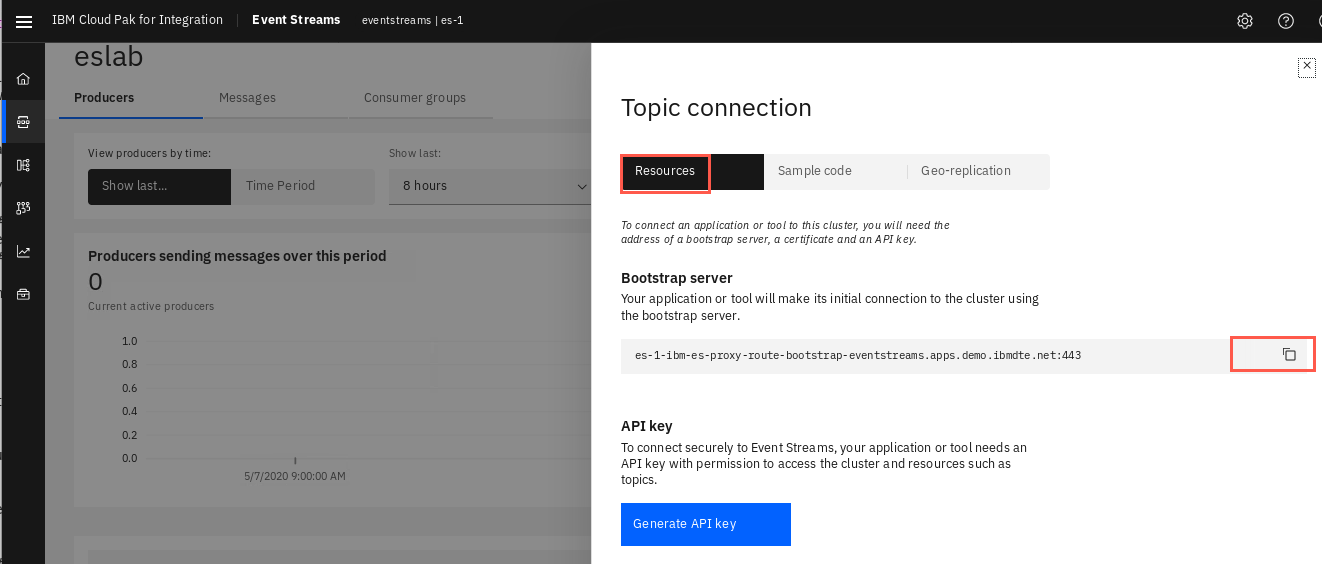
Click on the copy icon to copy bootstrap server address to get the URL.
-
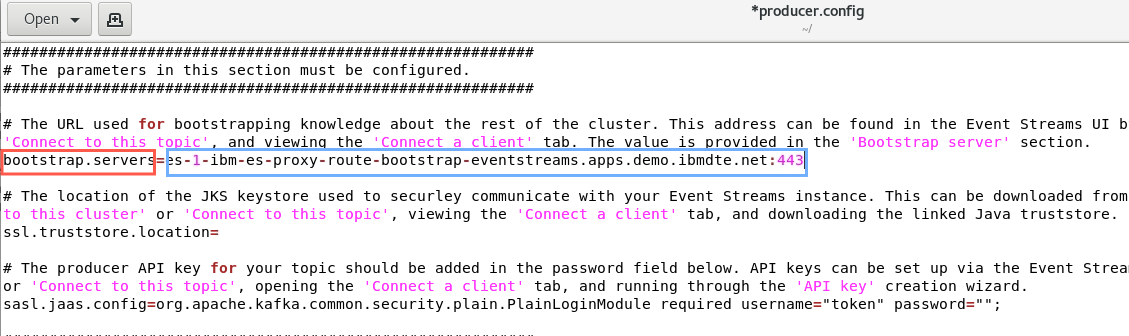
In the edit session, paste the value into the bootstrap.server field.
-
It is also a good idea to save this somewhere to be added to the config file later. For example, open another terminal window, enter command “gedit creds.txt”. Another tab will open in the gedit window called creds.txt. Paste the bootstrap server address then click Save.

-
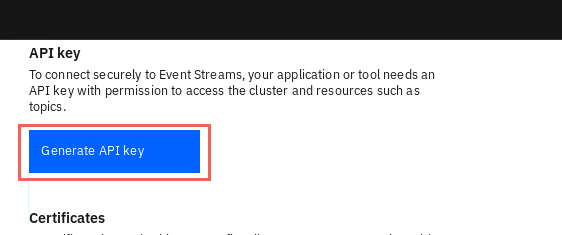
Return to the browser tab and under API key, click Generate AIP key.
-
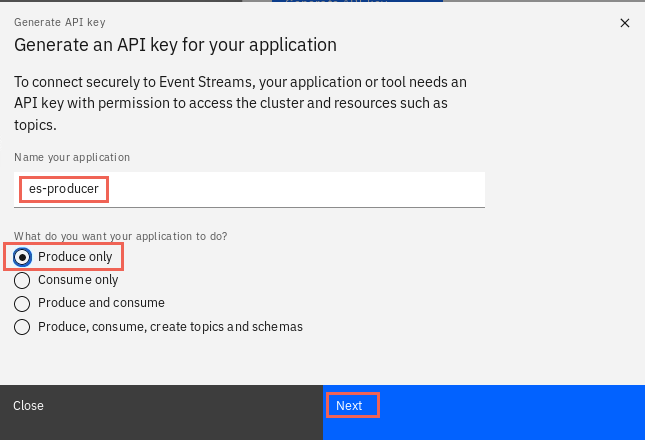
Enter a name for your application - es-producer under Name your application. Click Produce only then click Next.
-
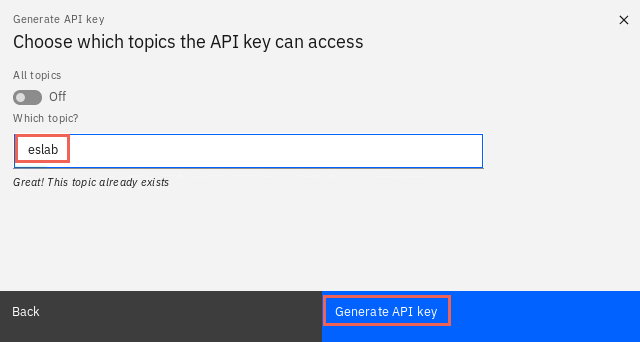
Type in eslab in Which topic?. You are notified that your topic is recognized because it already exists. Click Generate API key.
-
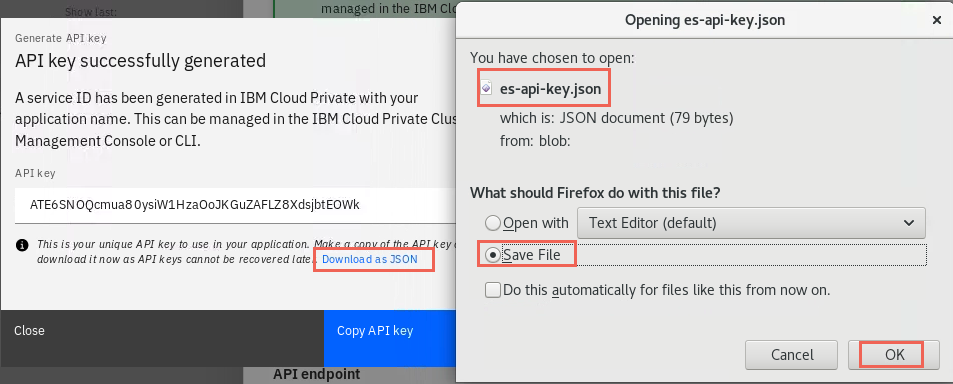
As you can see, the API key is generated. You can download the key as a json file (es-api-key.json) by clicking the hyperlink. Copy this file to your home directory.
You also have the option to Copy API key and save it where you saved the bootstrap server value (creds.txt).
-
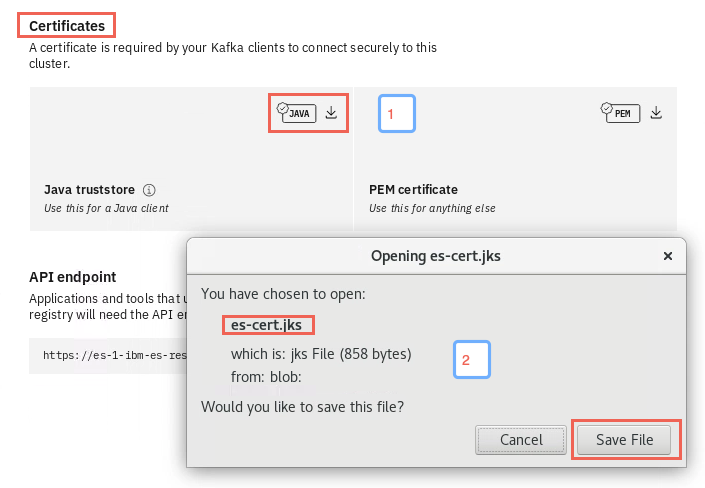
Scroll down a little until you see the Certificates section. We are using a java application so click on the download Java truststore. This will be in your Download directory as es-cert.jks. Click Save file, then copy this file to your home directory.
-
Close the Topic connection pane by clicking the X.
-
Be sure you have moved the two downloaded files to your home directory.
-
We now need to go back to the text editor and update the configuration file with the correct information.
-
Enter the connection URL that you saved previously as the bootstrap.servers parameter. If you followed our suggestion, you have a creds.txt window in your editor. Copy the URL and paste it into the producer.config file.
-
Enter the full path (including filename) of the keystore file you downloaded previously (note that in this example this file has been moved to the home directory) - /home/ibmuser/es-cert.jks.
-
Open the downloaded es-api-key.json file and copy the apikey. Or you may copy it from your save location (creds.txt).

-
Enter the API Key as the password parameter (do not change the username as this is already set to the required value of “token”).
-
Save the file.
-
Go back to the terminal window.
You create a load on your IBM Event Streams Kafka cluster by running the es-producer.jar command. You can specify the load size based on the provided predefined values, or you can provide specific values for throughput and total messages to determine a custom load.
To use a predefined load size from the producer application, you use the es-producer.jar with the -s option:
java -jar target/es-producer.jar -t <topic-name> -s <small/medium/large>
We will start with a small load:
-
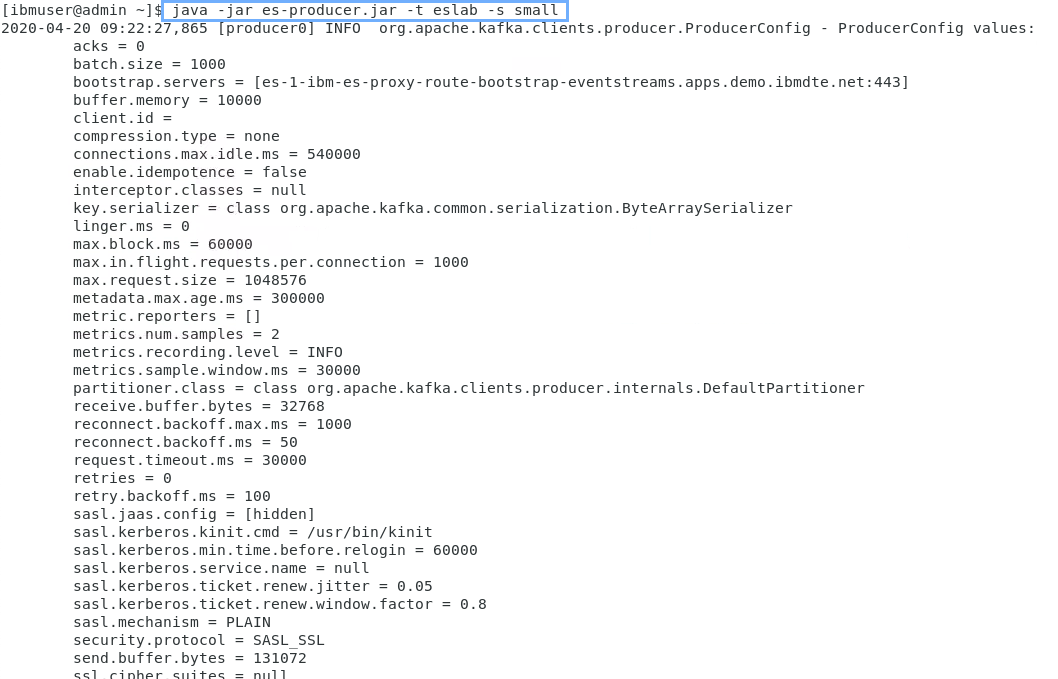
Enter command:
java -jar es-producer.jar -t eslab -s small -
After listing the parameters that will be used you will see the messages being sent (this should be fairly quick so if you are not seeing this, check for errors either on the screen or in the producer.log file).

-
The run will finish with a message that indicates the number of messages sent and the overall performance.

-
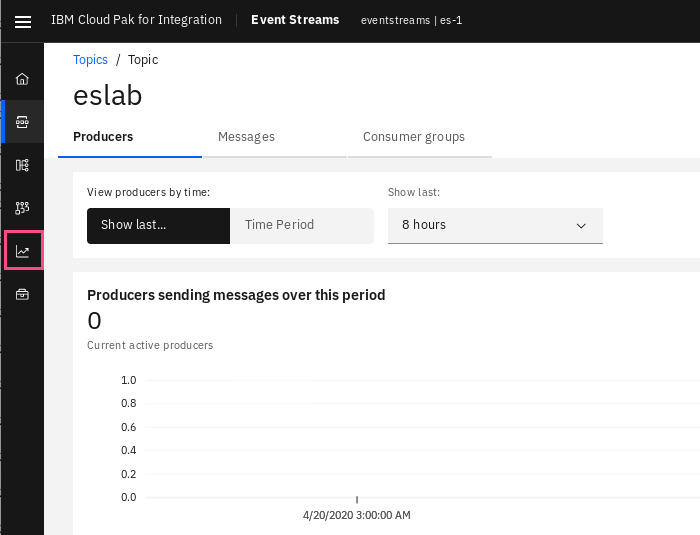
We can go back to the Event Streams UI and have a look at the Monitor for our test.
Click on the Monitoring icon on the menu bar.
-
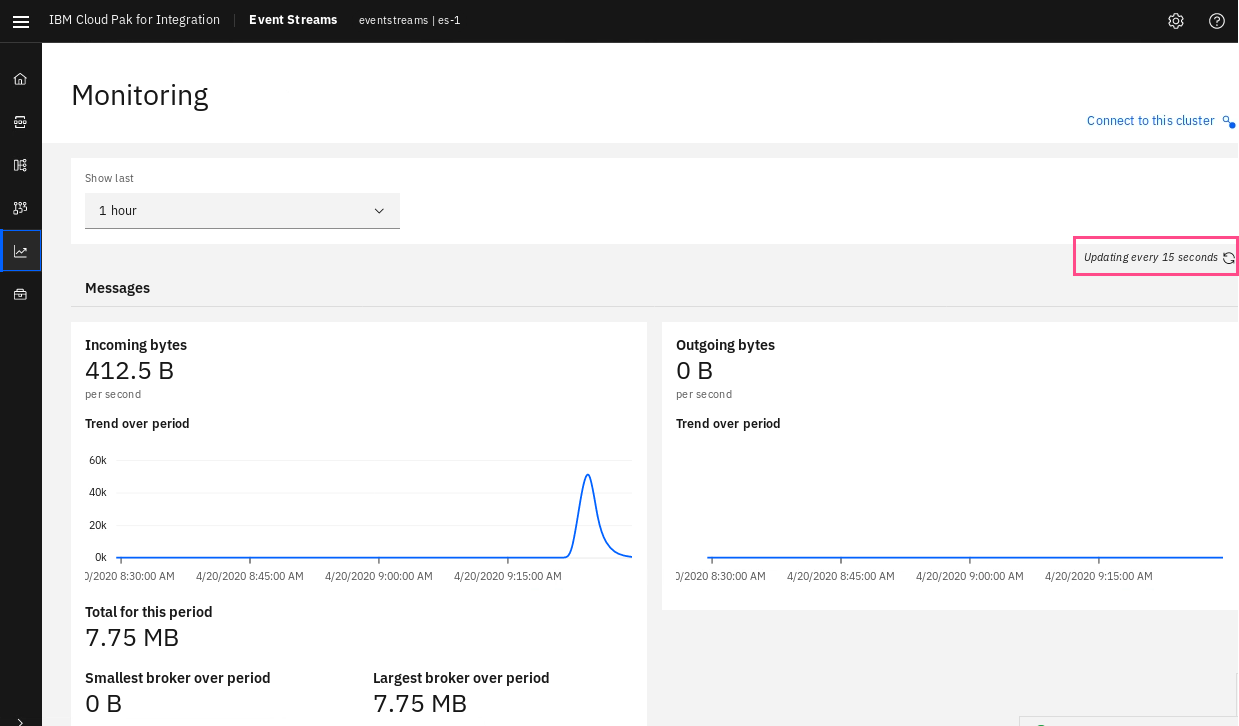
We can see the incoming messages from our “small” test.
-
There is not really very much interesting going on here (more about Monitoring will be contained in another lab). However, lets run a large load and we will be able to watch the monitor moving as the messages are loaded.
-
Go back to the terminal window and rerun the load test but this time send a large sized load.
java -jar es-producer.jar -t eslab -s large -
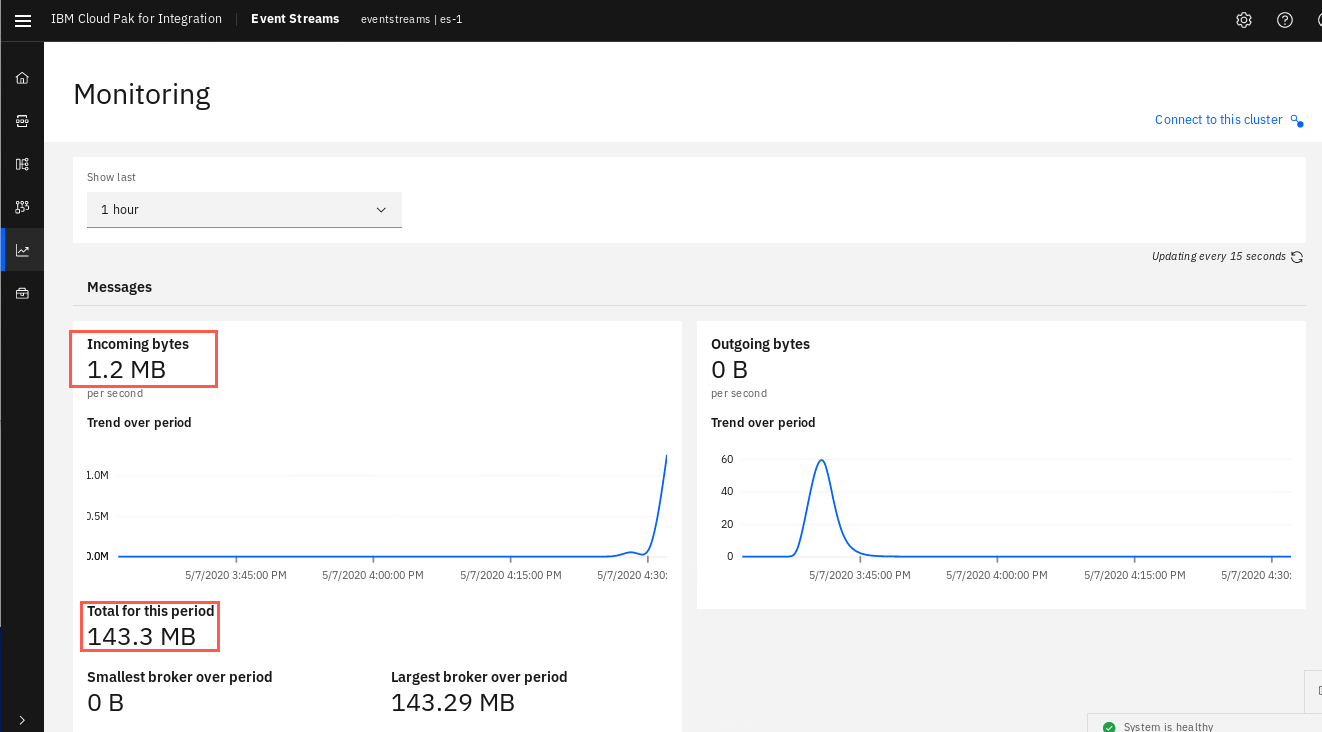
This is going to take considerably longer than before so go back to the Events Streams UI. It will eventually send 6,000,000 messages.

-
Wait a few seconds and you will see that the volume of data is increasing.
-
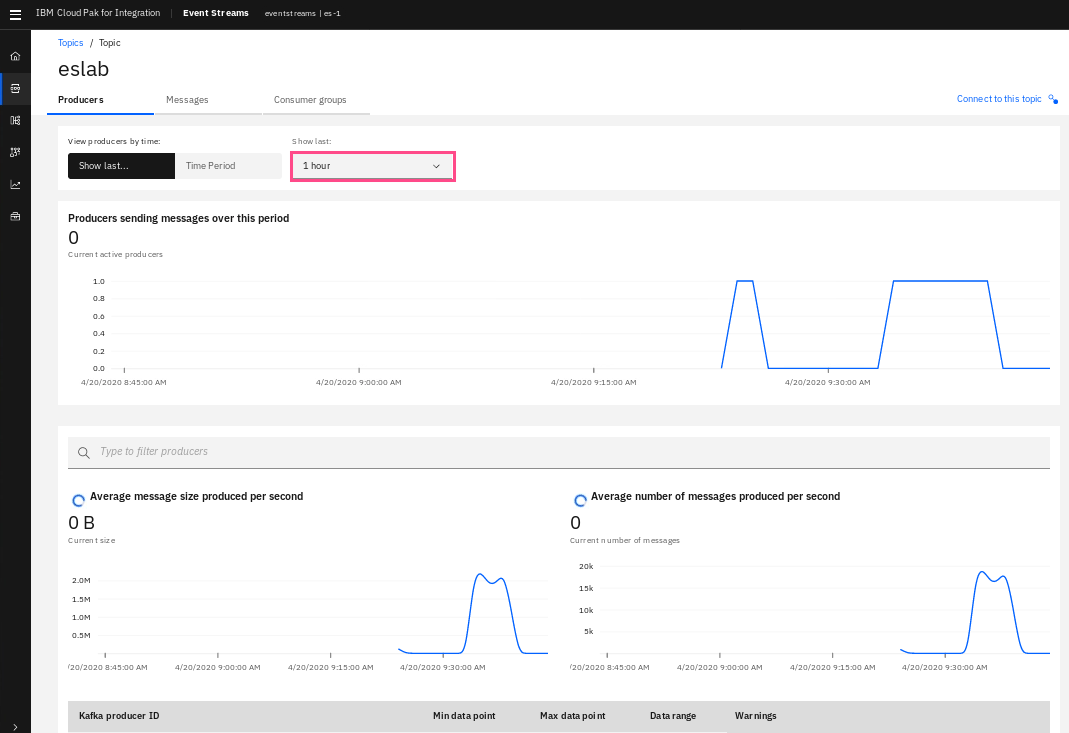
Click the Topics icon on the menu bar, then click the eslab topic. Click on the Show last and change value to 1 hour for a more detailed view. We can see both the small load run from earlier and now the large load run in progress. Review the Producers sending messages over this period and Average message size produced per second.
-
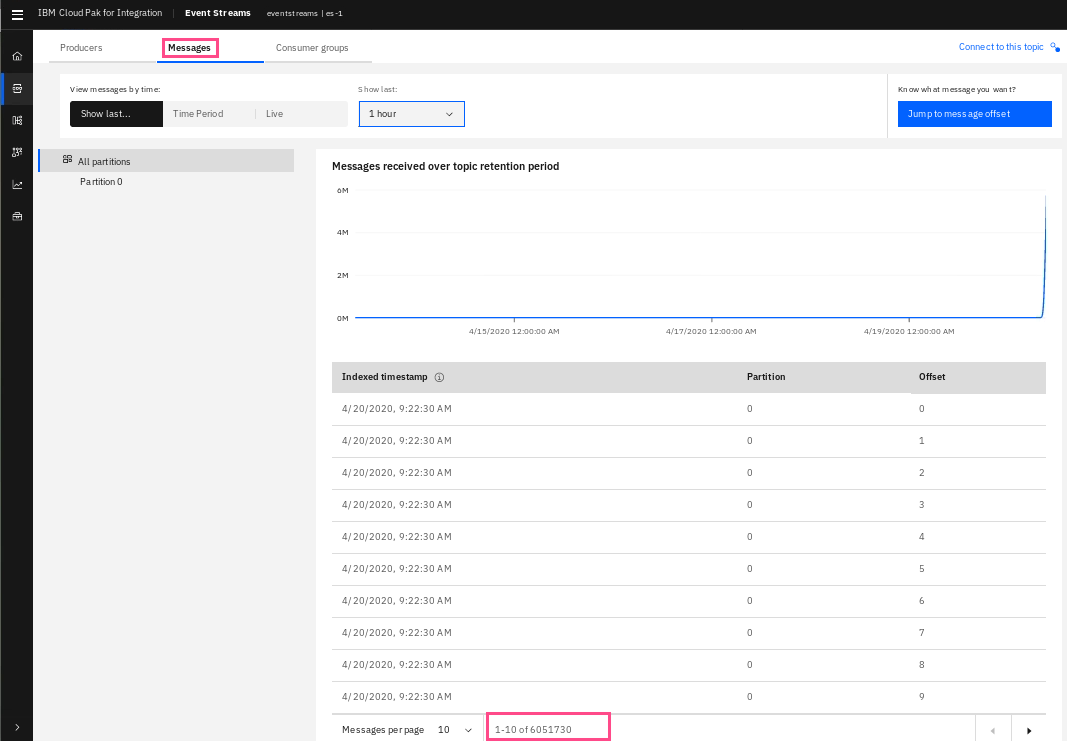
Click Messages. Scroll to the bottom where you can see total messages produced. This number should approximate the total messages produced by the small test (60000), large test (6000000), as well as the earlier test from the previous lab. We can see both the small load run from earlier. In your terminal window, scroll to the bottom and you should see that 6000000 messages were sent by the large test.
If you have time you may wish to experiment with options other than the defaults. The details of all of the available parameters can be found at:
If you still have your Consumer app running, you may also wish to start consuming the messages and have a look at the Monitor.
Congratulations
You have successfully created a workload generator application and ran some loads through Event Streams. You are now ready to create an Event Streams connector to MQ.