Setup environment for CP4I PoT
Connect to your Virtual Desktop Image
-
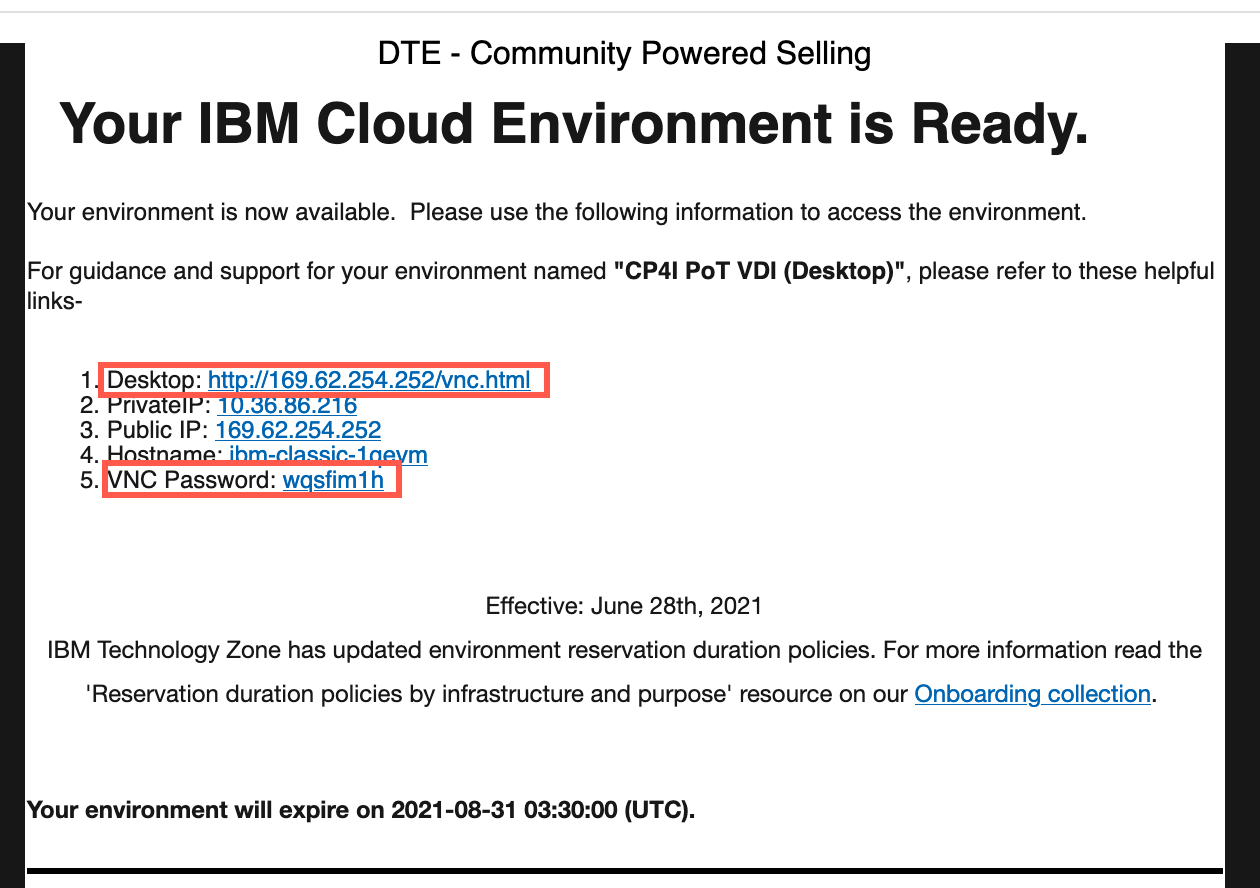
As a CP4I PoT attendee you should have received an email with instructions to connect to a Virtual Desktop Instance which you will use to execute the labs in this PoT. The email provided the details for connecting to you VDI.
-
Copy the password then click Desktop URL.
-
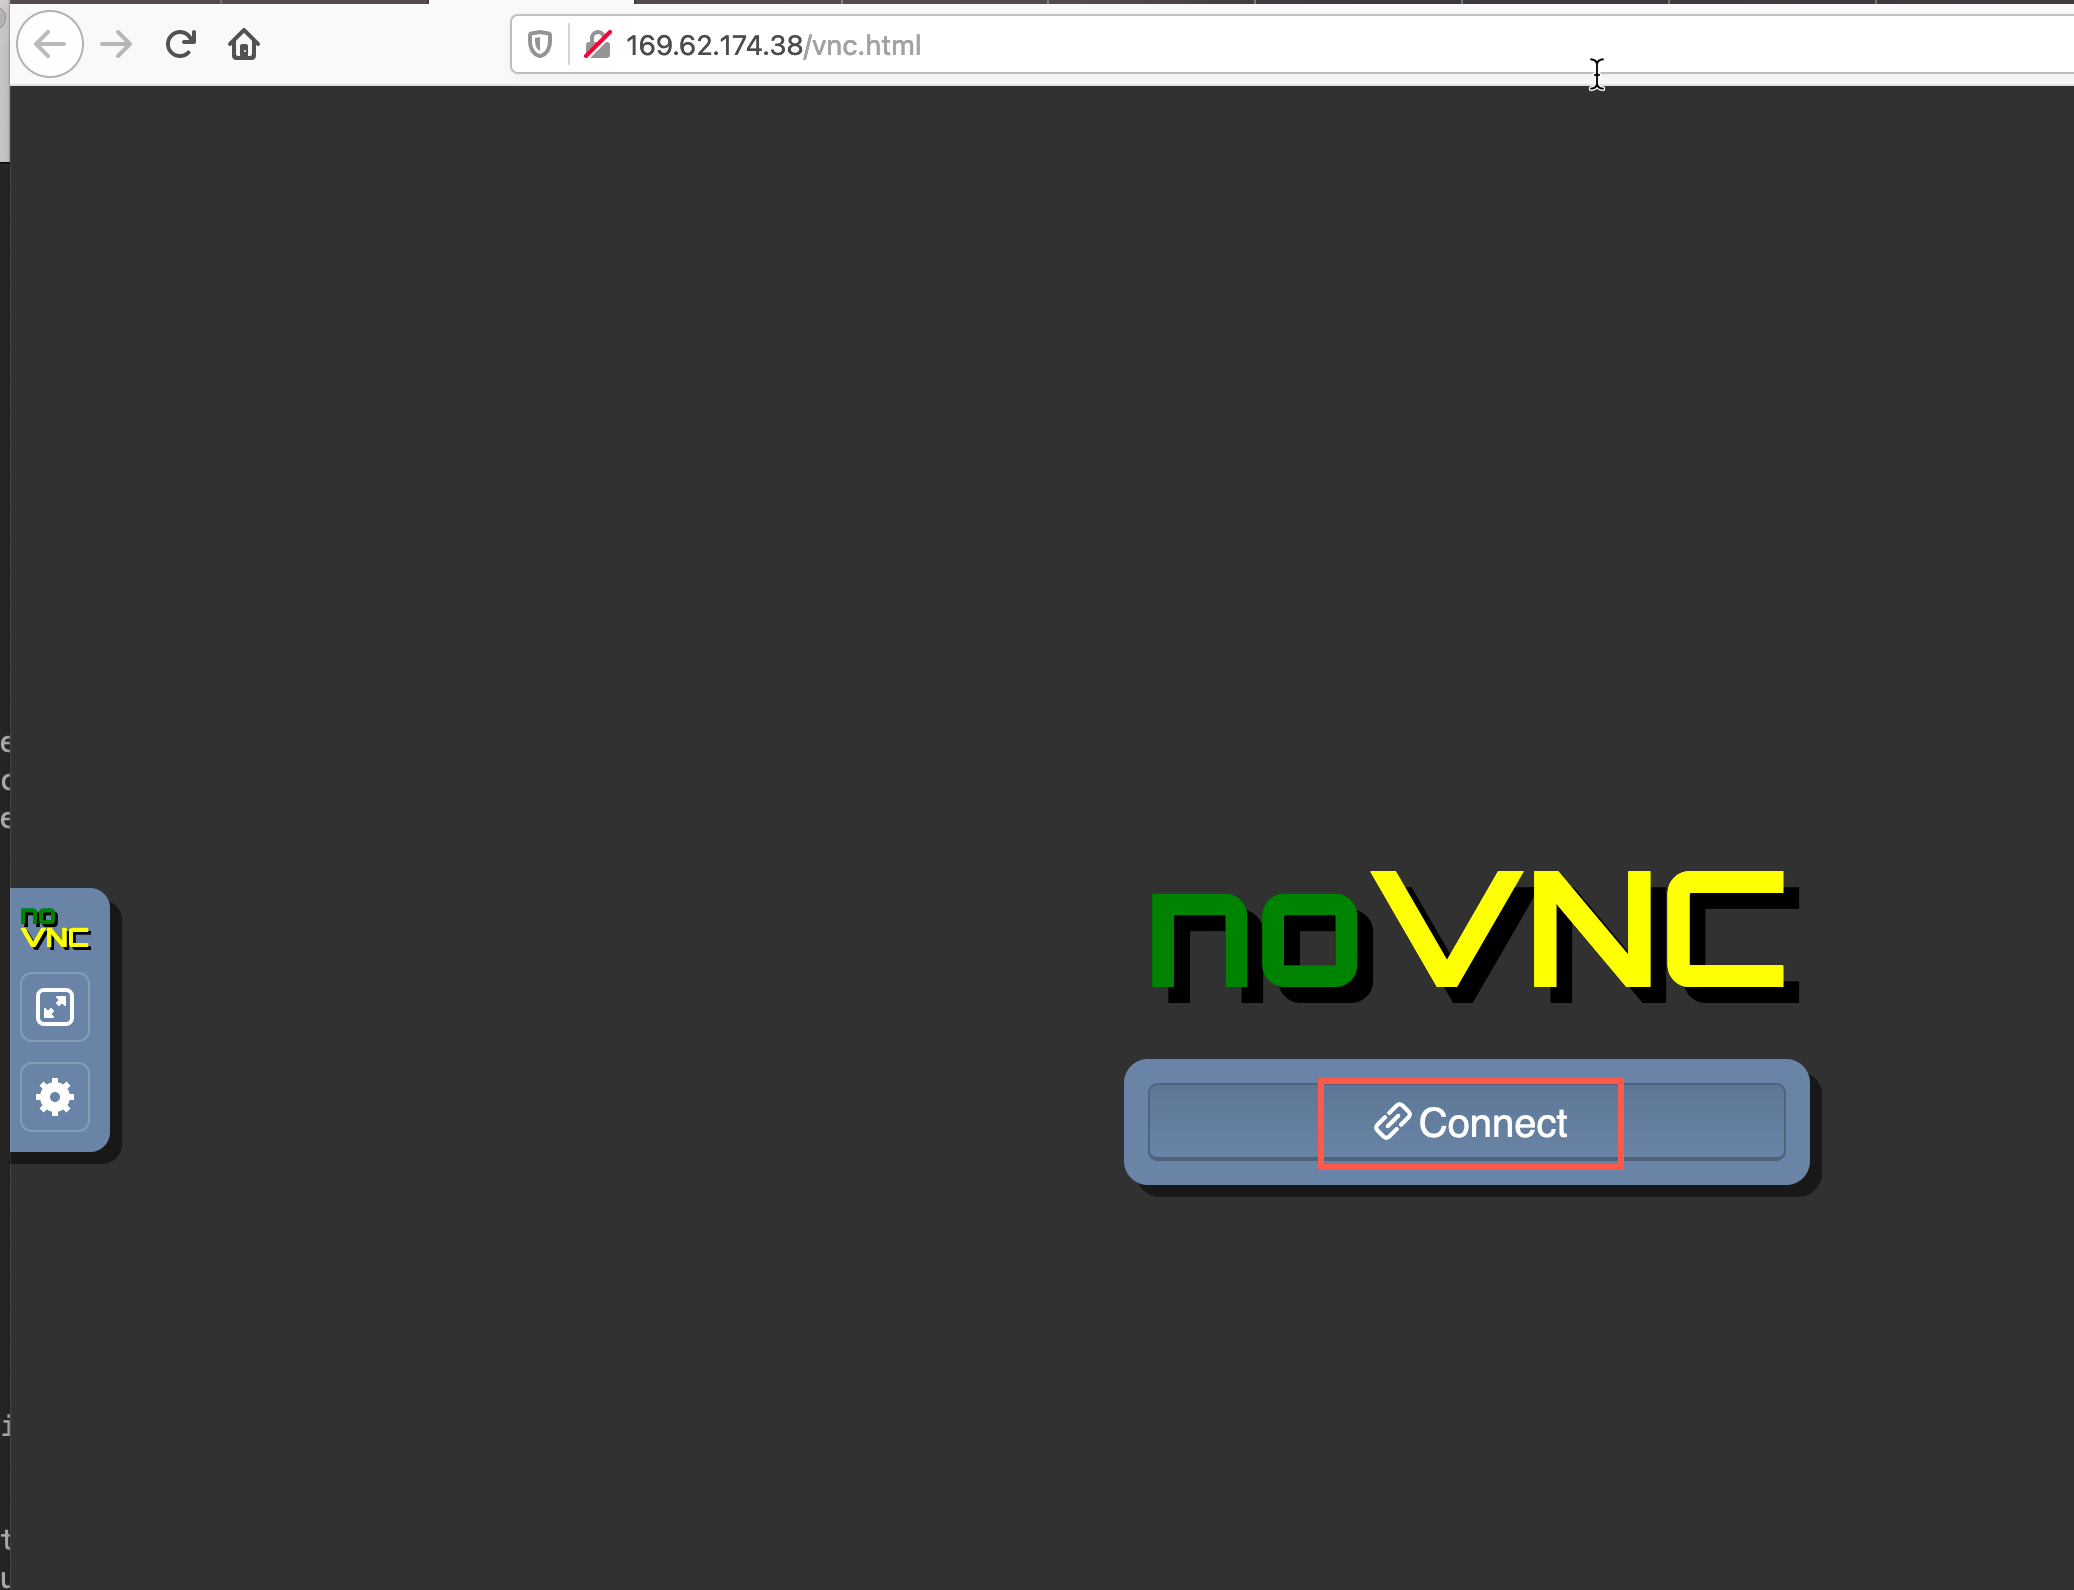
The VNC window appears. Click connect.
-
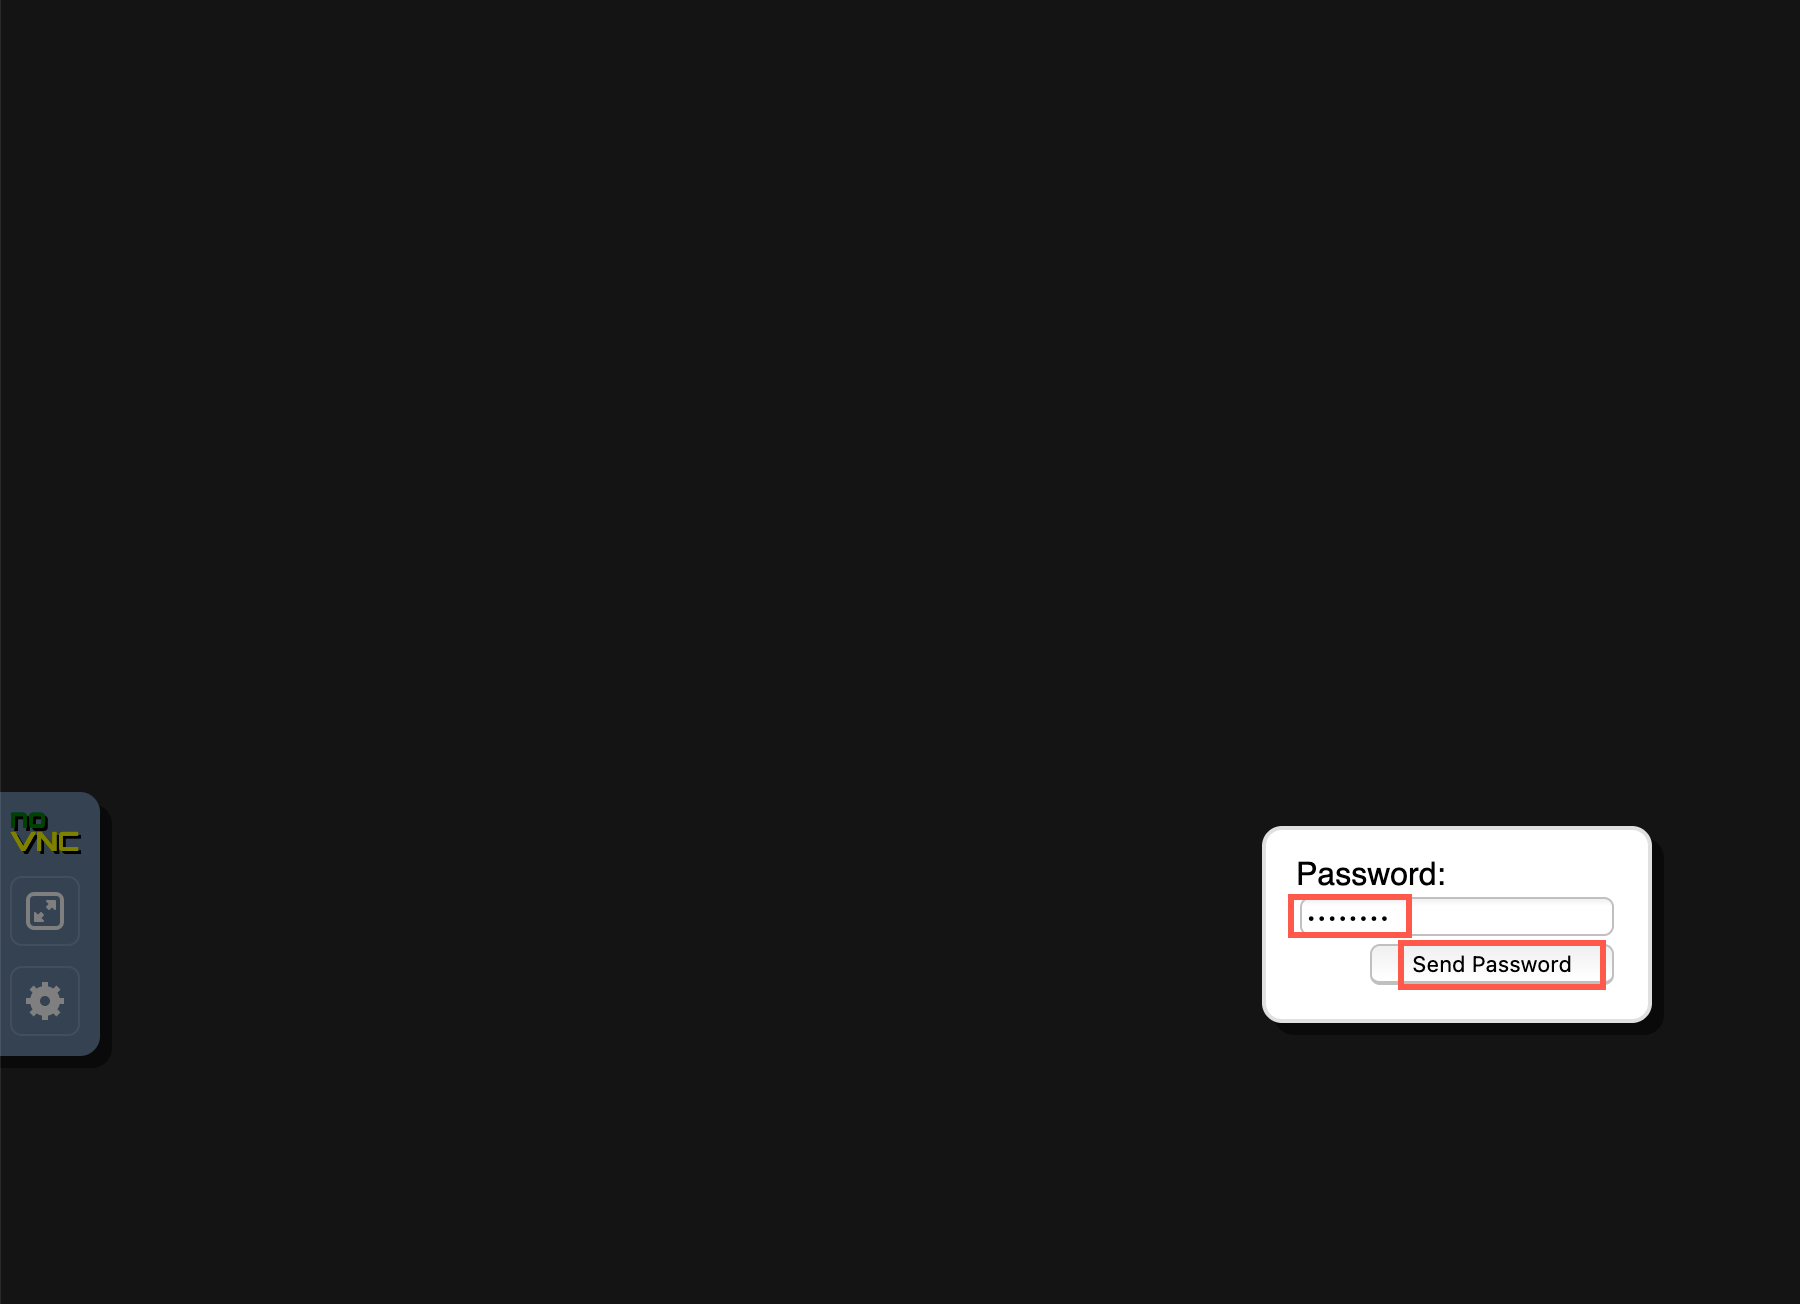
Paste or enter the password included in the details then click Send Password.
-
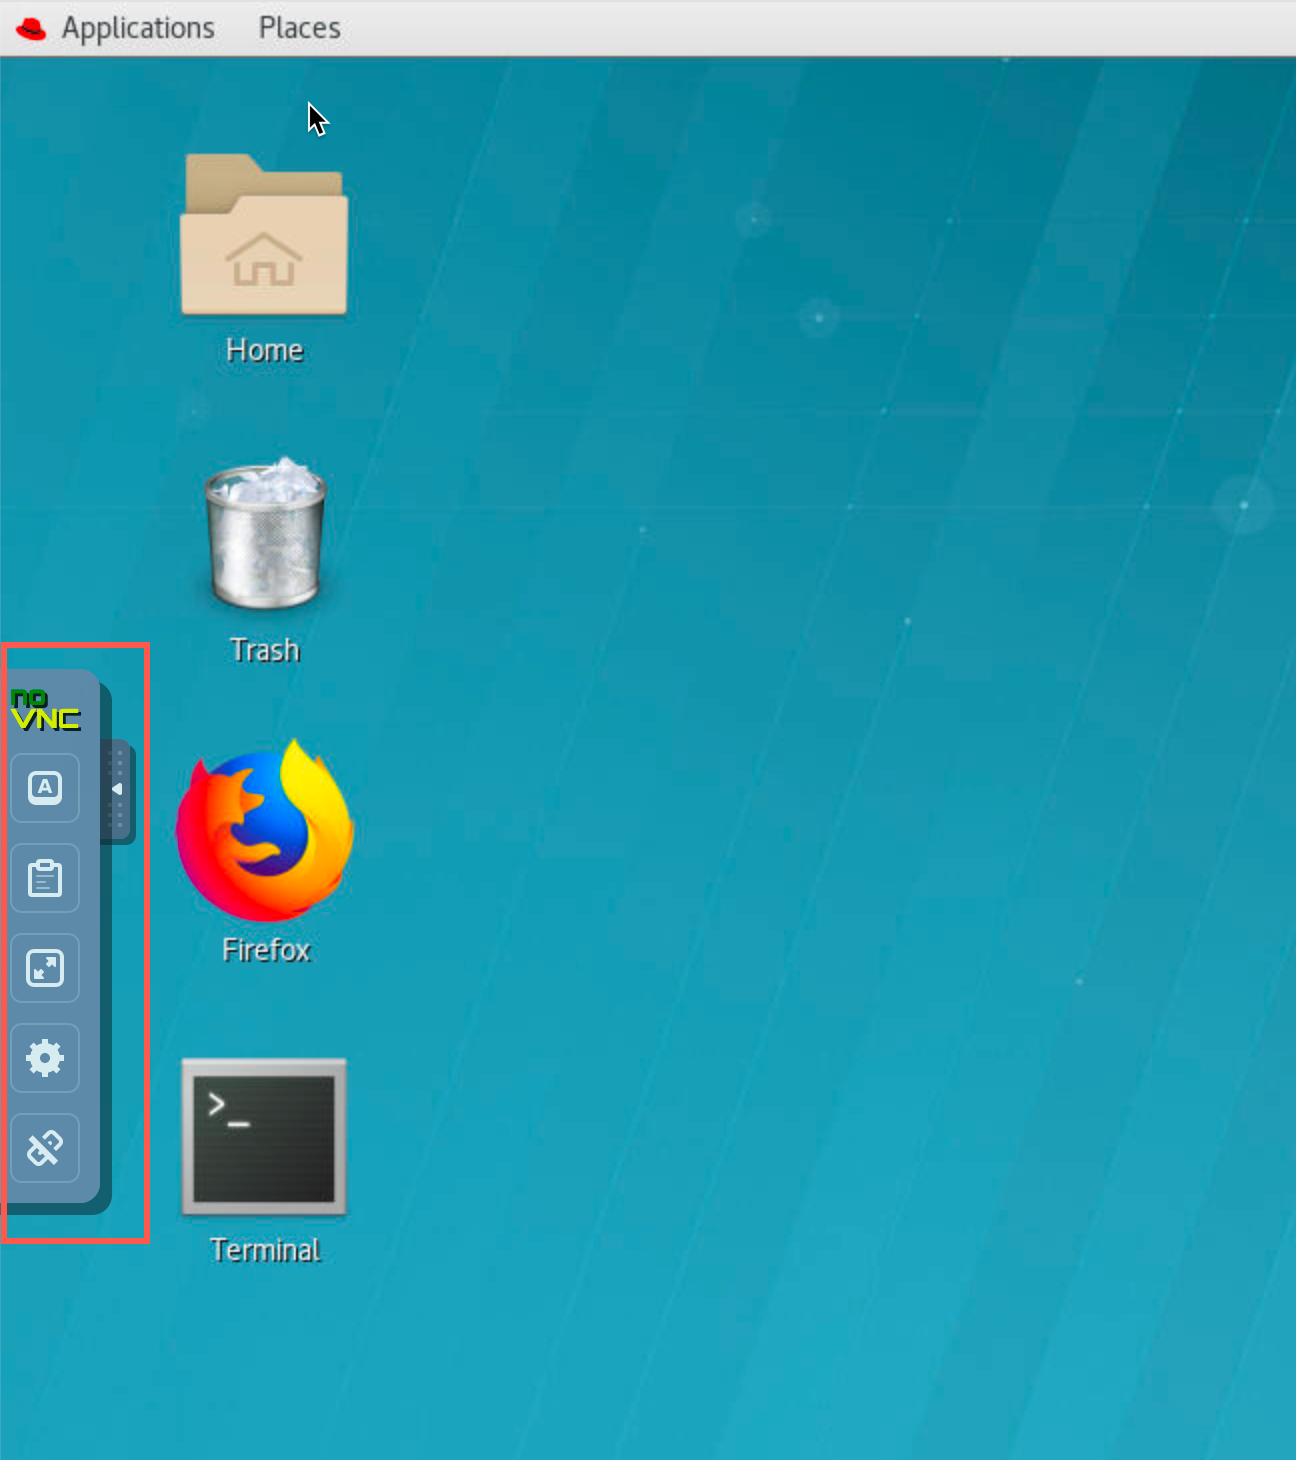
The Linux desktop appears. You are now logged in as student. You’ll notice the toolbar on the left. This is used to control the VNC settings. You will use it mostly for copy/paste from outside the VNC desktop. You can hide the toolbar by clicking the arrow on the side of the toolbar.
Connect to the Red Hat OpenShift cluster
If you did not receive an email for the PoT or your email did not include the following information, your instructor will provide the required information.
Your attendee email also included a URL to connect to the Red Hat OpenShift cluster where you will execute the labs. The name of the cluster will vary depending on which one has been reserved. The example below shows the Chopper cluster.
You will also receive a userid to use throughout the PoT. Your email will include the name of the cluster and userid. The userids are defined in an LDAP for the cluster. For example if Chopper is the cluster, your email will specify chopper/chopperxx where xx is your student number. If the cluster is chopper, you will receive chopper/chopperxx.
The userid will also be the assigned name of a project (namespace) for you to work in. The project will be yours alone throughout the PoT. No one else will have access to your project and you will not have access to any other student’s project.
For example: User id: chopper14 pw: chopper2021pot
Cluster chopper and Project chopper14 were the cluster and the project name used to document this setup. Your assigned cluster and userid/project will be different. Where ever you see chopper or chopperxx in the instructions or screen shots make sure to substitute the ones assigned to you!
-
From your email, copy the URL for the OCP Console.
-
Paste the URL onto the clipboard of the VDI.
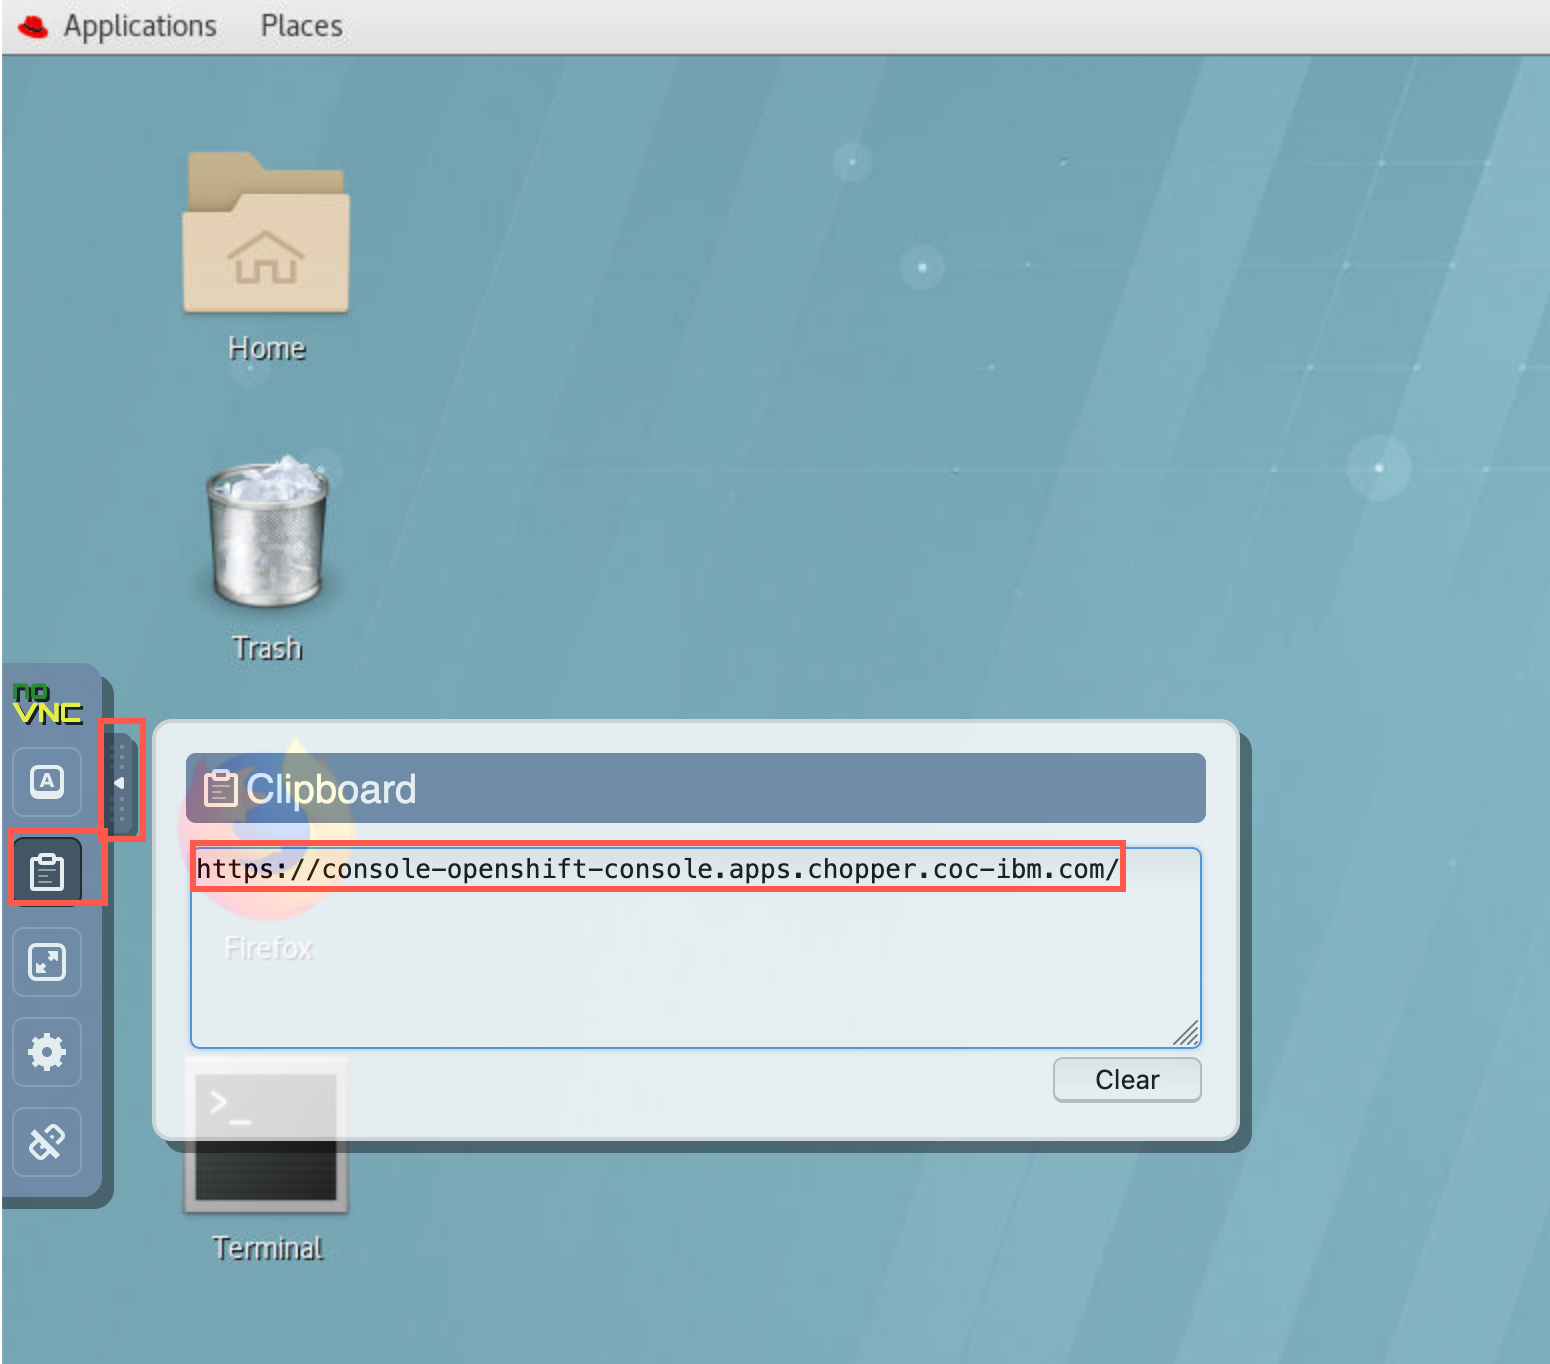
Then copy/paste the URL into a browser tab and hit enter.

If you receive a security warning, click Advanced then scroll down and click Accept the Risk and Continue.
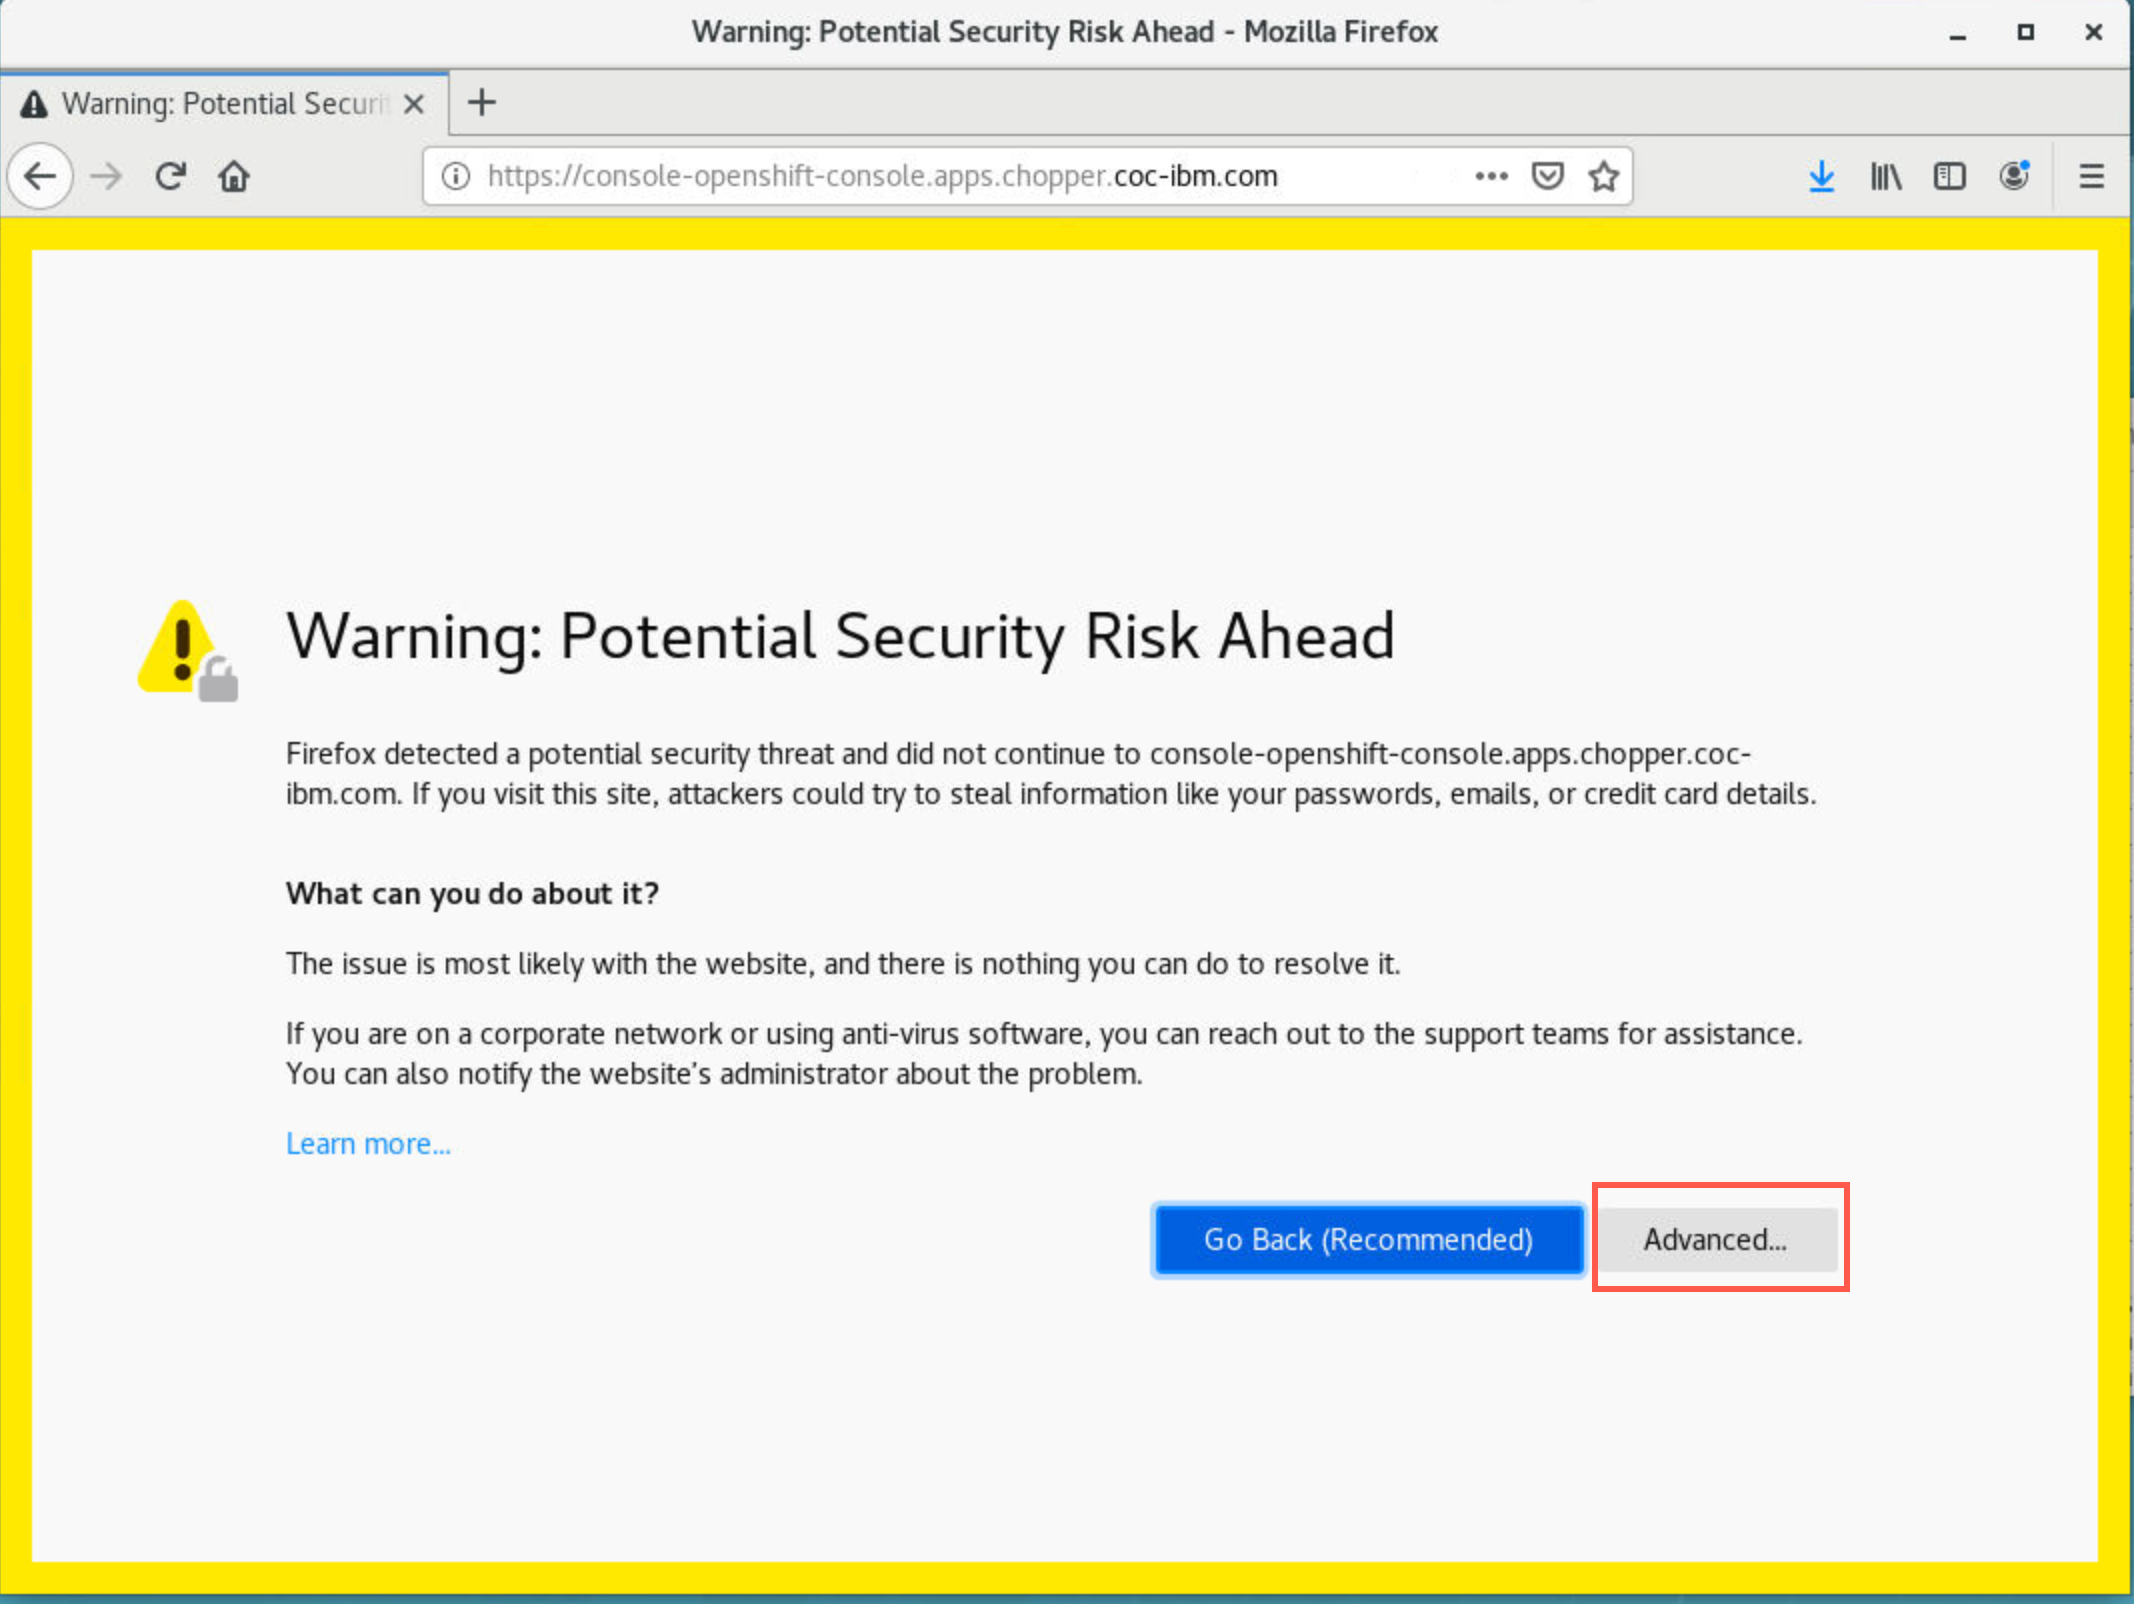
Repeat if challenged a second time.
-
Sign in to the cluster with the ID and password in your email. The sample used was chopper14/chopper2021pot. Click Log in.
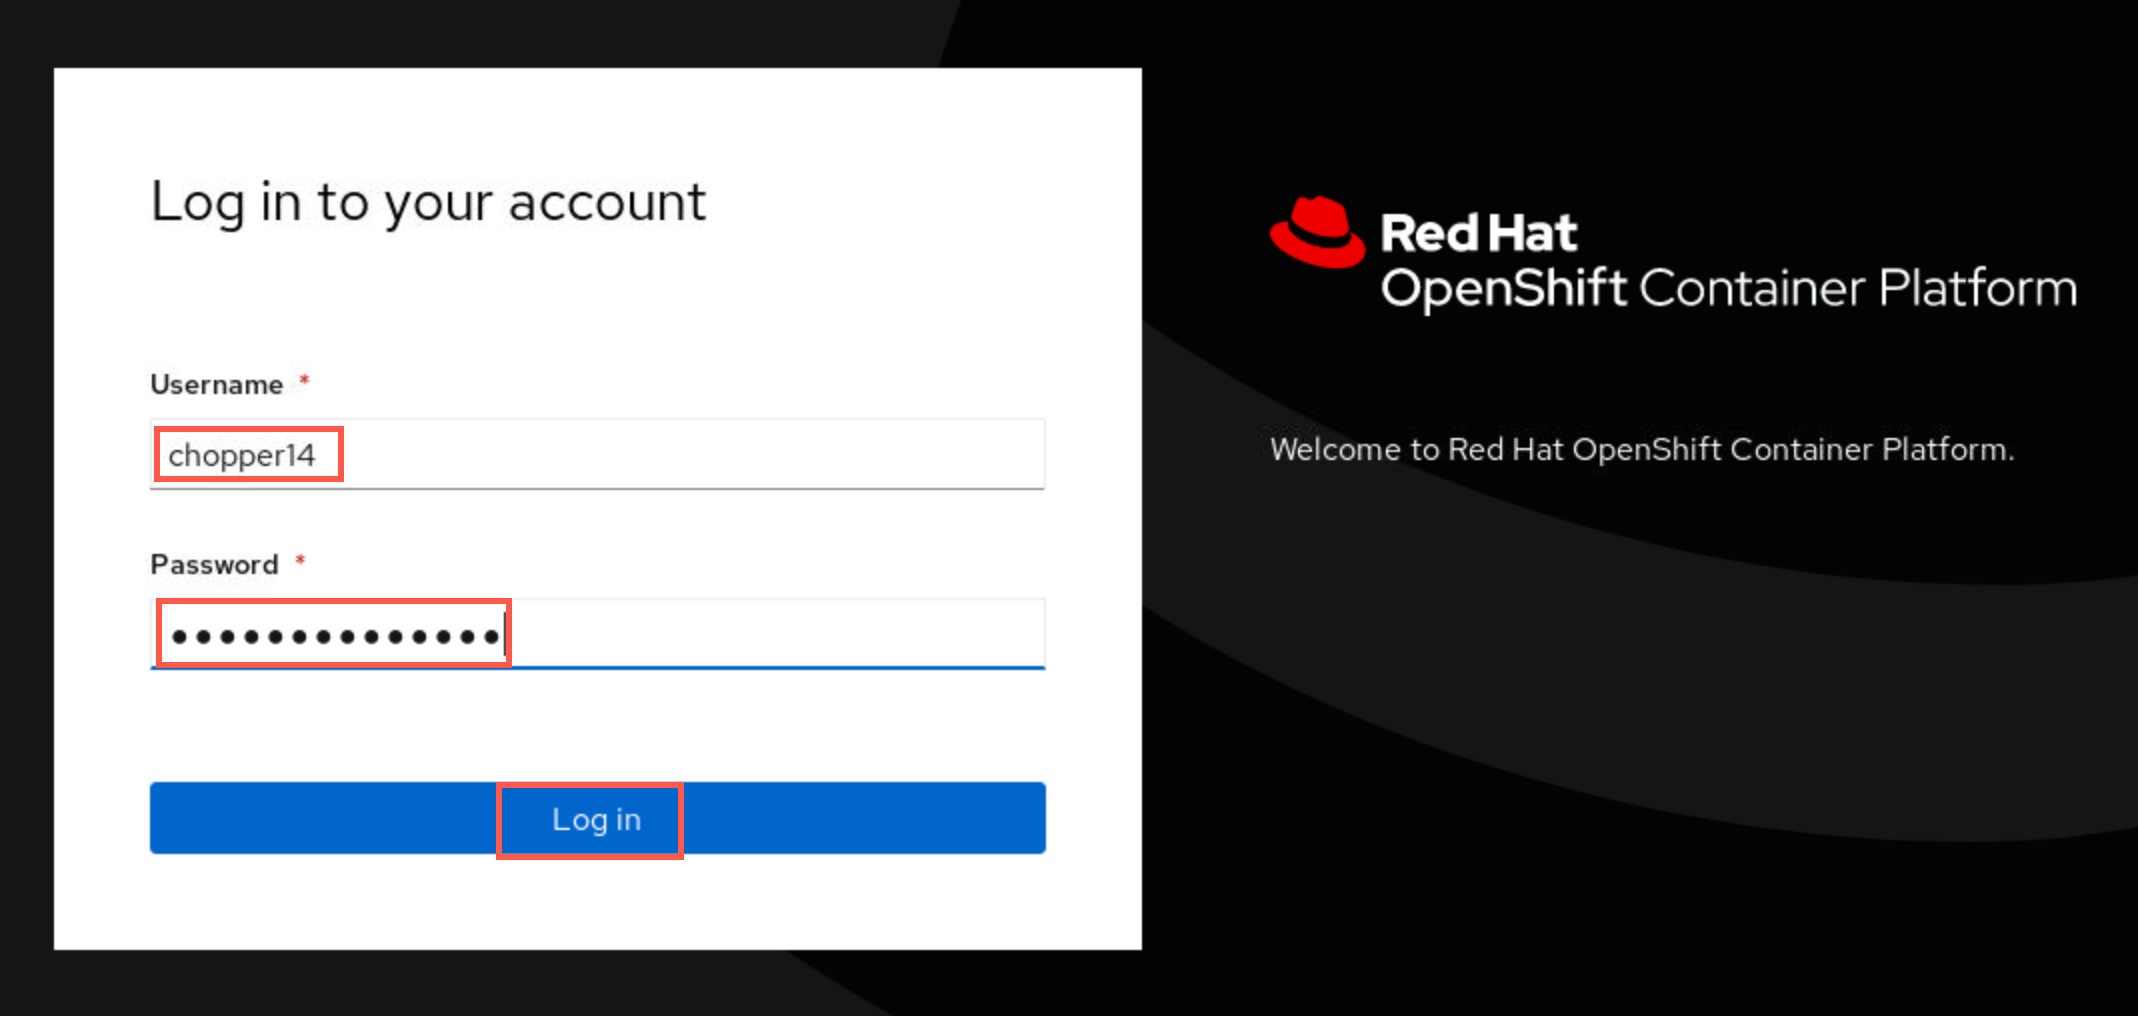
-
You are presented with an introductory tour. If you are interested you can page through the short tips. Otherwise you can just click Skip tour.
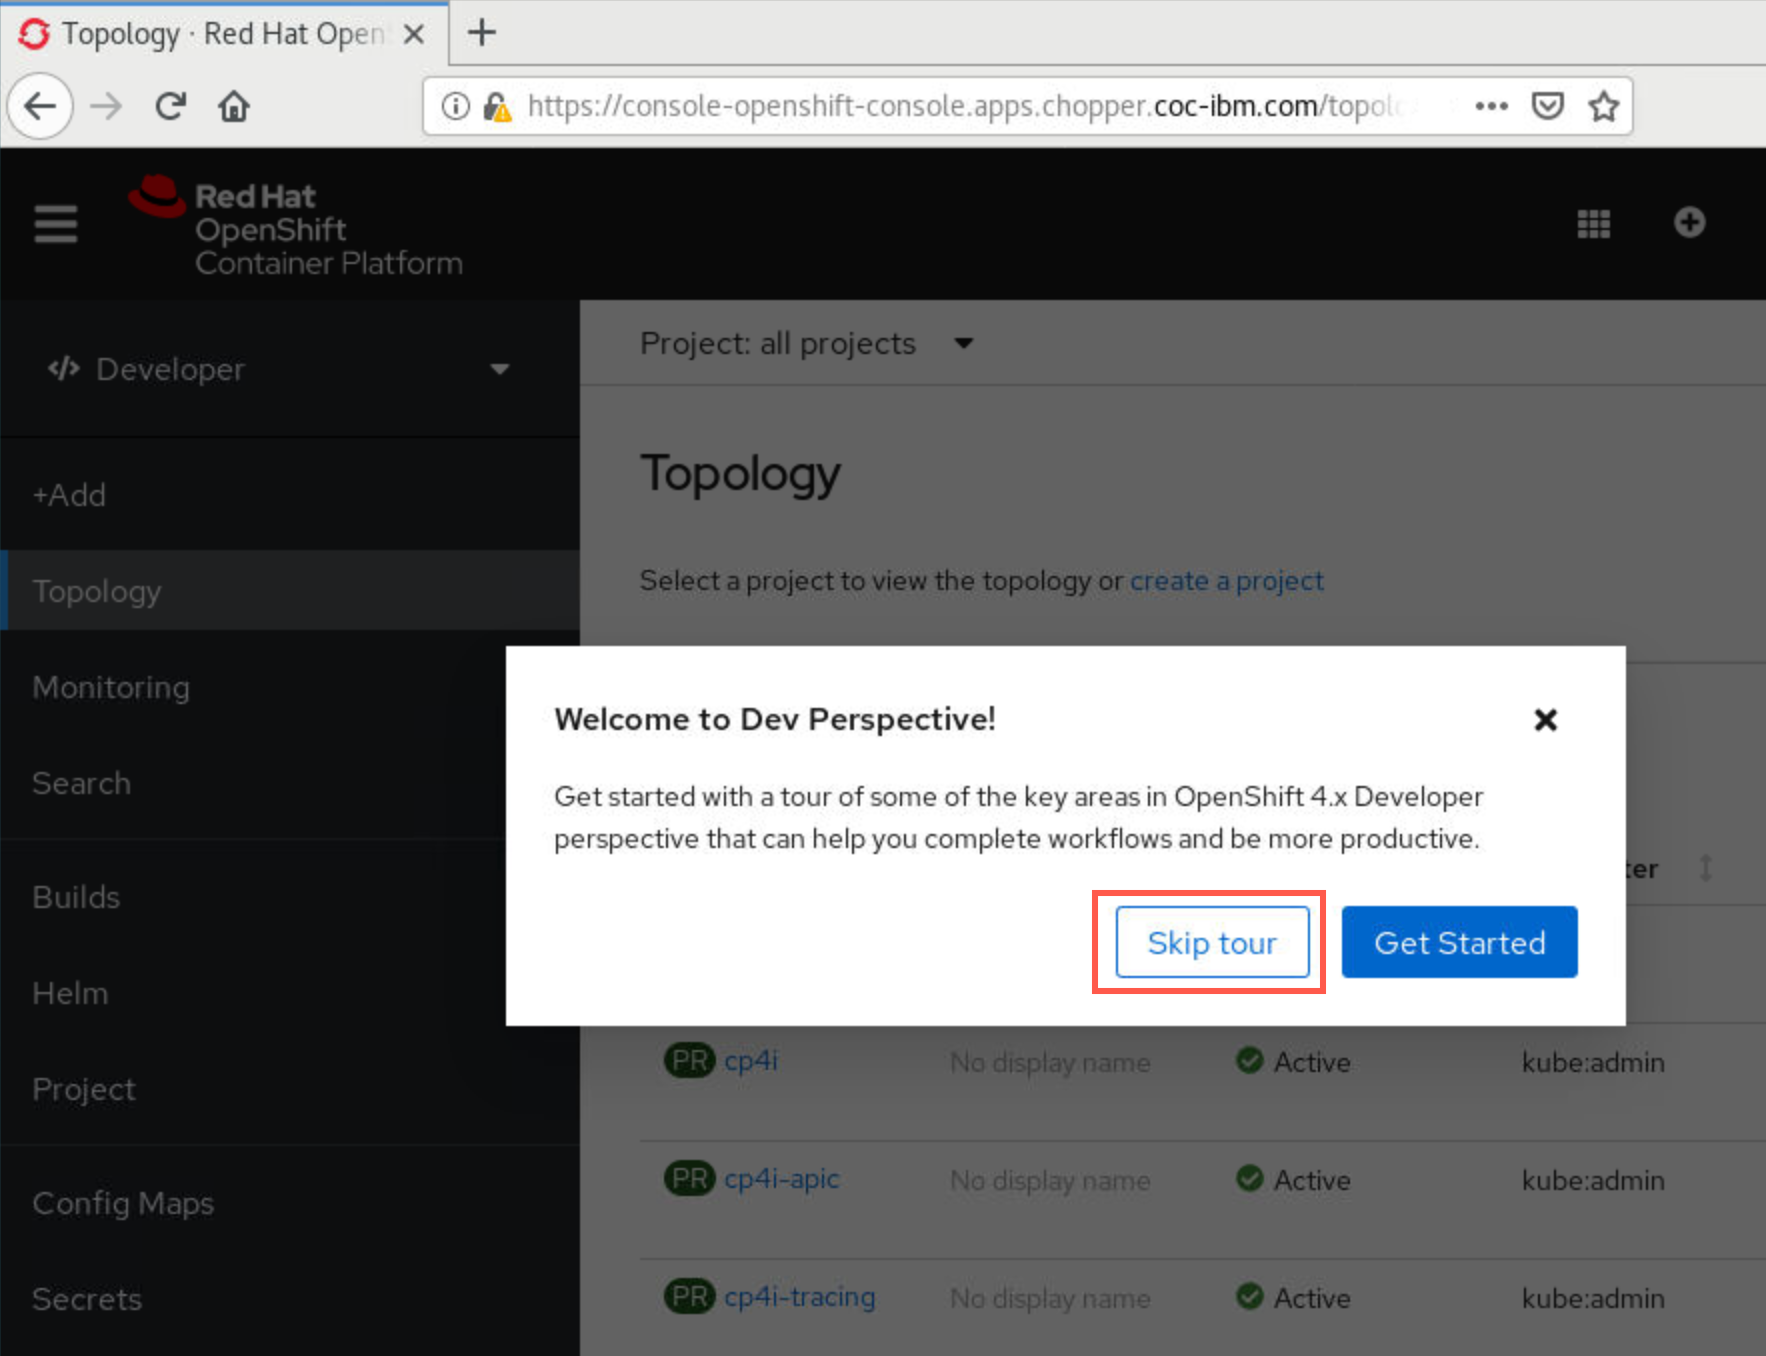
-
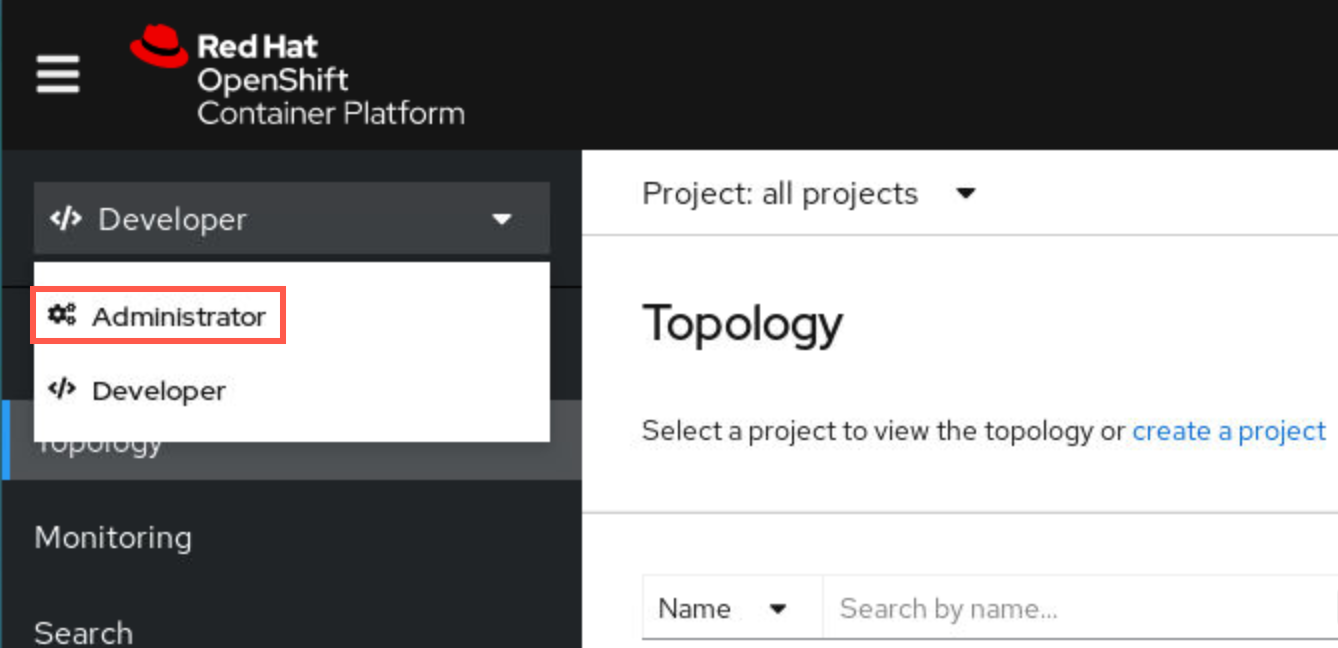
You have been logged into the Developer perspective. Click the drop-down next to Developer and select Administrator.
-
You are now in the Adminstrator perspective and logged it with your assigned userid. Your project (namespace) is visible as well as cp4i, cp4i-apic, cp4i-tracing. You will not use cp4i-apic for this PoT.
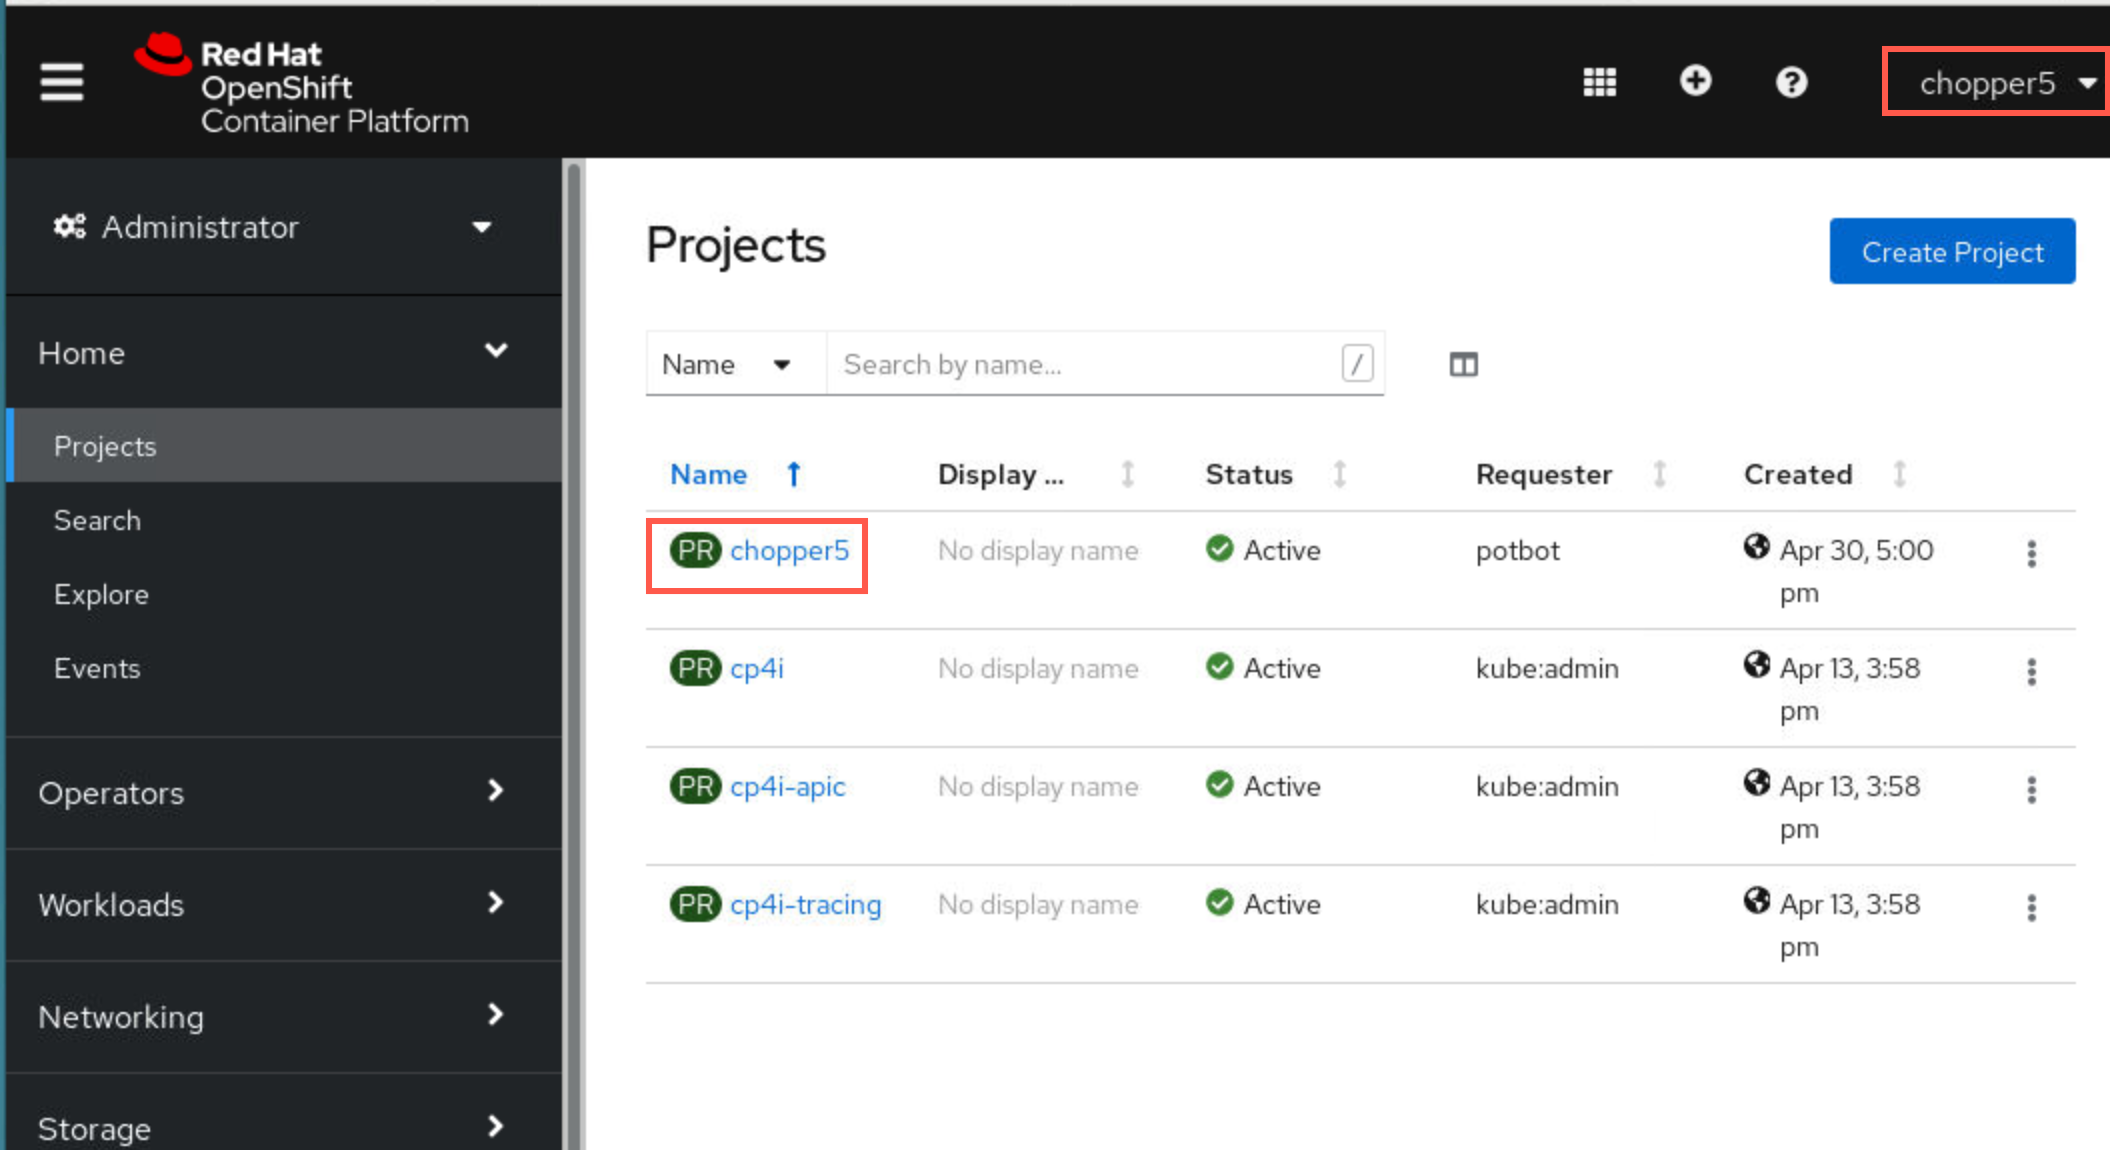
You will be in your assigned namespace. There are many other namespaces in OCP, but you will only be permitted to use yours so as not to affect the other users.
Note:
IBM Only - If you are running the lab in your own ROKS cluster, you may create a new project (namespace). Click here to create your namespace
Download artifacts for MQ on CP4I PoT
You should be logged on your VDI as student.
-
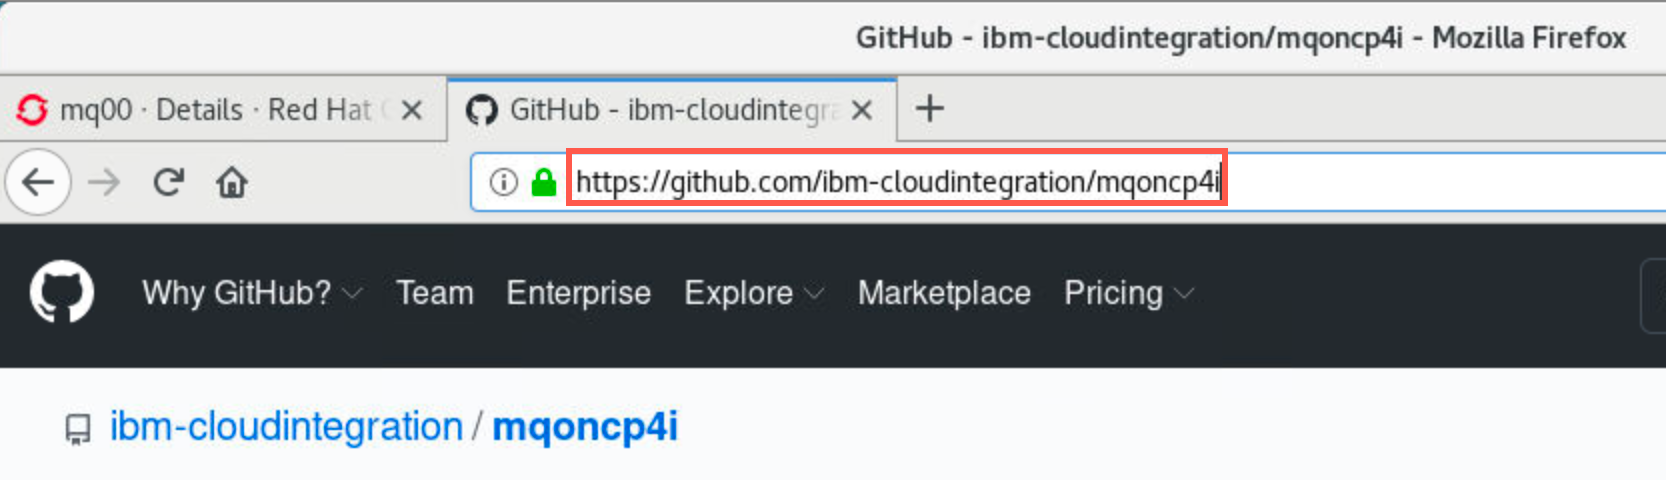
Open a Firefox browser tab and navigate to Github MQonCP4i.
-
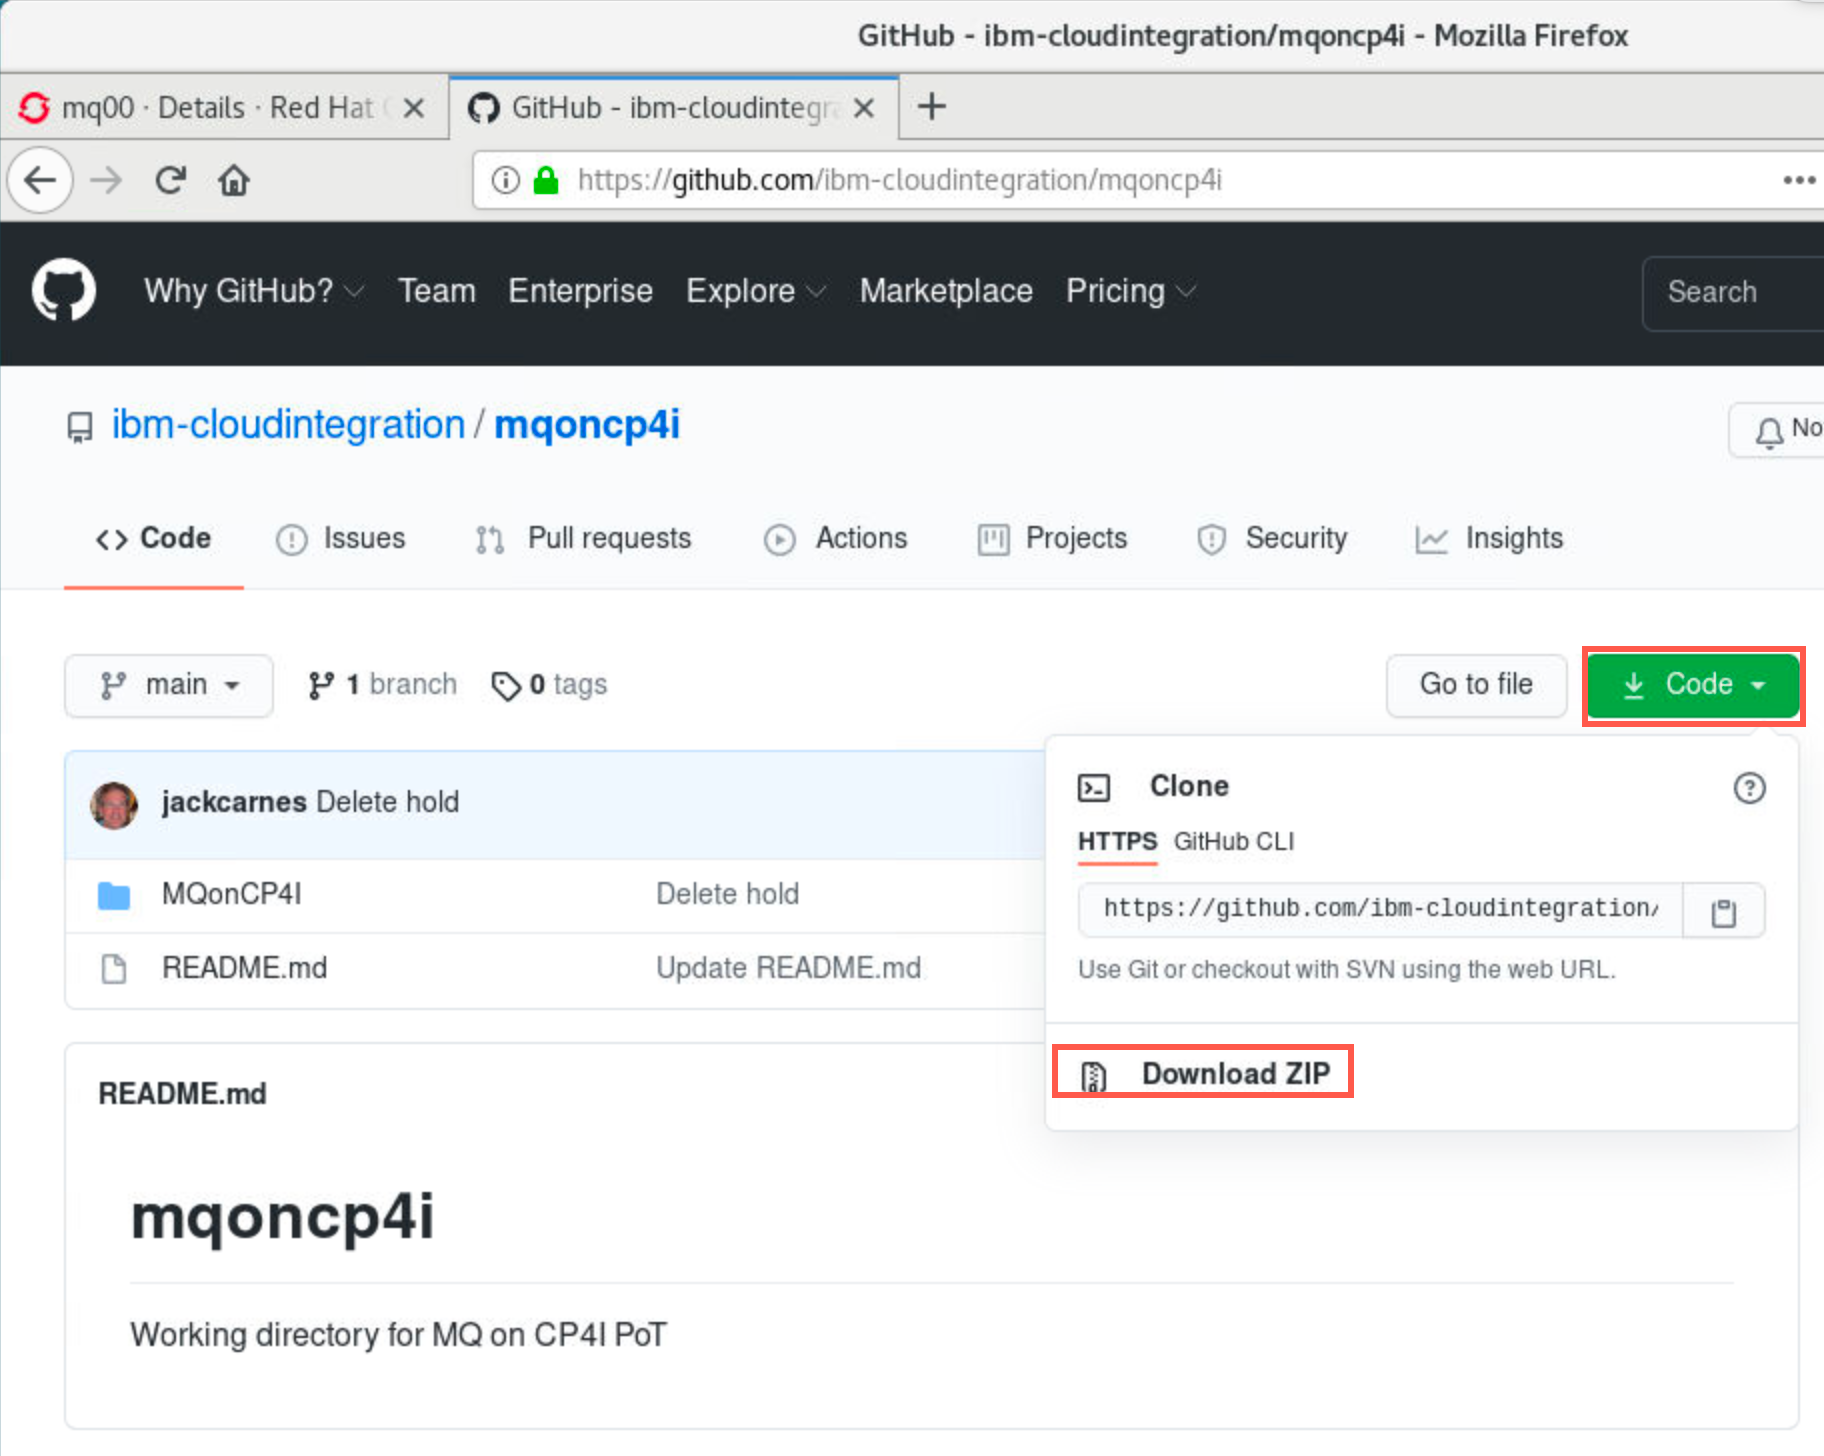
Click Code and select Download zip.
-
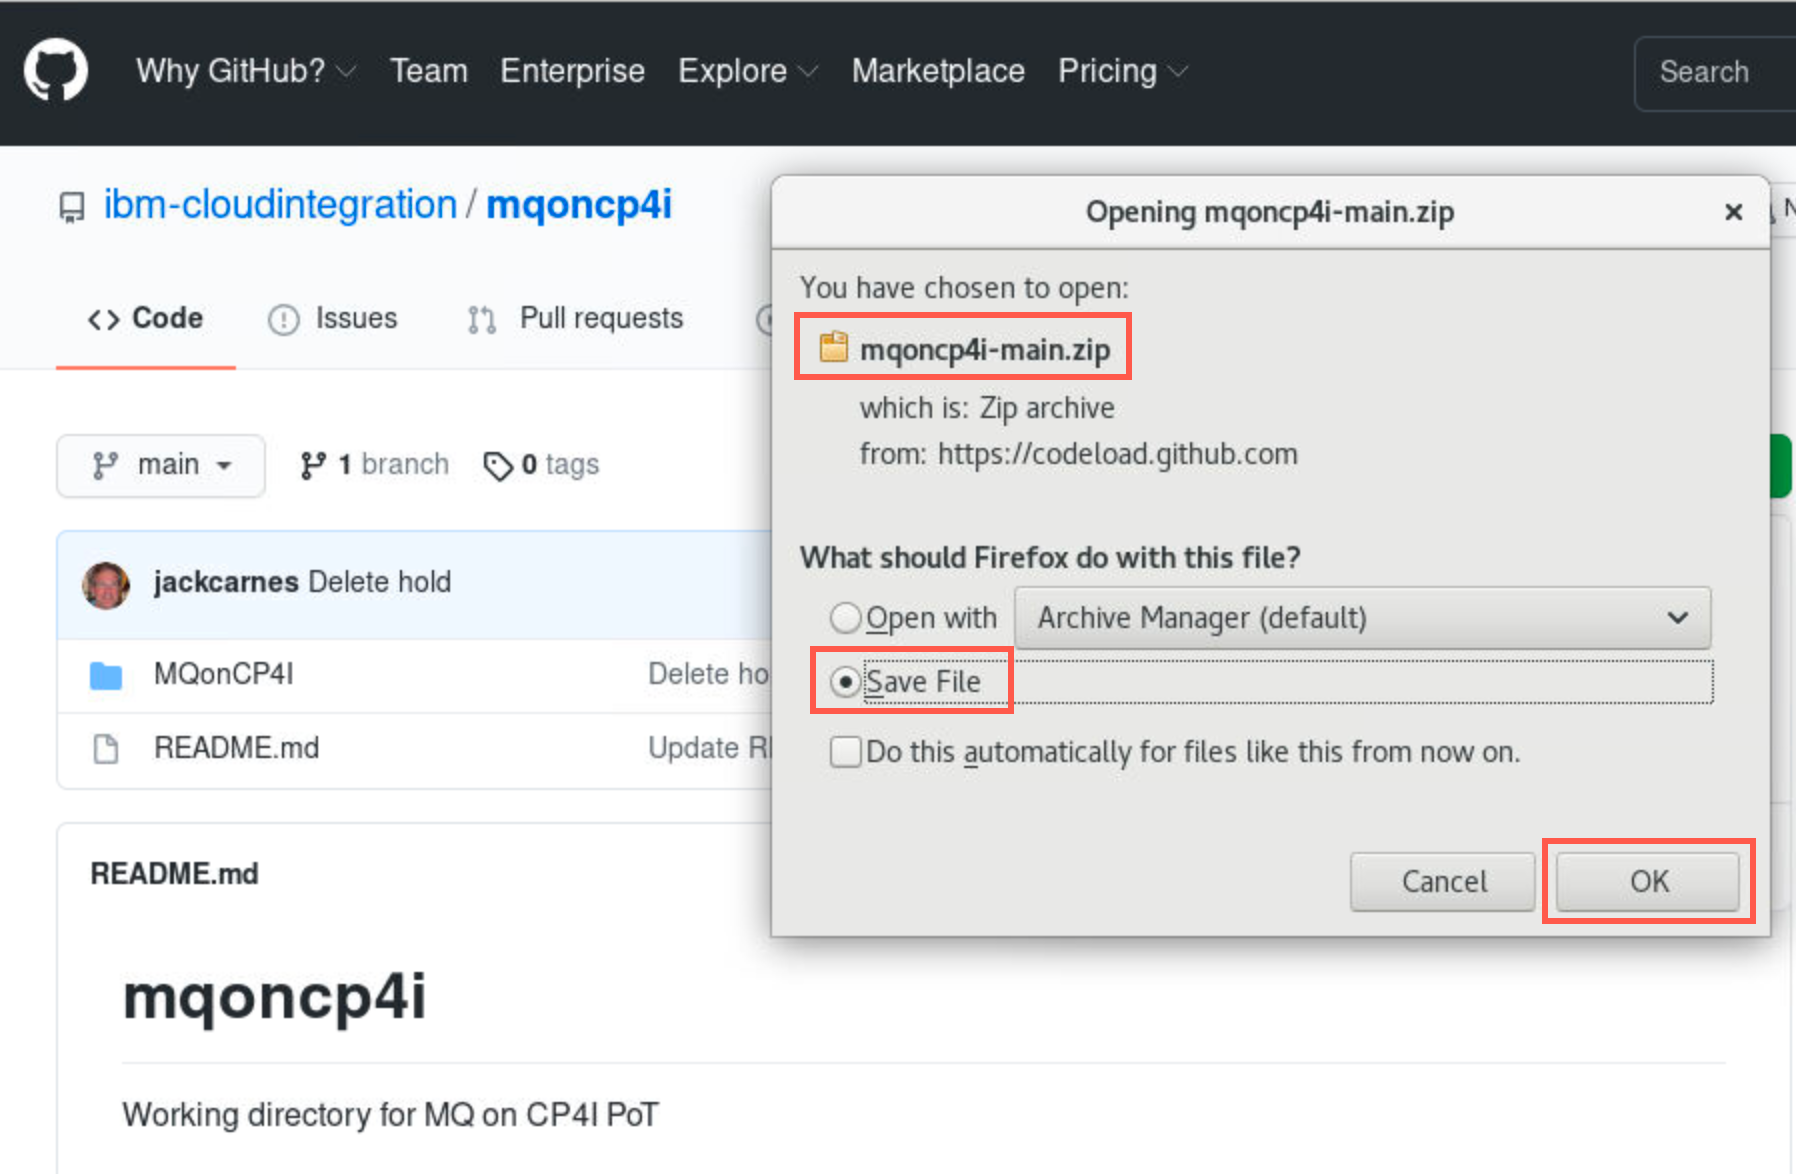
Click Save file radio button then click OK.
-
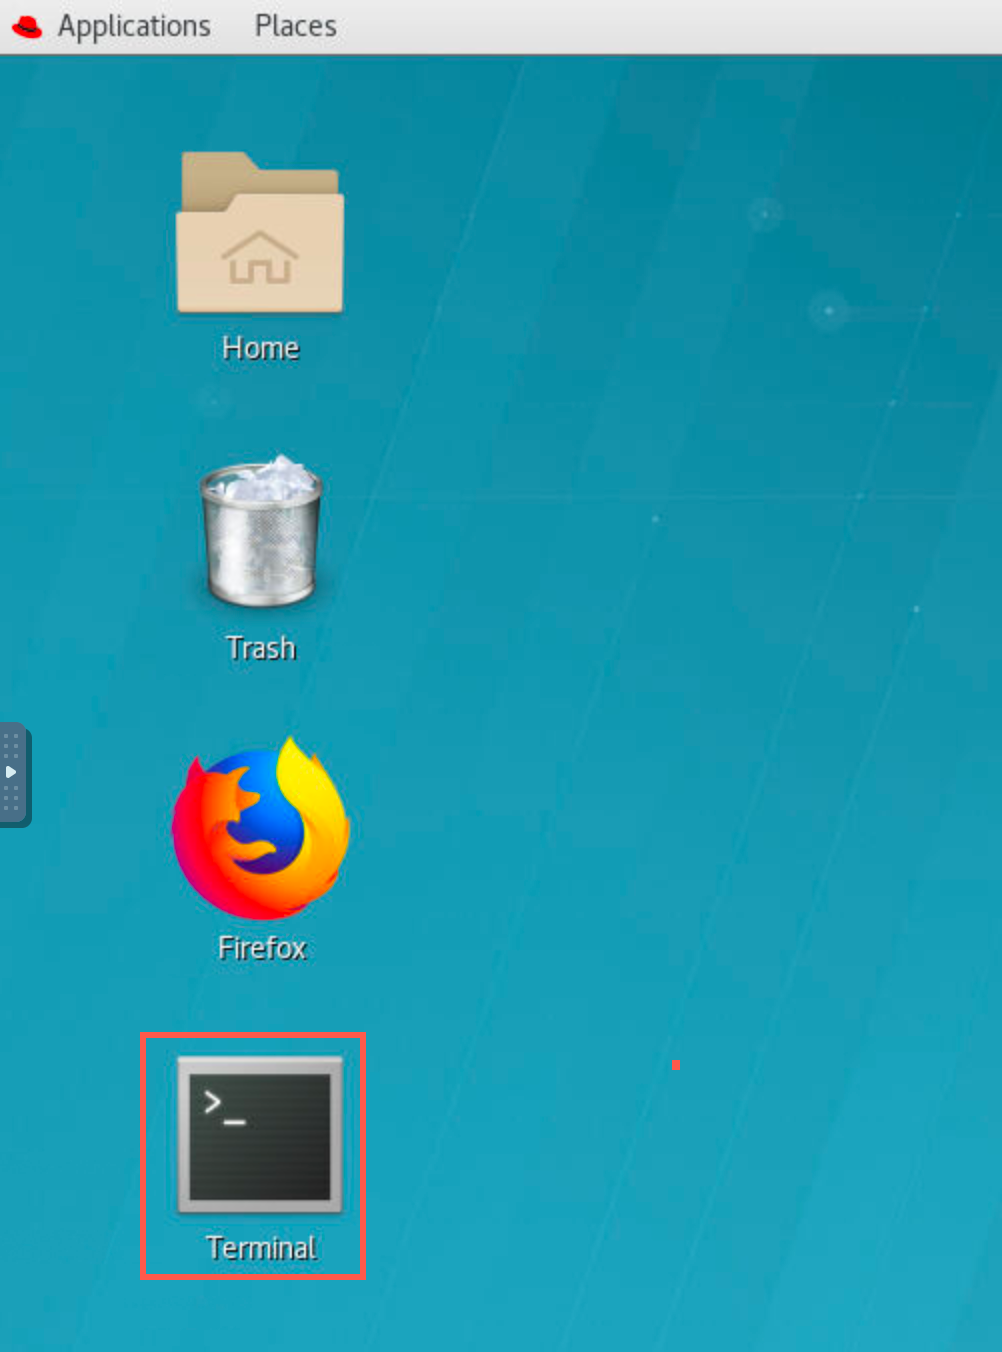
Open a terminal window by double-clicking the icon on the desktop.
-
Enter the following command to see the zip file you just downloaded.
cd Downloads -
Enter the following command to unzip the downloaded file:
unzip mqoncp4i-main.zip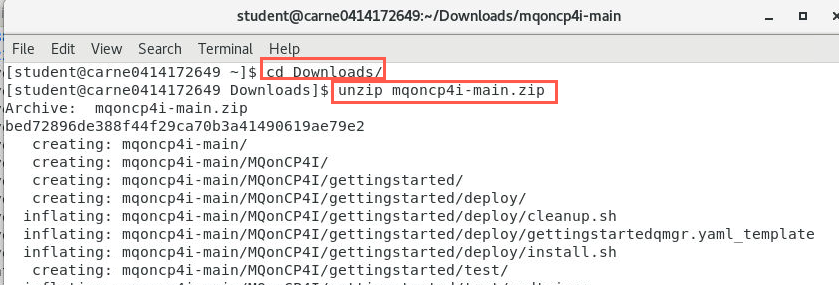
-
Move the unzipped directory to your home directory with the following command:
cd mqoncp4i-mainmv MQonCP4I/ ~/
This will create the directory /home/student/MQonCP4I. Change to your home directory and list the contents of the directory to verify that it contains MQonCP4I.
 cd ~
 ls
Great! You are now ready to start working with MQ in the labs. If running a PoT, attendees are now ready to start Lab 1 where they will create queue managers using their assigned IDs.
IBM Only - Create Project (namespace) for your lab assets
-
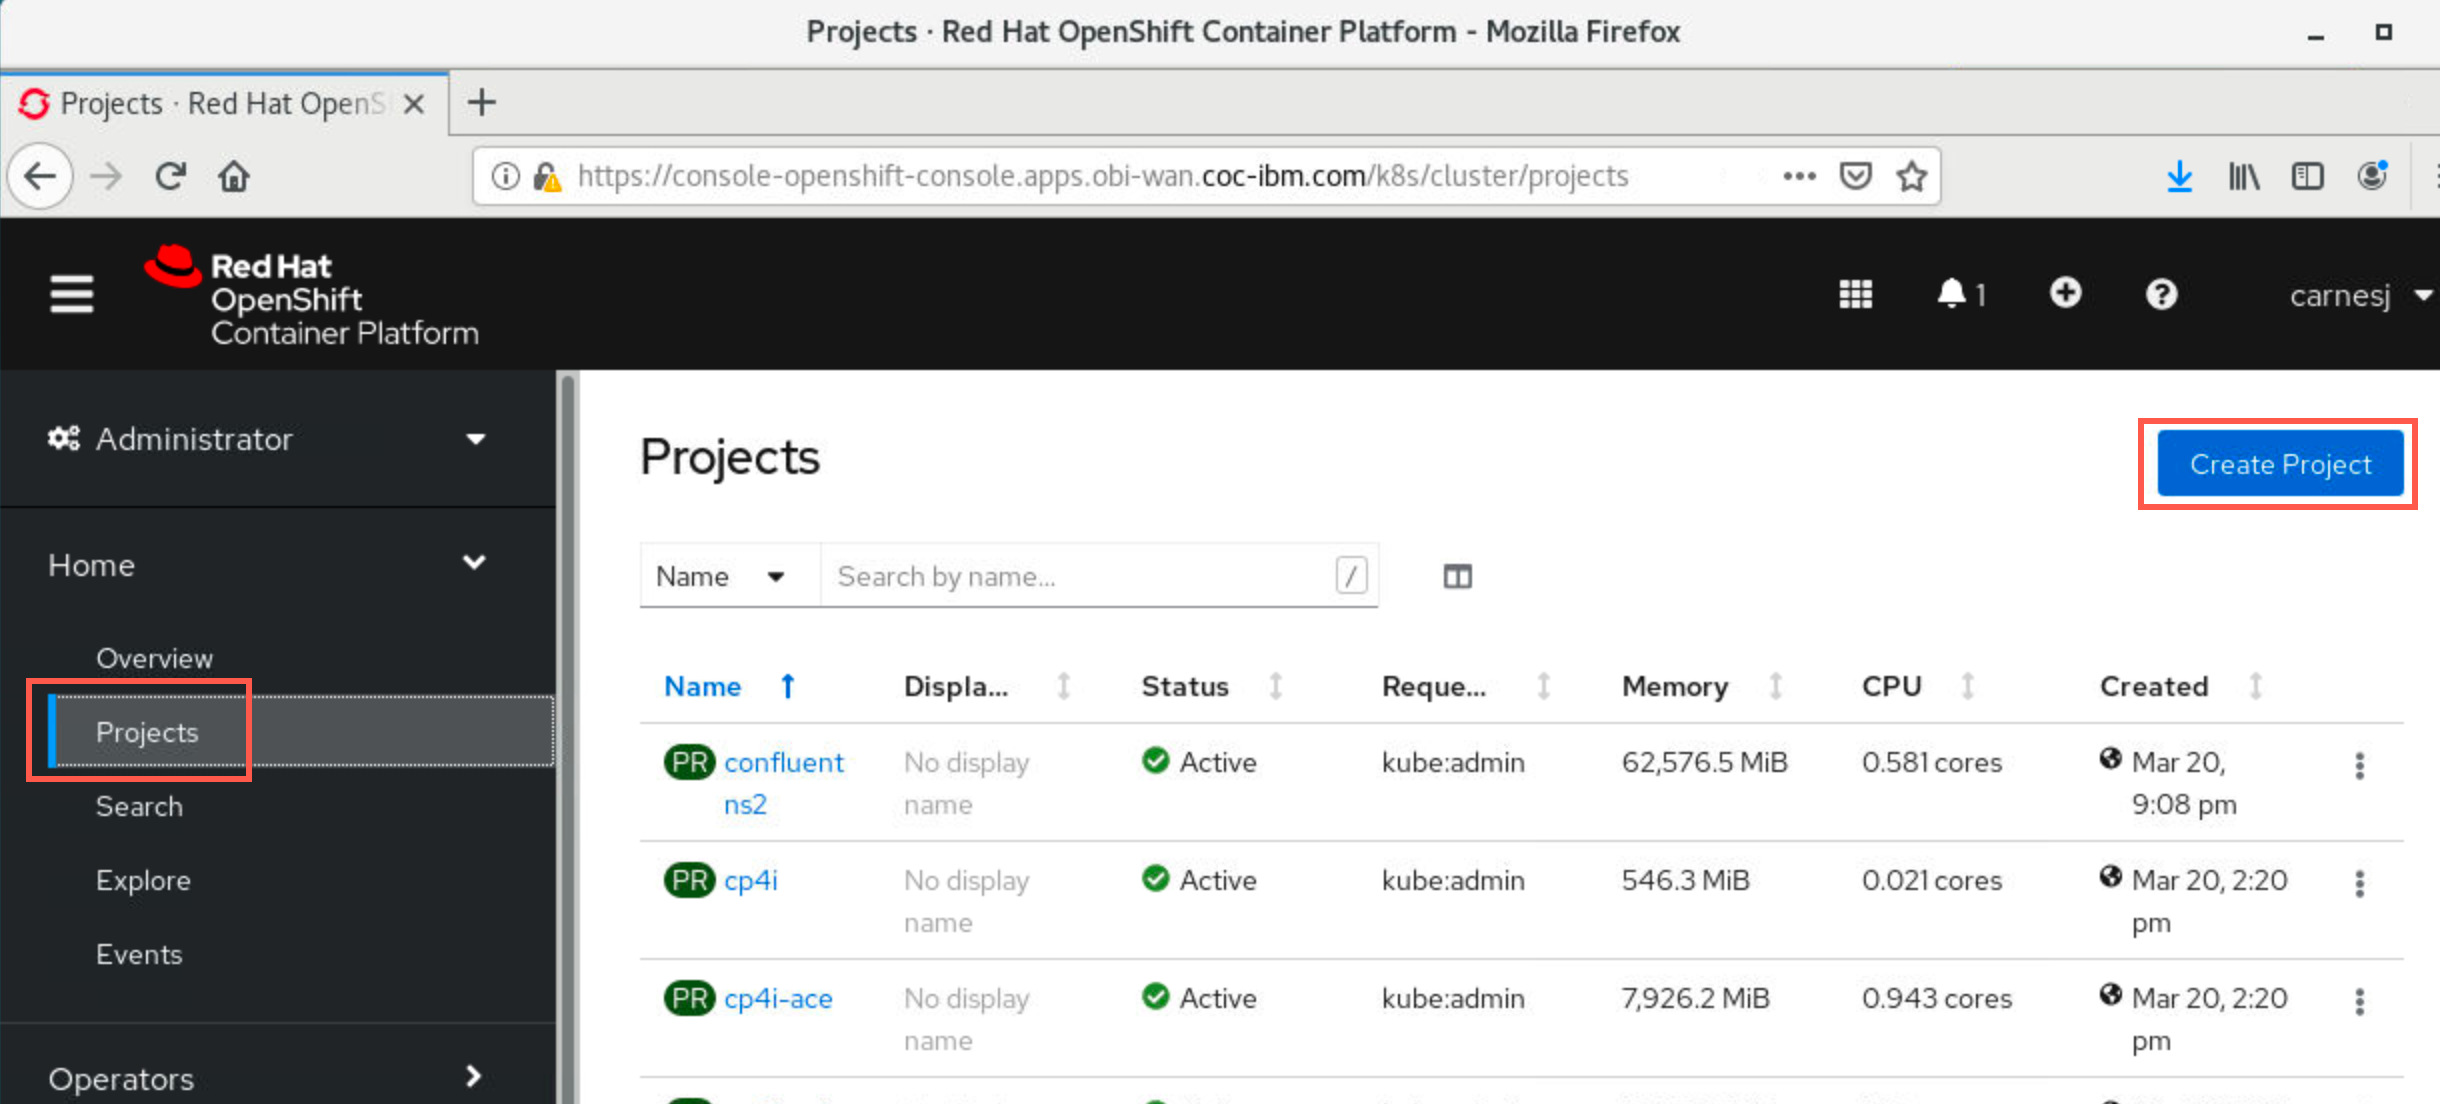
Click Projects then click Create project.
-
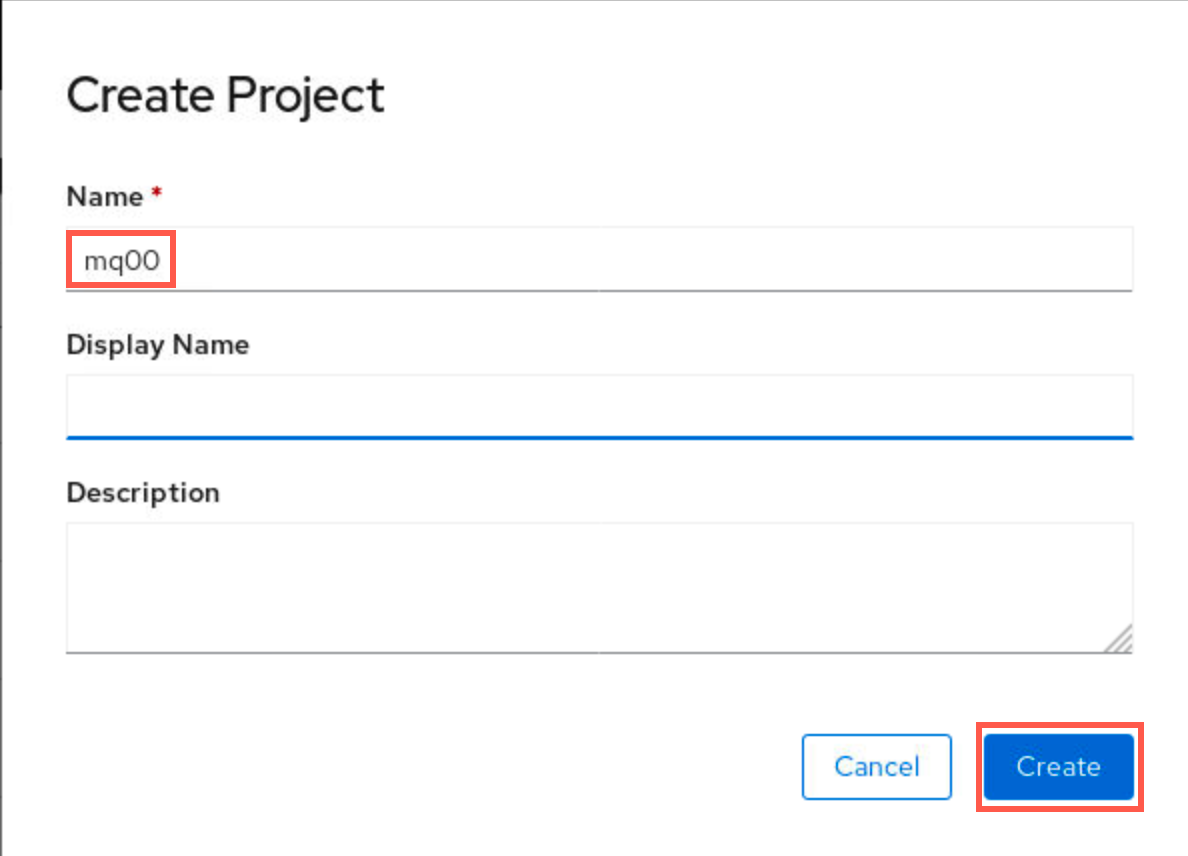
Select a student number between 01 - 99. Append this number to “mq” to create your unique project name within the cluster (mq00 is reserved for the instructor and has been used to document the lab). Project is the term for namespace in OpenShift. This is used to keep your assets separate from the other students.
Enter the name of your project mqxx in the name field and click Create.
Create entitlement secret for your namespace
-
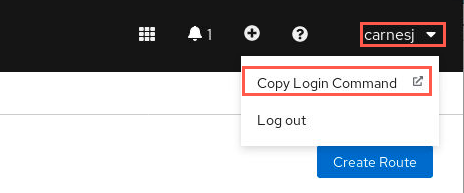
In OCP console, click the drop-down next to your username and select “Copy Login Command”.
-
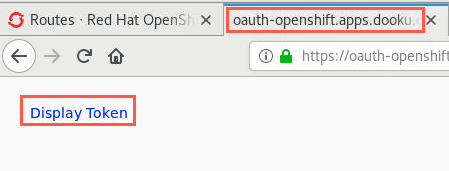
A new browser tab opens. Click the Display Token hyperlink.
-
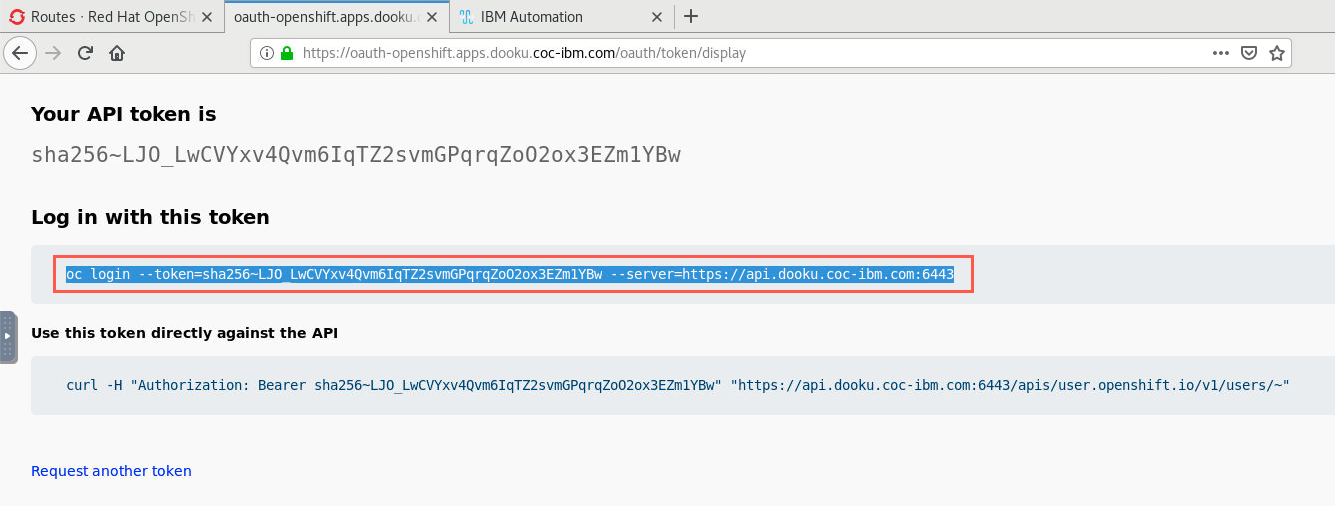
Copy the command under “Log in with this token”.
-
Open a terminal window and paste the command into the terminal and hit enter which logs you into the cluster. Enter the following command to change to your namespace. Make sure to substitute 00 with your student number.
oc project mq00 Note:
Note:
An entitlement key will be provided to you as part of the PoT. If you already have an entitlement key you may use it. -
Enter the following command to create the secret replacing “your-entitlement-key-goes-here” with your real entitlement key:
oc create secret docker-registry ibm-entitlement-key --docker-username=cp --docker-password=**your-entitlement-key-goes-here** --docker-server=cp.icr.io --namespace=mq00 -
You can now login to Docker with the following command replacing “your-entitlement-key-goes-here” with your entitlement key.
docker login cp.icr.io --username cp --password **your-entitlement-key-goes-here**