Lab 4 - Automate MQ Configuration with Tekton Pipelines
Requirements
- Openshift 4.7 or higher
- IBM Cloud Pak for Integration V2021.4.1
- IBM MQ V 9.2.4.0-r1 and mq.ibm.com/v1beta1 Operator ibm-mq.v1.7
- Red Hat OpenShift Pipelines Operator v1.5.2
- A namespace where the MQ Operator is installed
- An entitlement key called ibm-entitlement-key. IBM Employees can get from here.
-
A Github account and token
Once you have your gitHub account ready, you can continue with the lab.
Background
Some background would be helpful to comprehend what you will accomplish in this lab.
Review Understanding OpenShift Pipelines
In the lab you will:
- Fork the pipeline Git repository to your personal Git repository
- Clone (download) your personal Git repository to your Virtual Desktop Image (VDI)
- Modify the install and cleanup scripts and Tekton paramaters
- Add a webhook to your Git repository to trigger the pipeline when changes are made
- Change the MQSC file in your Git repository to initiate the pipeline
- Observe the pipeline run and results
Step 1: Fork the pipeline repository
-
Open a web browser by double-clicking on the icon on the desktop.

-
Navigate to your git account. Your URL should look like the following:
https://github.com/<your github account>/Note:
Replace <your github account> with your github userID.
-
If not signed-in, click Sign in and login with your personal gitHub ID and password.
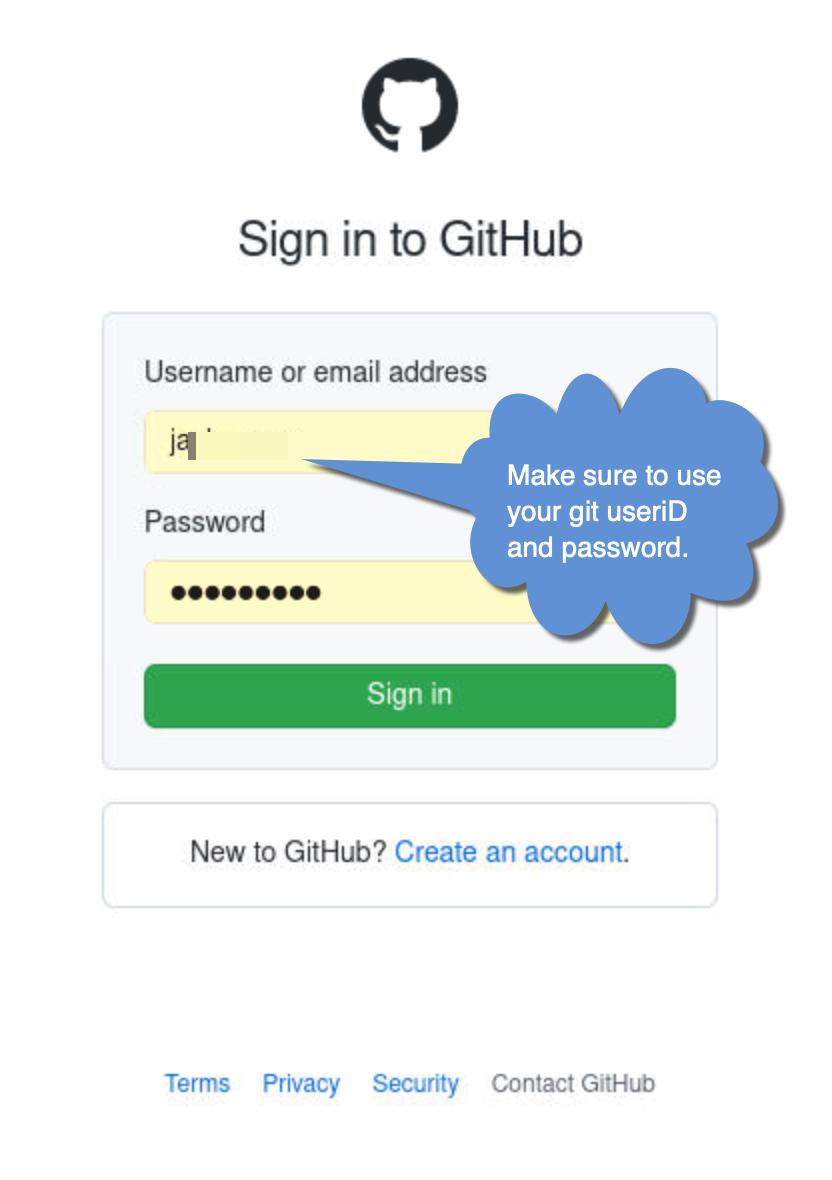
If you receive a message about unsupported browser, ignore the message. It still works for this lab.
-
You need to fork the cp4i-mq-tekton repository from the this PoT’s public git account. Open another browser tab and navigate to the following URL:
https://github.com/ibm-cloudintegration/cp4i-mq-tekton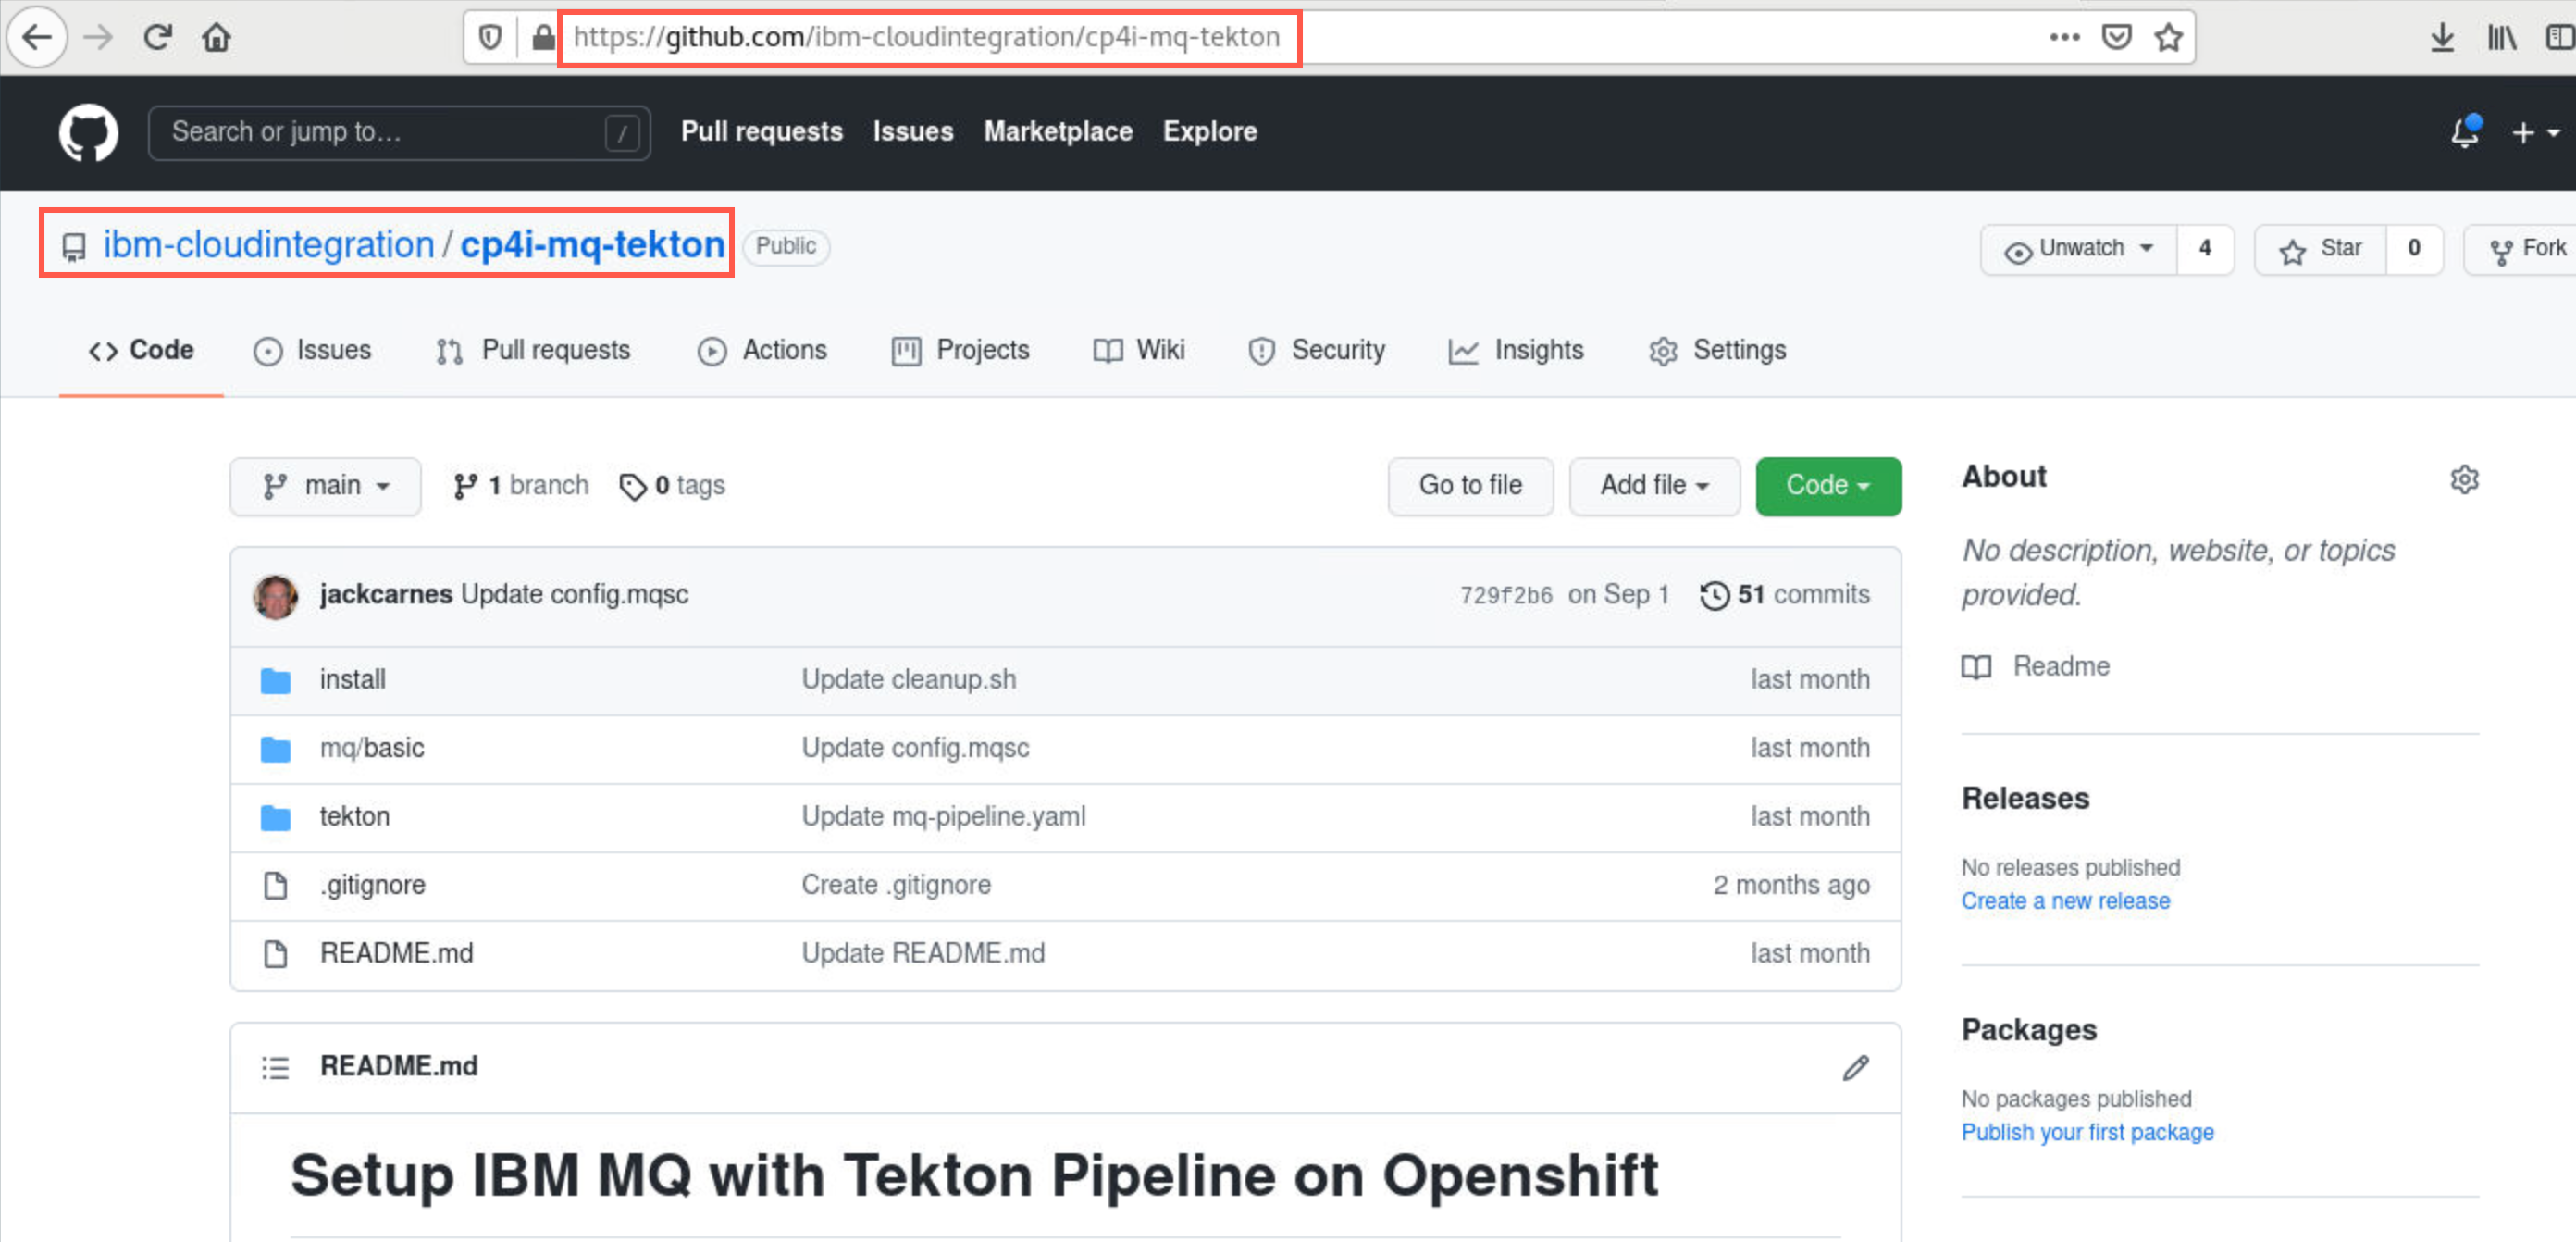
-
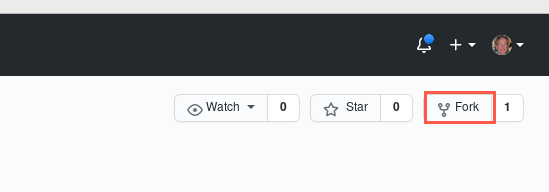
In the top right corner of the screen (under your profile) click Fork.
For more detailed instructions you may consult GitHub’s documentation on how to fork a repo to create your own fork of this repo.
-
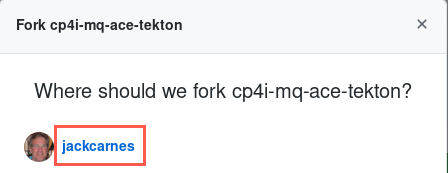
You will receive a pop-up with a list of one or more accounts to choose. Click your personal account.
-
The repository is copied to your account and you are taken to your account with the new repo.
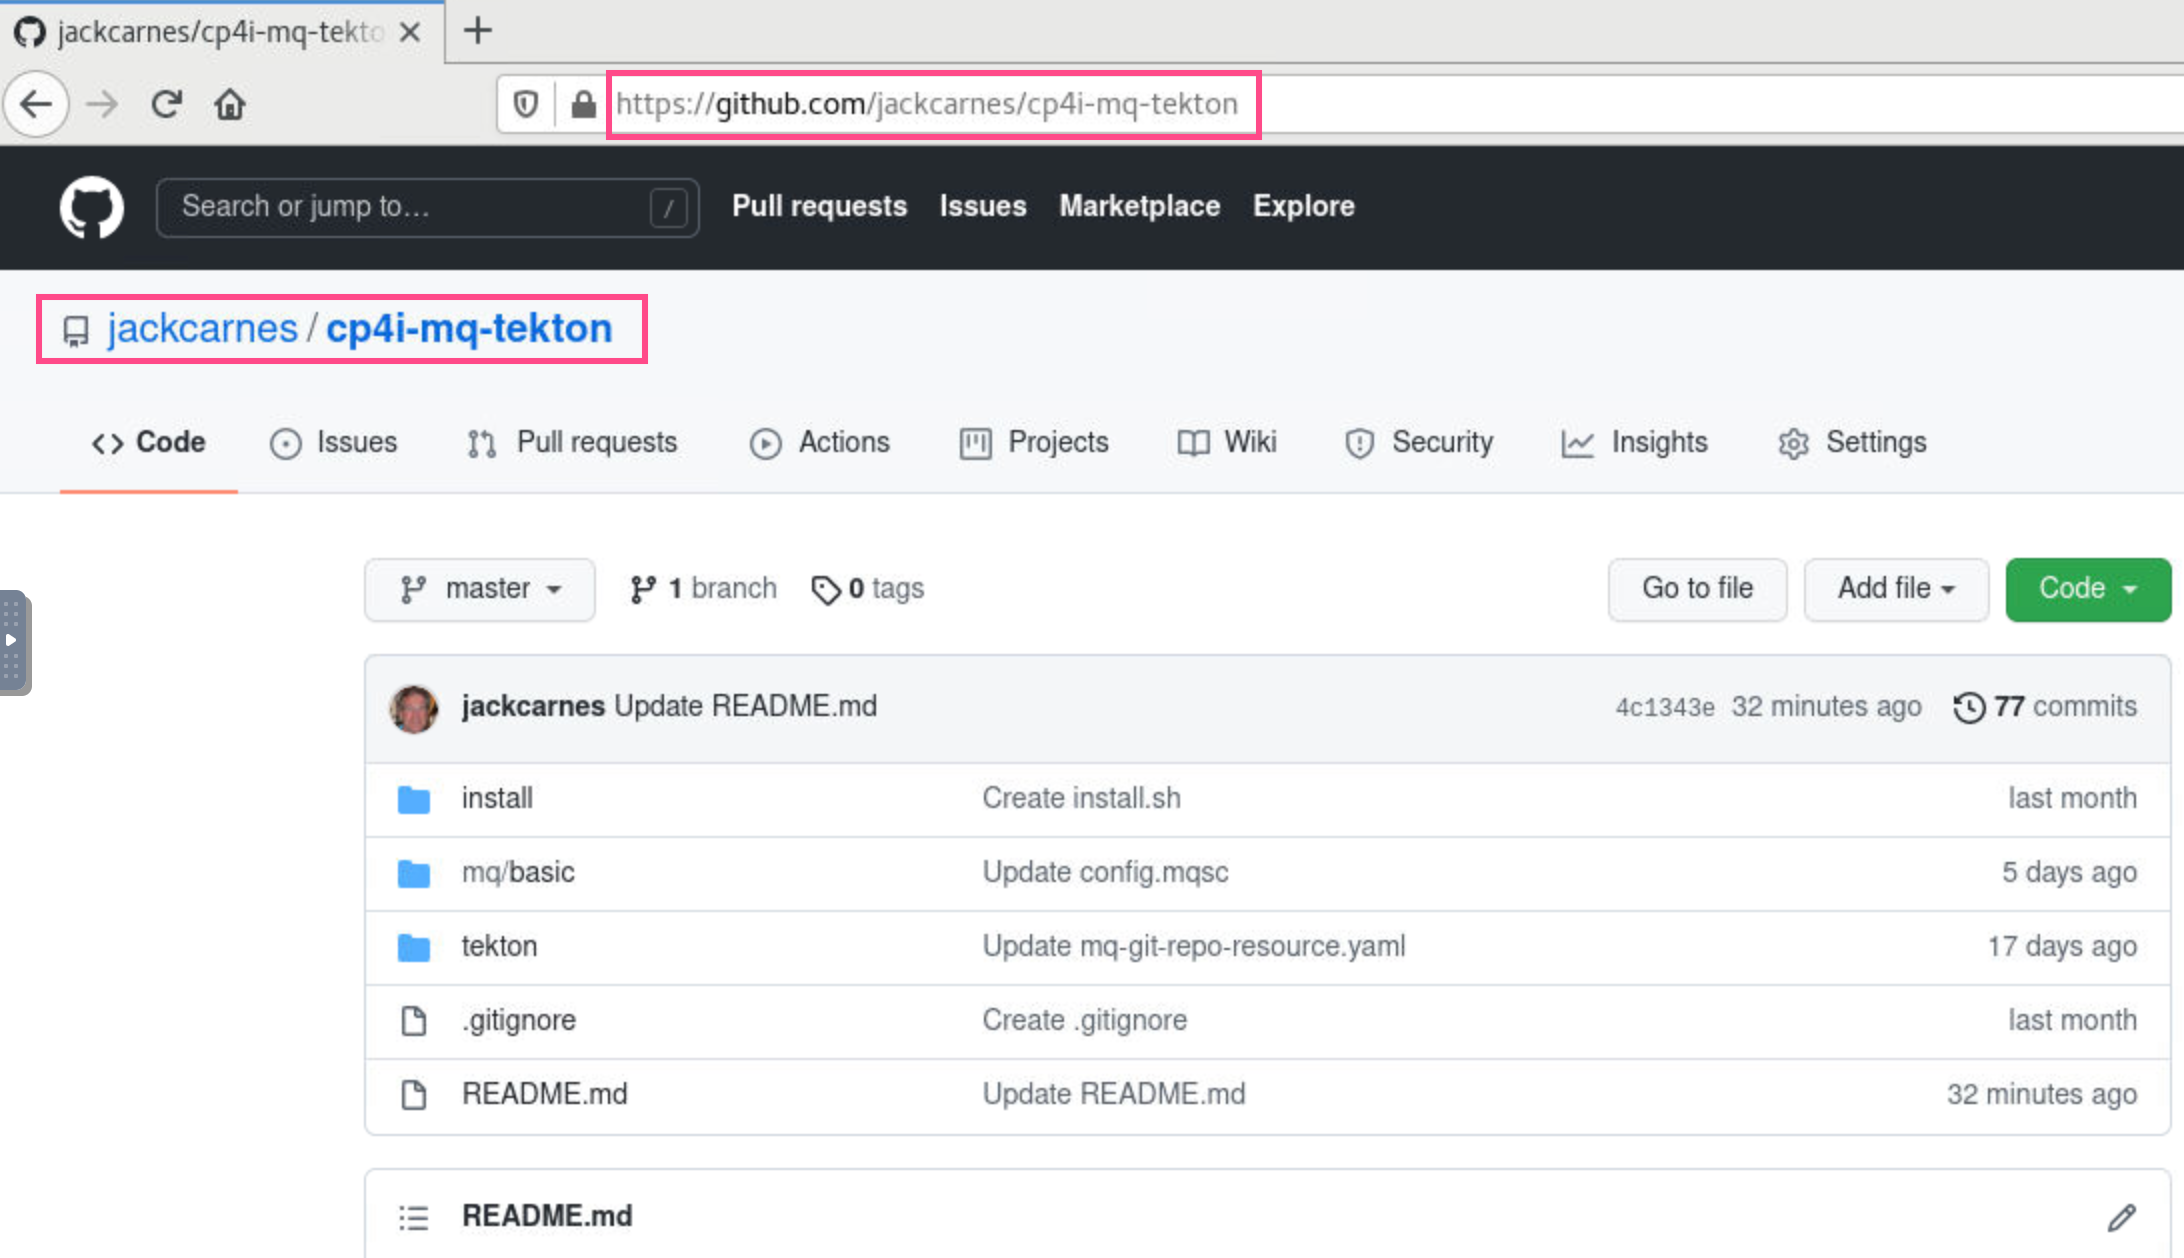
Step 2: Clone the forked repository onto your machine
Now you can download the code to your desktop.
-
Return to the browser tab where you have your git repo open.
https://github.com/<your github account>/cp4i-mq-tekton -
Make sure you are in the Repositories section then click the cp4i-mq-tekton hyperlink.
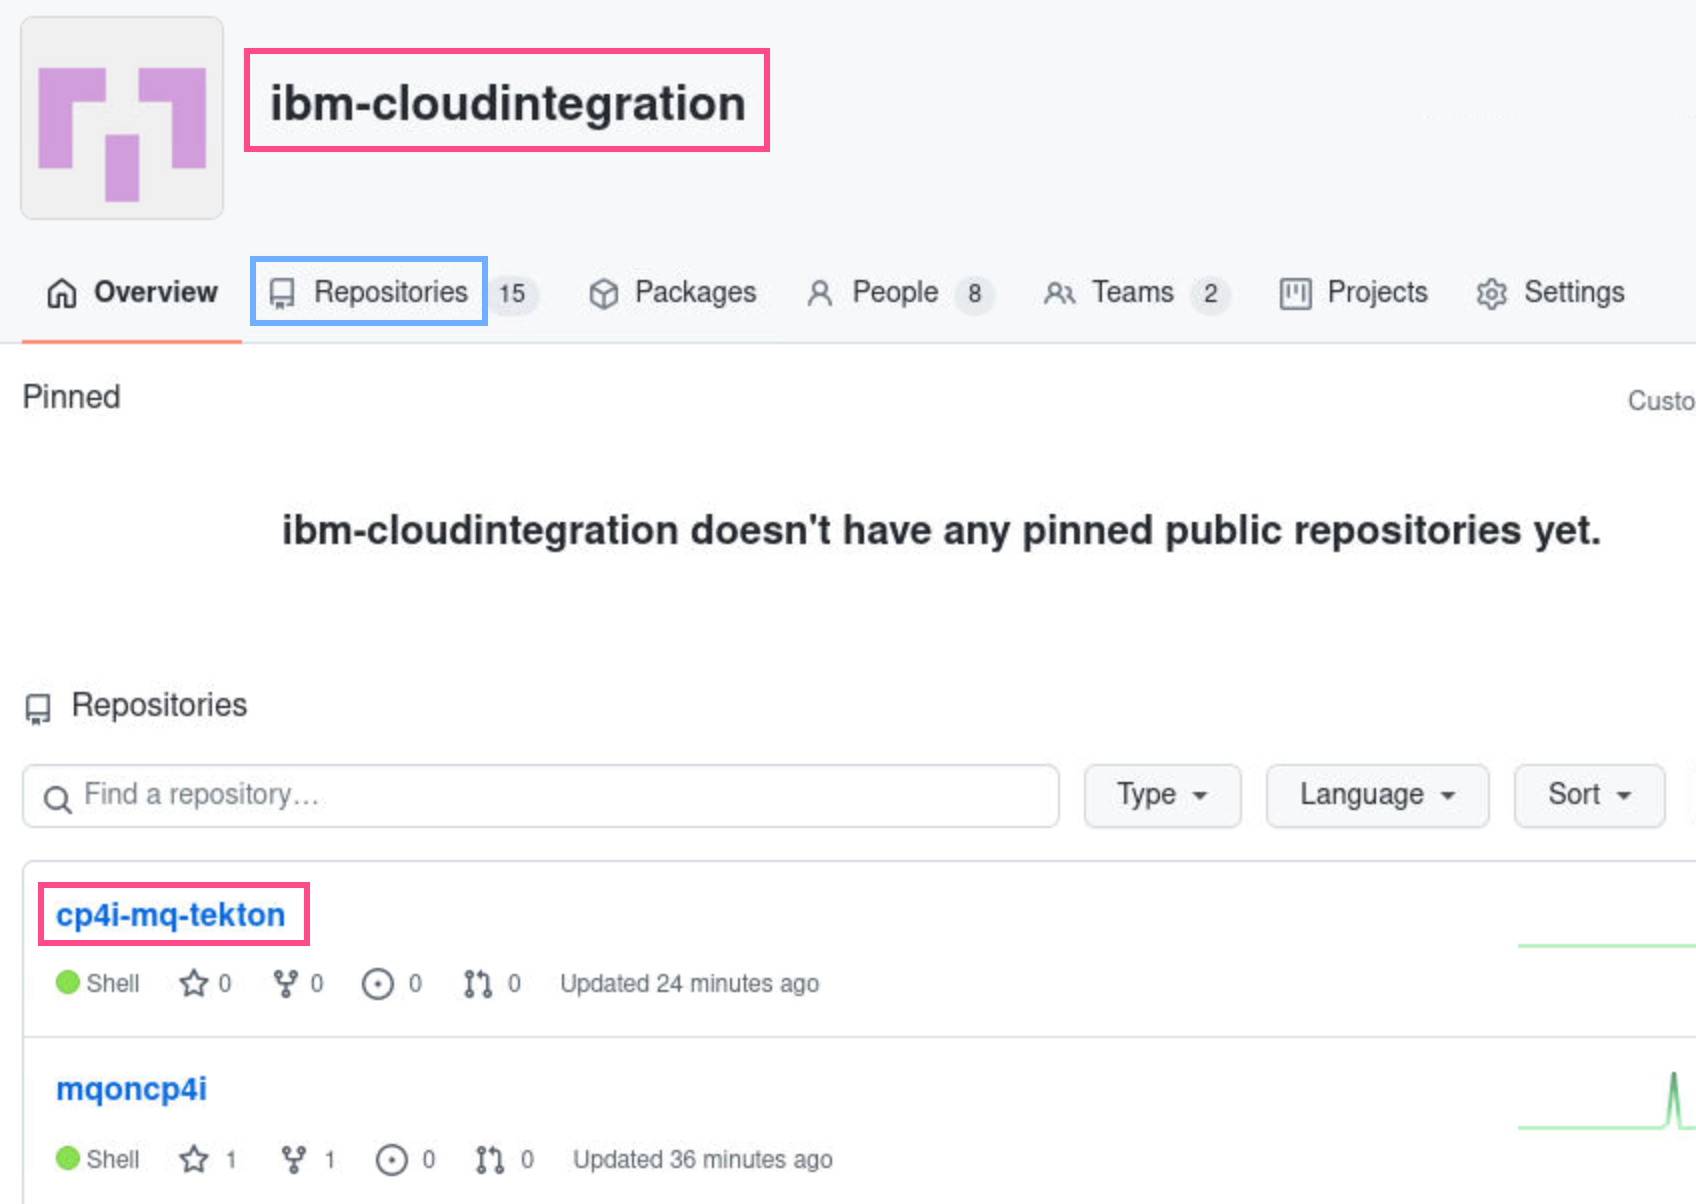
Normally you could just download the code. But each student will be creating a pipeline and making changes to the code, so you will need your own repository.
-
Click the Code button and select Download ZIP.
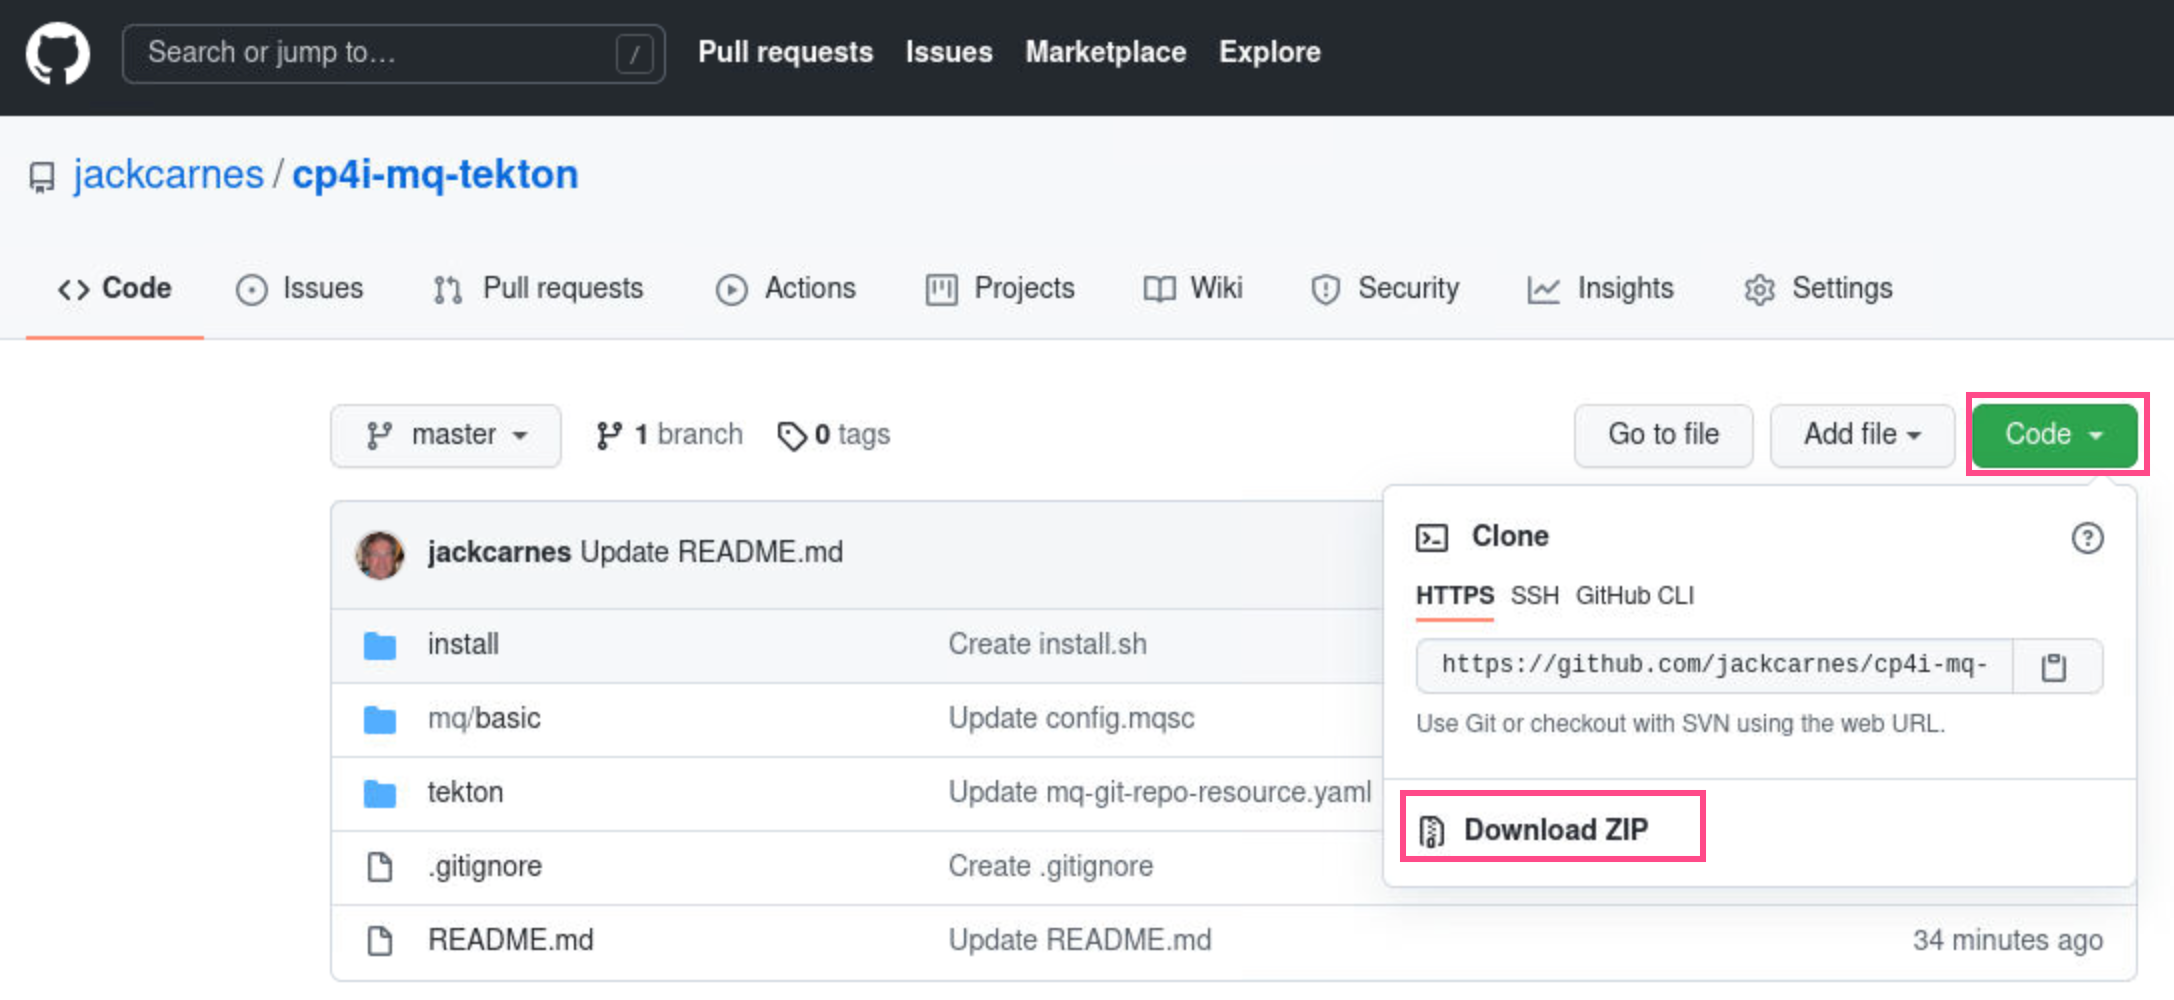
-
Click the Save file radio button then click OK.
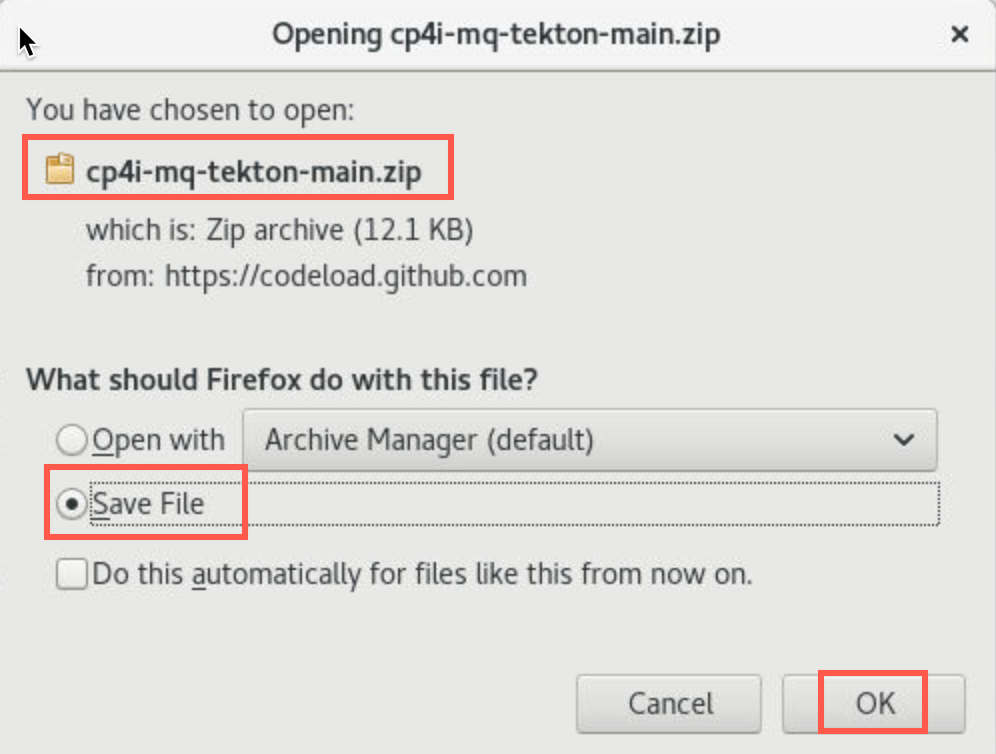
The file is downloaded to /home/student/Downloads/cp4i-mq-tekton-main.zip.
-
Open a terminal window by double-clicking the icon on the desktop.
-
Make a new directory in your home directory with the following command. Then change to that directory.
 mkdir ~/icp4ipl
 cd ~/icp4ipl
-
Unzip the downloaded code with the following command:
unzip ~/Downloads/cp4i-mq-tekton-main.zip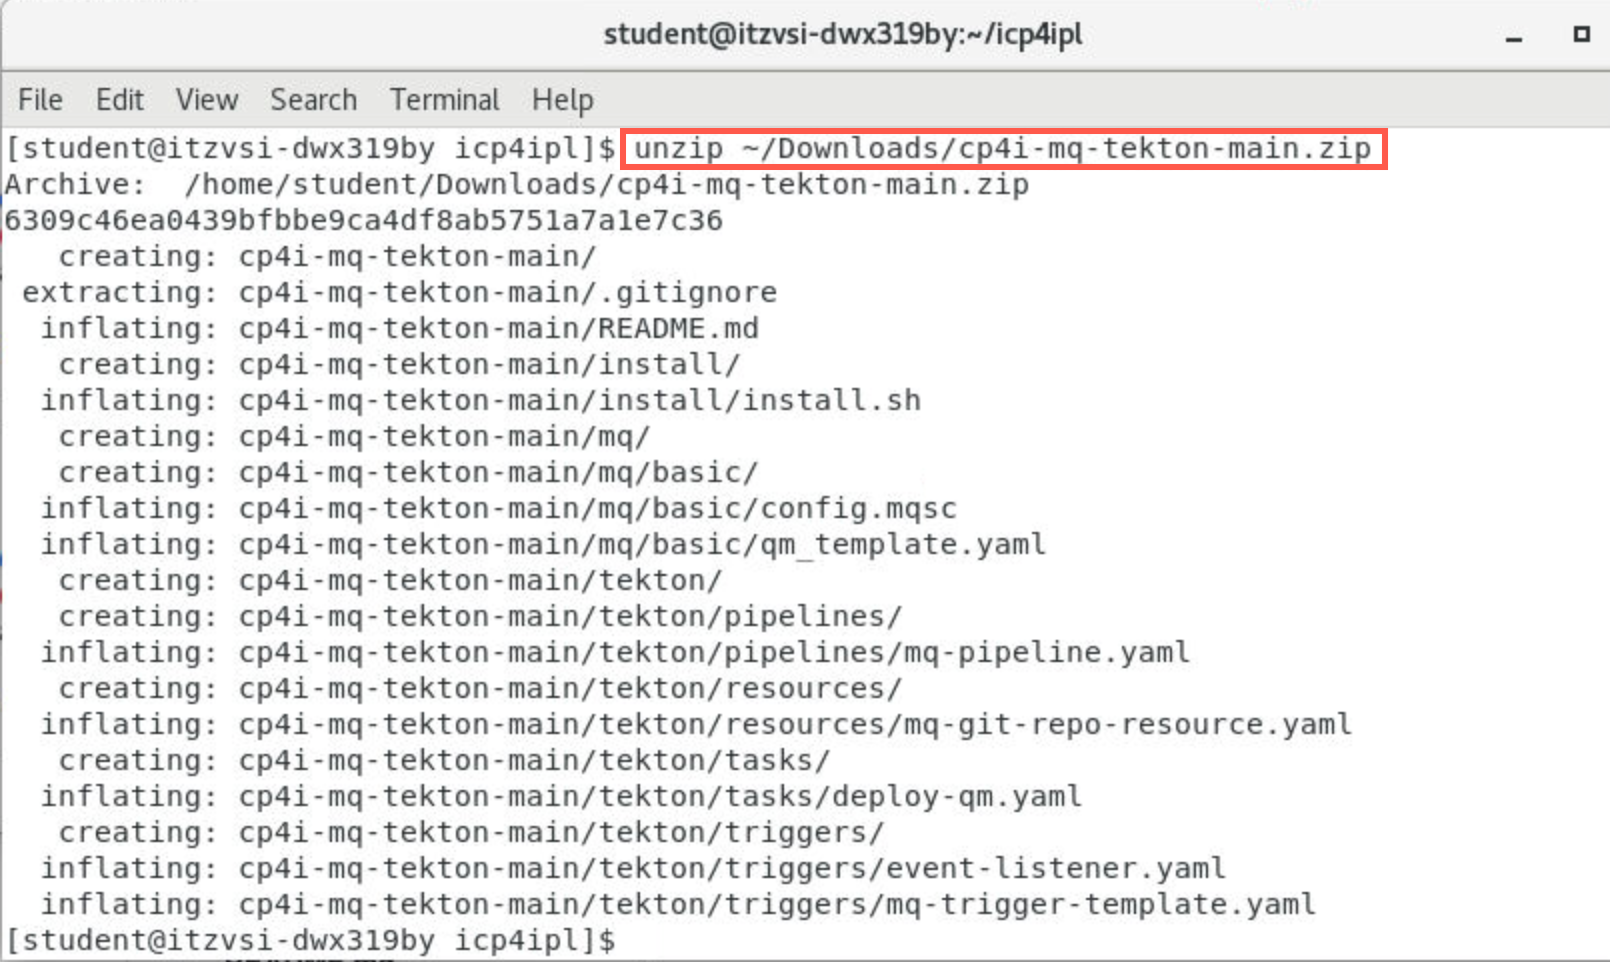
Step 3: Modify and run the install script
If running this lab as part of a PoT, you will only see your project (namespace). The name will be of the form clustername + your student number. For instance if the cluster name is wedge and your student number is 4, your namespace will be wedge4. So each attendee has a unique namespace and will only be authorized to see that namespace. Within your namespace you will only find your queue managers mq04xx in this example. You will also find a previously configured queue manager qmgrxx, where xx = your student number. That queue manager will not be used in this PoT and can be ignored.
You will see other projects such as cp4i-ace, cp4i-api, cp4i-mq. Since this cluster will be shared with other PoTs those have been predefined. They are not to be used for this PoT and can be ignored. You will only use your assigned namespace and at times cp4i. cp4i-mq was used to document part of this lab. Where you see cp4i-mq, you will substitute your assigned namespace.
-
Change to the cp4i-mq-tekton-main directory.
cd cp4i-mq-tekton-main -
Open an edit session using gedit for the file install.sh. It is in the subdirectory install.
gedit install/install.sh
The editor opens in a new window.
-
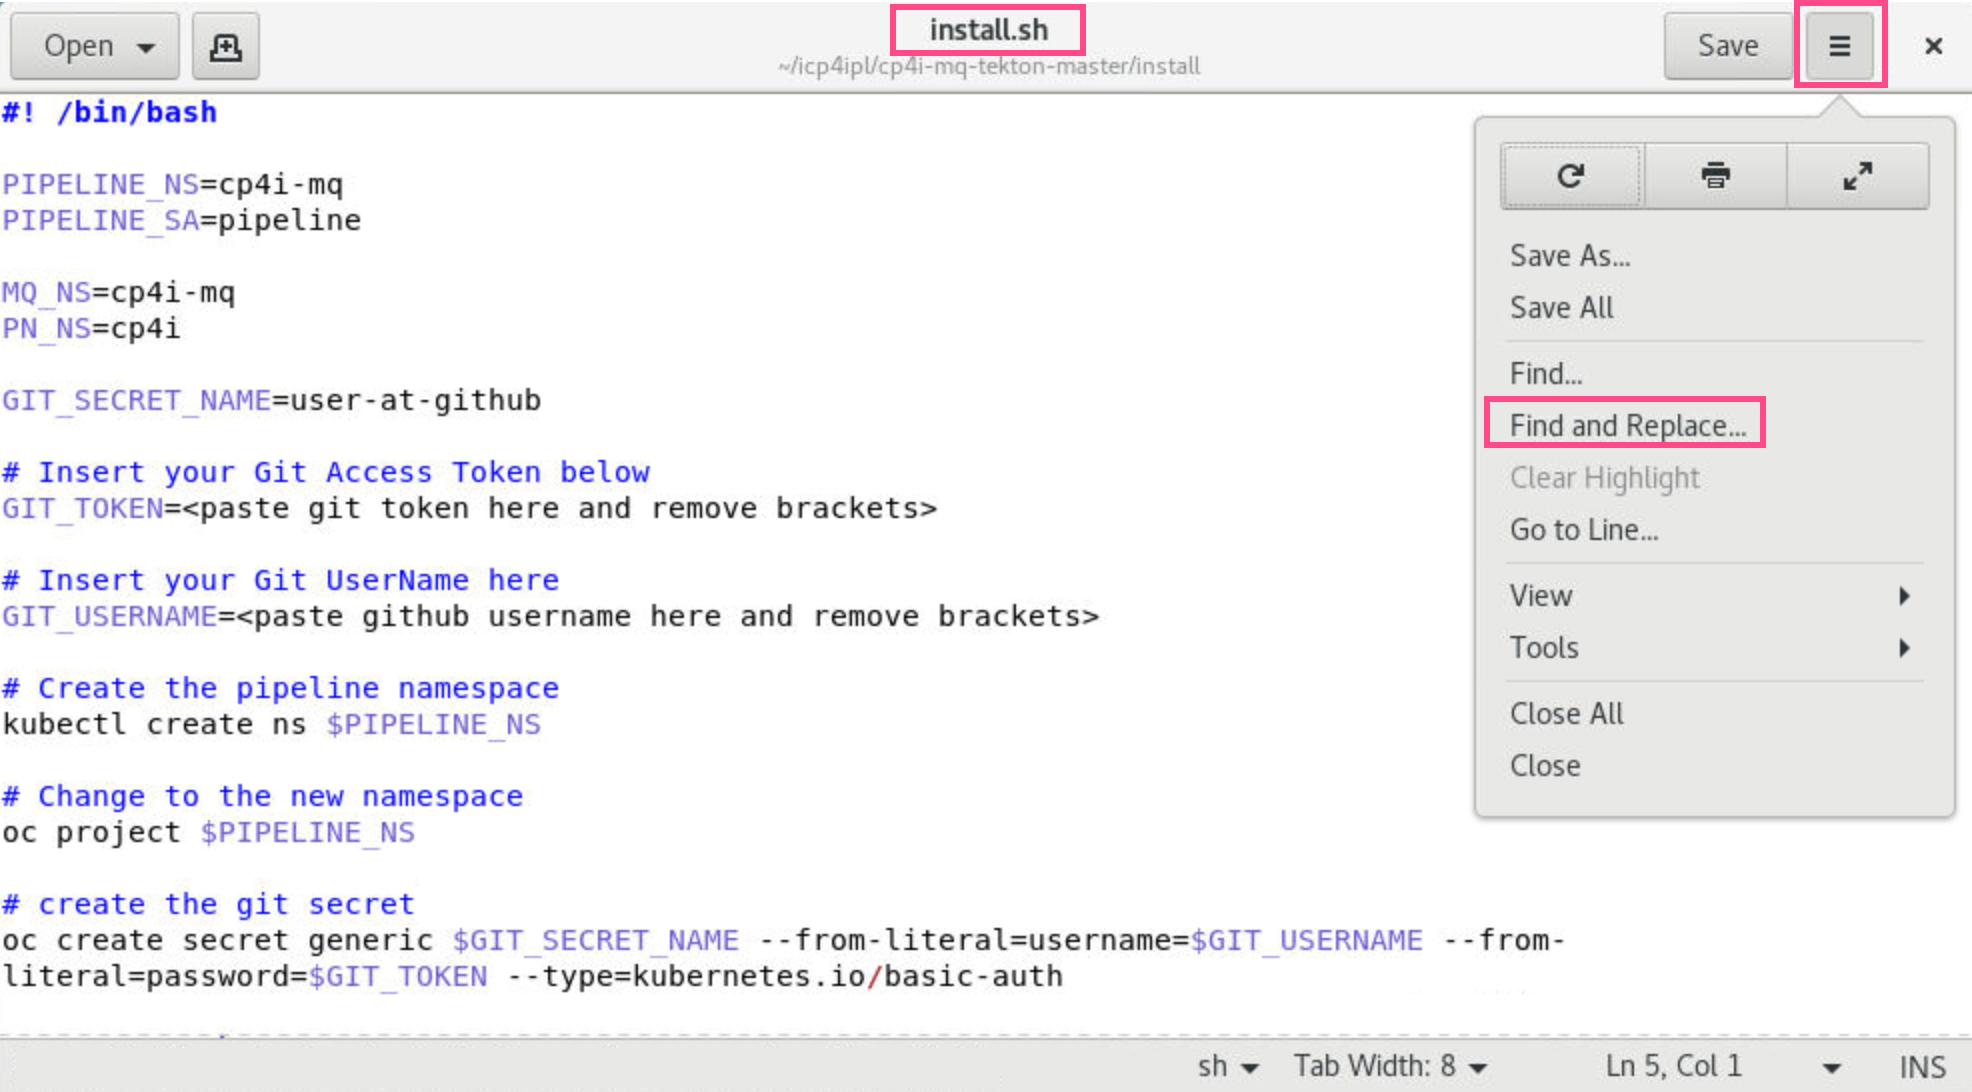
Review the file observing the commands and objects being created. There are a few changes needed.
Click the hamburger menu in the top right corner and select Find and Replace….
-
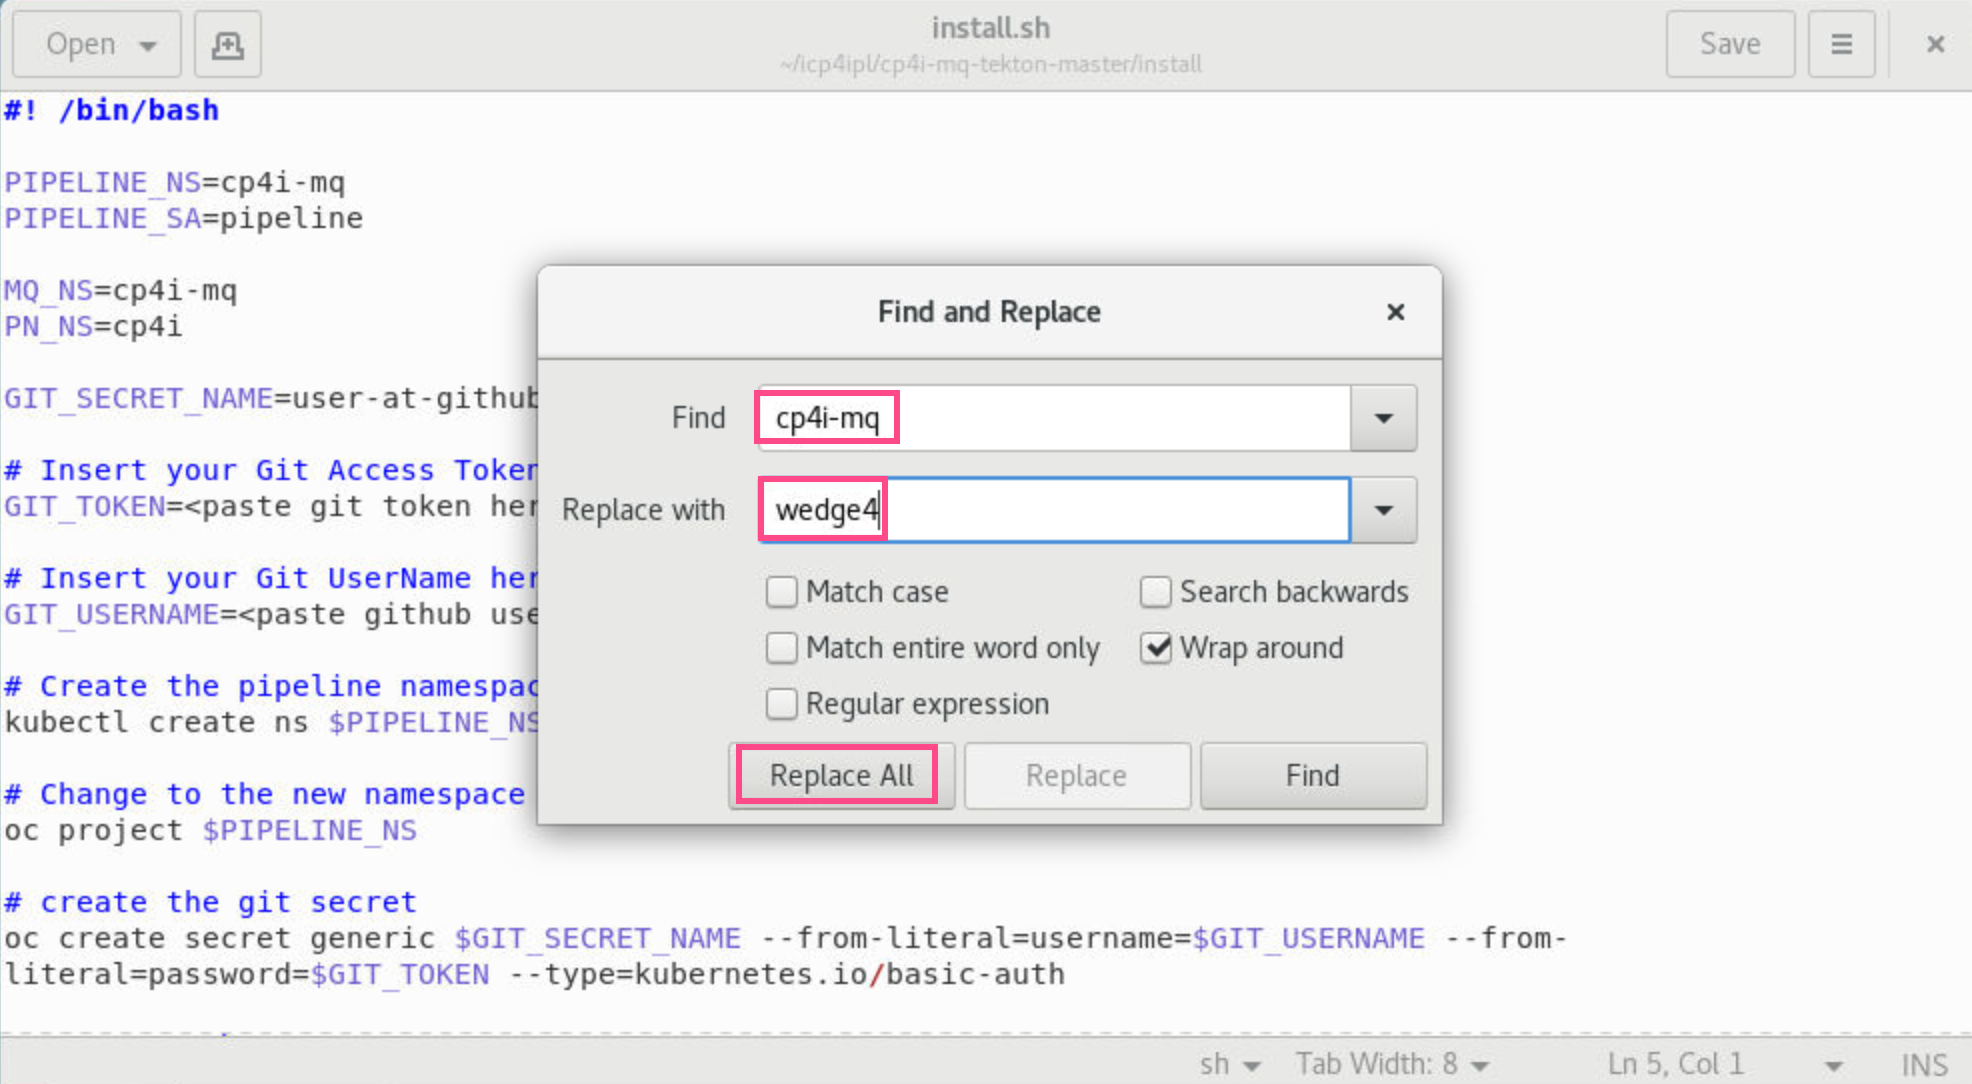
Enter cp4i-mq in the Find field and your assigned userID/namespace in the Replace with field. Click Replace All. This replaces the default namespace with your assigned namespace for PIPELINE_NAMESPACE and MQ_NS. Close the Find and Replace window.
-
Insert your git token and git usernname. Click Save.
GIT_TOKEN=<paste git token here and remove brackets> GIT_USERNAME=<paste github username here and remove brackets>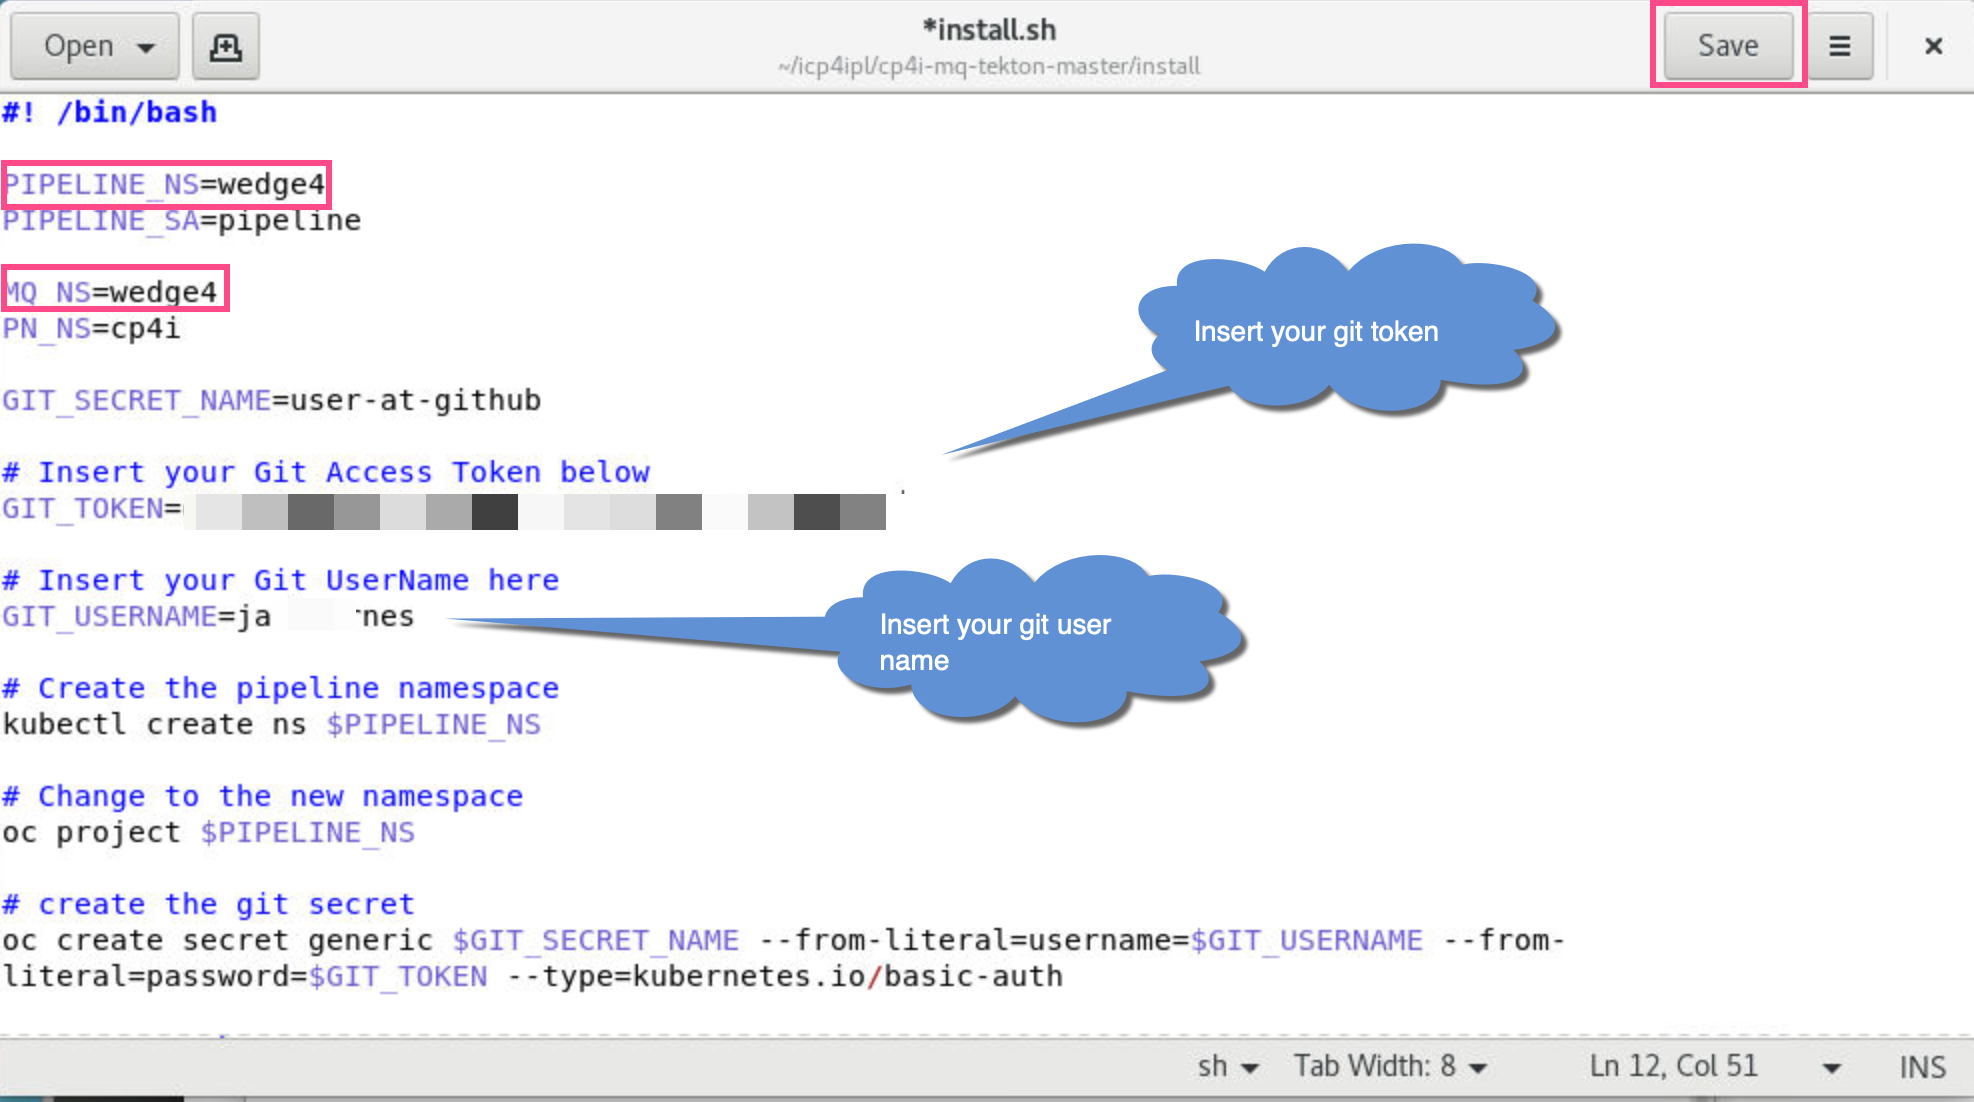 Note:
Note:
You should have gotten your gitHub token at the beginning of the lab. If you didn’t, you will need to get it now. -
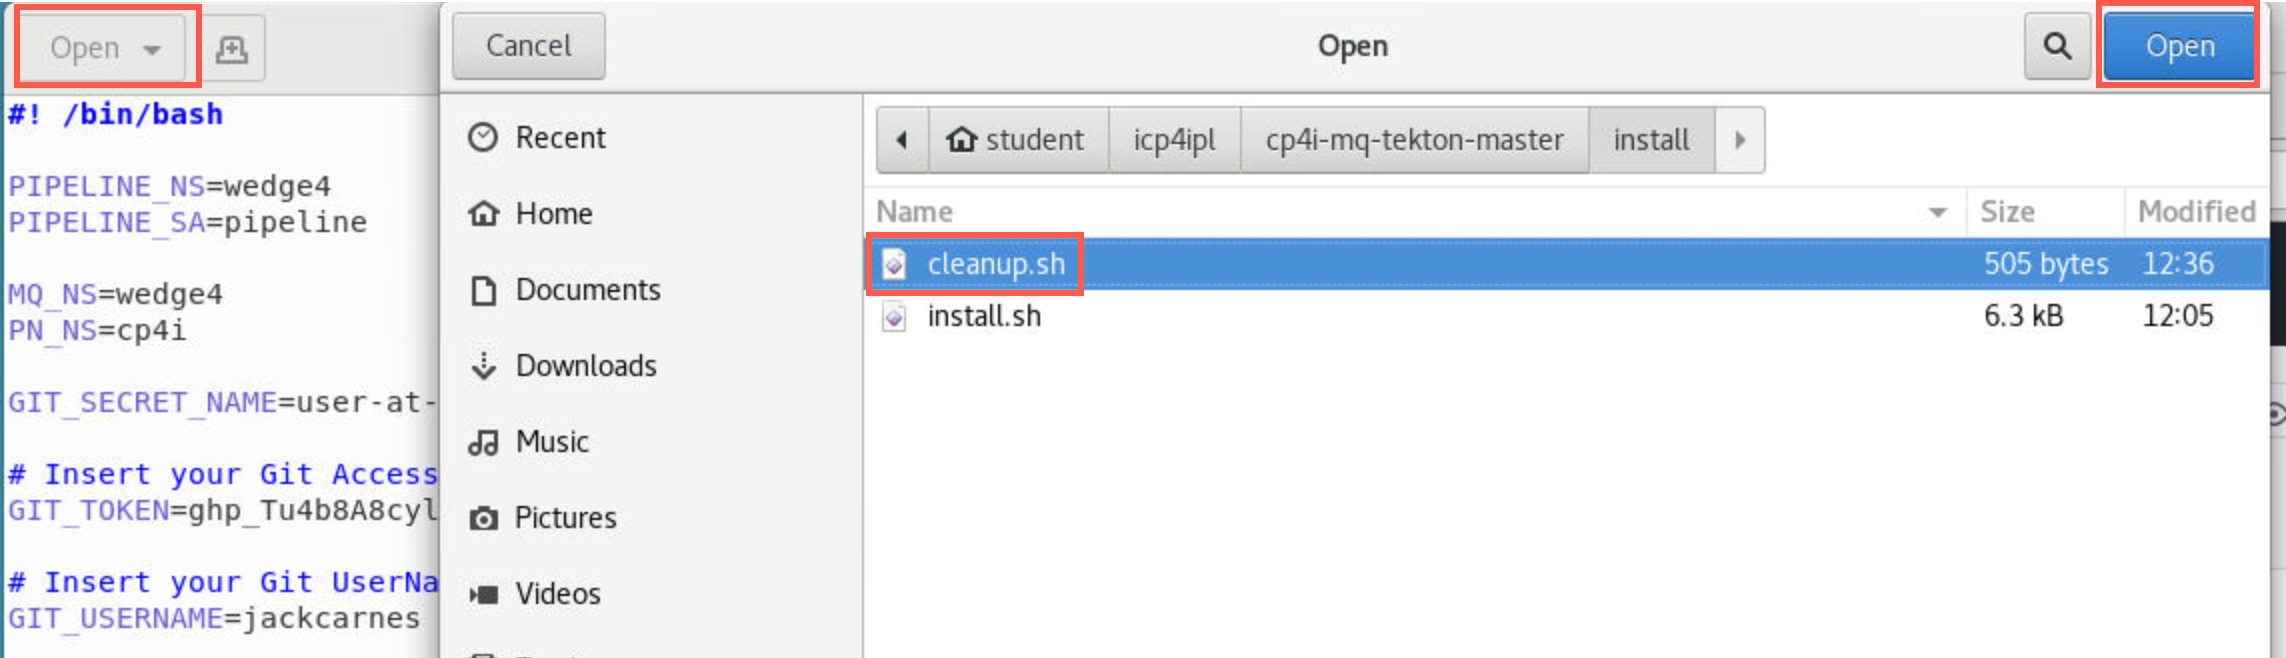
In gedit click Open > Other documents and select cleanup.sh. Click Open.
-
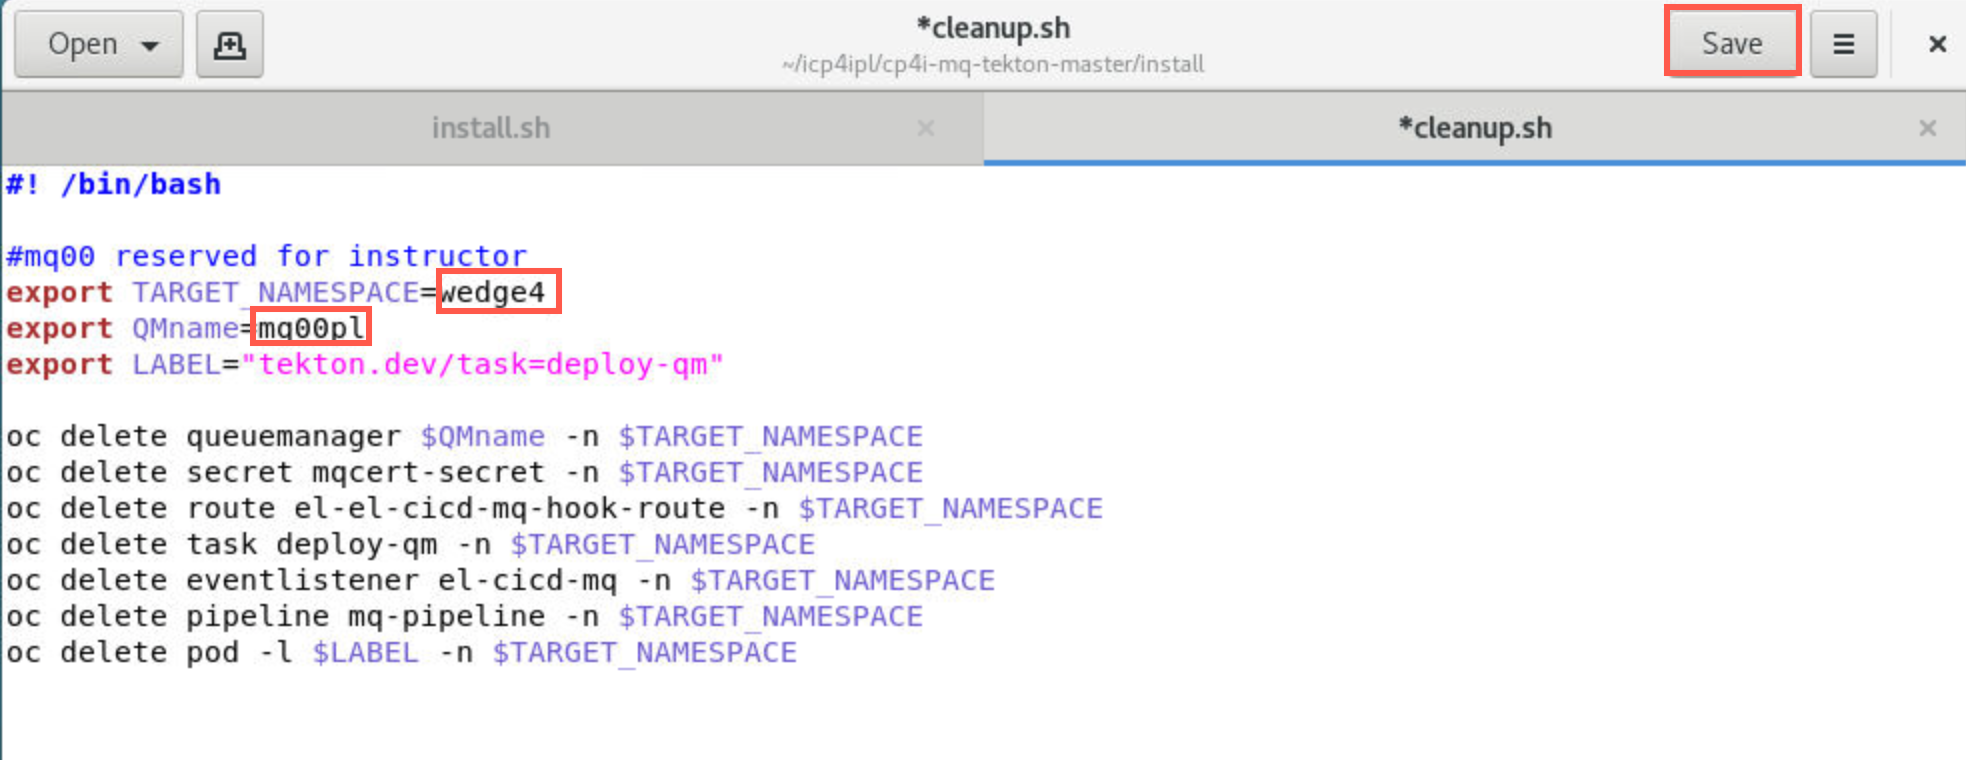
Change TARGET_NAMESPACE to your assigned namespace. Change the “00” in mq00pl to your student number. Click Save.
-
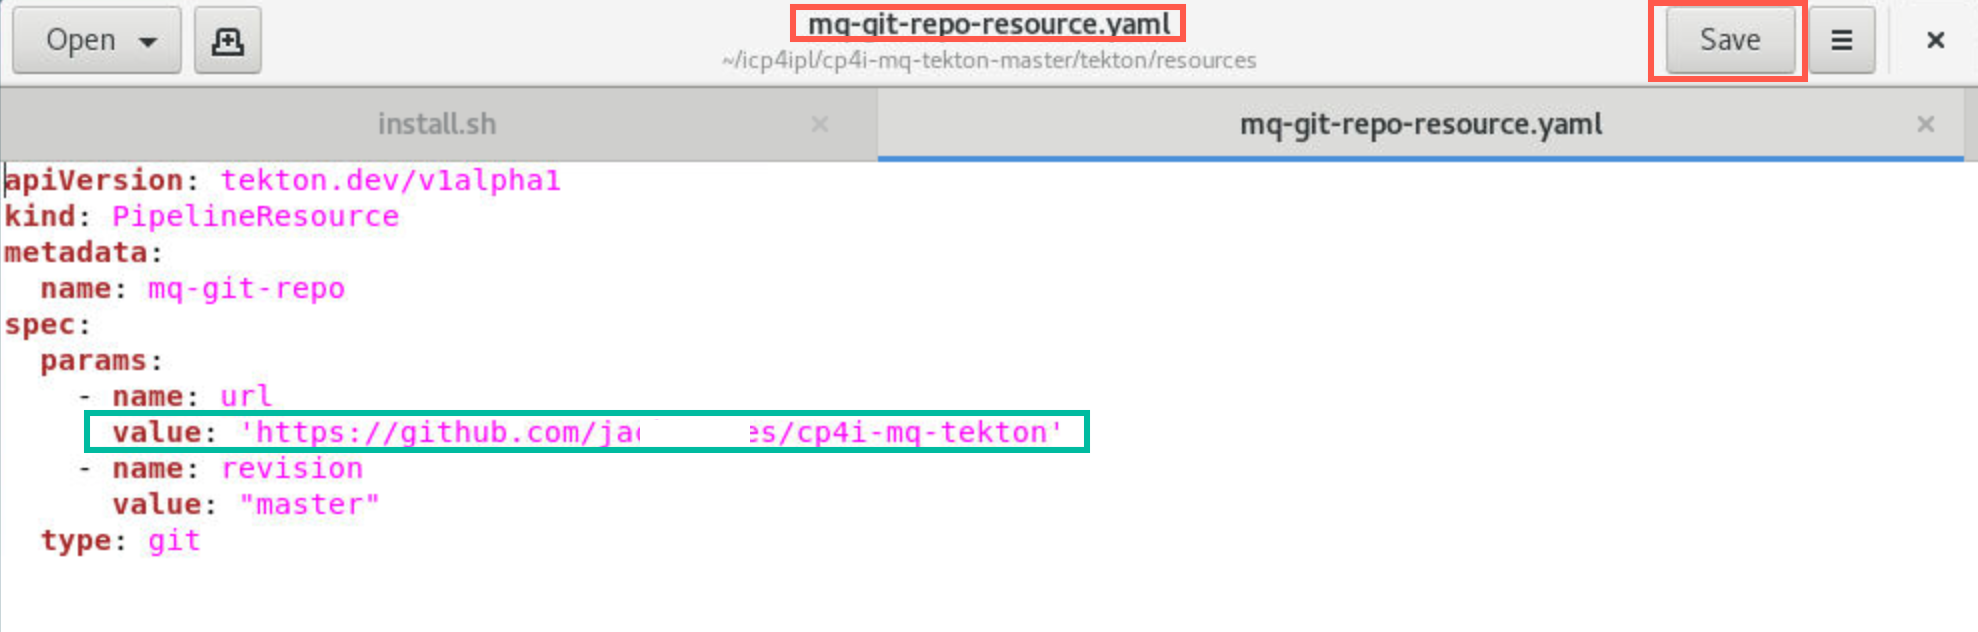
In gedit click Open > Other documents and navigate to /home/student/icp4ipl/cp4i-mq-tekton-master/tekton/resources/mq-git-repo-resource.yaml. Click Open.

-
Update the PipelineResource by pointing to the url of your forked repository on line 8 - replace the value with your github repo. Click Save.
 Note:
Note:
By default, gedit does not display line numbers. To see line numbers, click the LN, COL drop-down in bottom right corner and check Display line numbers. See screen shot below.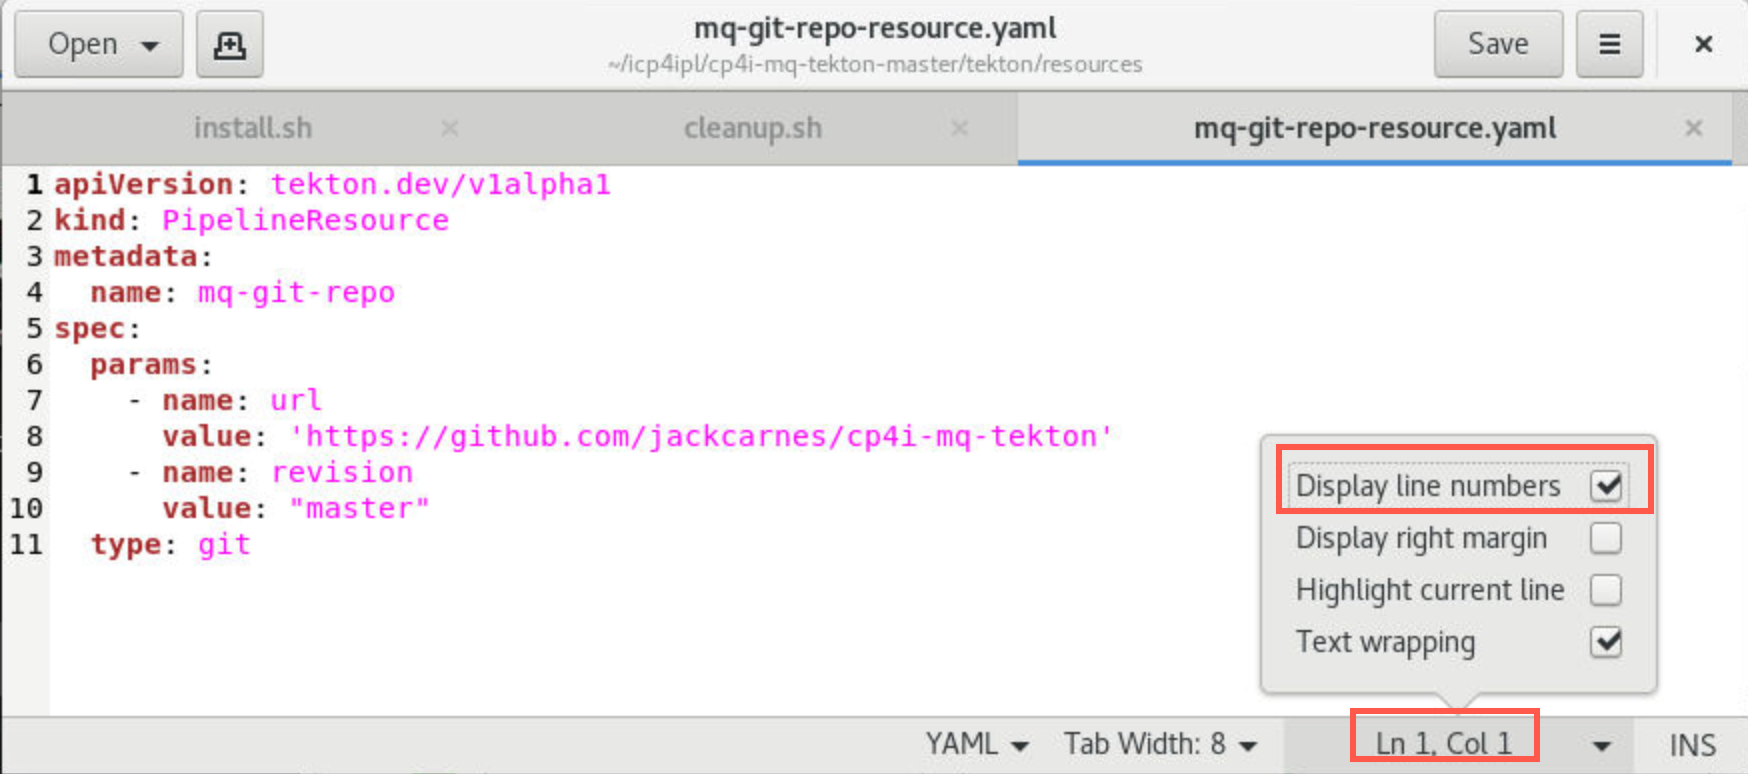
-
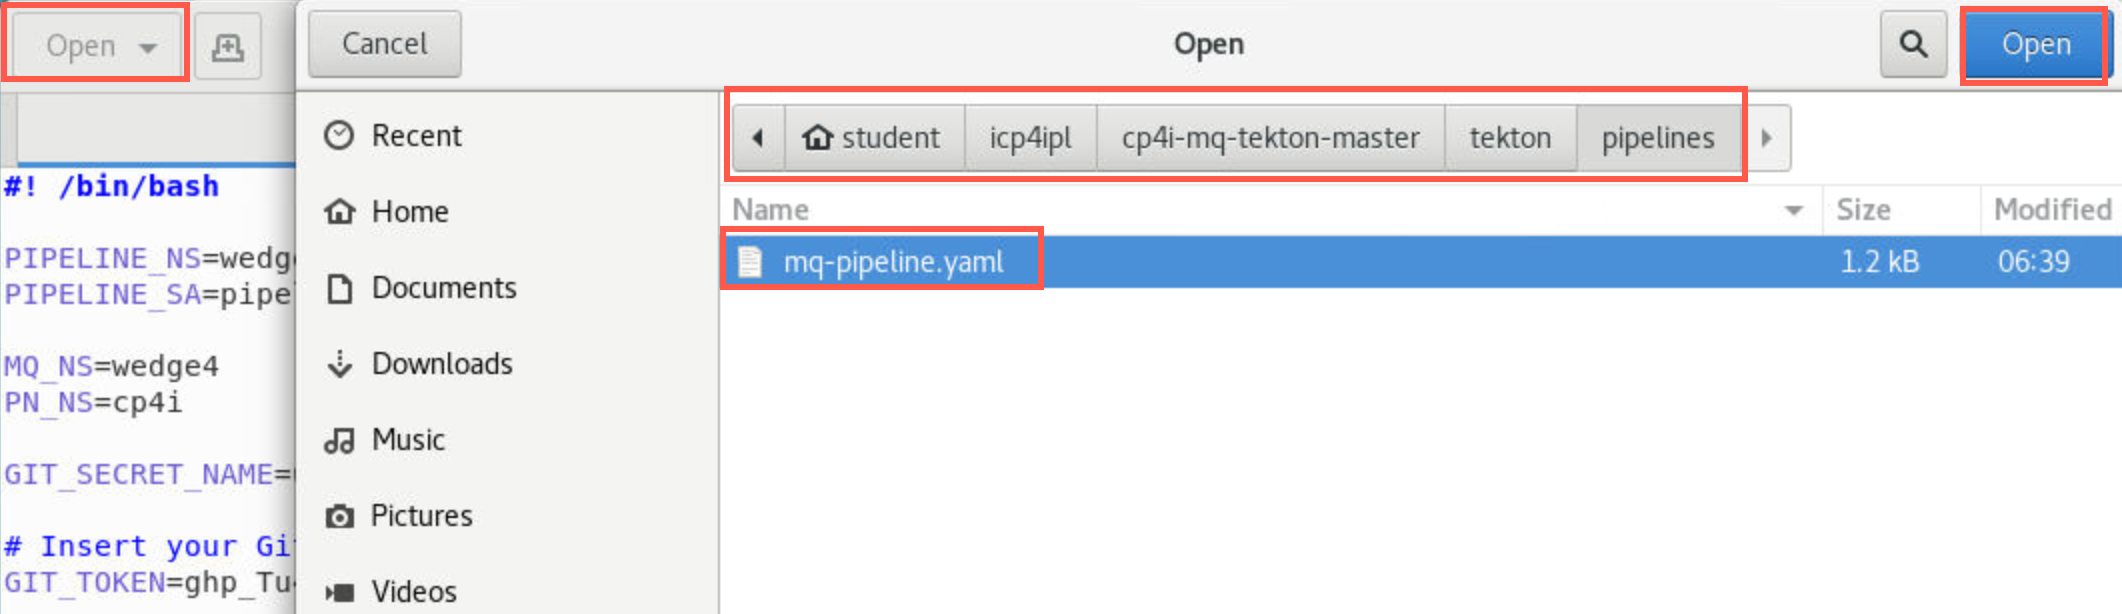
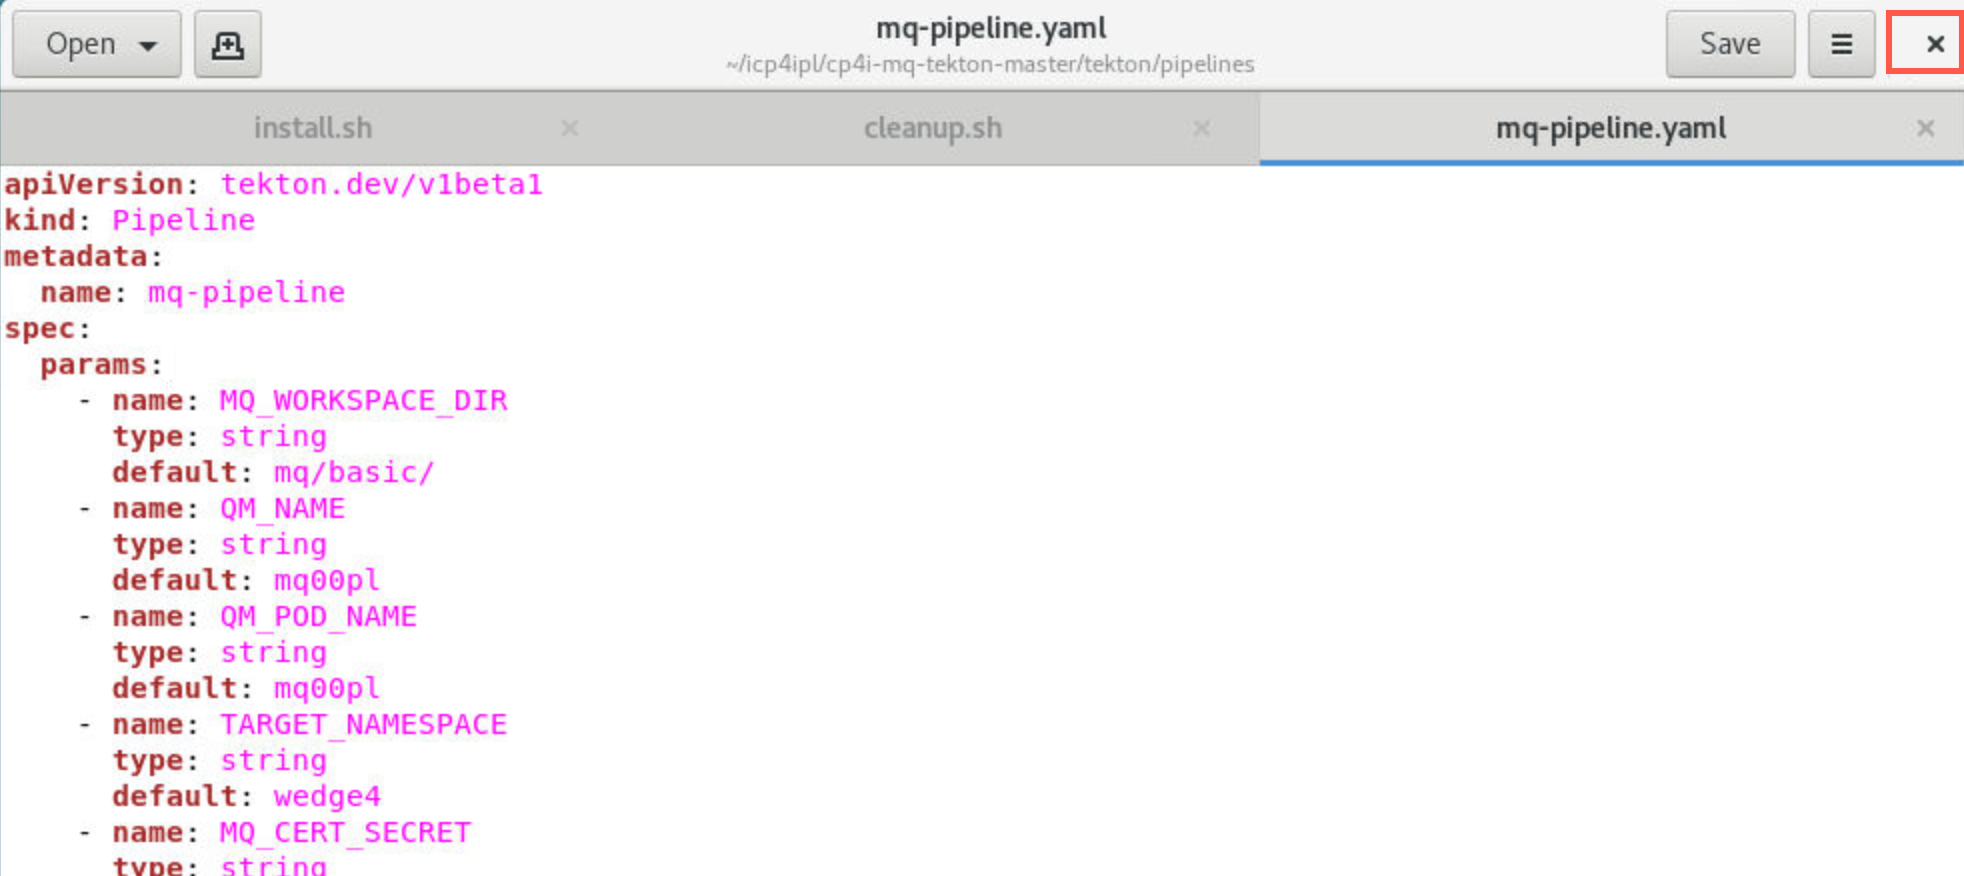
In gedit click Open > Other documents and navigate to /home/student/icp4ipl/cp4i-mq-tekton-master/tekton/pipelines/mq-pipeline.yaml. Click Open.
-
As you did previously, click the hamburger menu in the top right corner and select Find and Replace….
-
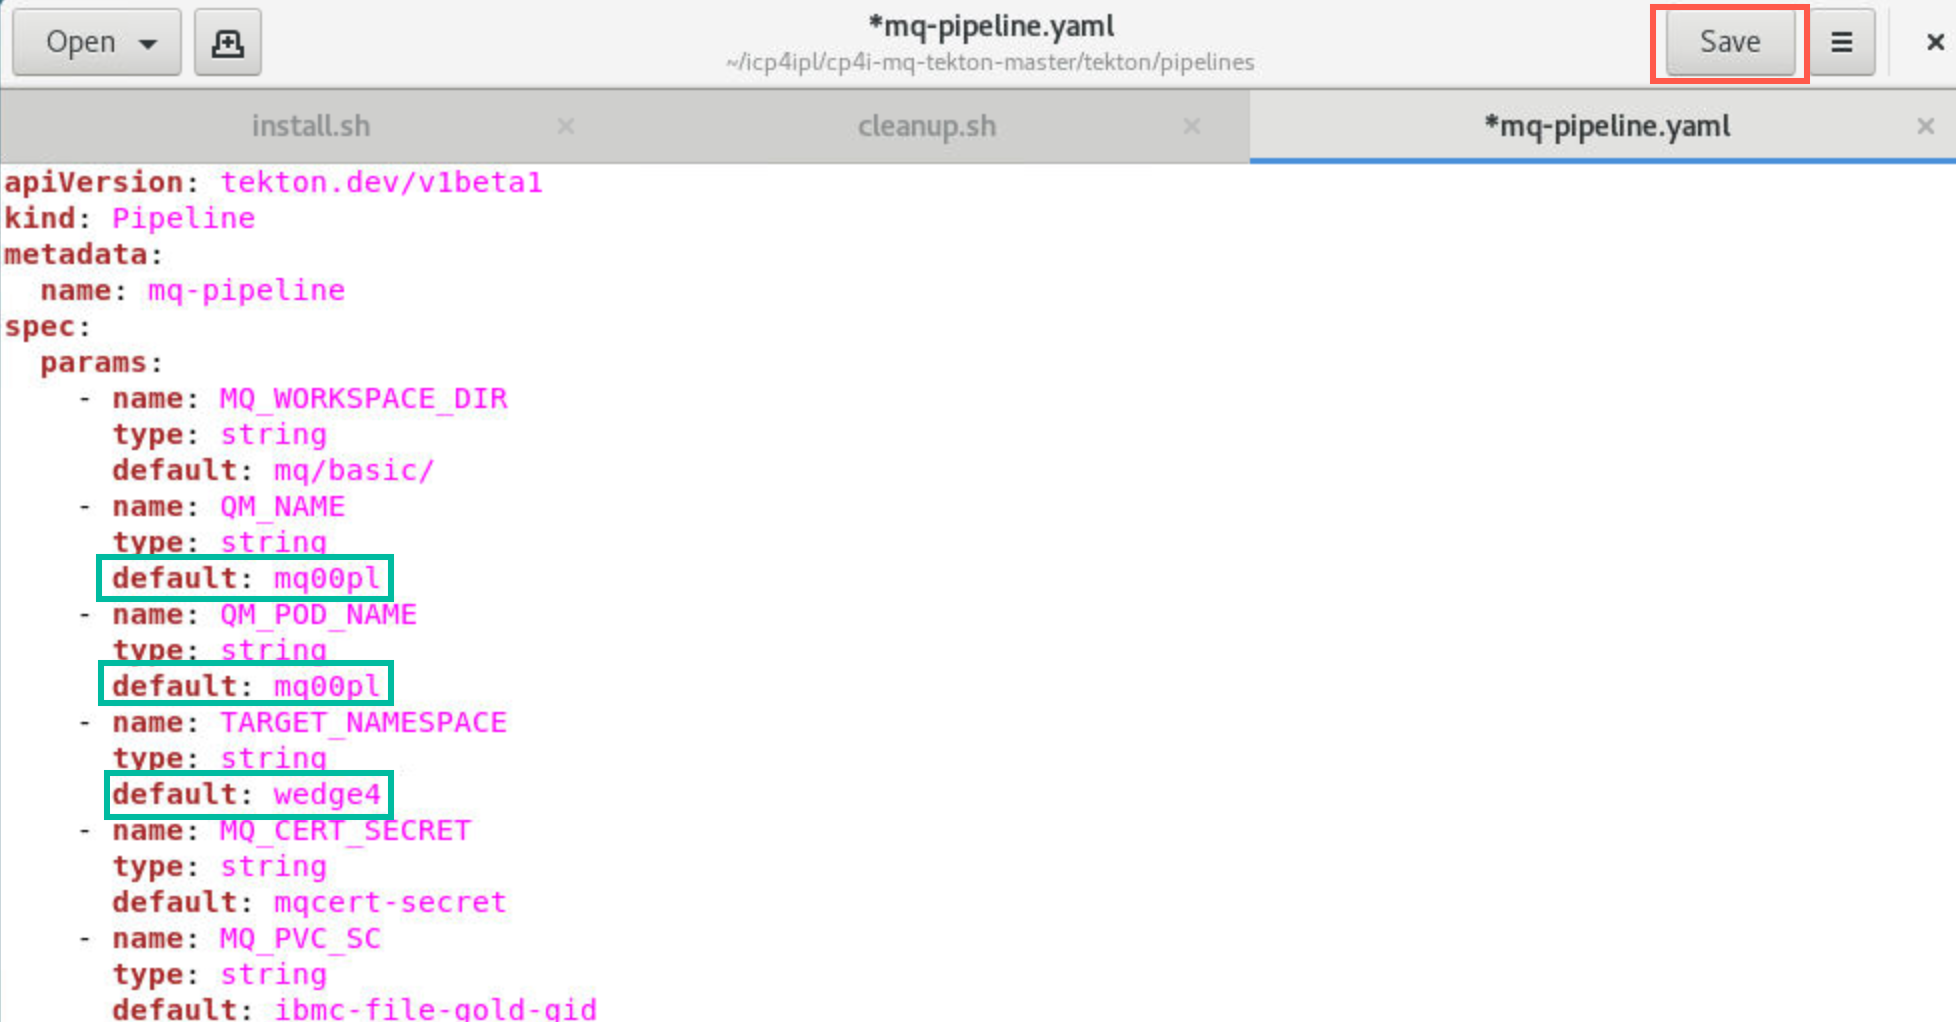
Enter 00 in the Find field and your assigned student number in the Replace with field . Click Replace All. Change the default value for TARGET_NAMESPACE to your assigned namespace.
 Note:
Note:
If you are an IBM employee and running this lab on a ROKS cluster, you will need to change the default value for MQ_PVC_SC to ibmc-file-gold-gid. -
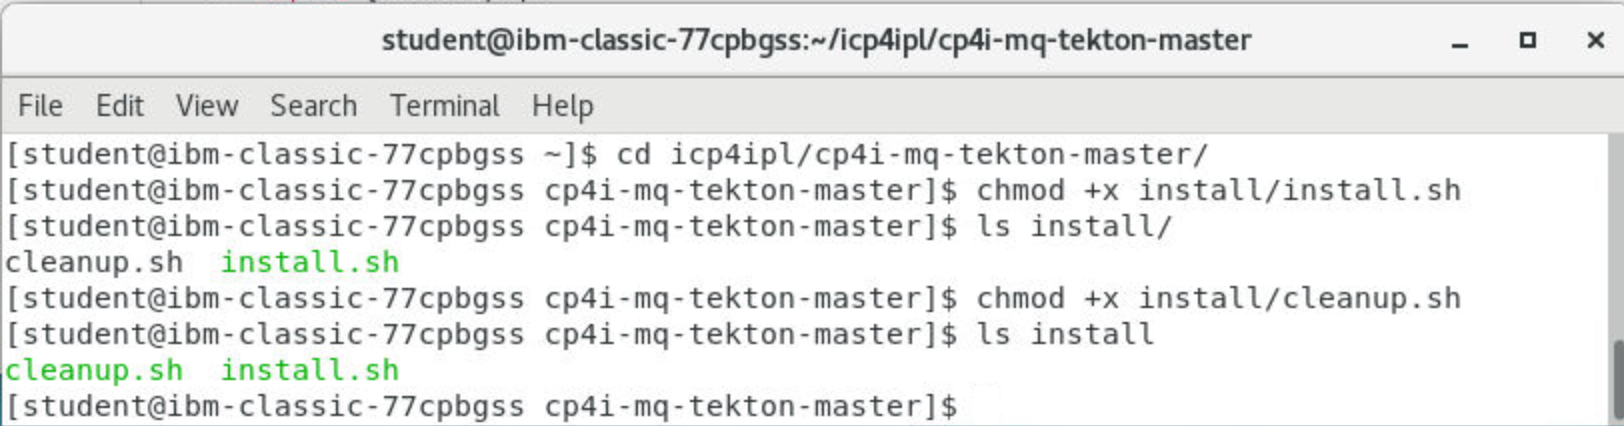
Open another terminal window and navigate to /home/student/icp4ipl/cp4i-mq-tekton-master/. Make the install script executable with the following command:
 cd icp4ipl/cp4i-mq-tekton-master
 chmod +x install/install.sh
Repeat above command for cleanup.sh.
-
Close gedit by clicking the “X” in the top right corner.
-
Run the install script with the following command:
./install/install.sh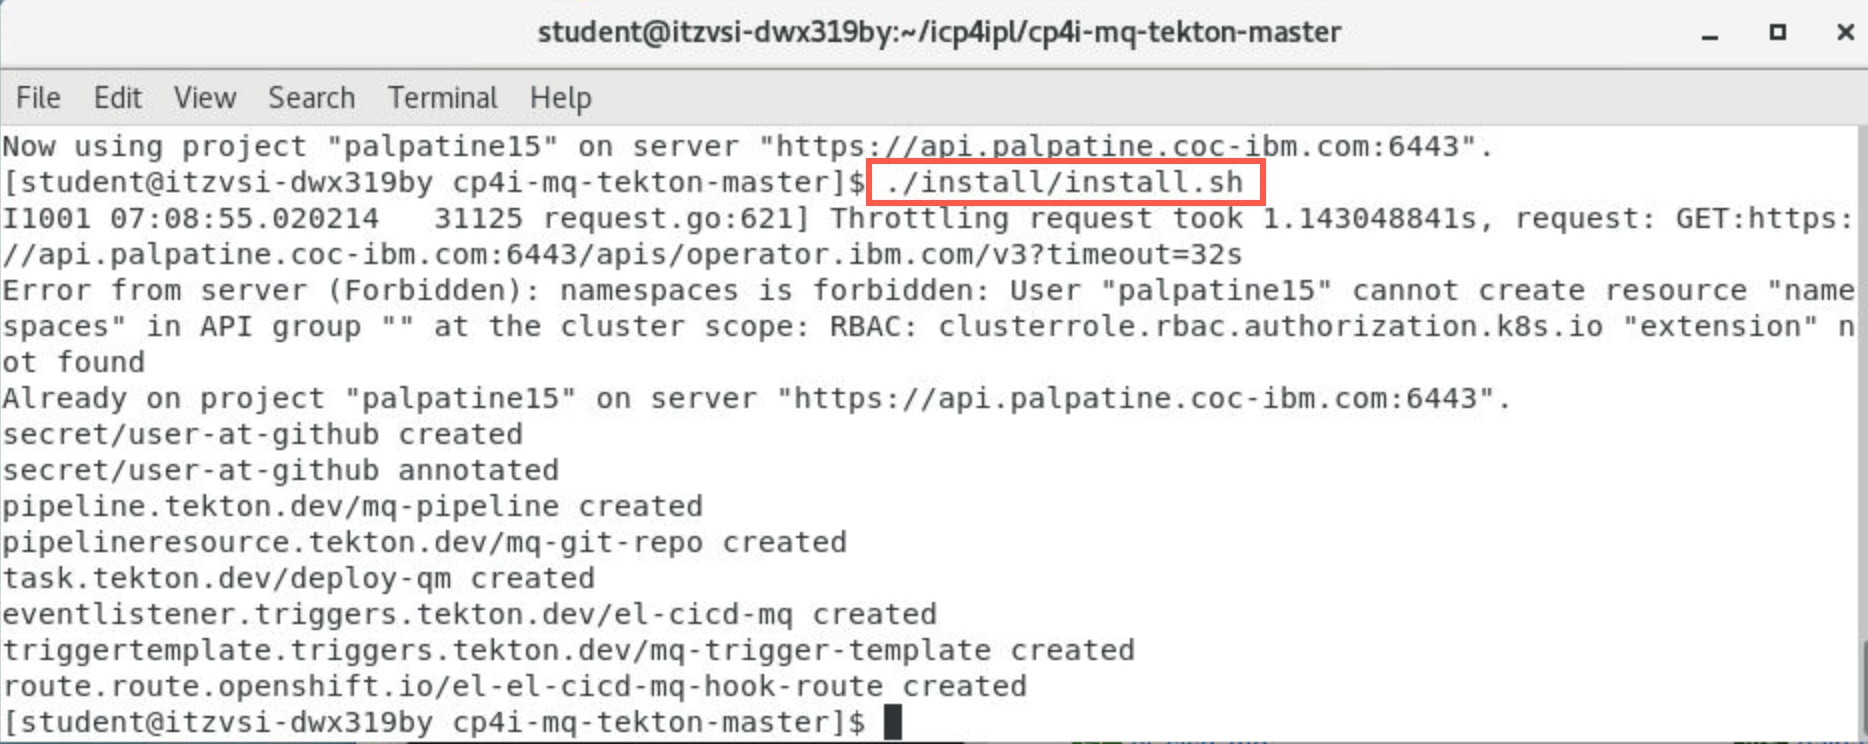 Note:
Note:
If you get a not authorized message, your login may have timed out. You will need to log in to the cluster again. -
Wait approximately one minute for the pipeline resources to be deployed. Ignore the error about authorization to create namespaces.
-
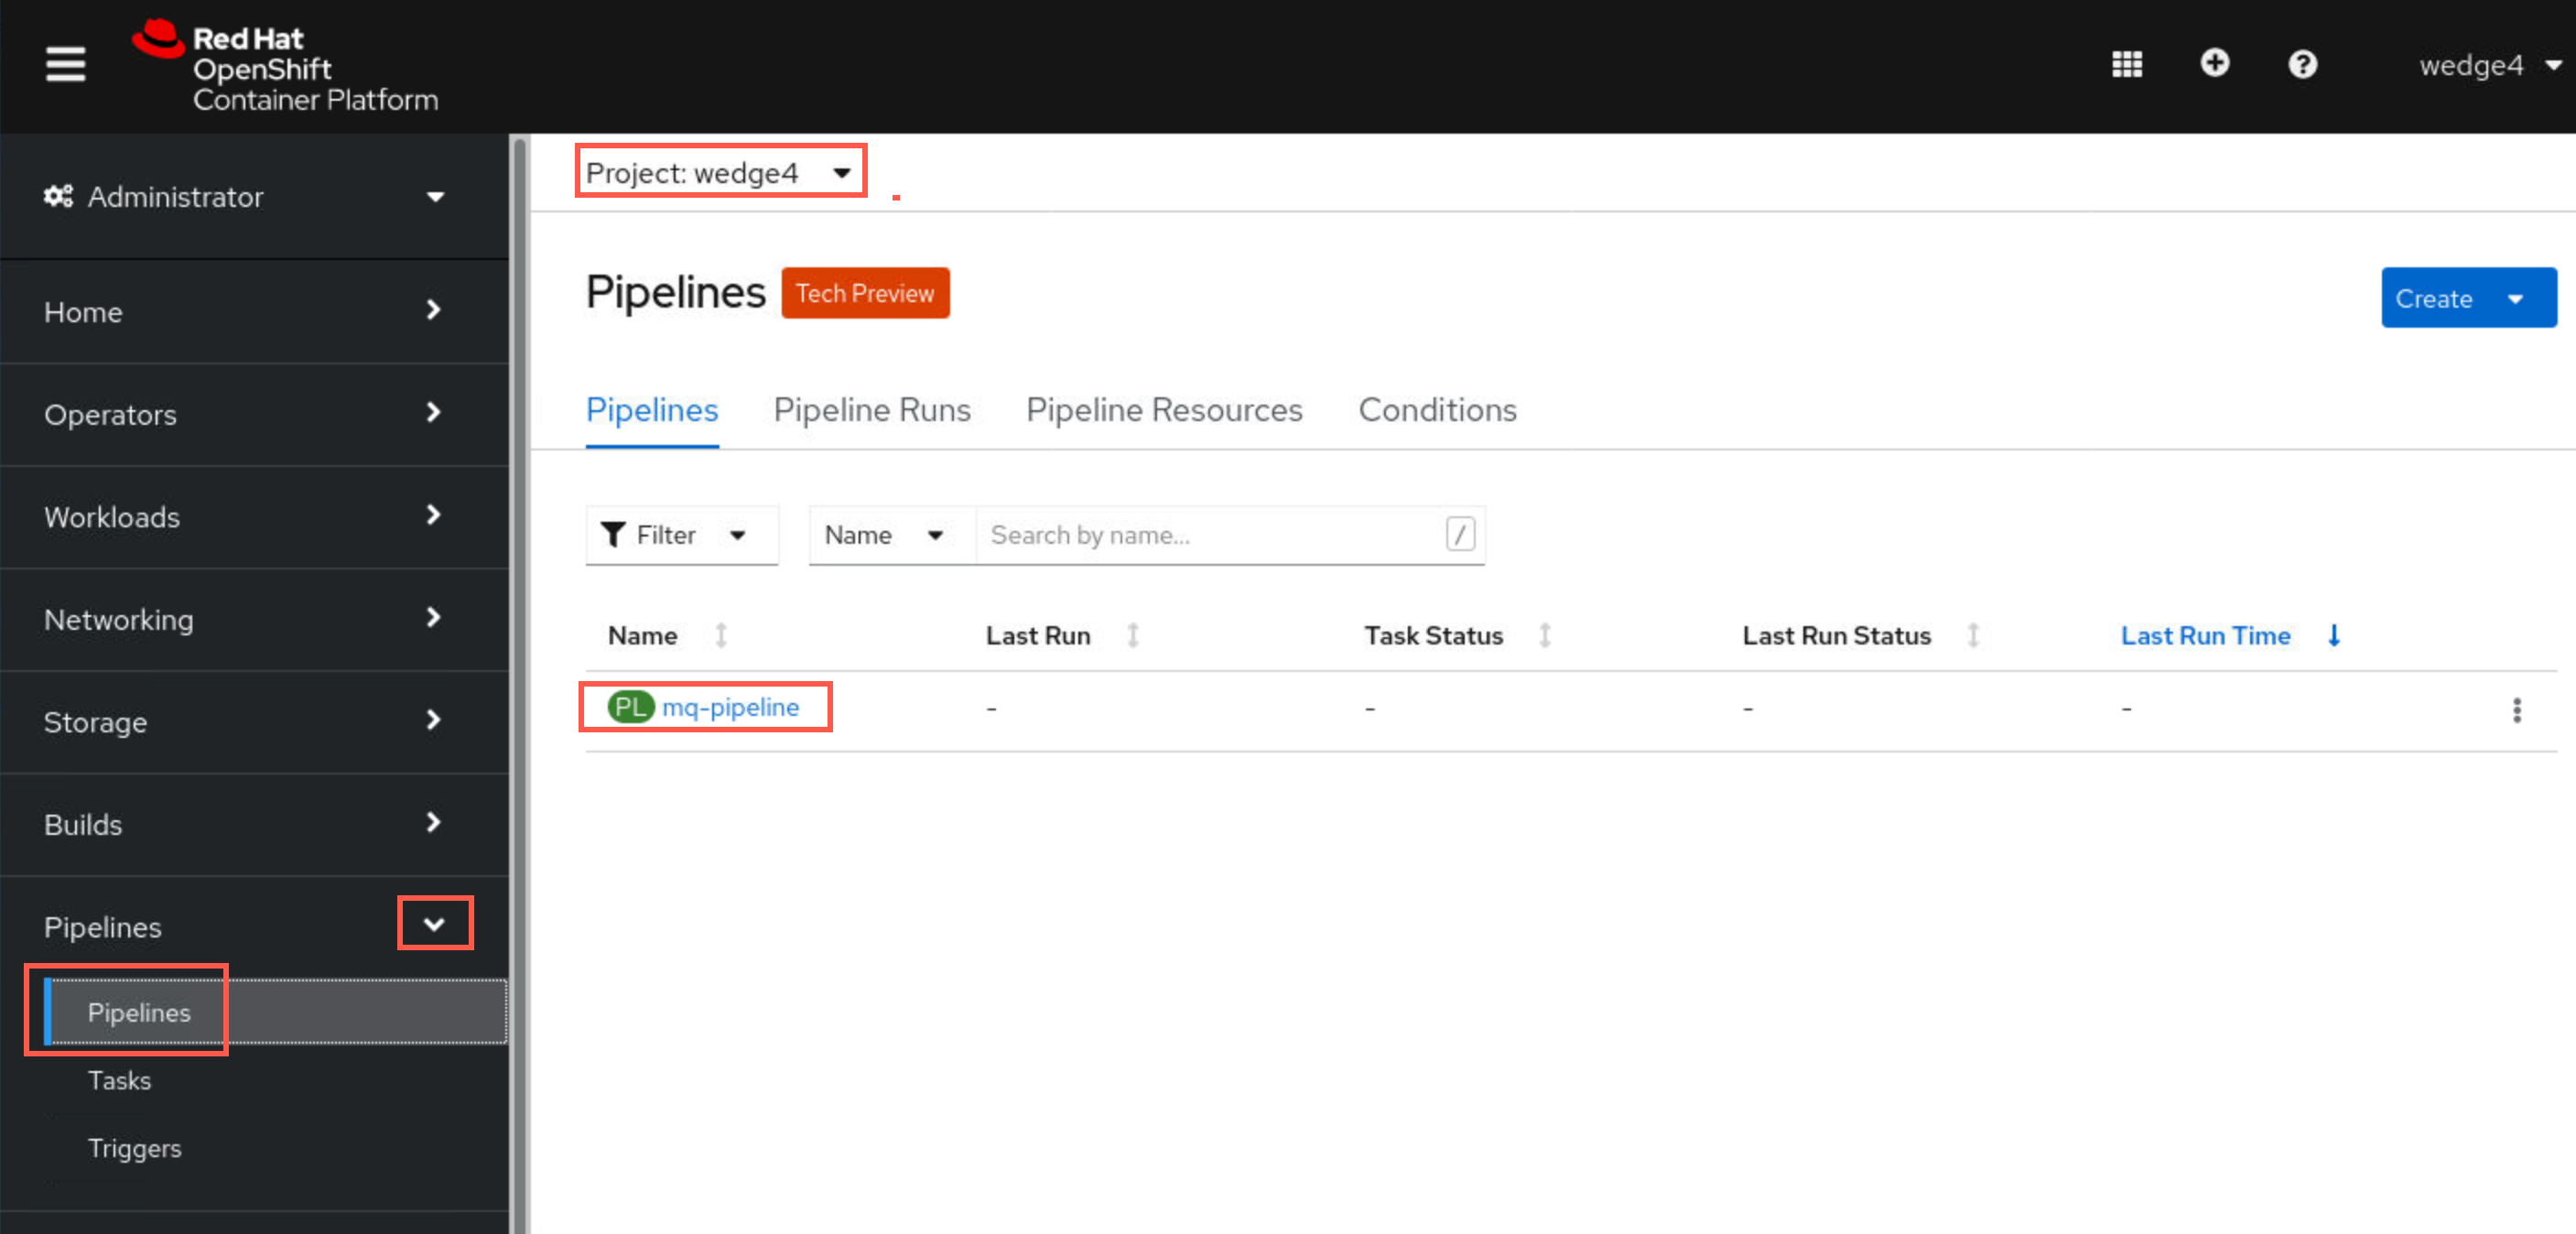
Once the install.sh is complete return to the Open Shift Console to verify that the pipeline was created. Make sure you are in your assigned project. Click the drop-down for Pipelines and select Pipelines.
-
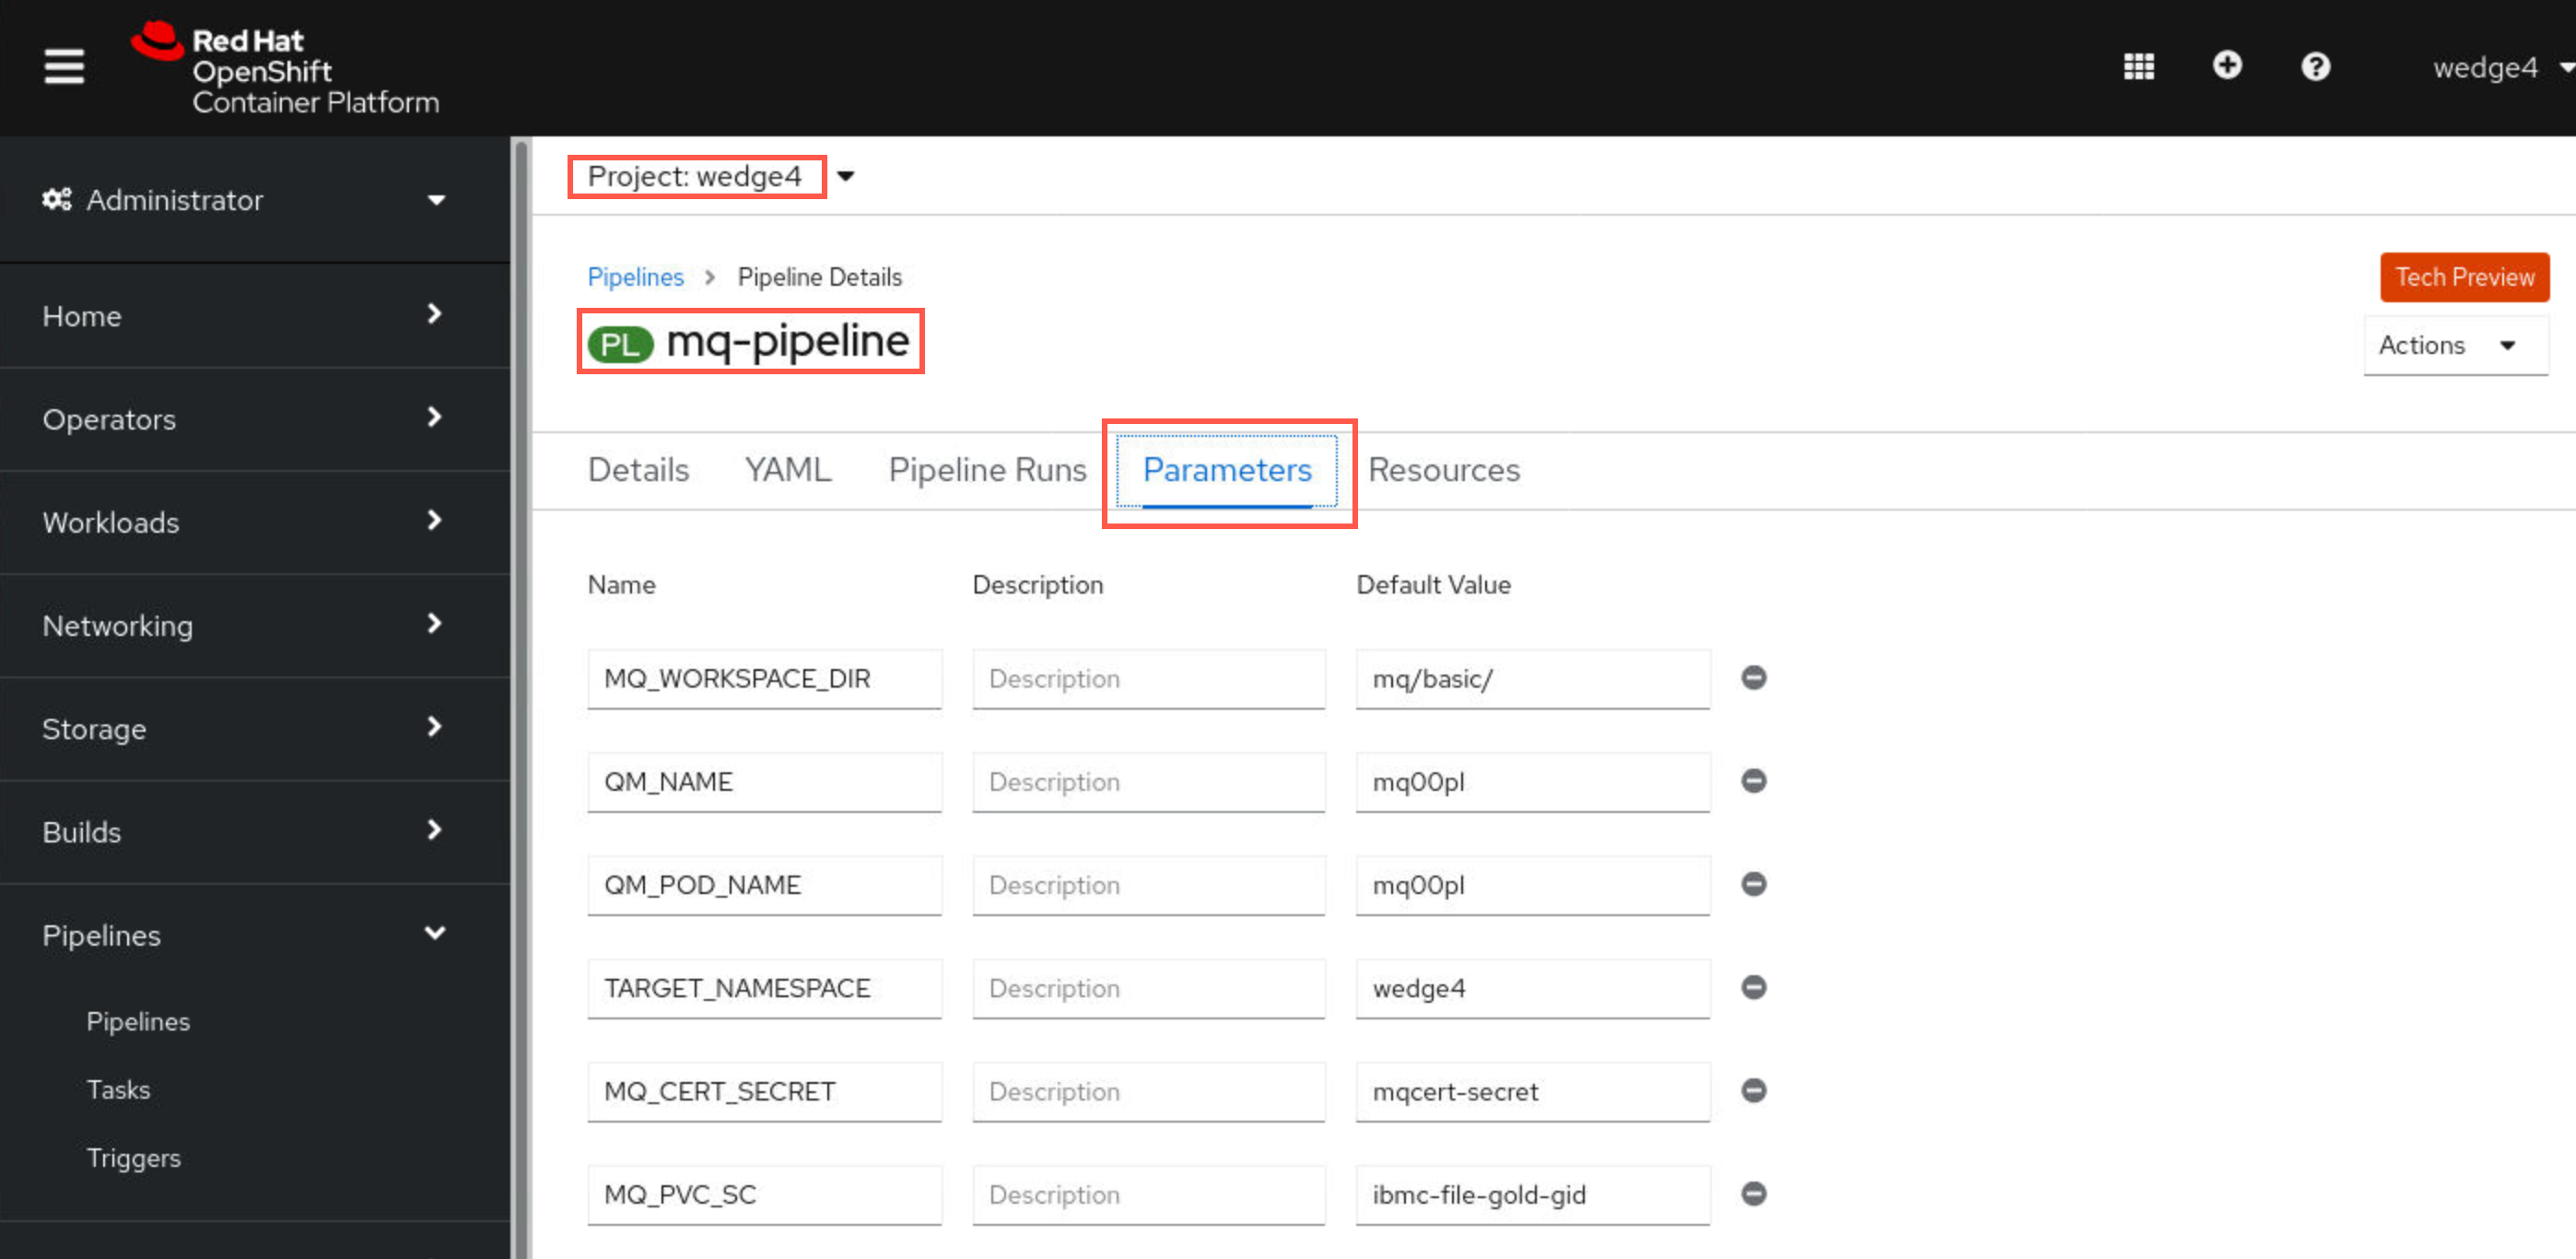
Click the hyperlink for mq-pipeline. Explore the various tabs. Pay particular attention to Parameters and Resources. You will see the parameters you defined in your install.sh script and the tekton pipeline file.
-
You have not defined a WebHook yet, so you will not see any Pipeline Runs.
Step 4: Add the route to Github WebHook
Follow steps here to add a webhook.
-
Return to the web browser tab for you GitHub account. If Firefox has been closed, open a new Firefox web browser session by double-clicking its icon on the desktop.

-
Navigate to your fork of the this repository in GitHub and sign-in.
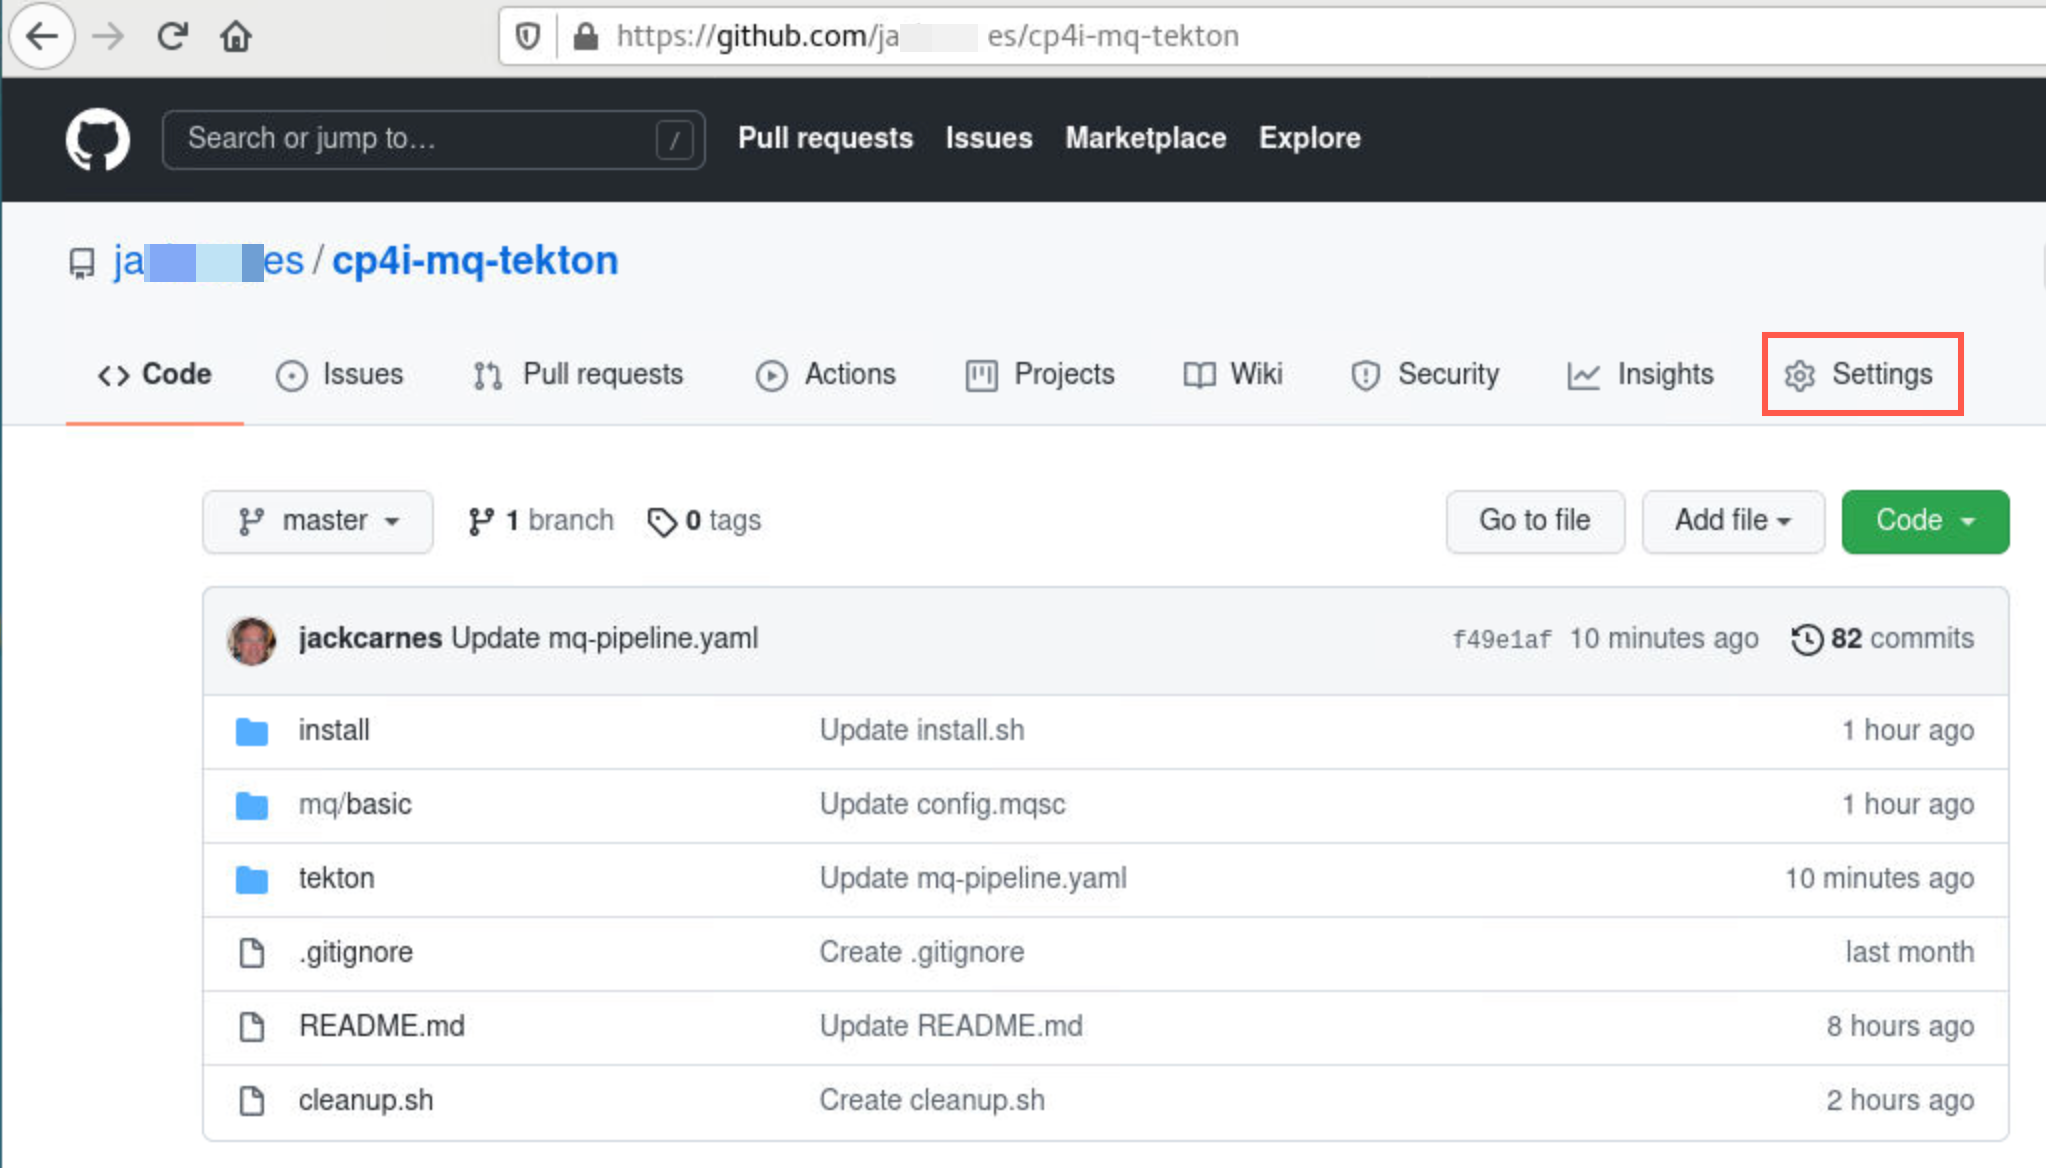
-
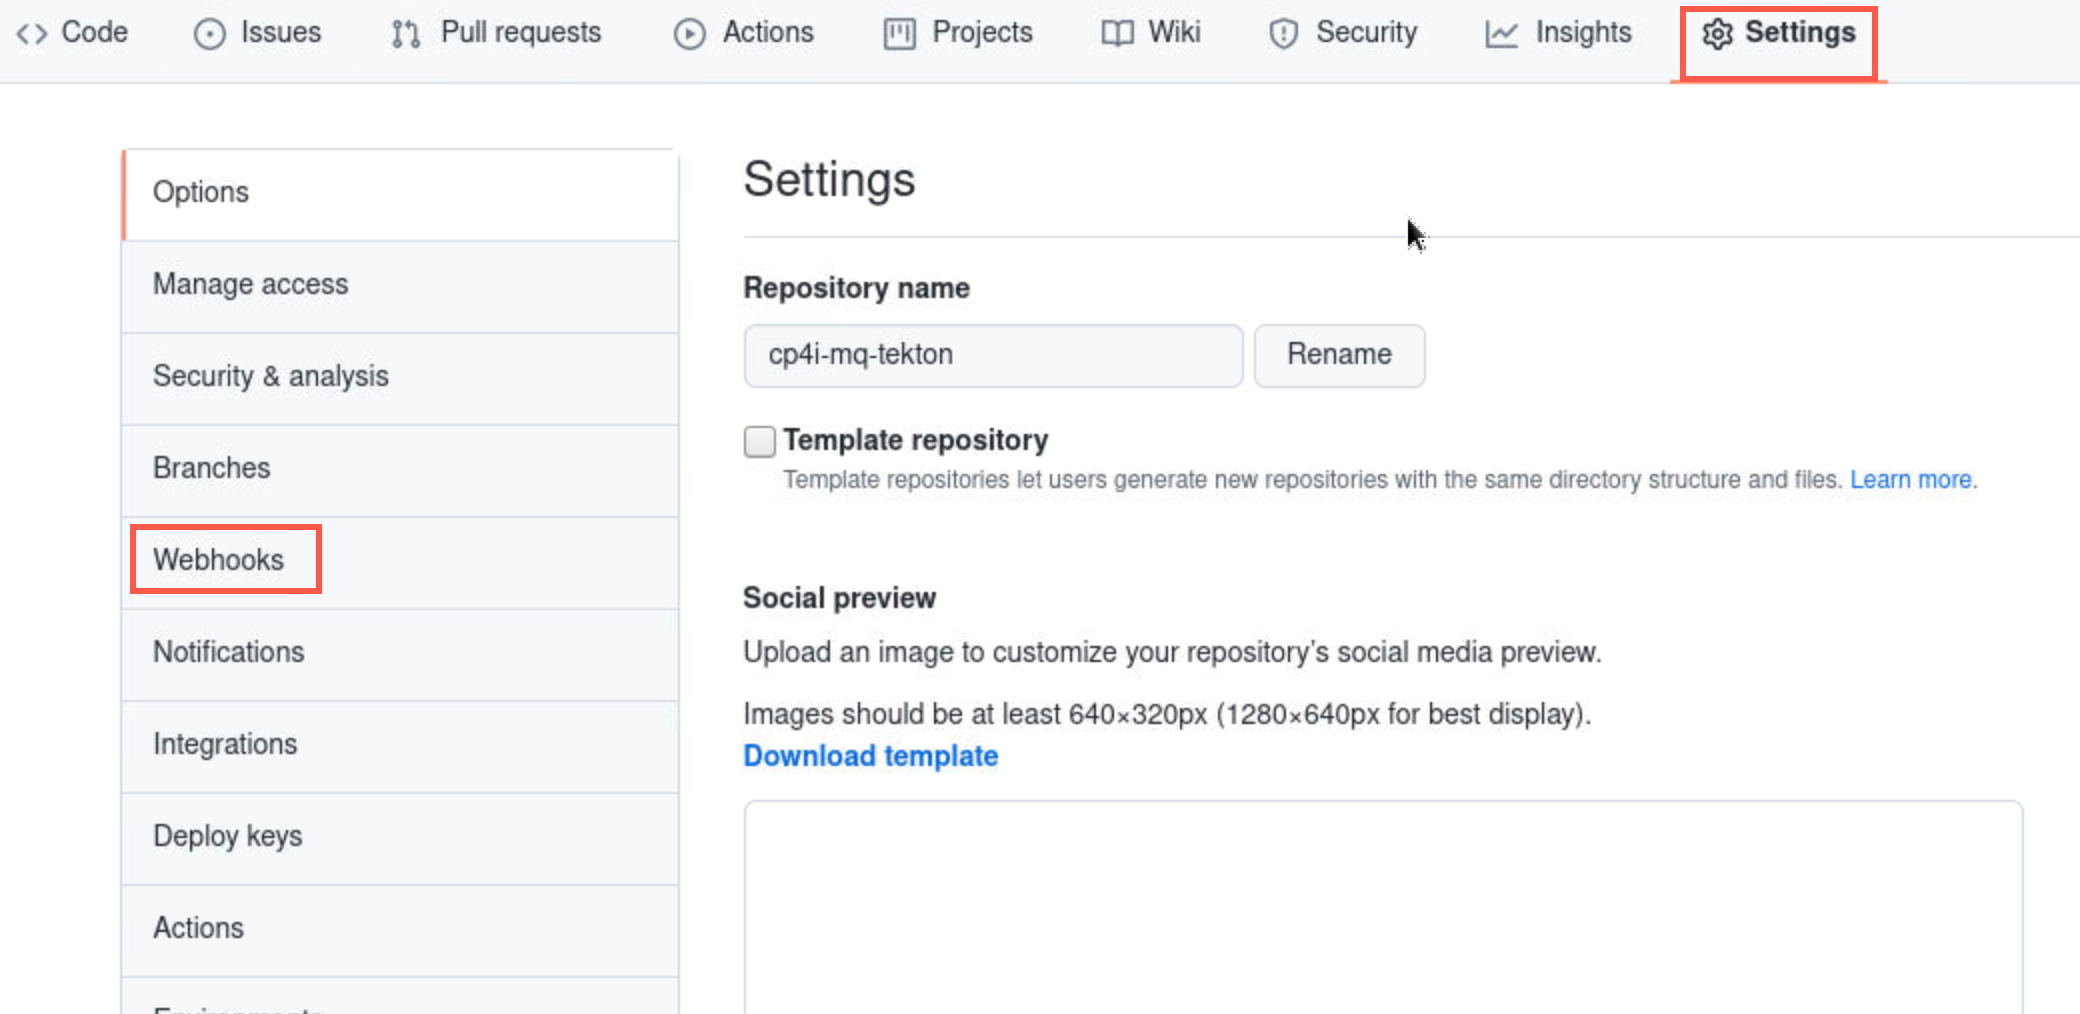
Click Settings then click Webhooks.
-
Click the Add webhook button.

-
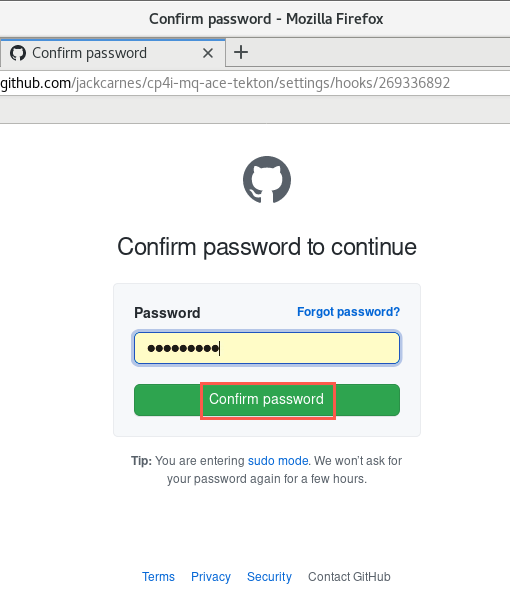
If you receive a pop-up to confirm password, enter password and click the Confirm password button.
-
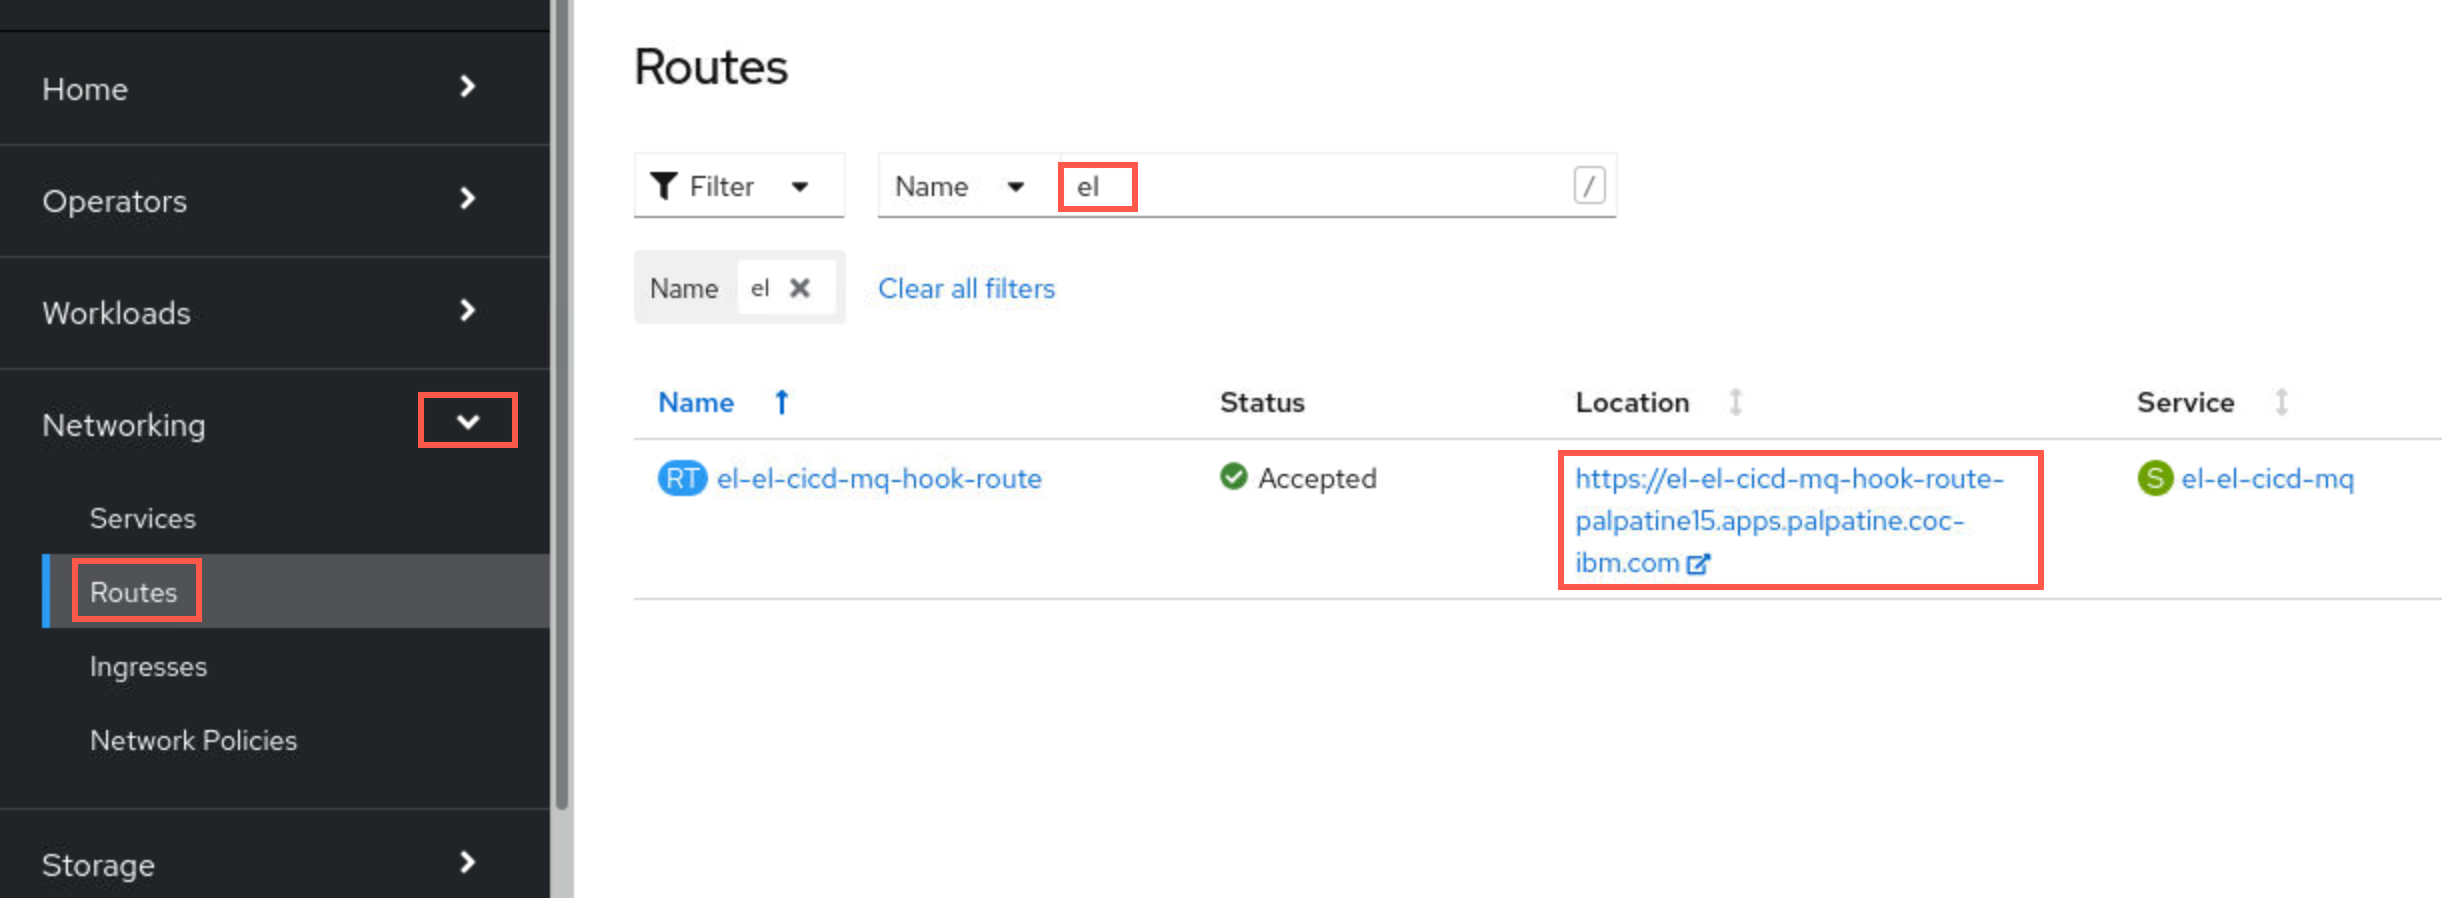
You need to set the Payload URL to the EventListener Route. In order to find the URL, you need to obtain the correct route from the OCP Console. Return to the console, scroll down to Networking, click the dropdown and select Routes. Type el in the filter field which will display the route to use for the pipeline. Copy the URL value under location.
-
Paste the copied value into the Payload URL field of the Webhook definition. Set the Content type to application/json. You aren’t using the Secret in this lab, so you can leave it blank. Select Just the Push Event radio button.
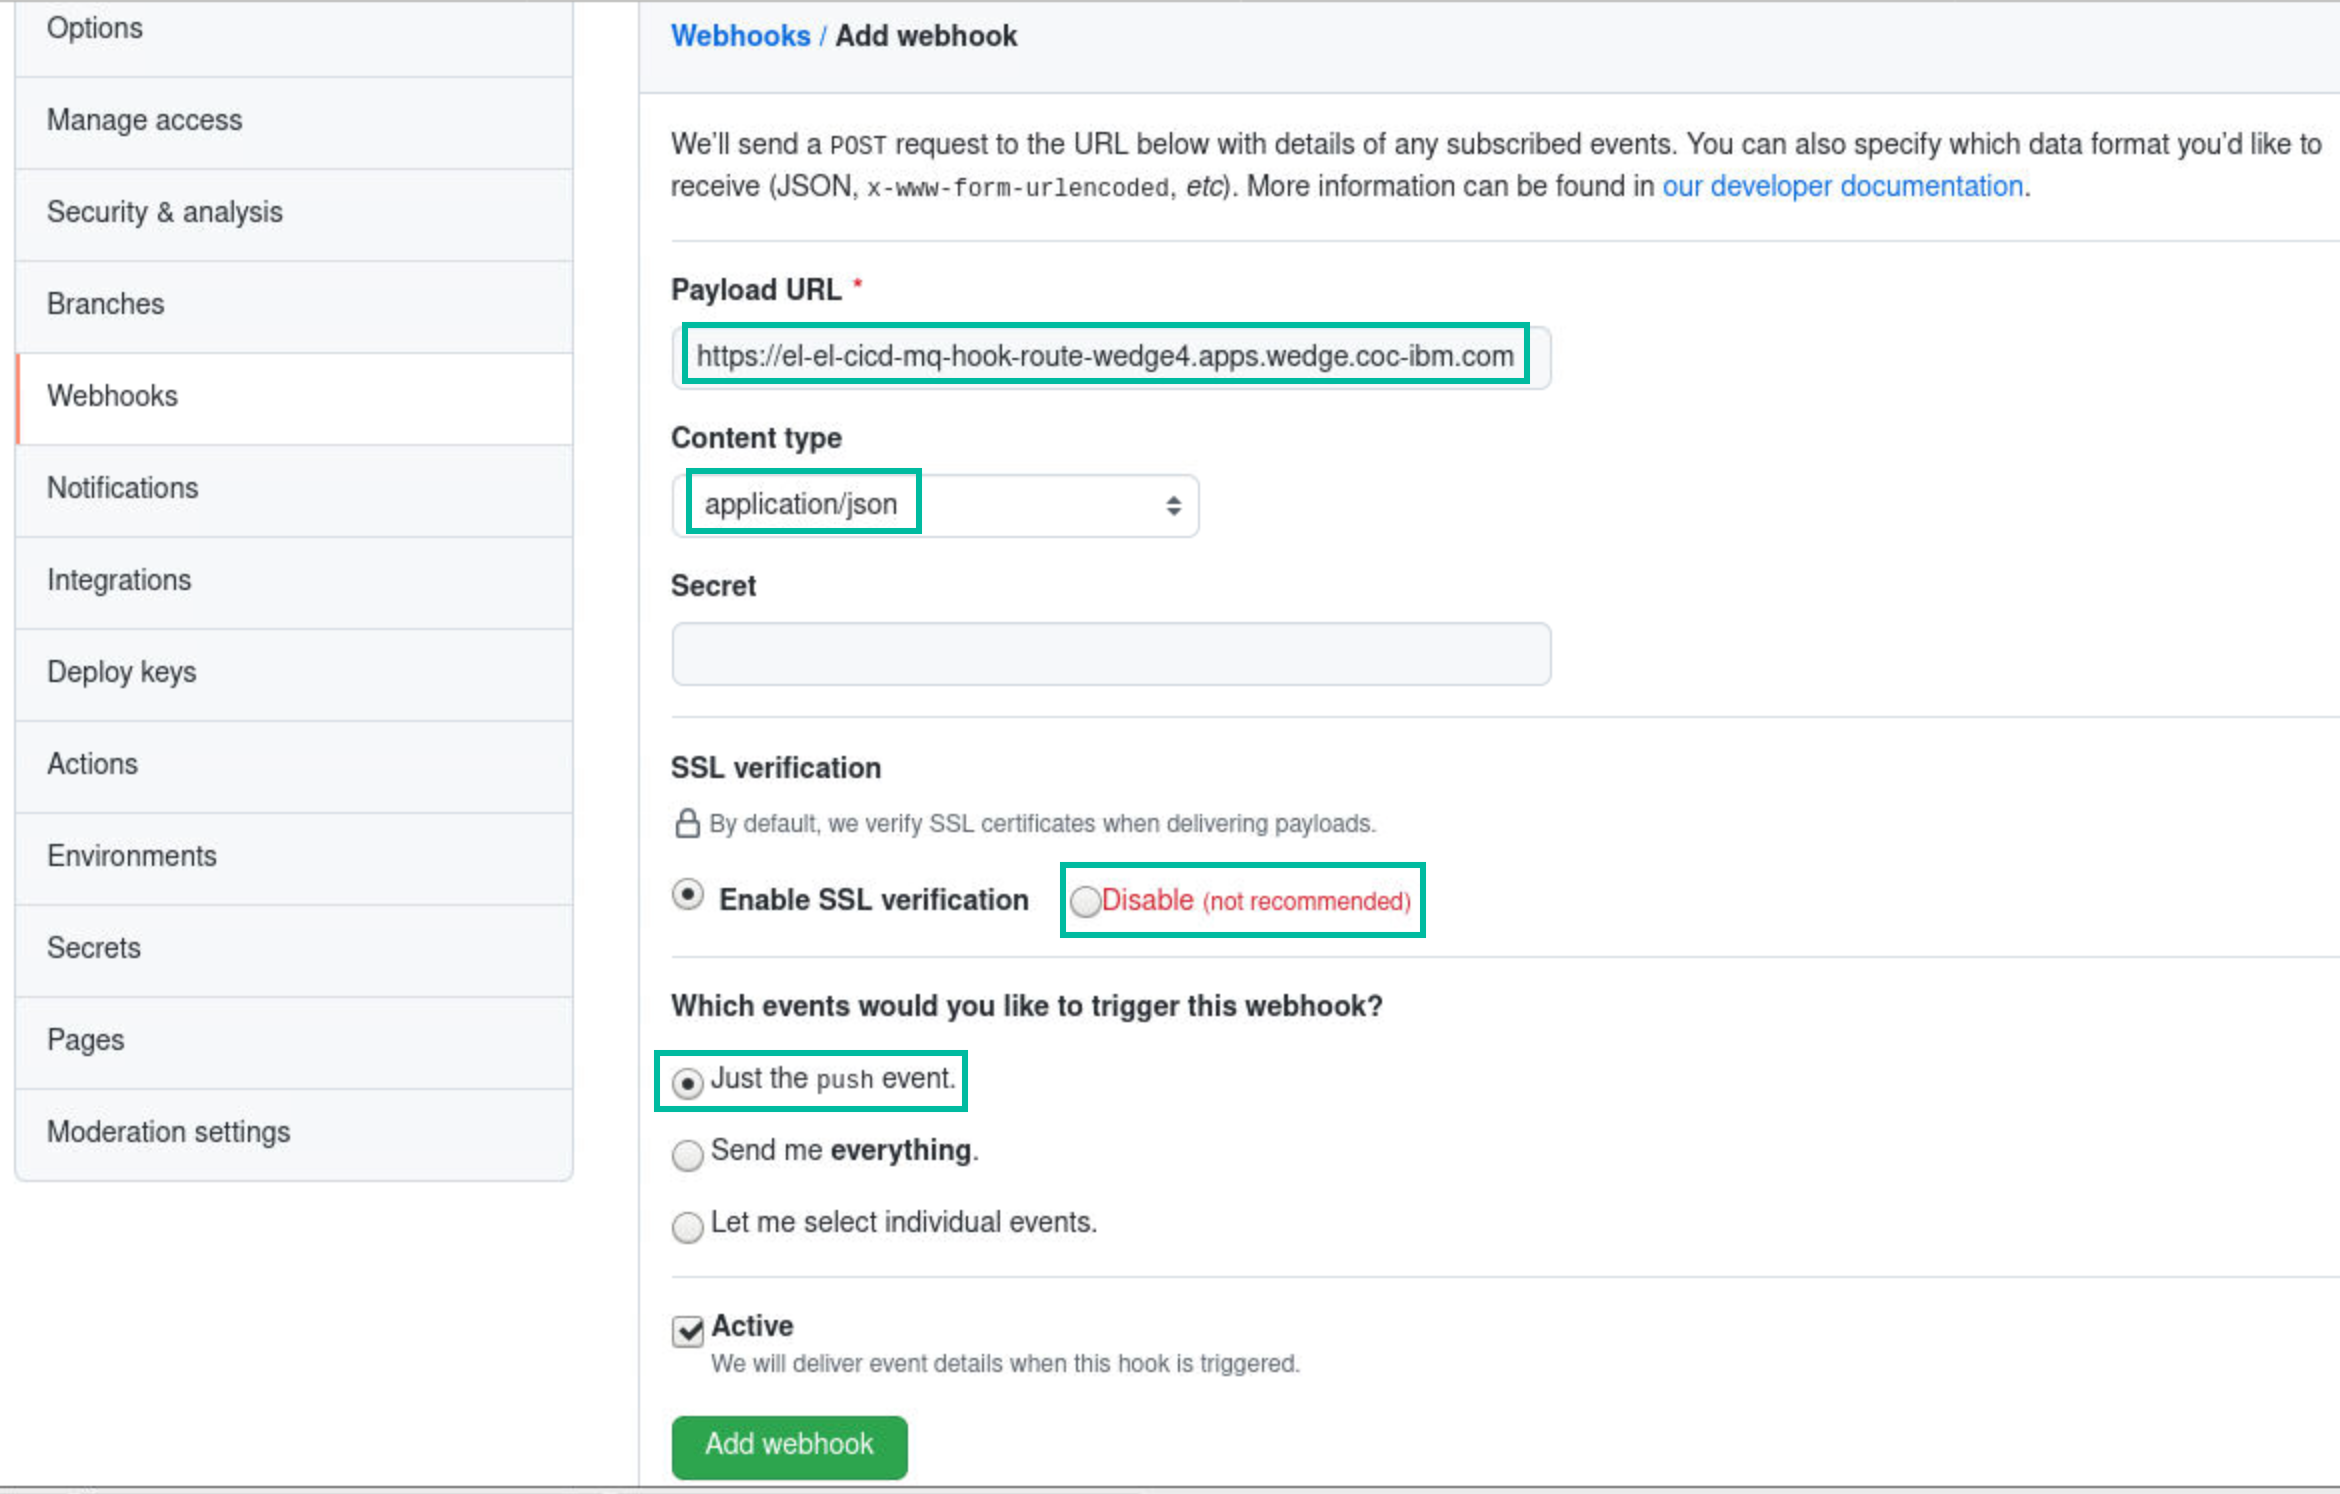
-
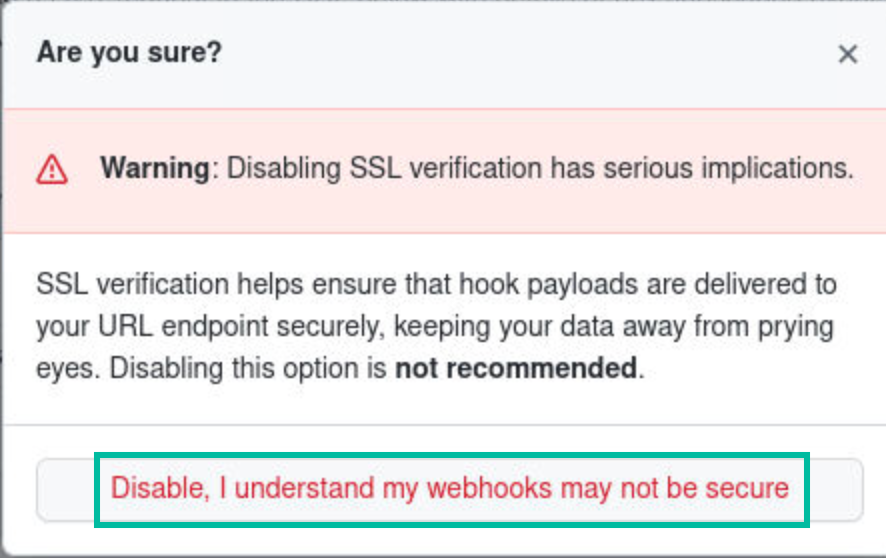
The CoC clusters use self-signed certificates and the webhook will fail if using TLS. This lab will not use TLS, so click the Disable radio button under SSL verification. Click the Disable,… button to confirm.
-
Scroll to the bottom and click Add webhook.
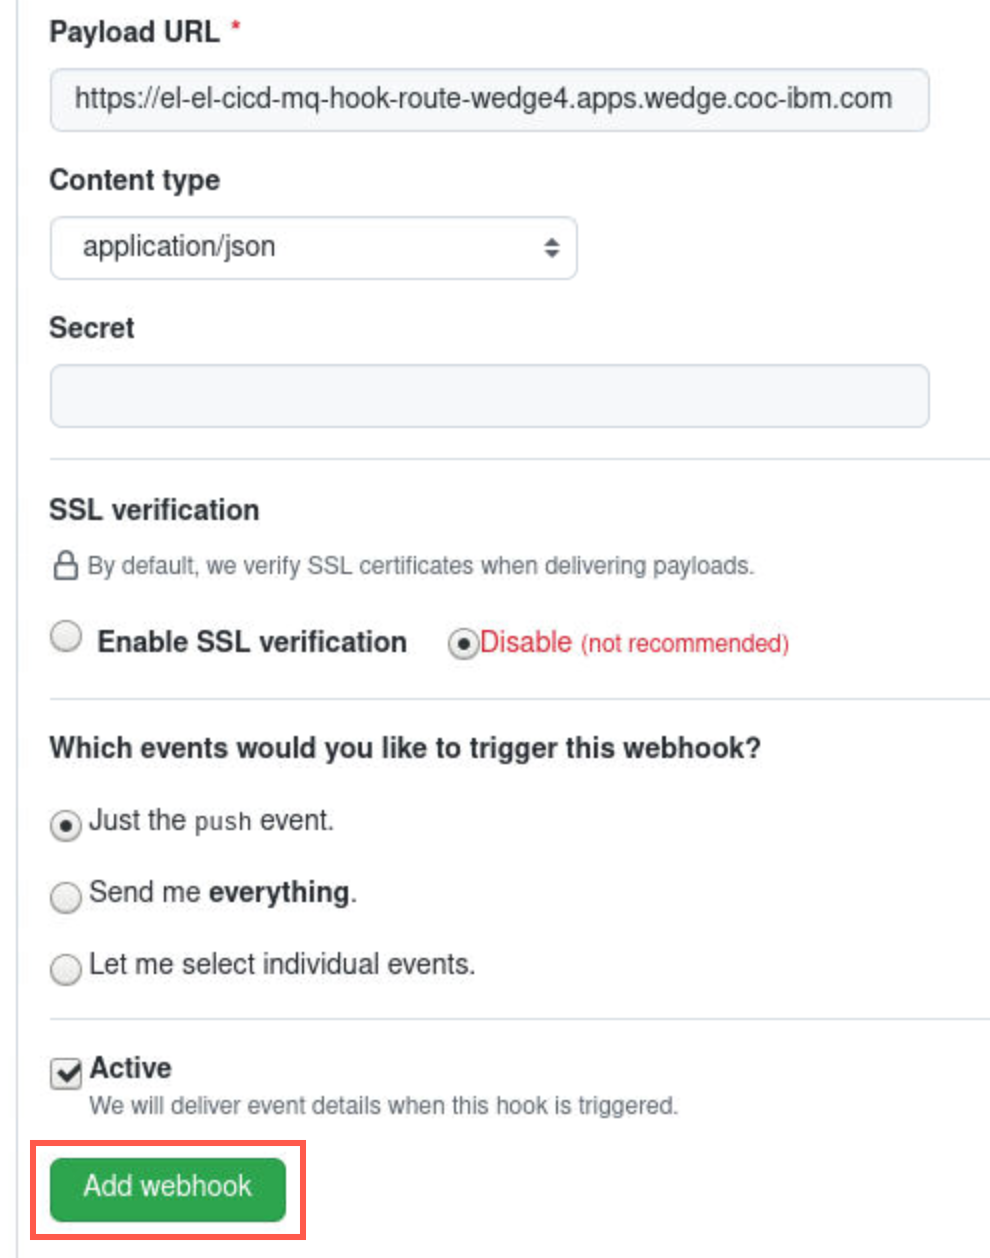
The webhook is defined and is ready to be tested.
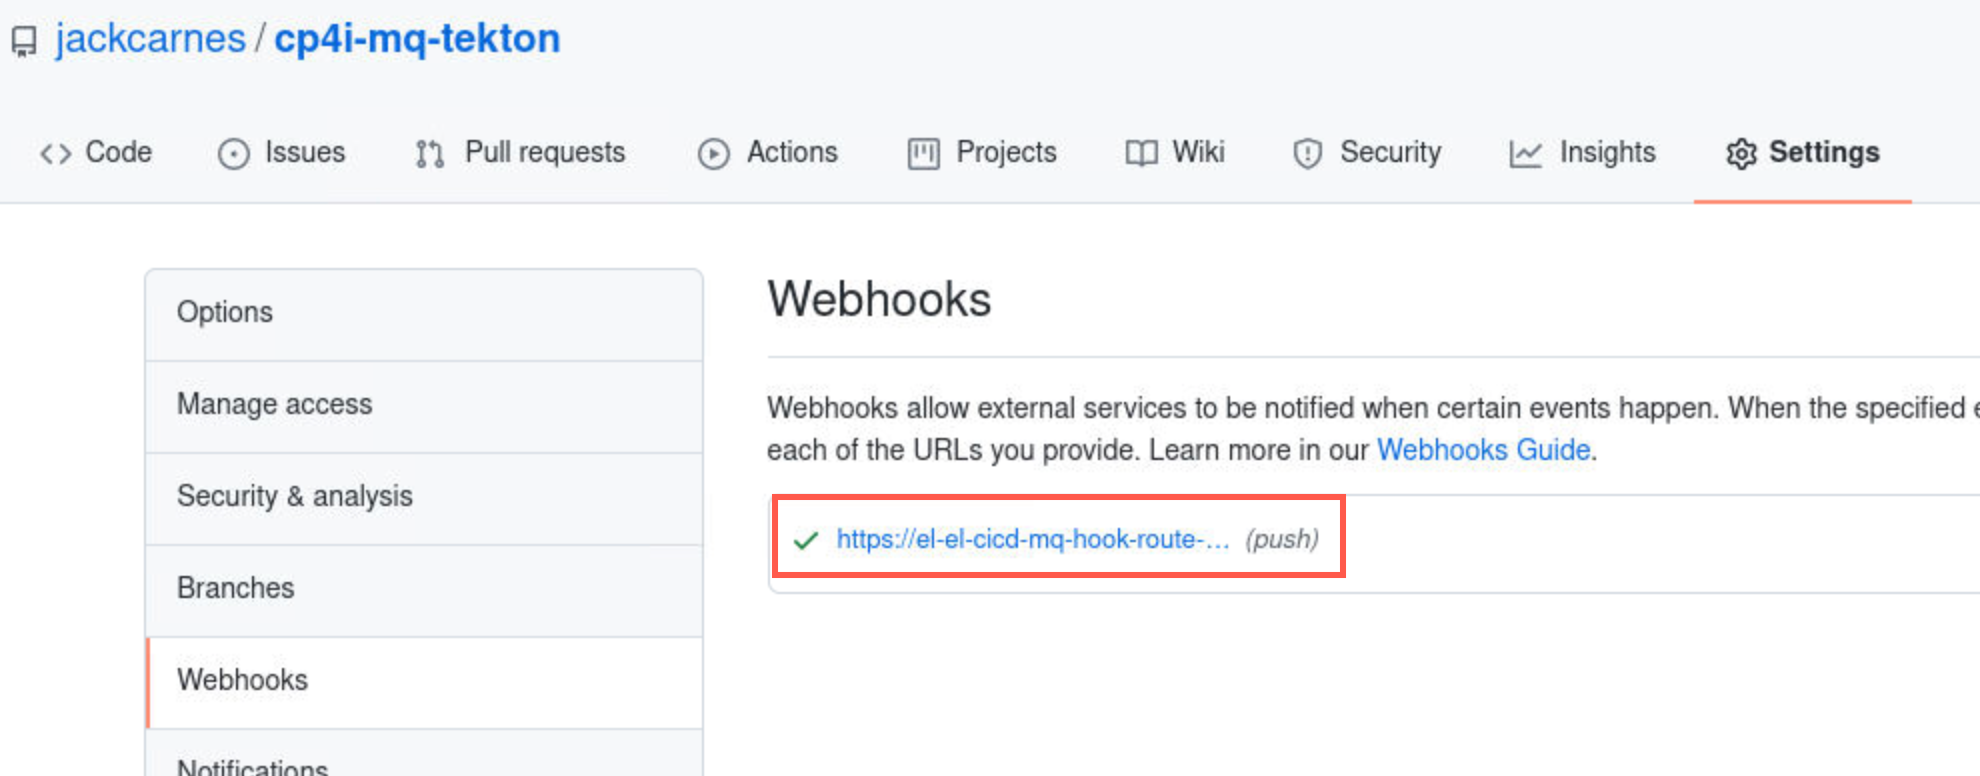
-
Refresh the page. If the pipeline ran successfully, you will get a green checkmark next to the webhook.
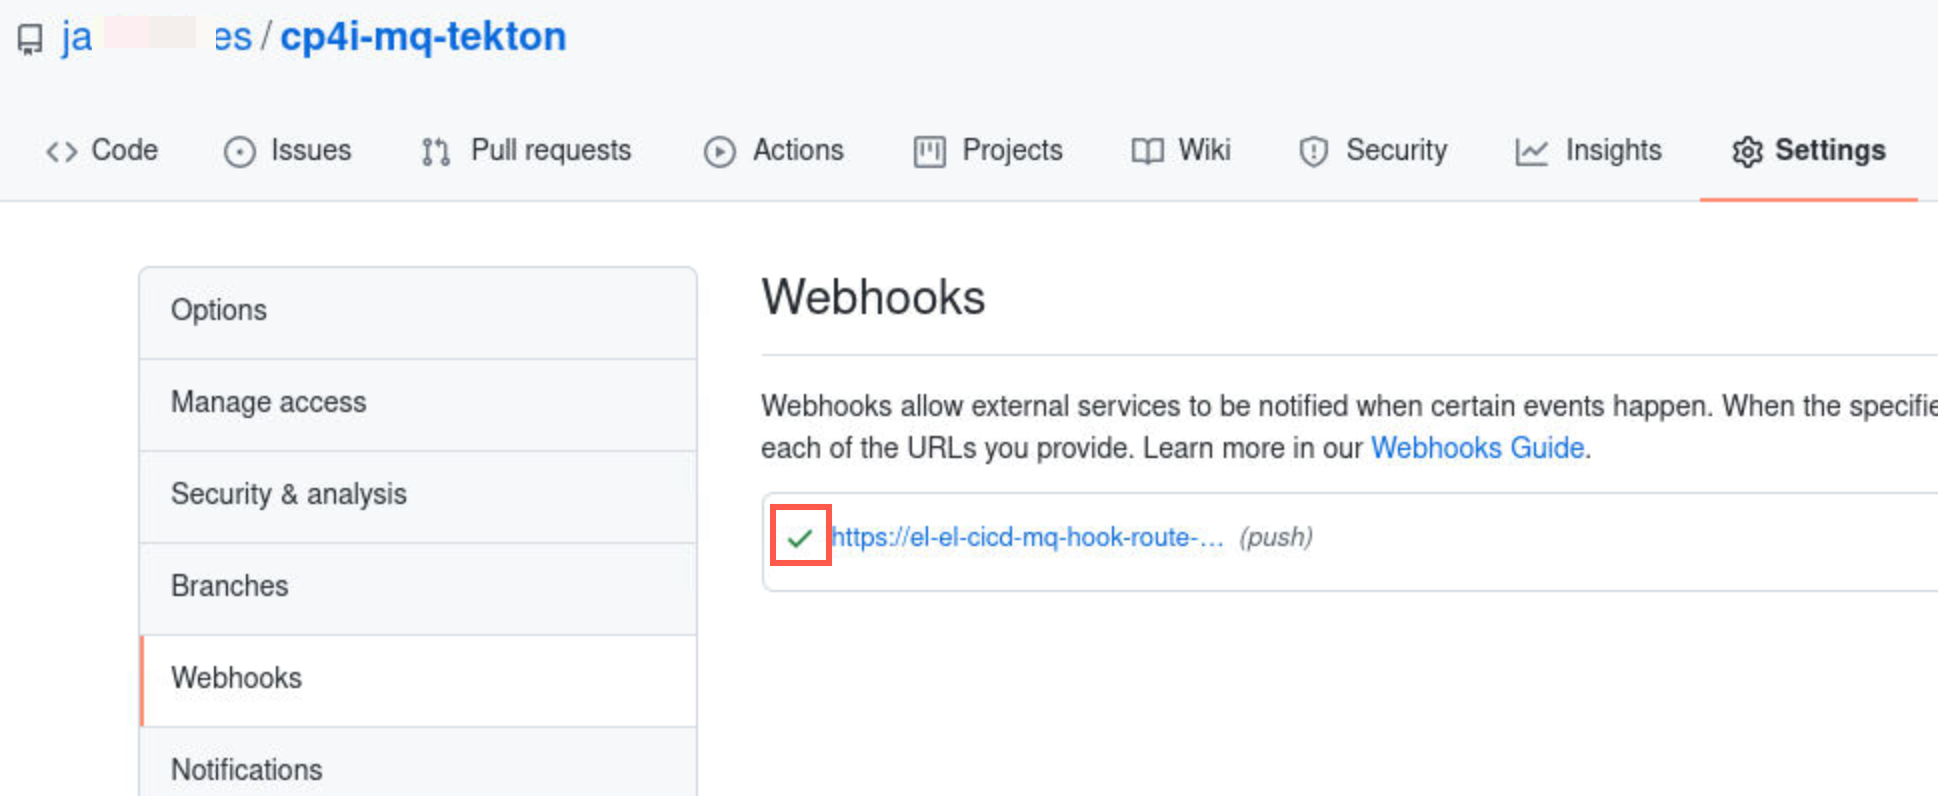
-
Return to the OCP Console and scroll little more to find Pipelines. Click the dropdown and select pipelines.
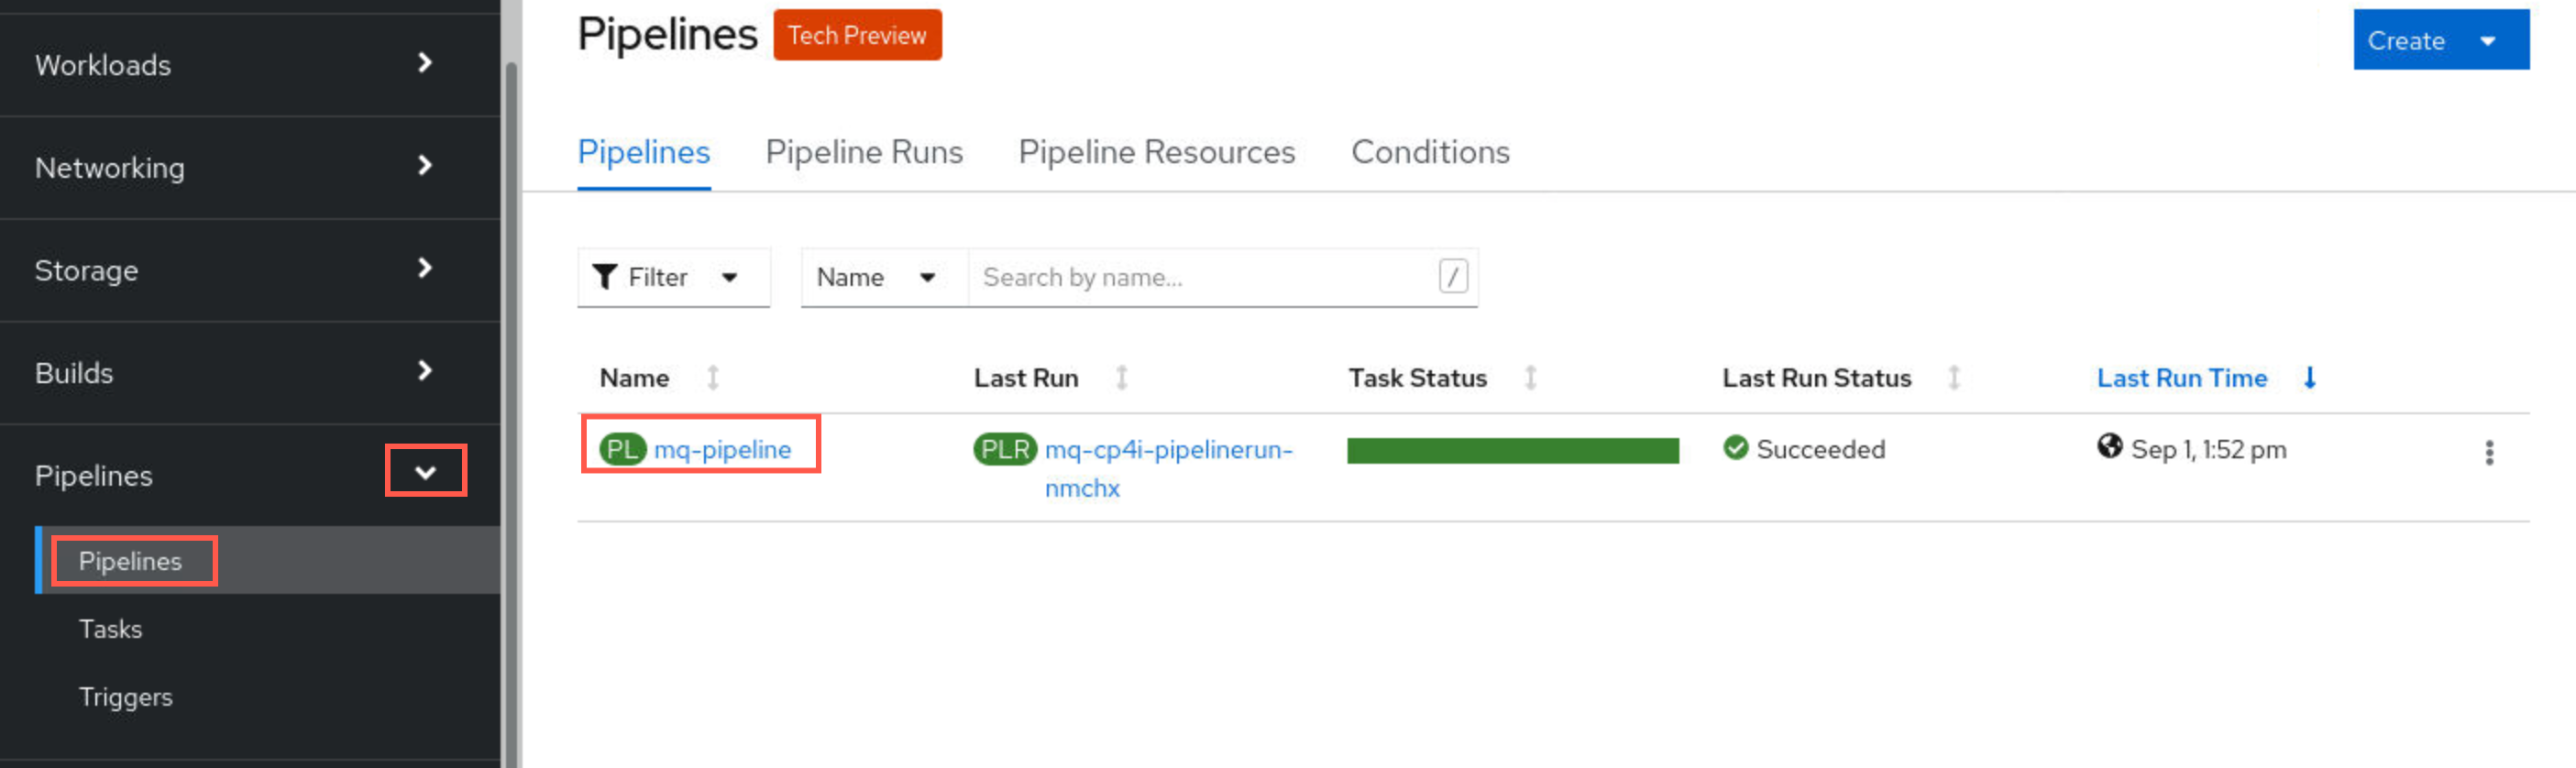
-
You will see the pipeline you created with the install.sh script. You should see a green progress bar under the Task Run column and green checkmark under the Task Status column.
Troubleshooting:
If the task is still running, the progress bar will be blue. If there was an error, the bar will be red. You can click the bar to determine the error. If the bar is not green, your github repo webhook will not have the green check mark. If the bar is blue, your webhook will have a solid circle. If the bar is red, your webhook will have a corresponding red triangle. You can click Recent Deliveries to see the results of the webhook. See the following diagram.</div>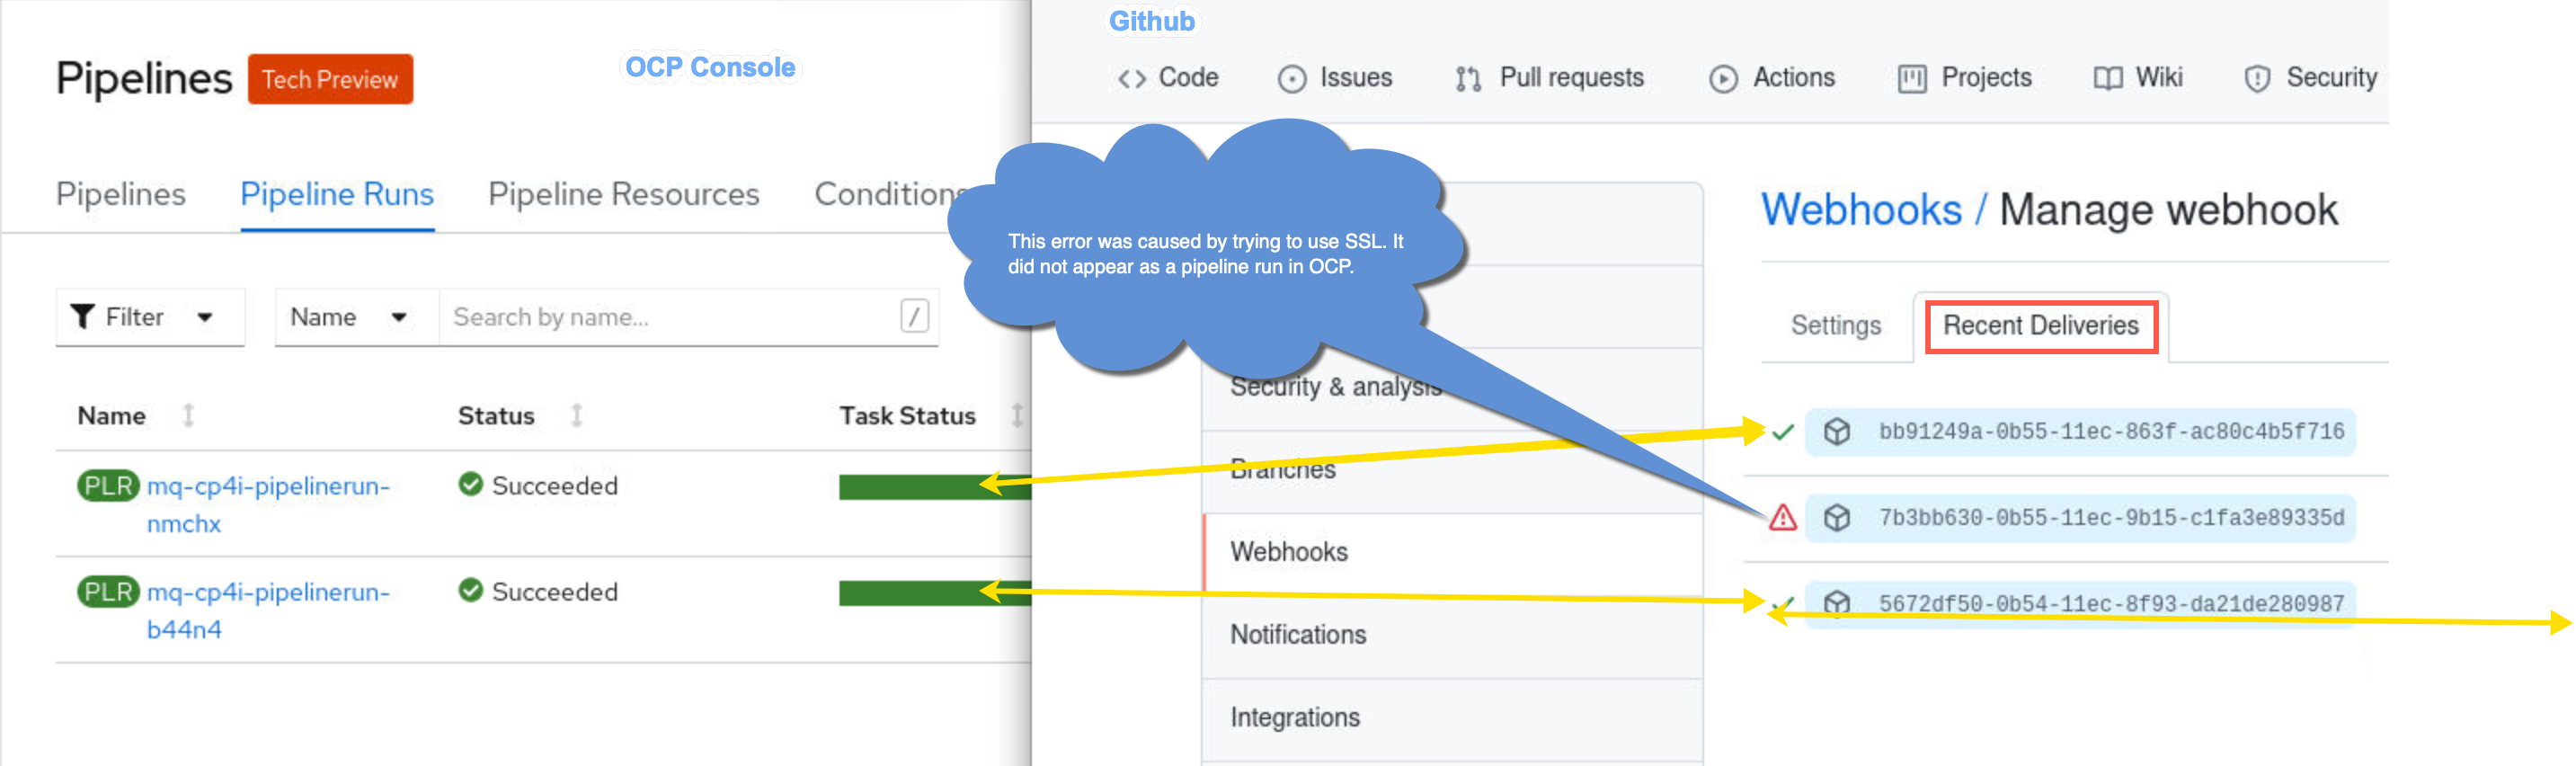
-
Return to your browser tab where the Platform Navigator is open. Refresh the page. You should now see your new queue manager under Messaging. You may need to scroll or you can click the up arrow on the right to conserve screen space. Click the hyperlink for you queue manager.
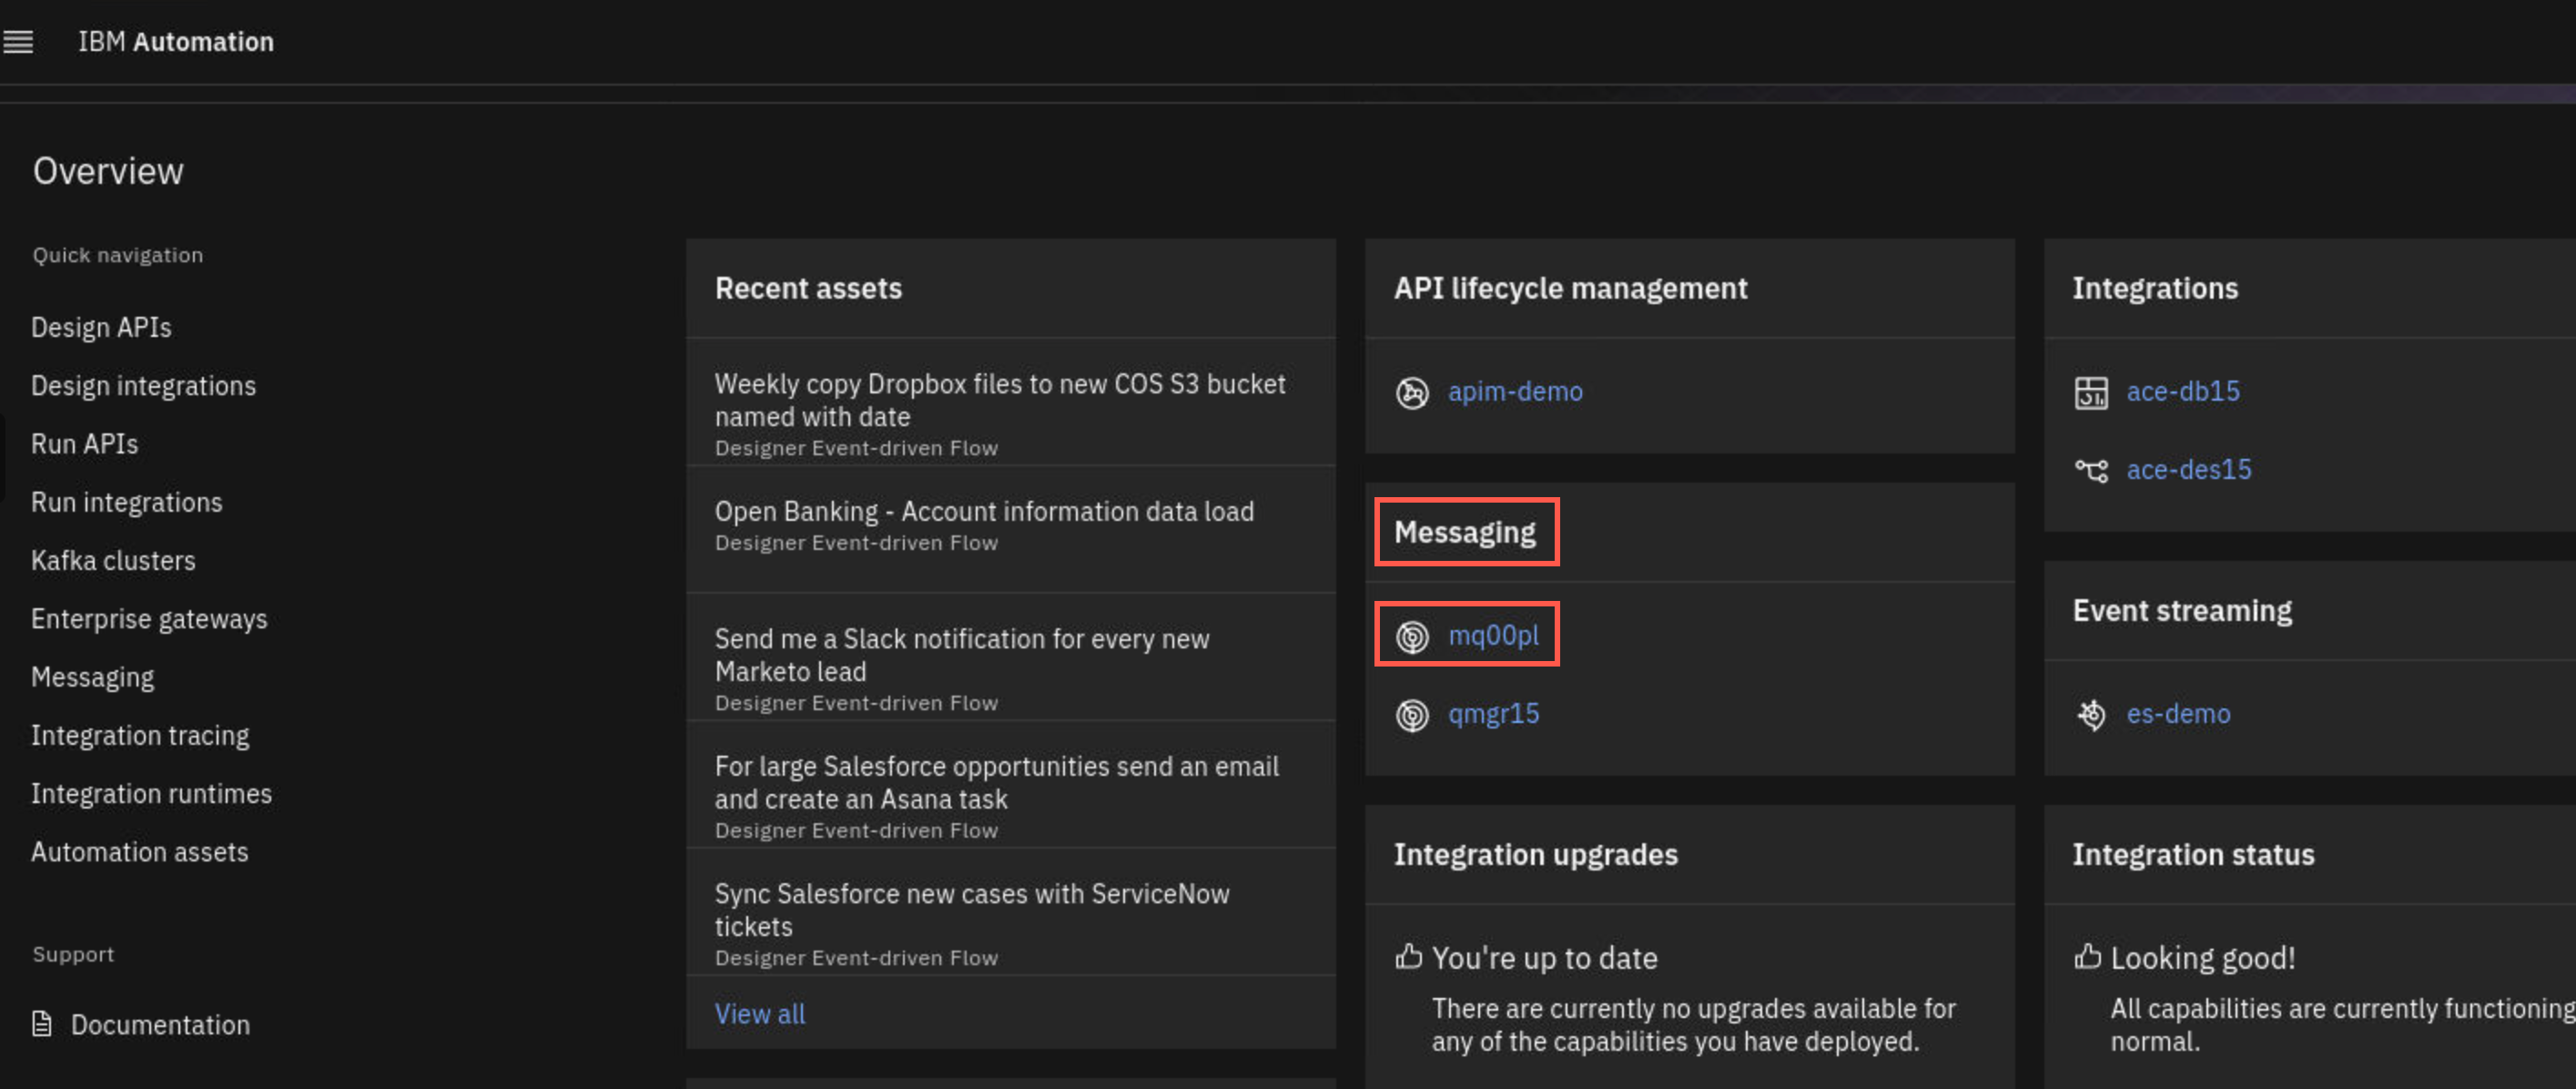
-
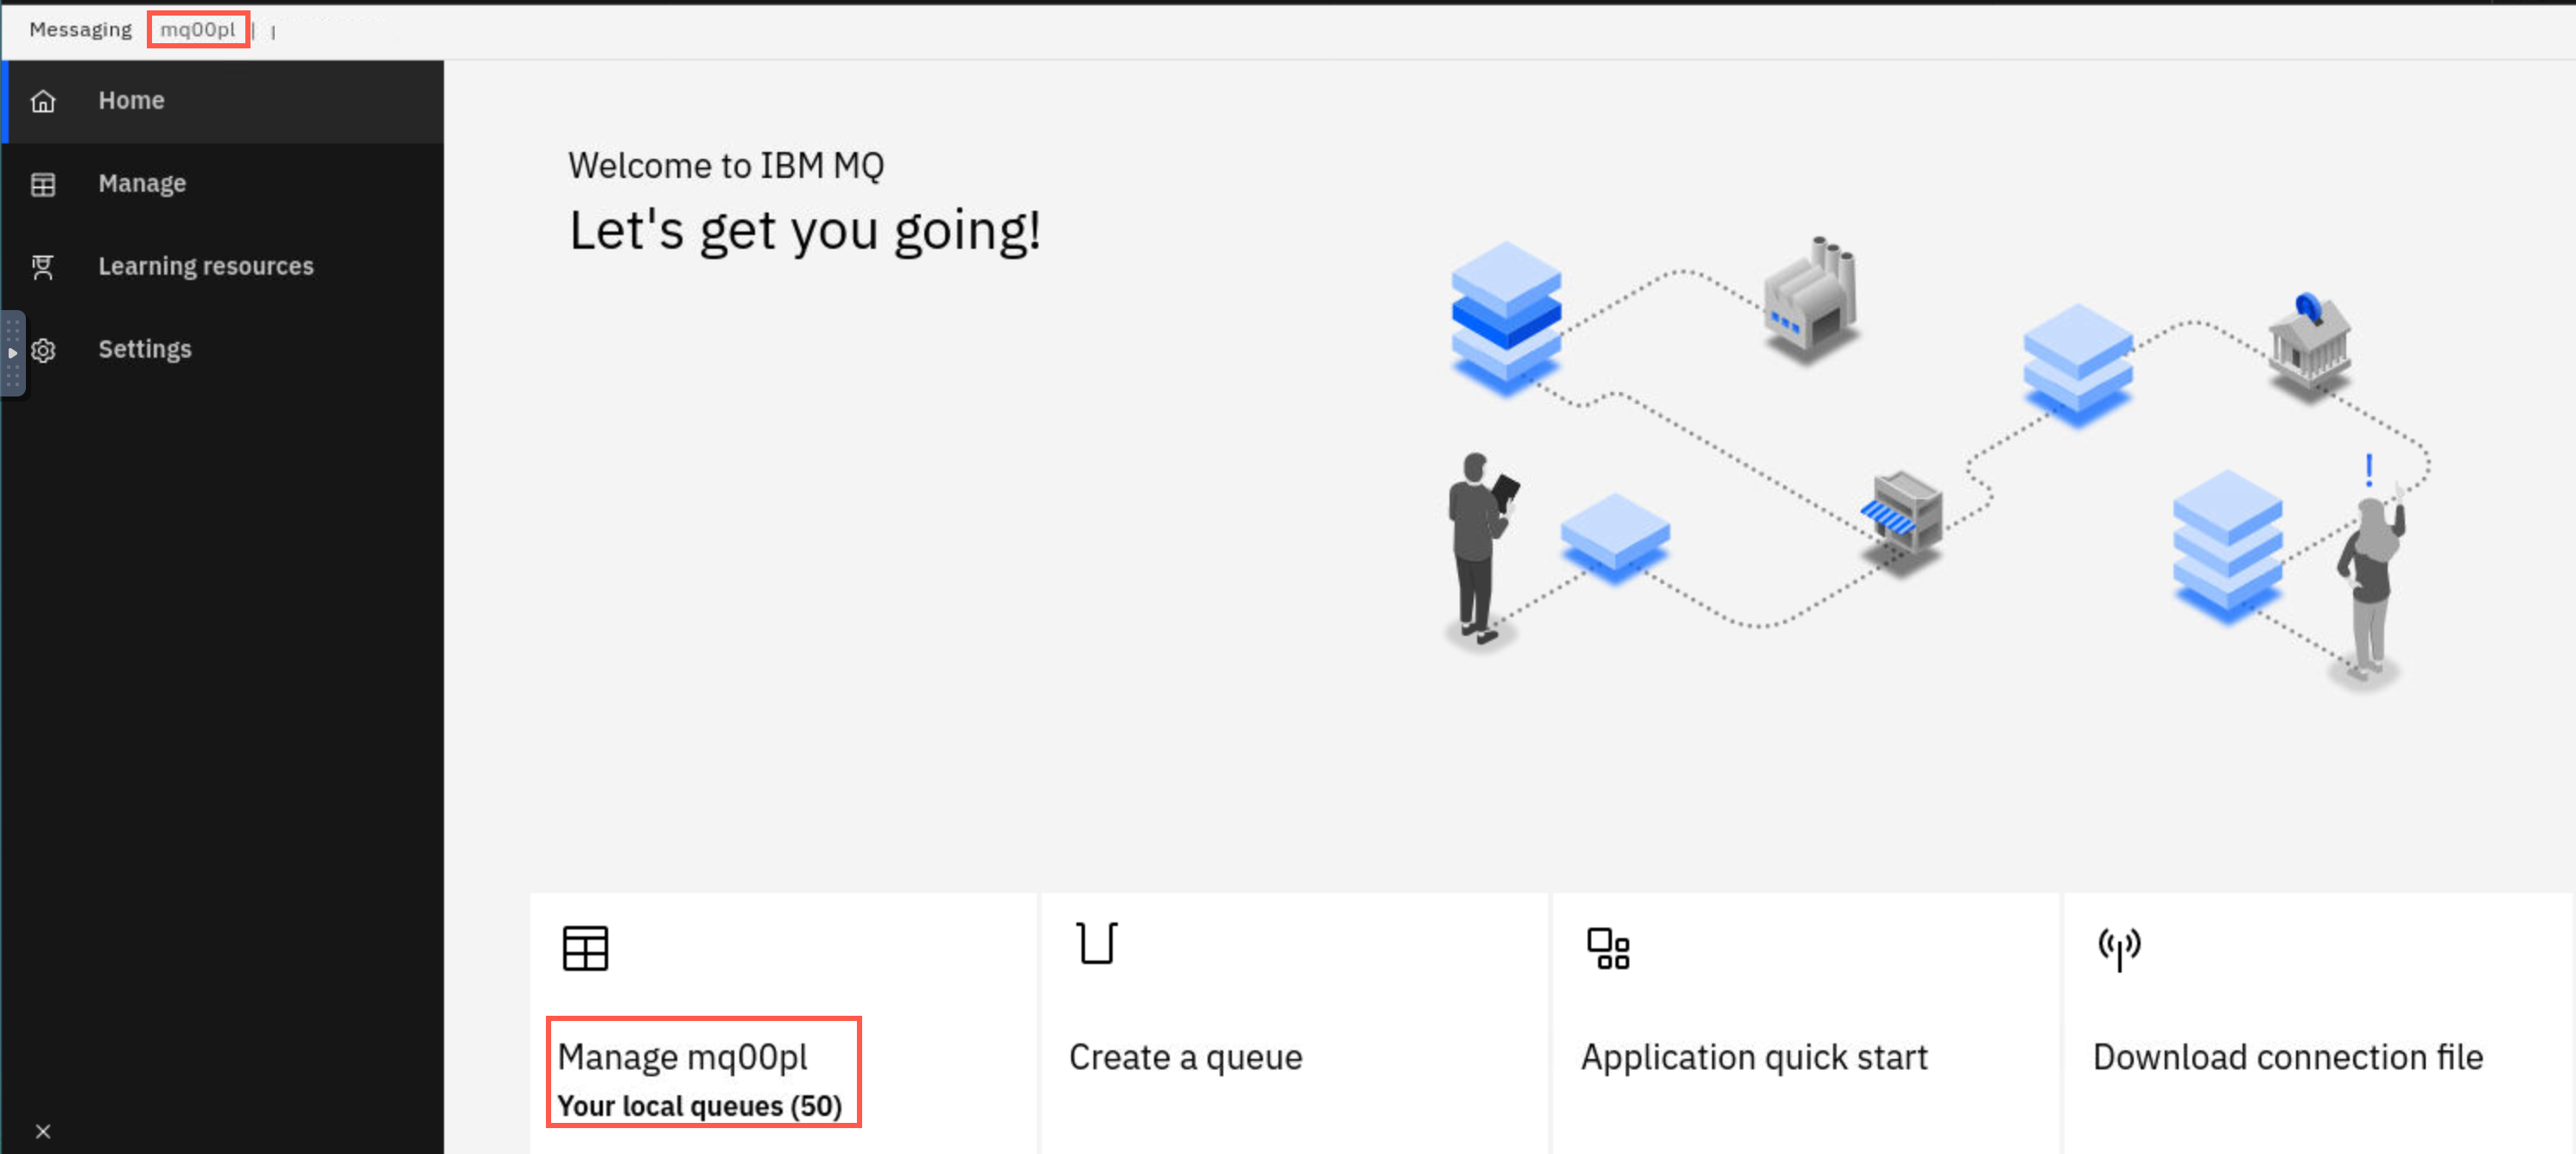
The MQ Console will open for your queue manager. Click Manage xxxxxx Your Local Queues.
-
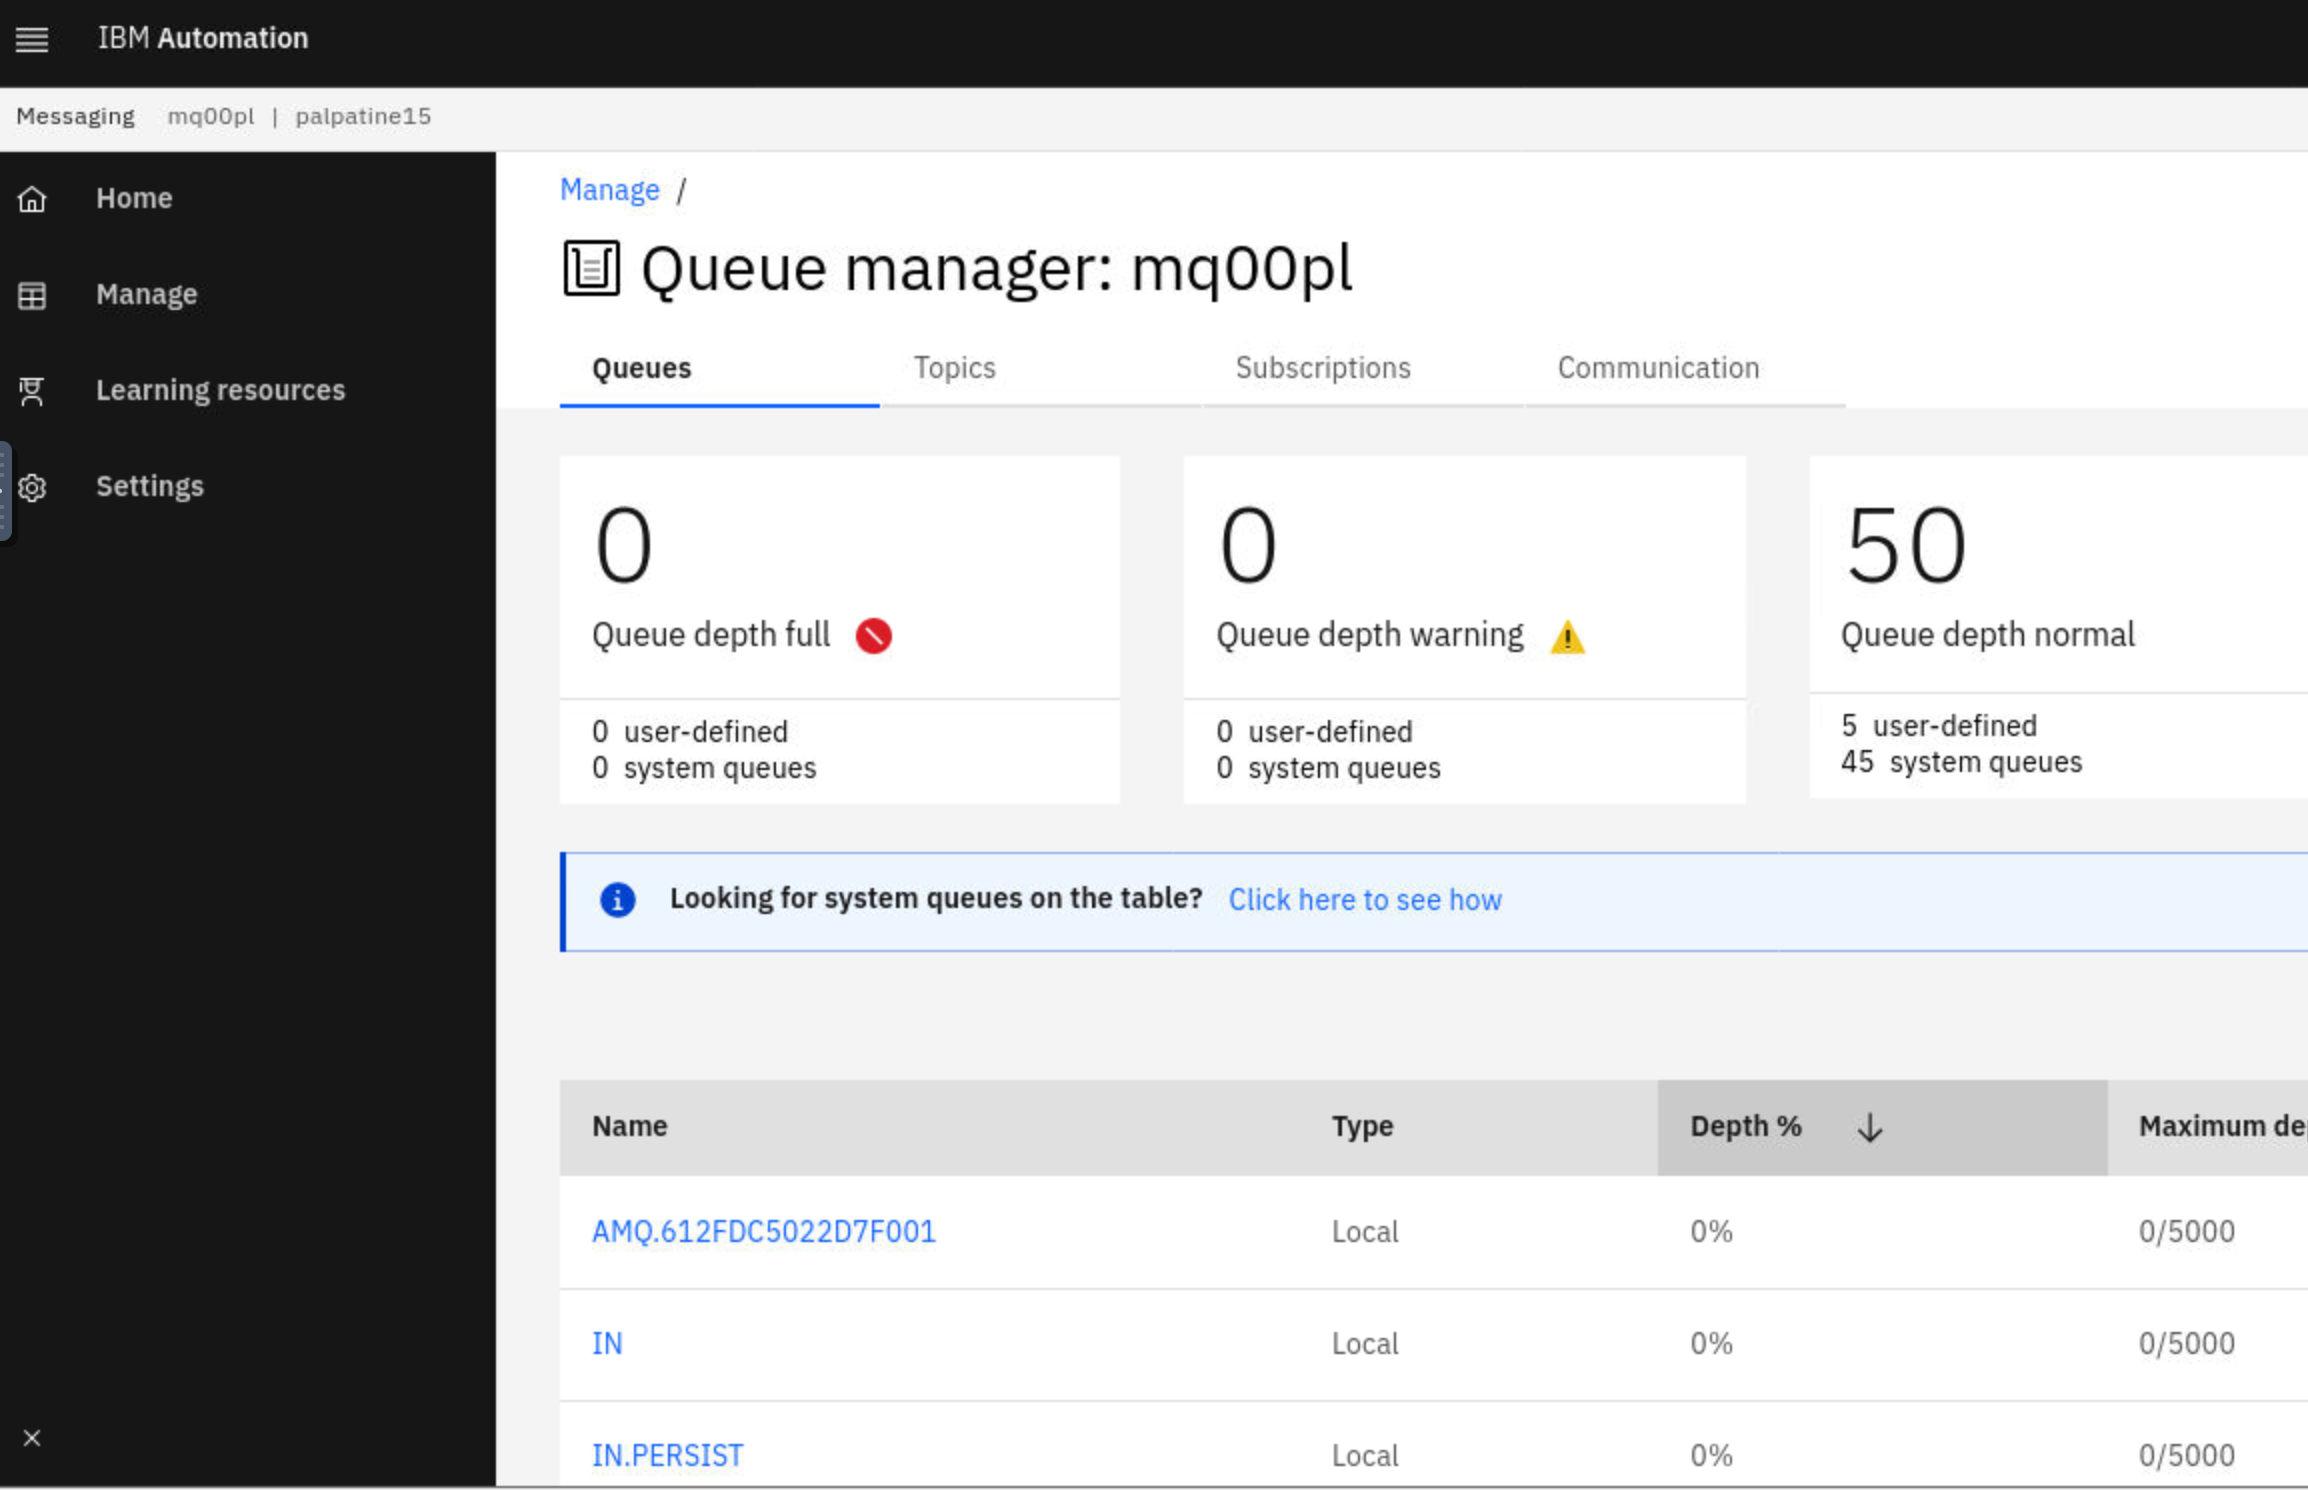
Verify that the queues are what you had defined your github repo. The number of queues will of course be more because the SYSTEM. queues are counted, but by default do not display in the console.
Step 5: Test it out by committing a change
-
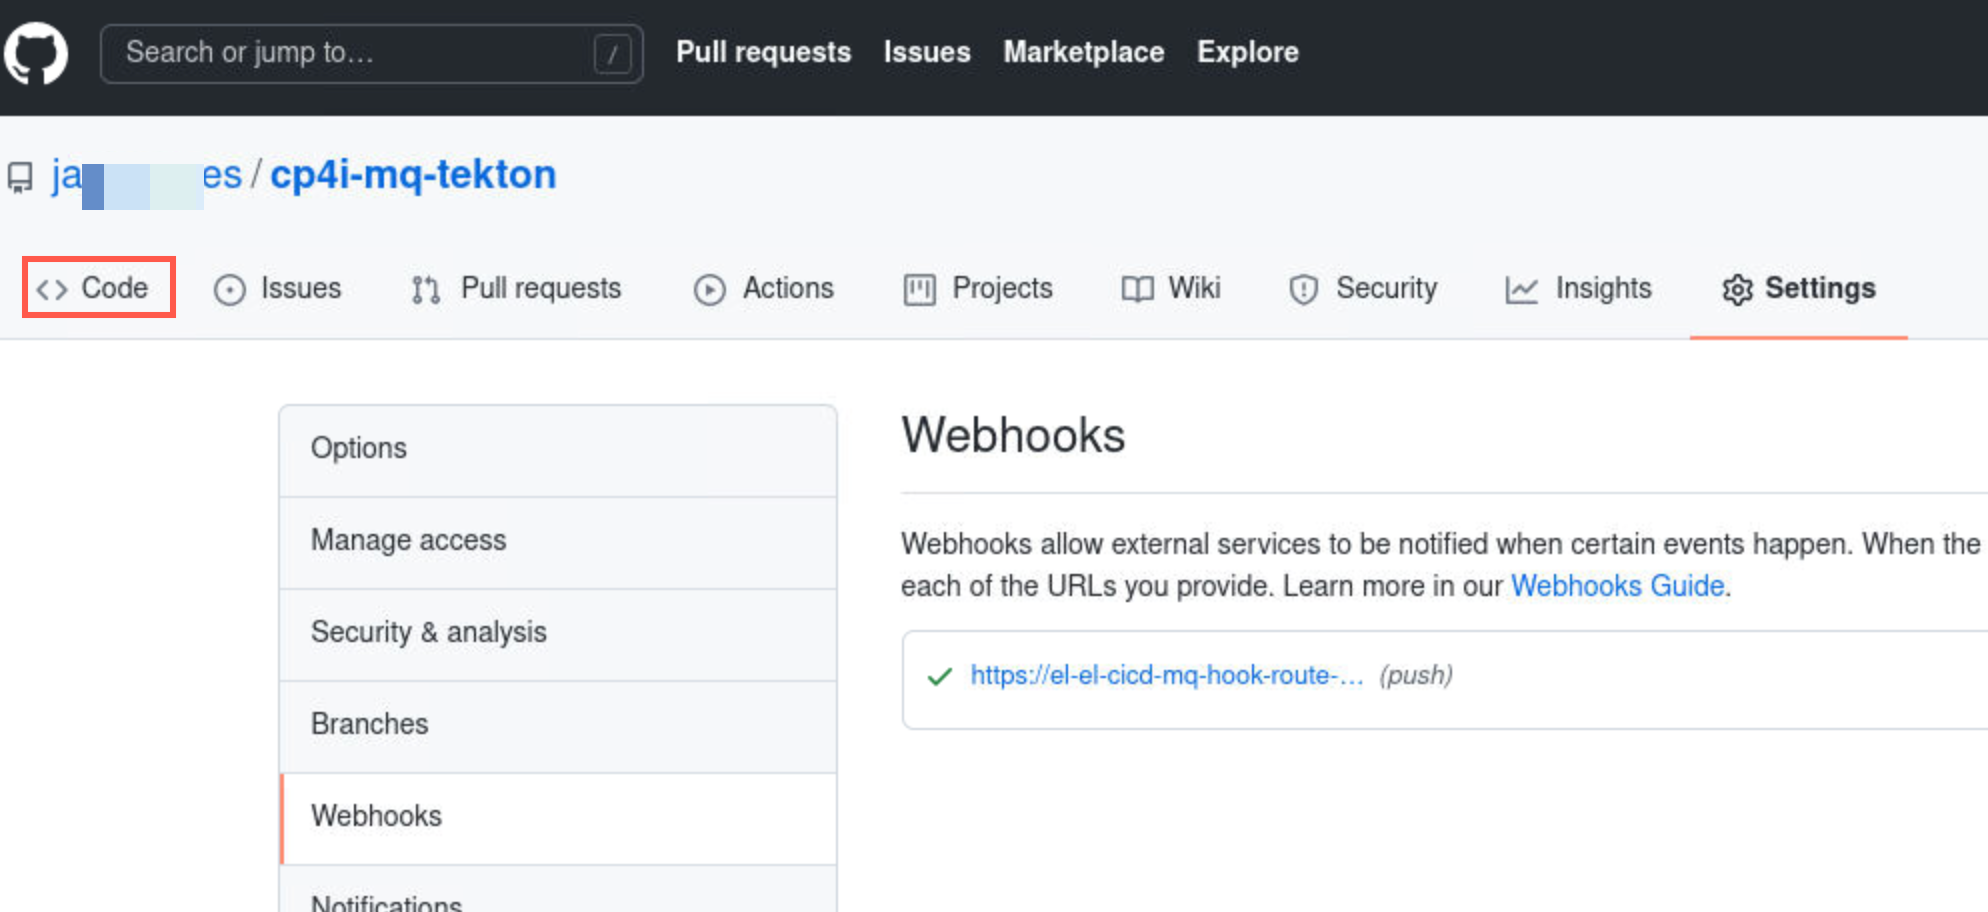
Return to your github repo and click Code.
-
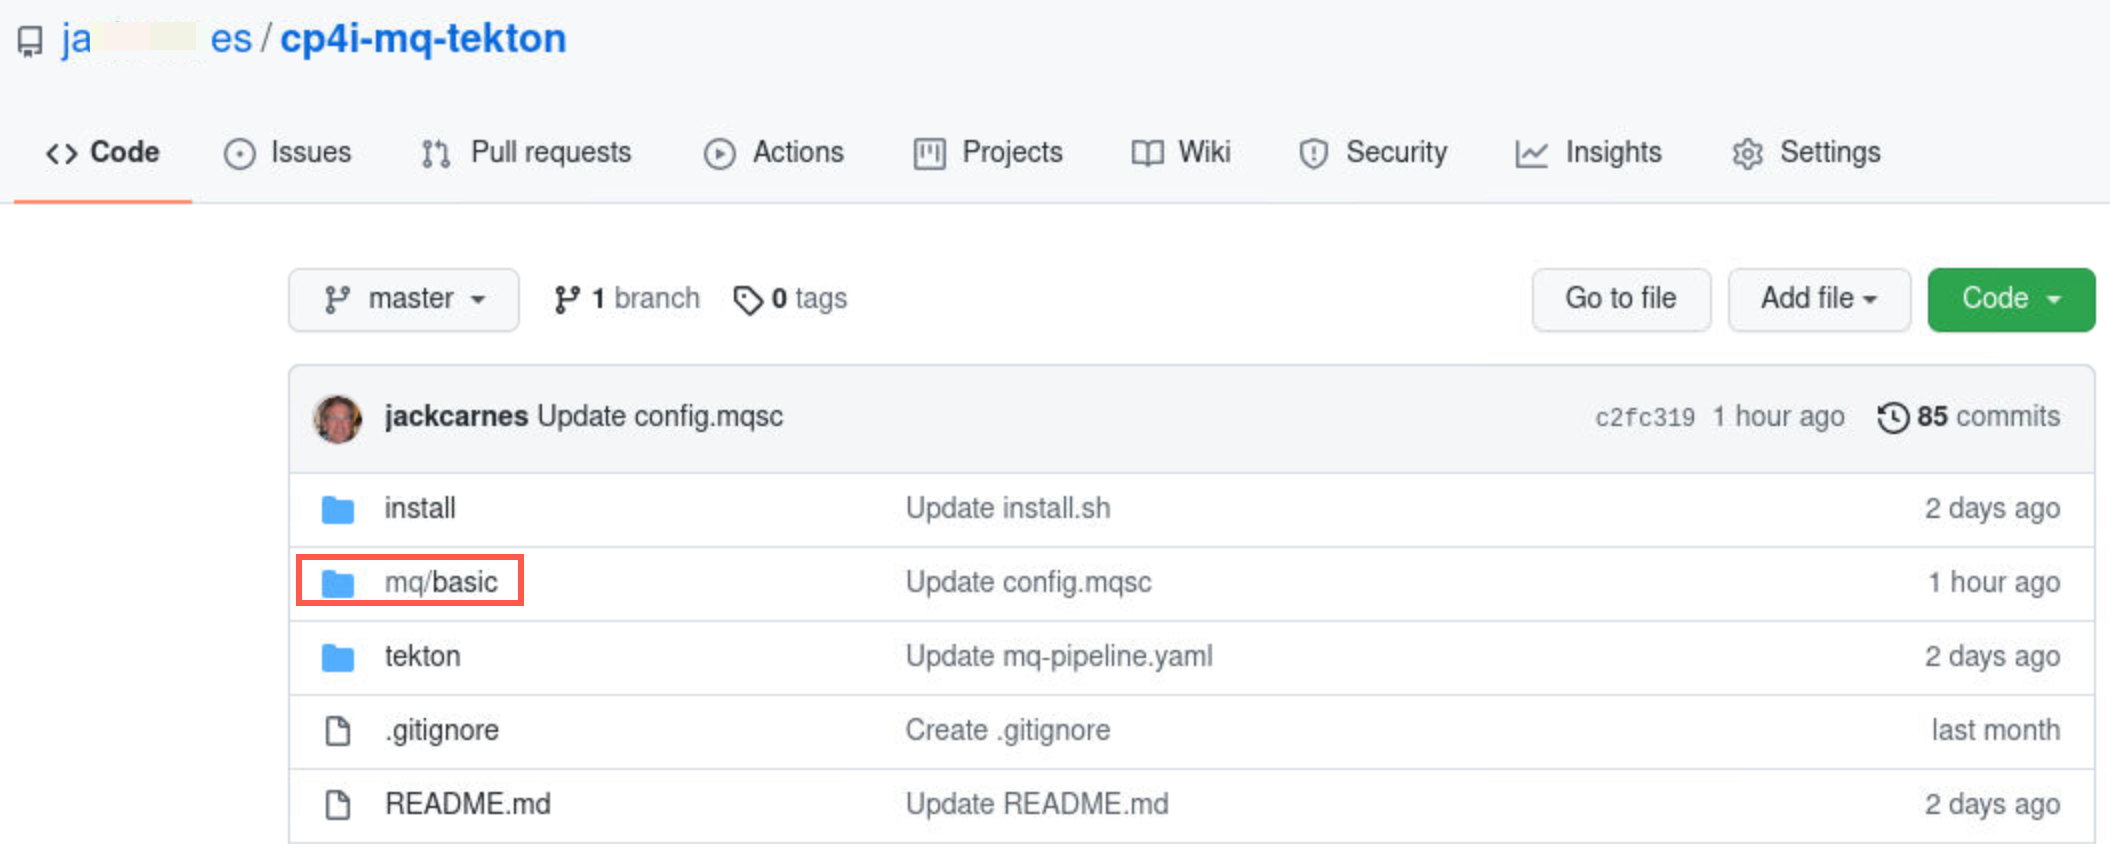
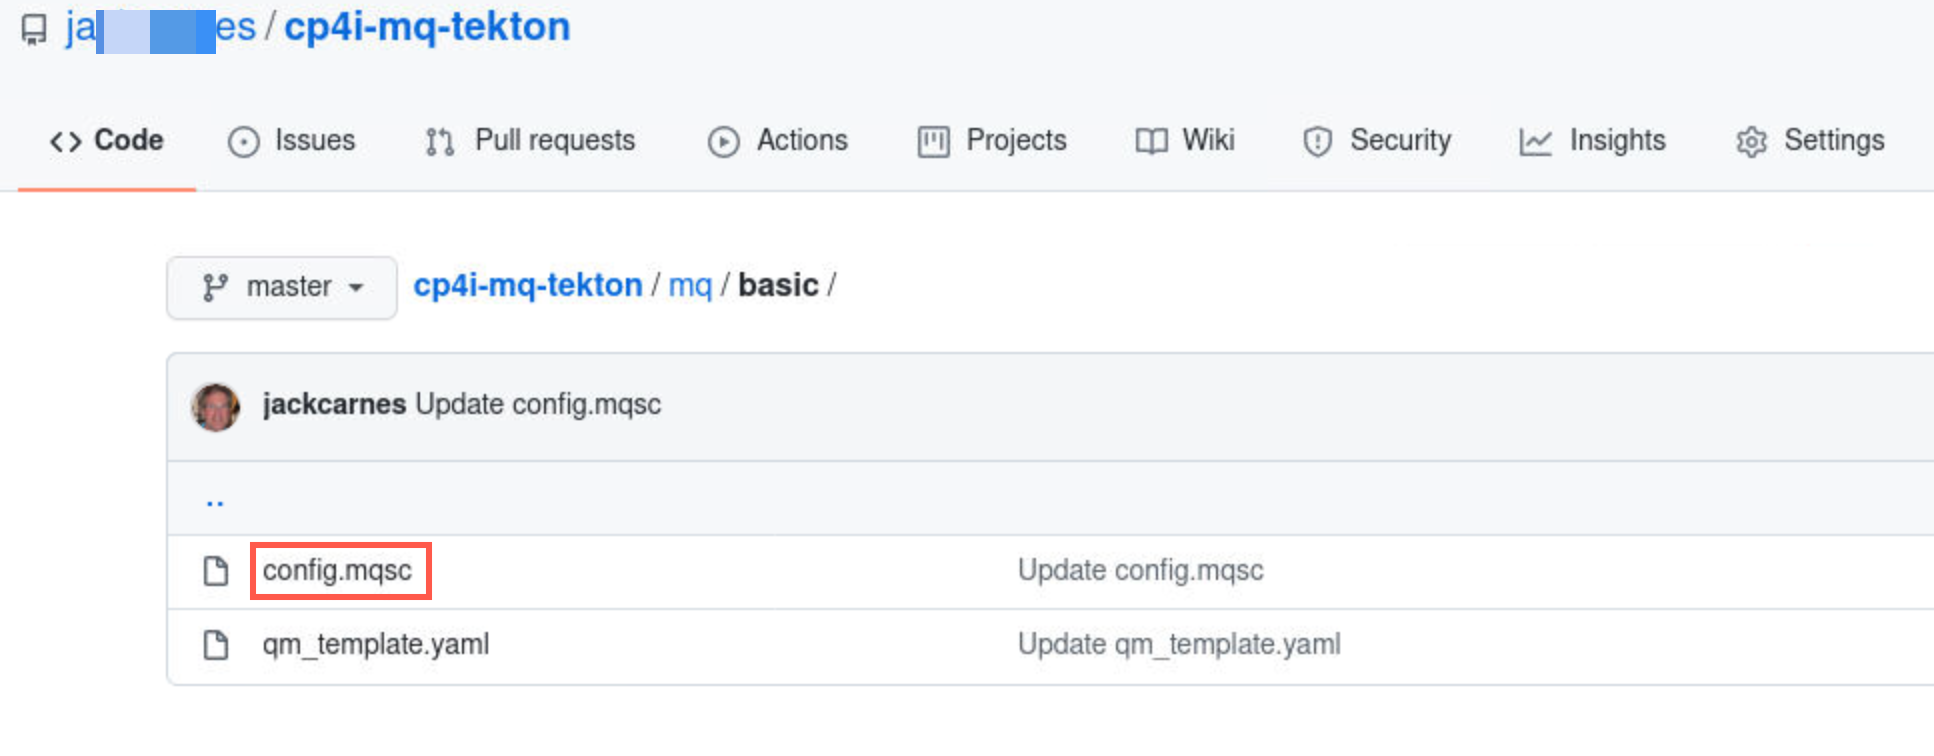
Click mq/basic.
-
Click the file config.mqsc to open the file.
-
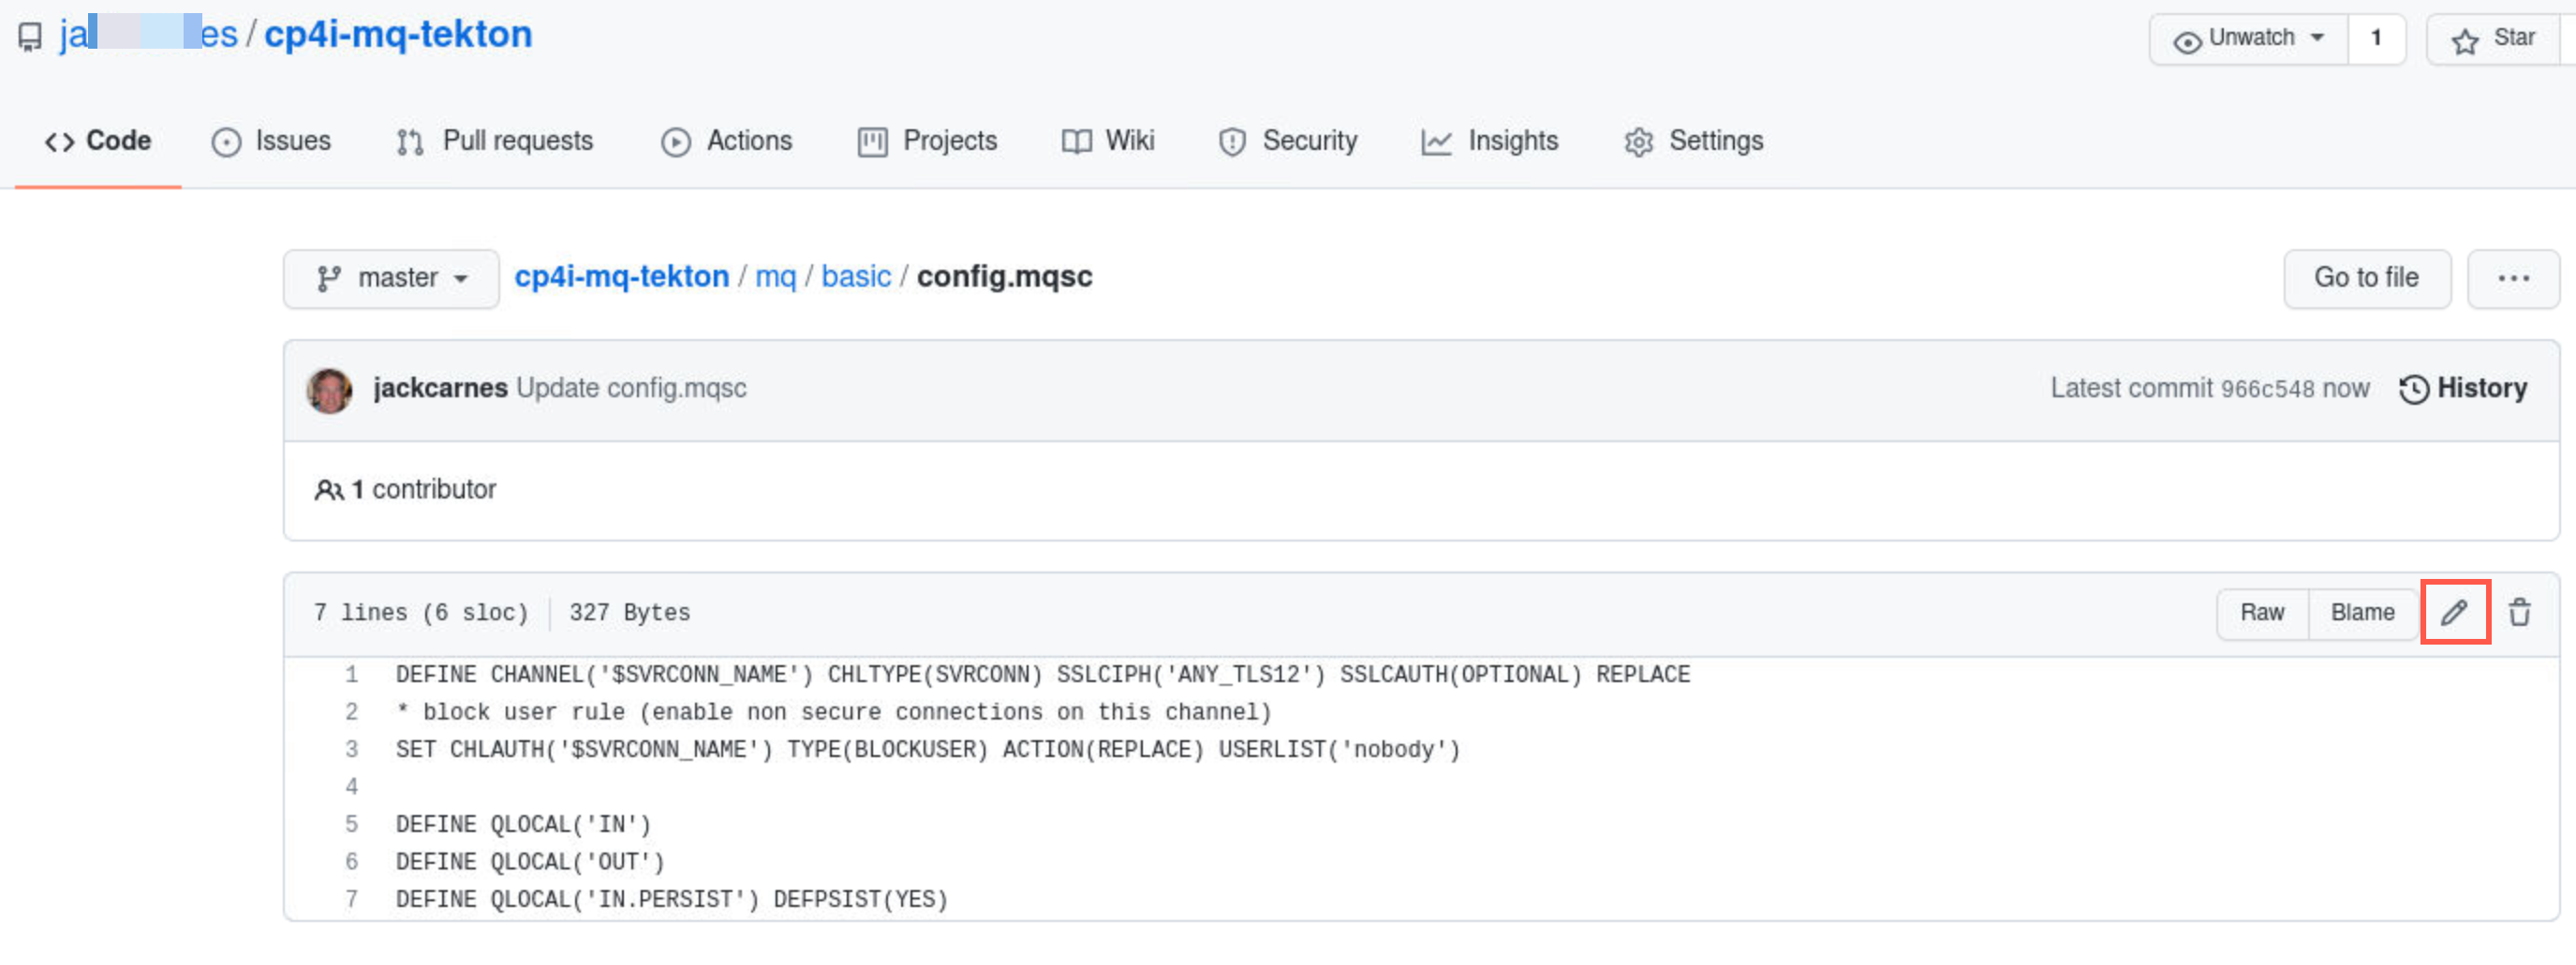
Click the pencil icon to edit the file.
-
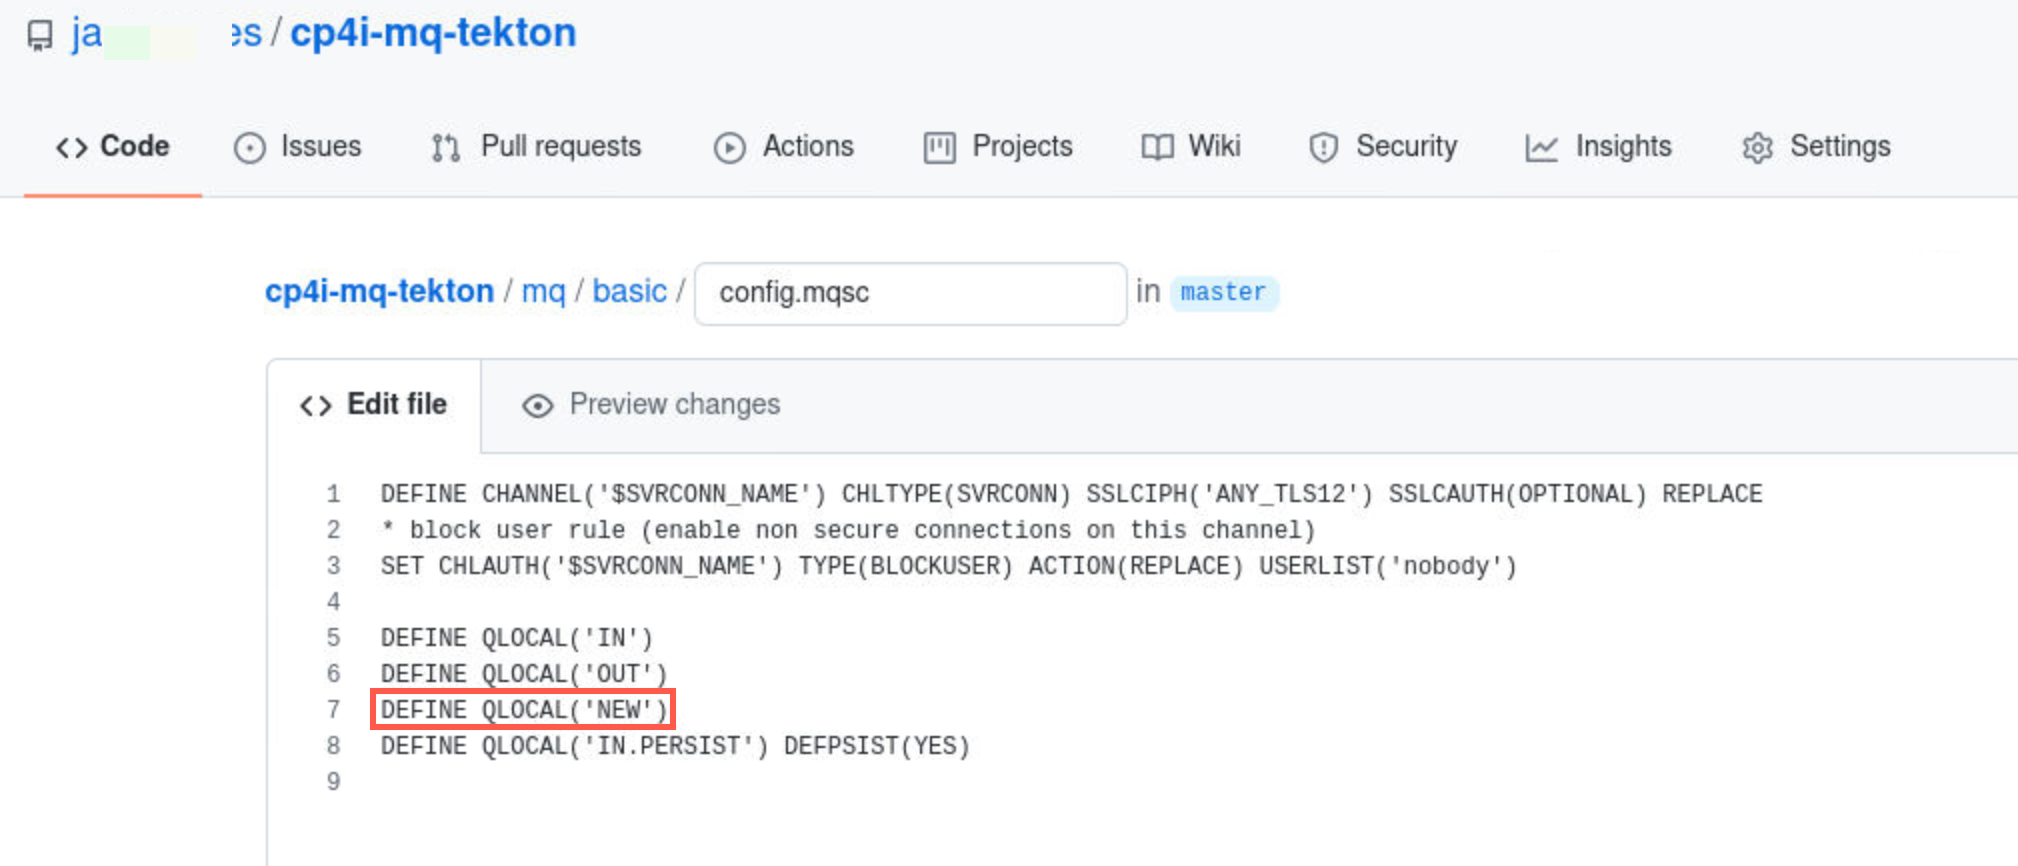
Make a simple change like adding a local queue called NEW.
-
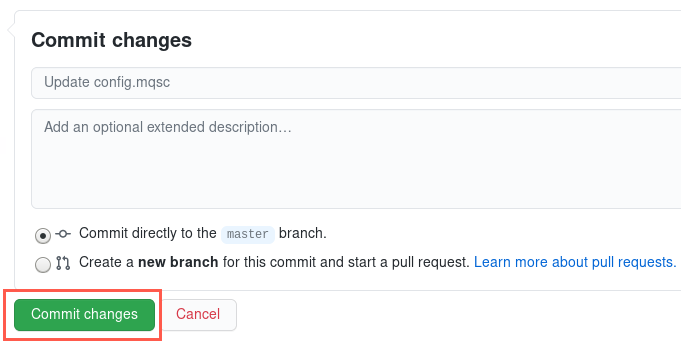
Scroll down and click Commit changes.
-
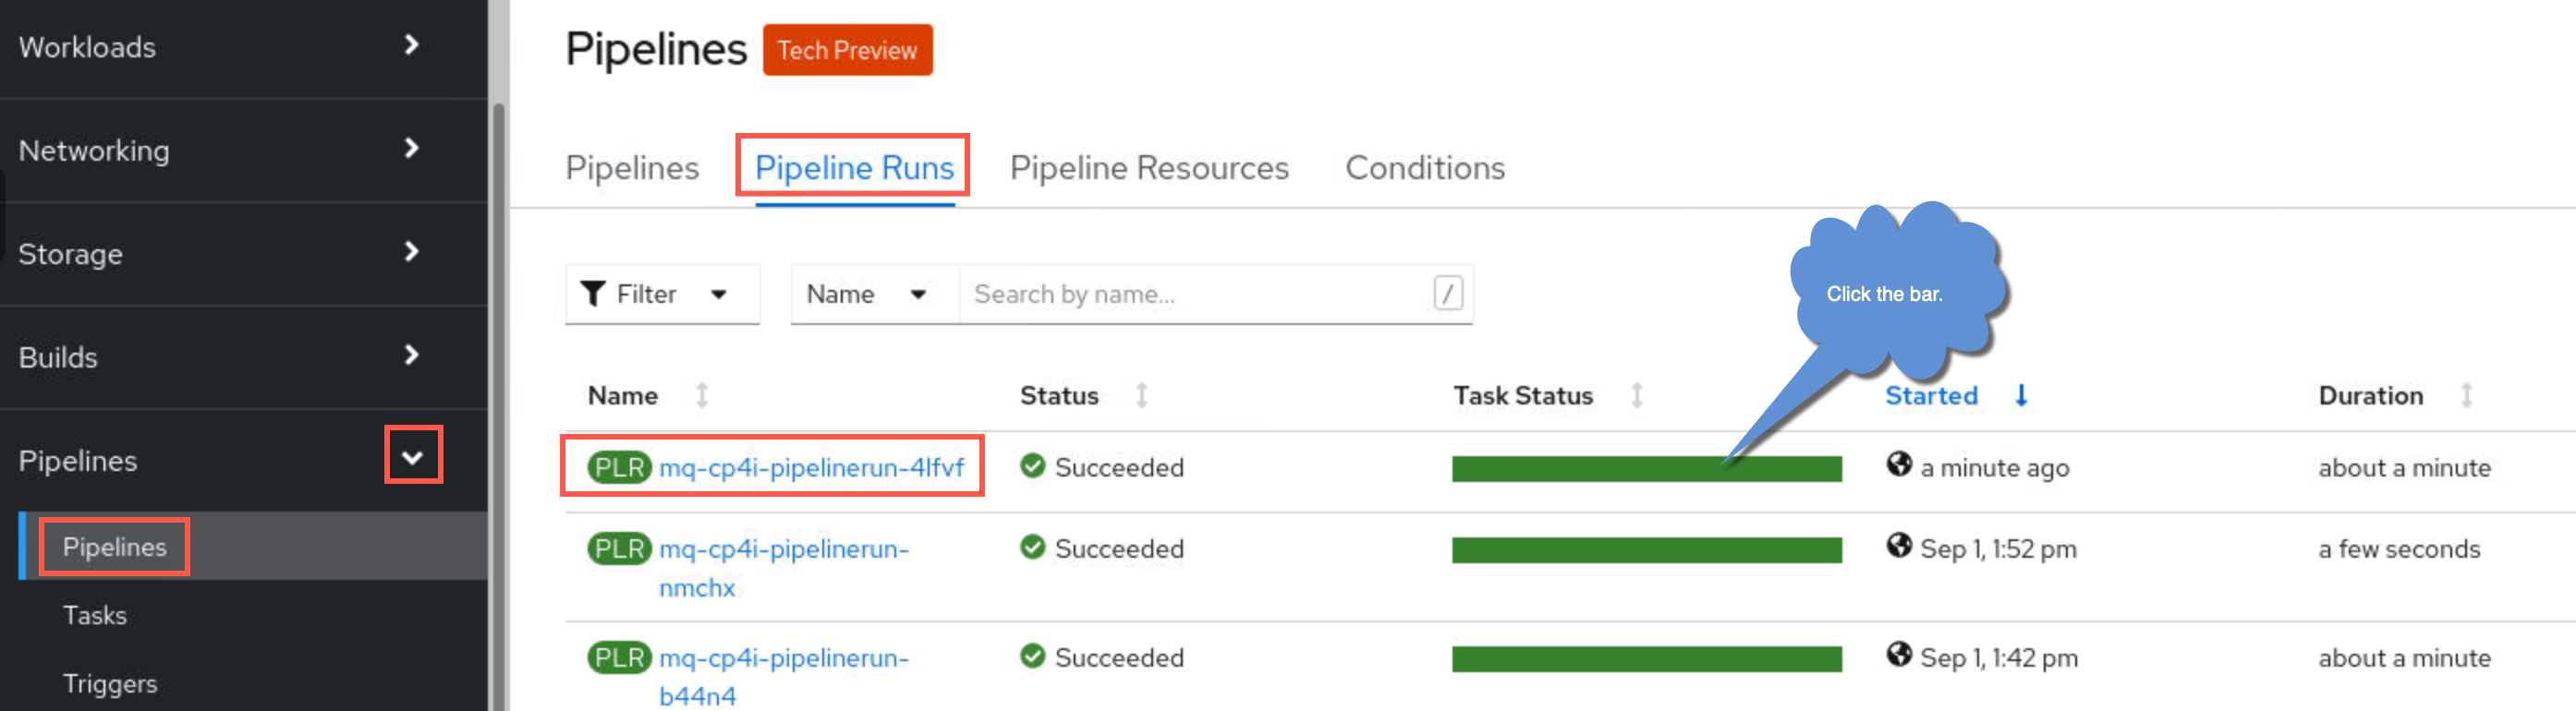
Return to the OpenShift console. Scroll down to Pipelines. Make sure you are in your workspace. Click the drop-down and select Pipeline Runs. Click the hyperlink for the latest run.
-
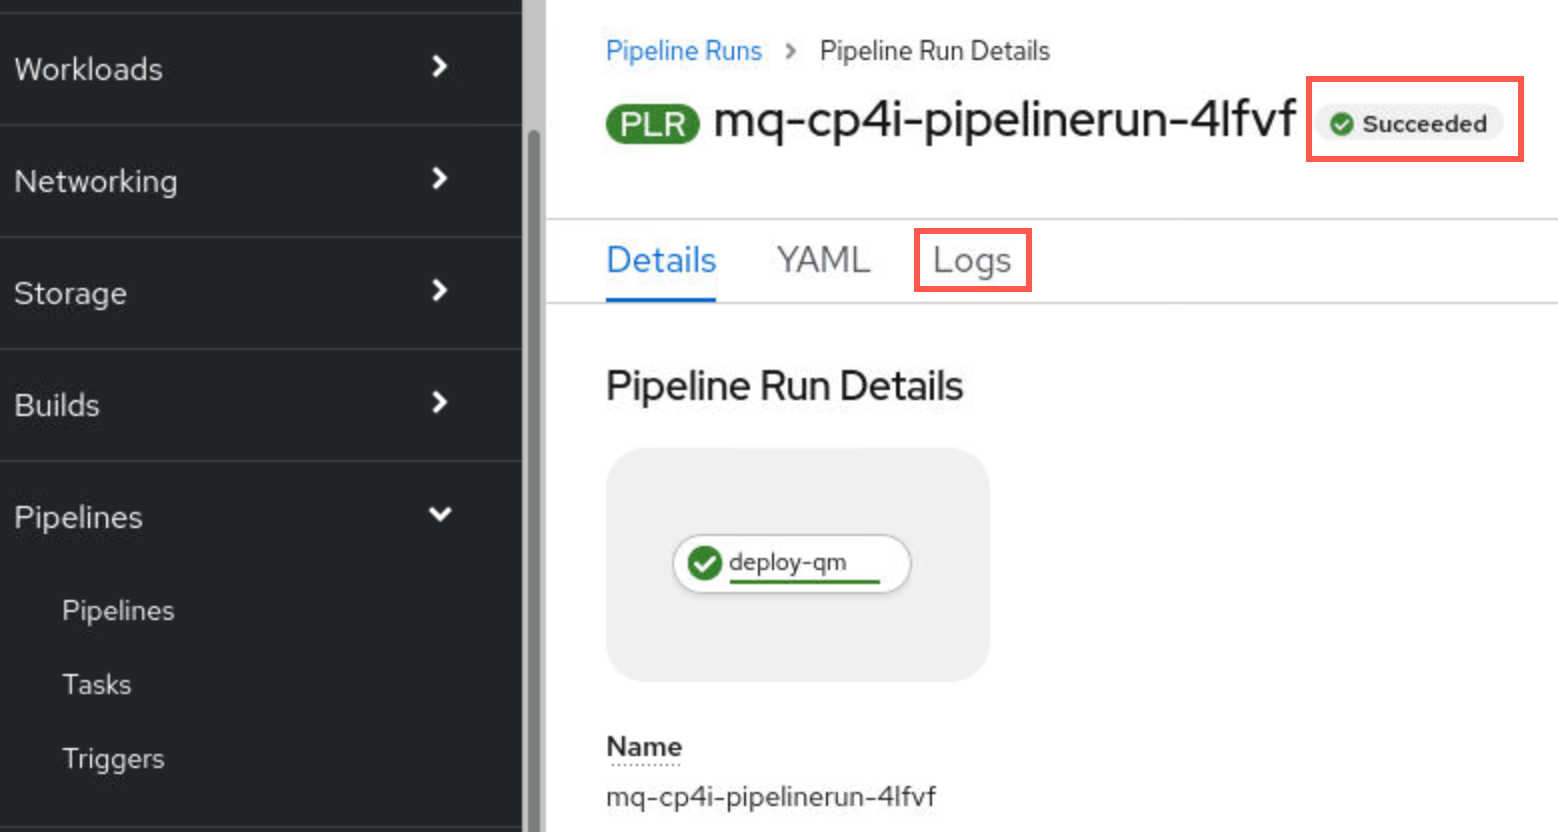
You can see that task deploy-qm was successful. It will be high-lighted with a green check mark. If it fails it will be highlighted red. Click Logs.
-
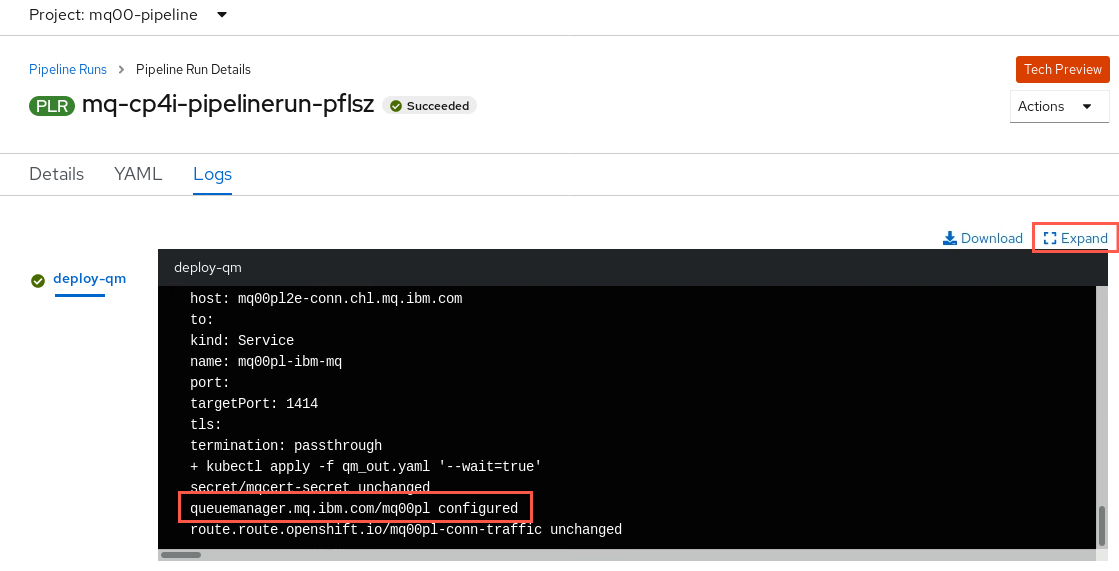
The display will be at the end of the log where you can see the deployment of the queue manager. You can also click Expand to make the log display full screen.
-
Since the queue manager has been changed, the pipeline ran the deploy-qm task again which will restart the pods. When this happens the Platform Navigator will show your queue manager in a deploying status. Your console will also disappear. When the the status shows Ready, you may need to refresh the MQ Console page and login again.
-
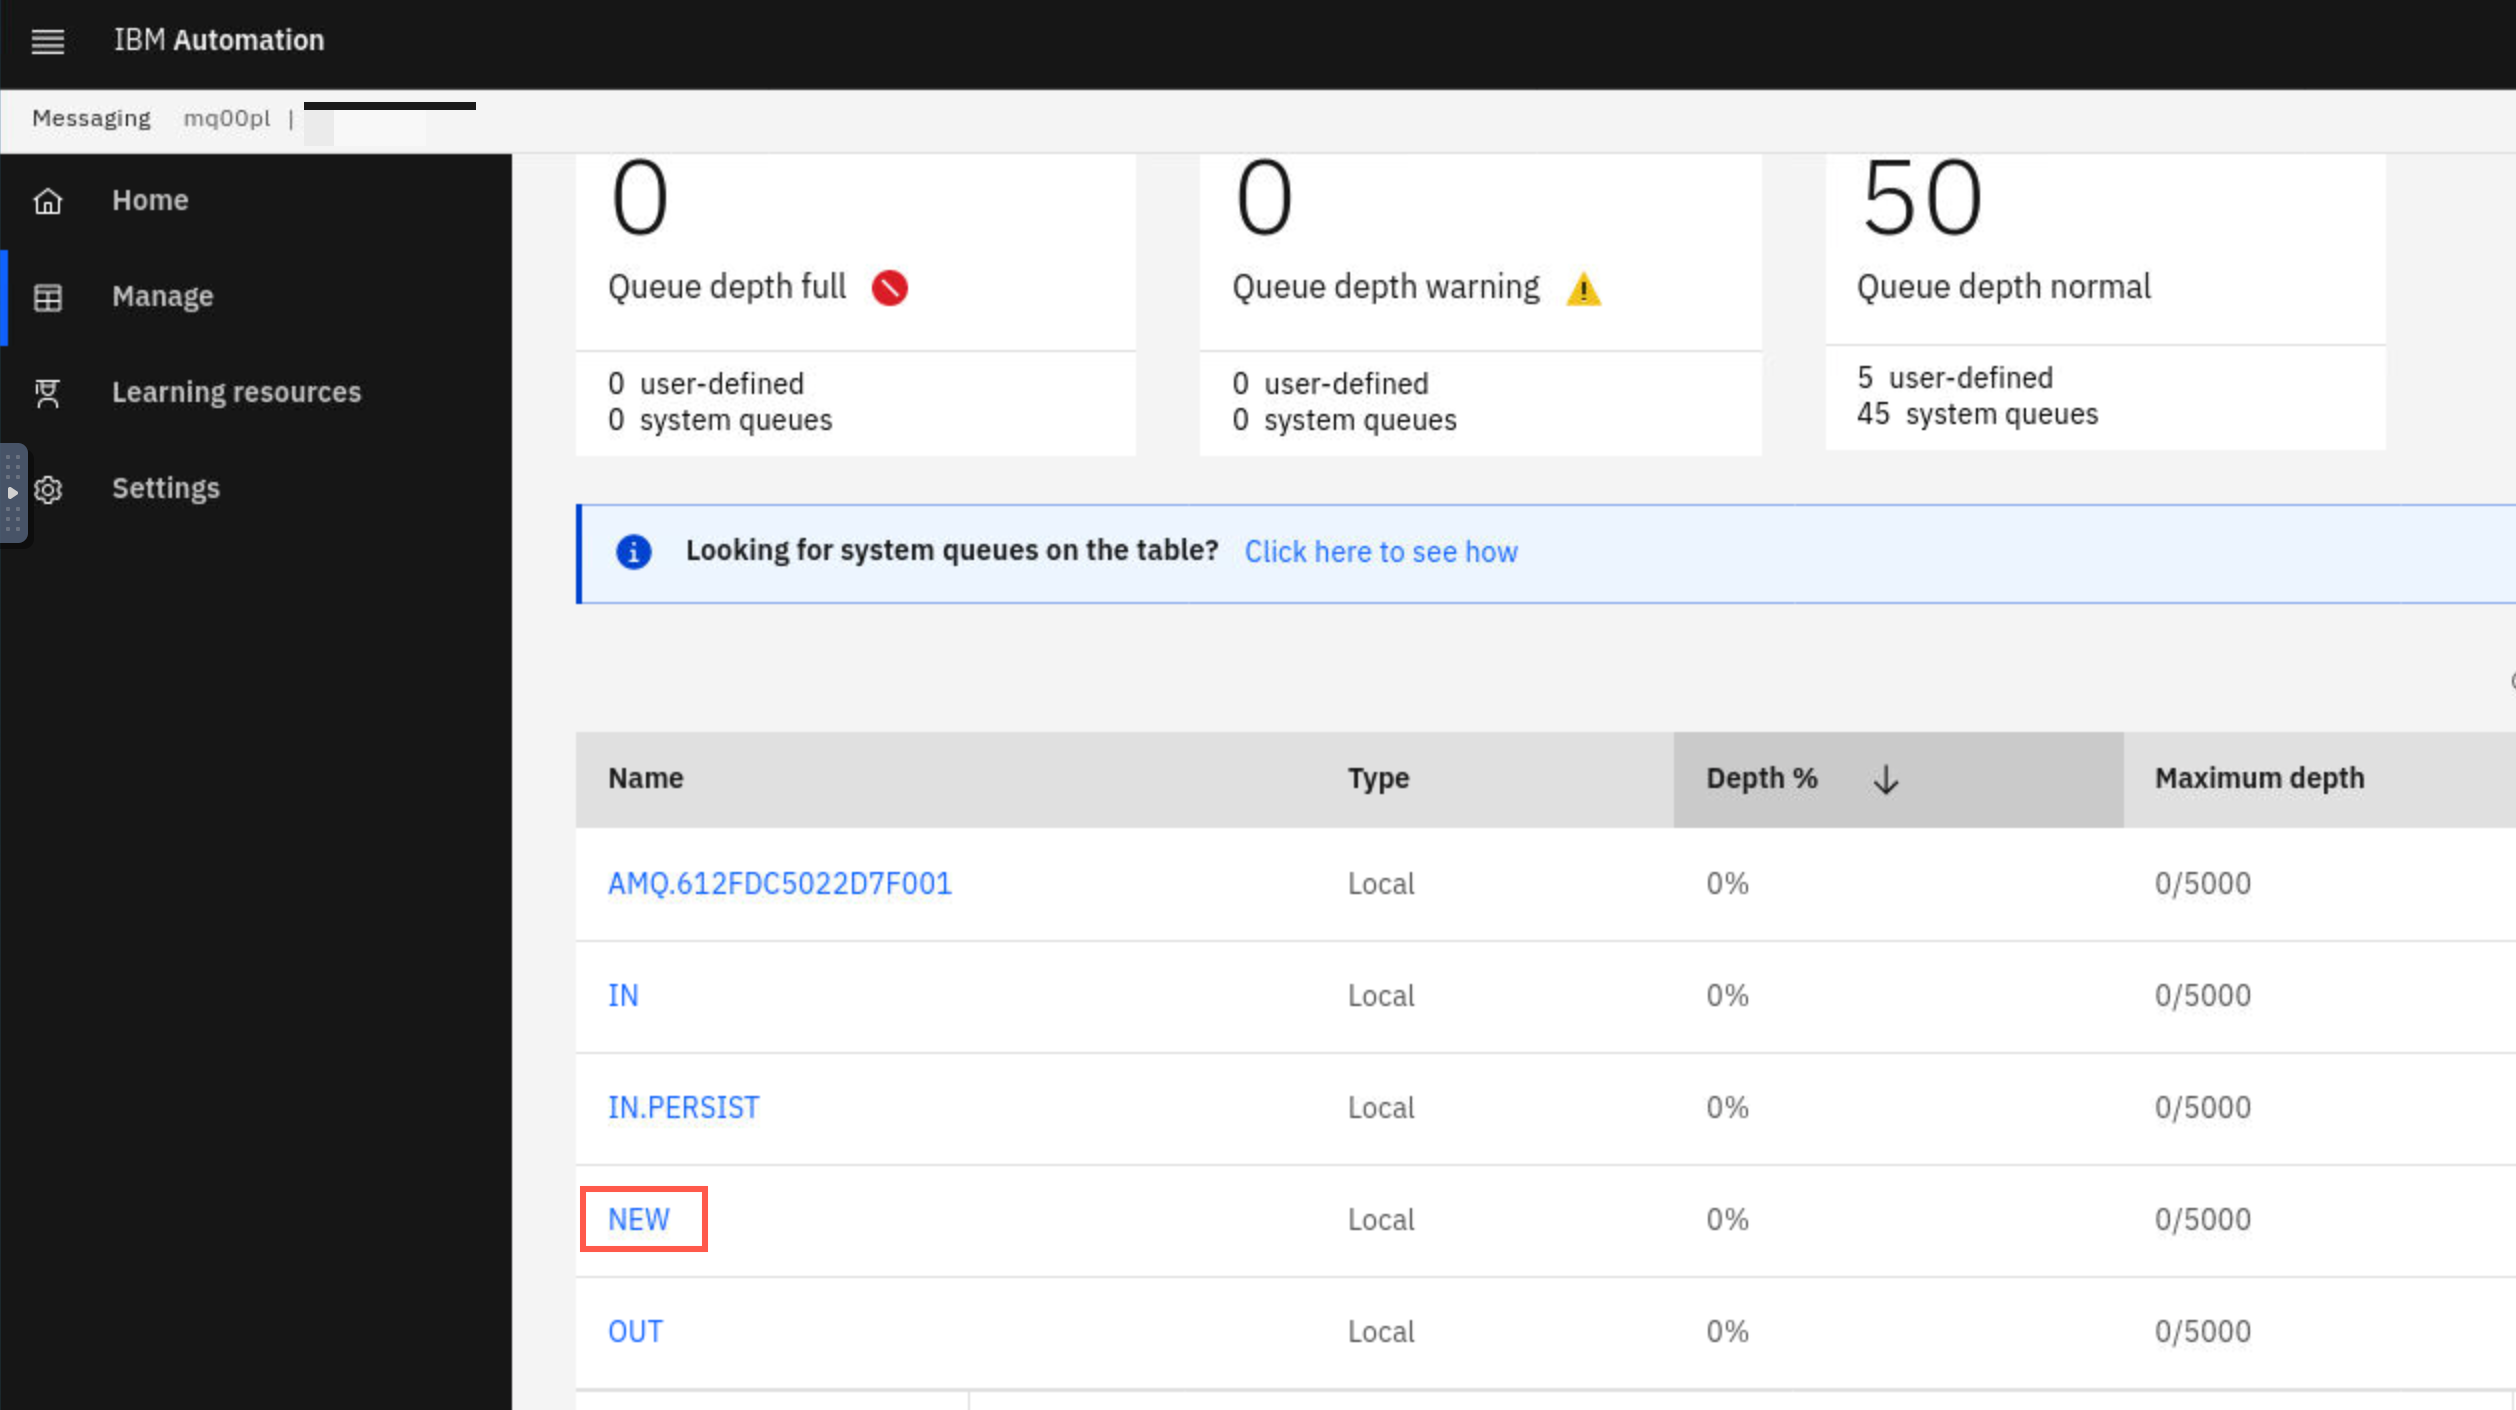
Once you are in the console you can verify your changes are there. Check that your changes are included. For example, if you added the local queue NEW make sure it now appears in the local queues display.
-
Experiment by making more changes and observe your webhook deliveries and pipeline runs.
Congratulations
You have completed this lab MQ Tekton Pipelines.
Cleanup
-
Return to the Platform Navigator. Under Runtimes find your instance, click the elipsis on the right and select Delete.
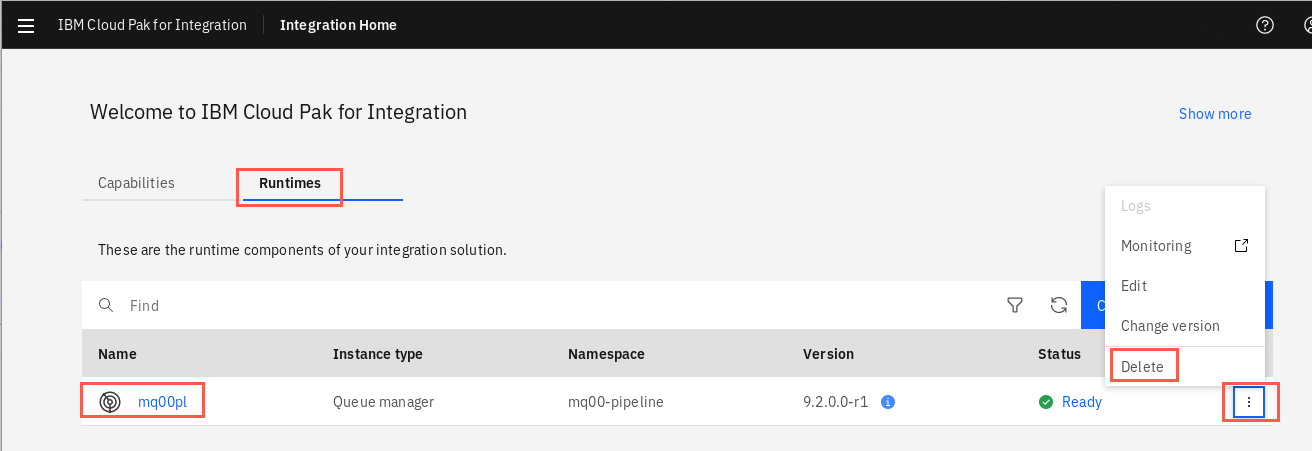
-
Type the queue manager name and click Delete to confirm deletion.
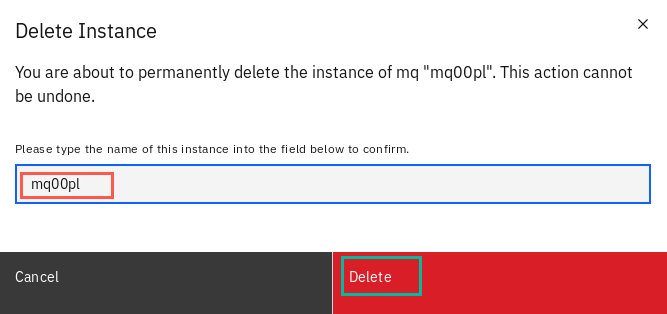
This will delete the queue manager pods and all related artifacts. This will help reduce load on the cluster as you continue the rest the labs. This queue manager will not be needed again.
- In a terminal window, navigate to /home/student/icp4ipl/cp4i-mq-tekton-master/install. Enter the following command to delete all resources in the mq-pipeline.
./cleanup.sh
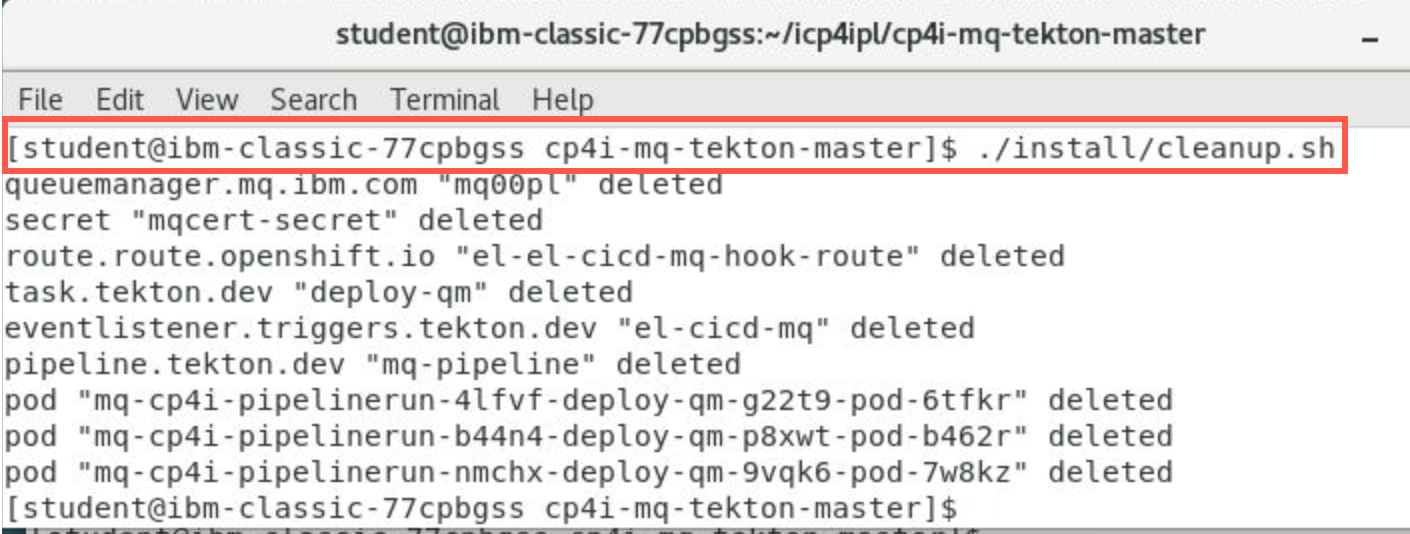
Troubleshoot pipeline issue
-
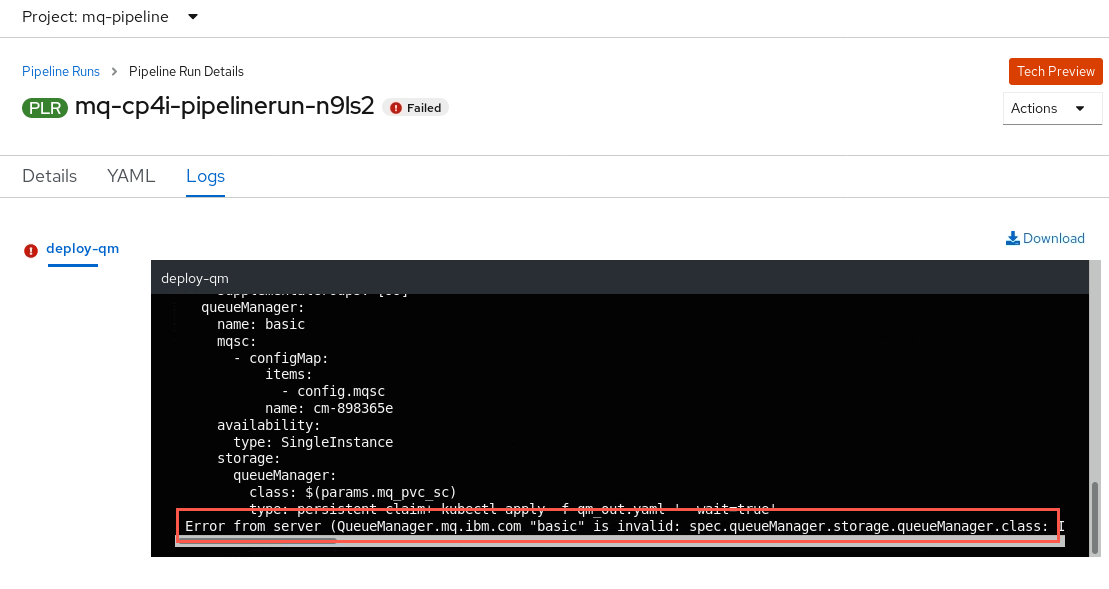
Notice that pipeline run failed again. Time for a little OpenShift troubleshooting. Click the hyperlink for the pipeline run, then click Logs to review any messages.
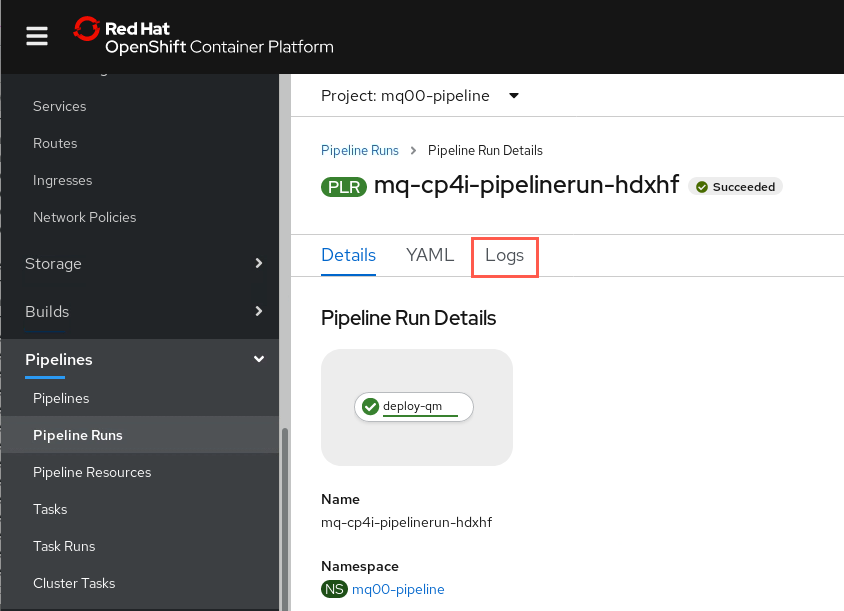
-
The end of the log is displayed and you see the error. Scroll to the right and you will see more details - storage class does not exist. What storage class does it need?
-
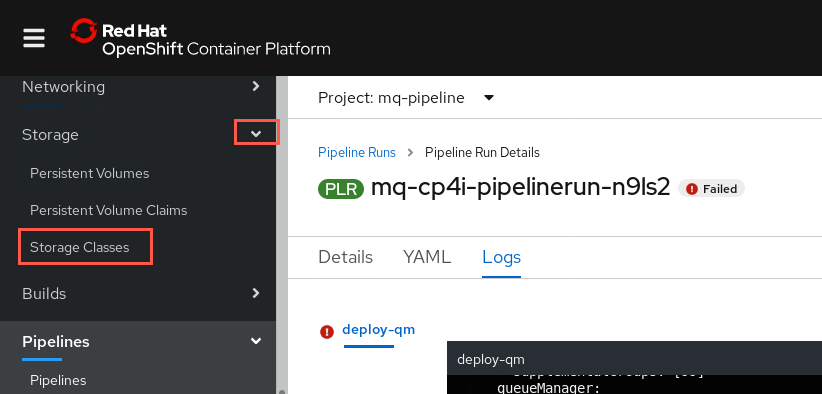
Find the storage classes available by clicking the drop-down for Storage in the menu on left and select Storage Classes.
-
The list of available storage classes is displayed. But which storage class is required?