Overview
In this lab exercise you will complete the necessary steps to configure the Event Streams MQ bridge.
In order to complete this lab you must have completed the Introduction to Event Streams lab exercise that is a part of this Proof of Technology.
Step 1: Create the ESQM Queue Manager
In order to test the Event Streams MQ Bridge you will need to create an MQ queue manager. Perform the following steps to create a new queue manager named ESQM and configure it for use with Event Streams.
-
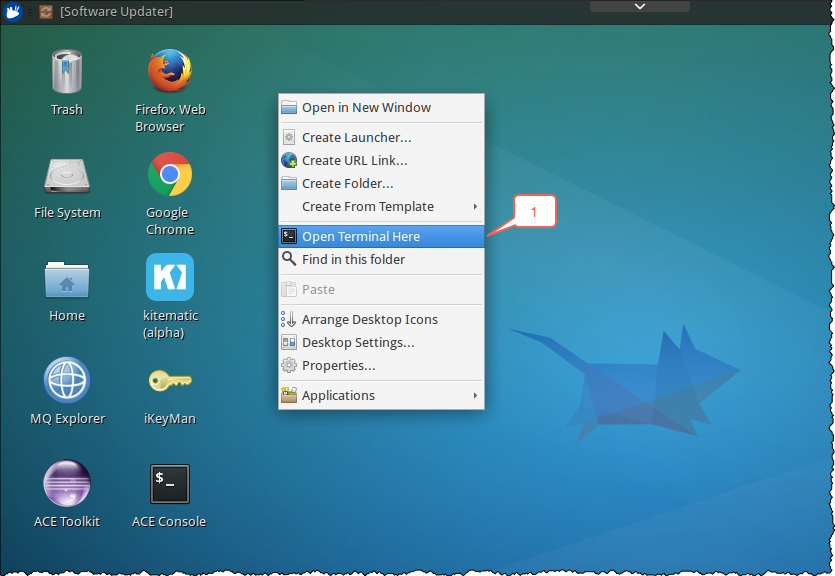
Open a new command prompt by right-clicking in the desktop area and then clicking on the Open Terminal Here menu option.
-
Enter the following commands to create and start the ESQM queue manager.
 crtmqm -p 1420 -u SYSTEM.DEAD.LETTER.QUEUE ESQM
 strmqm ESQM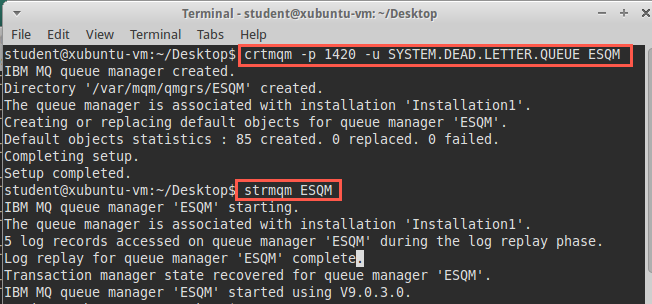
-
Since MQ security is not a topic for this lab, perform the following steps to enable the MQ Bridge to connect to the ESQM queue manager without having to configure additional security settings.
-
Enter the following command to launch the runmqsc command shell.
runmqsc ESQM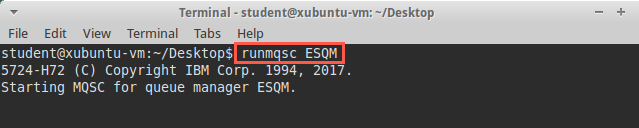
-
Enter the following commands to reconfigure the ESQM queue manager and its configuration objects.
 alter qmgr chlauth(DISABLED)
 alter channel(SYSTEM.DEF.SVRCONN) CHLTYPE(SVRCONN) MCAUSER('mqm')
 alter authinfo(SYSTEM.DEFAULT.AUTHINFO.IDPWOS) AUTHTYPE(IDPWOS) CHCKCLNT(OPTIONAL)
 refresh security type(CONNAUTH)
 end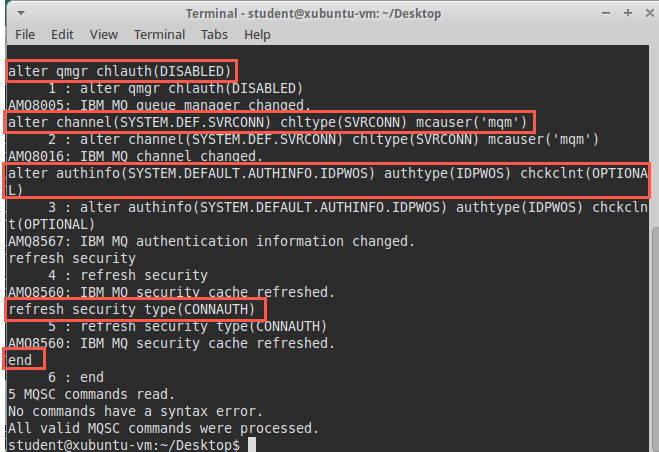
-
Step 2: Create a Secure Gateway Instance
The Ubuntu image that hosts the ESQM queue manager is configured behind a firewall. In order to enable communications between the queue manager and the Event Streams MQ Bridge a Secure Gateway instance will need to be configured.
IBM Secure Gateway is an IBM Cloud service that enables customers to establish a secure tunnel between the specific resources that you want to connect. By using Secure Gateway it won’t be necessary to open any of the network ports on the Ubuntu image. Communication between the Secure Gateway server and client components is always initiated at the client end. All communication with Secure Gateway may be configured to provide TLS encryption and mutual authentication, if desired. Simple access management controls are available to allow or deny access to Secure Gateway clients on a per resource basis.
Perform the following steps to create and configure a Secure Gateway instance.
-
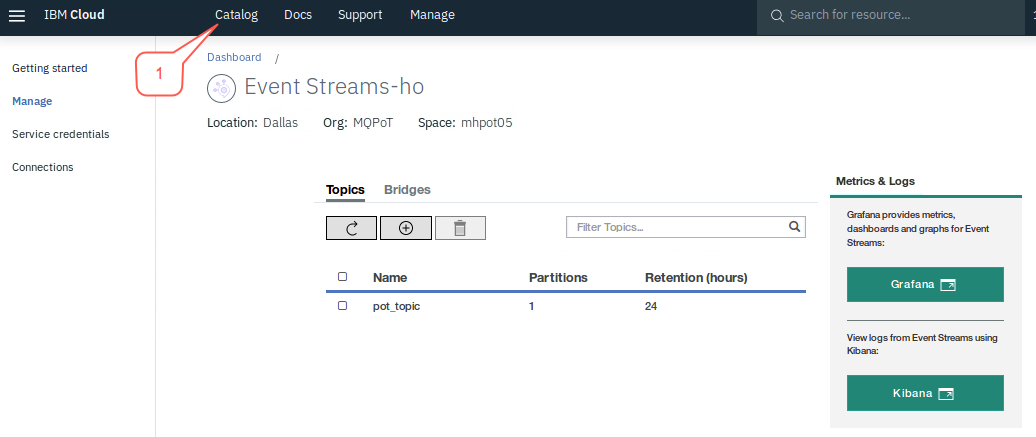
Click on the Catalog link in the IBM Cloud web page.
-
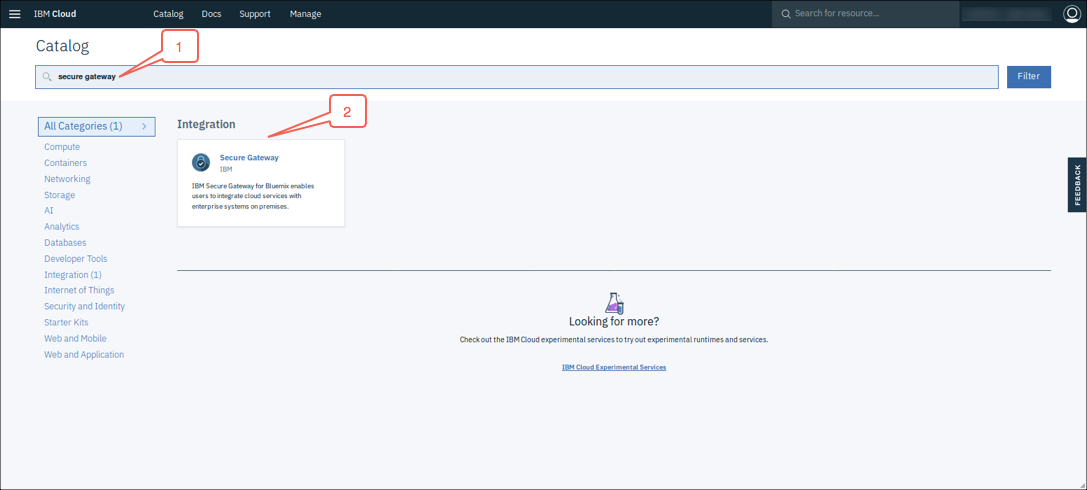
Enter Secure Gateway in the search box and then click on the Secure Gateway tile that is displayed.
-
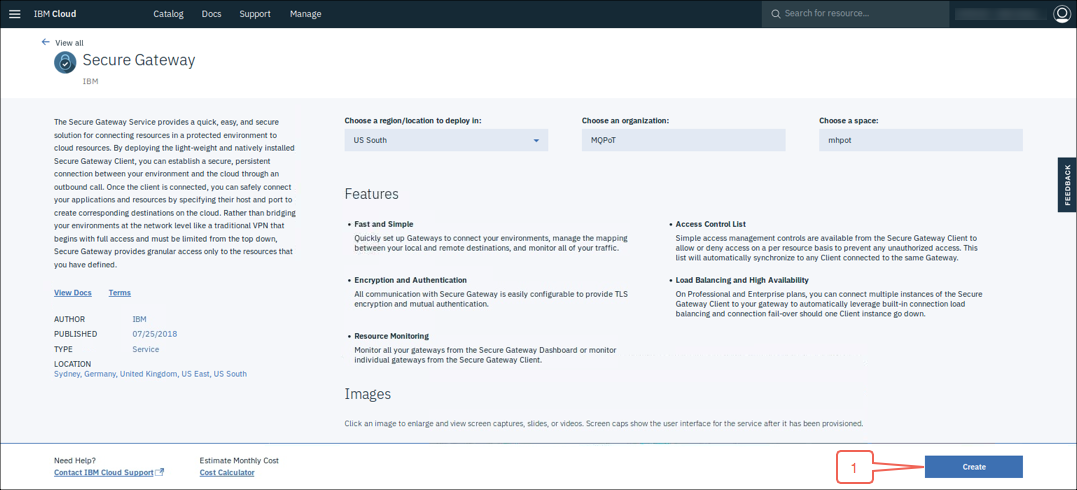
Accept the default settings and then click on the Create button to create an instance of the Secure Gateway service.
-
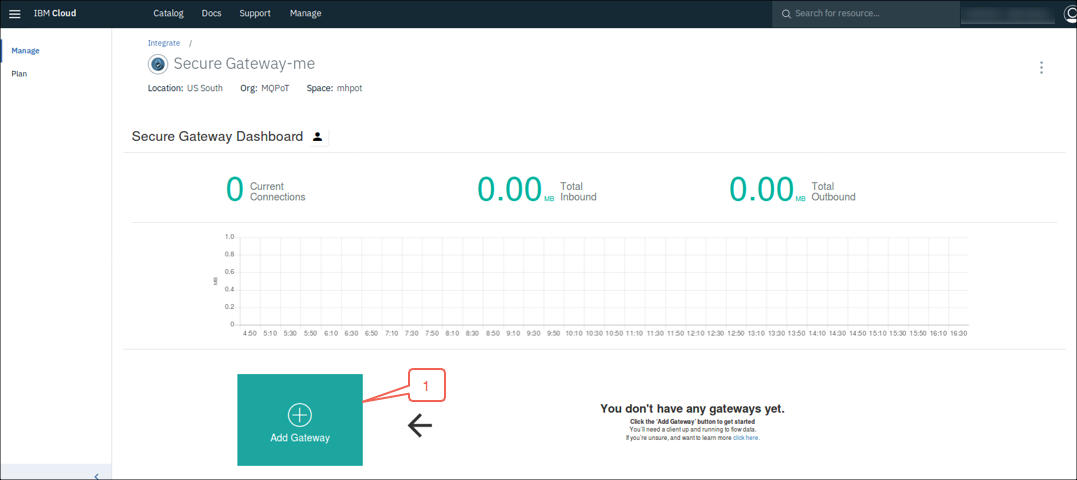
The Secure Gateway instance dashboard is displayed. At this point you have created an instance of the service, but you have not yet created a gateway. Click on the Add Gateway button to create a new gateway.
-
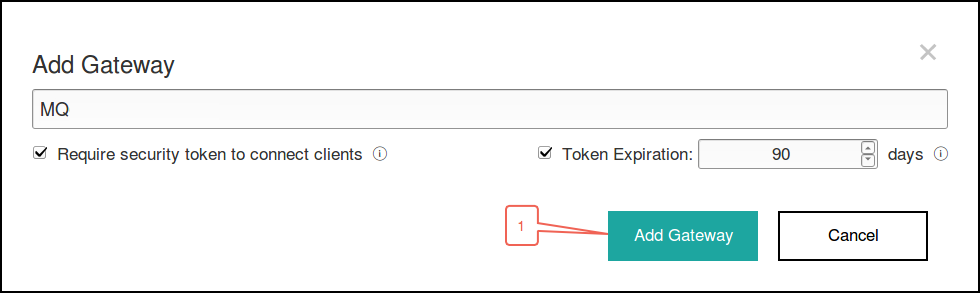
Provide an appropriate name for the gateway. It is not necessary to change the default values of the remaining properties for this lab exercise. Click on the Add Gateway button.
-
Now that the gateway has been configured on the IBM Cloud you will need to configure a client for the Ubuntu image to use. Scroll down, if necessary, to locate and click on the Connect Client button.
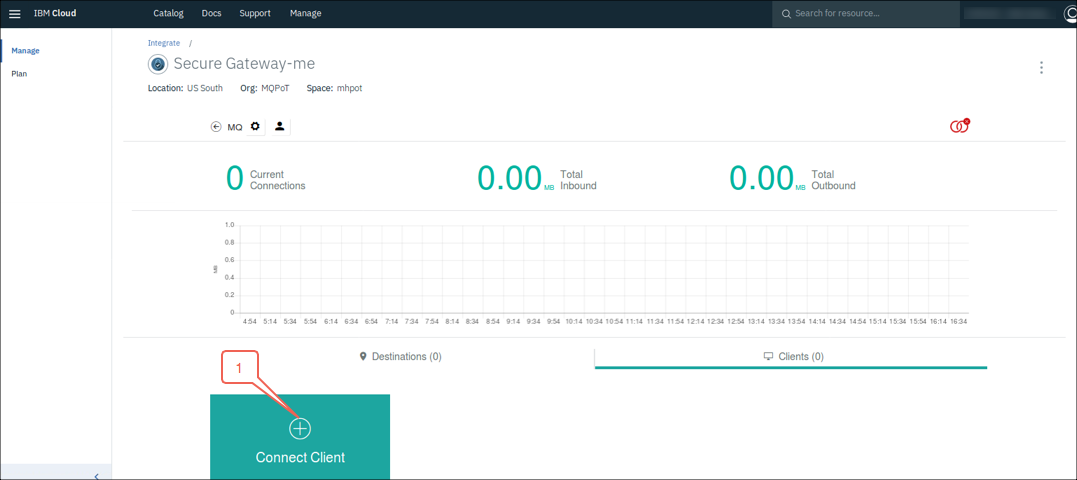
- There are three different options that you may use to connect to the Secure Gateway server:
- Install the Secure Gateway client on a supported operating system.
- Download and run the Secure Gateway client in a Docker container.
- Configure an IBM DataPower Gateway to serve as the Secure Gateway client.
For this lab exercise you will install the Secure Gateway client application.
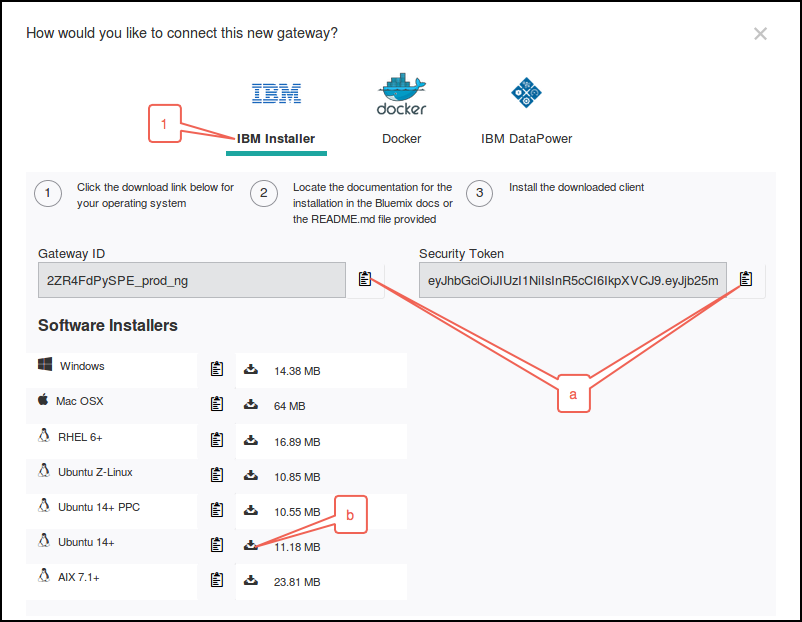
- Click on the IBM Installer and then complete the following steps:
- Copy the Gateway ID and Security Token values and save them for later use.
-
Click on the download link for the Ubuntu 14+ installer.
-
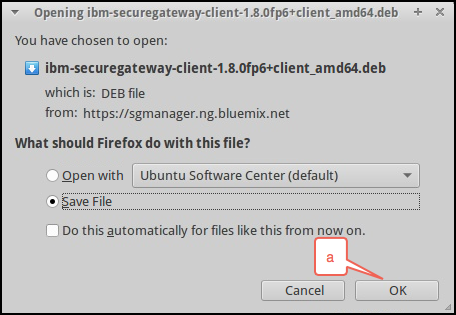
Click on the OK button to save the file.
-
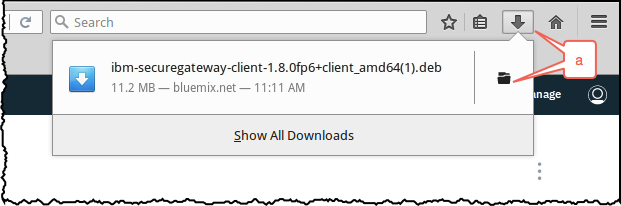
Click on the downloads icon in the web browser and then click on the folder icon to open the folder where the client package was downloaded.
-
Note the path and the proper name of the downloaded file for the Secure Gateway client package.
Note:
Since the name of the downloaded file may be different from what is illustrated ensure that you use the actual name of the file when running the command provided.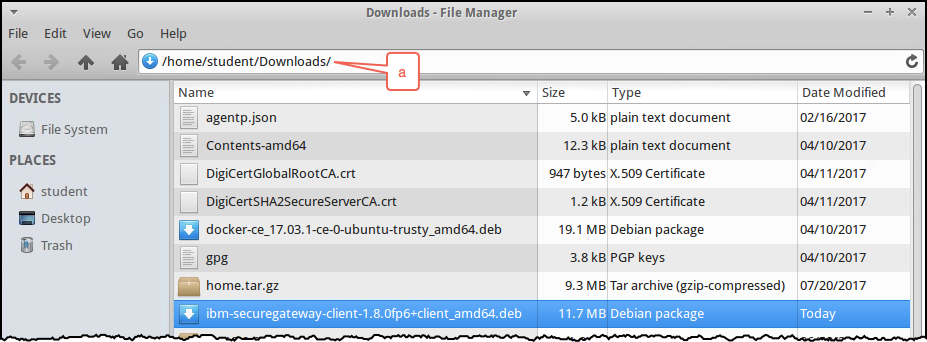
-
Switch to the command prompt window and launch the installer by entering the following commands:
 cd /home/student/Downloads
 sudo dpkg -i ibm-securegateway-client-1.8.0fp6+client_amd64.deb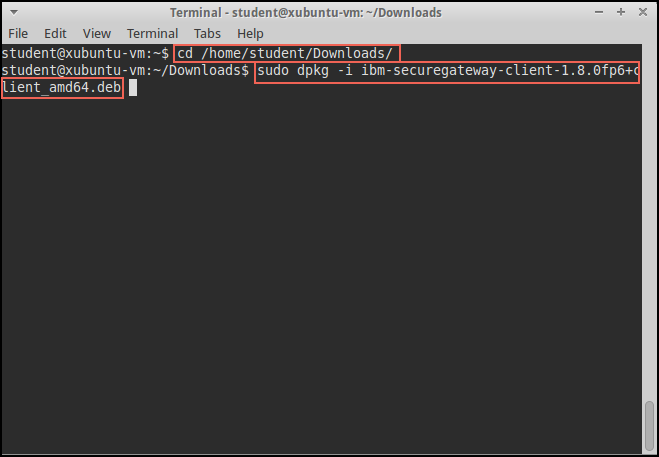
-
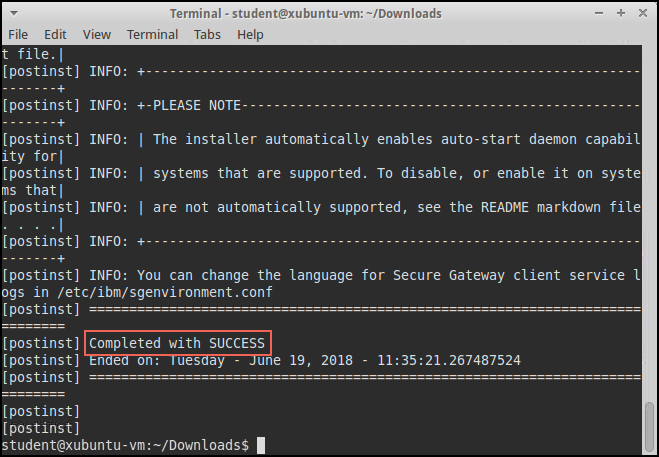
The installation process will uninstall any previously installed versions of the Secure Gateway client. Ensure that the installation process completes with SUCCESS status.
-
Use the following command to edit the Secure Gateway client configuration file.
sudo xdg-open /etc/ibm/sgenvironment.conf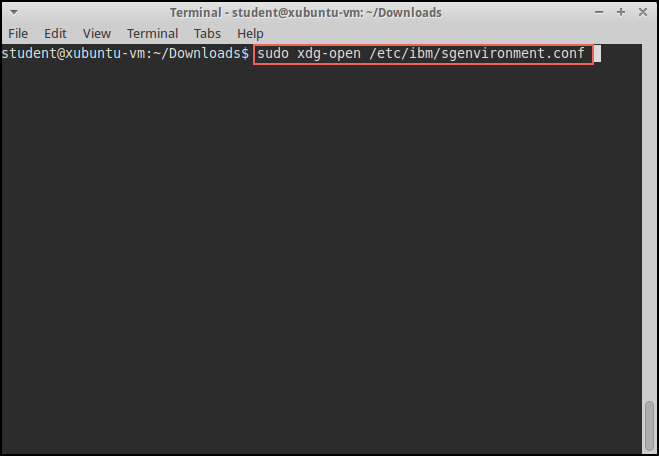
-
Find and replace the values for GATEWAY_ID and SECTOKEN with the values that you had saved when you had initially created the Secure Gateway client. Save your changes and then exit the editor when you have finished.
Note:
You may safely disregard the warning about using the root account.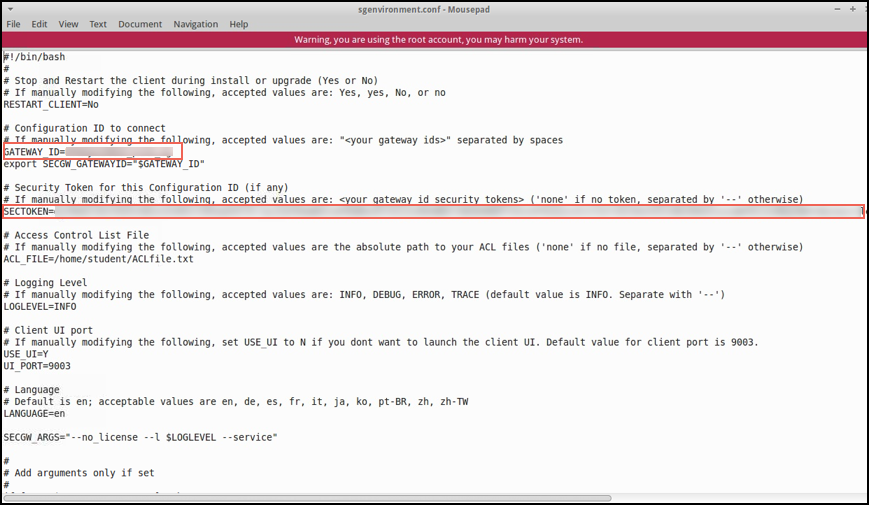
-
Next you must edit the access control list for the Secure Gateway client to allow Event Streams to connect to the listener port for th ESQM queue manager. Use the following command to edit the ACLfile.txt access control list file:
sudo xdg-open ~/ACLfile.txt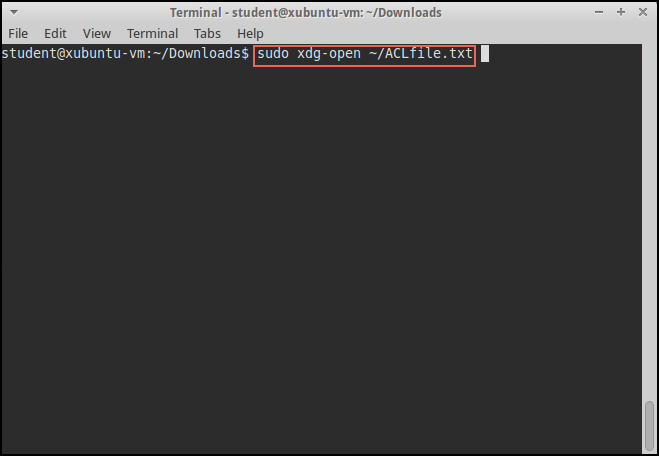
-
Add the following line to the end of the file. Save your change and then exit the editor when you have finished.
acl allow :1420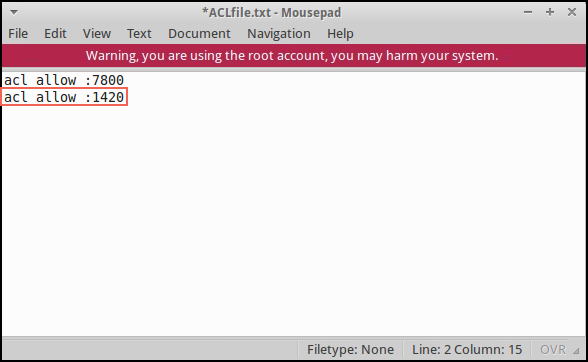
-
The lab image has been configured to use upstart to control daemon services such as the Secure Gateway client. Enter the following upstart command to start the Secure Gateway client:
sudo initctl start securegateway_client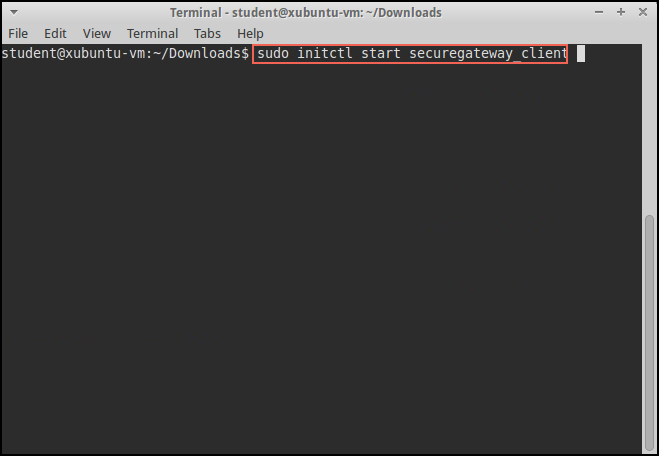
-
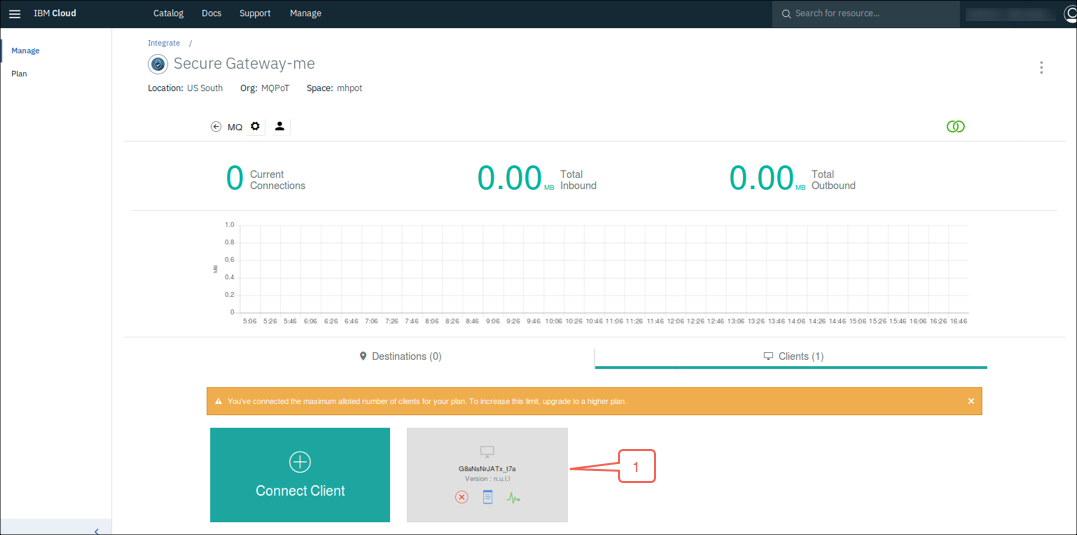
Return to the Secure Gateway page in the browser window. Clear any open dialog windows and then click on the Clients tab if it’s not already selected. You should see now see the Secure Gateway client connection has been started and successfully connected to the Secure Gateway server.
-
Now that the Secure Gateway client has been configured to connect to the Secure Gateway server, and has successfully connected, you need to configure a destination in the gateway to enable access to the ESQM listener port. Perform the following steps to create the destination.
-
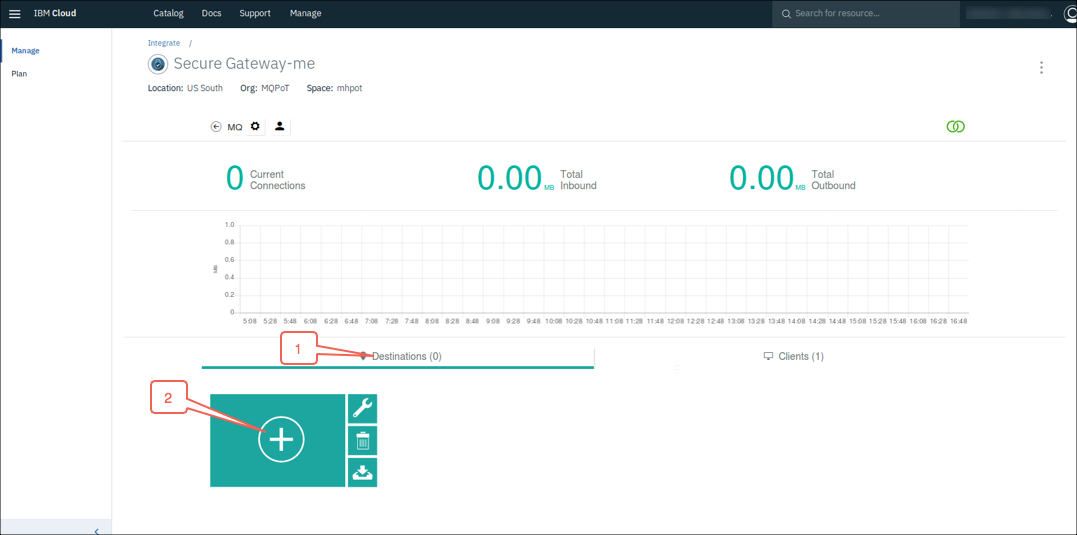
Click on the Destinations link on the Secure Gateway page in the browser window and then click on the large Add Destination button (the button labeled with the large +) to launch the Add Destination wizard.
-
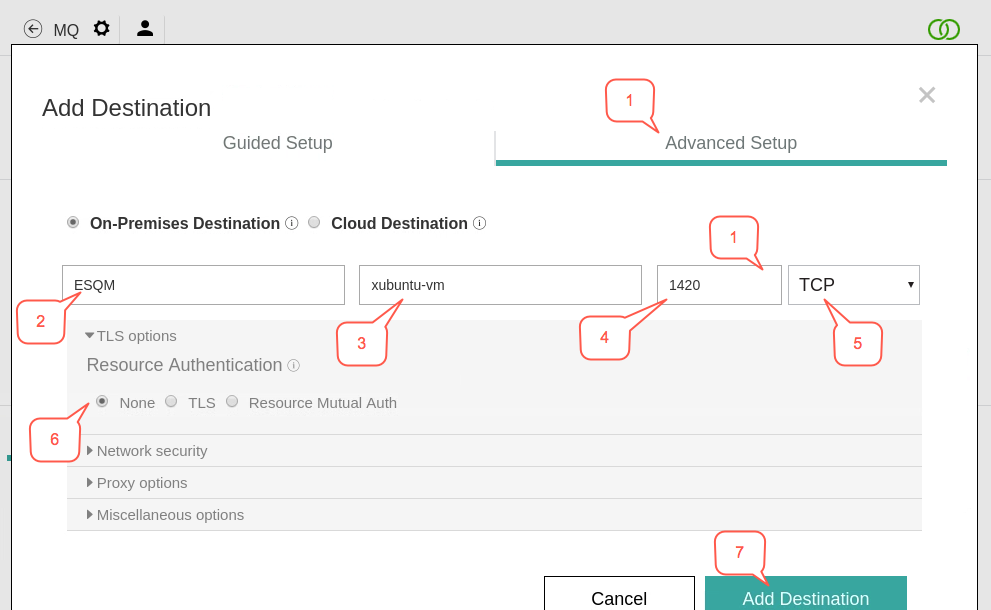
Click on the Advanced Setup tab and then use the following table to add the appropriate values in each of the fields:
Field Name Value to Enter On-Premises Destination Selected Destination Name ESQM Resource Hostname xubuntu-vm Resource Port 1420 Protocol TCP Resource Authentication None Click on the Add Destination button when finished.
-
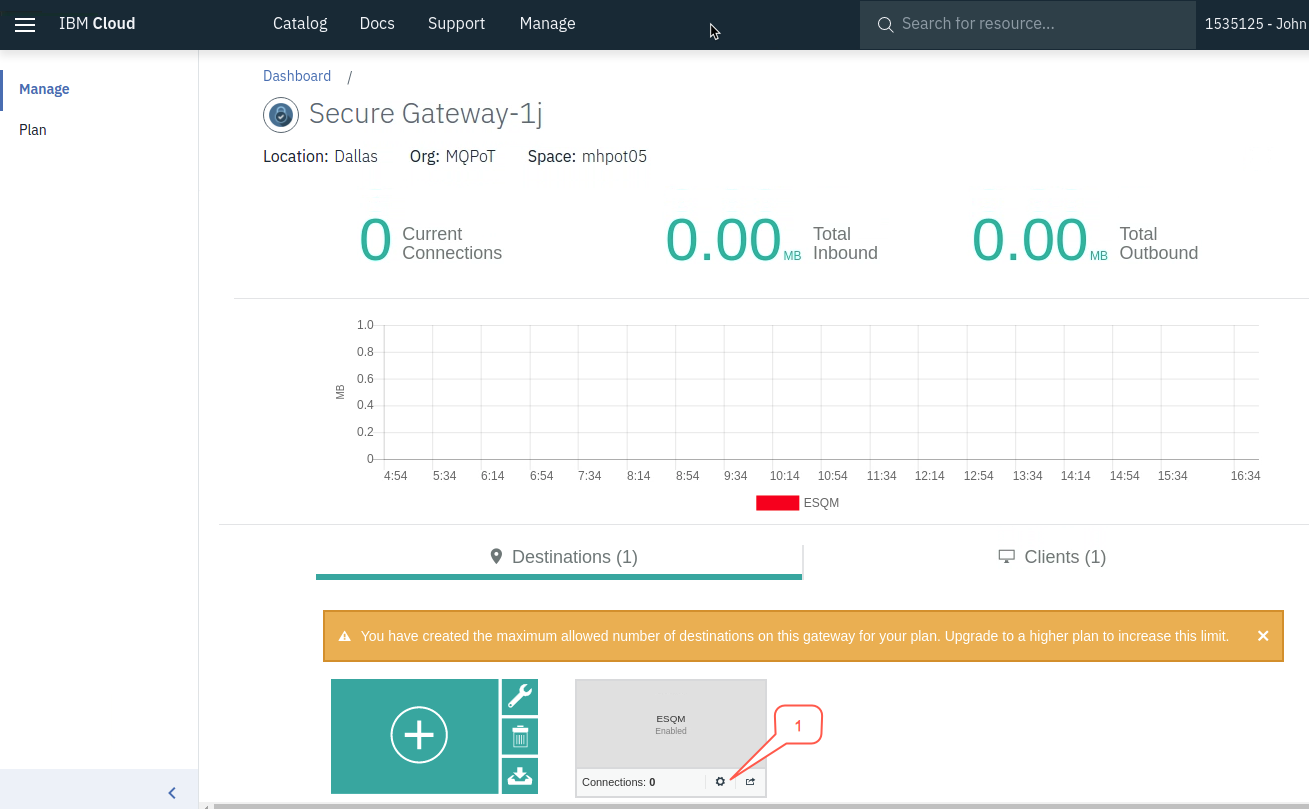
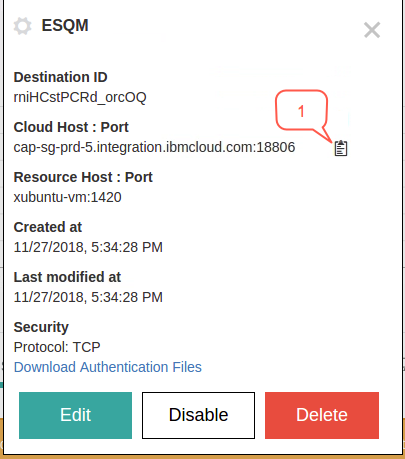
A new destination named ESQM is displayed on the Secure Gateway web page. Click on the gear icon at the bottom of the ESQM destination to view the connection properties that are needed to utilize this gateway.
-
Click on the copy icon next to the Cloud Host:Port value to copy the value and save it for later use. Close the connection properties window after you have saved the value.
-
Step 3: Create the MQ Bridge for Event Streams
With the Secure Gateway server and client components configured to communicate with each other, along with a destination to the ESQM queue manager defined, you must now configure the MQ Bridge for Event Streams instance. Perform the following steps to complete the configuration.
-
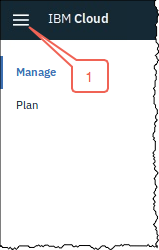
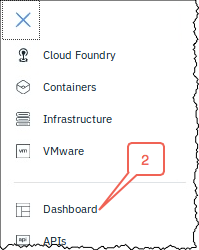
Access the Event Streams instance by clicking on the hamburger menu at the top left corner of the web page and then clicking on the Dashboard menu item.
-
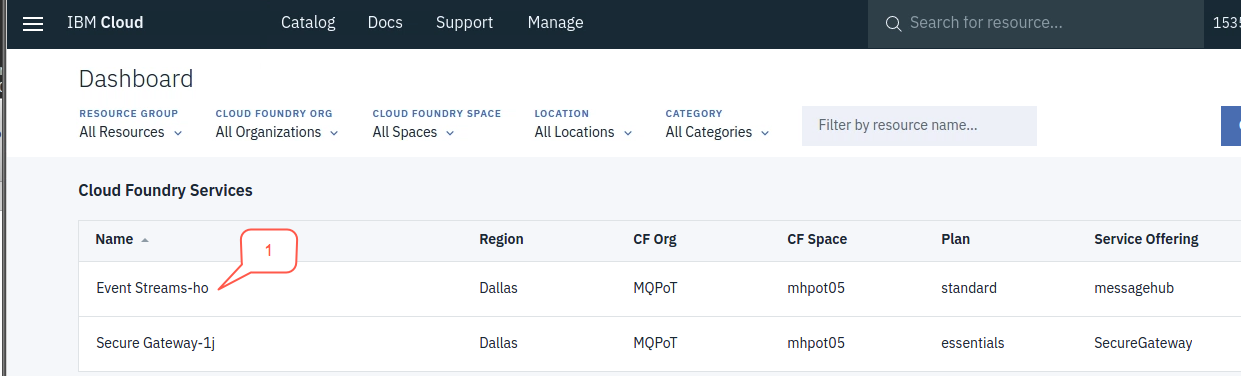
Click on the Event Streams service that you had previously created.
-
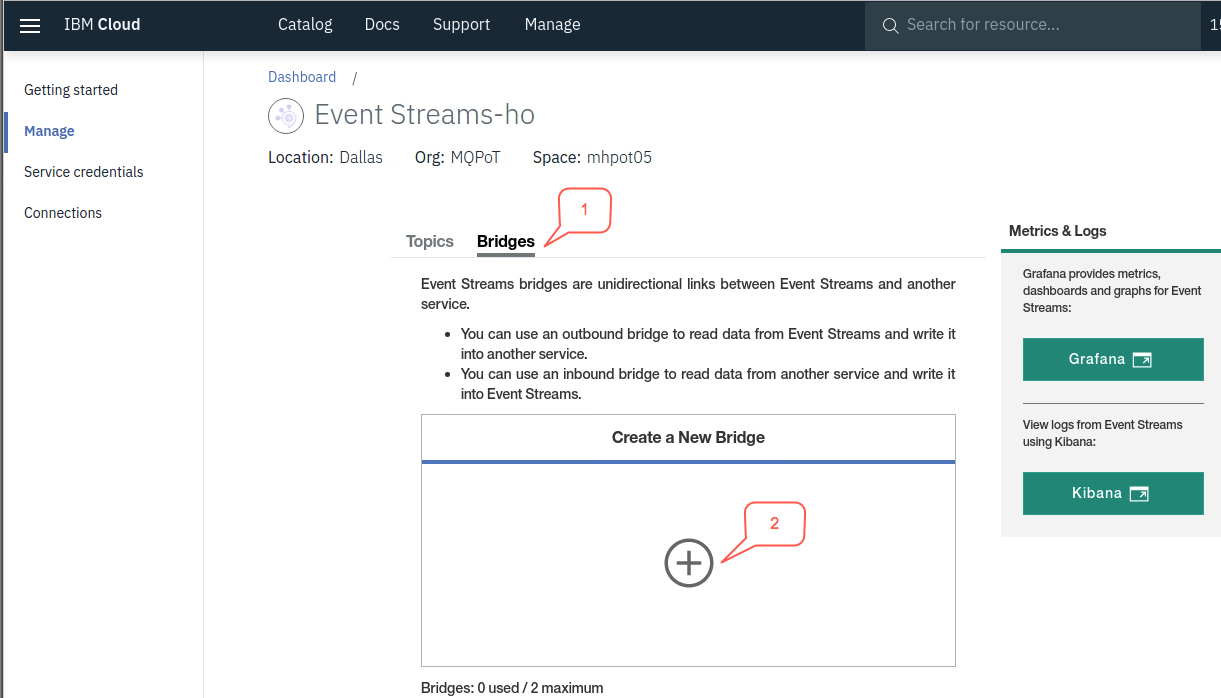
Click on the Bridges tab on the Event Streams page and then click on the Create a New Bridge icon (The large +) to create a new MQ Bridge definition.
-
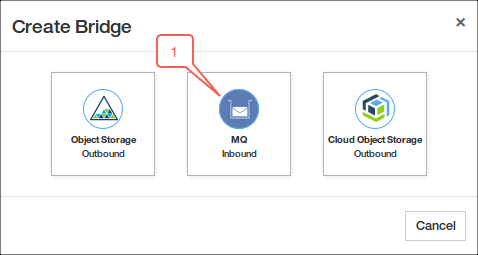
Click on the MQ Inbound icon when the Create Bridge window pops up.
-
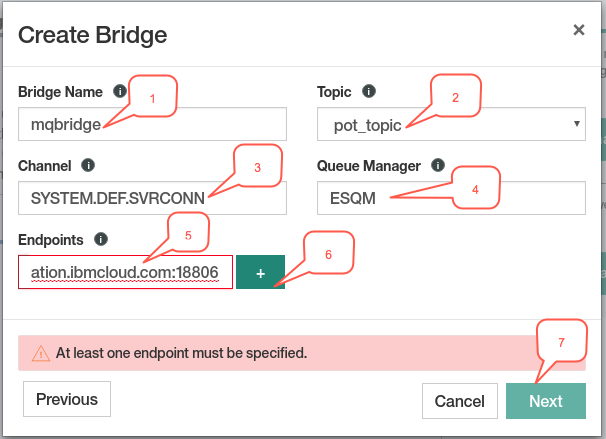
Use the following table to add the appropriate values in each of the fields:
Field Name Value to Enter Bridge Name mqbridge Topic pot_topic Channel SYSTEM.DEF.SVRCONN Queue Manager ESQM Endpoints Use the Cloud Host:Port value from when you created the Destination. Click on the Add Endpoint button (the button with the + symbol) when you have entered the Endpoints value and then click on the Next button to continue.
-
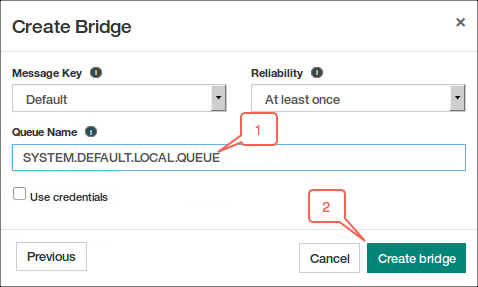
Enter SYSTEM.DEFAULT.LOCAL.QUEUE in the Queue Name field and then click on the Create bridge button.
-
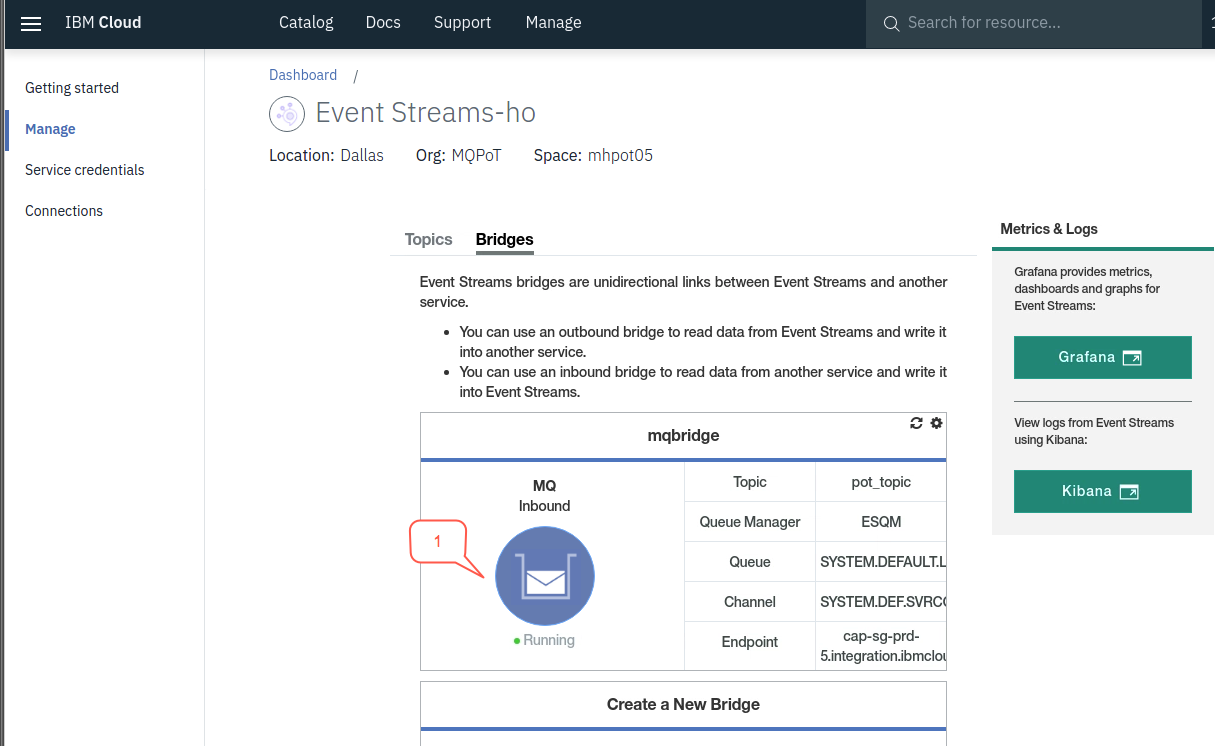
Your bridge should now be running.
Step 4: Test Sending Messages to Event Streams
As you recall from the first lab exercise, Event Streams provides a set of sample applications to send and receive messages to the Event Streams service. IBM MQ also provides a set of sample applications to send and receive messages to and from queues.
In this step you will use those sample applications to demonstrate how the MQ Bridge for Event Streams can transfer messages from an MQ queue manager to Event Streams via the MQ Bridge. Perform the following steps to demonstrate this capability.
-
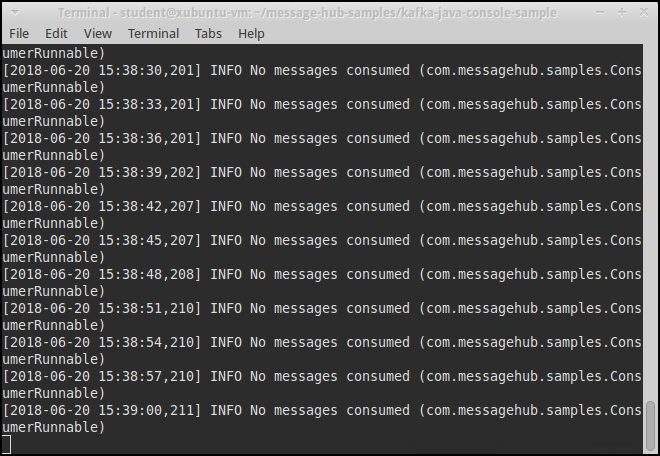
Ensure that the Event Streams sample consumer is running. Refer to the Lab 1 directions if it is not running. Notice that the window contains a collection of “INFO No messages consumed” messages.
-
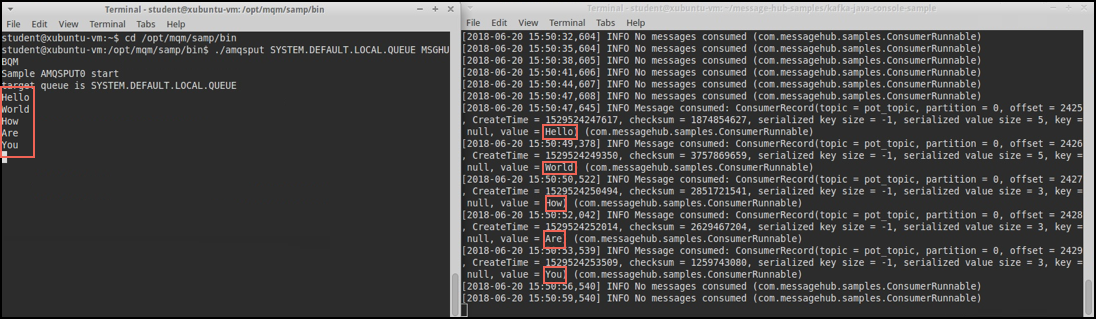
Enter the following commands from another command prompt window to start the amqsput sample application. The amqsput application will allow you to put messages to the MQ queue that the MQ Bridge is monitoring.
 cd /opt/mqm/samp/bin
 ./amqsput SYSTEM.DEFAULT.LOCAL.QUEUE ESQM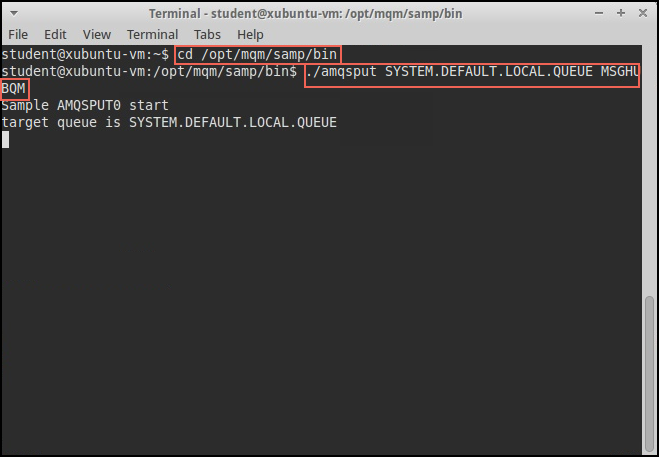
-
Enter any number of messages, with each followed by the enter key. Note that for each message you enter in the amqsput application it will be displayed in the Event Streams sample consumer application.
Congratulations
You have successfully completed Lab 2 of this PoT.