Lab 3 - MQ Uniform Cluster on CP4I
Featuring:
- Creating a Uniform Cluster
- Application Rebalancing
- Application Rebalancing & Queue Manager Outage
- Metrics
- Using CCDT Queue Manager Groups
Introduction
This lab introduces MQ Uniform Cluster and Application Rebalancing as of MQ 9.2 code level. The lab can be run on any IBM Cloud environment running RedHat OpenShift 4.6 or above with IBM Cloud Pak for Integration (CP4I) 2020.4.1 or above.
In this lab, you will:
- Create a Uniform Cluster quickly using yaml configuration files consisting of three identical queue managers
-
Run re-connectable sample applications to a queue manager within the Uniform Cluster to show automatic rebalancing of the apps to other queue managers in the Uniform Cluster
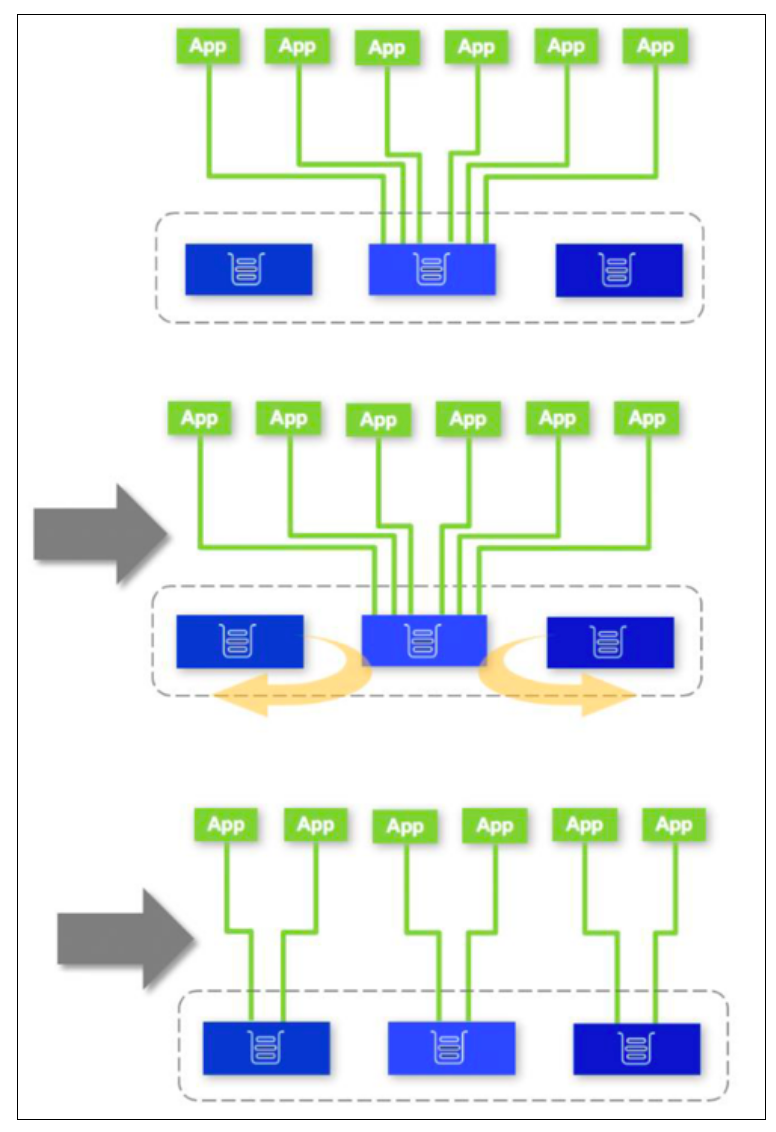
- Stop then restart a queue manager with connected apps to show automatic application rebalancing to remaining running queue managers in the Uniform Cluster
- Report resource usage metrics for the applications, introduced in MQ 9.1.5.
- Connect an application to a Queue Manager Group instead of a queue manager
Pre-reqs
You should have already downloaded the artifacts for this lab in the lab Environment Setup from GitHub MQonCP4I.
If you are doing this lab out of order return to Environment Setup to perform the download. Then continue from here.
Important points to note
The lab guide assumes you are using the RHEL Virtual Desktop Image (VDI) VM from the IBM Technology Zone. If you are using another platform, you can download the necessary artifacts from the github repo. The instructor will provide directions.
If running as part of a PoT, you will only see your project (namespace). The name will be of the form clustername + your student number. For instance if the cluster name is chopper and your student number is 10, your namespace will be chopper10. So each attendee has a unique namespace and will only be authorized to see that namespace. Within your namespace you will only find your queue manager mq10mi in this example. You will also find a previously configured queue manager qmgrxx, where xx = your student number. That queue manager will not be used in this PoT and can be ignored.
You will see other projects such as cp4i-ace, cp4i-api, cp4i-mq. Since this cluster will be shared with other PoTs those have been predefined. They are not to be used for this PoT and can be ignored. You will only use your assigned namespace and at times cp4i. cp4i-mq was used to document part of this lab. Where you see cp4i-mq, you will substitute your assigned namespace.
The screen shots were taken on a test cluster and many will not match what you see when running the lab. Particularly URL values will be different depending on the cluster where CP4I is running. Projects (Namespaces) may also vary. It is important to follow the directions, not the pictures.
Further information
- IBM MQ Knowledge Center
- “Building scalable fault tolerant systems with IBM MQ 9.1.2 CD” article by David Ware, STSM, Chief Architect, IBM MQ: David Ware article
- “Active/active IBM MQ with Uniform Clusters” video by David Ware: YouTube Demo Video
Configure the cluster using yaml
-
Open a Firefox web browser by double-clicking the icon on the desktop.

-
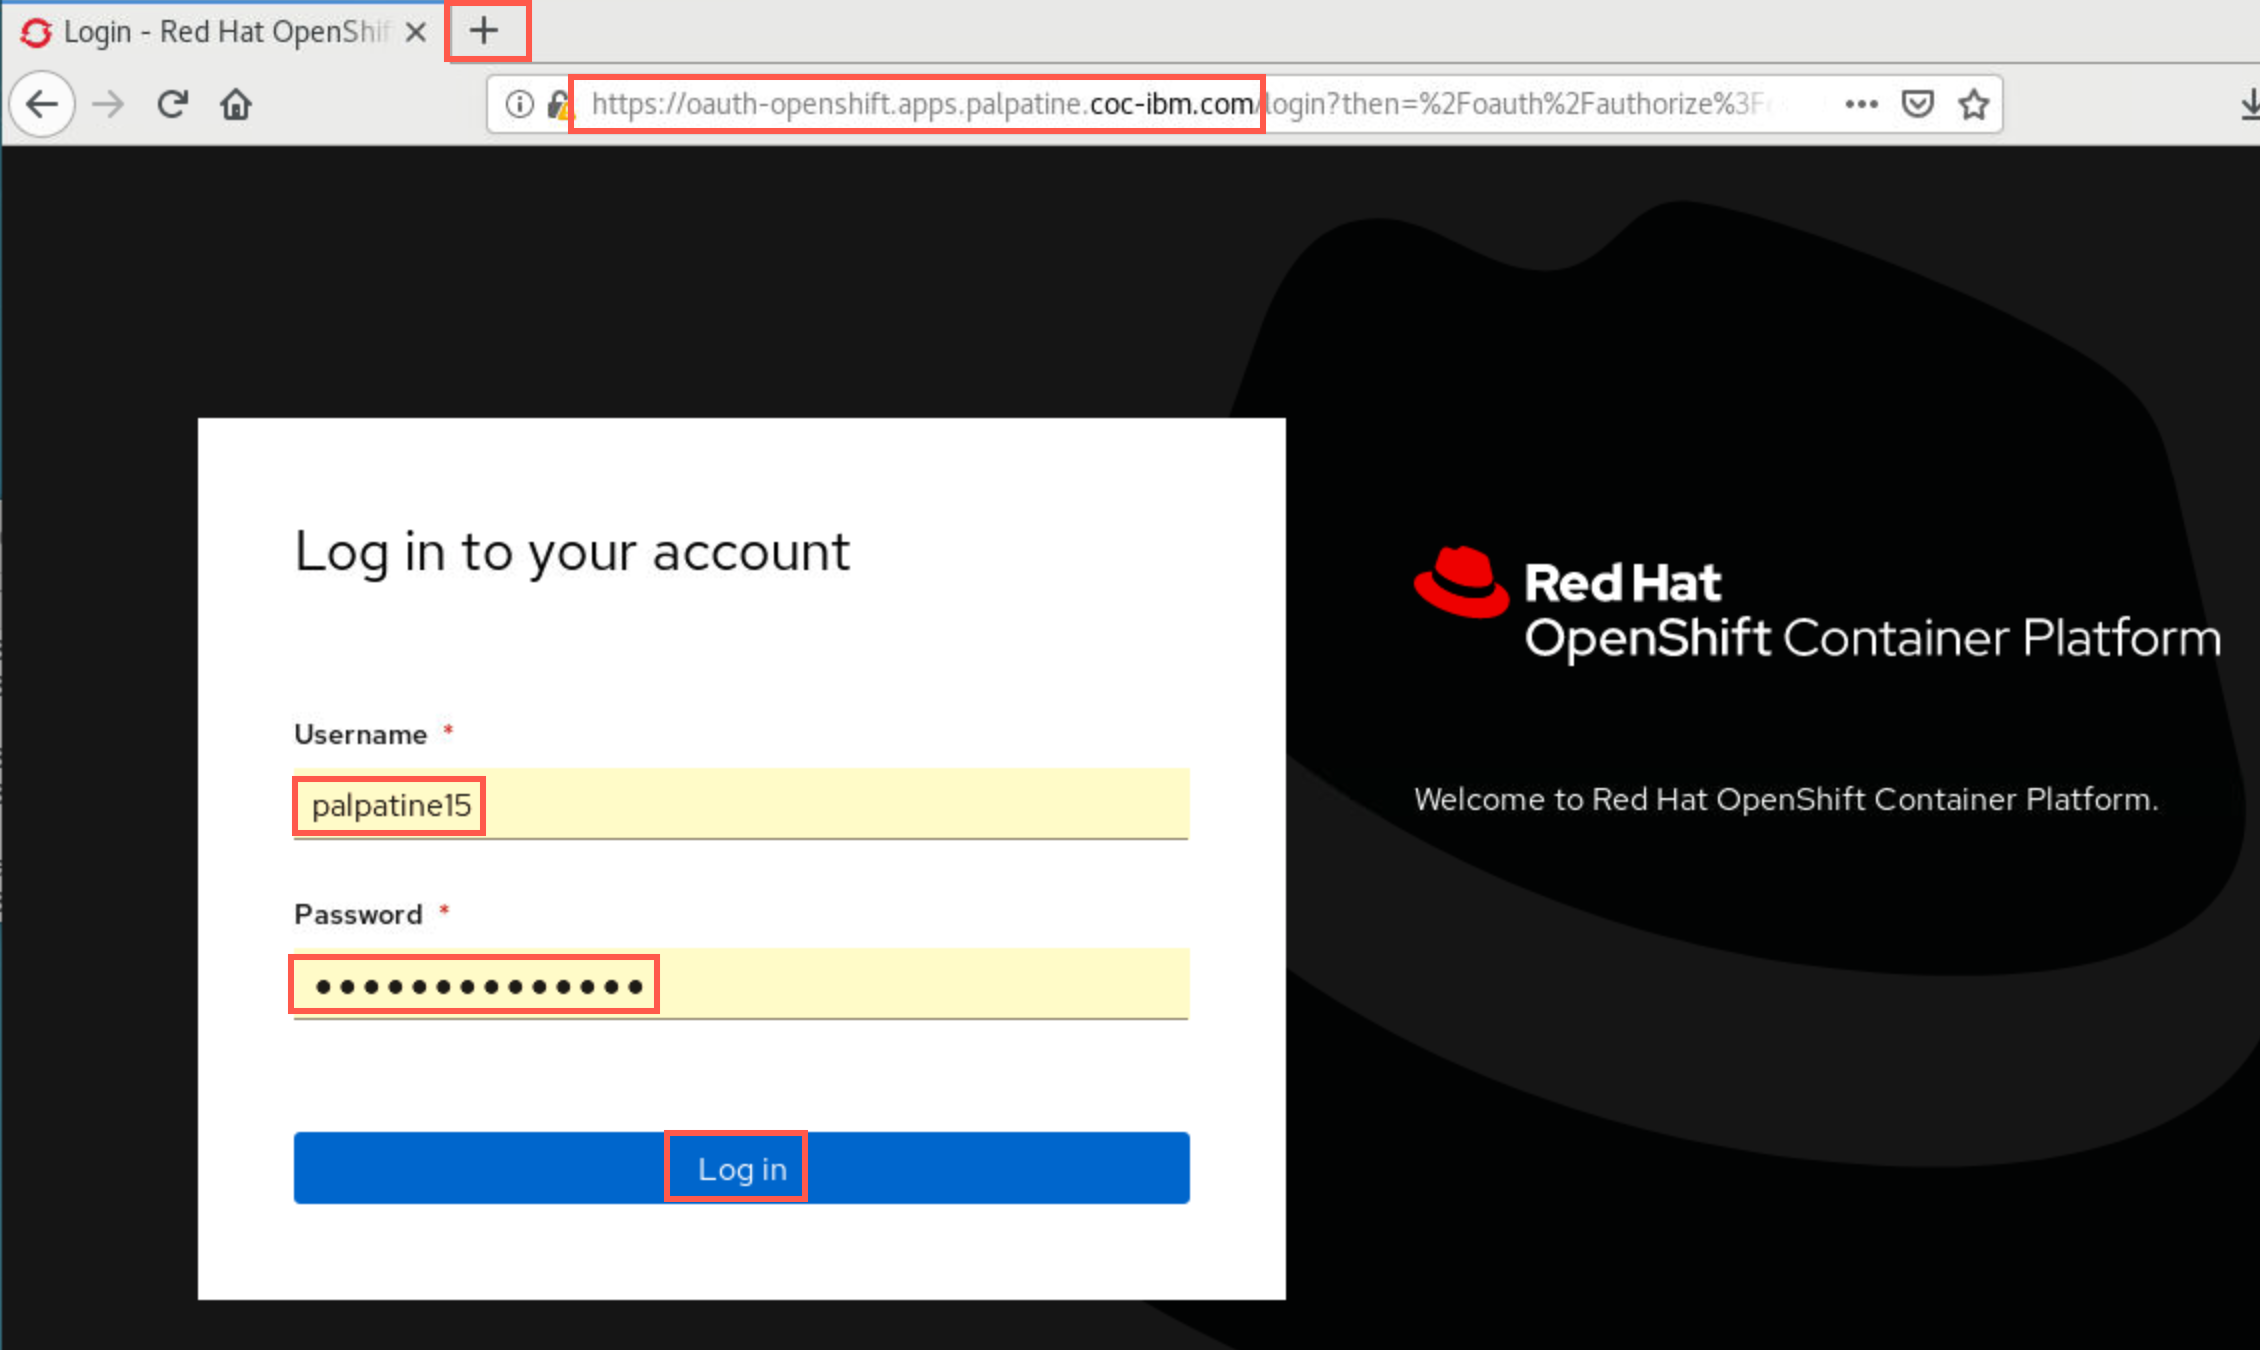
Navigate to the URL for the OCP console provided in your PoT email. Accept any security warnings. If required to log in use the userid / password provided in the email.
-
Then add another browser tab by clicking the “+” sign and opening the CP4I Navigator URL for the platform navigator provided in your PoT email.
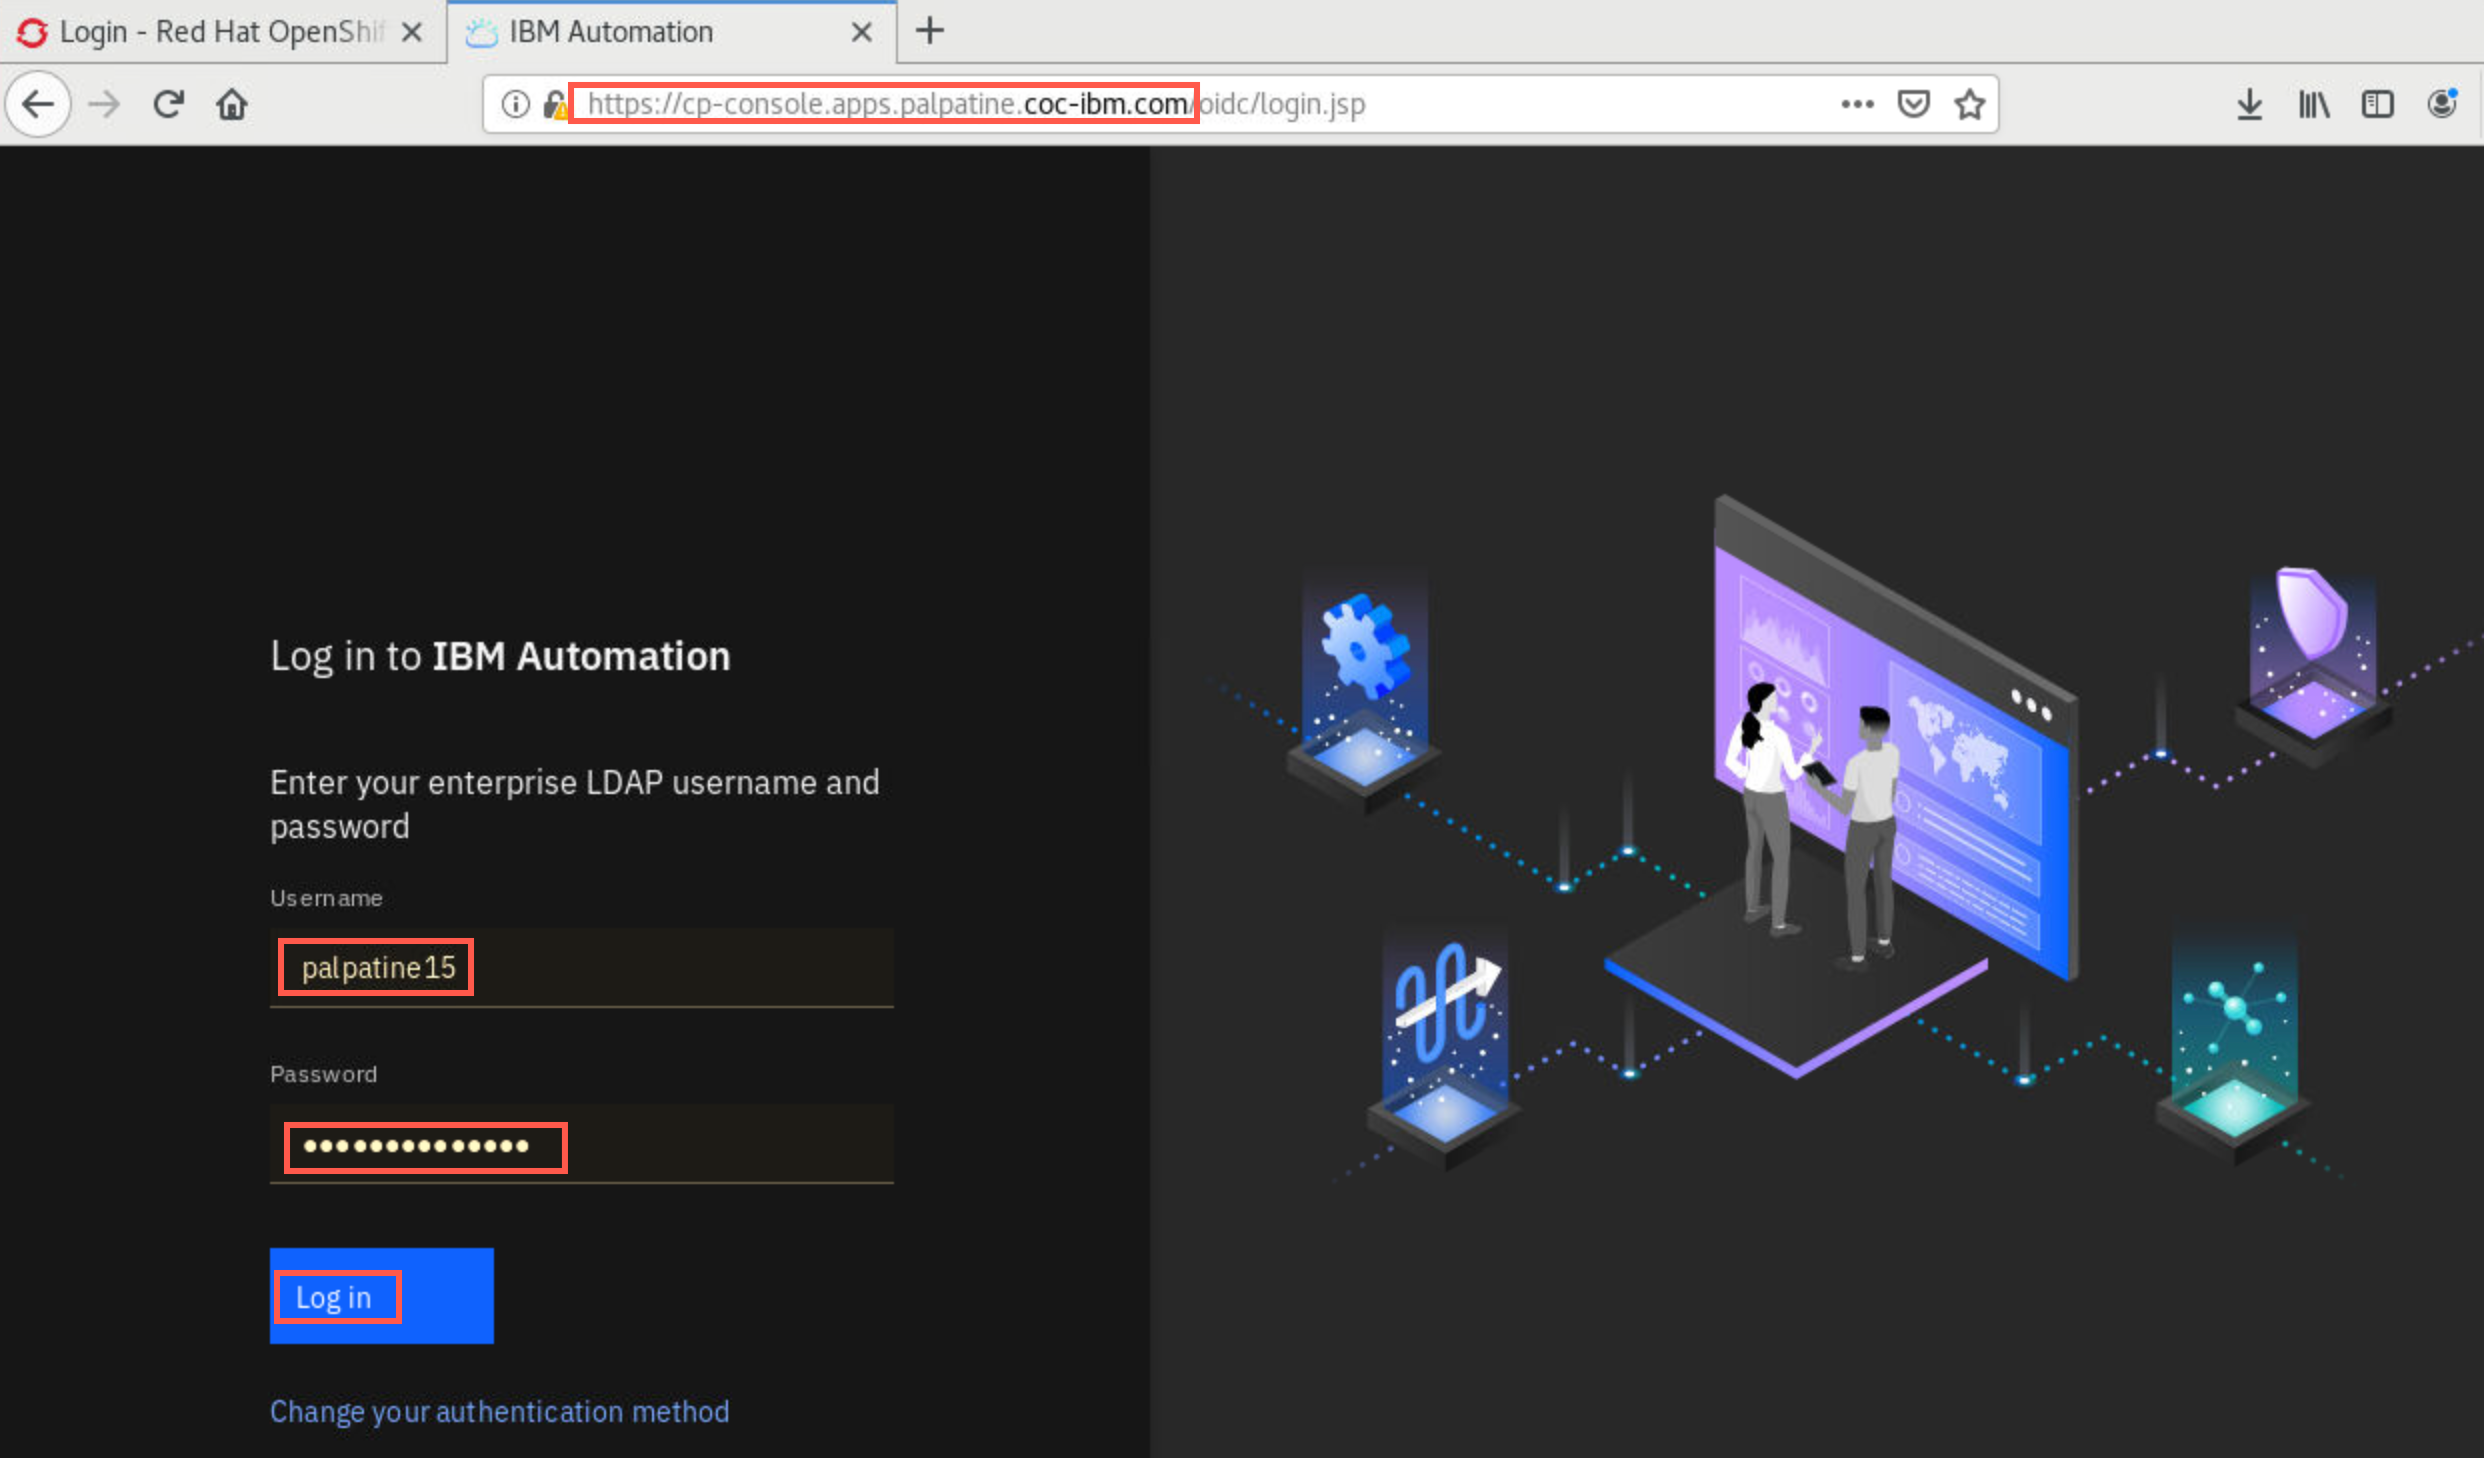
You may still be logged in from the previous labs. If your platform navigator session timed out, you may be required to log-in again.
-
If you get directed to the IBM Cloud Pak / Aministration Hub, click the Cloud Pak Switcher hamburger menu in the top right corner of the window and select IBM Automation (cp4i).
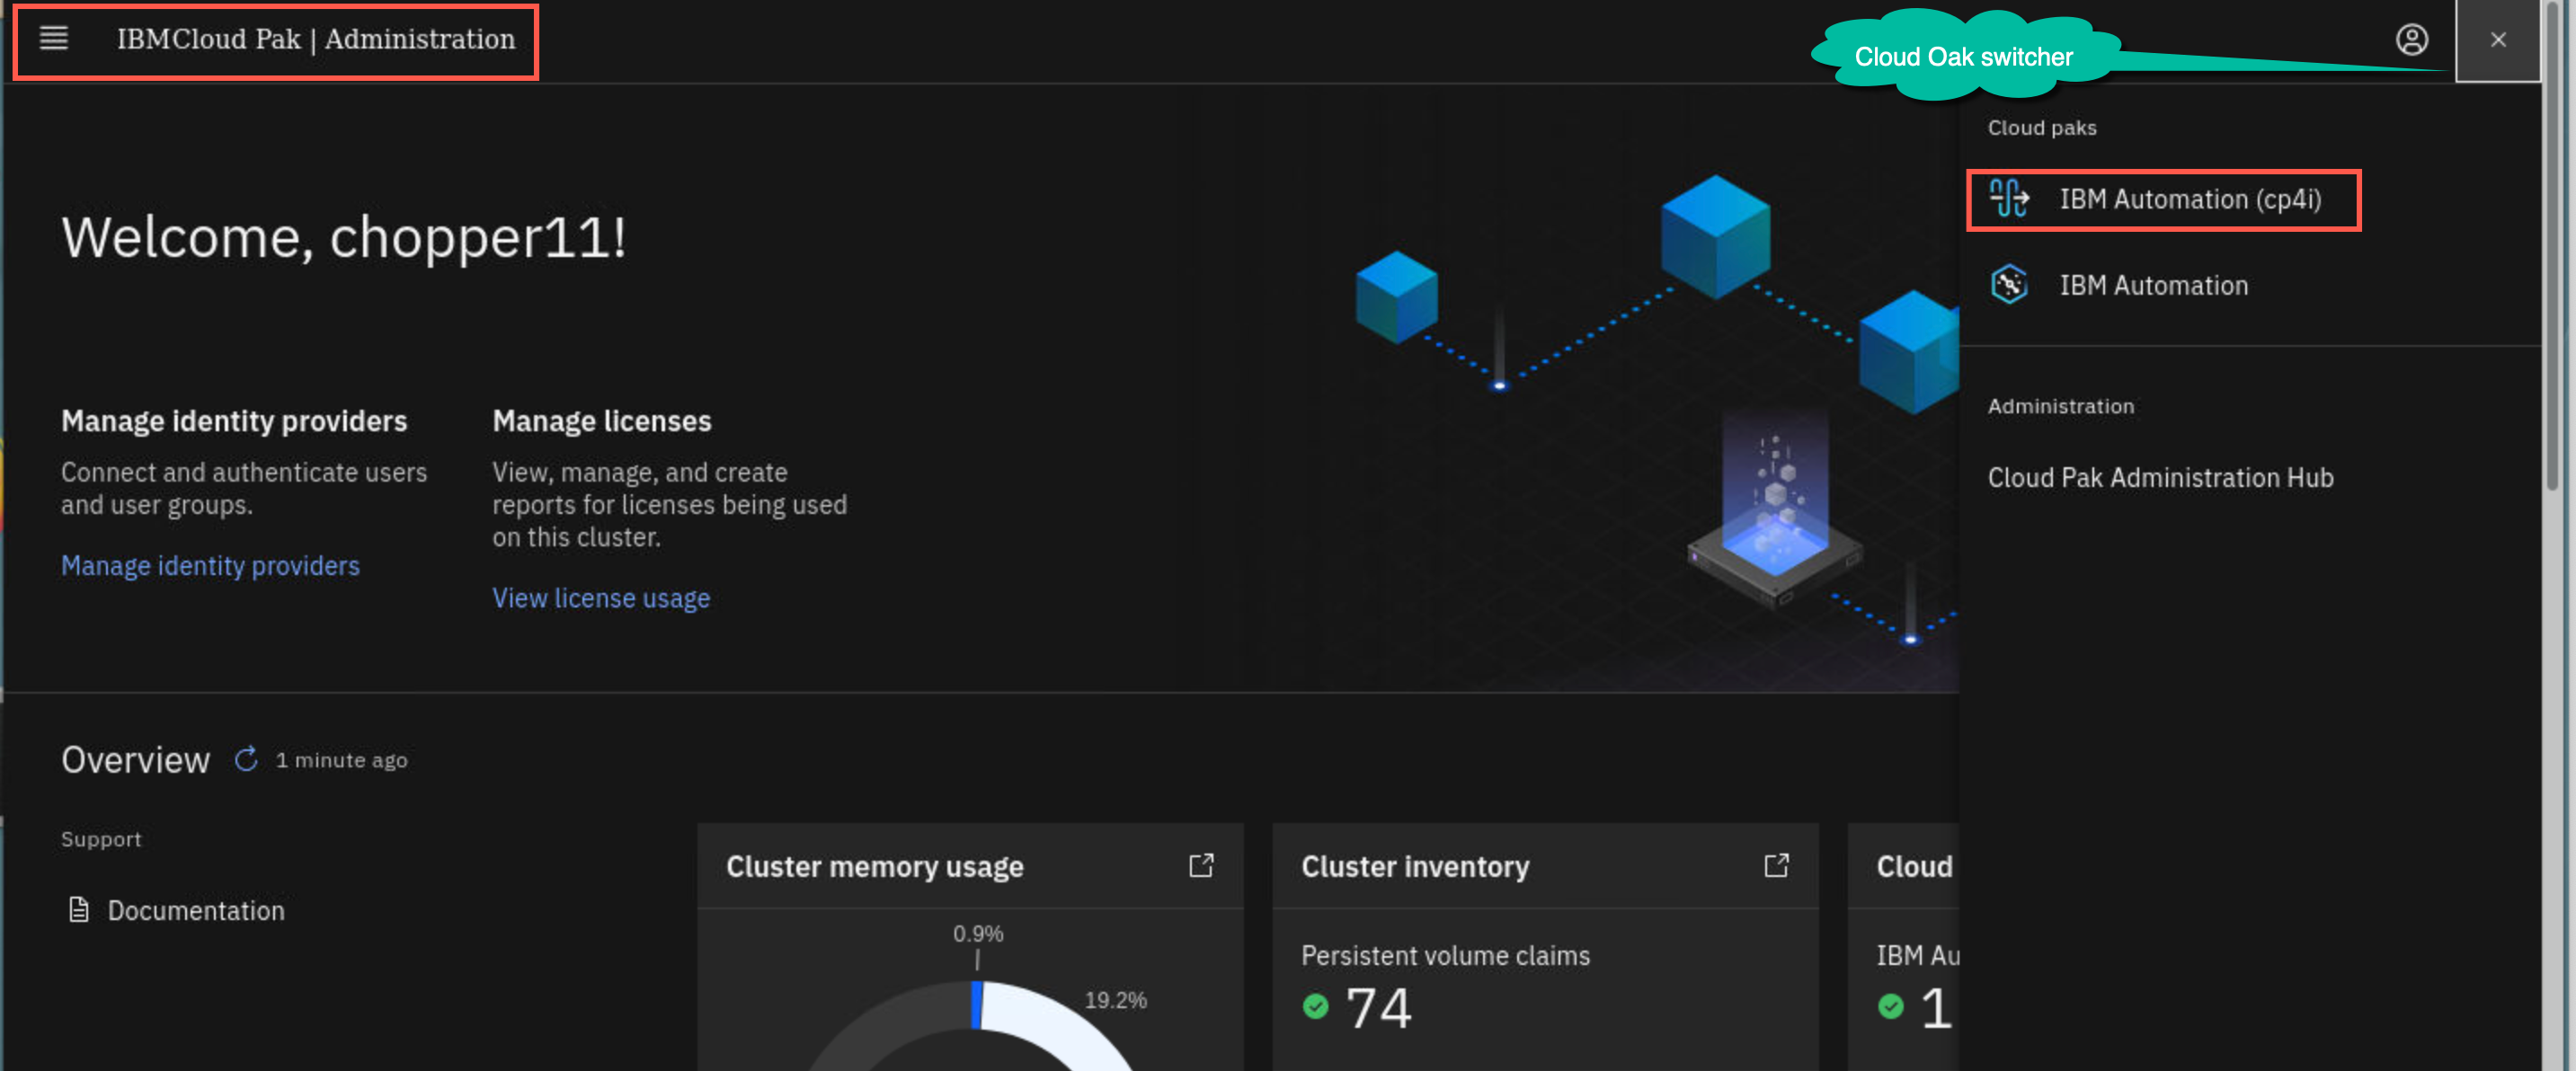
-
You are routed to the IBM Automation page. To conserve screen space you can click the up icon on far right to hide the upper portion of the window. Use it as a toggle to show top portion again.
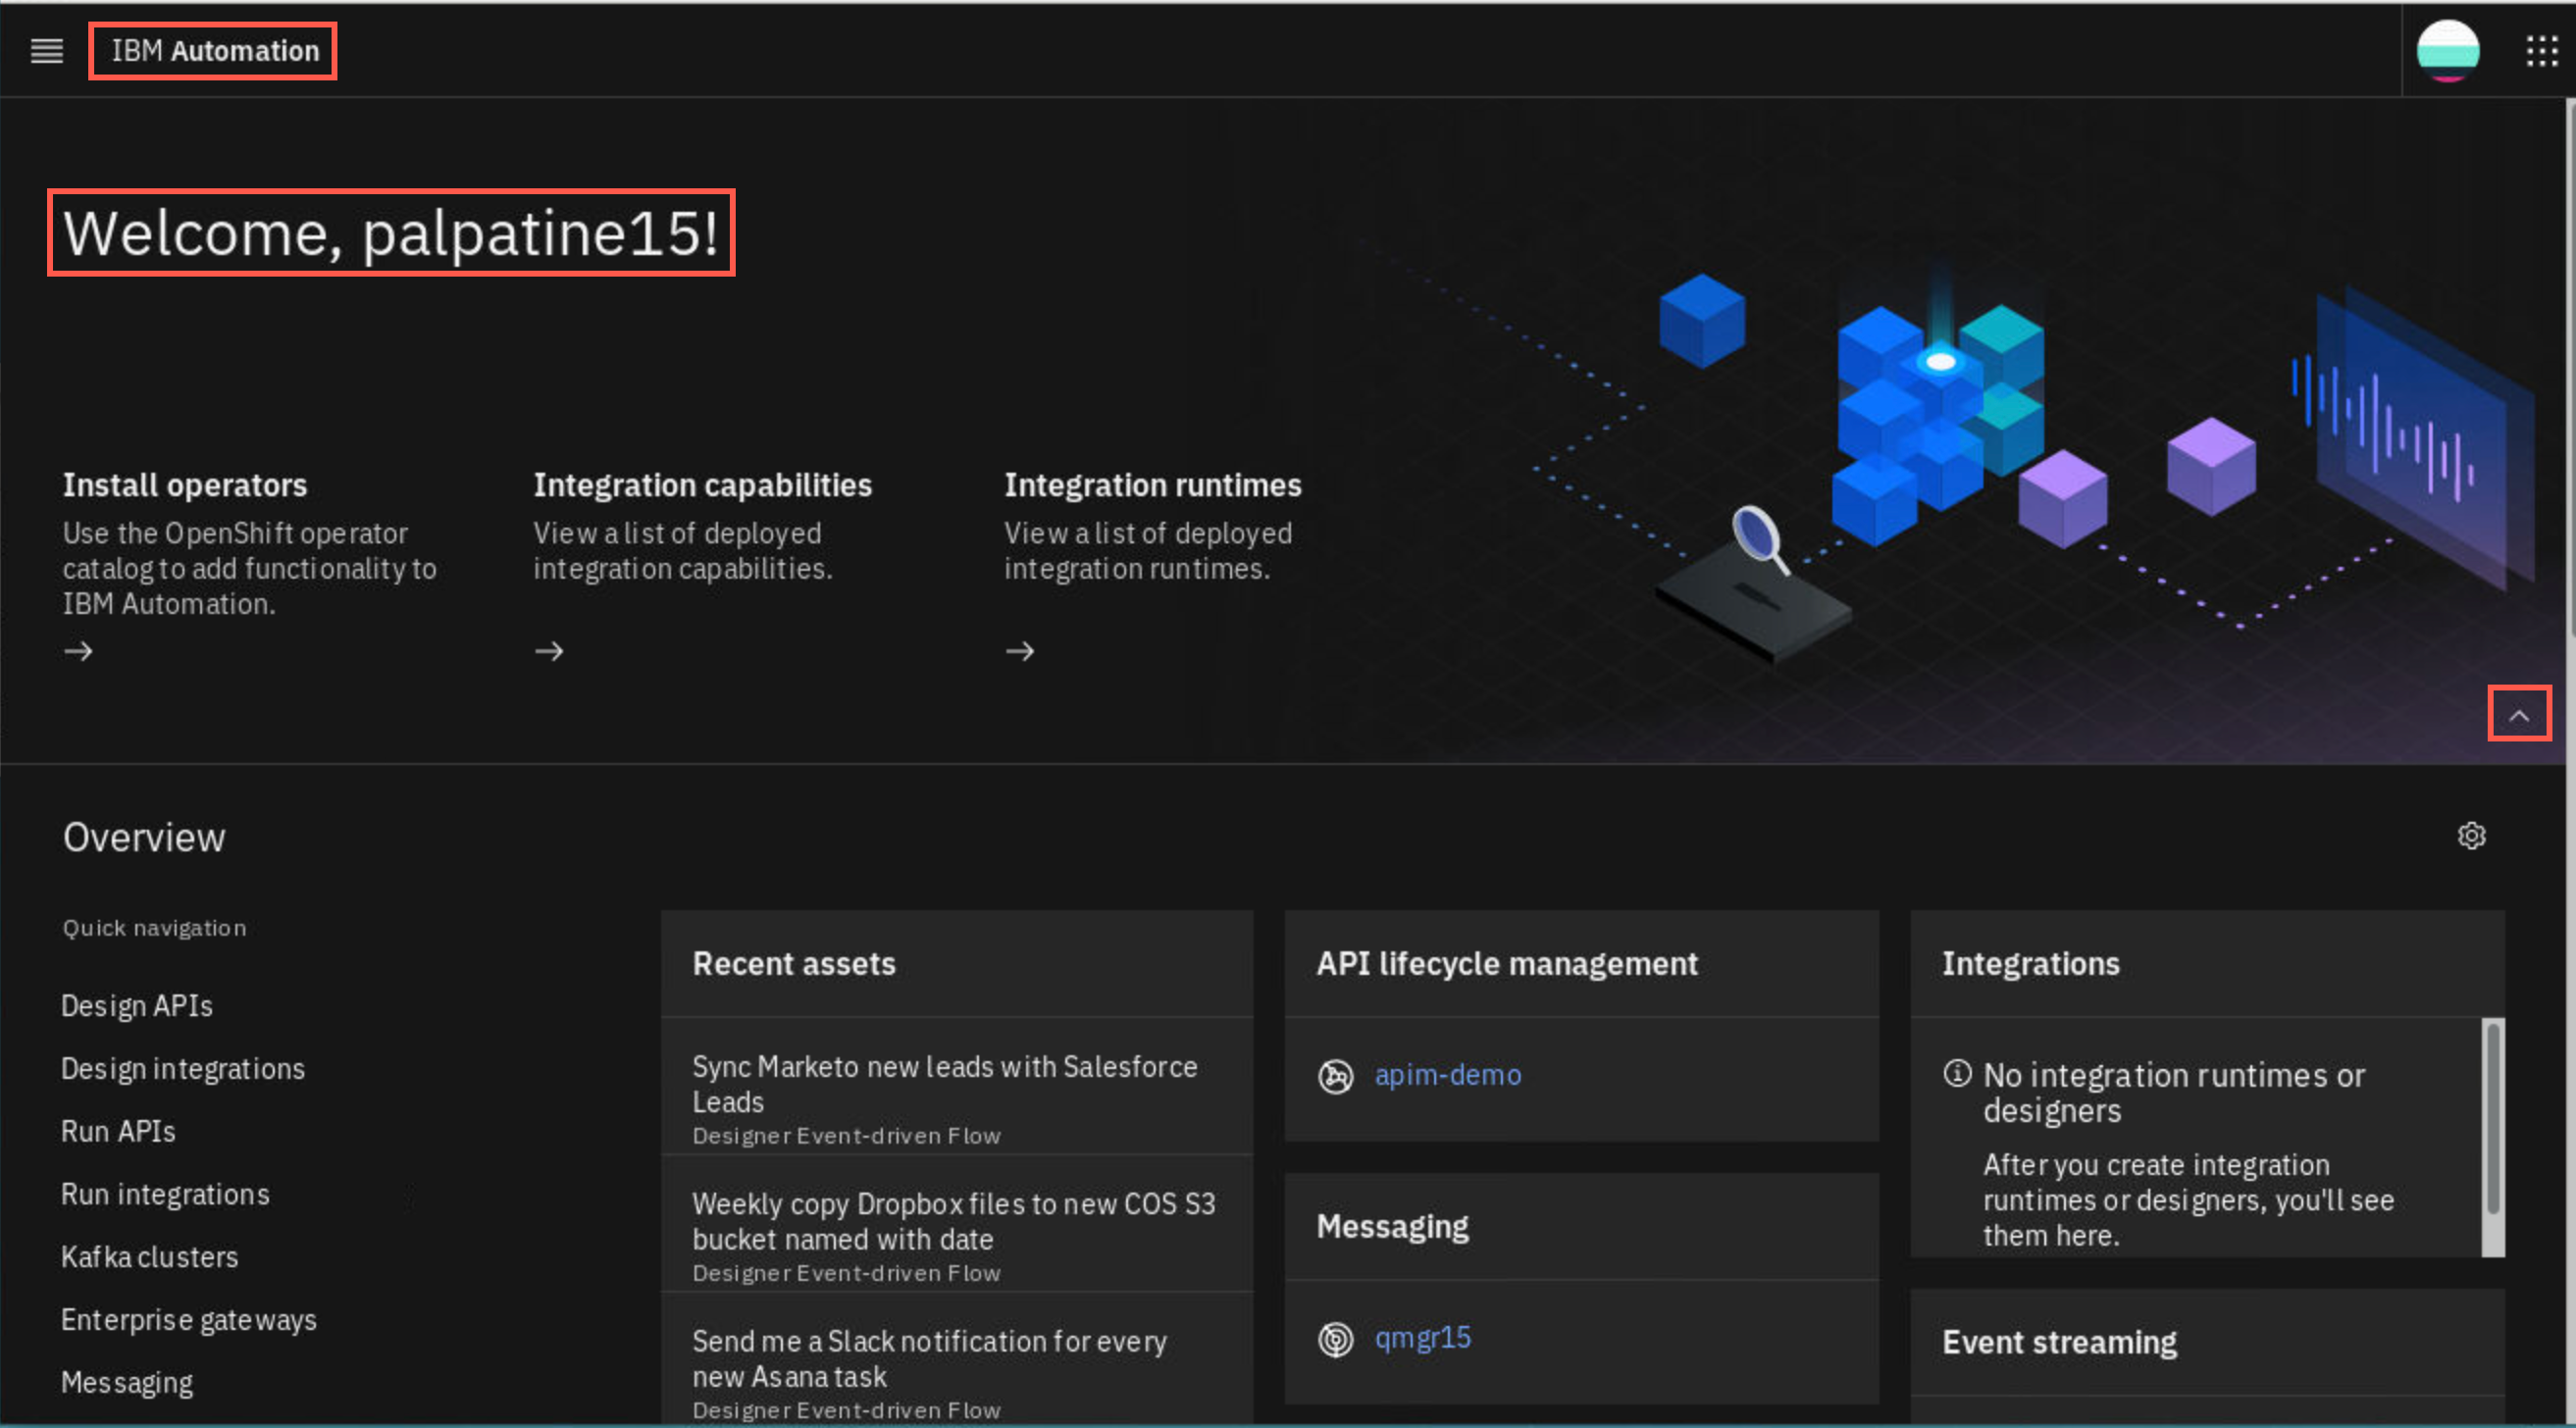
-
The Overview page shows all integration capabilities and runtimes defined in the cloud pak. You may go directly to one of the resoures by clicking the hyperlink.
Click Integration runtimes on the left sidebar.
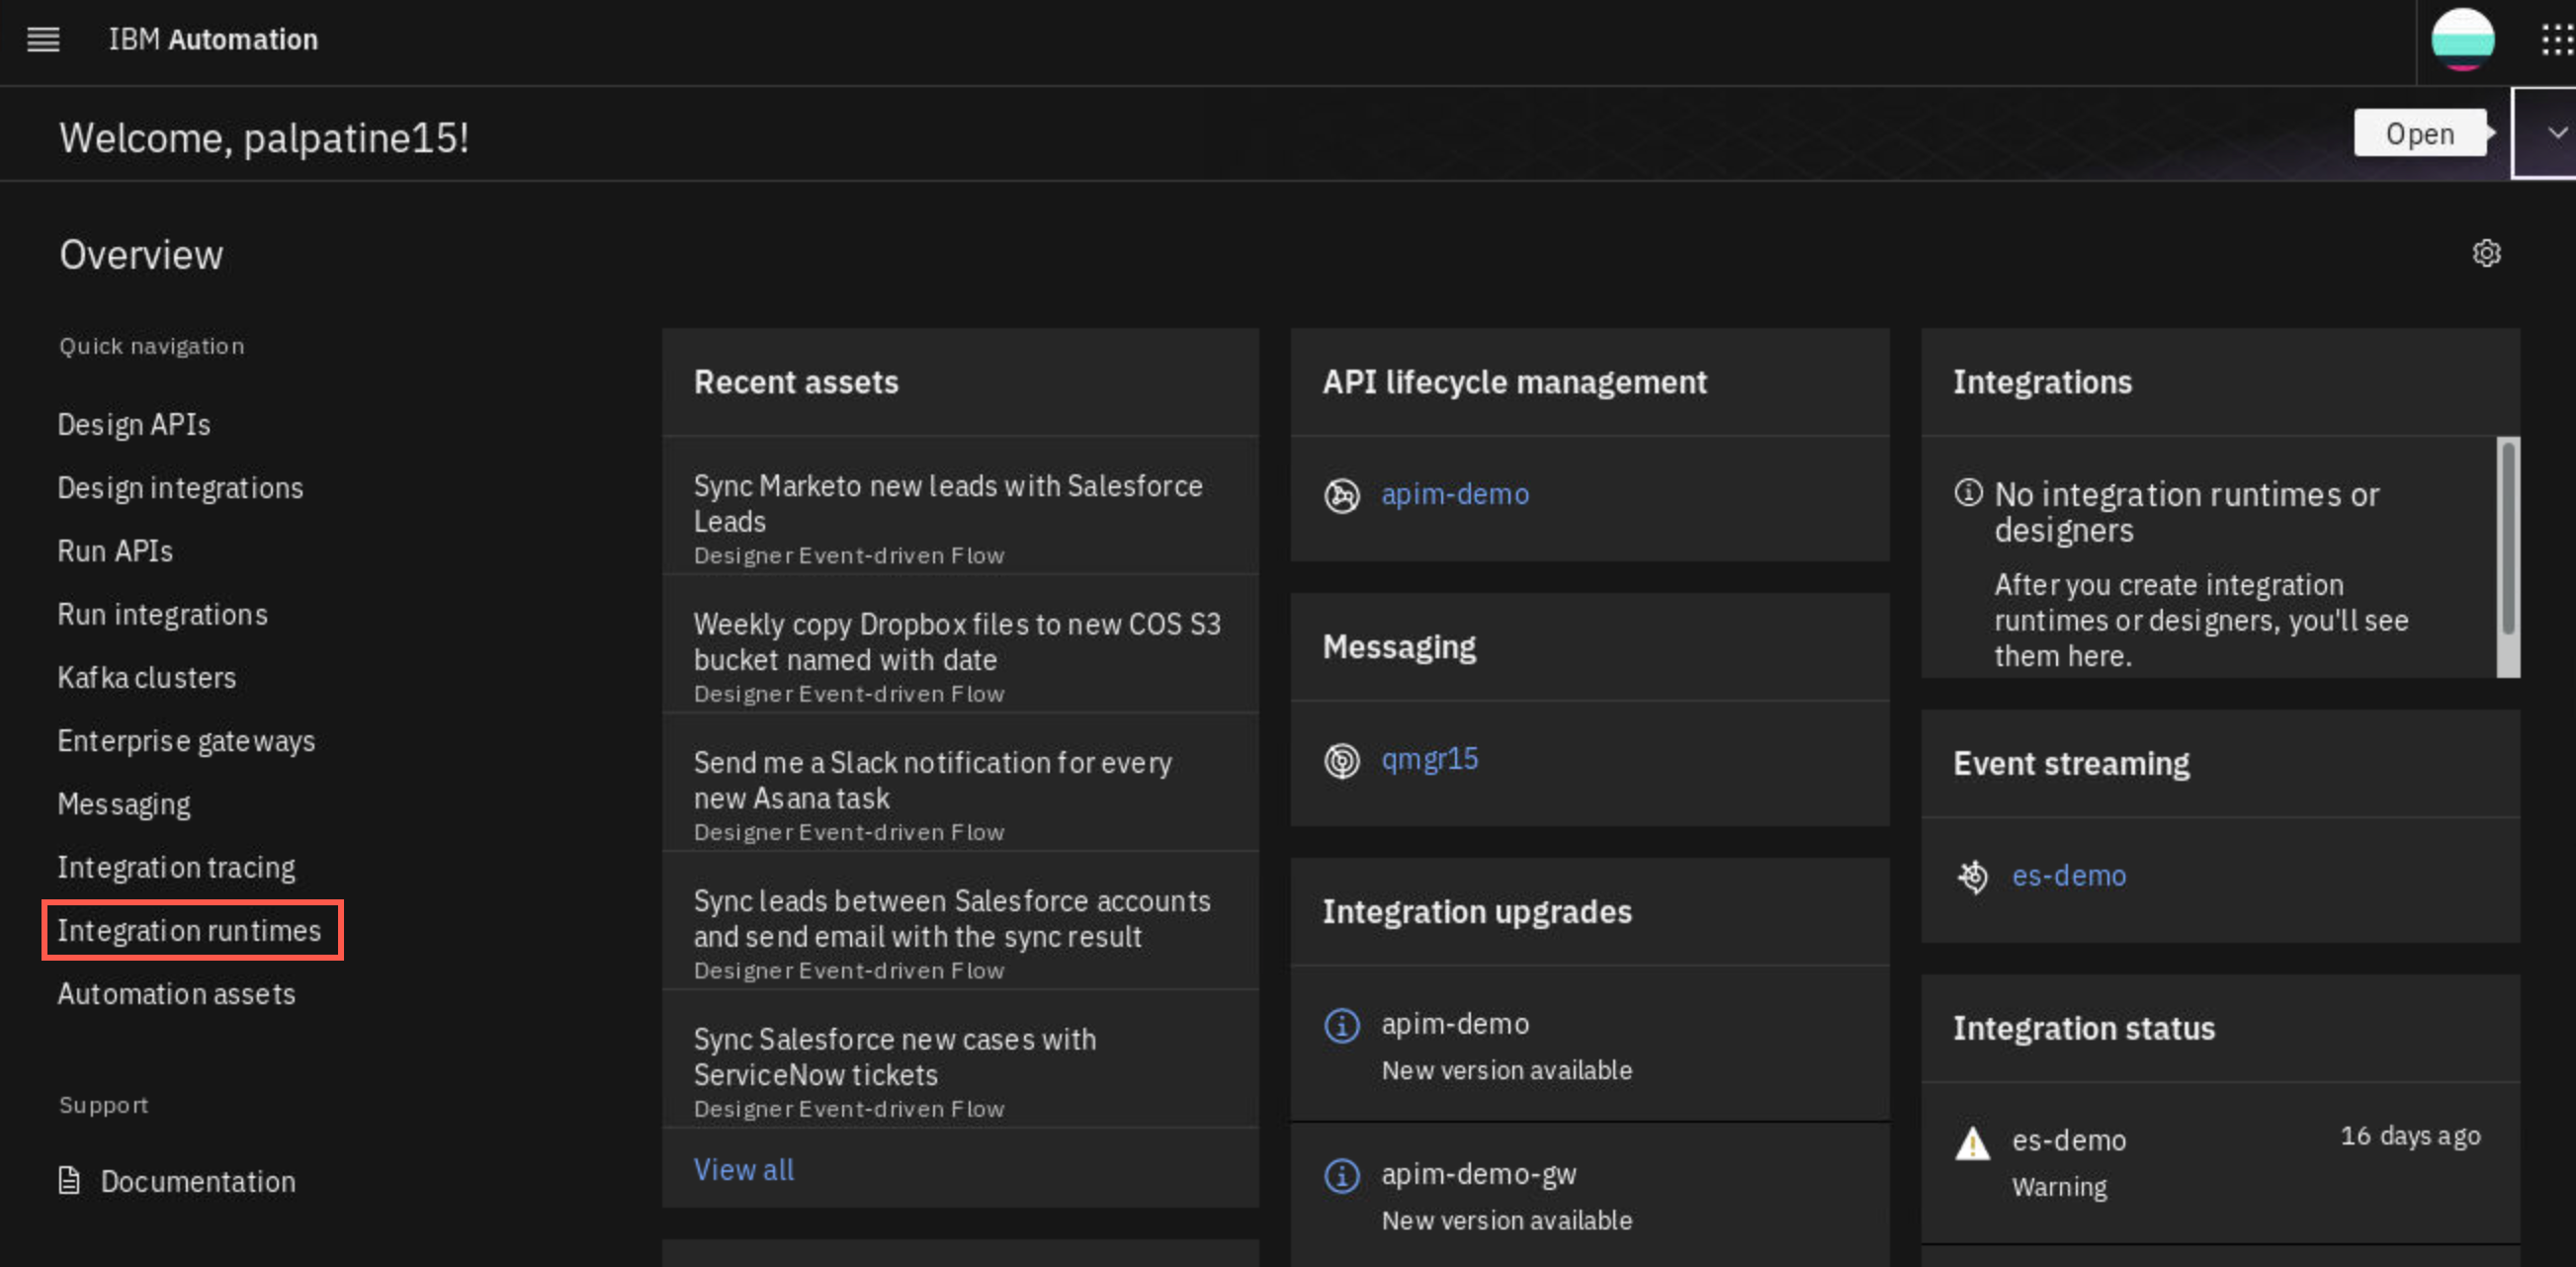
-
If you ran the Cleanup step in prior labs there should be none of your created queue managers running. However there will be other predefined instances running in your namespace.
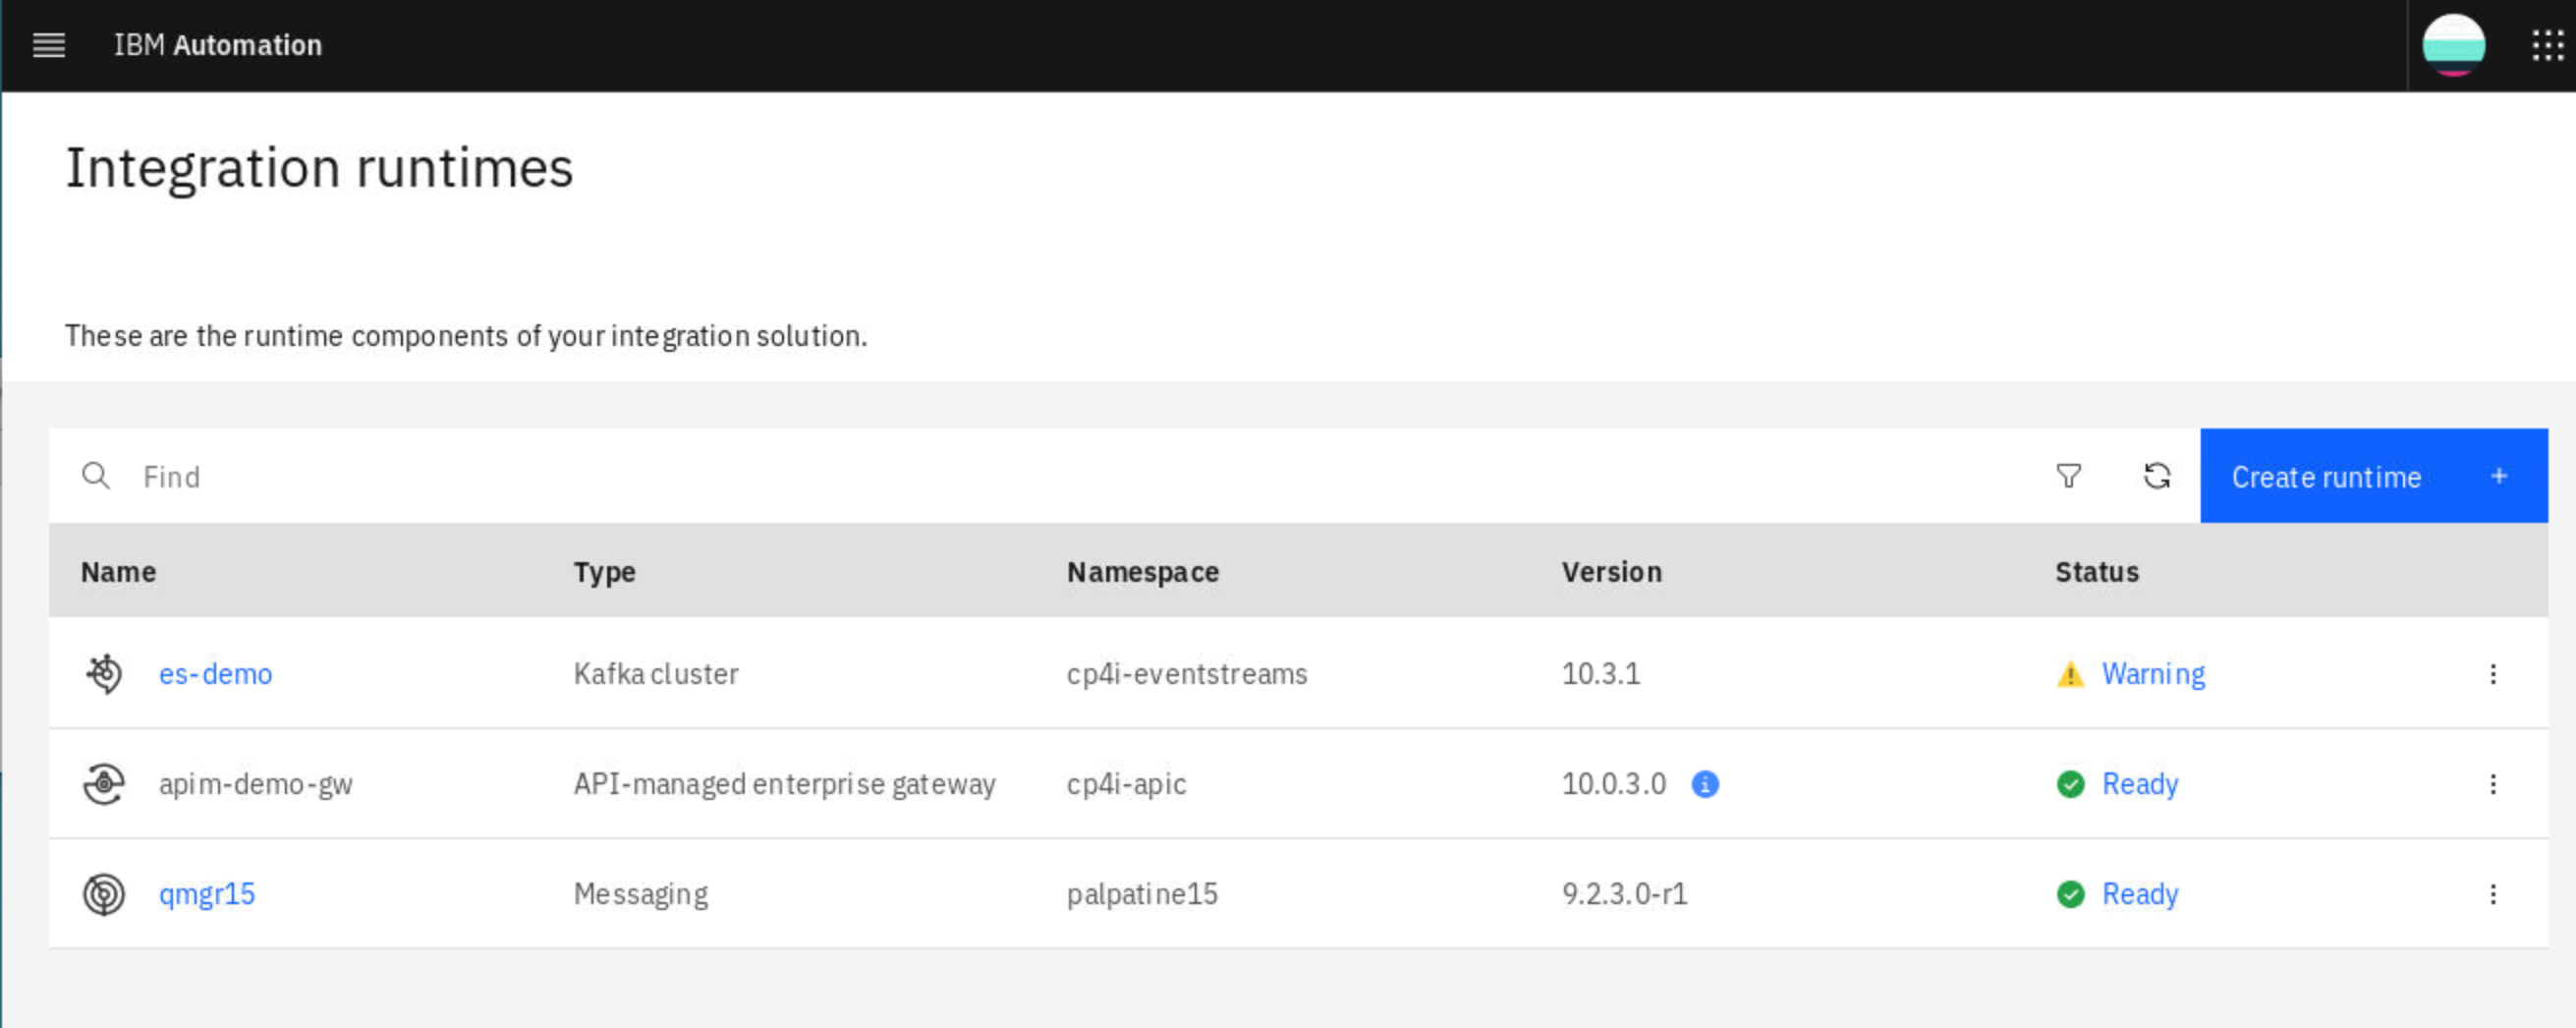
If you have any remaining mqxx (xx = your student ID), you should go back and run the cleanup steps now.
-
Open a new terminal window by double-clicking the icon on the desktop.
-
Navigate to the /MQonCP4I/unicluster/ directory using the following commnand:
cd ~/MQonCP4I/unicluster -
There are two subdirectories, deploy and test. Change to the deploy directory.
 cd deploy
 ls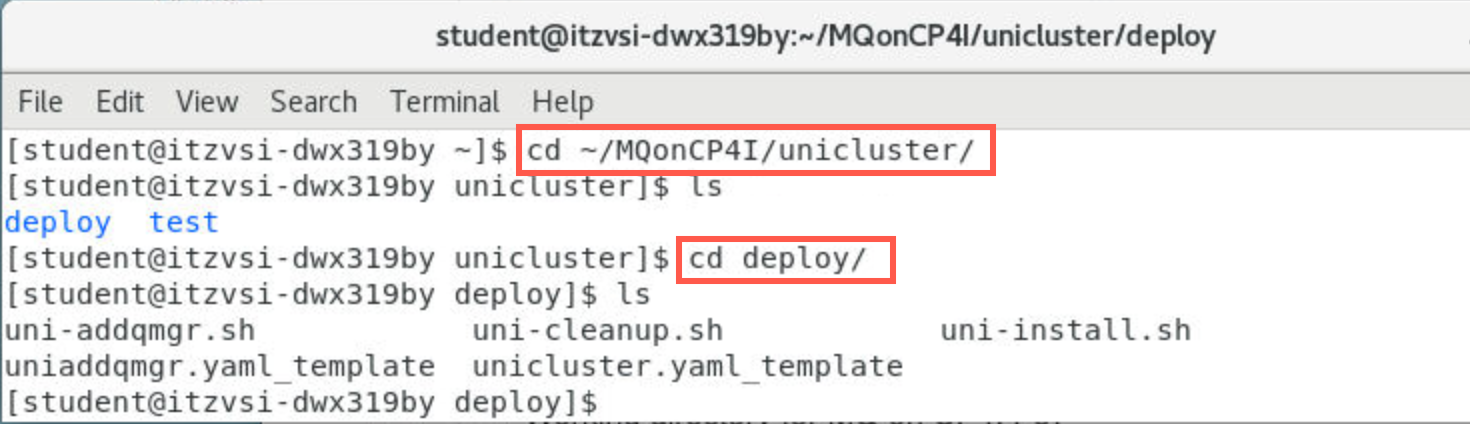
unicluster.yaml_template contains the yaml code to define a cluster. uni-install.sh is a shell script which contains environment variables using your student ID and copies unicluster.yaml_template to unicluster.yaml and runs the openshift command to apply the definitions. uni-cleanup.sh is another shell script containing environment variables with your student ID and commands to delete your queue managers and related artifacts when you are finished.
-
Enter the following command to display the permissions for the files:
ls -al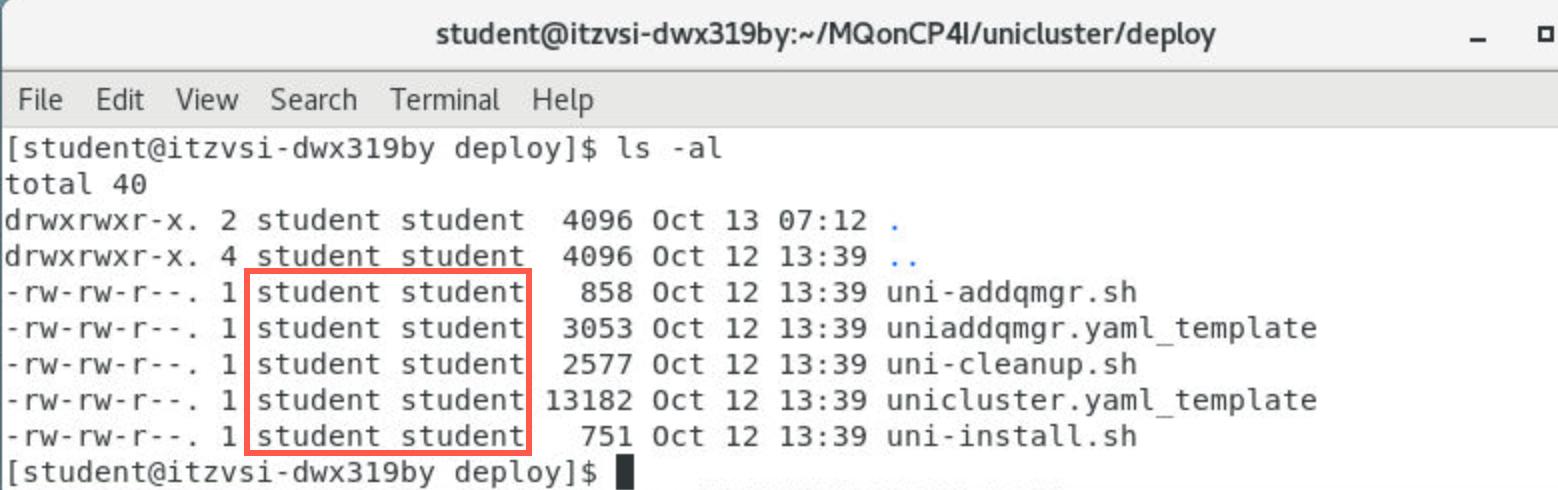
-
Make uni-addqmgr.sh, uni-installl.sh and uni-cleanup.sh executable with the following commands.
chmod +x uni-addqmgr.shchmod +x uni-install.shchmod +x uni-cleanup.sh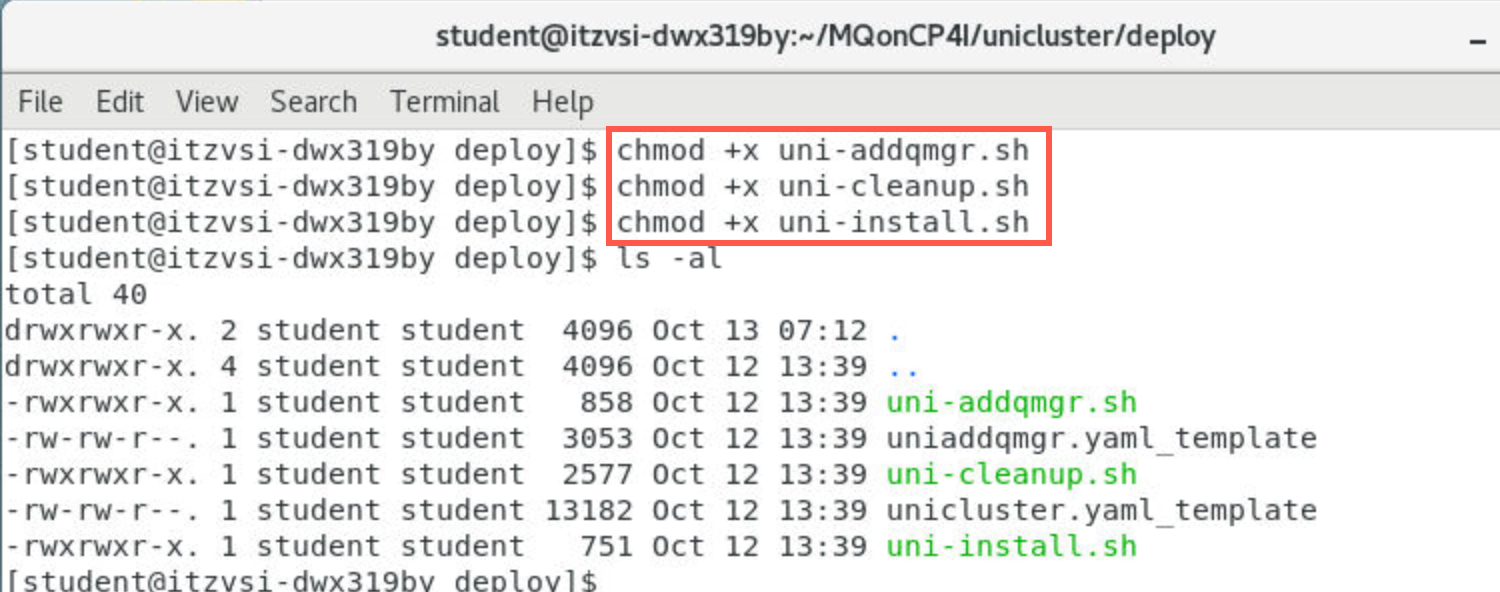
-
Open an editor to review the uni-install.sh script with the following command:
gedit uni-install.sh &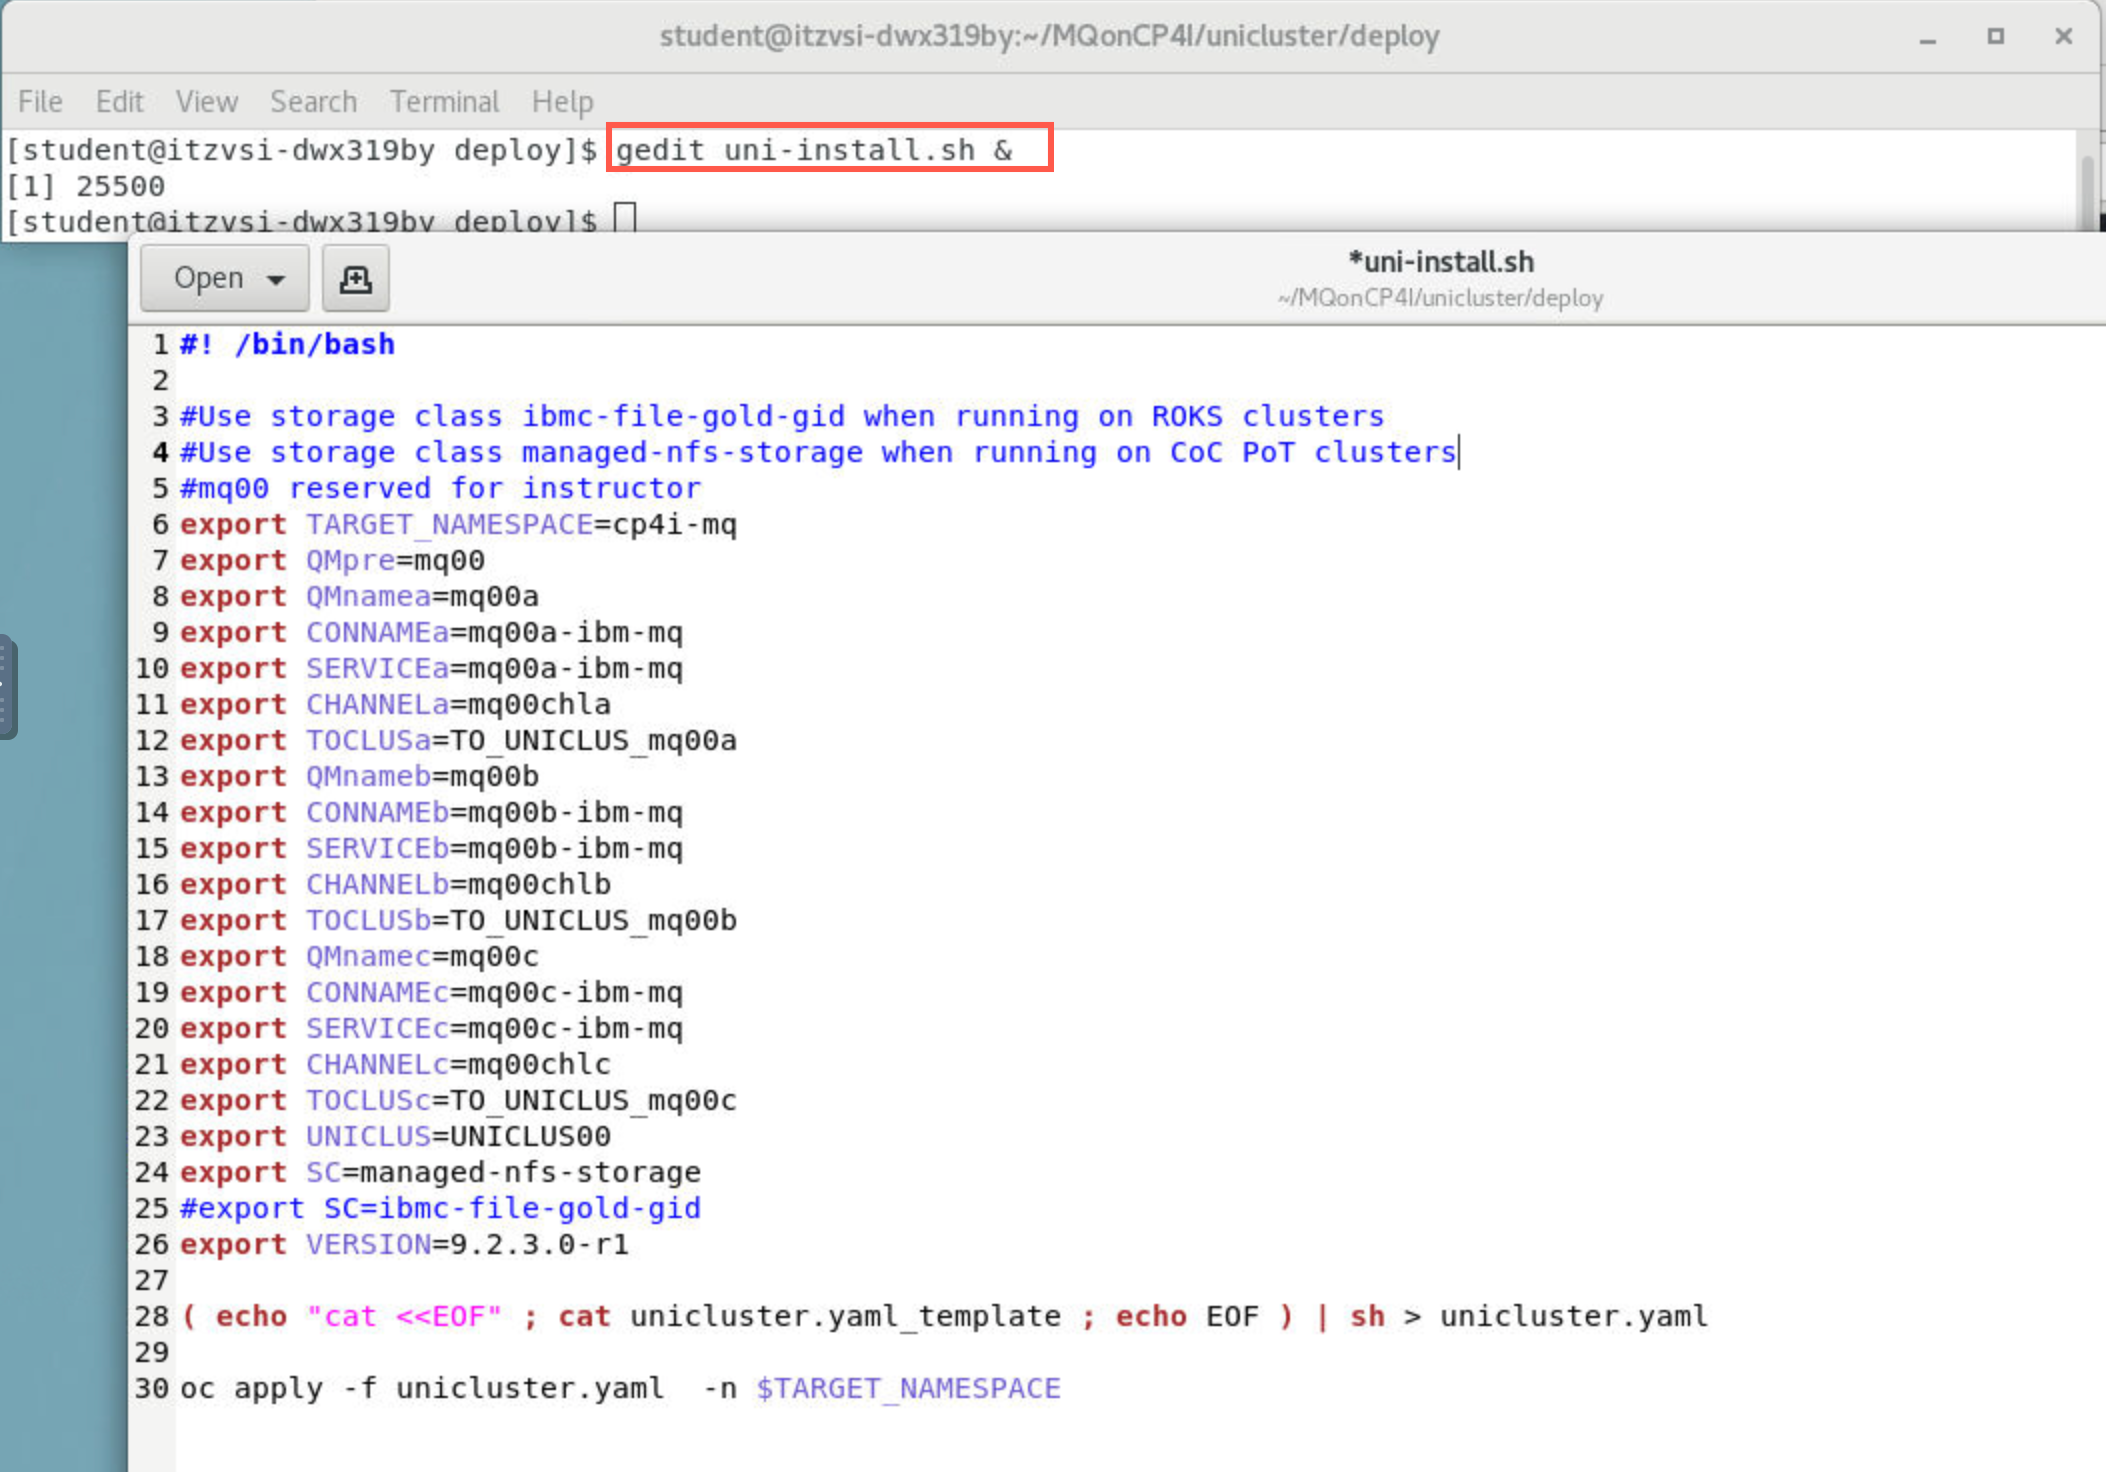
Using & on this command runs gedit in the background keeping your terminal free for other commands. Without the paramater the terminal would be locked while running gedit and could not be used for other commands while you are editing files.
Tip:
To show line numbers in gedit, click the drop-down in bottom right corner and select Display line numbers.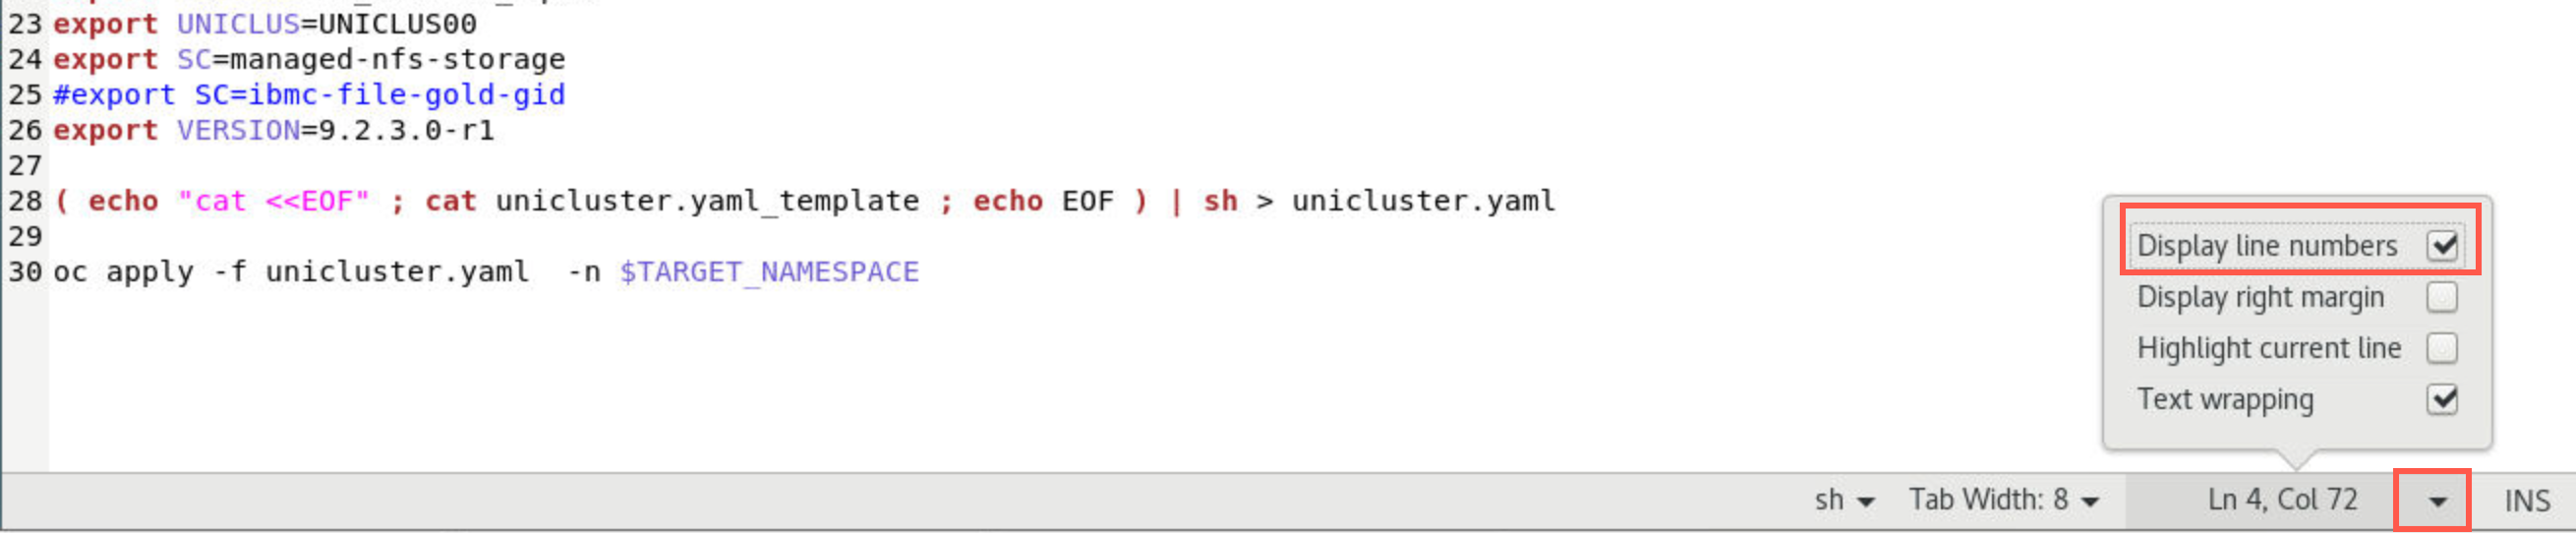
-
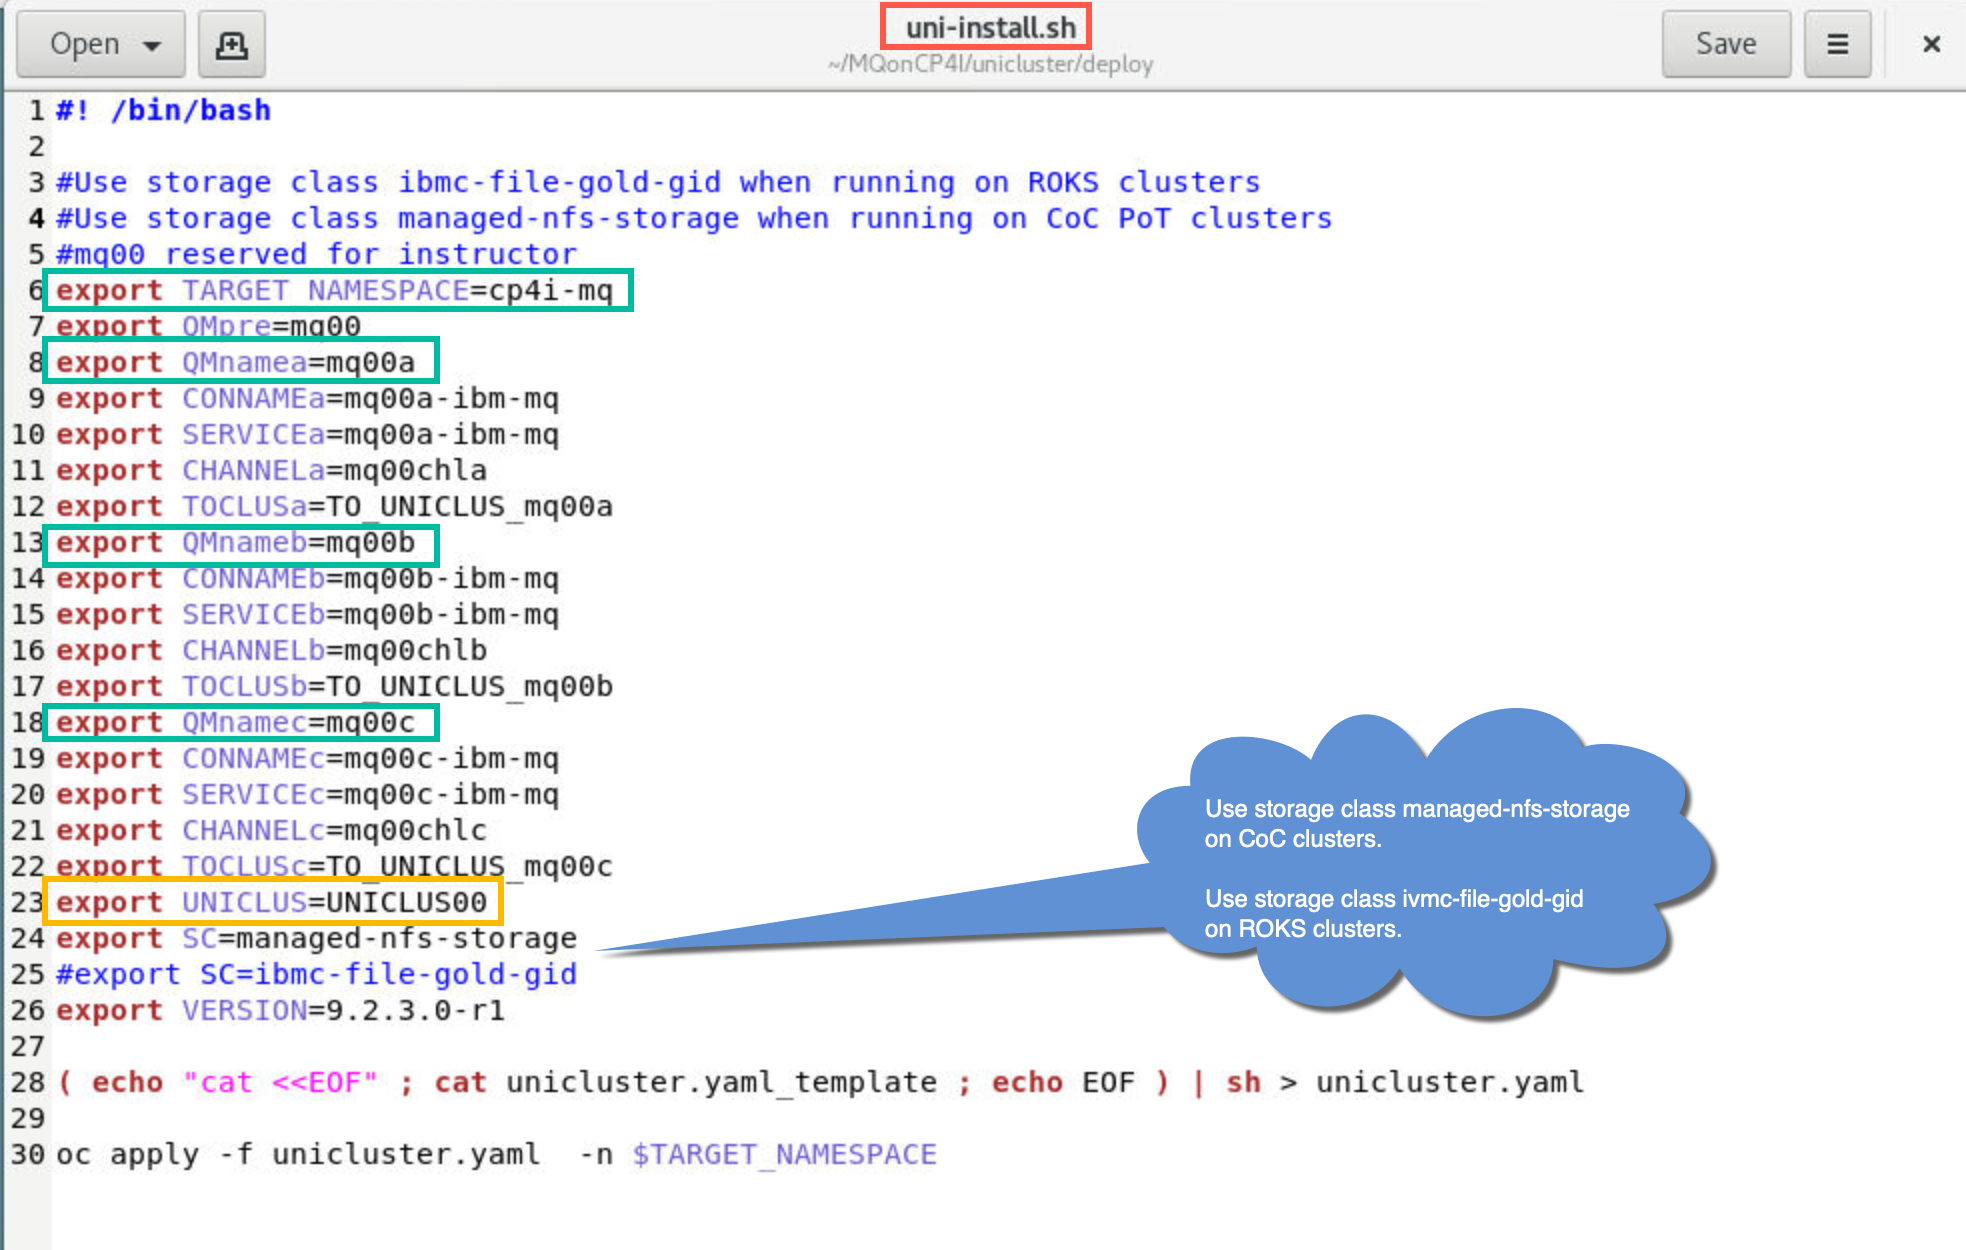
Review the uni-install.sh shell script. The export commands define environment variables using your student number to uniquely define your queue managers and related objects. This will help you identify and filter based on your student ID.
Notice that you will be using your assigned project (TARGET_NAMESPACE). Replace cp4i-mq with your assigned project name.There will be three queue managers, mqxxa, mqxxb, and mqxxc in your cluster UNICLUSxx.
-
Change the TARGET_NAMESPACE to your assigned project name.
One of the environment variables is SC for Storage Class. If you are running on a ROKS cluster use the ibmc-file-gold-gid storage class and comment out the managed-nfs-storage line. If you are running on a CoC cluster use the managed-nfs-storage storage class and comment out the line for ibmc-file-gold-gid.
If you are attending a PoT, ask the instructor which Red Hat cluster you are using.
-
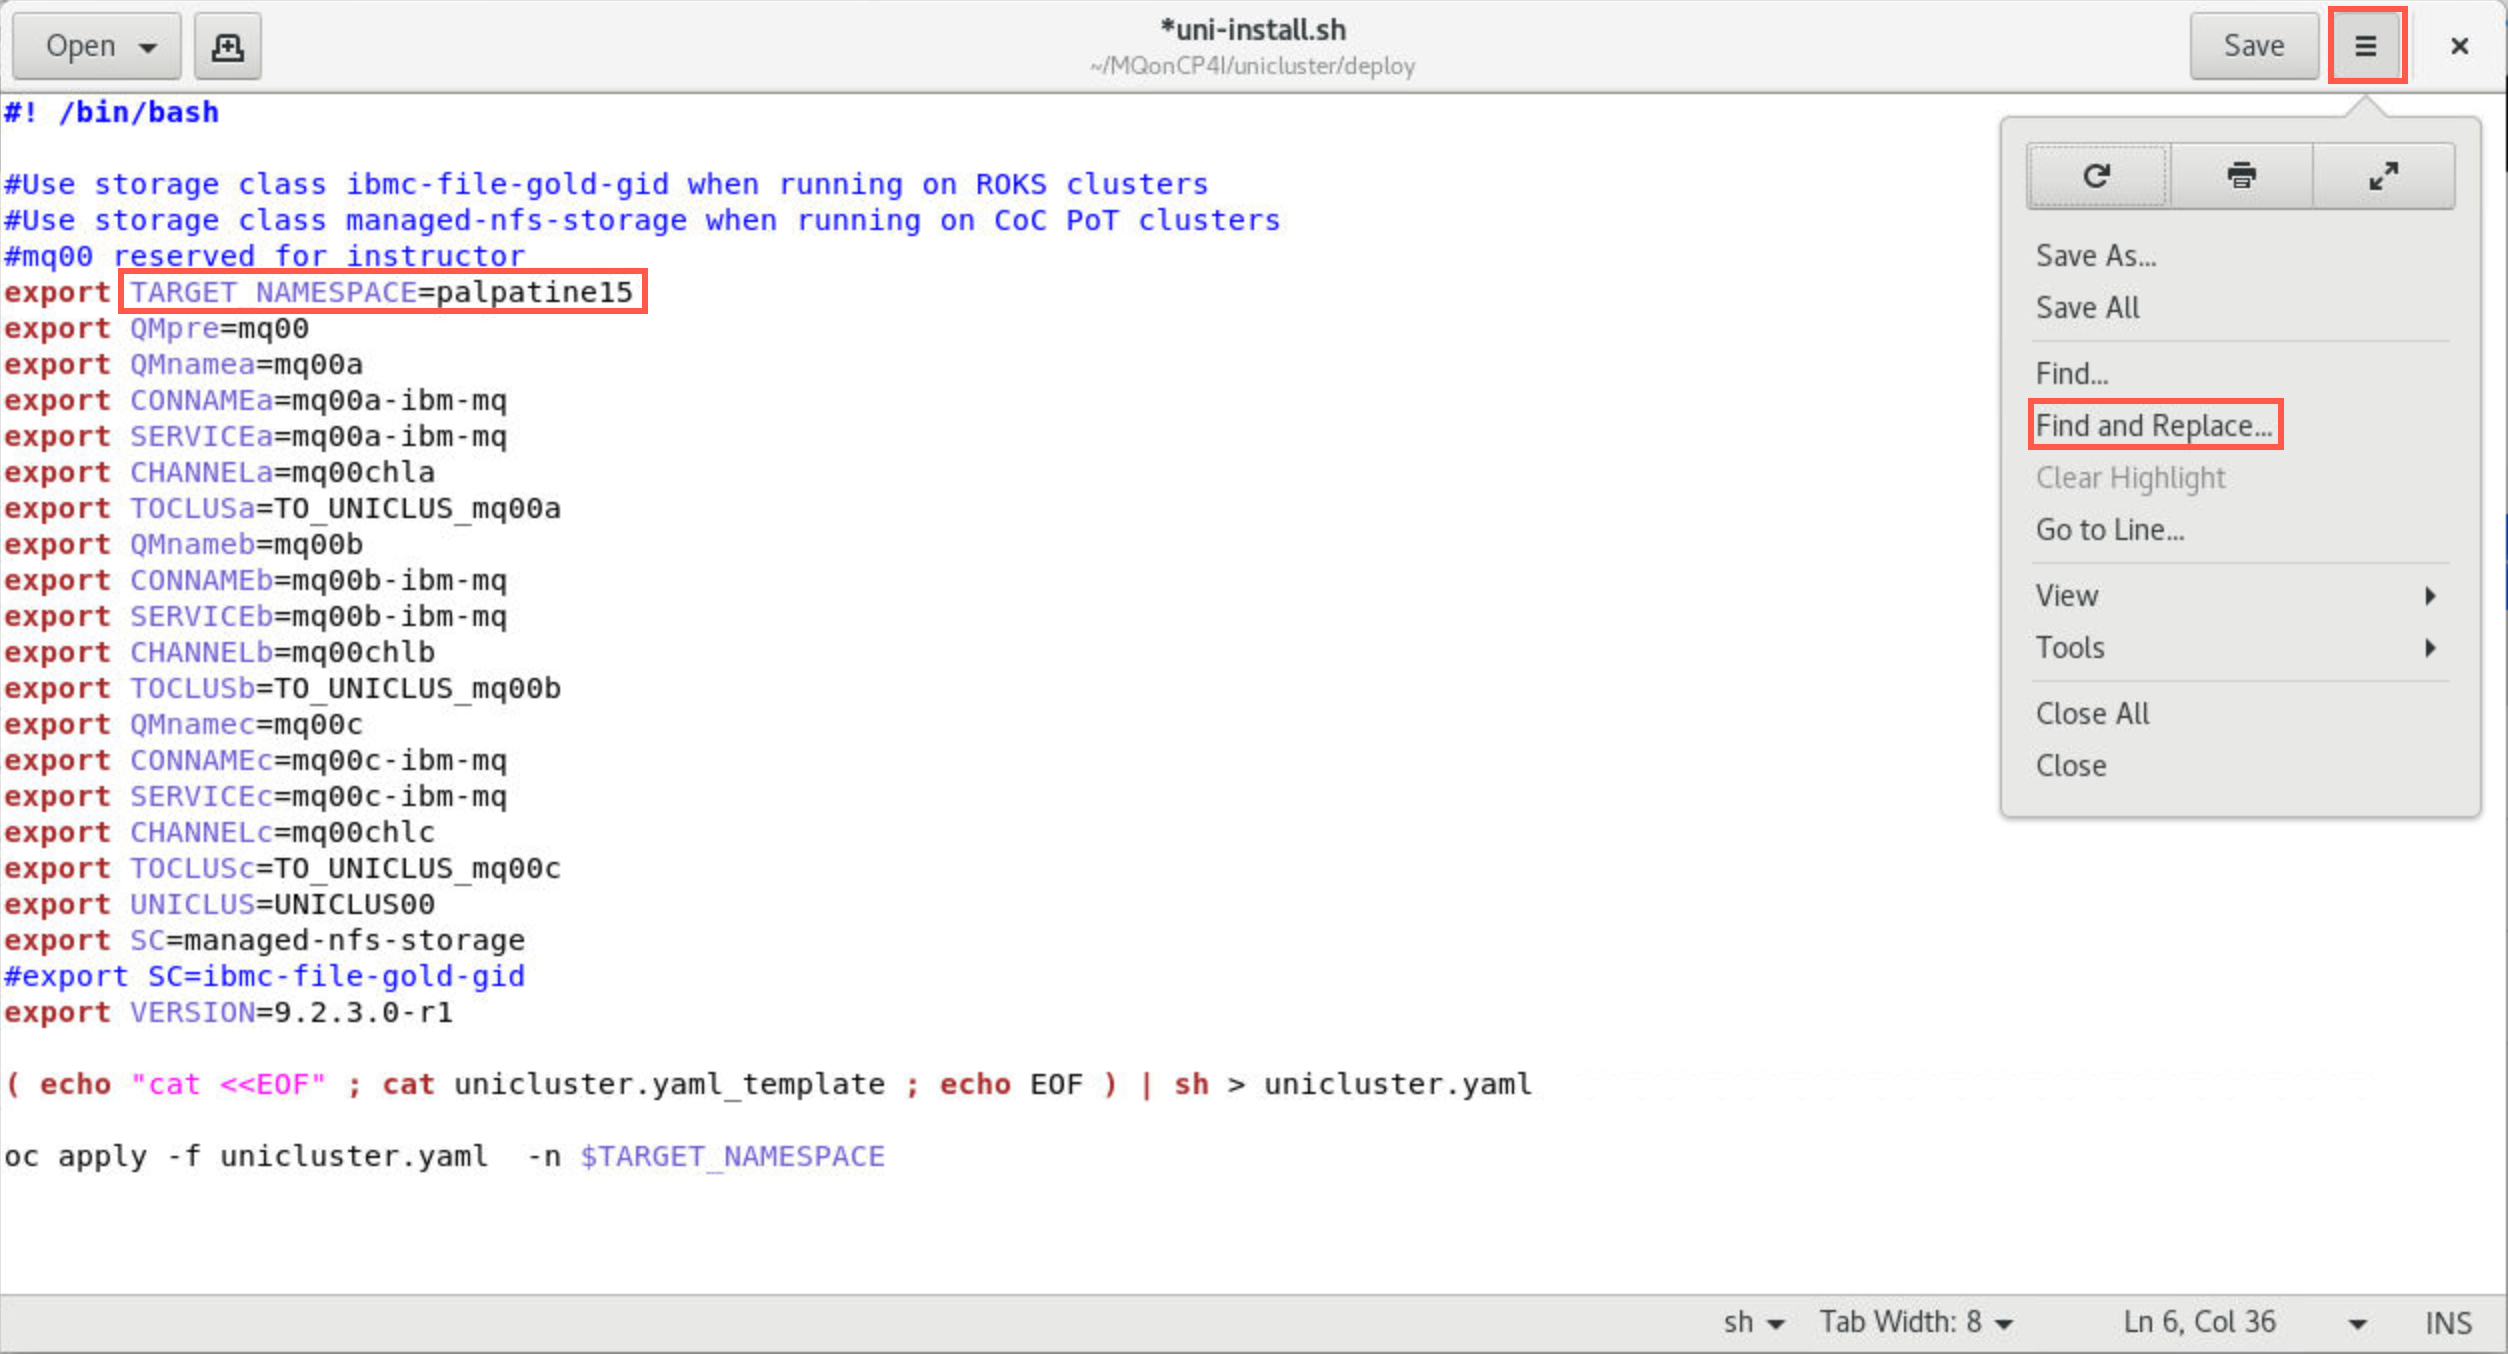
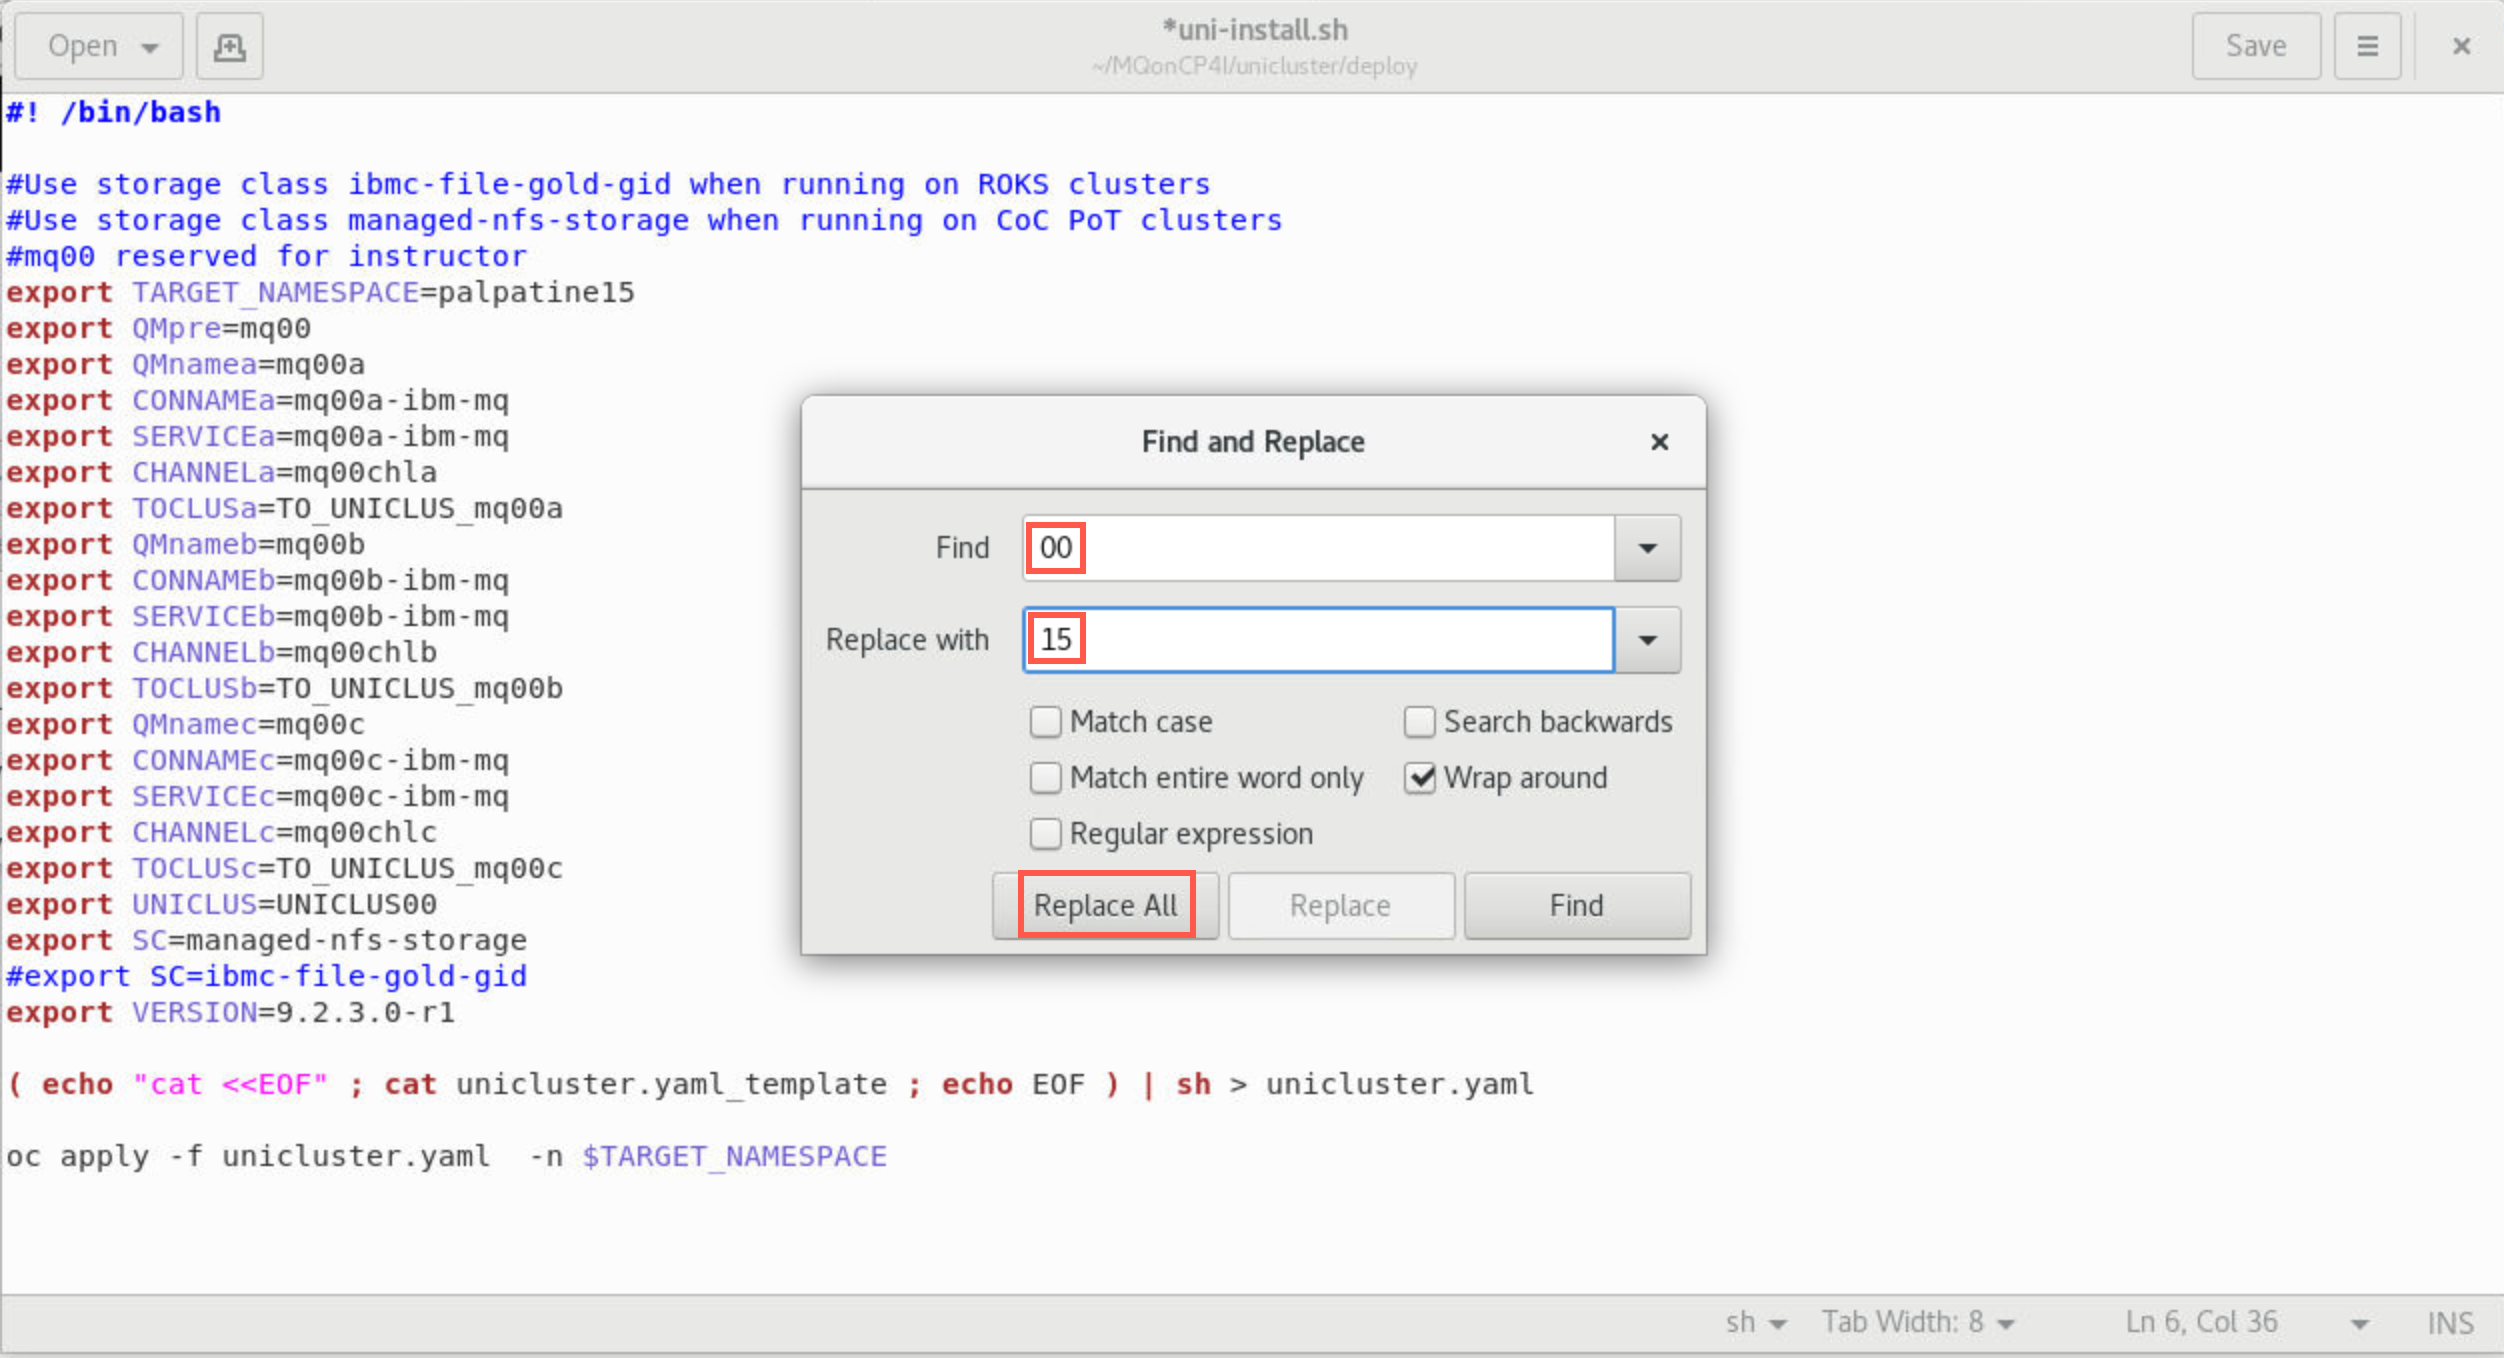
Click the hamburger menu in the top right corner, select Find and Replace….
-
Enter 00 in the Find field and your student number in the Replace with field. Click Replace All.
-
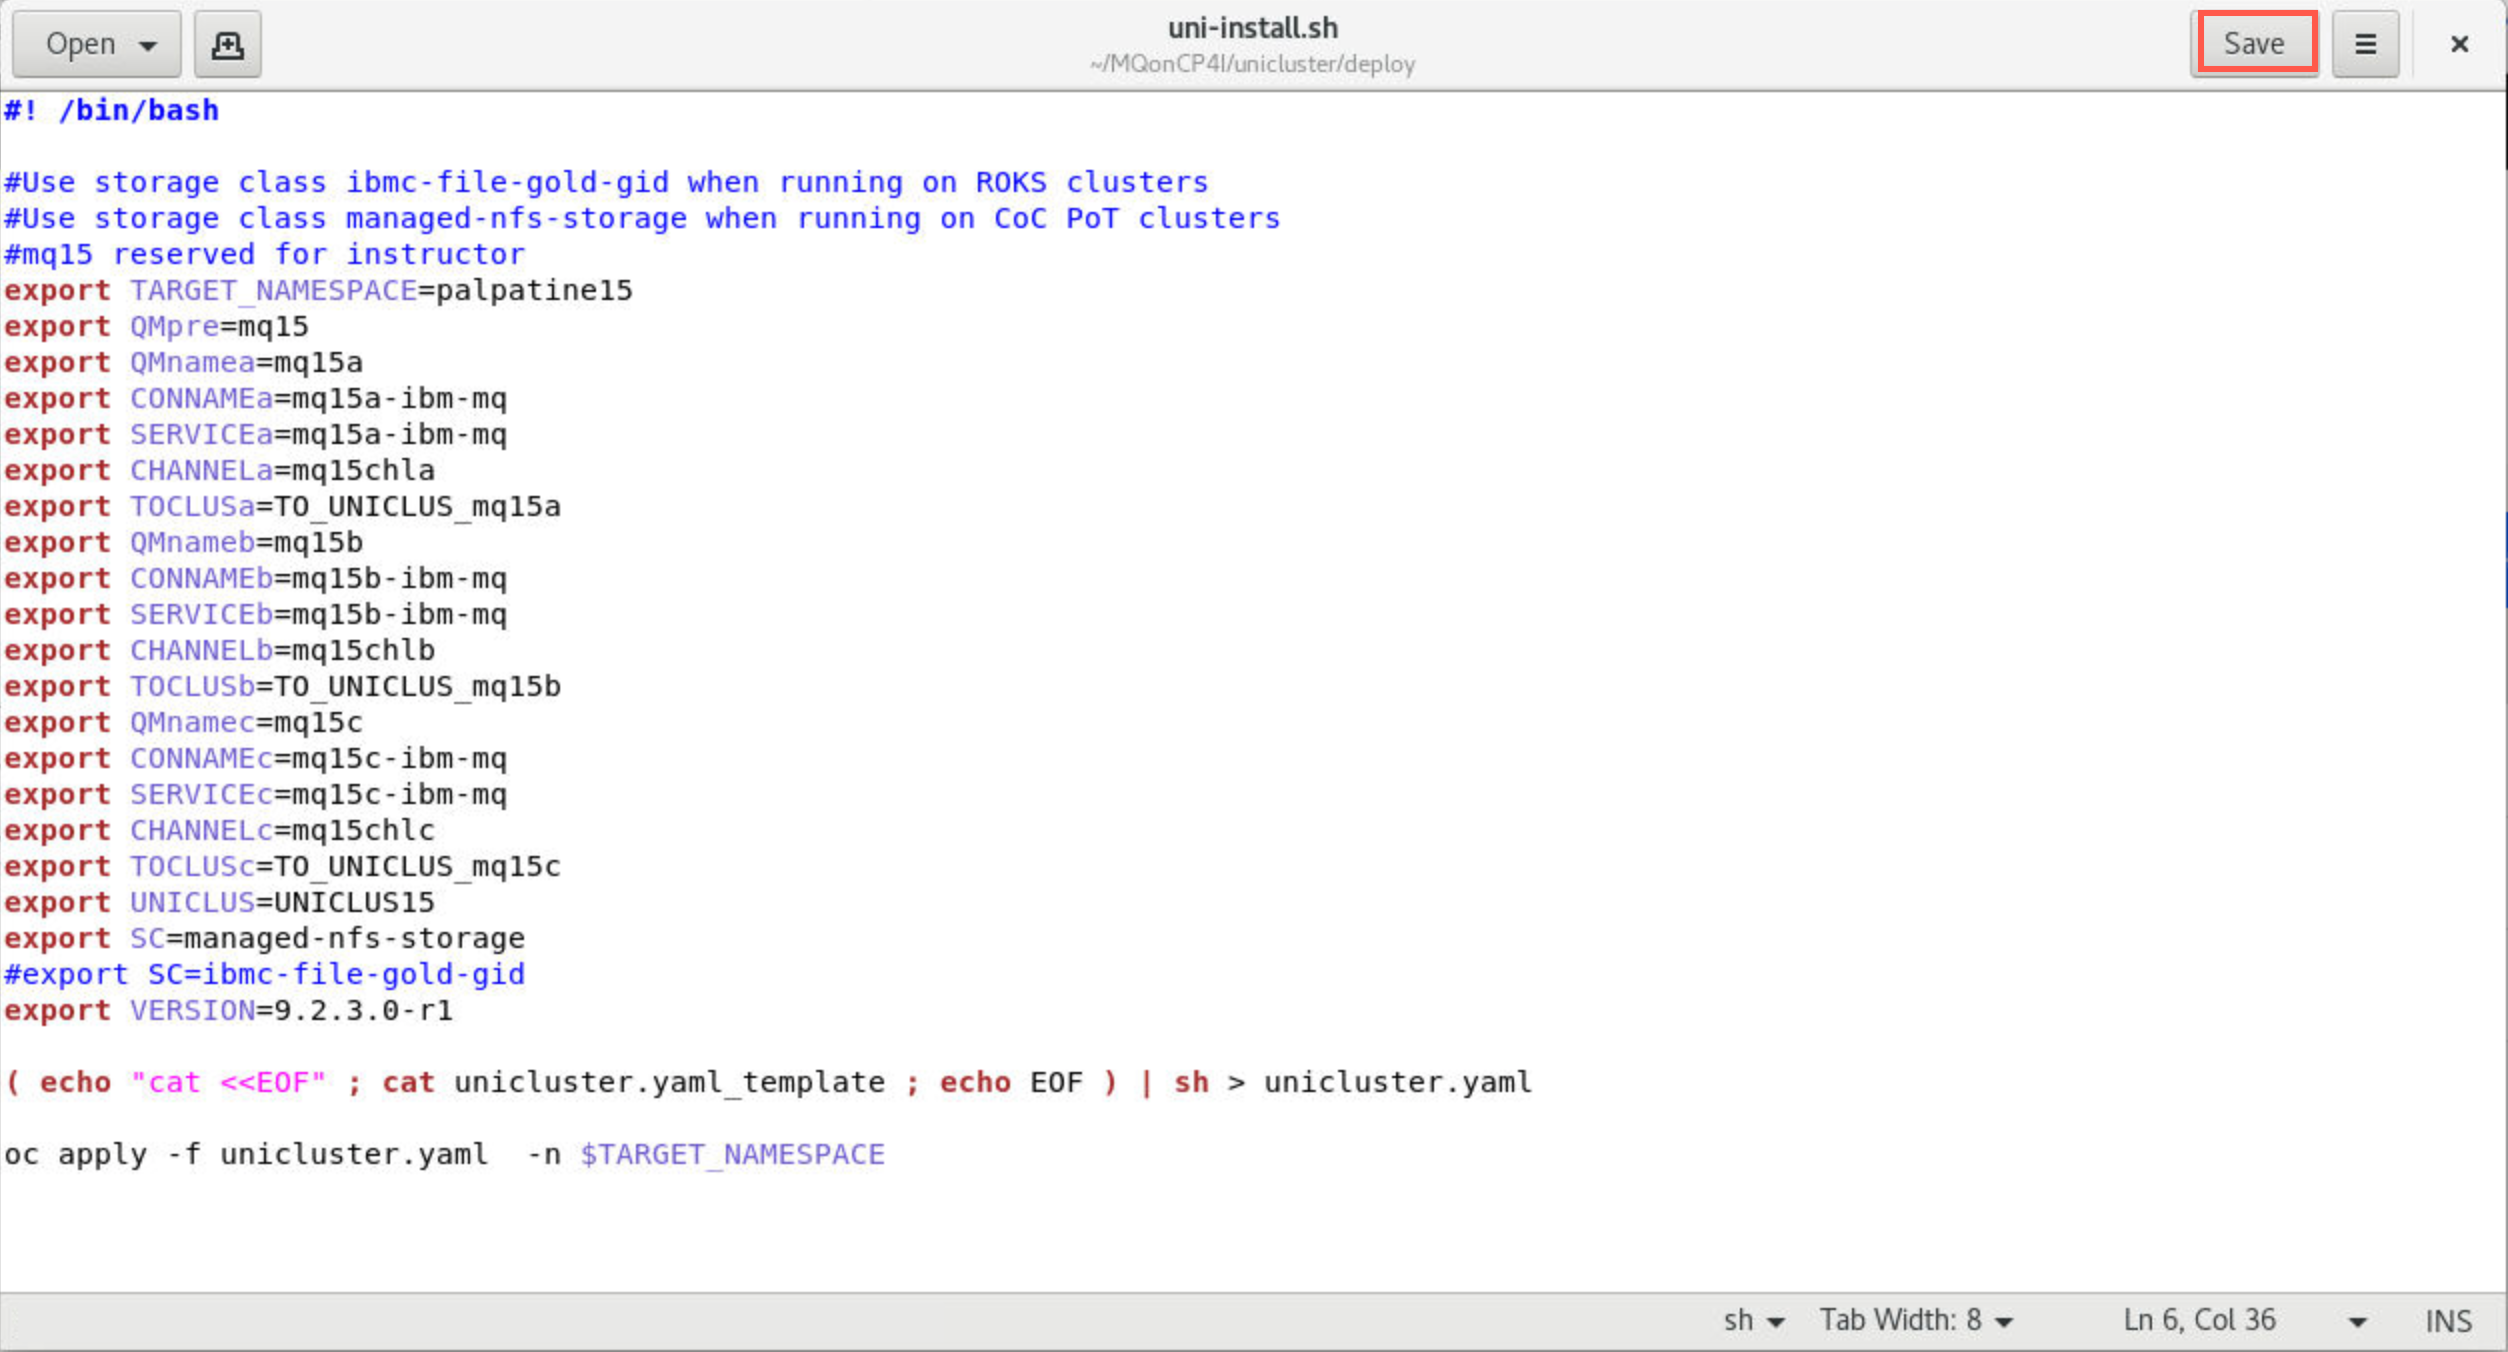
Close Find-and-Replace window, then click Save.
-
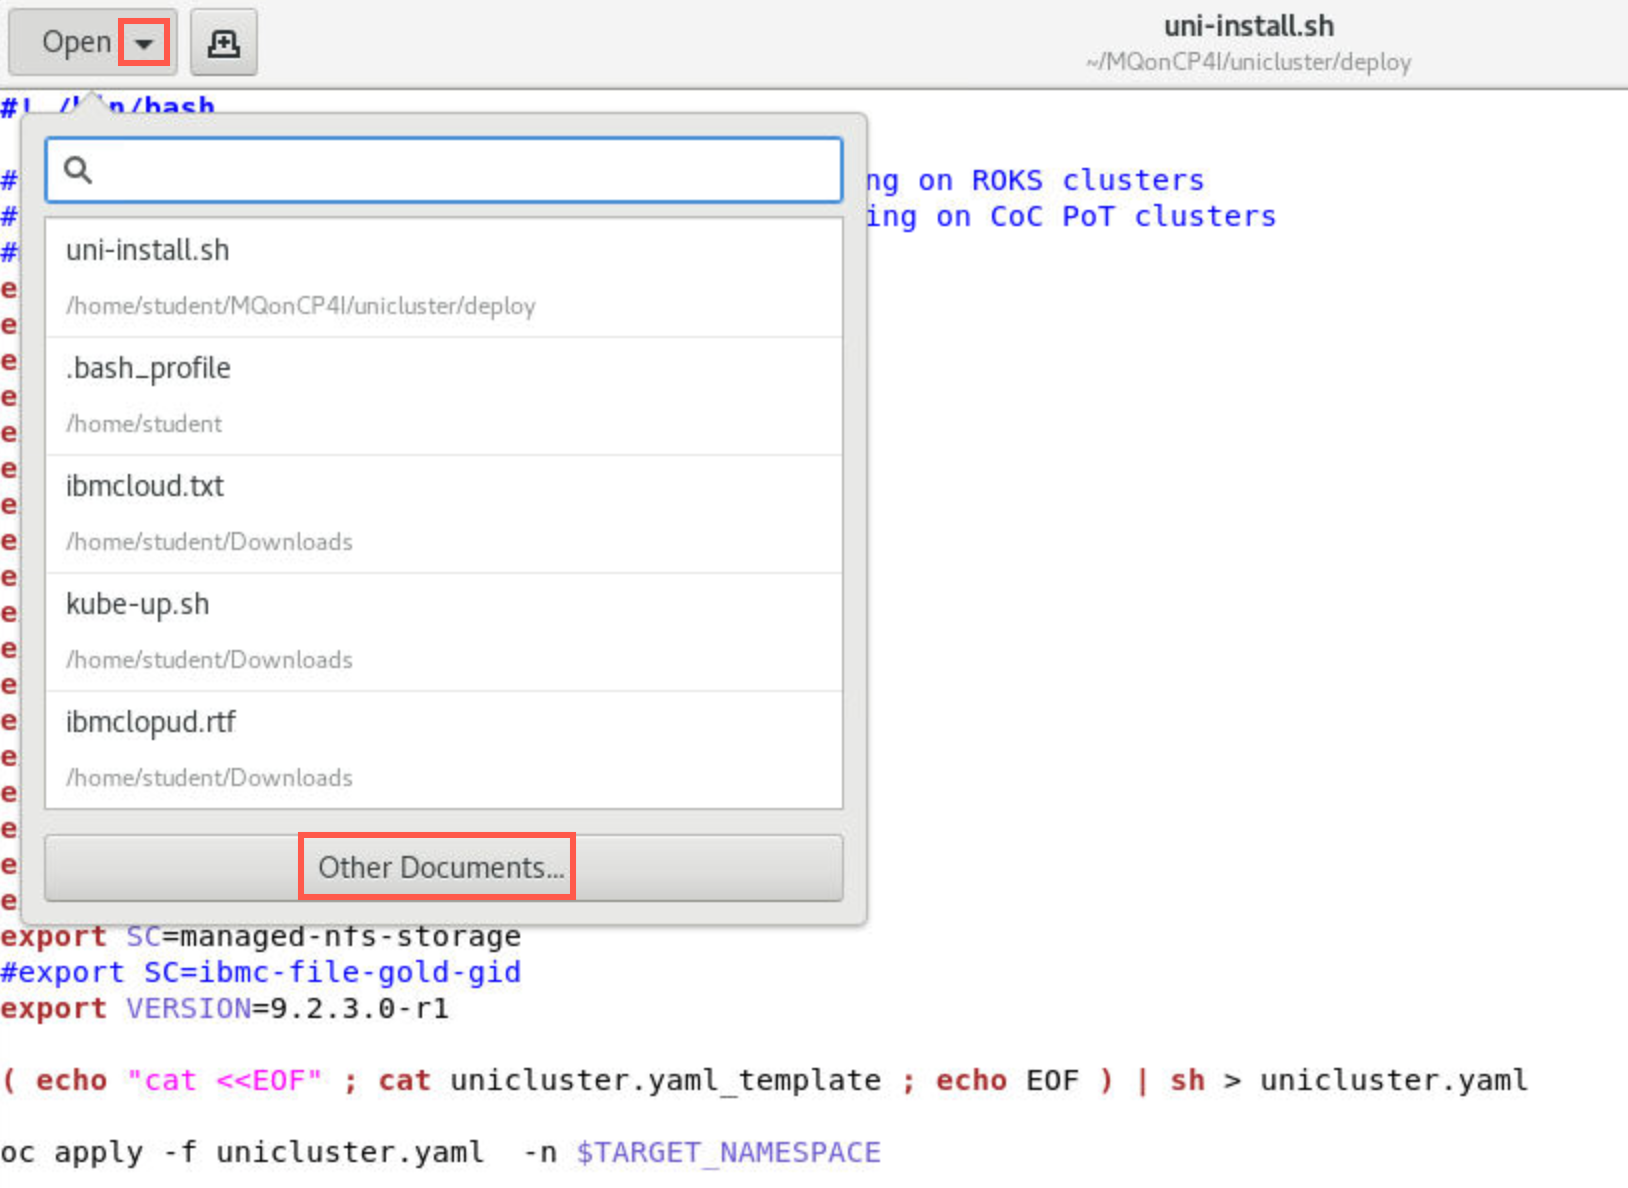
Still in gedit, click the drop-down for Open and click Other documents.
-
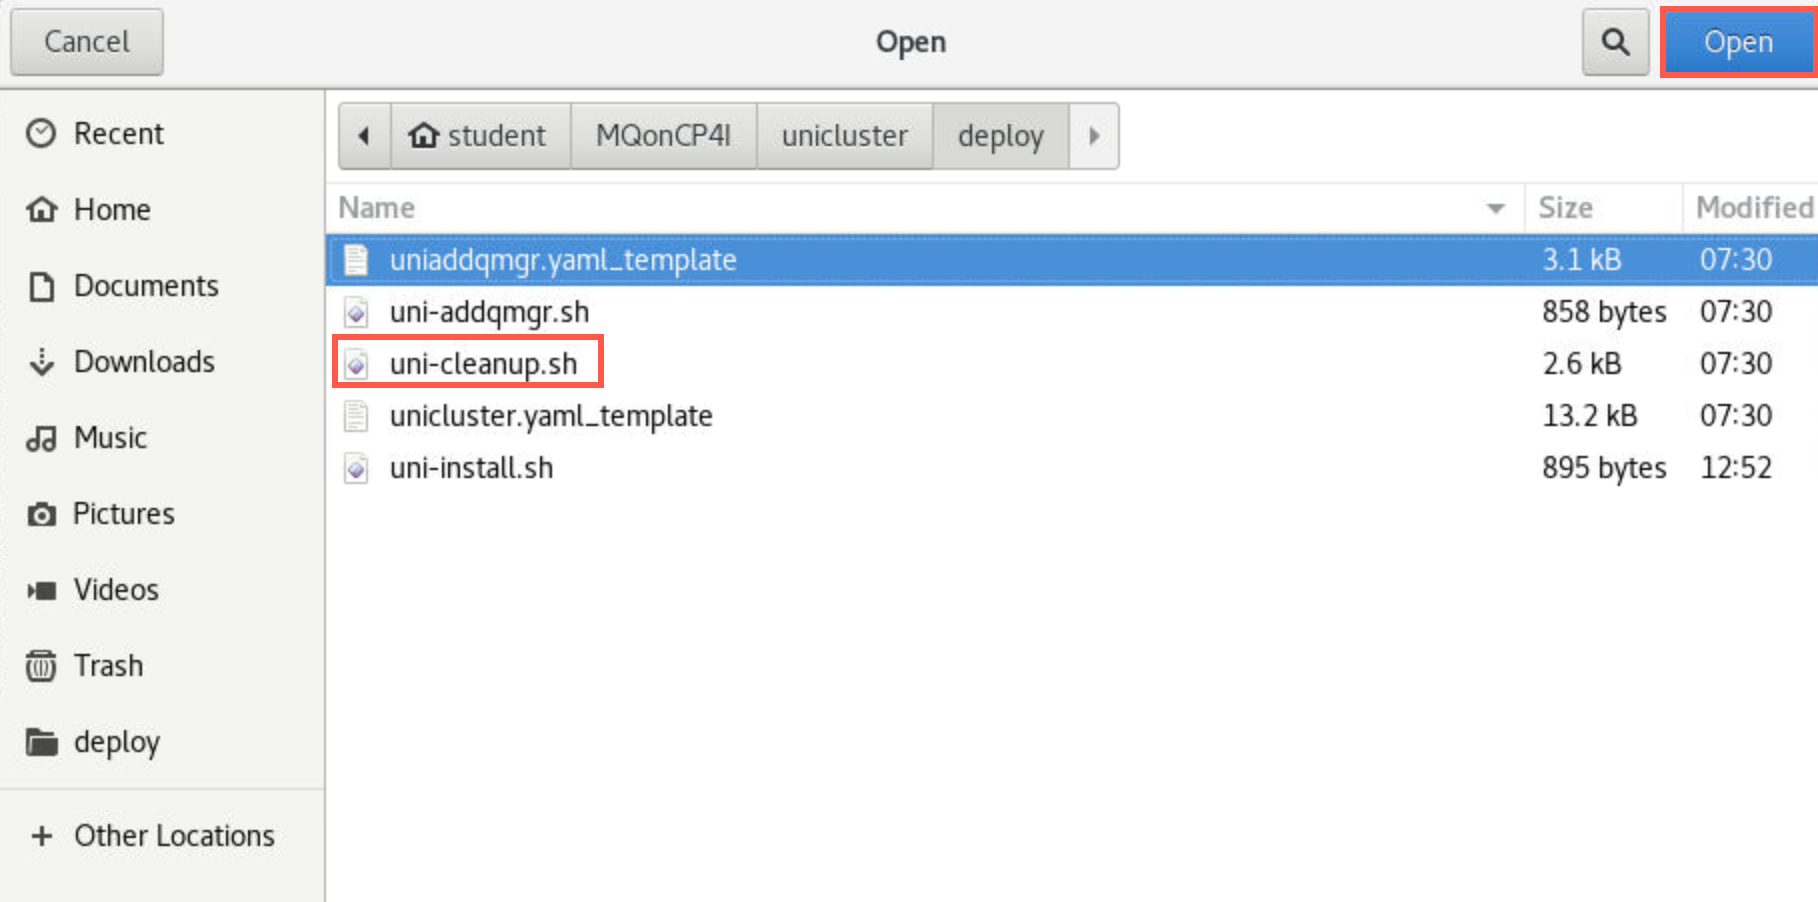
Select uni-cleanup.sh.
-
Change the TARGET_NAMESPACE to your assigned namespace. Repeat the find-and-replace. Make sure to save the changes.
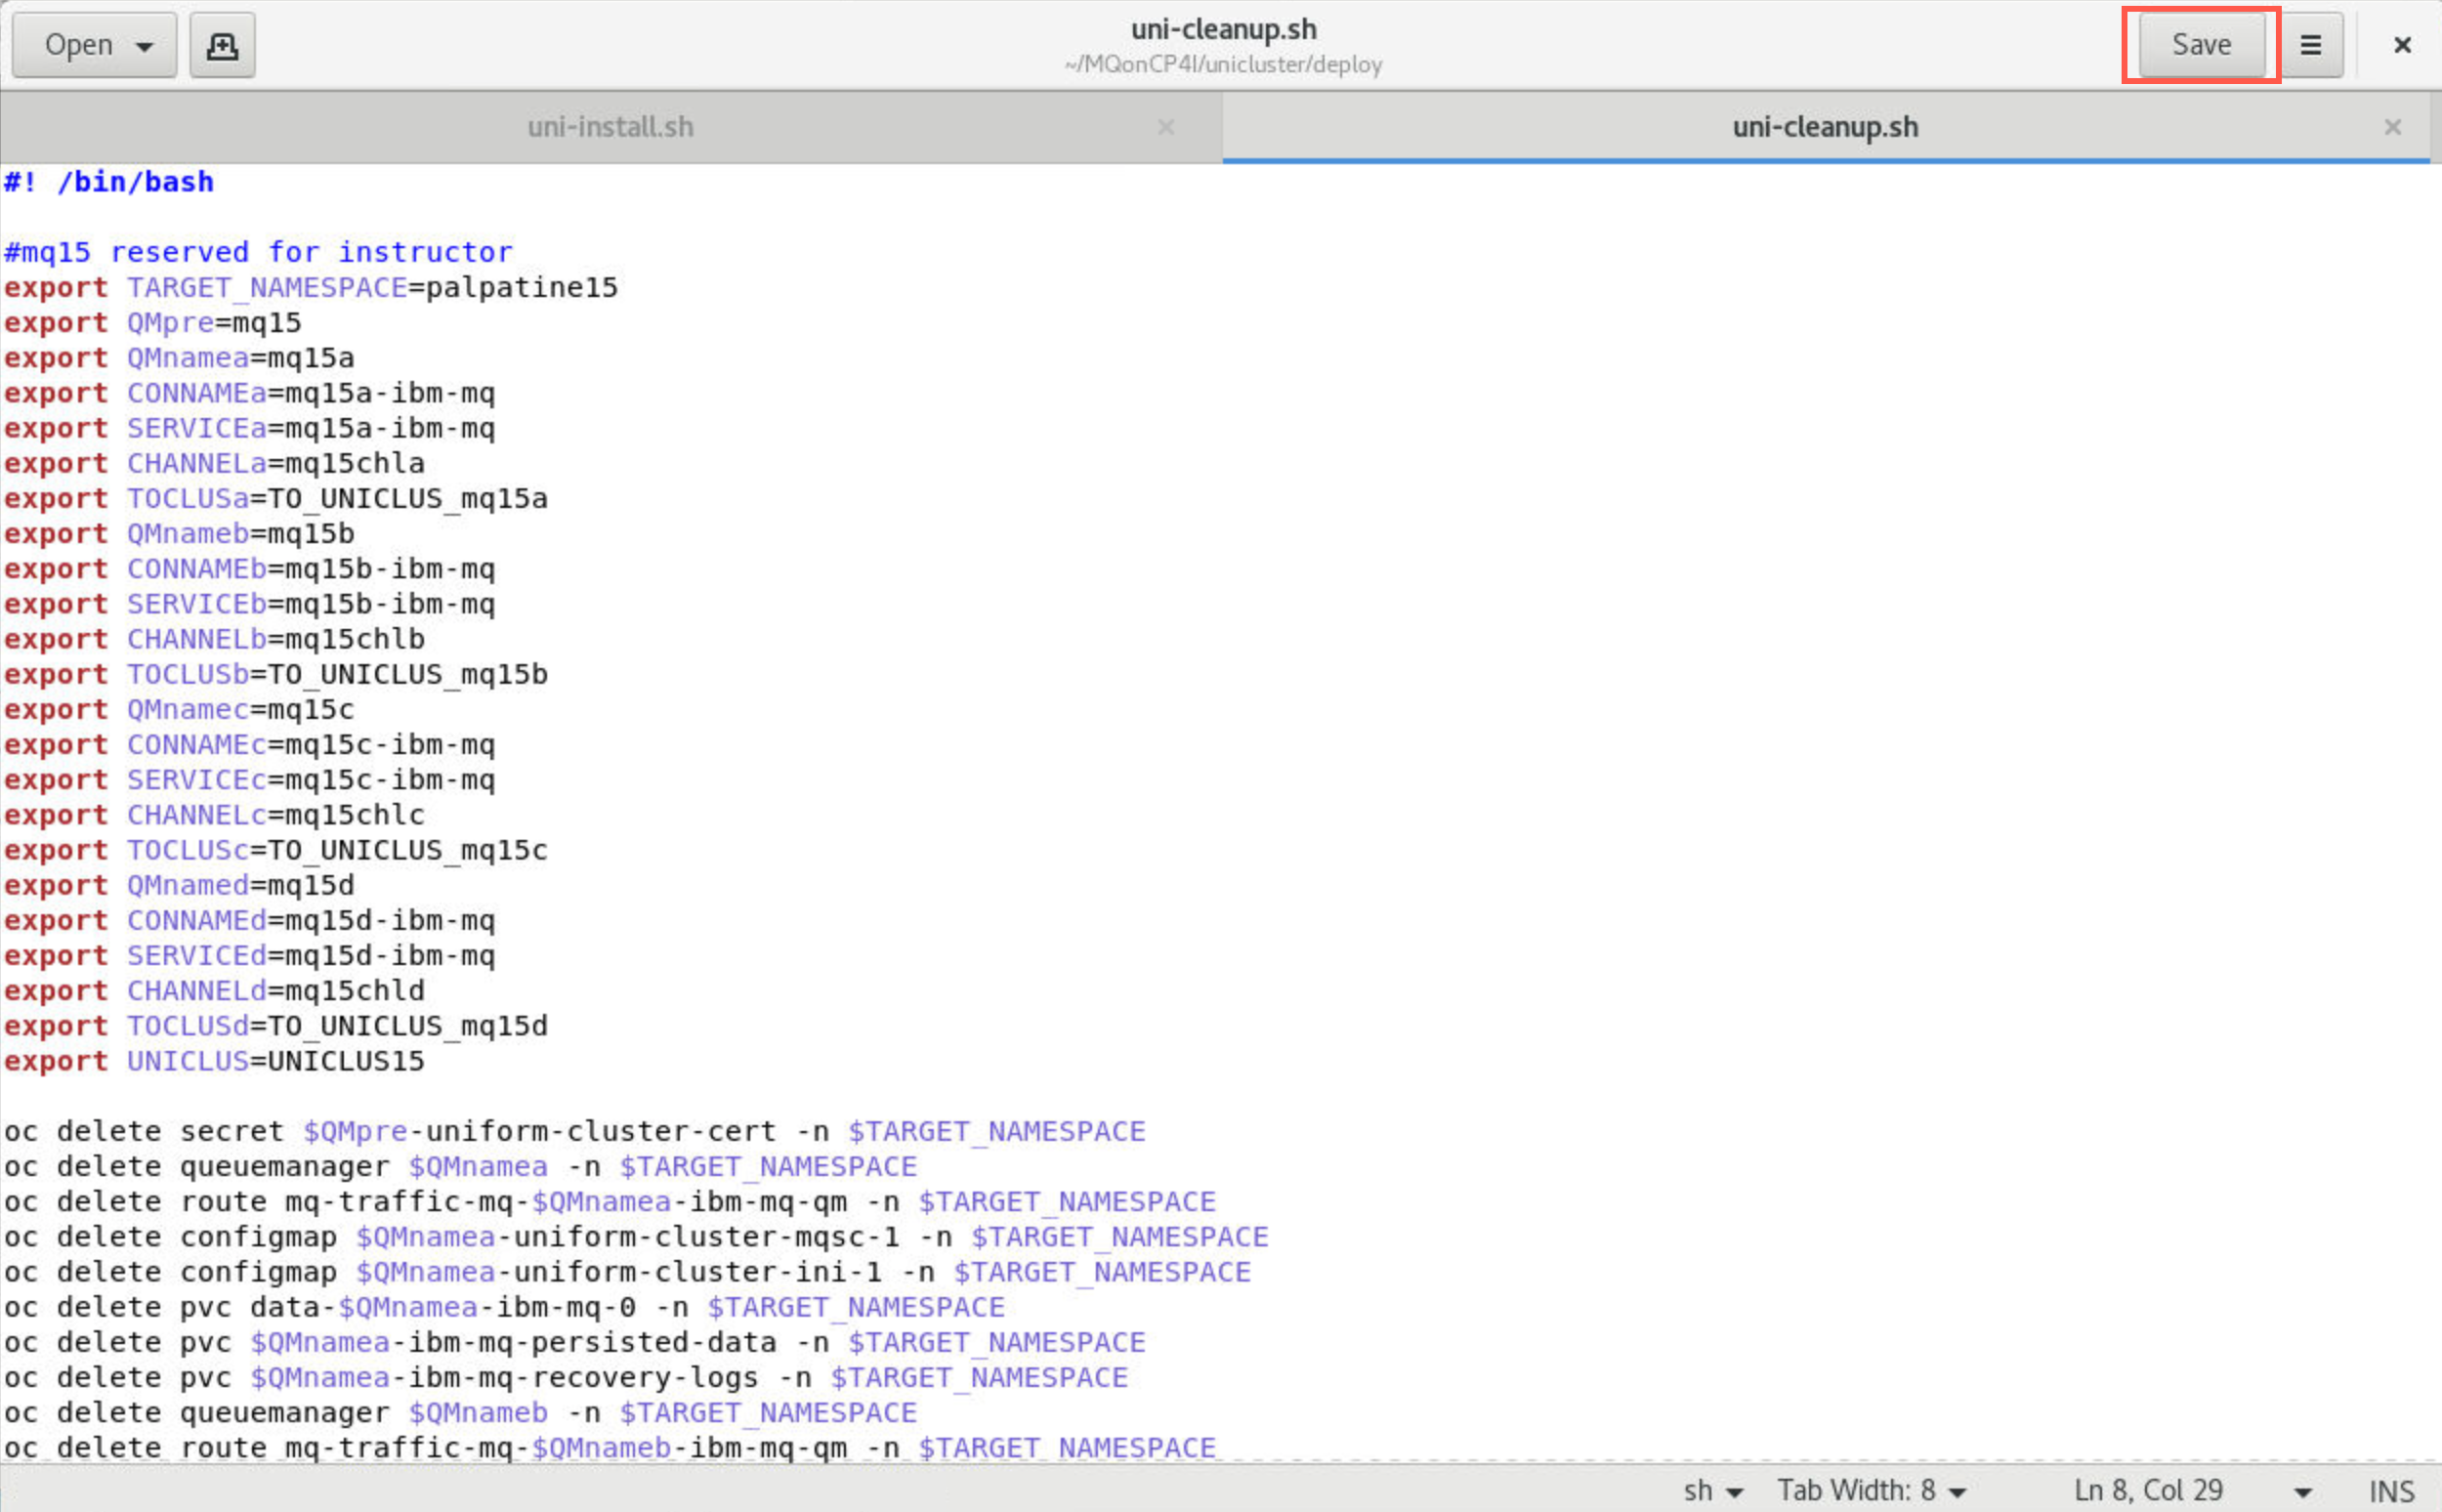
-
Click Open > Other documents and select unicluster.yaml_template.
Note: If the file name does not appear in the drop-down list, click Other and navigate to the correct directory to find it.
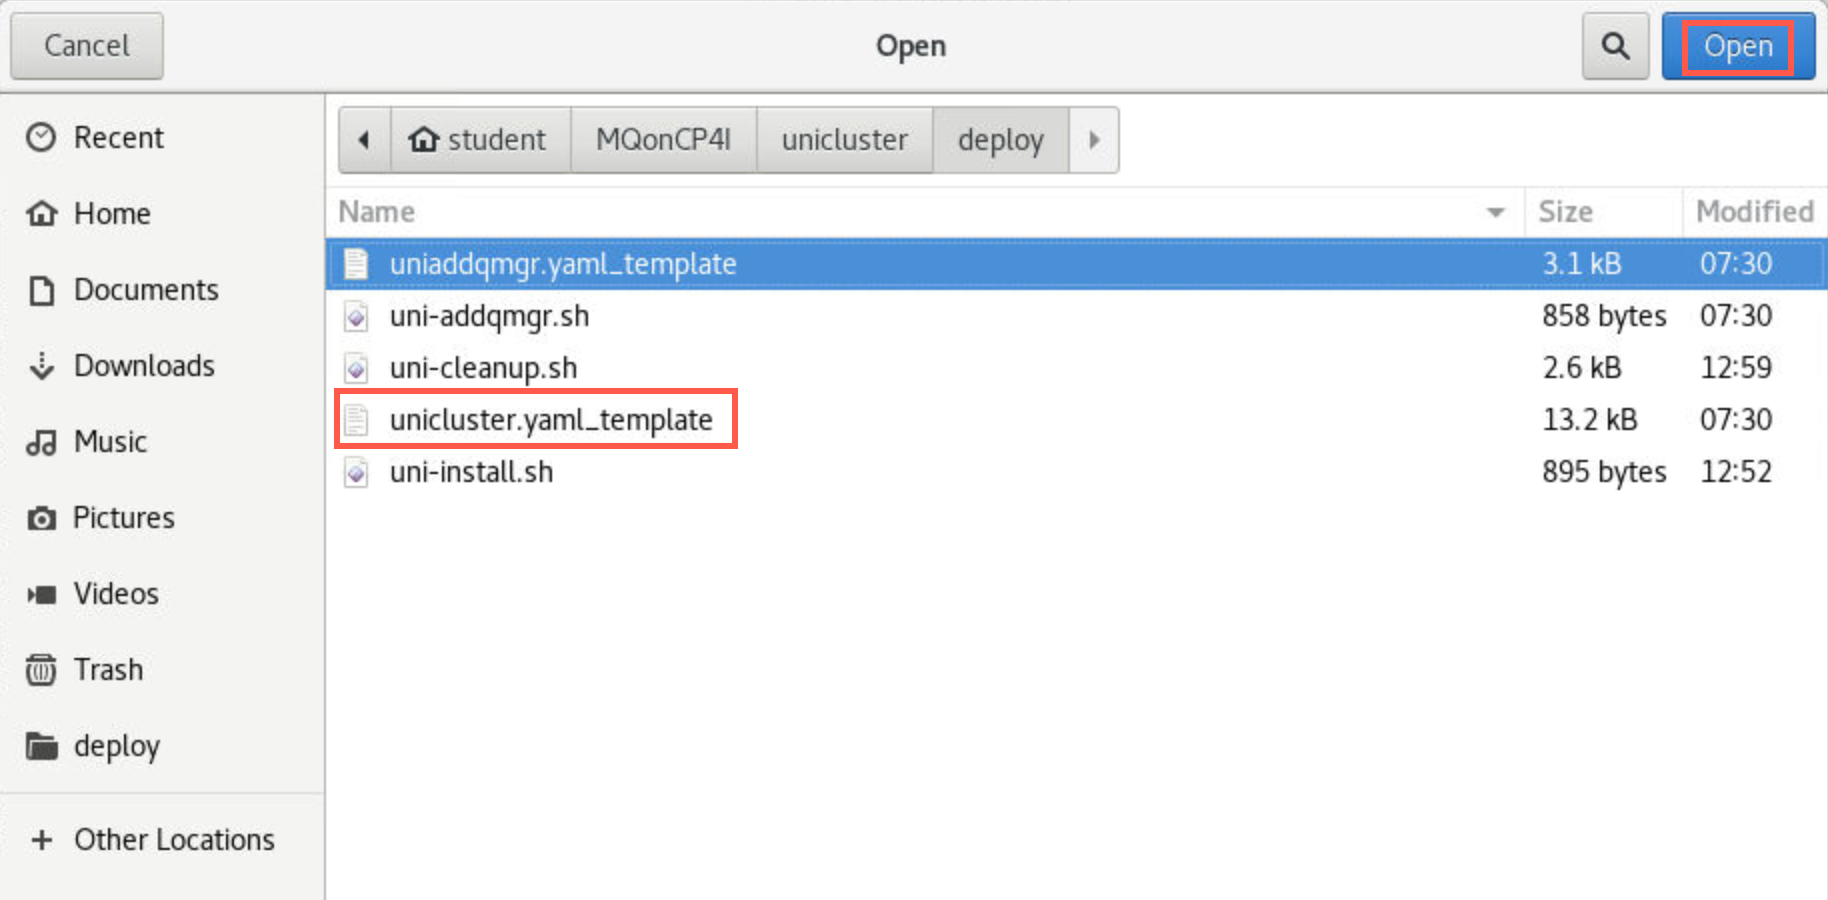
-
Scan through the file but do NOT change anything in this file. The template has definitions for all three queue managers. Your environment variables will be substituted throughout the file. If you execute a find for “$” you can easily locate the substitutions.
Each queue manager has two ConfigMap stanzas, one QueueManager stanza, and one Route stanza. One ConfigMap is the mqsc commands for the queue manager - uniform-cluster-mqsc-x and one for the cluster ini file - uniform-cluster-ini-x.
The queue managers share the same secret - lines 1 - 9. Queue manager mqxxa is defined on lines 11 - 116. Queue manager mqxxb is defined on lines 118 - 223. Queue manager mqxxc is defined on lines 225 - 325.
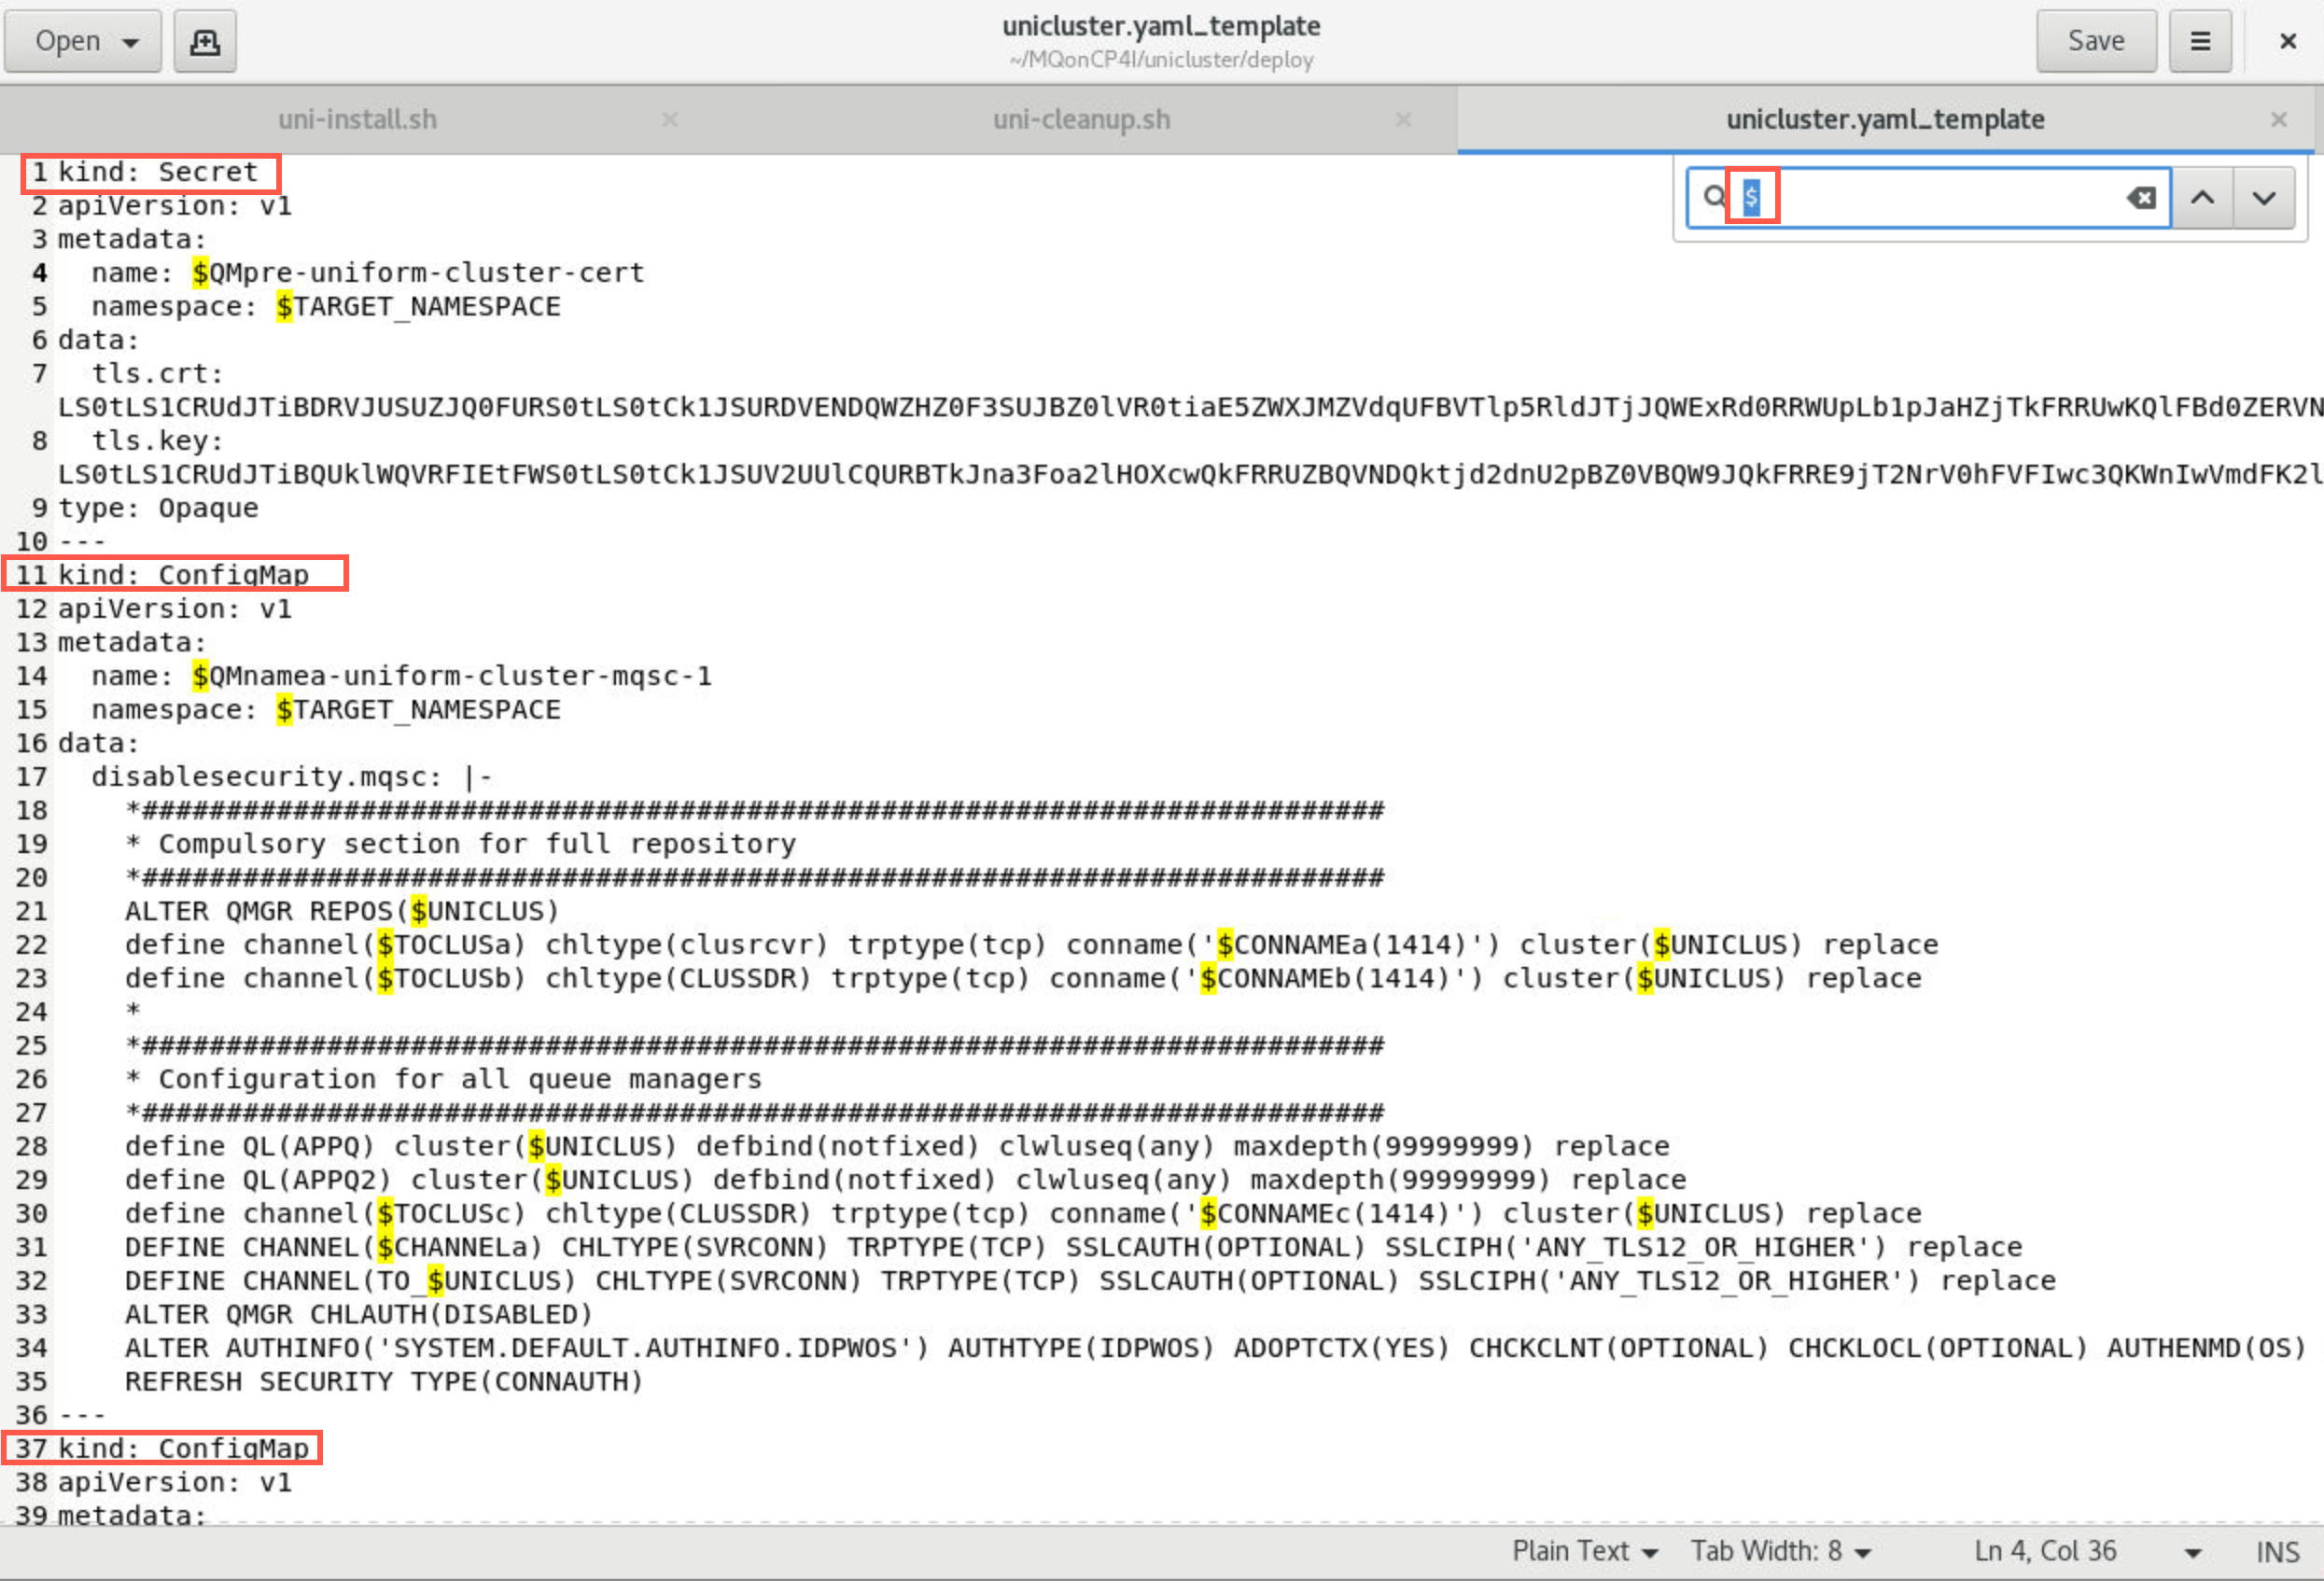
Pay particular attention to the mqsc commands which define the cluster repository queue managers and the cluster channels.
-
Review the config map.
-
Open another terminal window and navigate to /home/student/MQonCP4I/unicluster/deploy.
-
You should still be logged into the OpenShift environment. If not, click on your username on the top right menu of the OpenShift Console, then click on Copy Login Command.
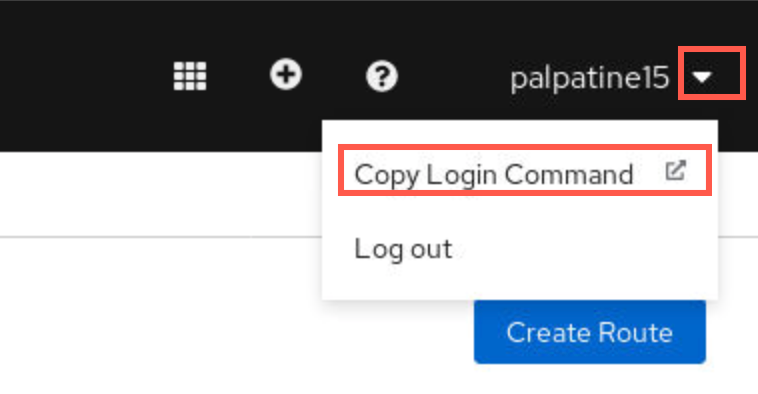
-
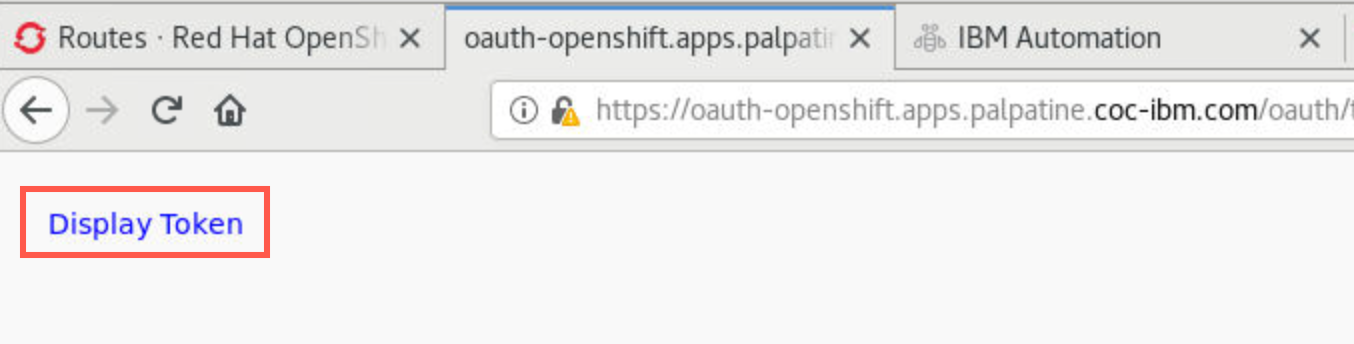
Click Display Token.
-
Copy the token and run it on your terminal.
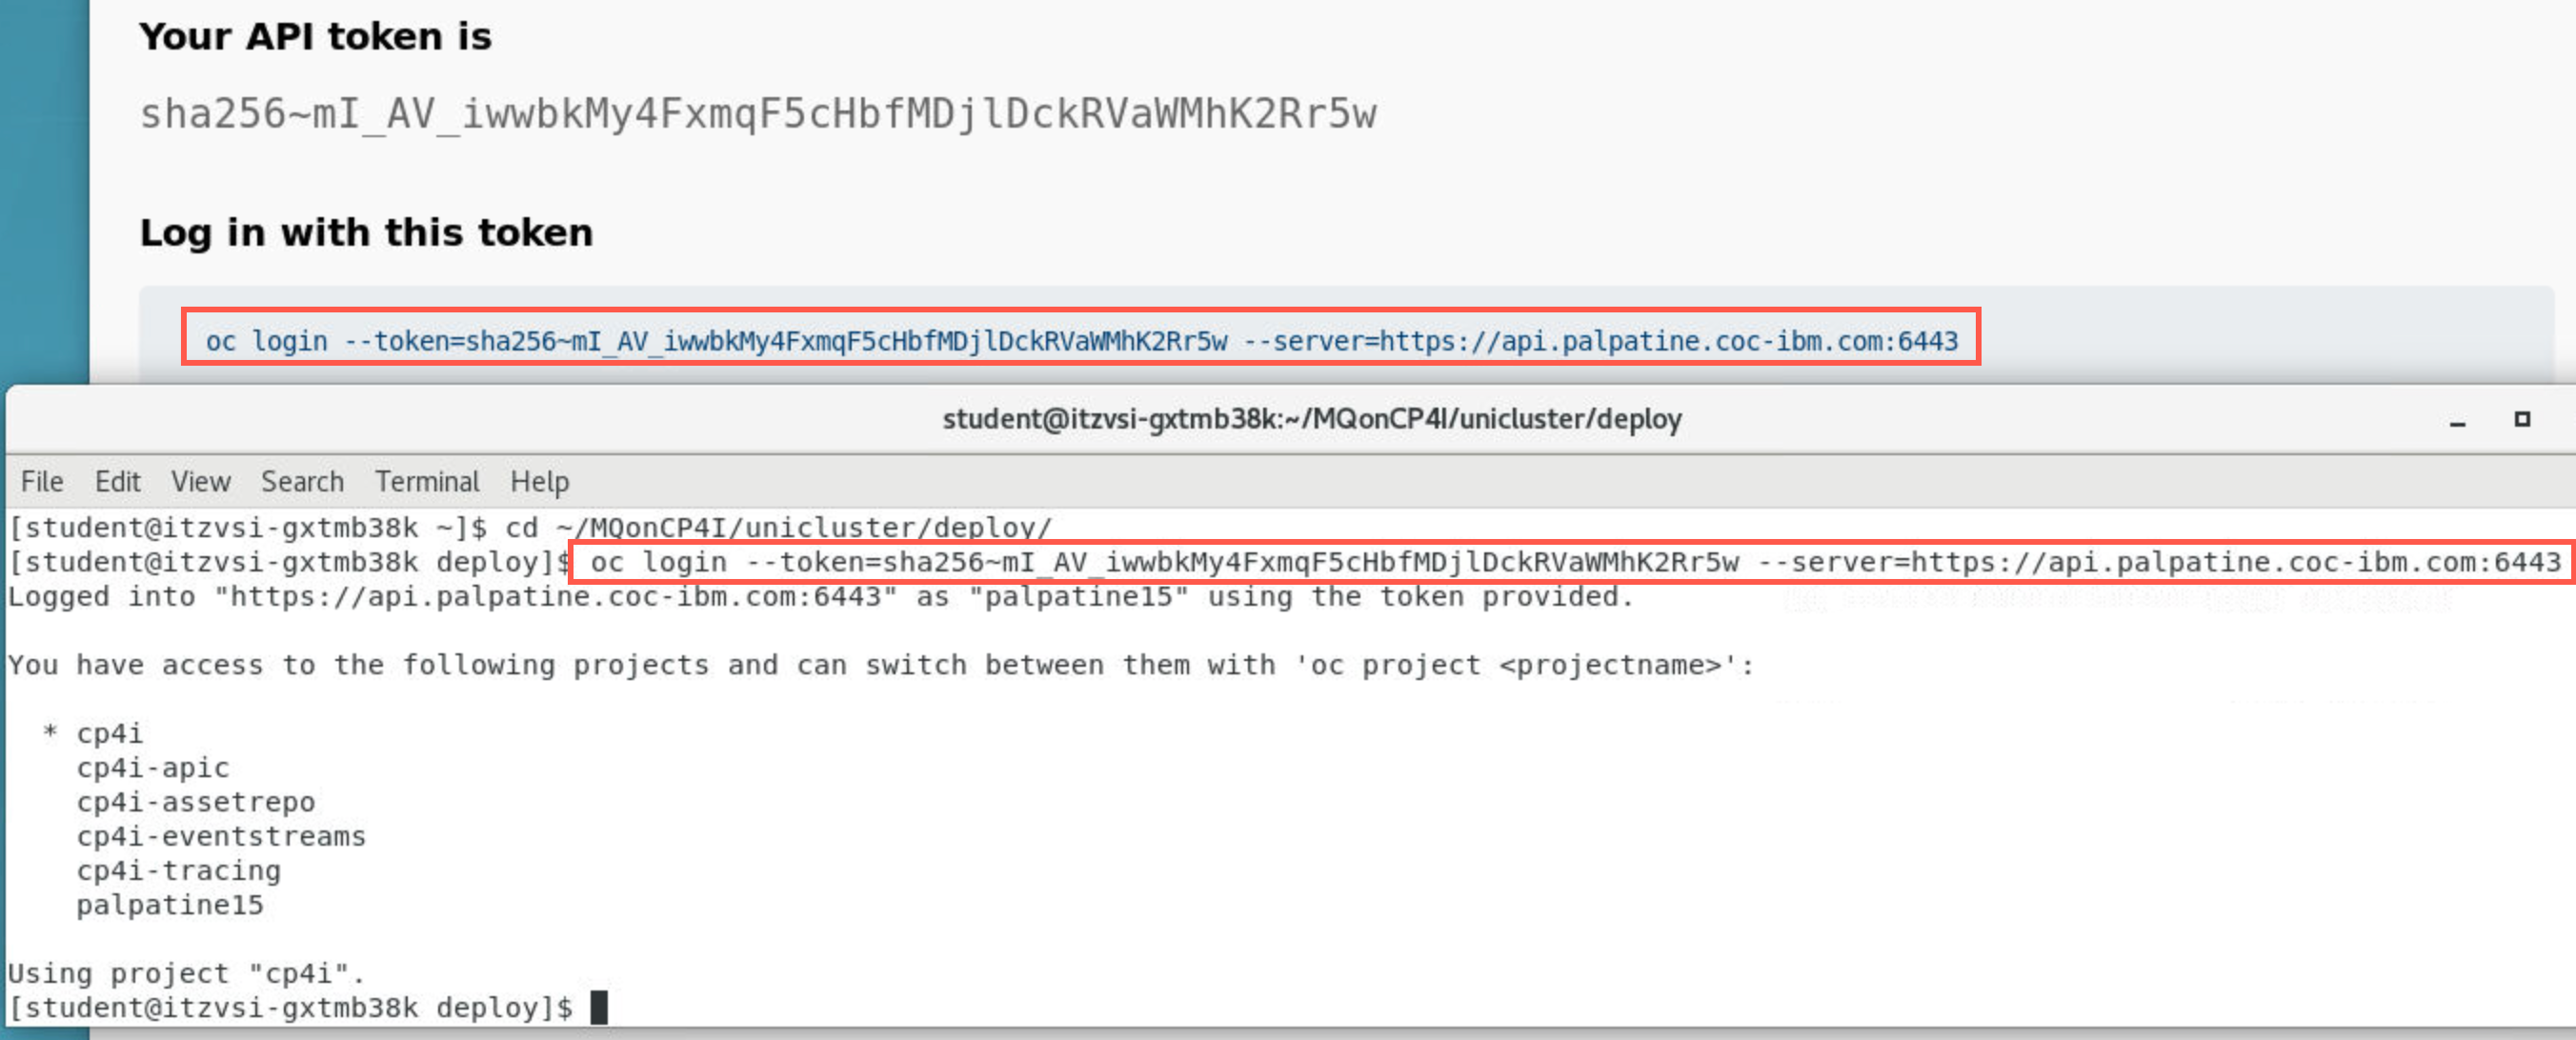
Respond y if asked to Use insecure connections?.
Note:
You should still be in your project so you shouldn’t need to run this command. -
Run the following command to navigate to your project substituting your personal project name for xxxxxxxxxxxxx:
oc project xxxxxxxxxxxxxx -
Enter the following command to create your uniform cluster.
./uni-install.sh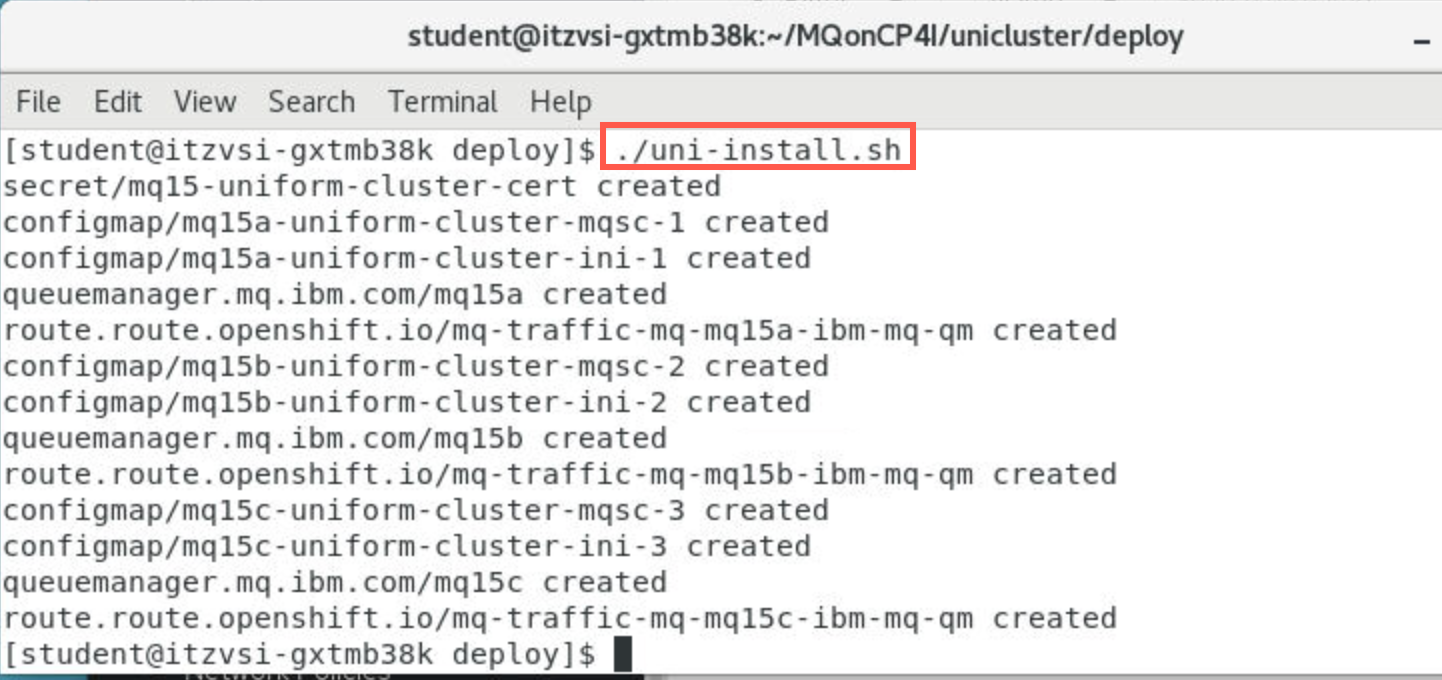
-
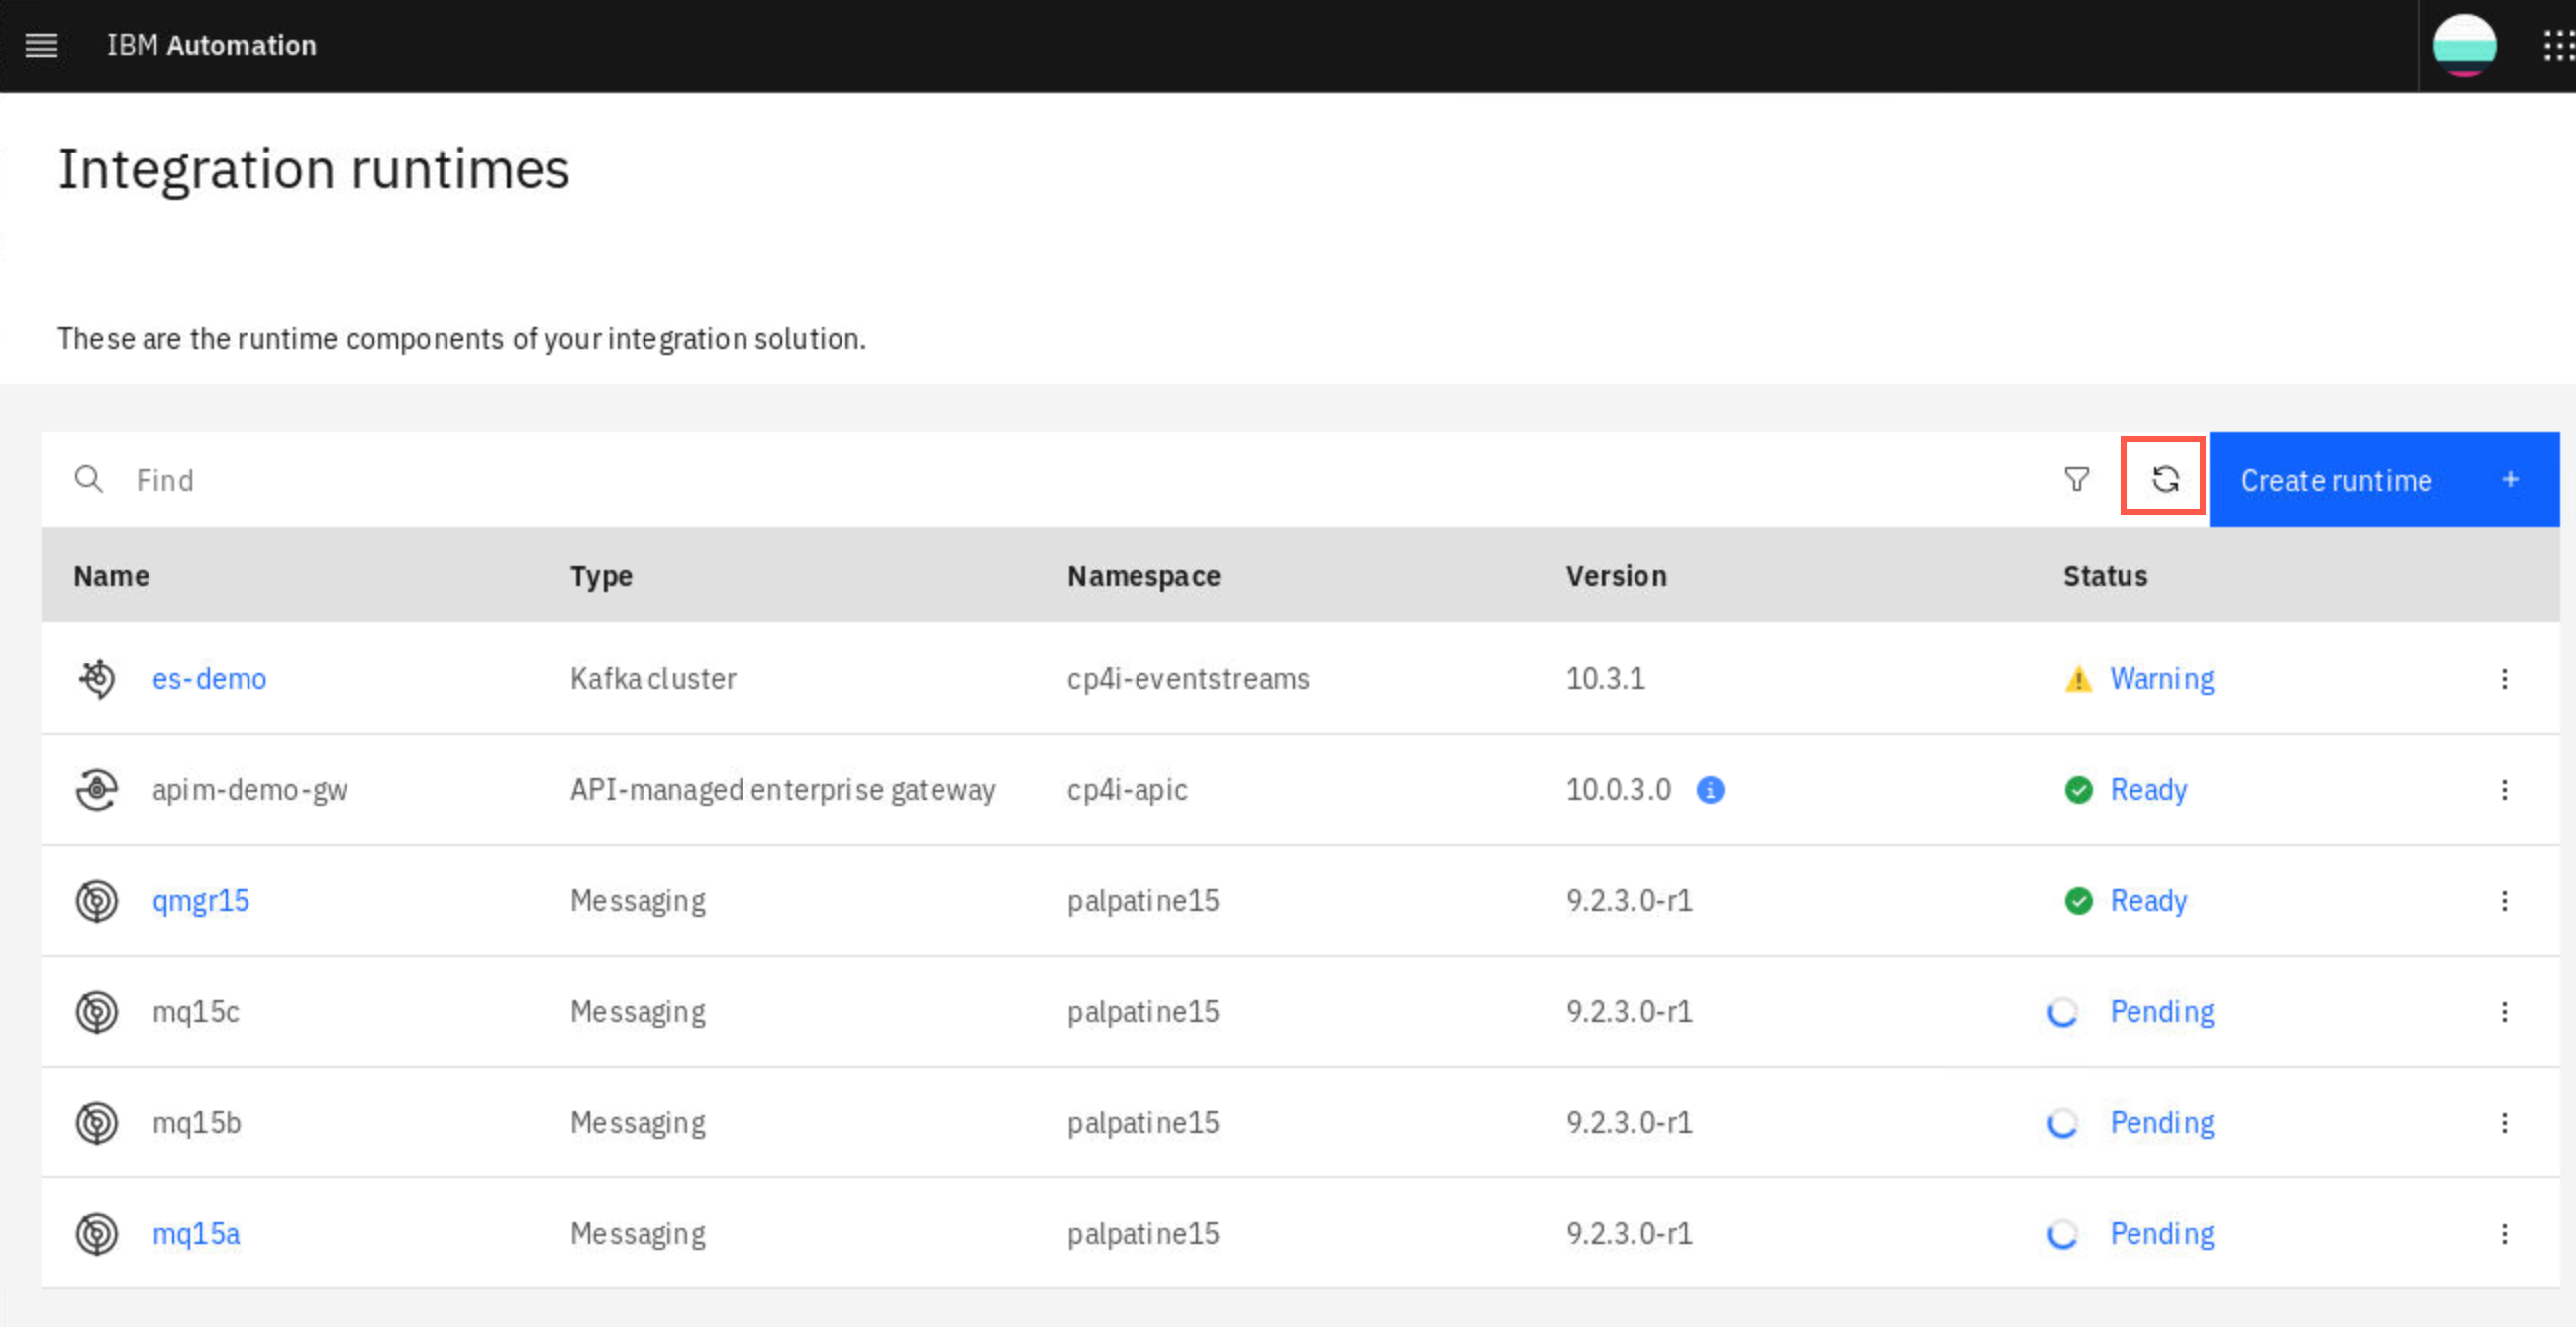
Return to the Platform Navigator web browser page. In Runtimes click the Refresh button.
-
The queue managers will be in a Pending state for a couple of minutes while they are provisioned.
-
On the OpenShift Console you can watch the pods as they create containers. Click Workloads then select Pods. You will see a pod for each queue manager and you will see states of Pending, Container creating, and then Running.
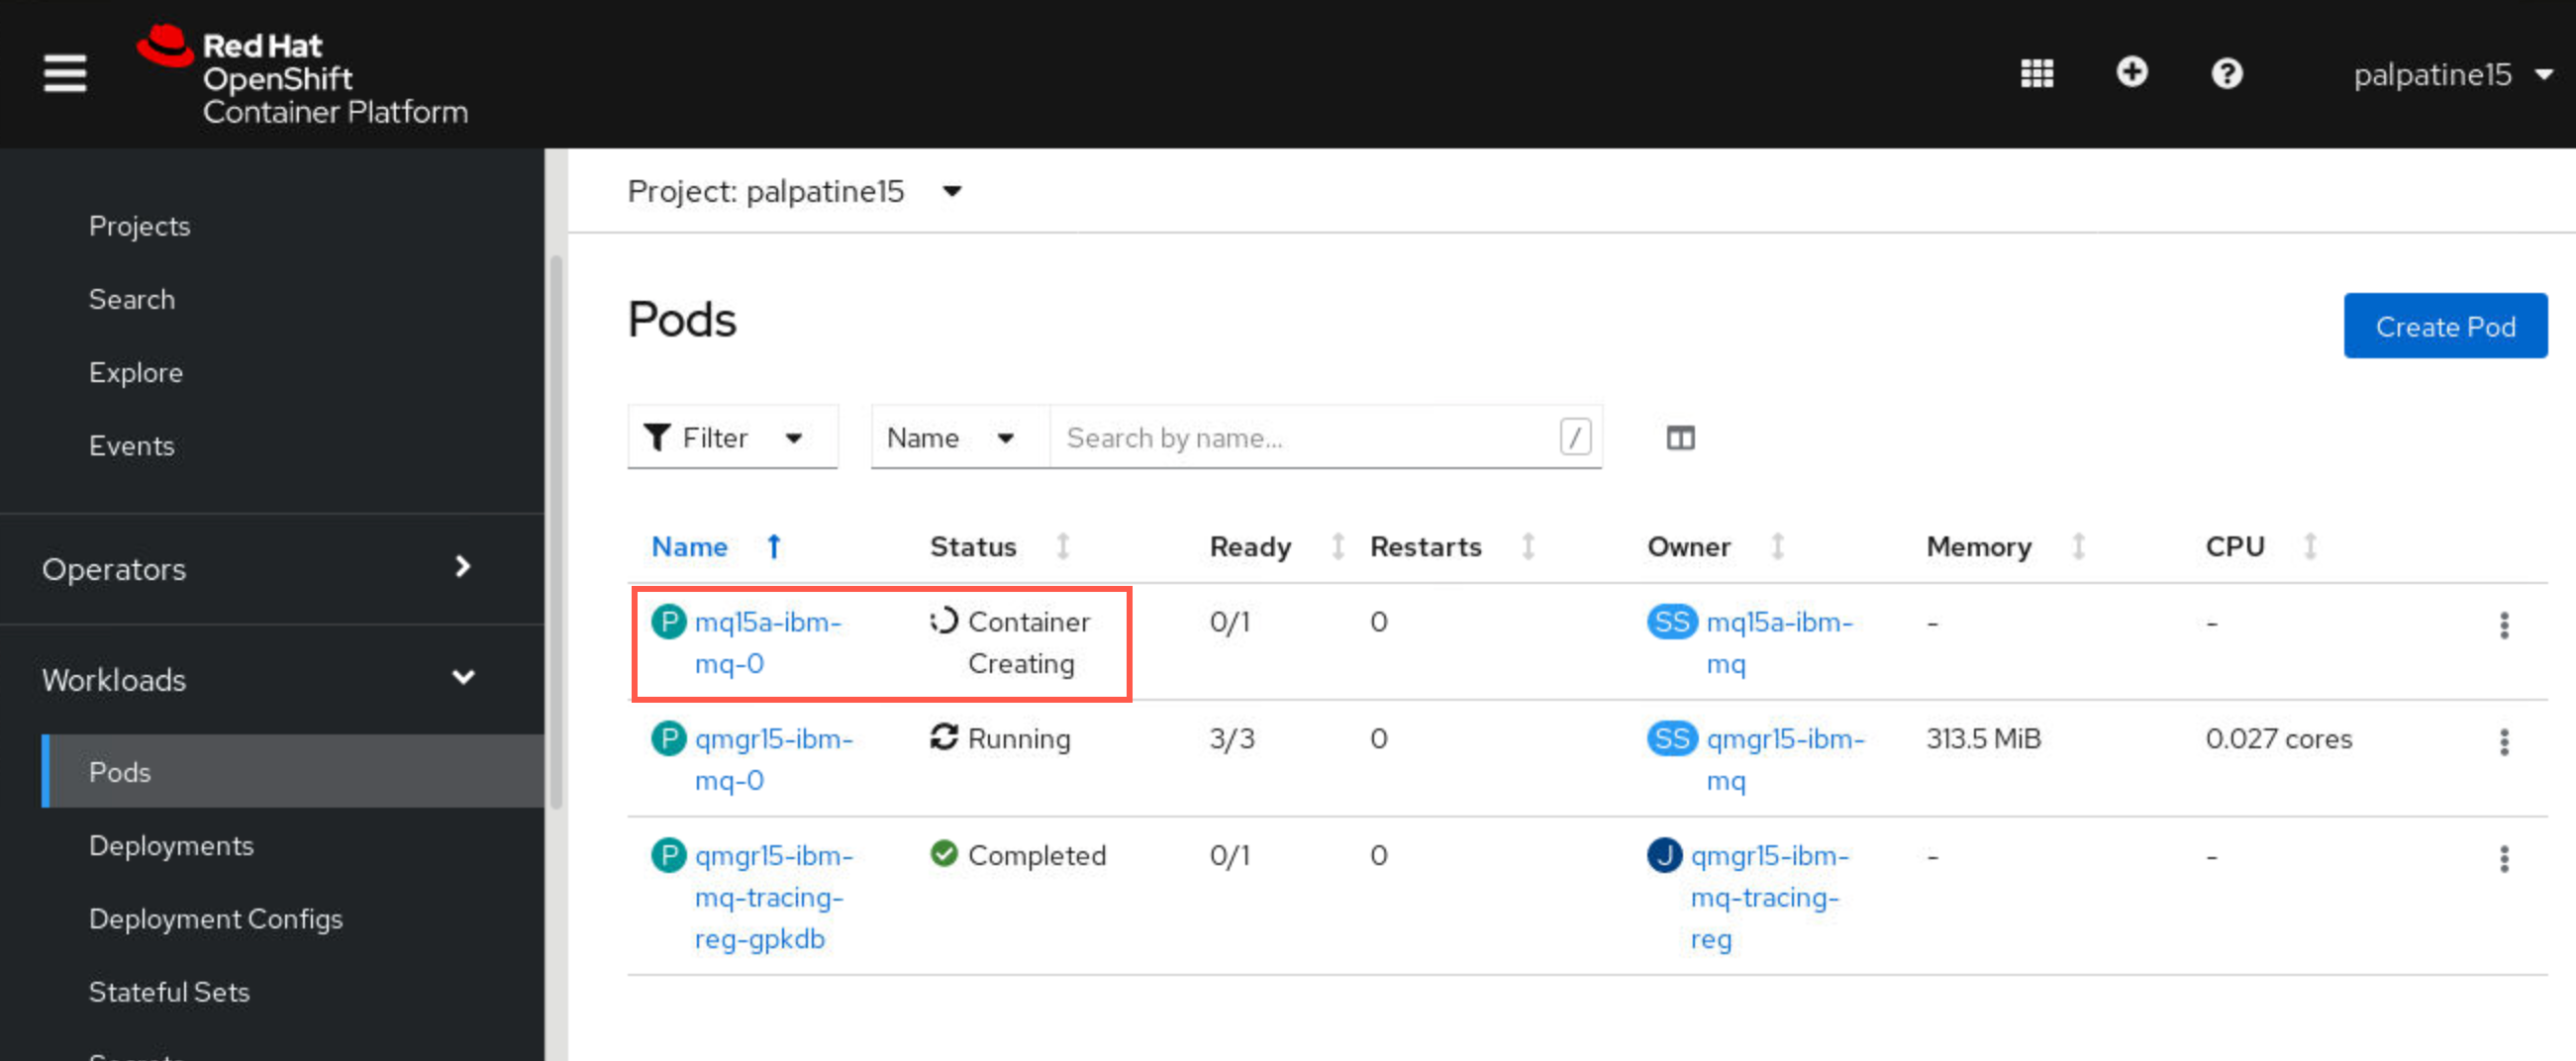
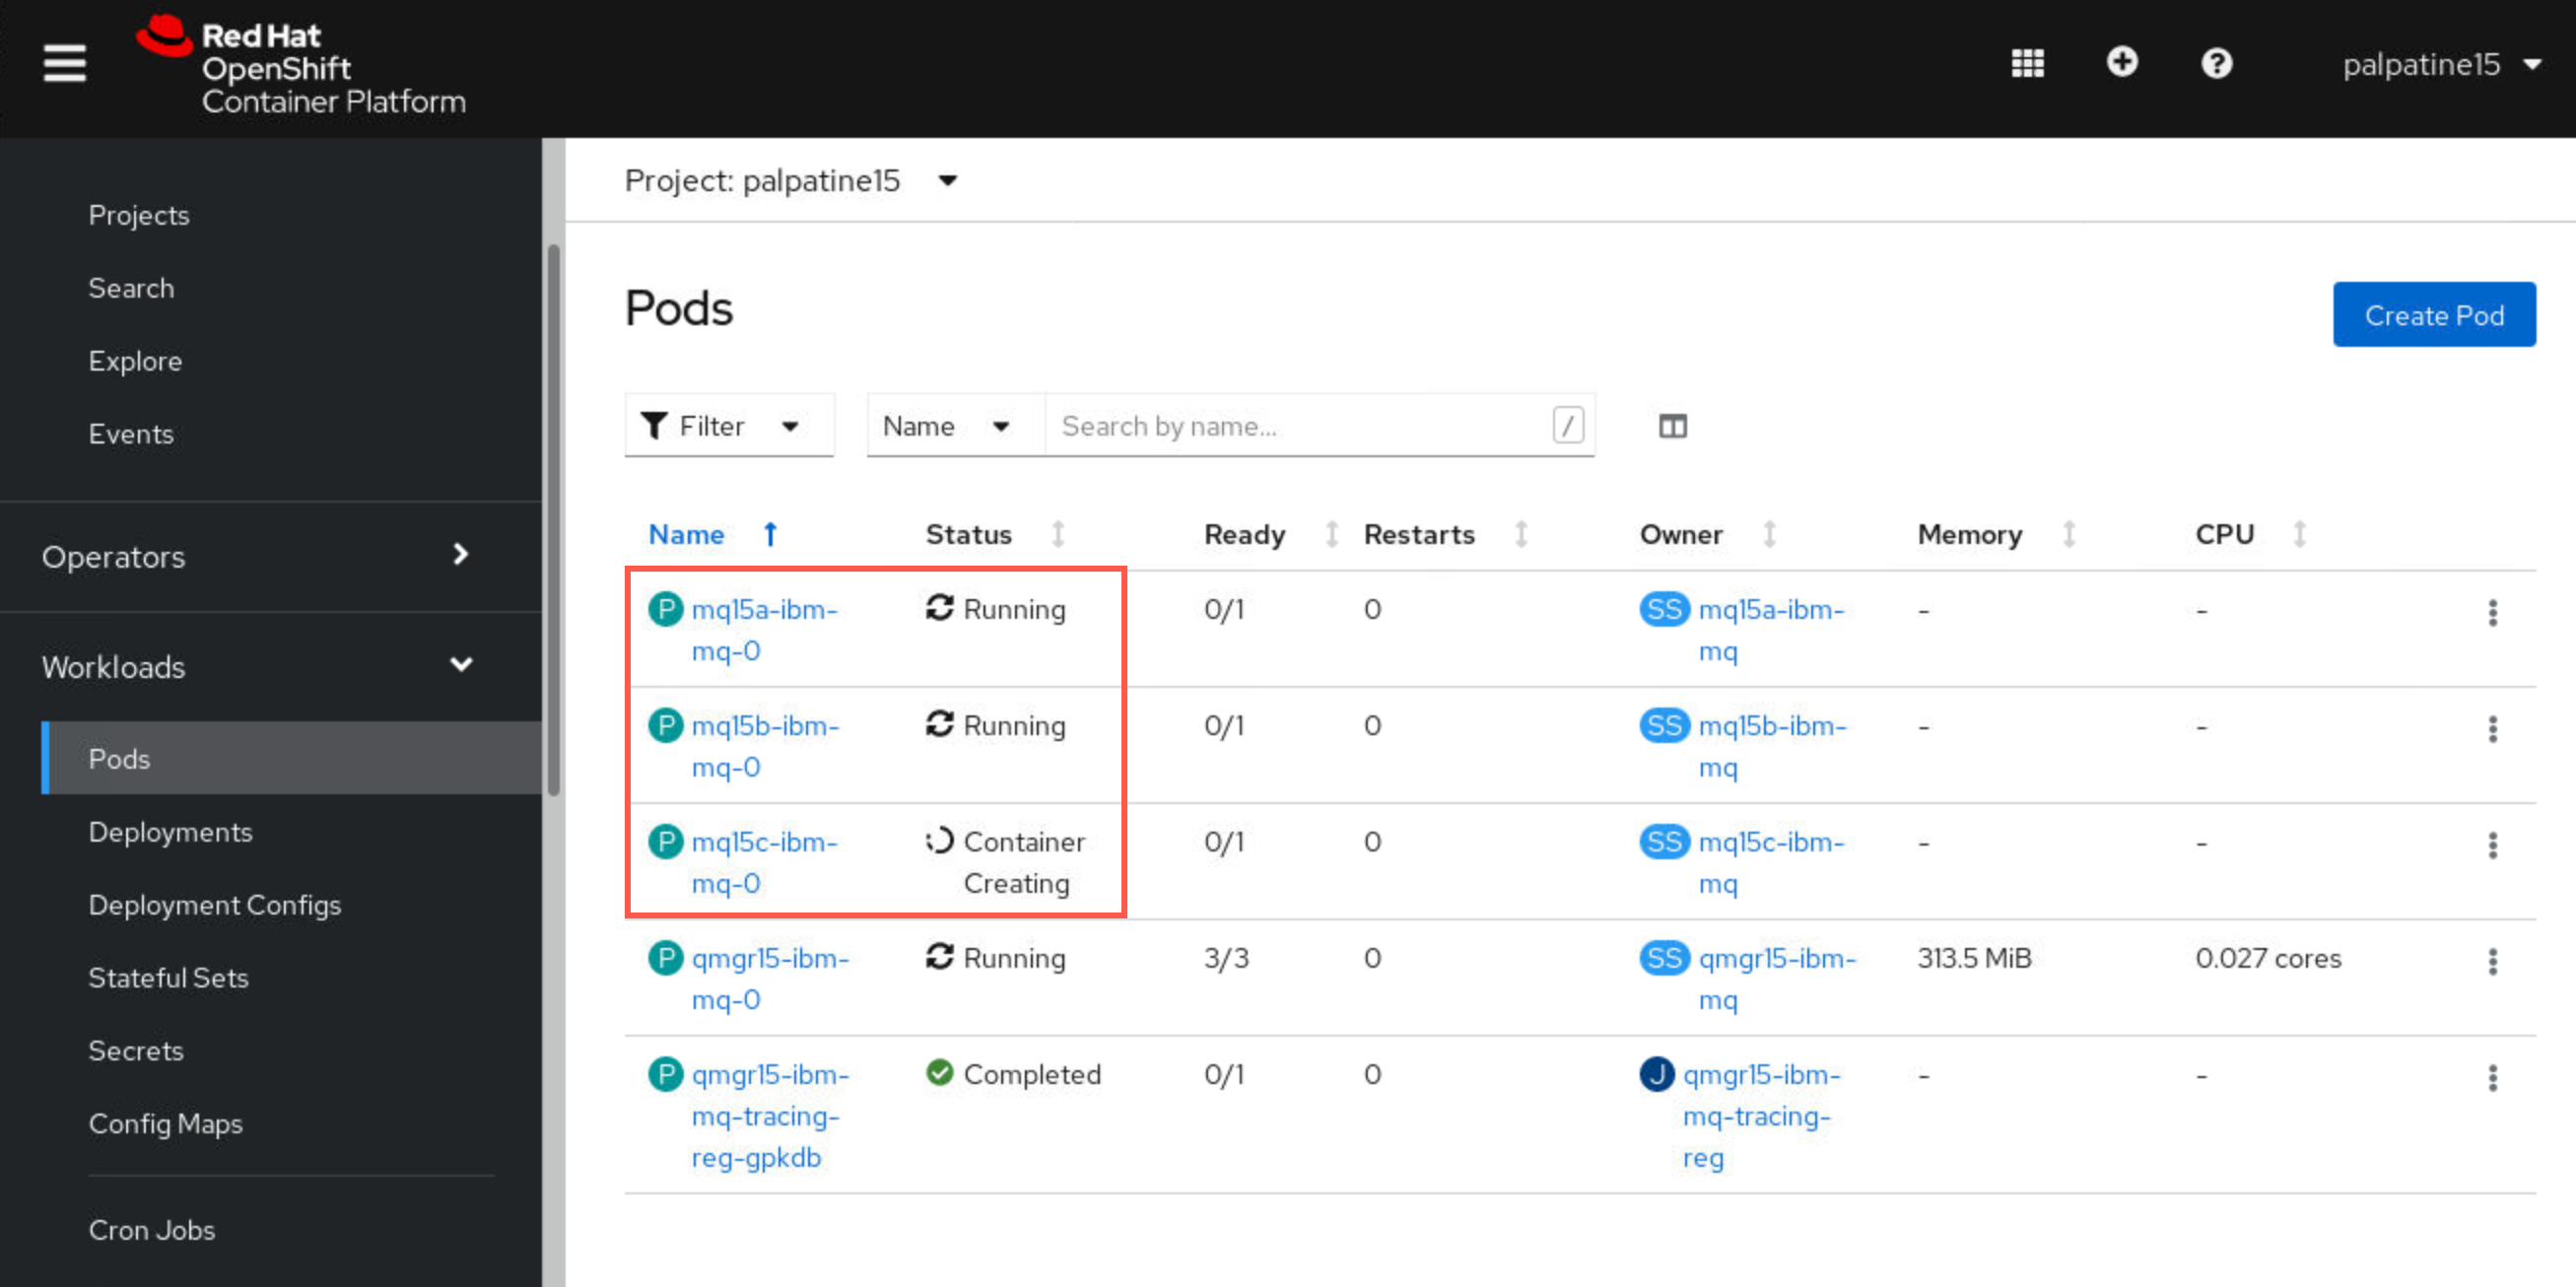
-
After a few minutes the queue managers will then show Ready on the Platform Navigator and the pods will show Running on the OpenShift Console.
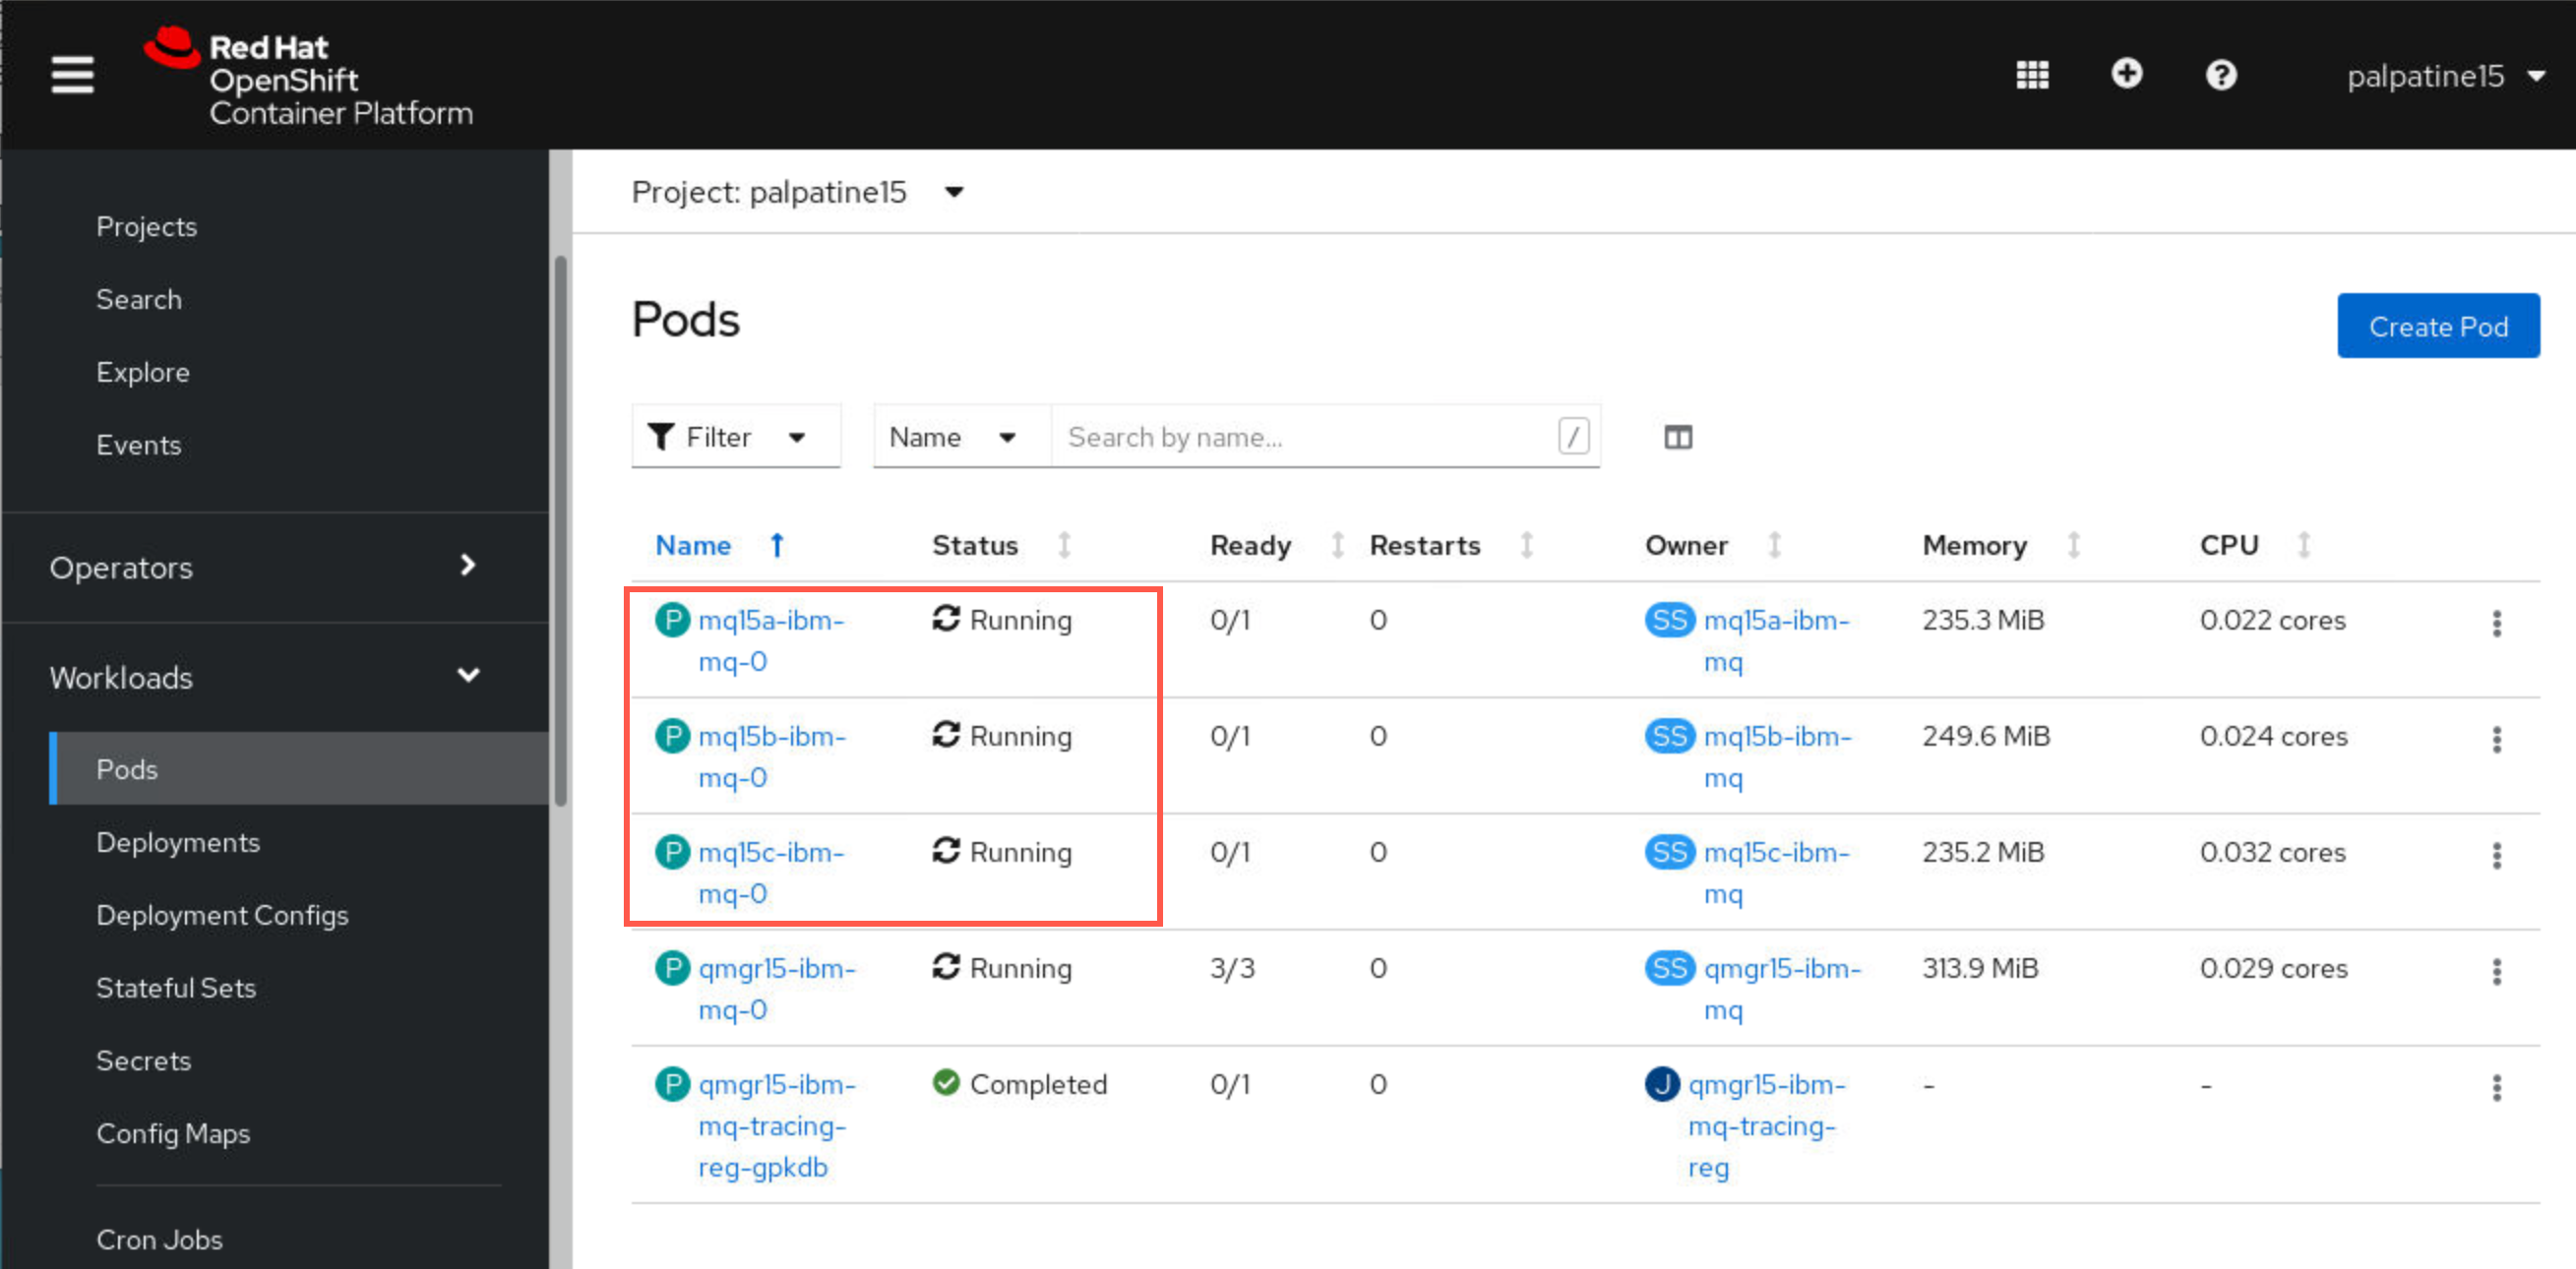
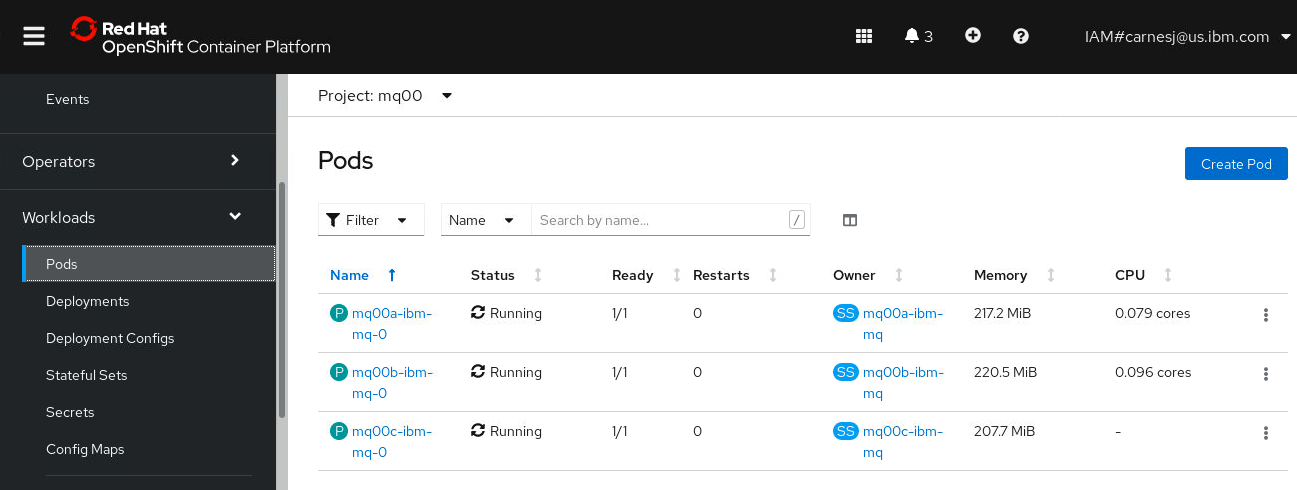
-
Your cluster is also now completely configured. Check this from the MQ Console of one of the queue managers. Click the hyperlink for mqxxa.

-
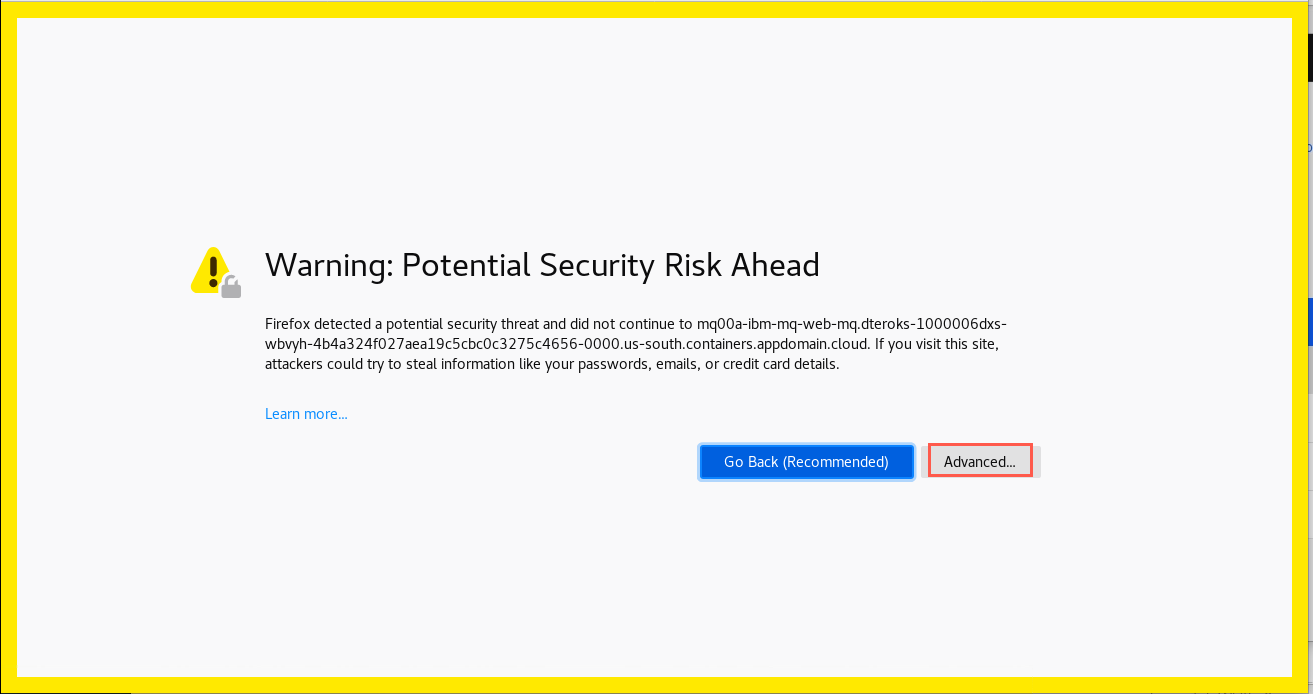
You will be presented with a warning pop-up. Click Advanced, then scroll down and click Accept the Risk and Continue.
-
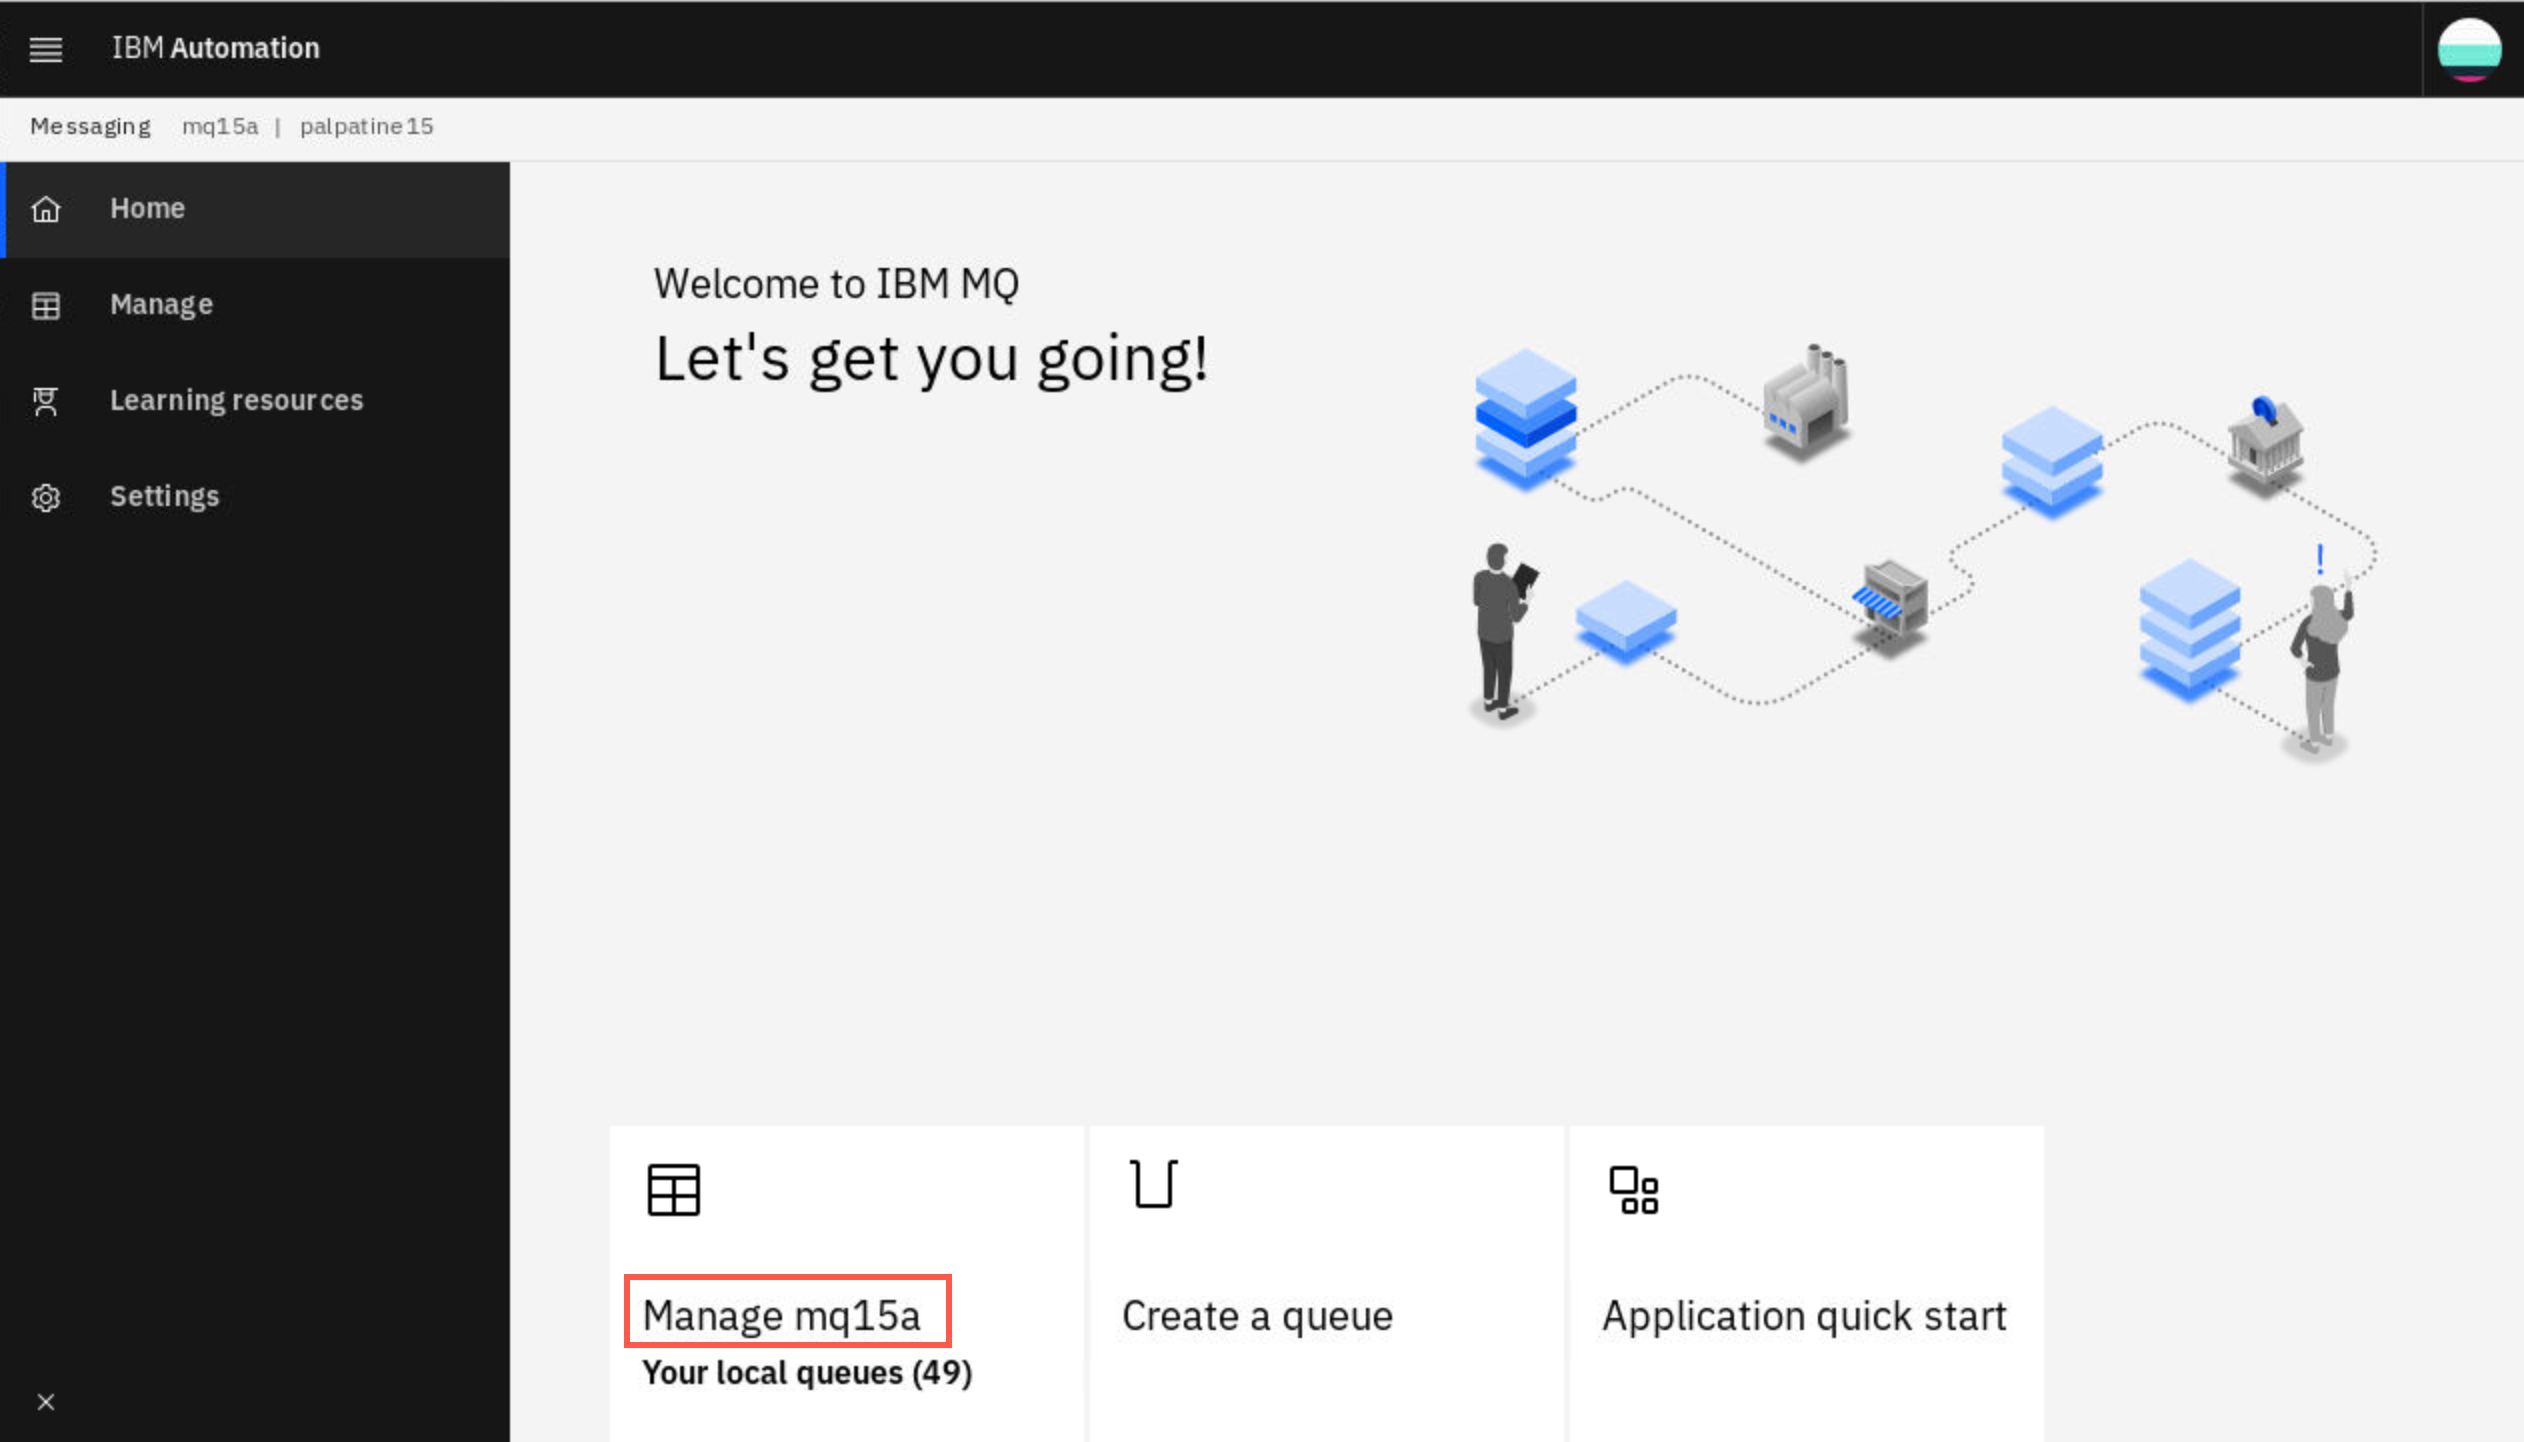
In the MQ Console click Manage mqxxa. Of course your queue managers are different, 00 being replaced by your student ID.
-
You will see the two local queues APPQ and APPQ2 which were defined by the mqsc ConfigMap defined in the yaml template. The other queue managers also have the queues by that name.
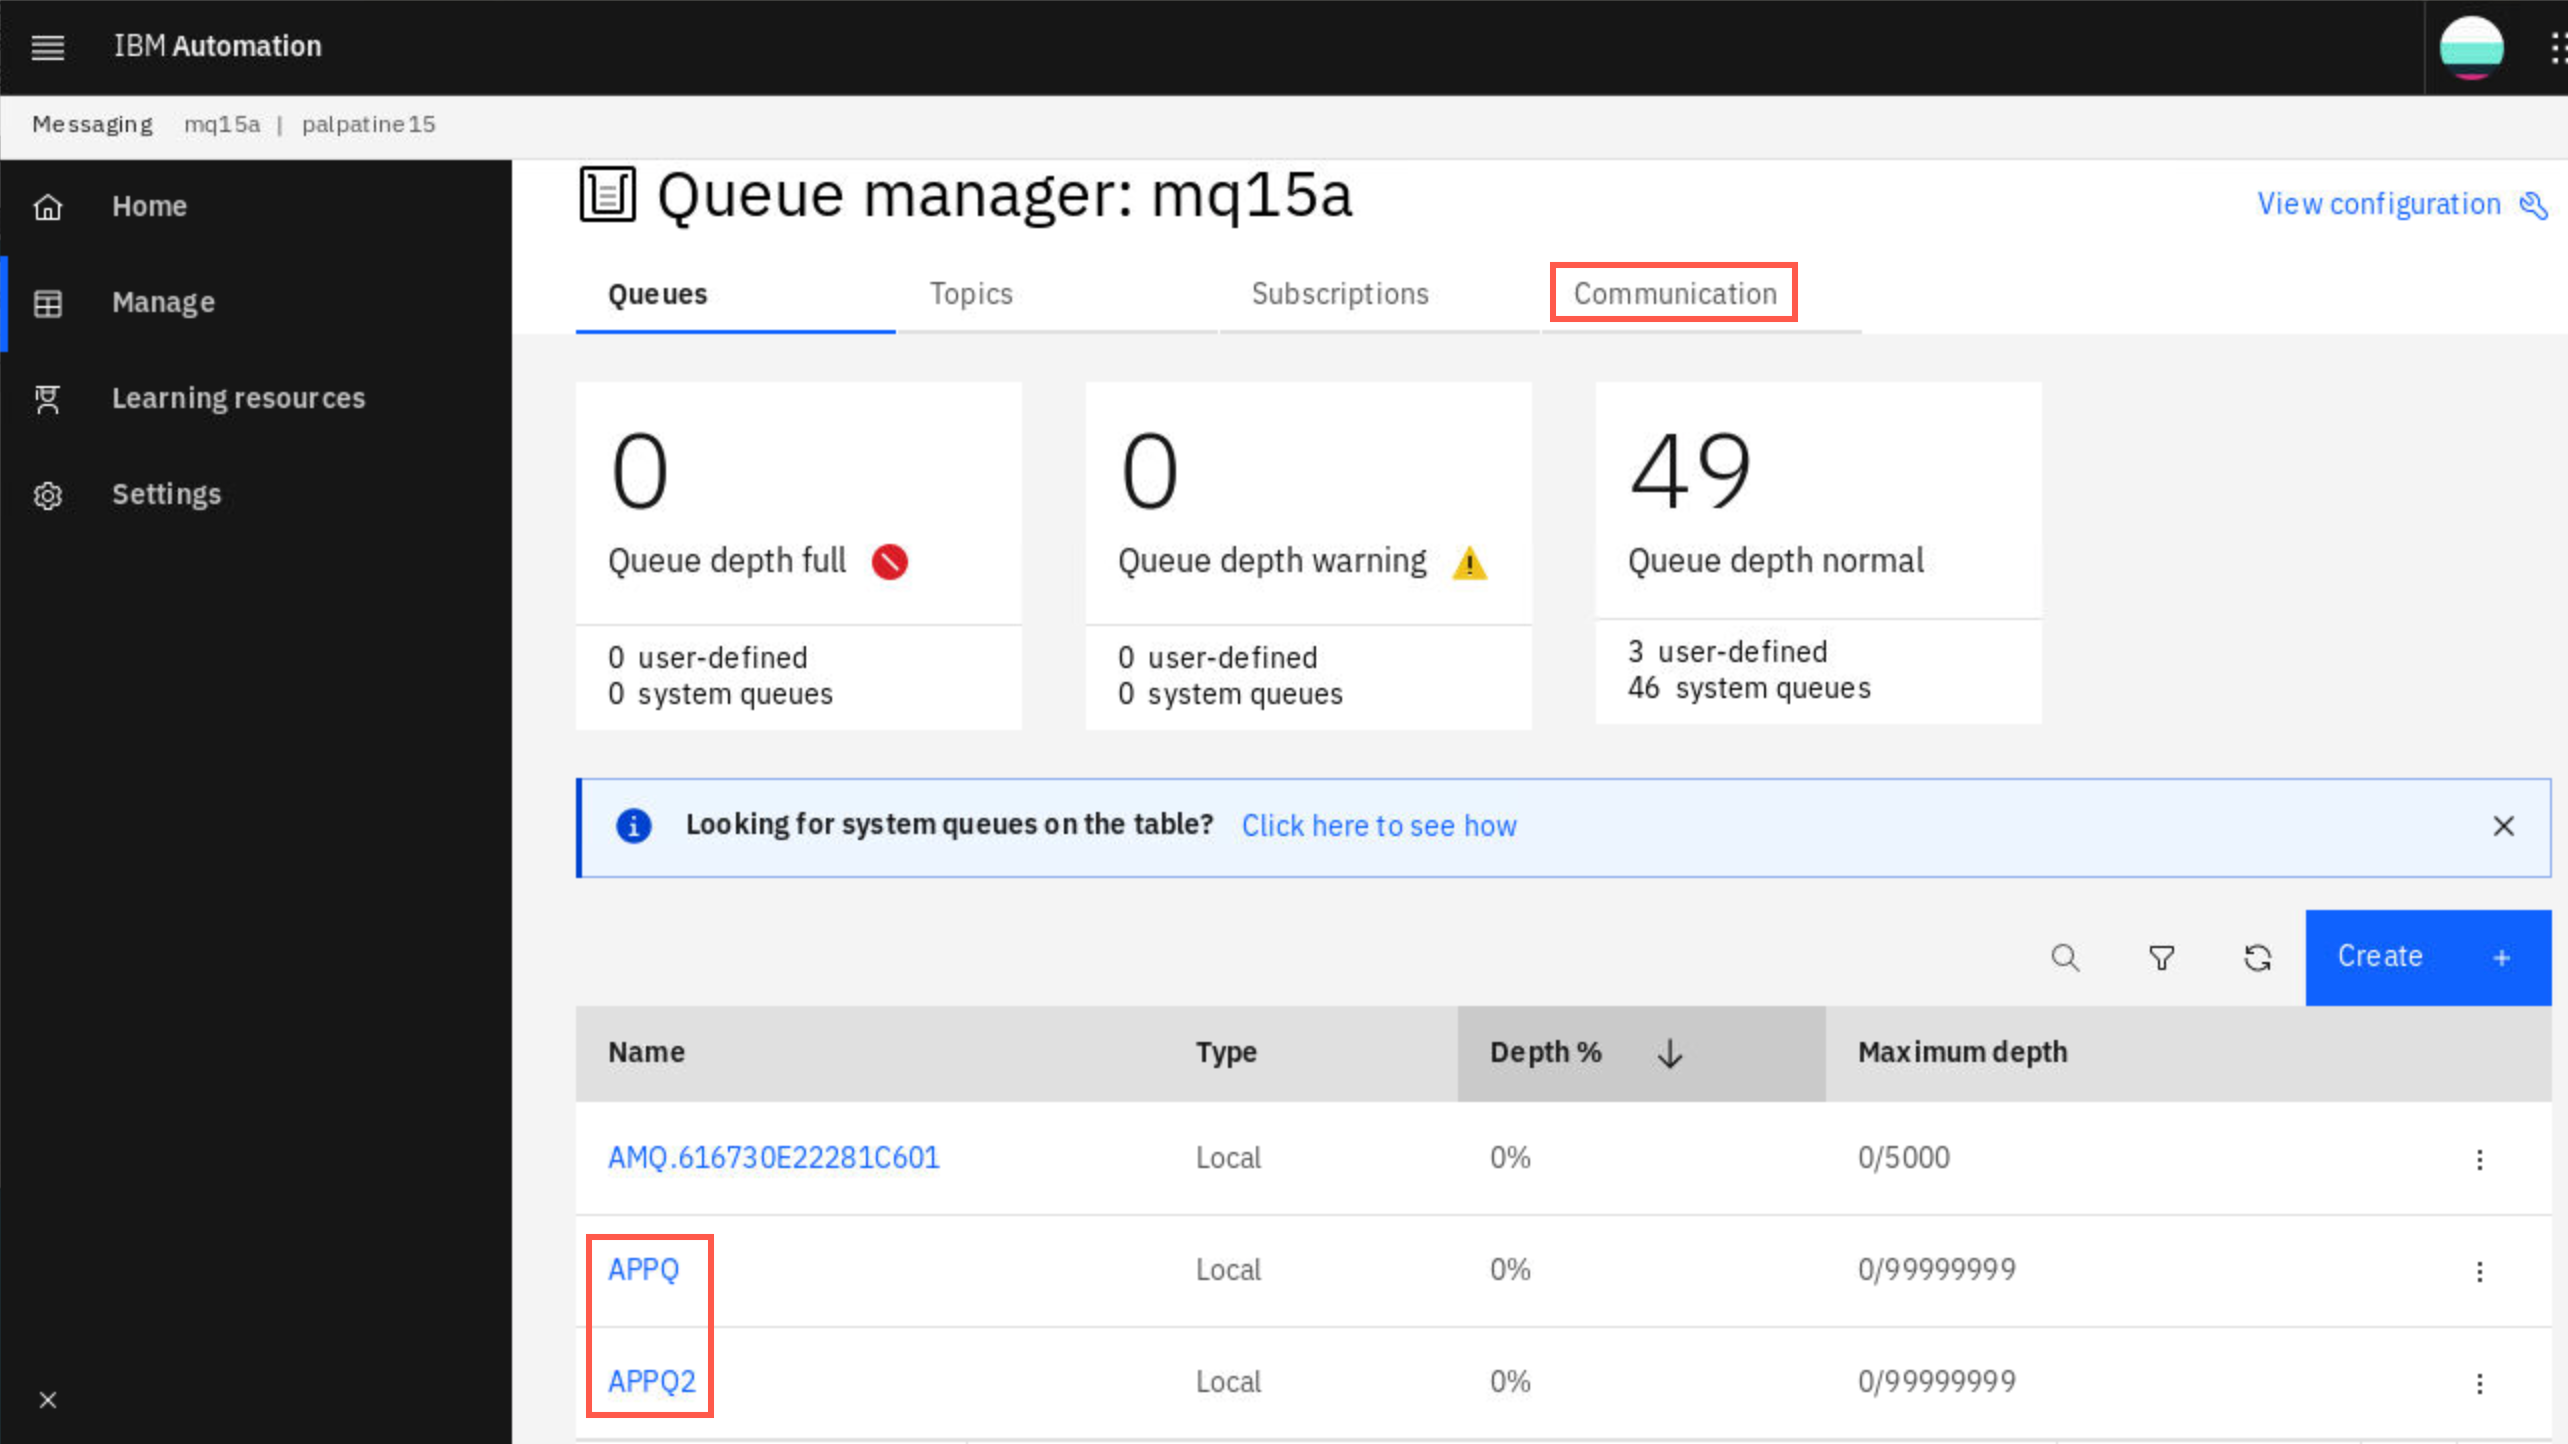
Click Communication.
-
The listener SYSTEM.LISTENER.TCP.1 is running.
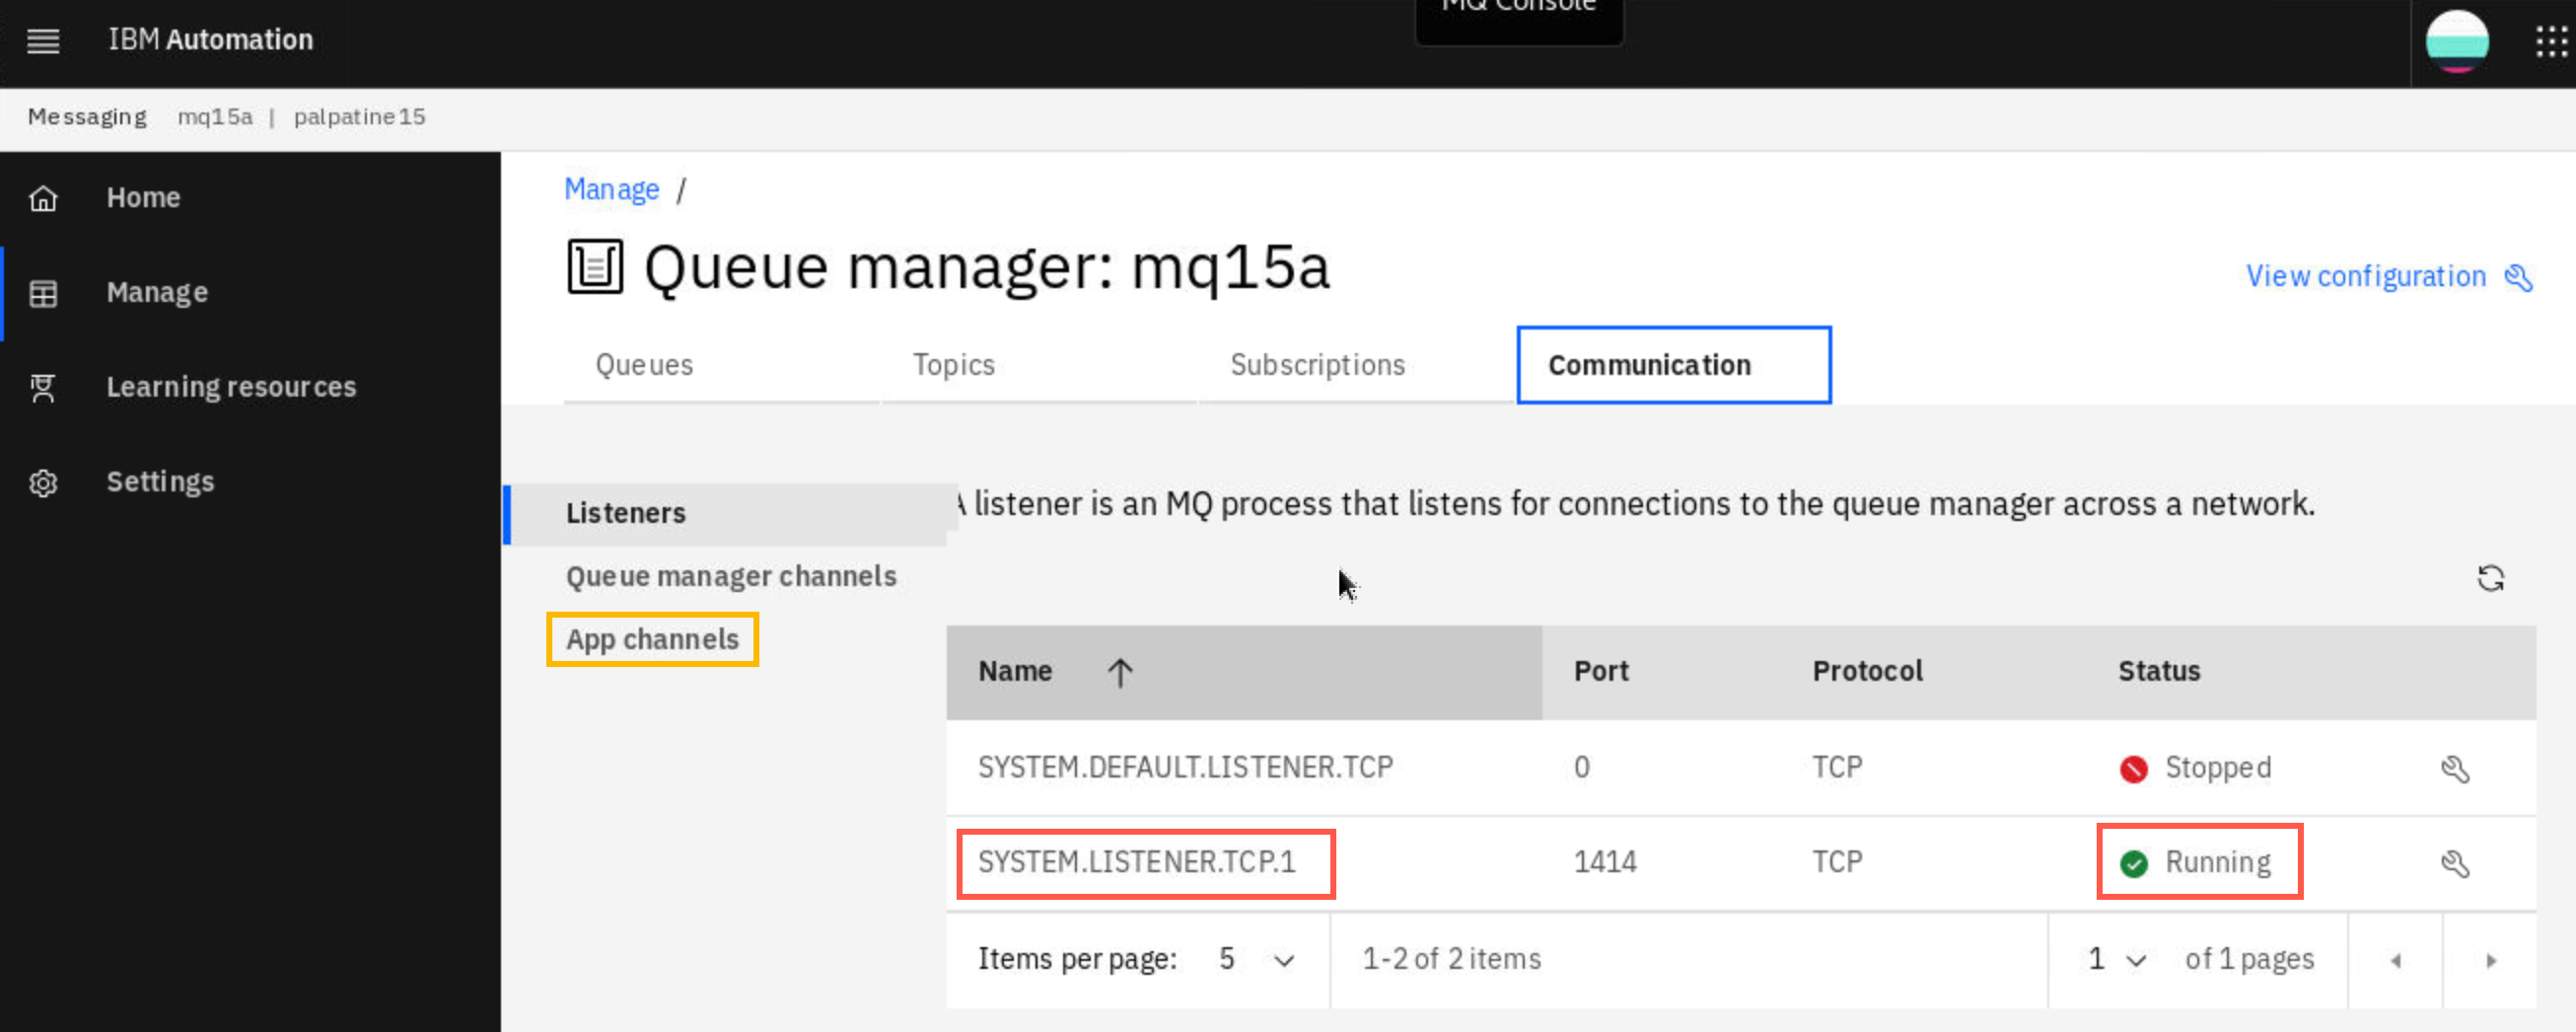
Click App channels.
-
App channels are actually SVRCONN channels. You will have two defined within the yaml file. MQxxCHLA and TO_UNICLUSxx. These will be used during testing in the next section.
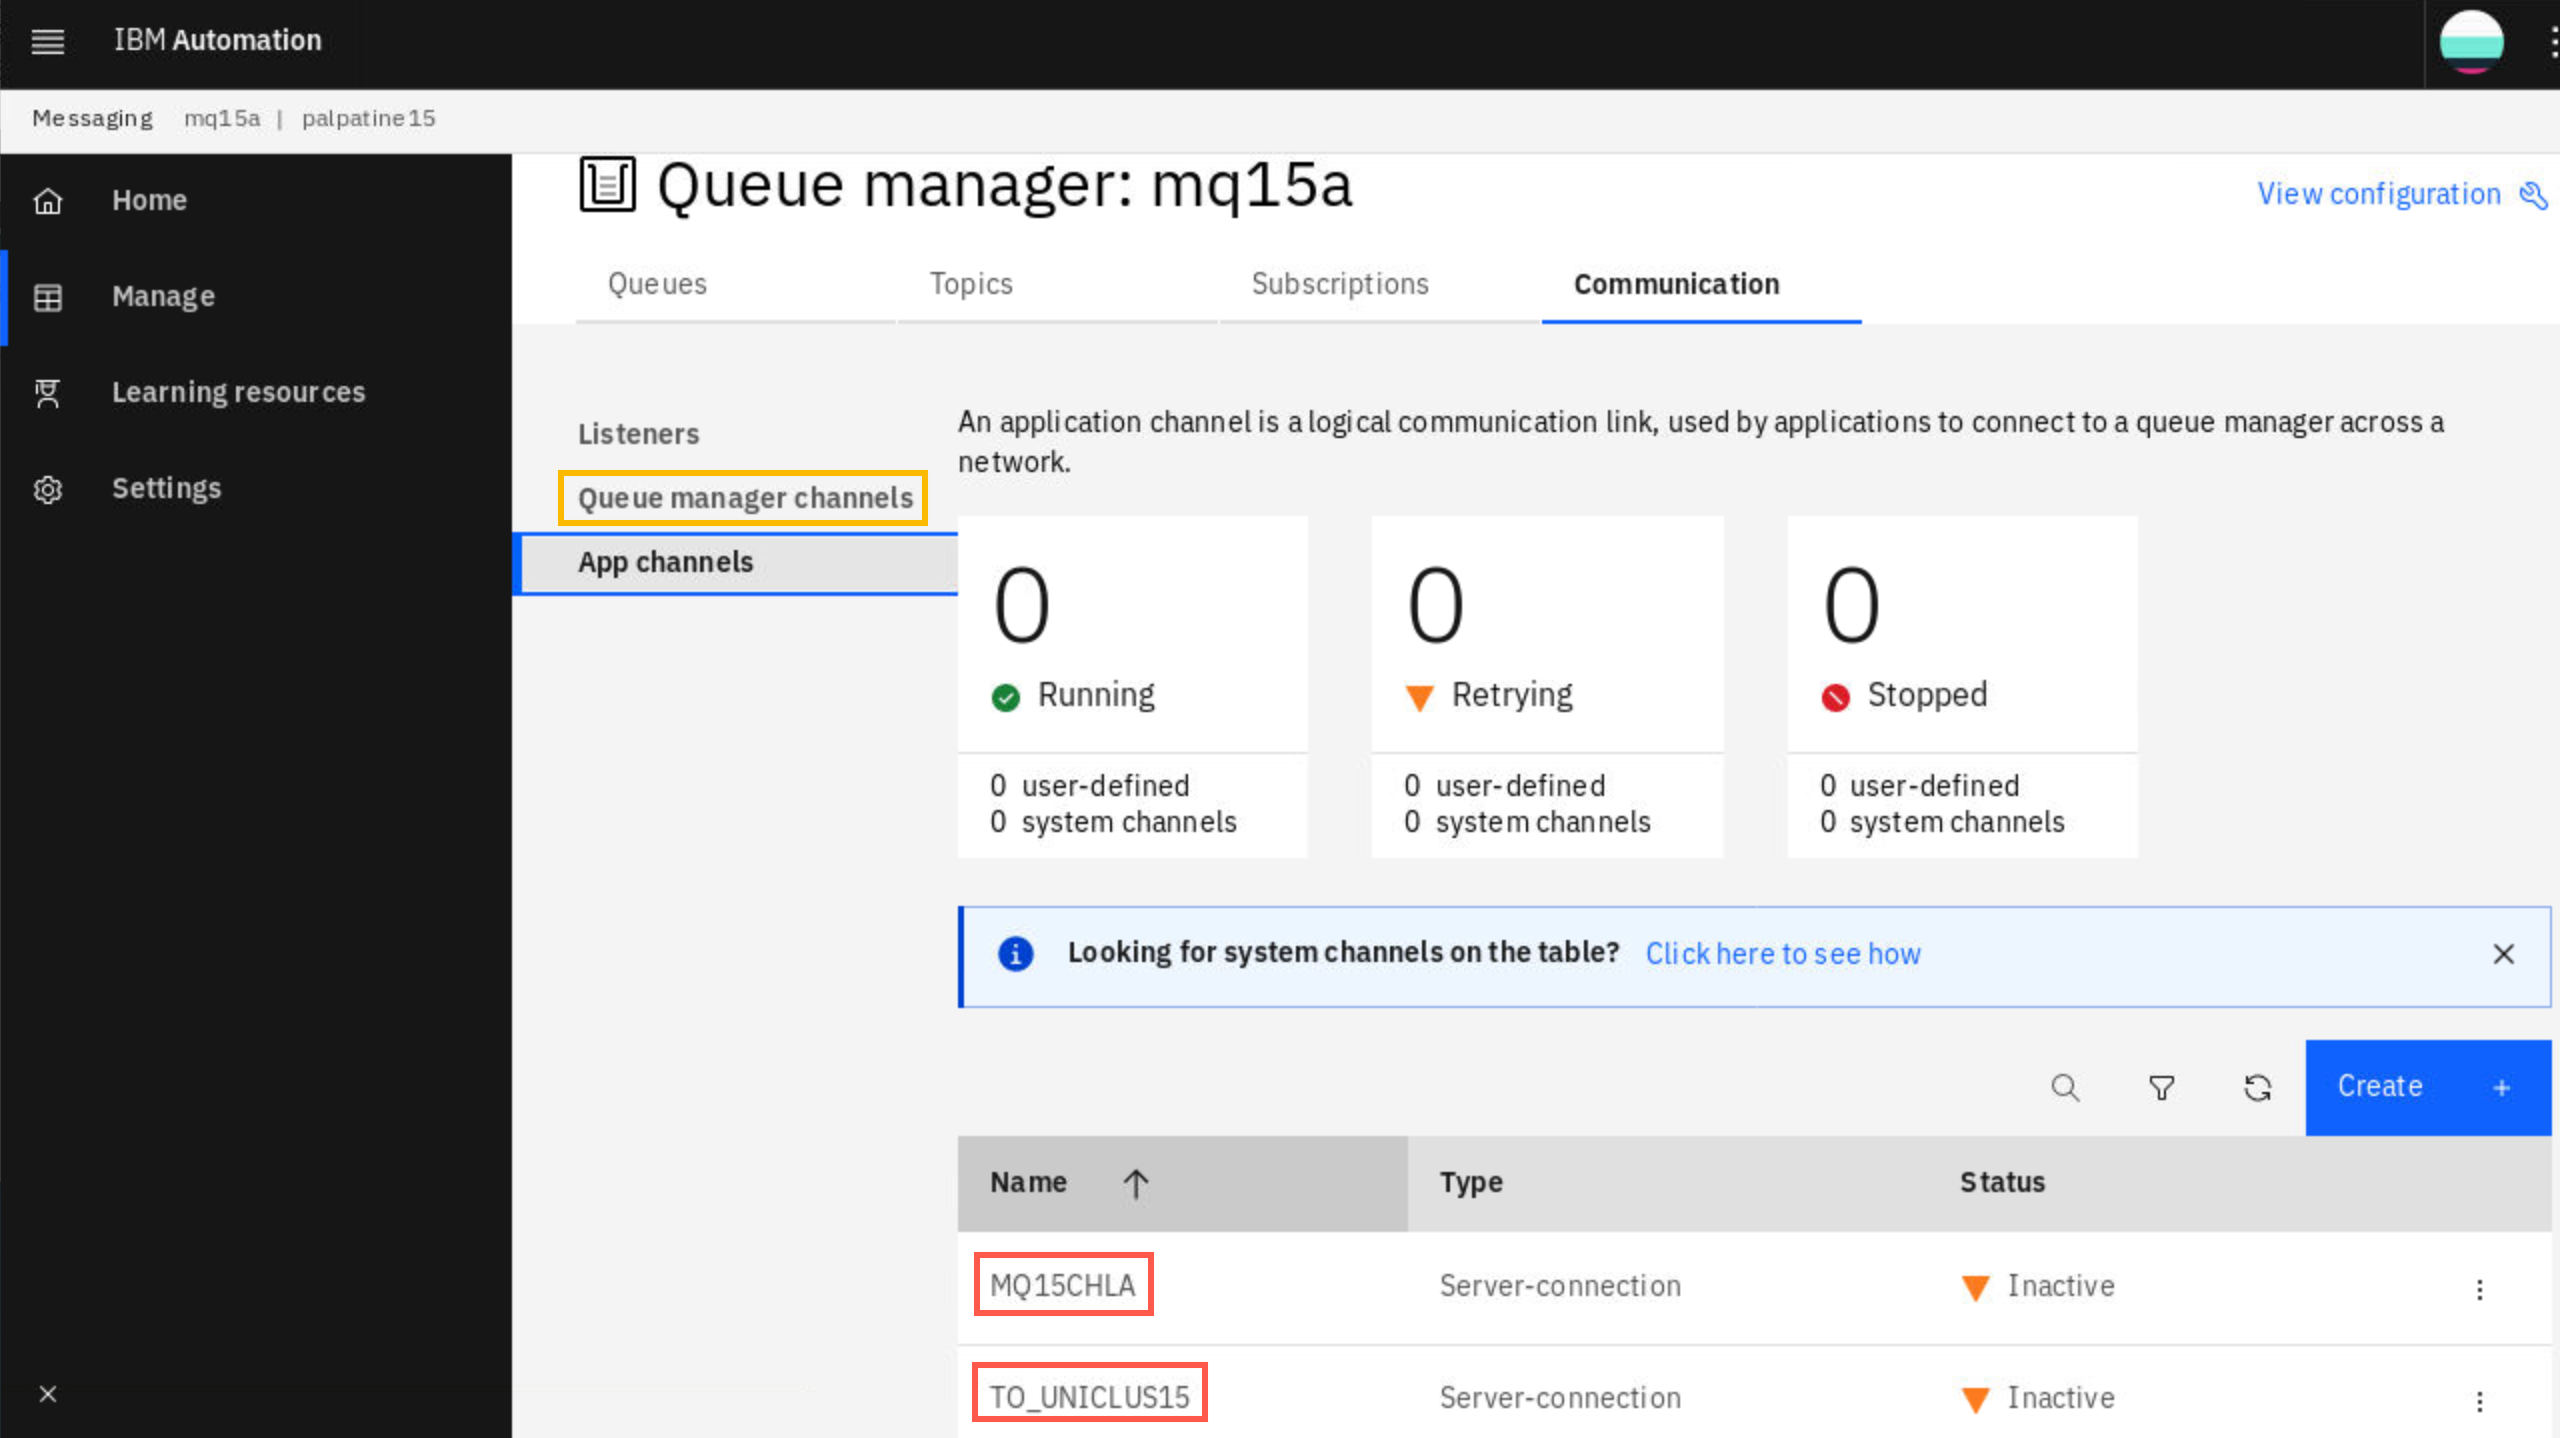
Click Queue manager channels.
-
Here you find your cluster channels. If you looked closely at the yaml template, you’ll remember that your mqxxa and mqxxb are the primary repositories for your cluster UNICLUSxx. While looking at mqxxa you see a cluster receiver channel TO_UNICLUS_MQxxA and two cluster sender channels TO_UNICLUS_MQxxB and TO_UNICLUS_MQxxC. They should be Running.
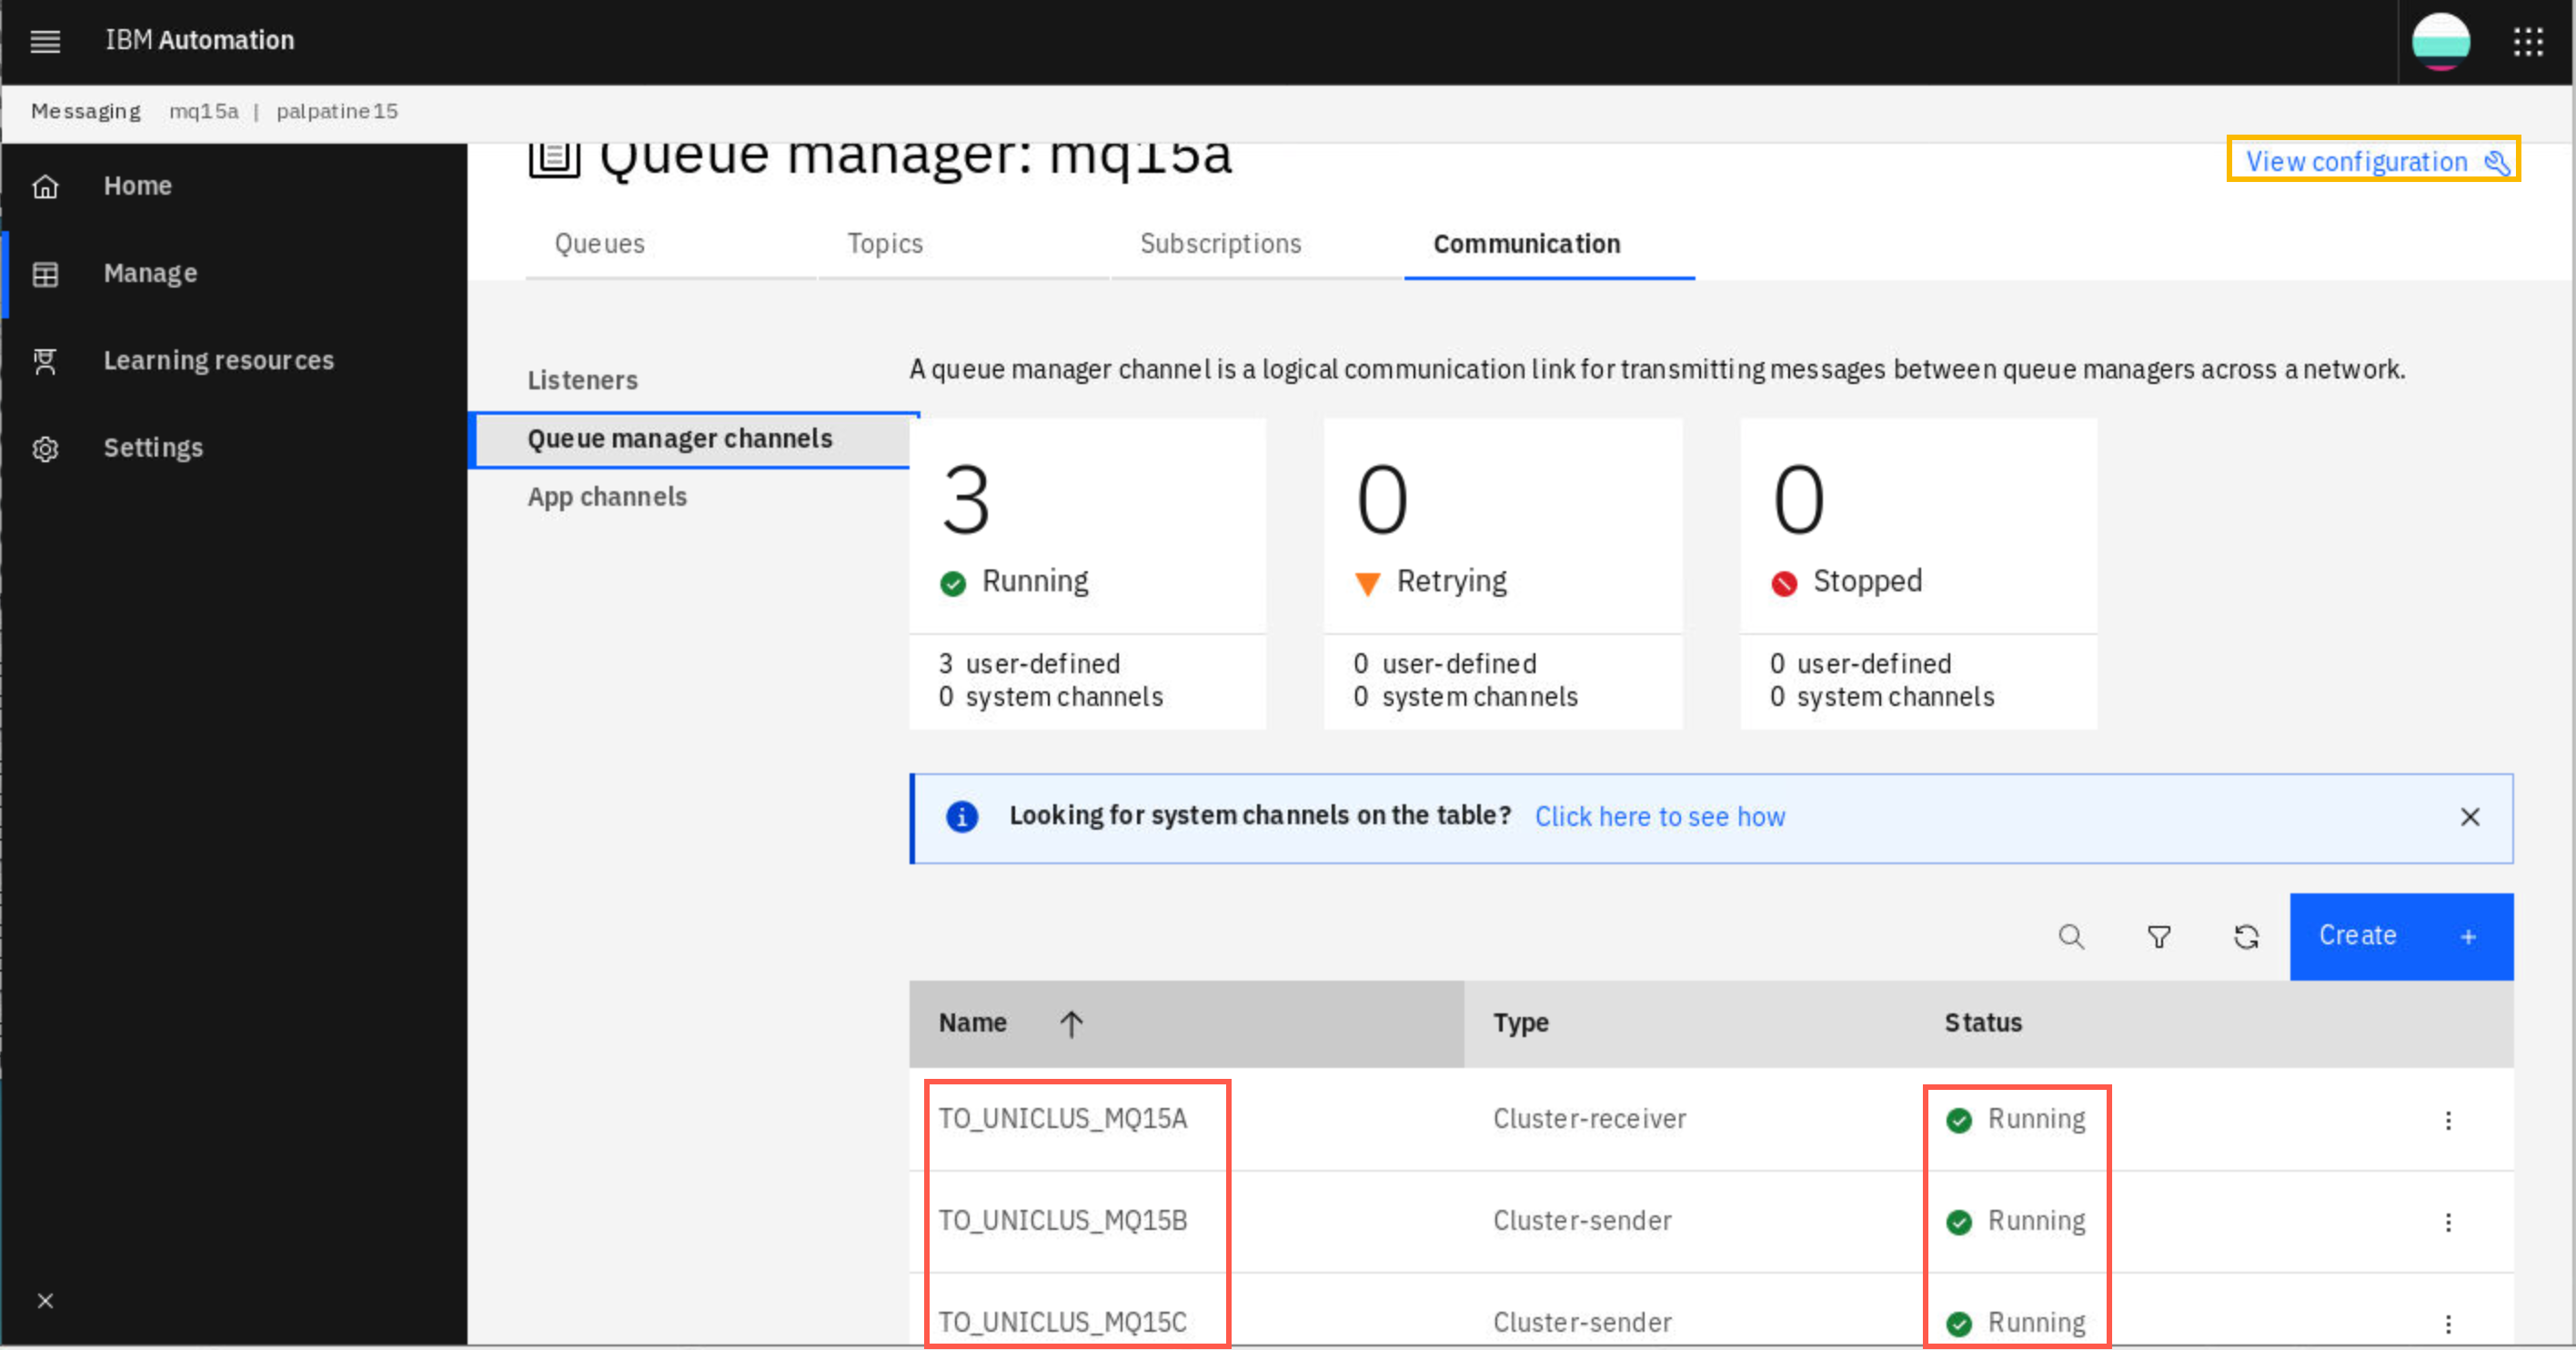
Click Configuration in the top right corner.
-
The queue manager properties are displayed. Click Cluster to see the cluster properties where you see your cluster name - UNICLUSxx.
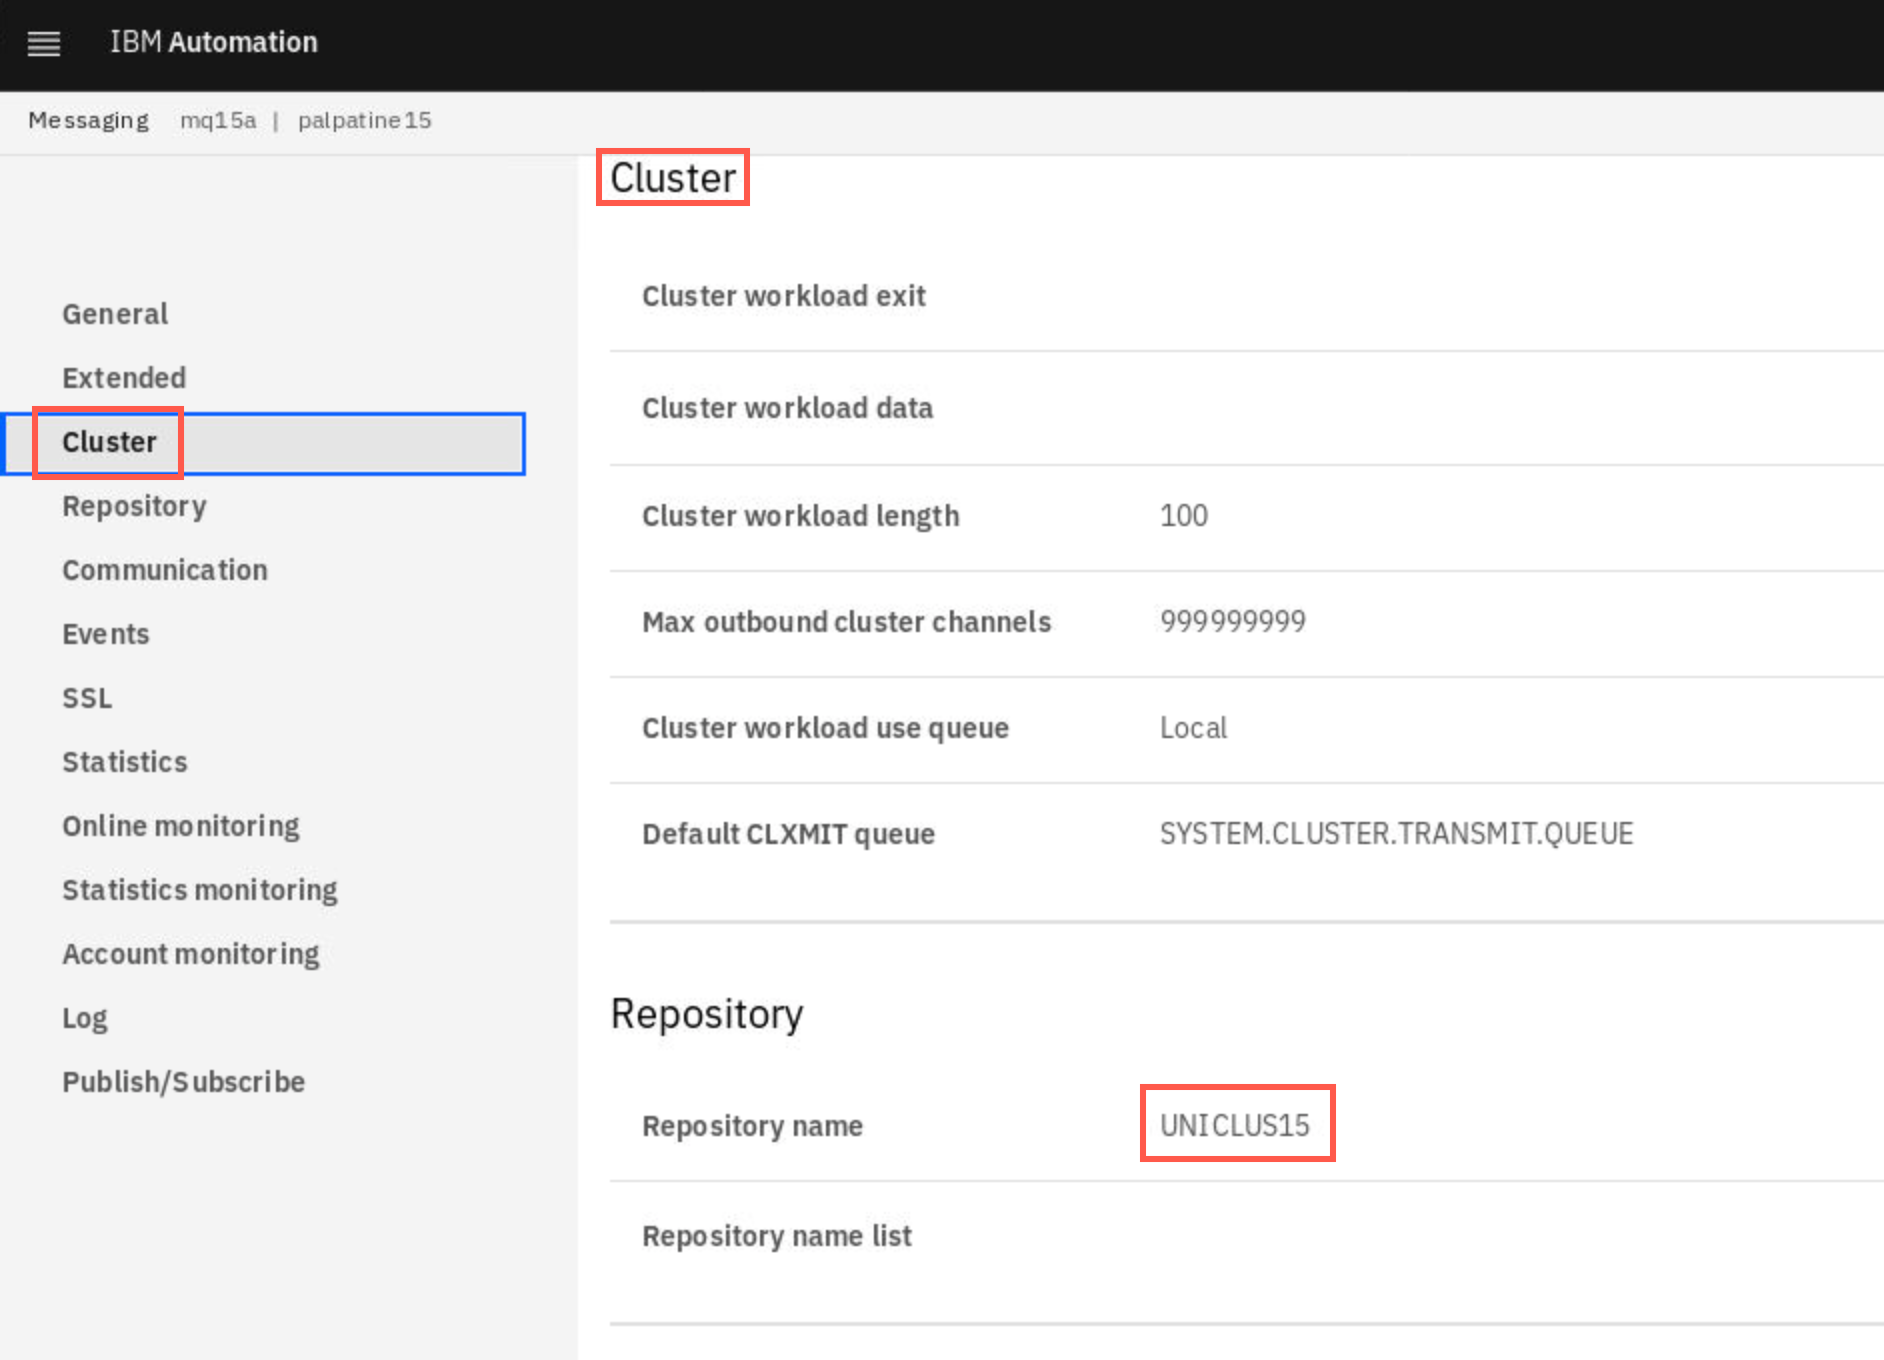
-
You can check the other queue manager’s console to verify that they are all configured the same. You should have verified that when reviewing the yaml template.
You are all set, time for testing.
Test uniform cluster
Perform health-check on Uniform Cluster
Before proceeding, we need to check the cluster is up and running.
-
Open another terminal window and start MQ Explorer with the following command.
MQExplorer & -
Connect your queue managers mqxxa, mqxxb, and mqxxc. Once they are connected and running, you can visually verify your cluster configuration.
Note:
You learned how to connect MQ Explorer to queue managers on CP4I in Lab 2. Please review those instructions if you have trouble getting your queue managers connected. -
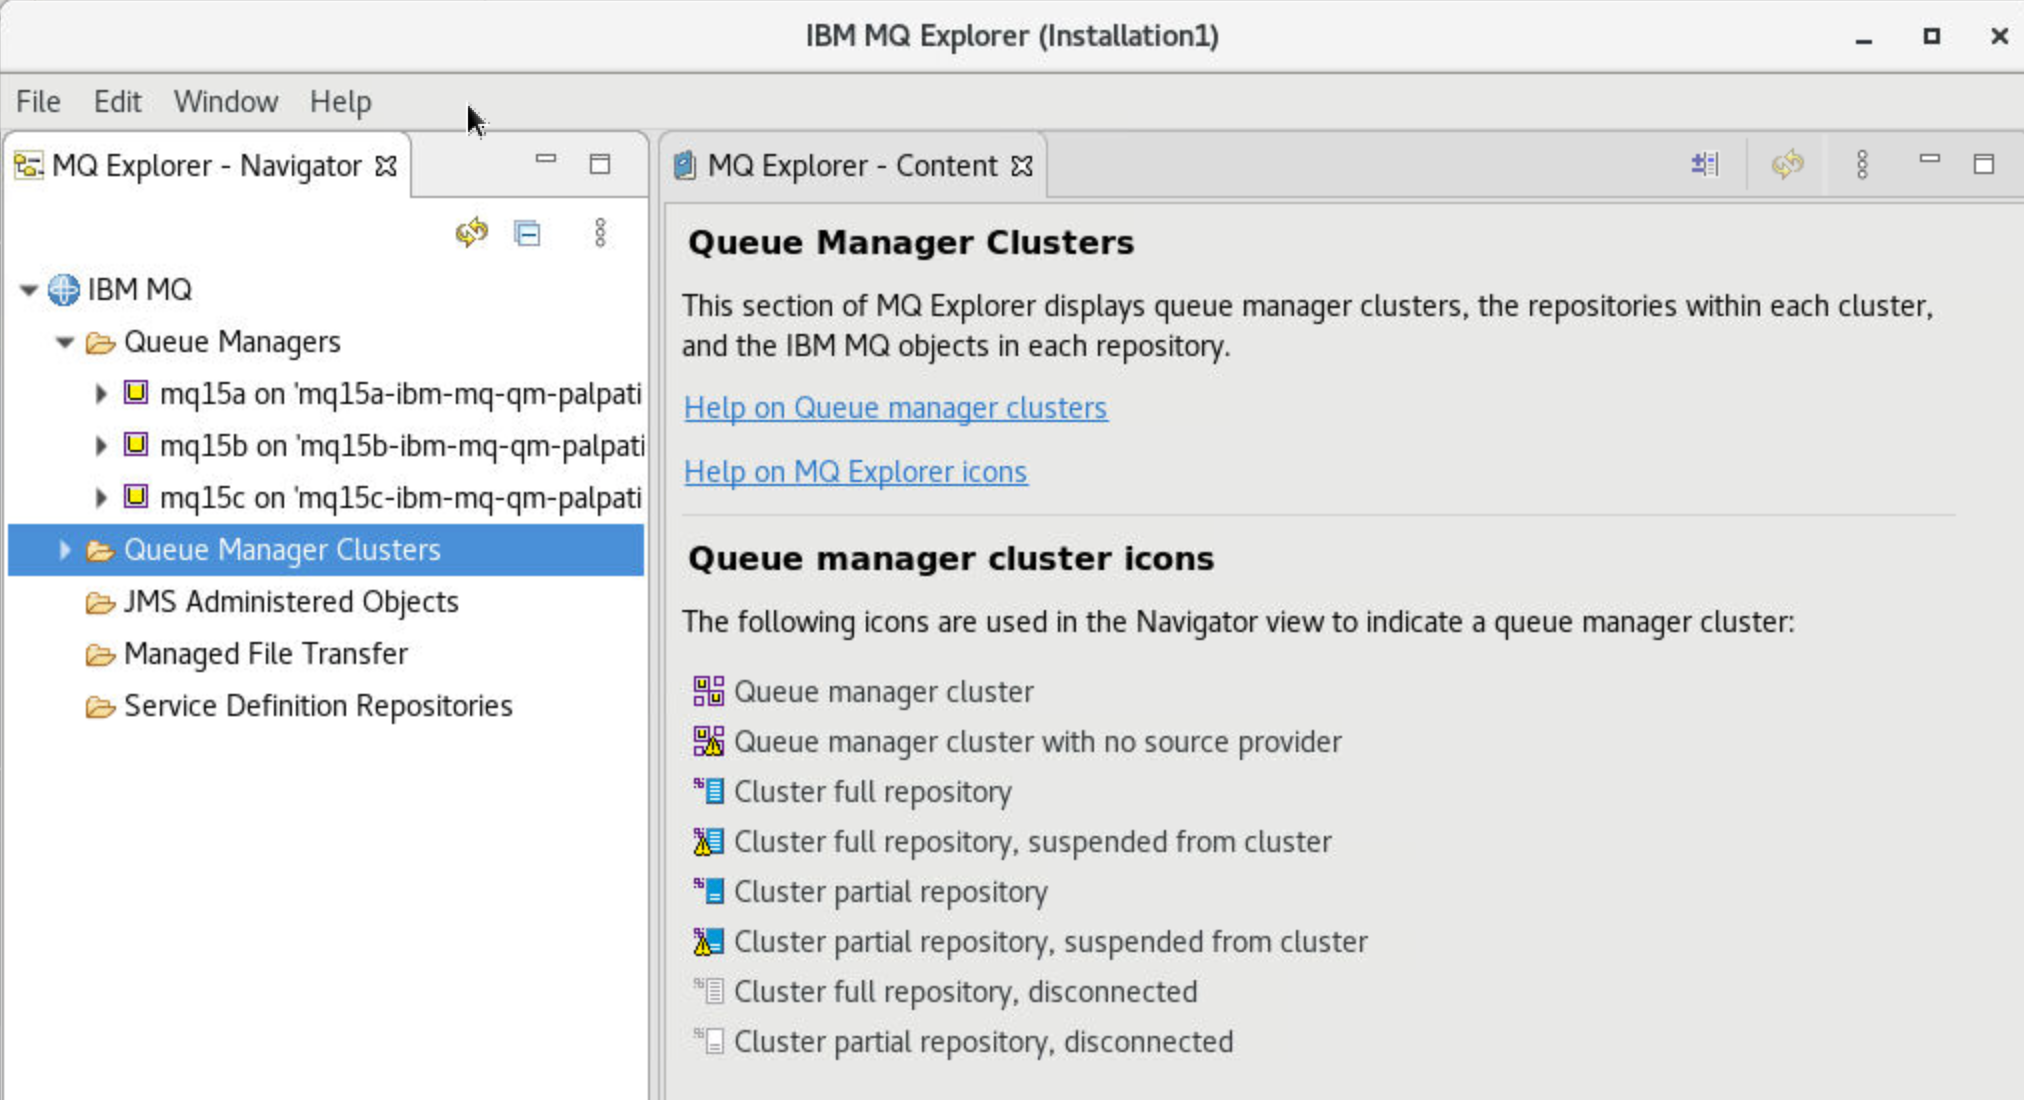
Expand Queue Manager Clusters to confirm that queue managers mqxxa and mqxxb have full repositories, while mqxxc has a partial repository.
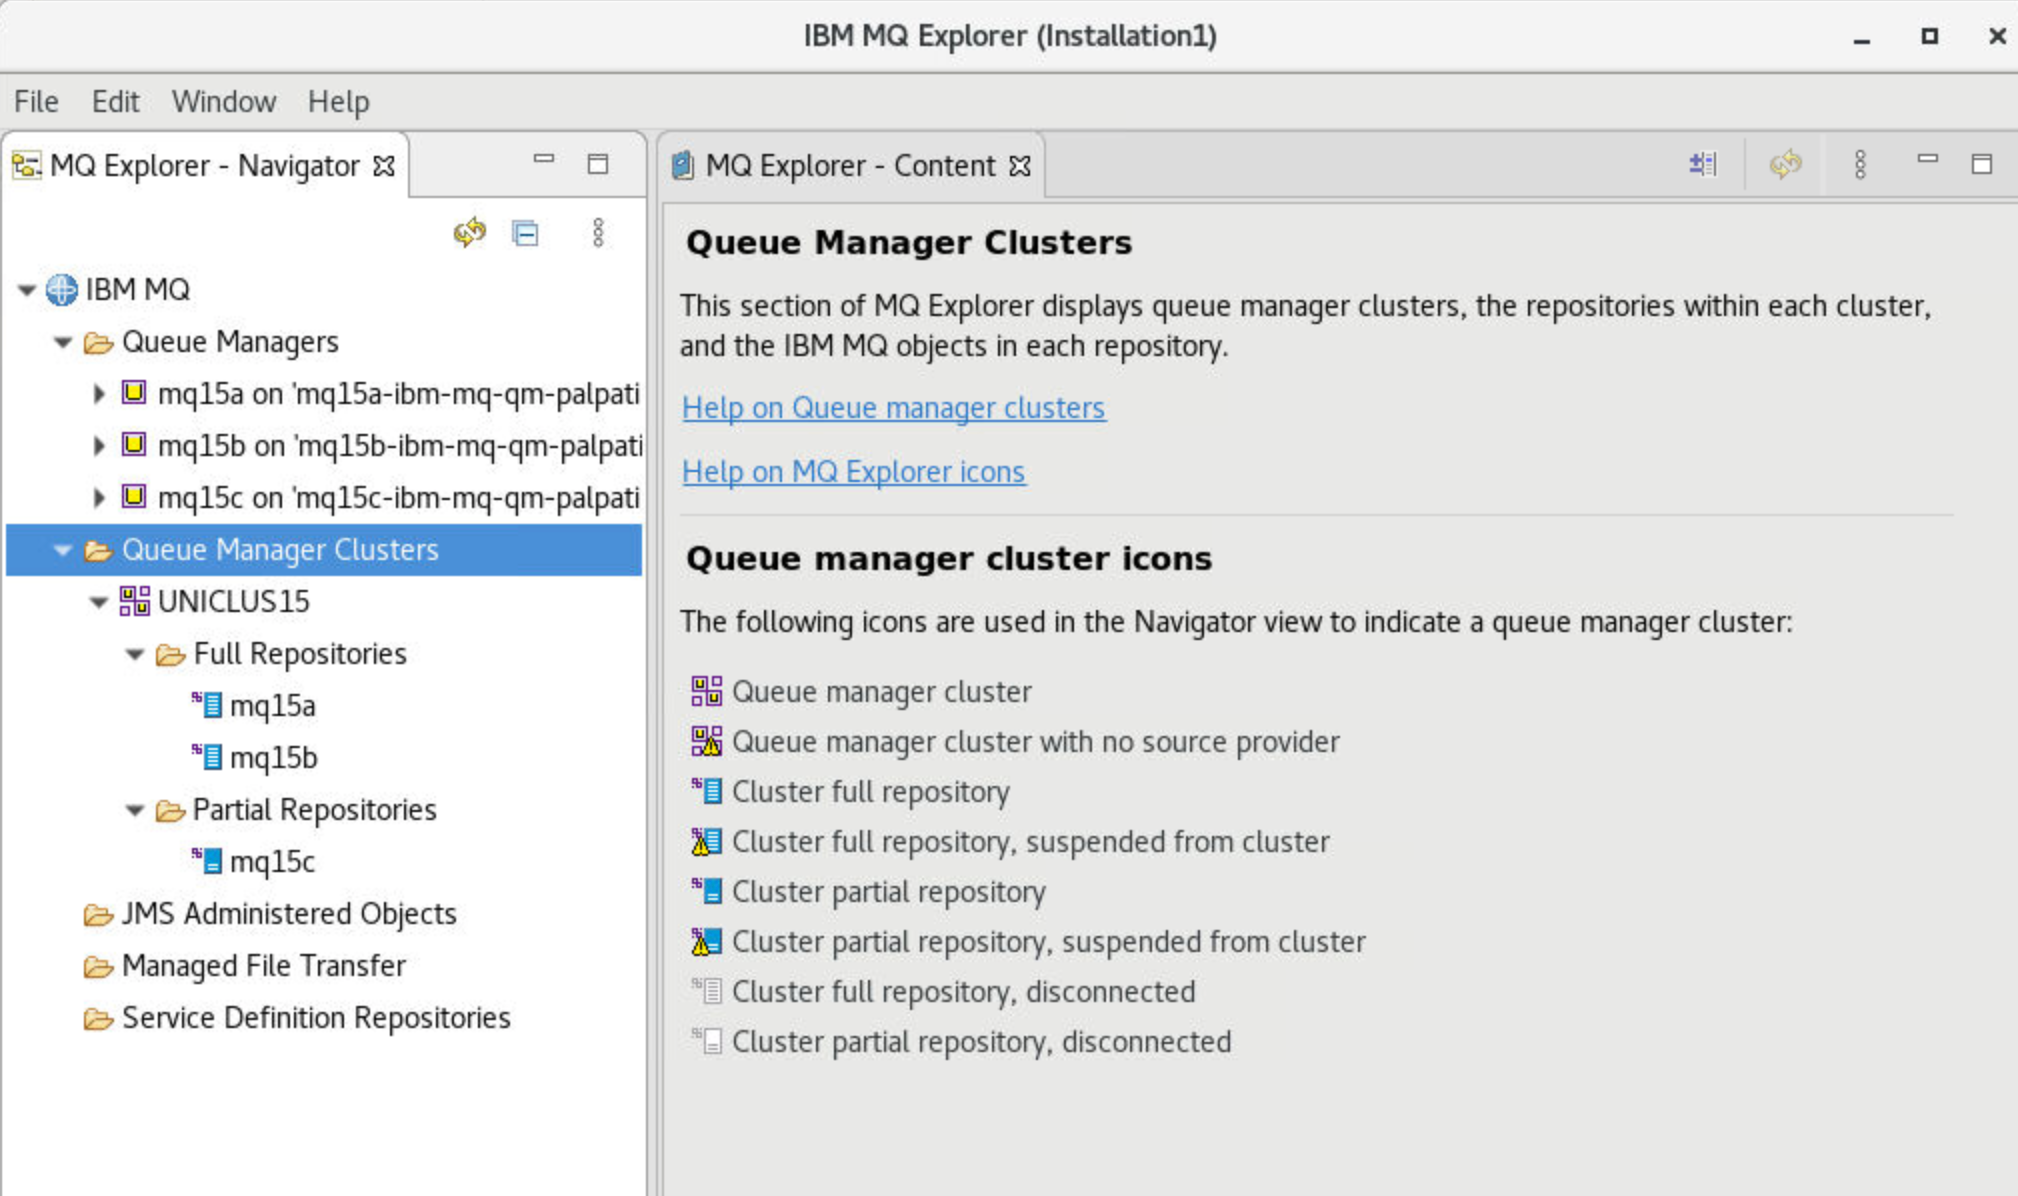
-
You observed the cluster channels in the MQ Console, but you can verify them in MQ Explorer also. Since mqxxc is a partial repository, it has two cluster sender channels, one to each full repository.
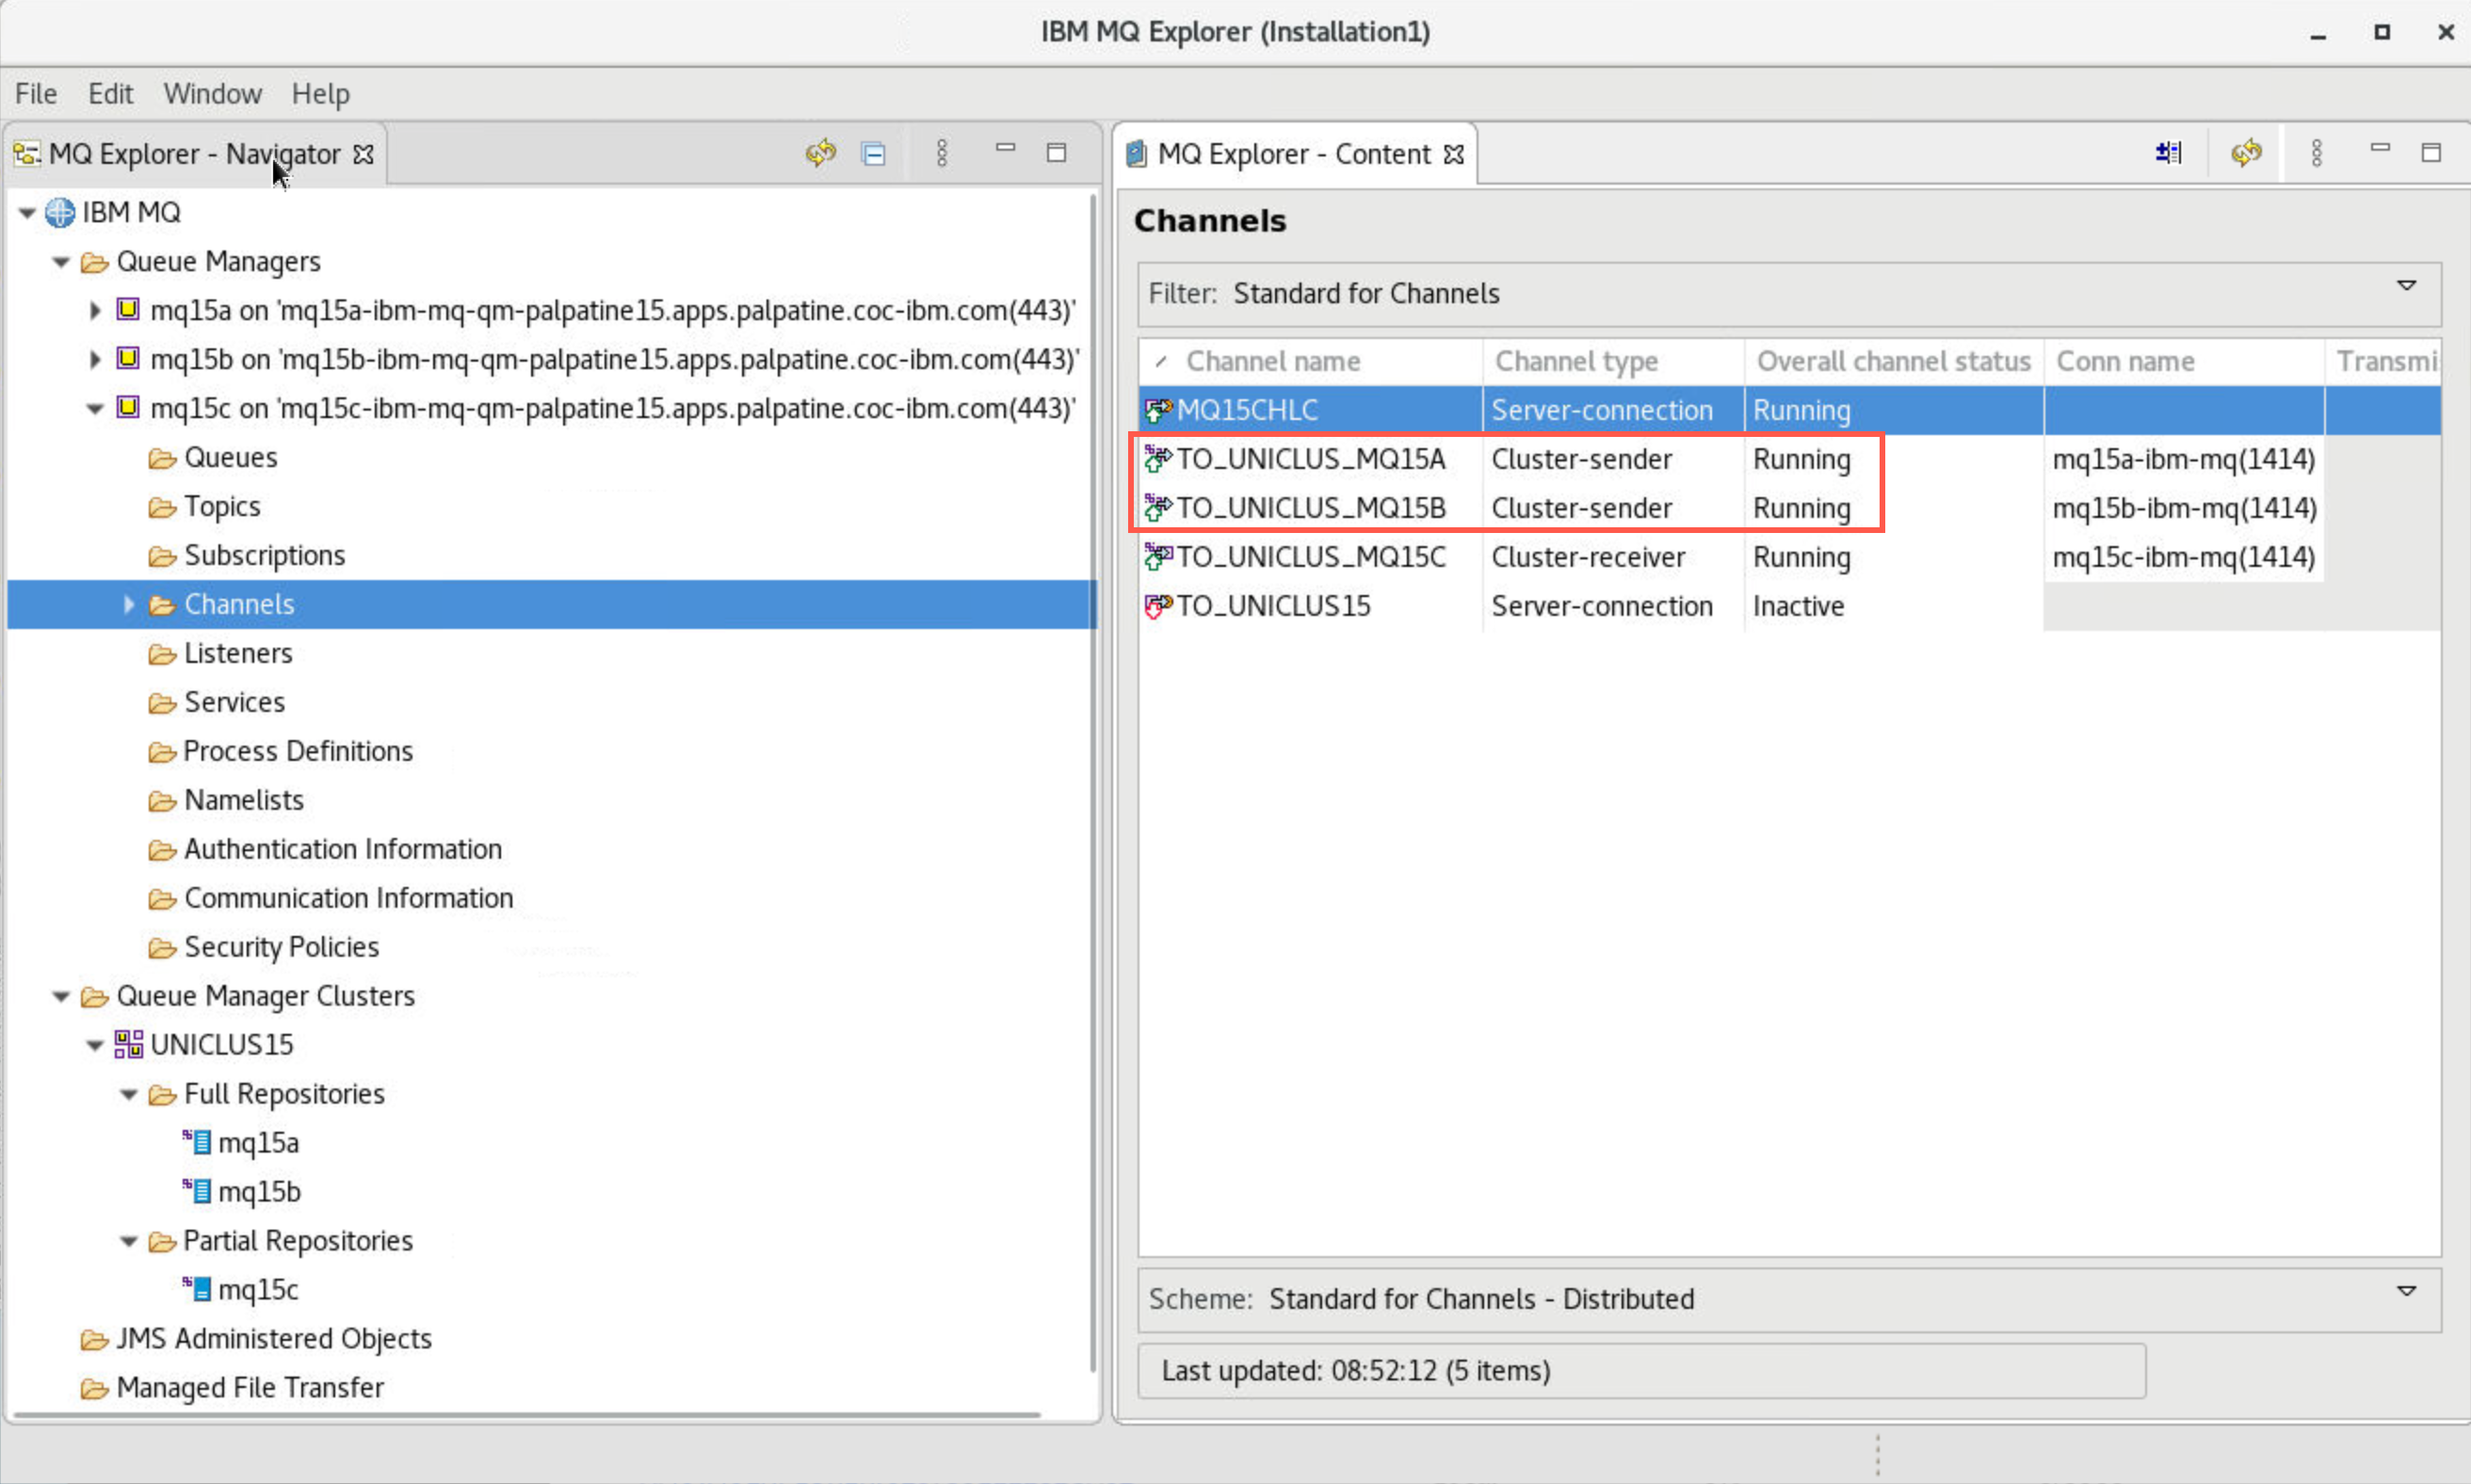
-
Check that Cluster Sender and Receiver Channels for each queue manager are running and if not, start them.
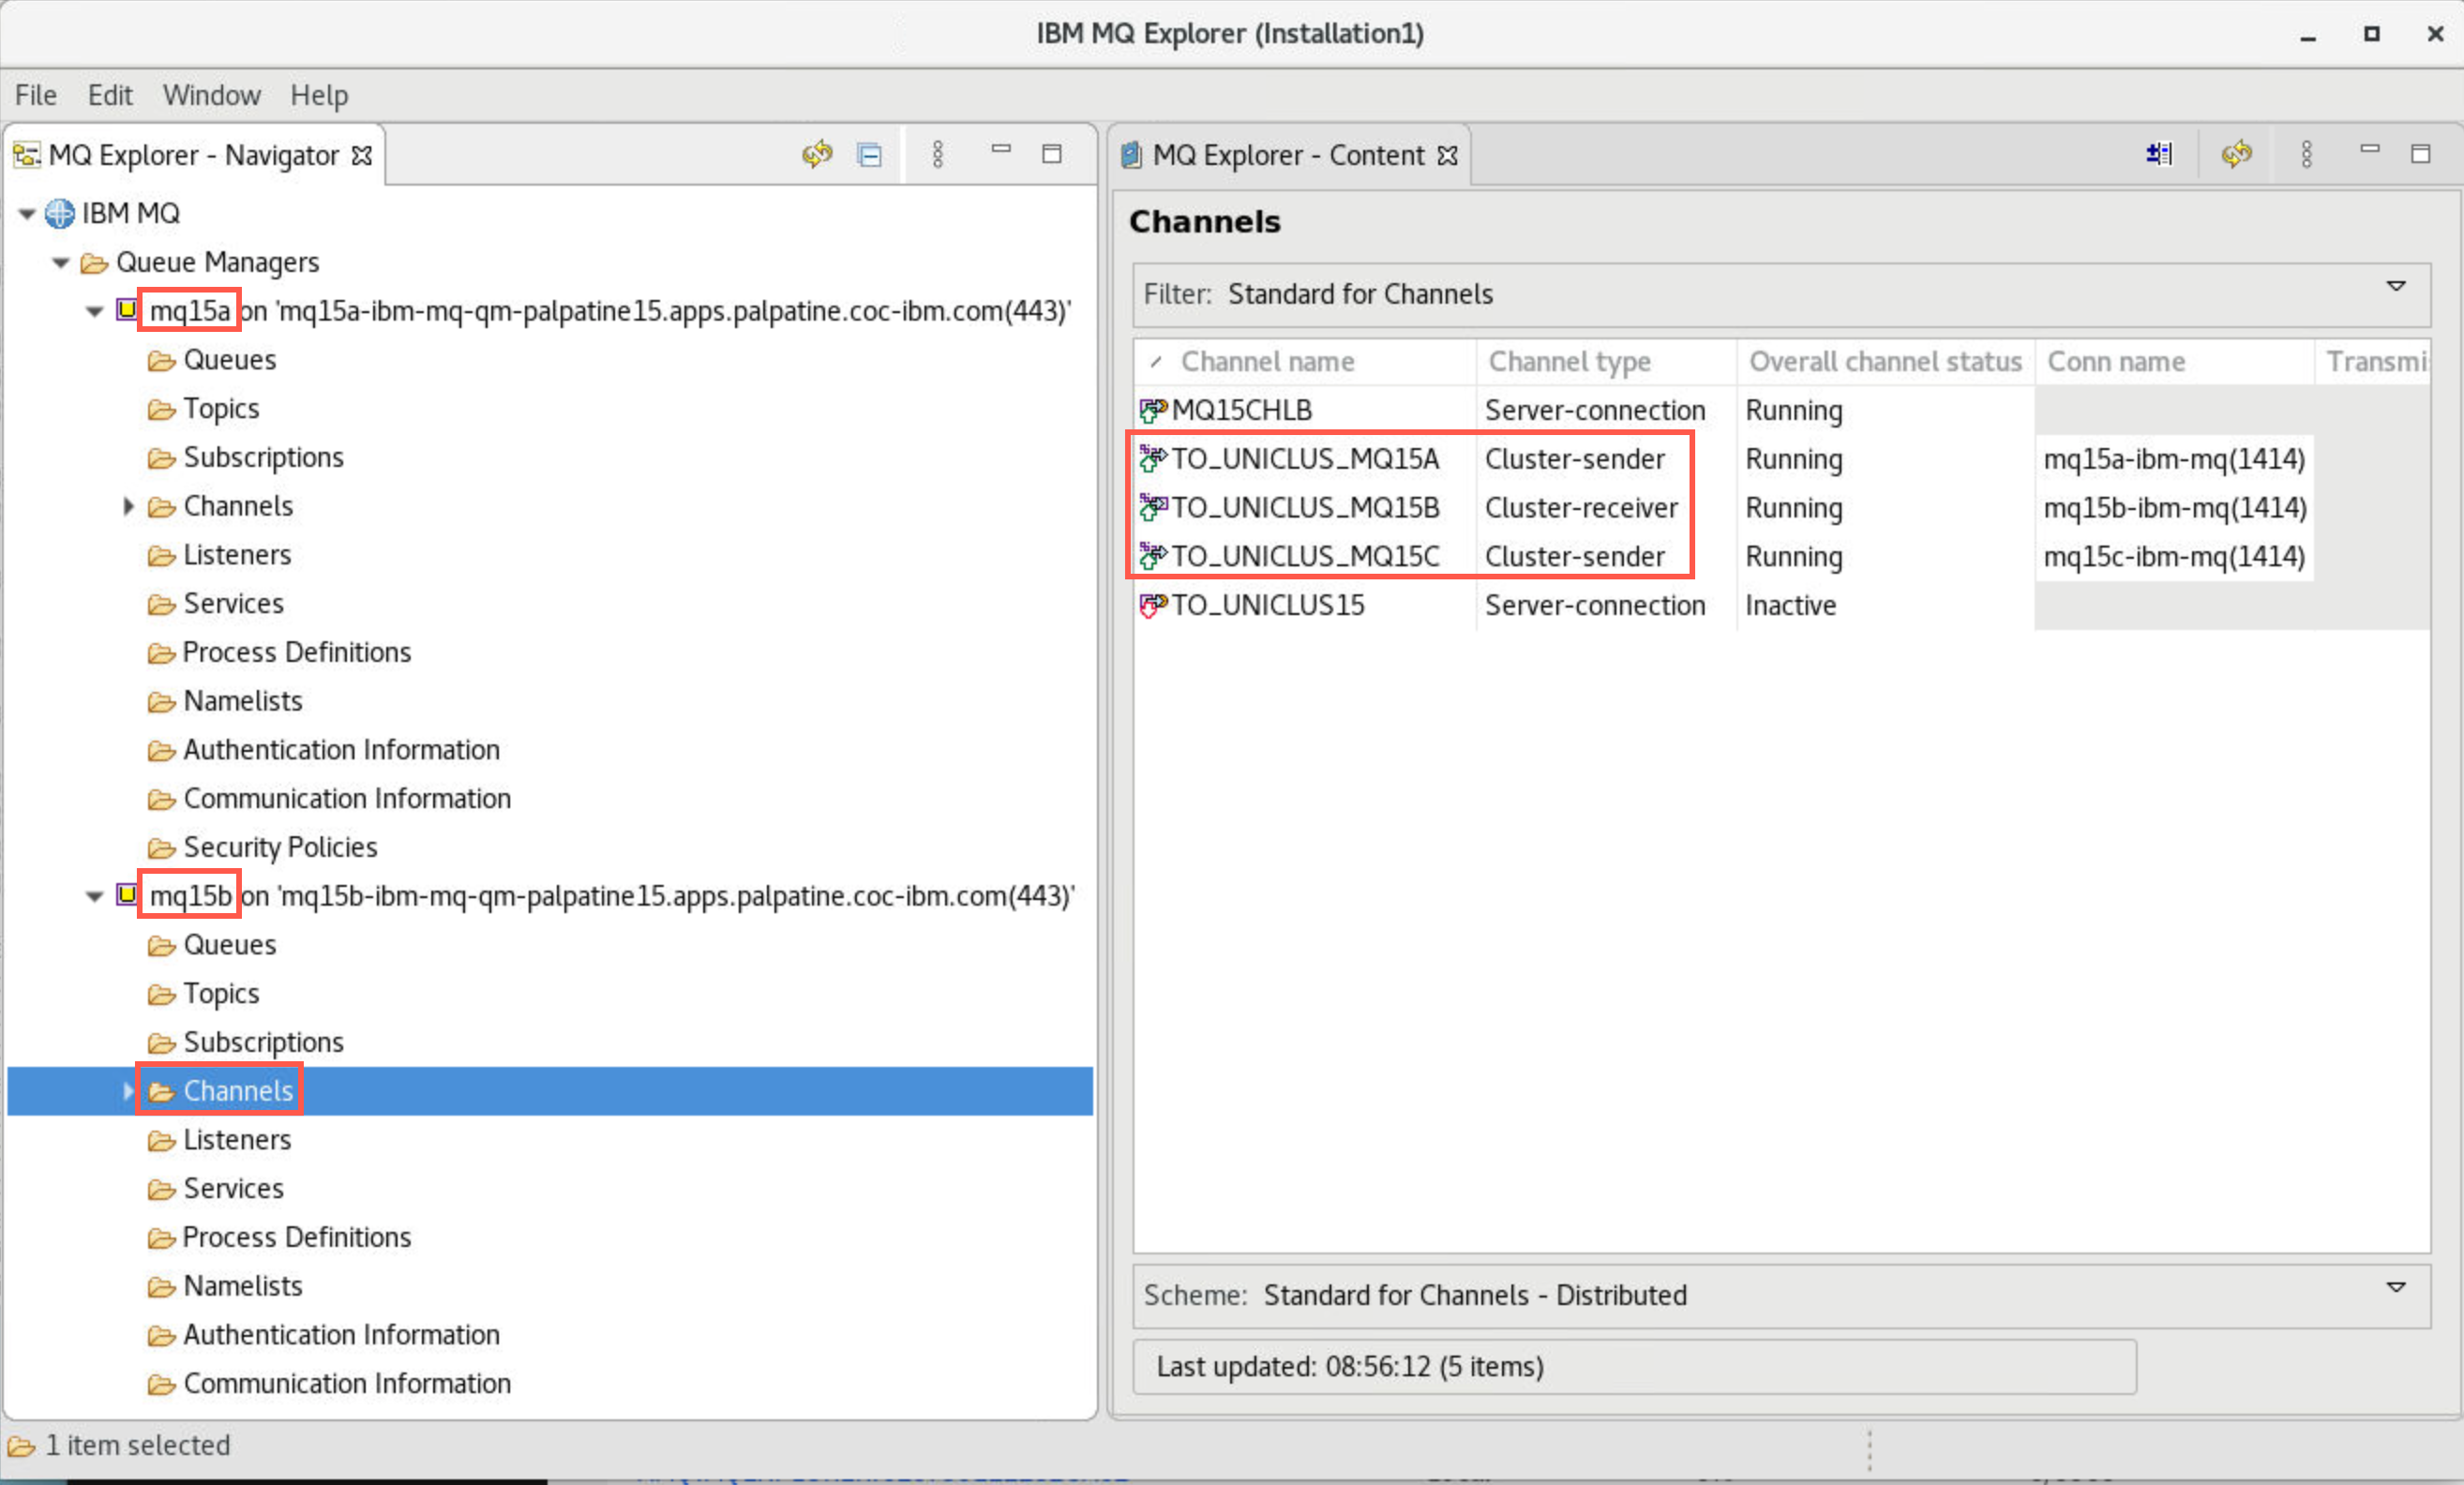
Note: the Server Connection Channels will be inactive – do not attempt to start these.
-
Right-click you cluster name and select Tests > Run Default Tests.
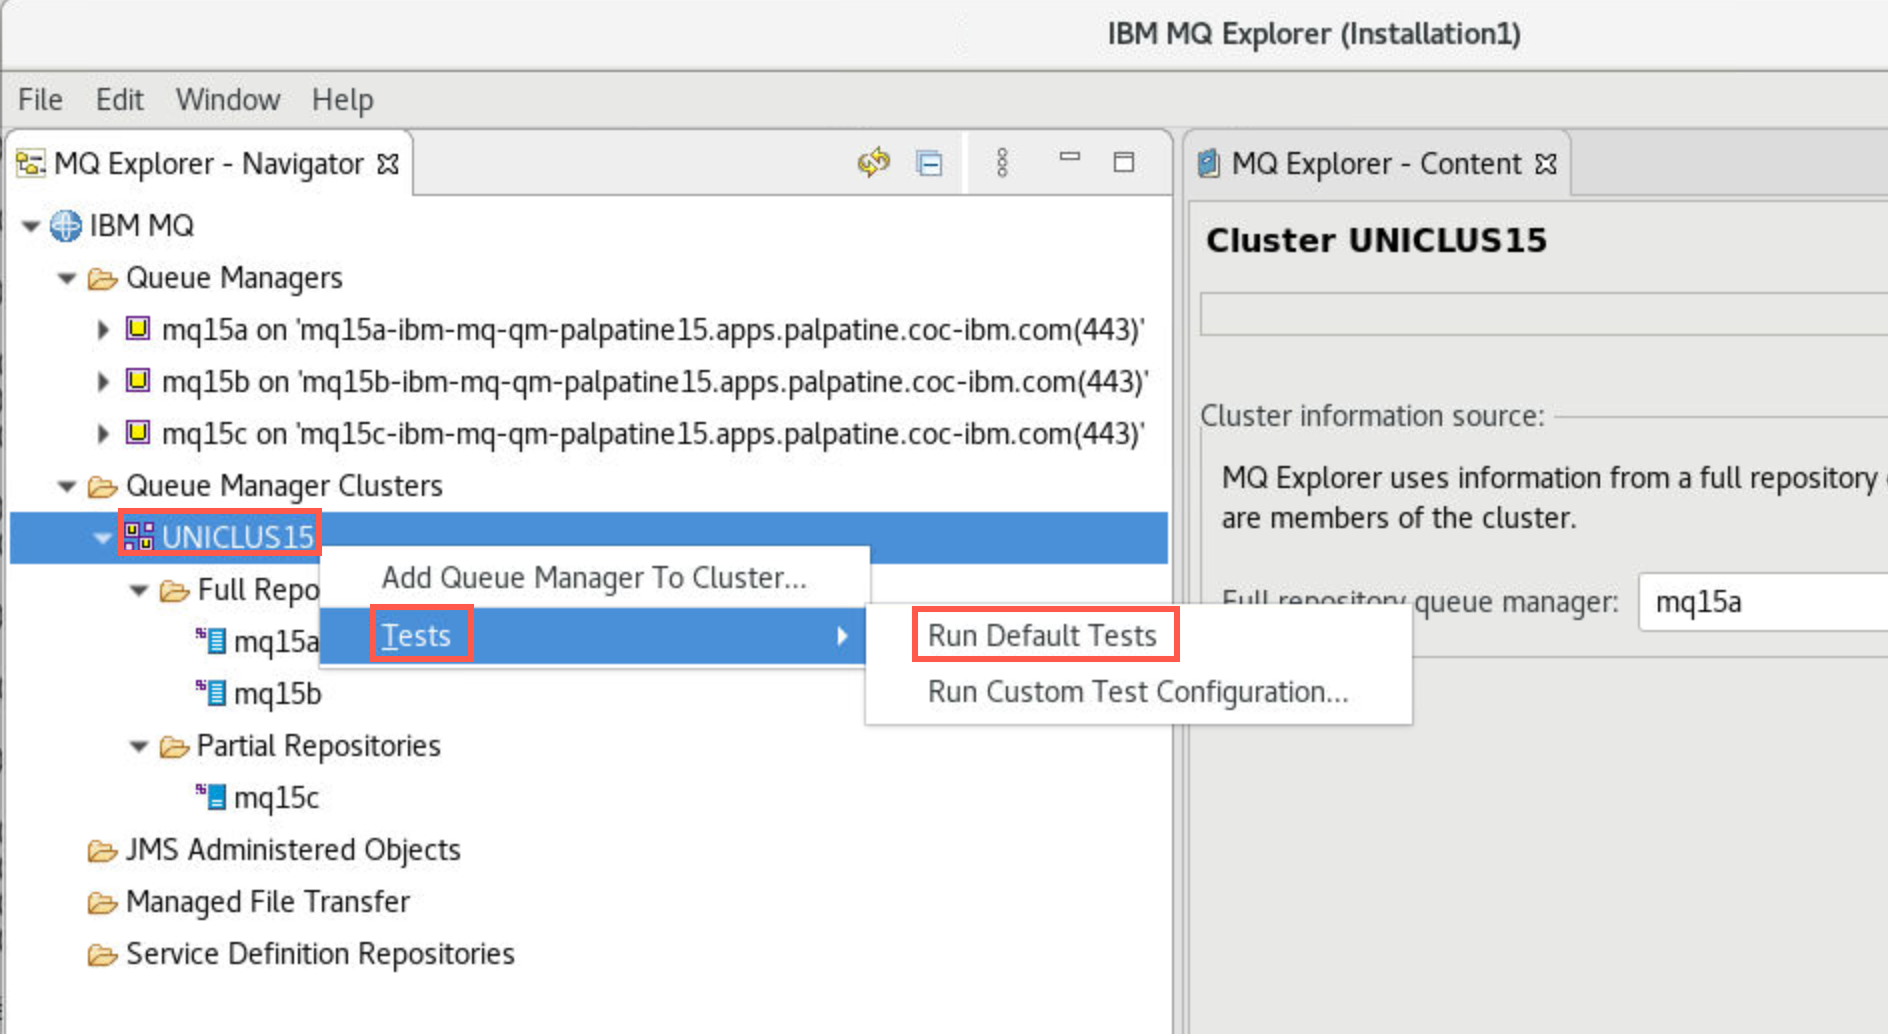
-
Check that there are no errors or warnings resulting in the MQ Explorer - Test Results.
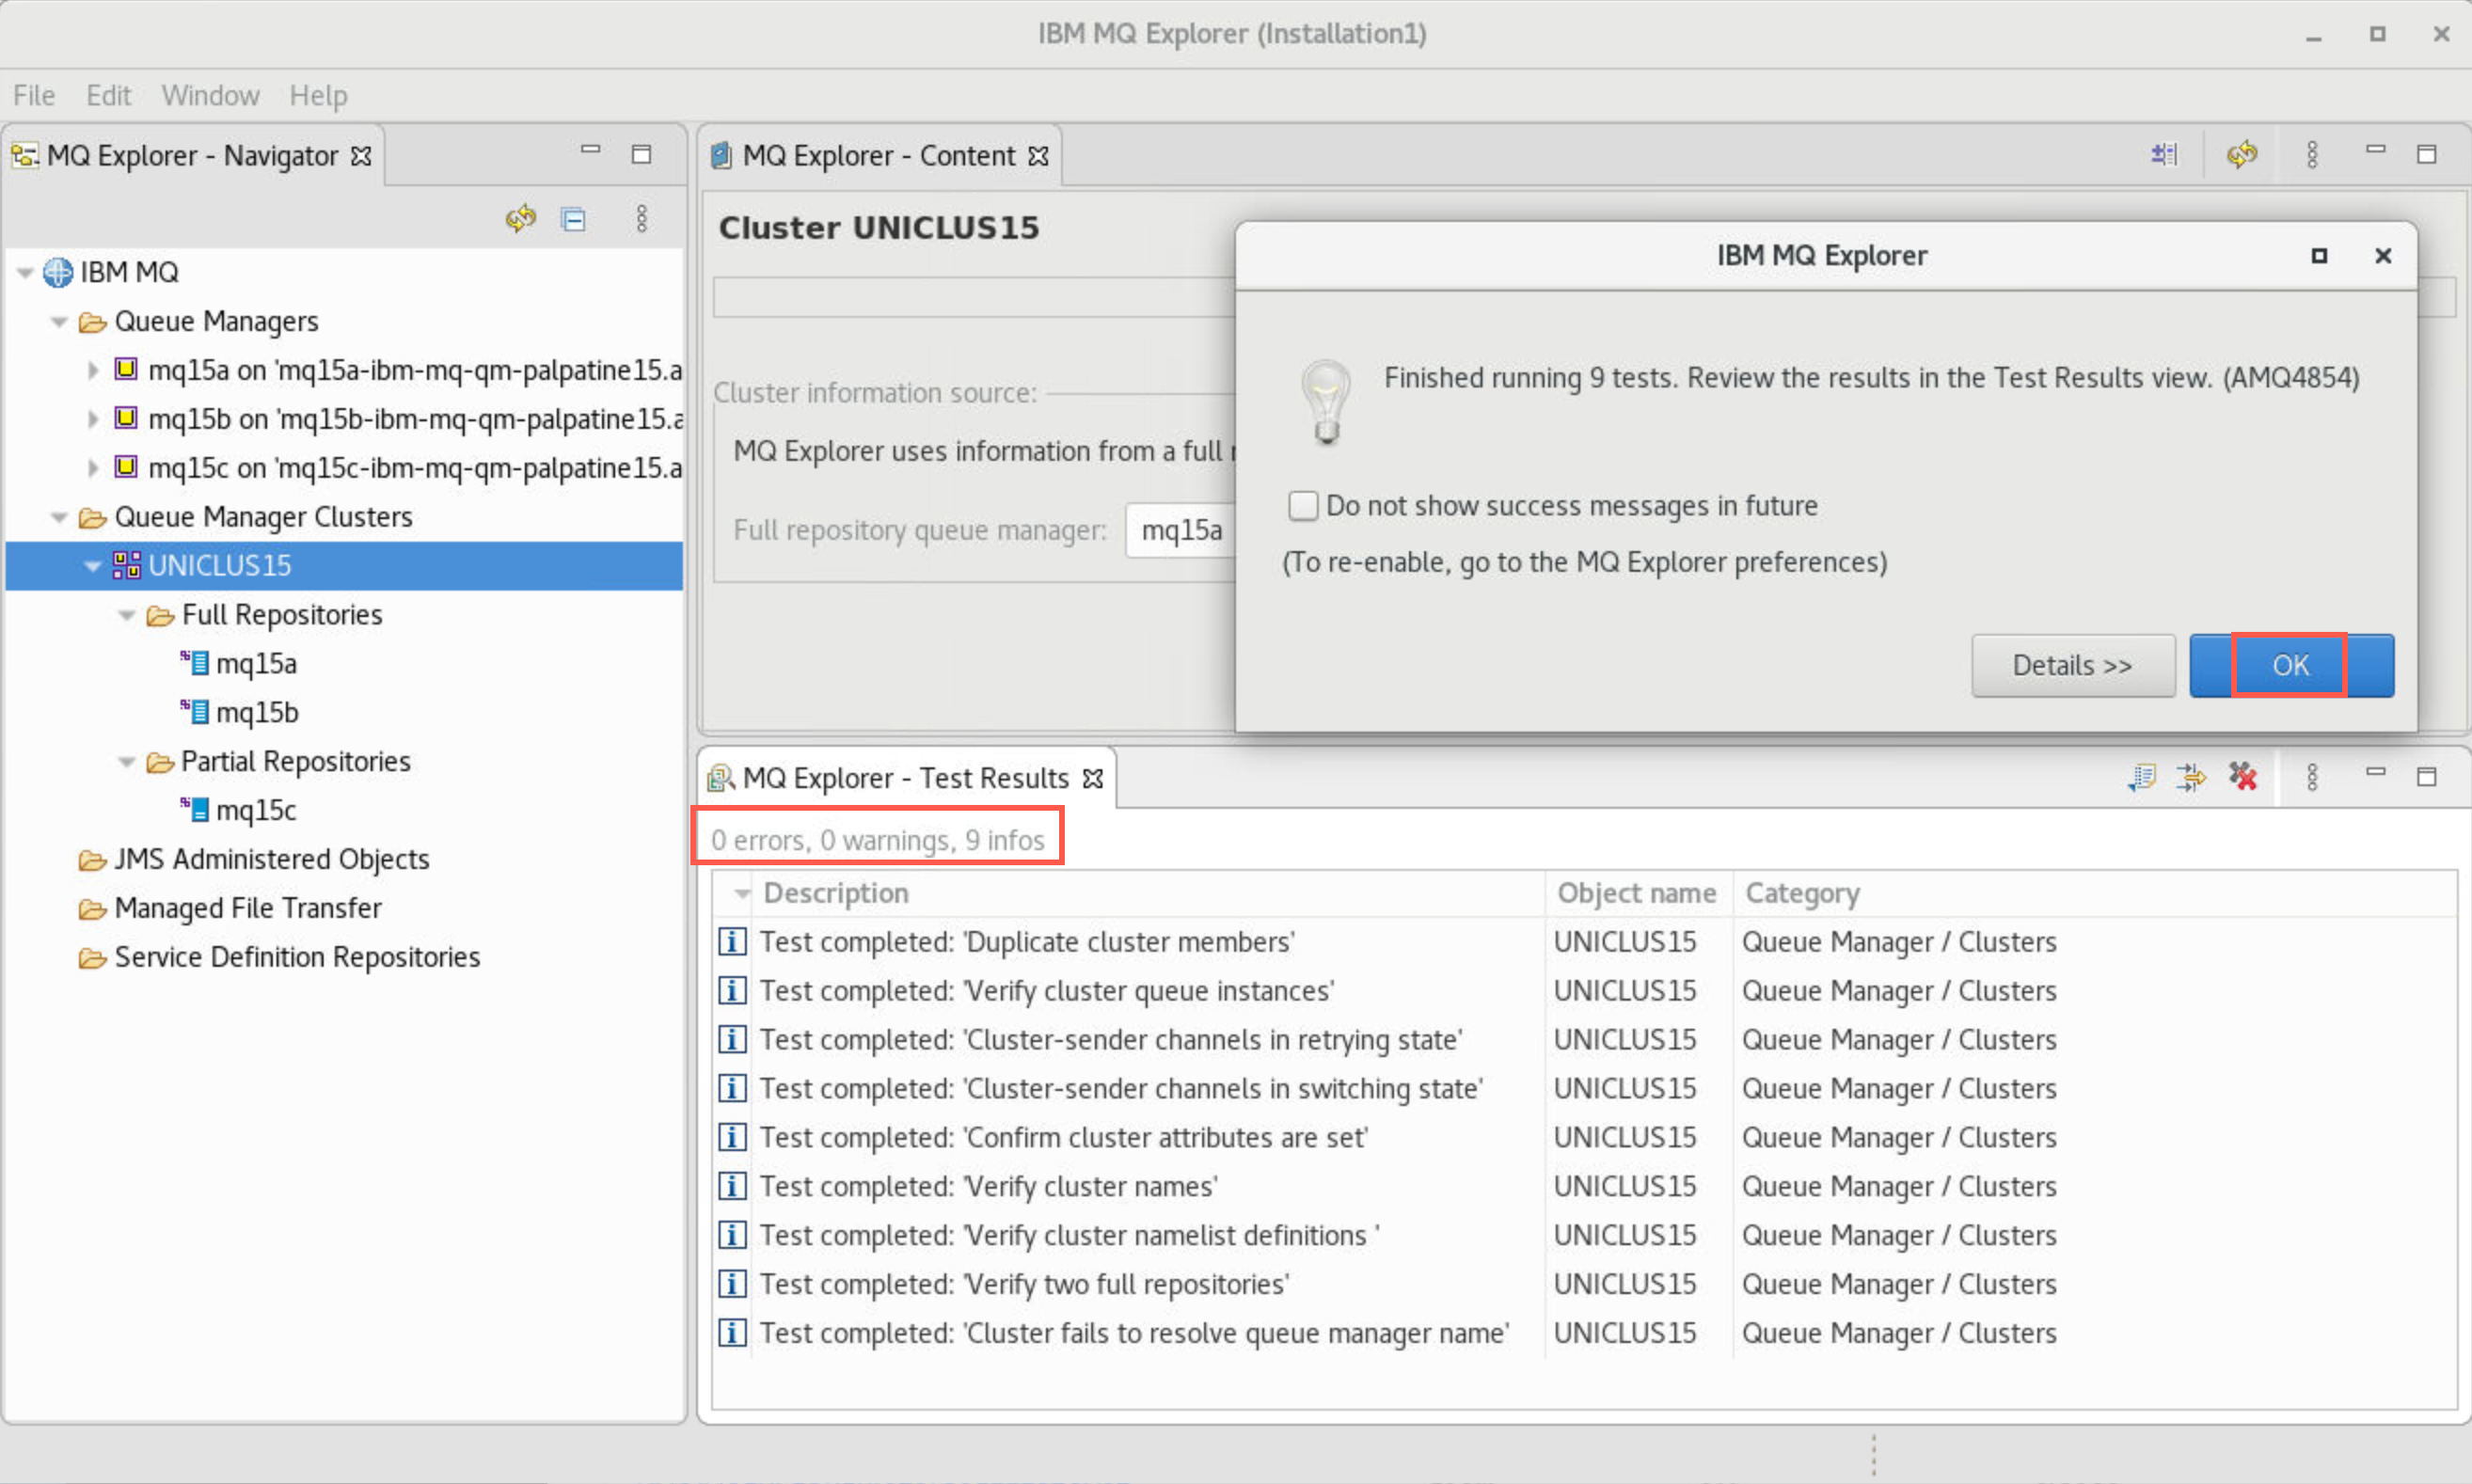
Launch getting applications
In this section we shall launch 6 instances of an application connected to the same queue manager.
The Client Channel Definition Table (CCDT) determines the channel definitions and authentication information used by client applications to connect to a queue manager. We shall be using a CCDT in JSON format.
-
Open a terminal window and navigate to /home/student/MQonCP4I/unicluster/test. Copy the command snippet so you don’t have to type the whole thing (you will need it in other terminals).
cd /home/student/MQonCP4I/unicluster/test -
Make shell scripts executable with the following commmand:
chmod +x getMessage.shRepeat the command for the other scripts:
- sendMessage.sh
- killall.sh
- rClient.sh
- sClient.sh
- setEnv.sh
- showConns.sh
-
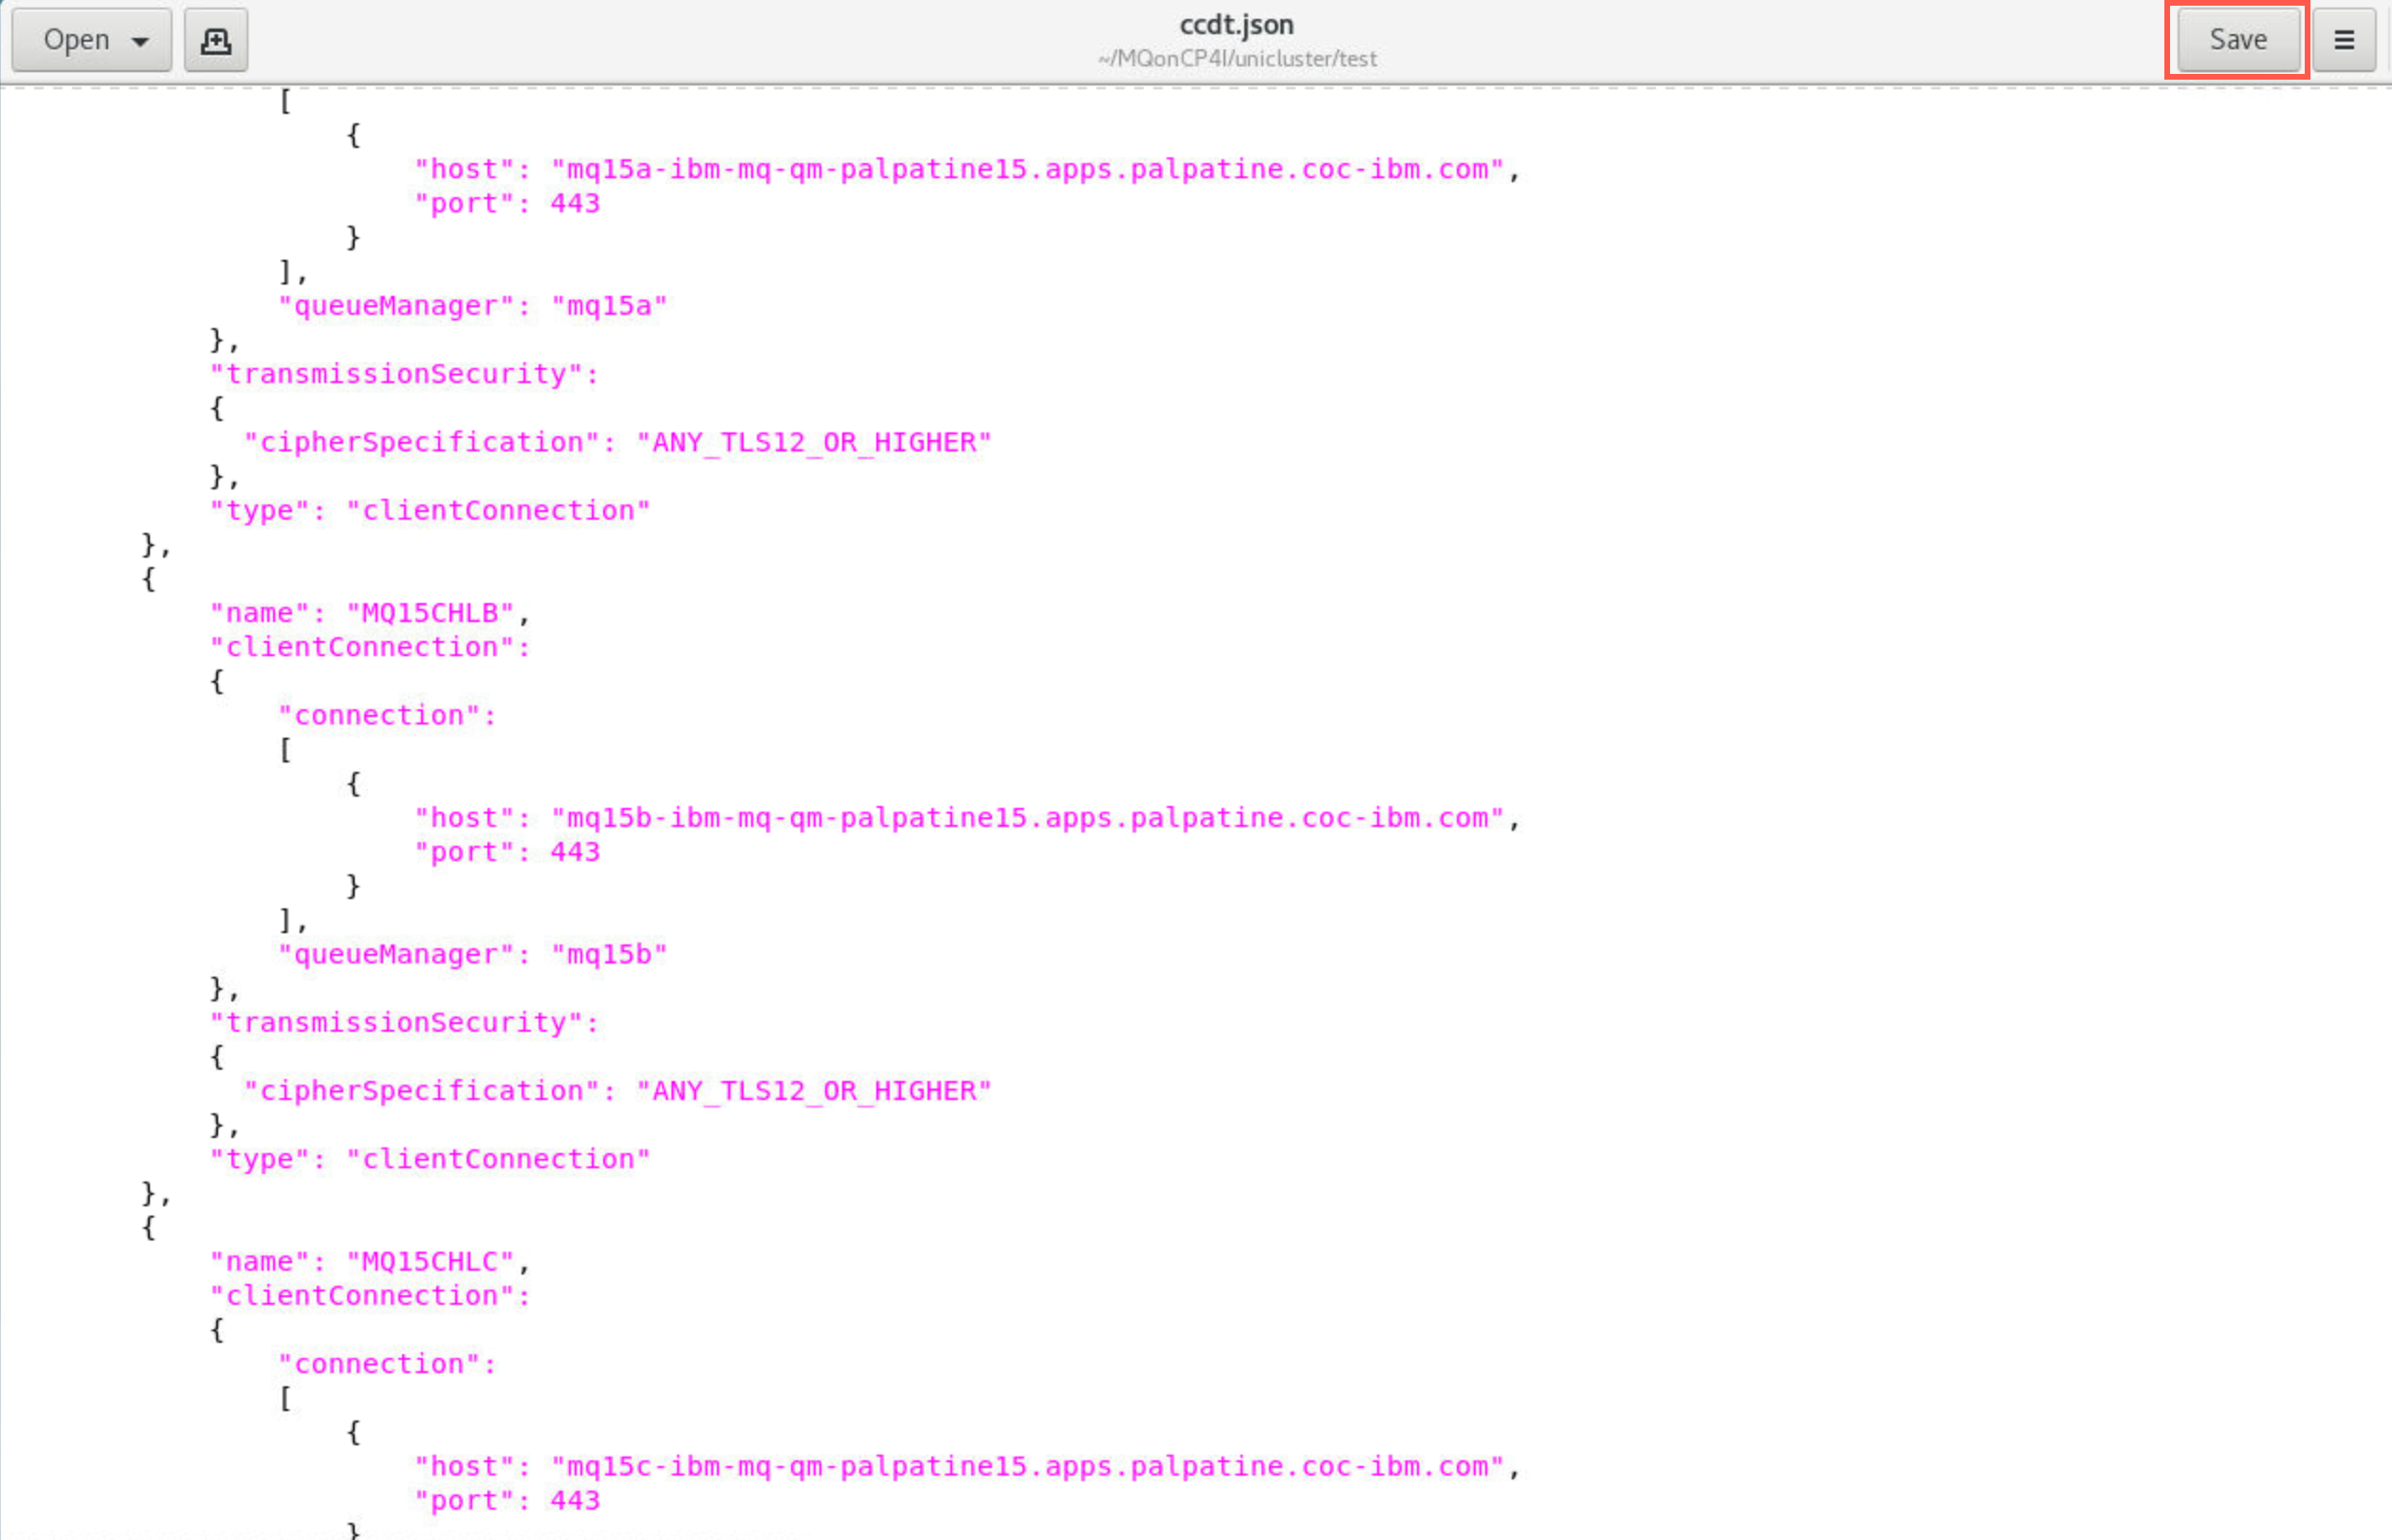
Edit ccdt.json with the following command:
gedit ccdt.json &
-
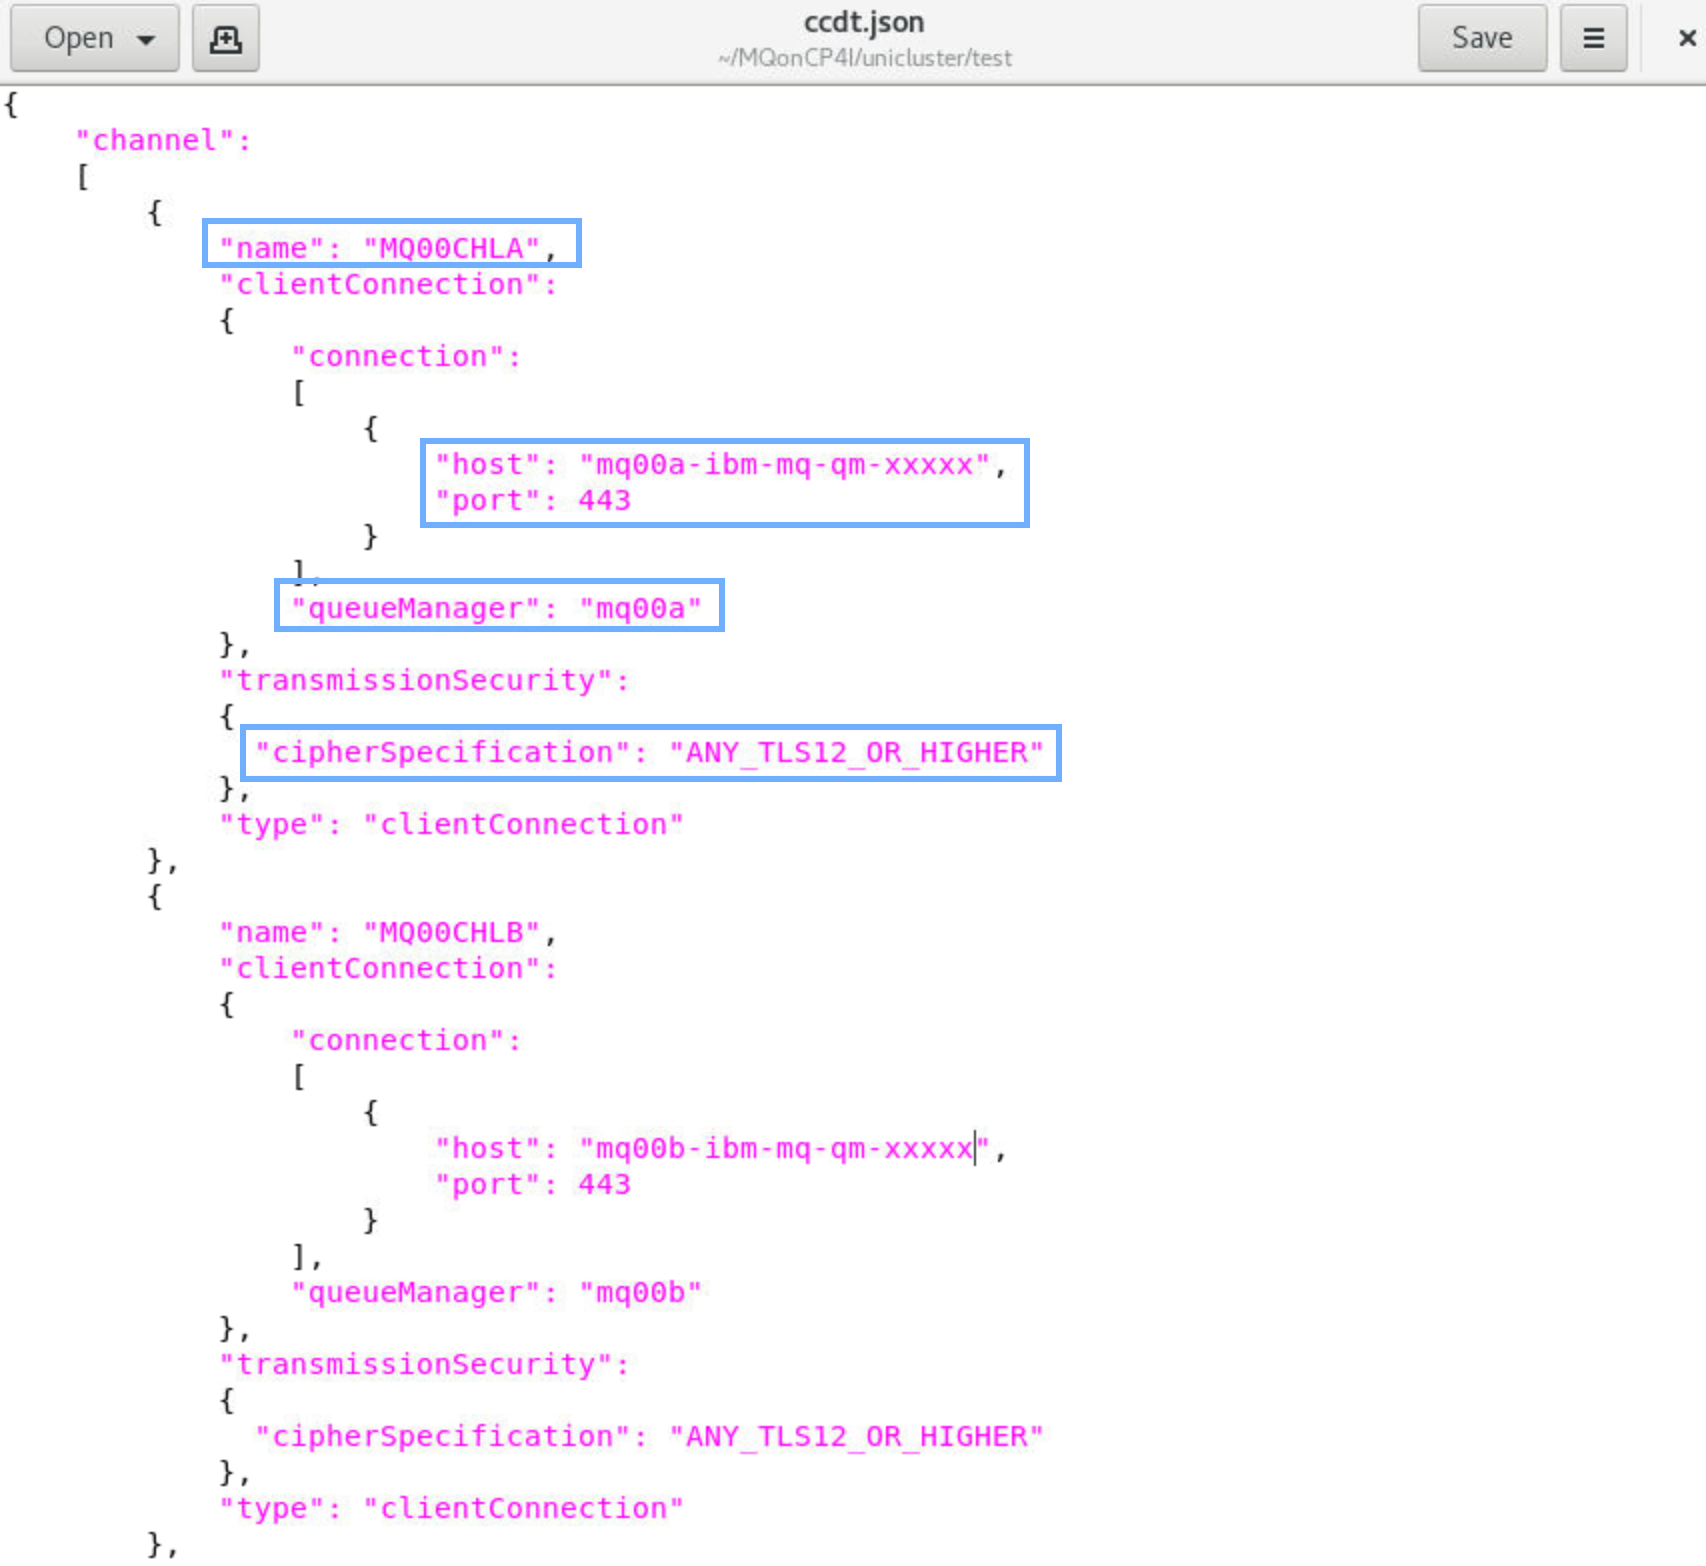
Before you make any changes review the file observing:
- the channel name matches the server connection channel on the queue manager
- the host is in the format that you used in MQ Explorer * the port is the listener port for the queue manager
- queue manager name
- cipherspec
-
You only need to change the channel name, host, and queue manager name. First you need to find the host name. To get the host name, return to the OpenShift console. Make sure you are in your project. Open Networking and select Routes. Filter by your queue manager name (mqxxa) then click the hyperlink for mqxxa-ibm-mq-qm.
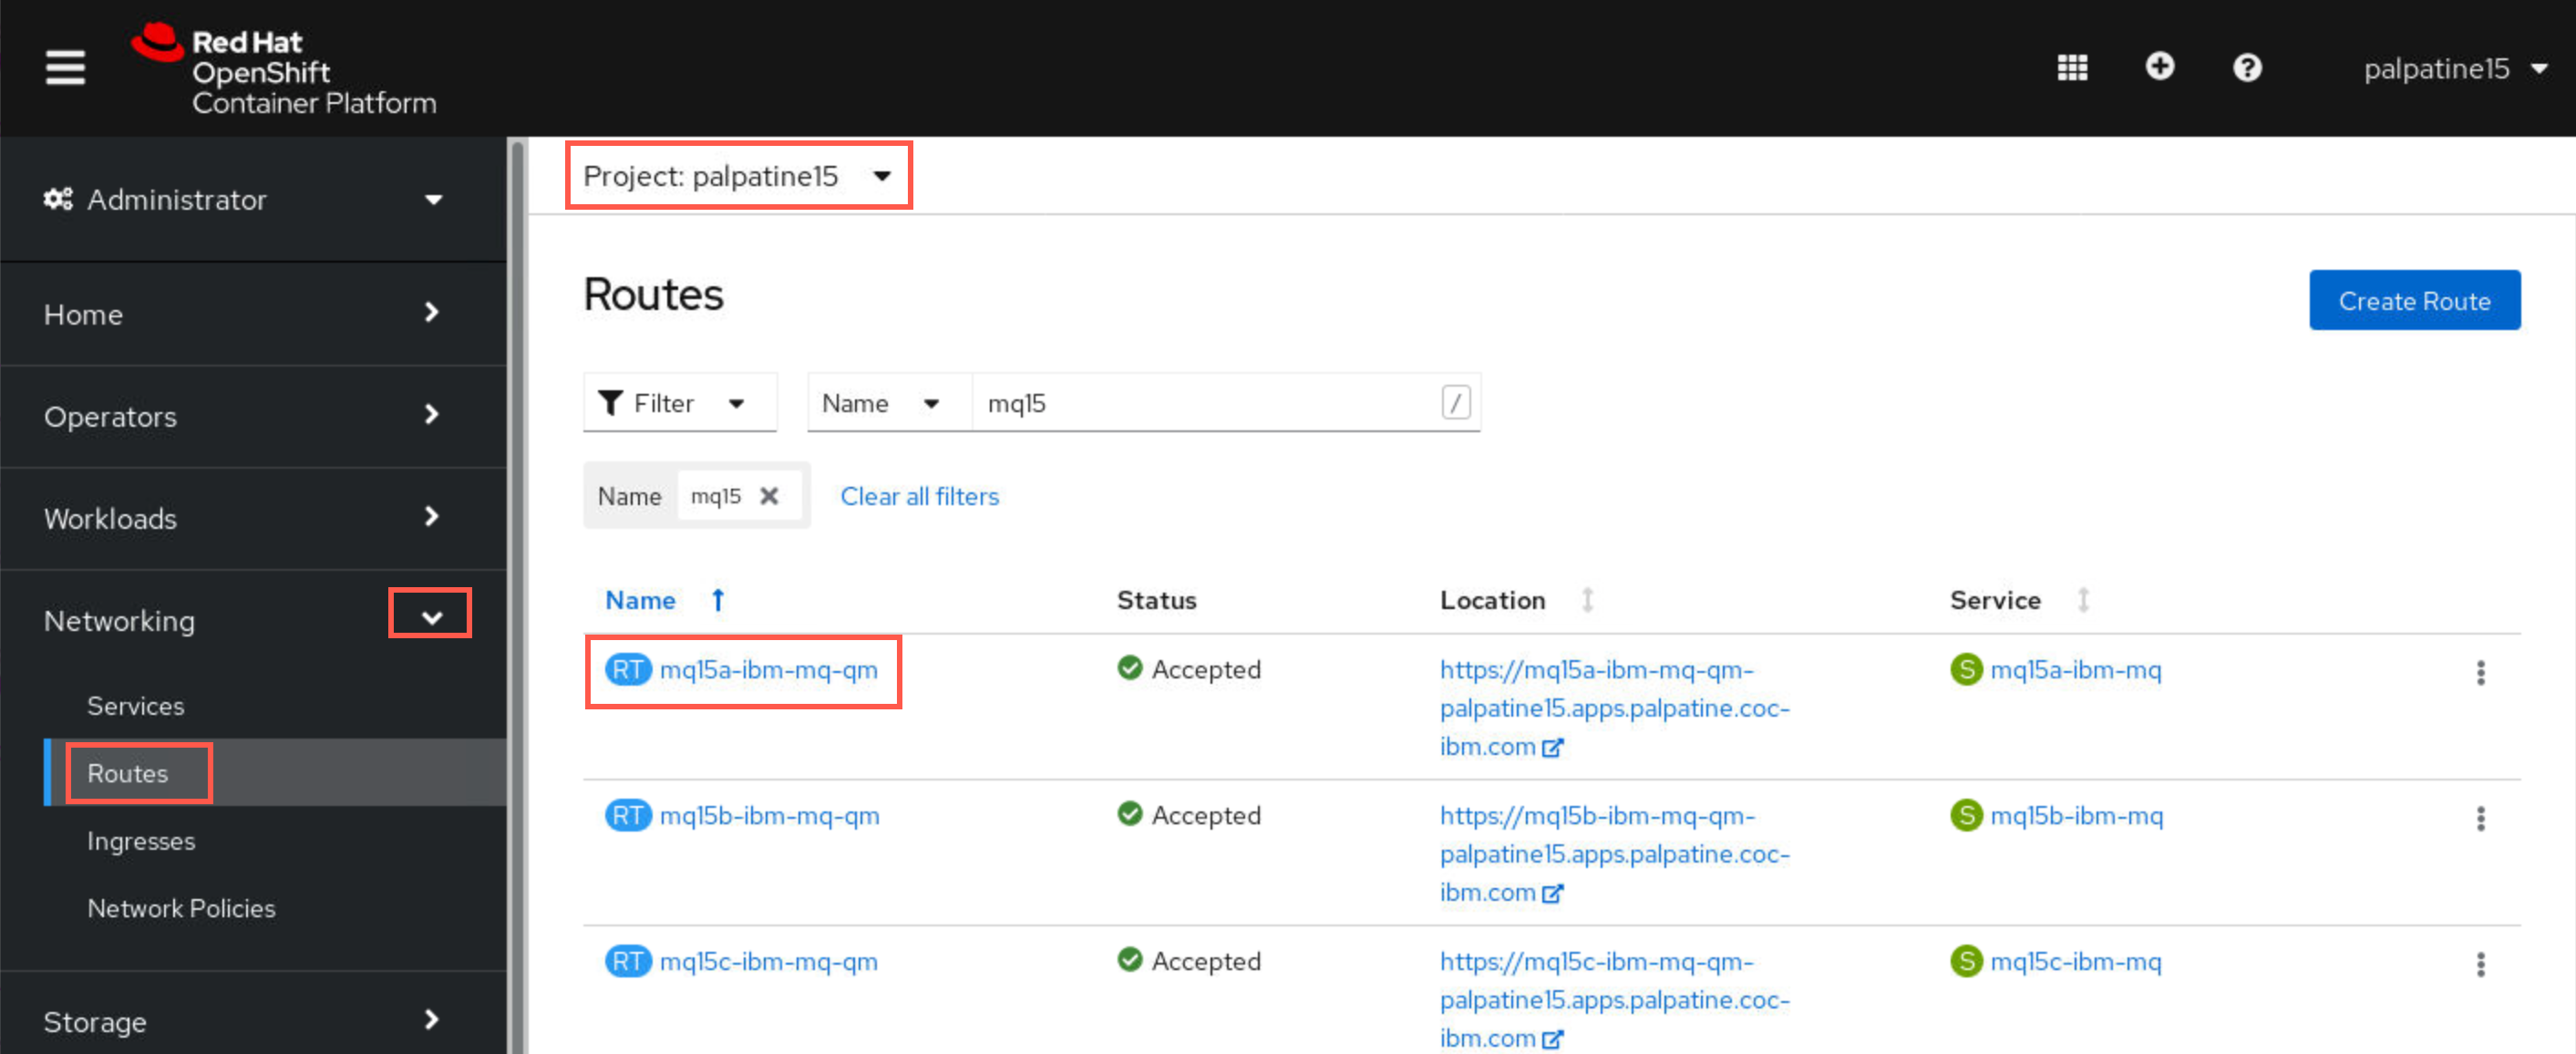
Scroll down to the Router:default section. Copy the string under Host and paste it into the host field of the ccdt.json file.
Tip:
The route value will be the same for all the queue managers except for the queue manager prefix. So, you can paste this value into all of the host fields then change mqxxa to mqxxb or mqxxc in the appropriate stanzas. See the screen shot below.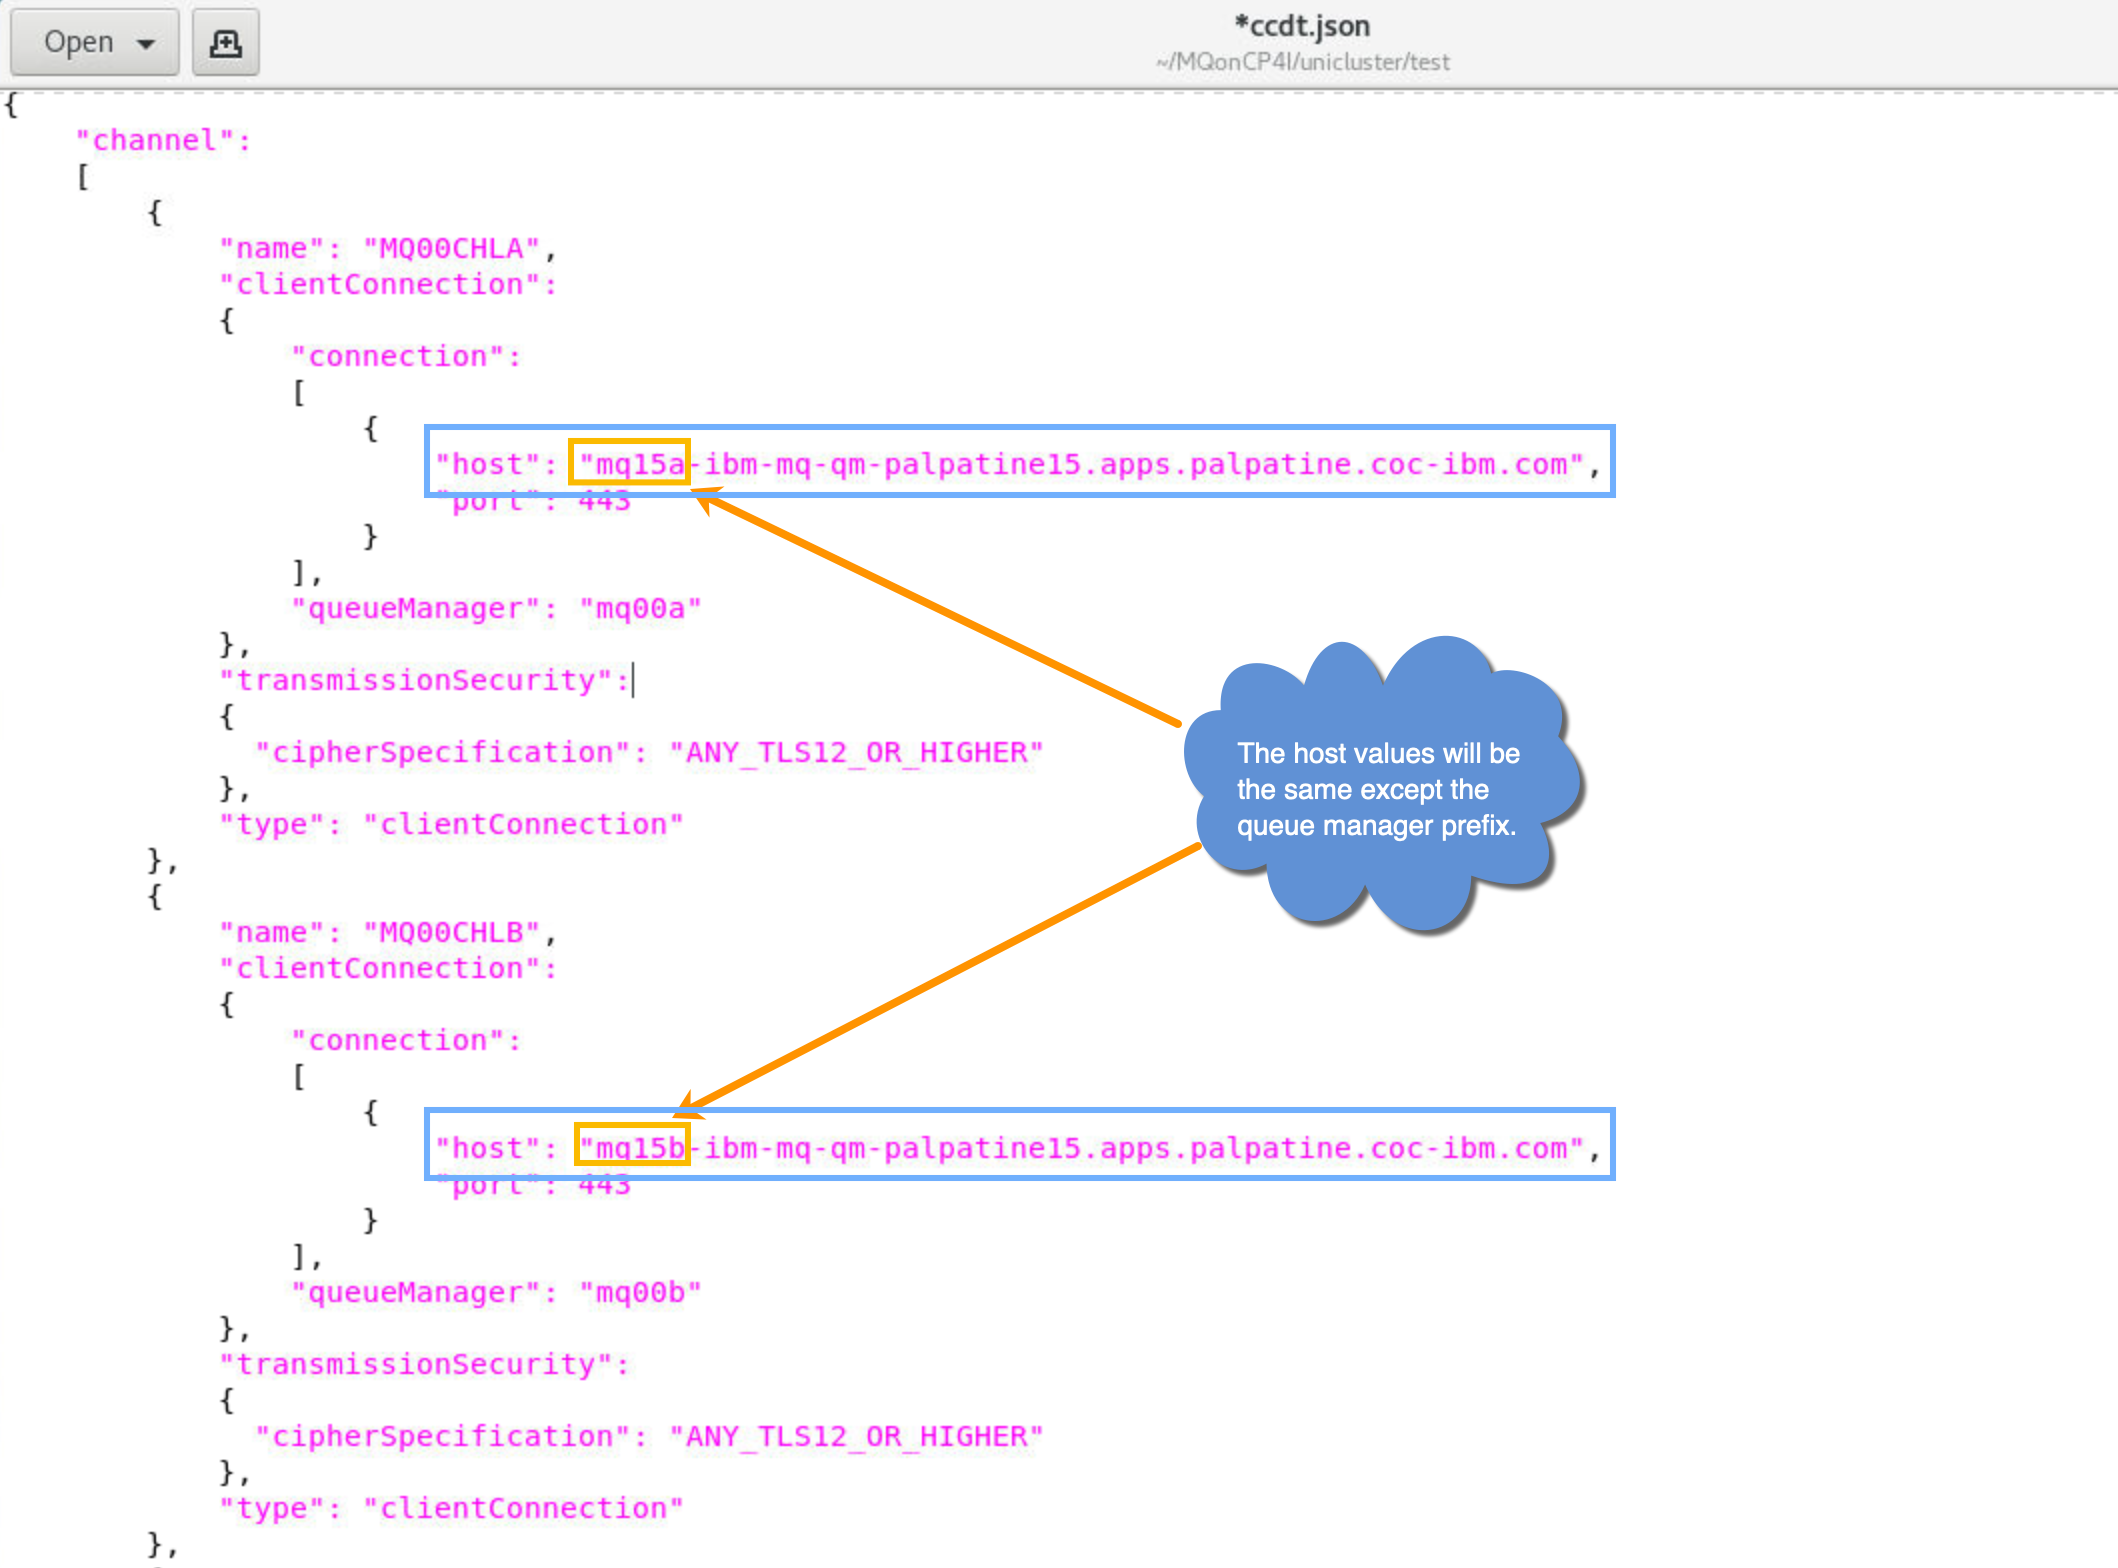
-
Use the Find and replace feature of gedit to change the “00” to your student ID in the channel name and queueManager values for all occurences.
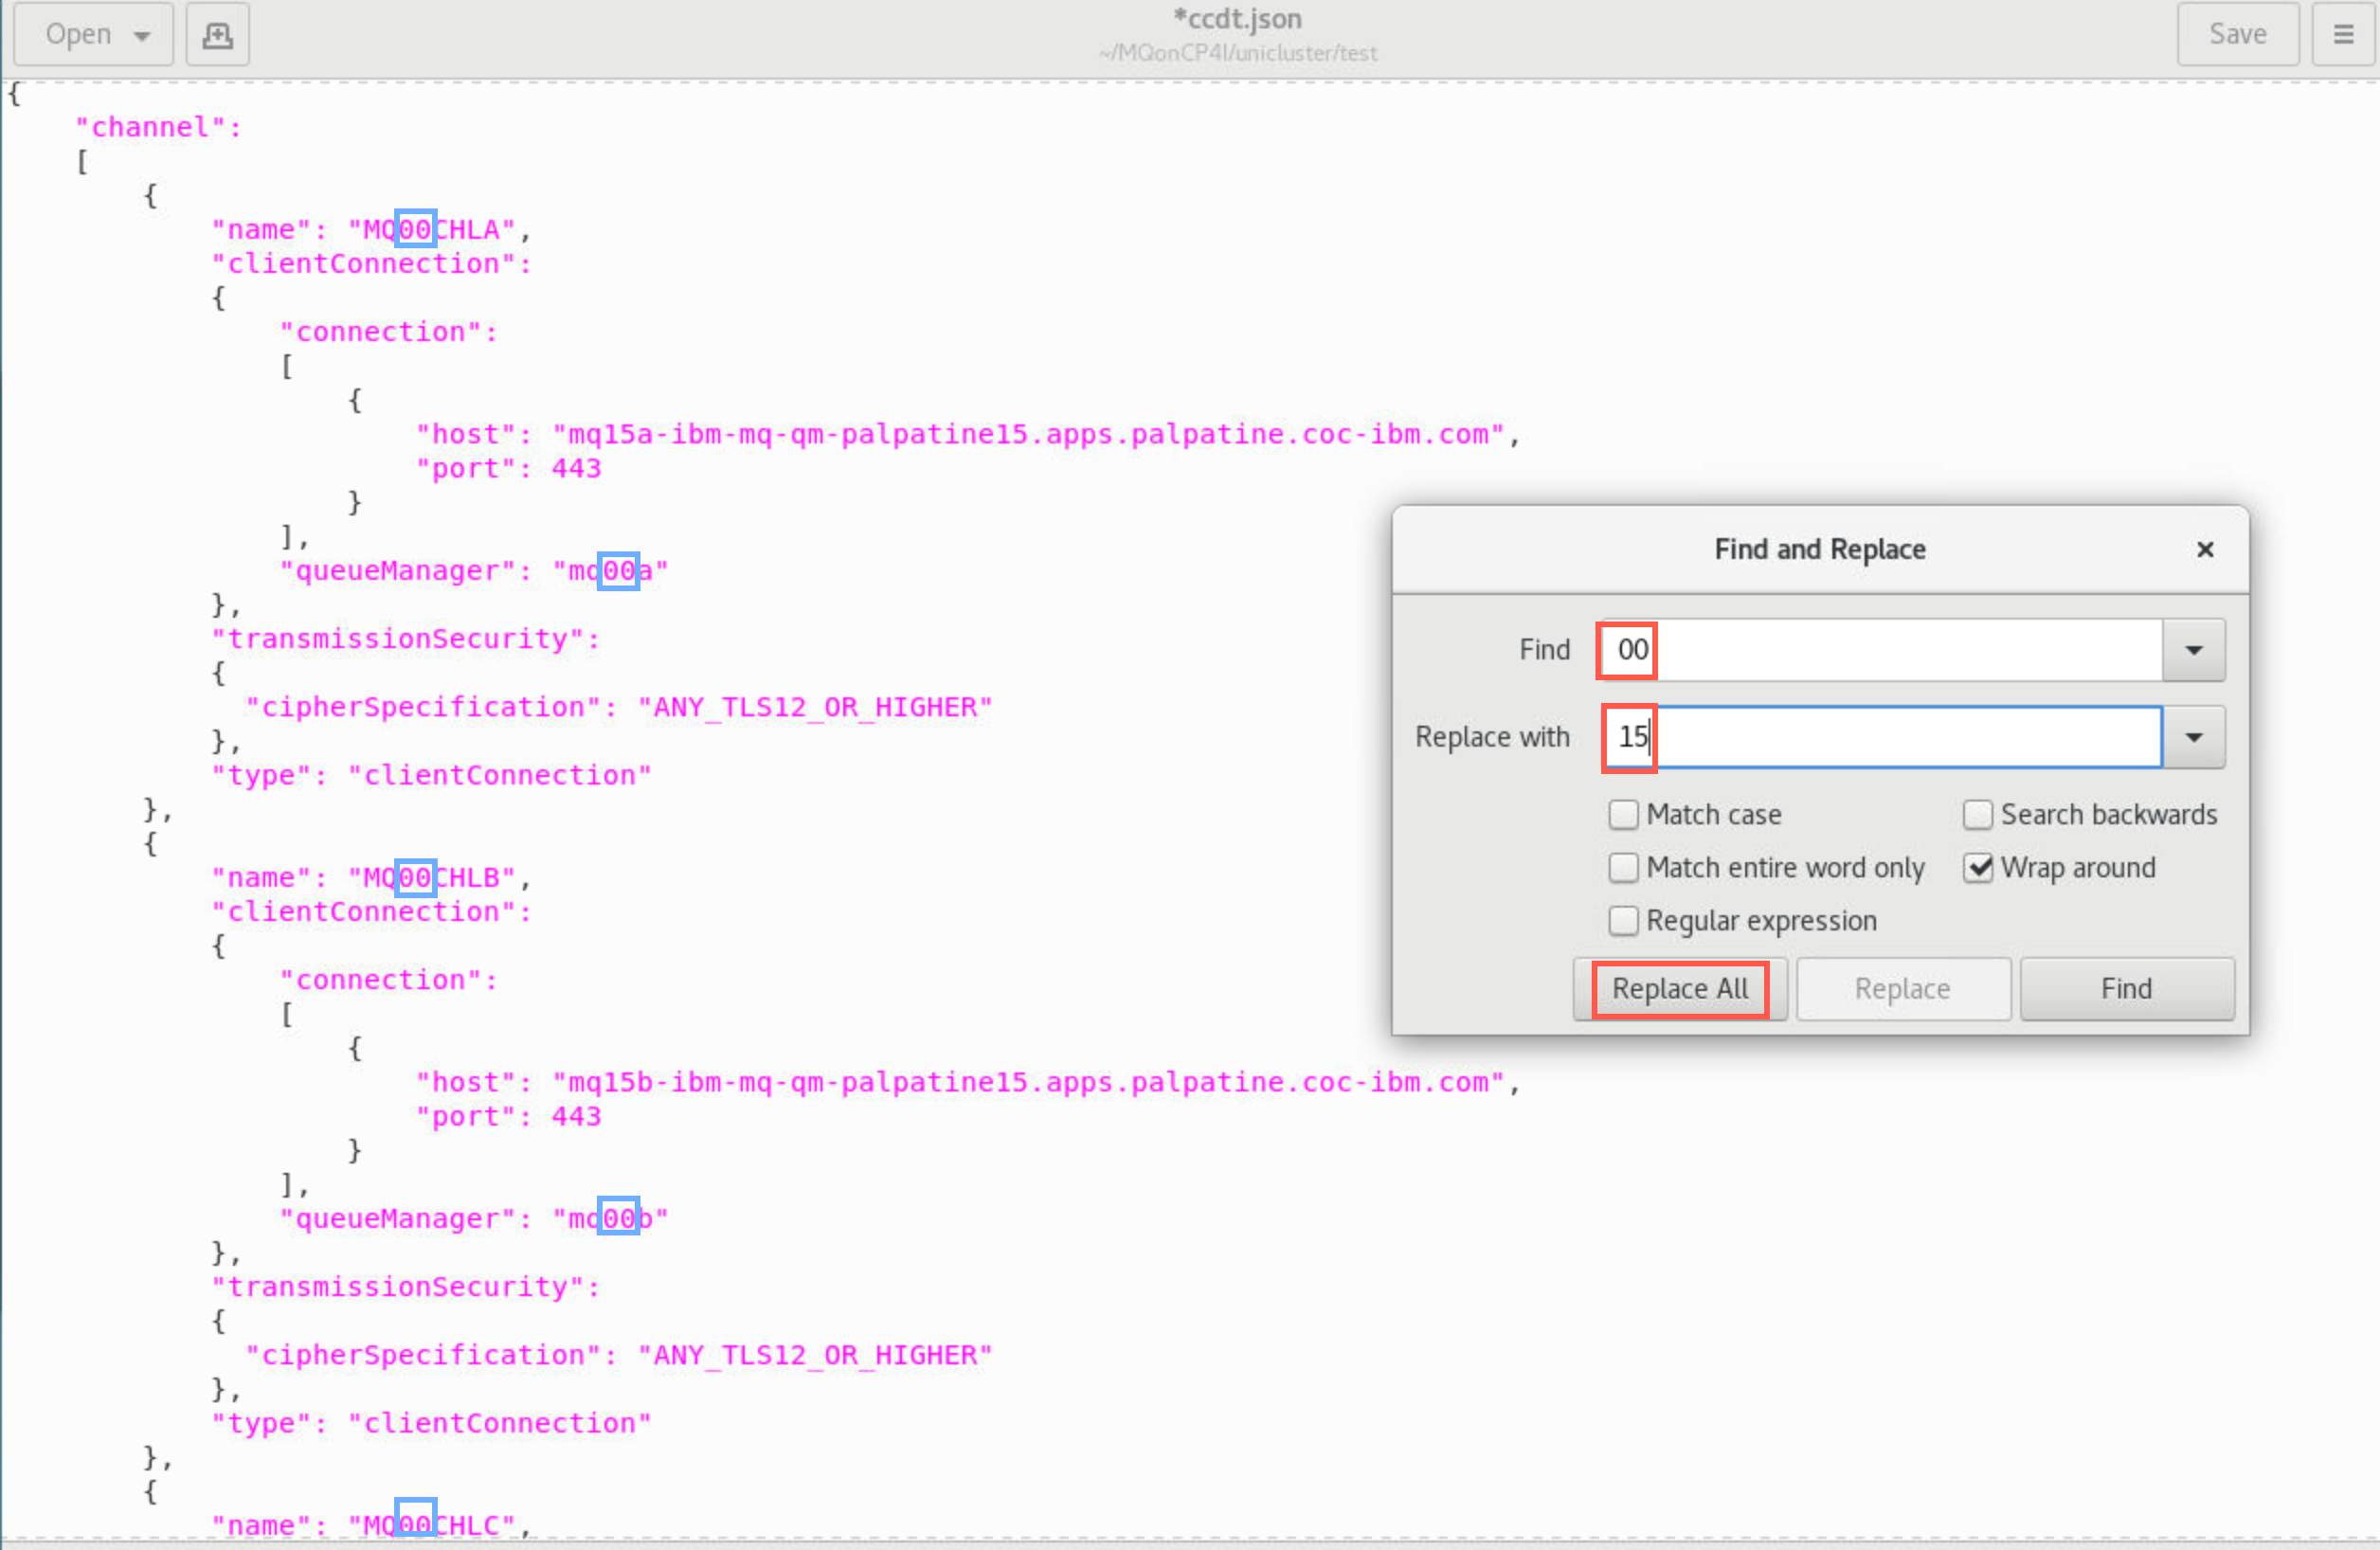
Click Save.
-
In the editor, click the Open drop-down and select getMessage.sh. You may need to click Other documents if it doesn’t appear in the list.
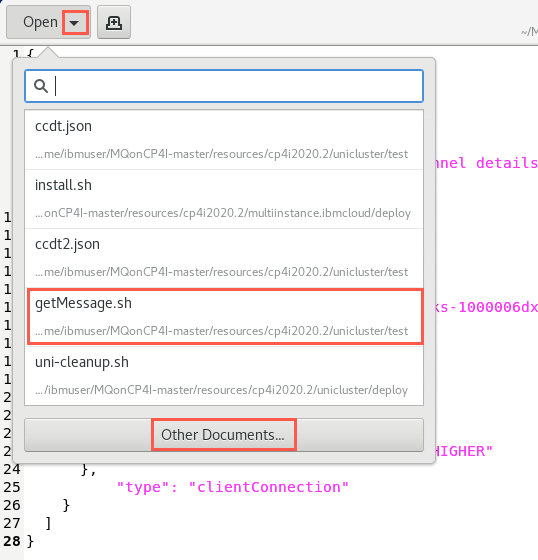
-
Also review this file before making any changes observing:
- MQCHLLIB sets the folder containing the JSON CCDT file
- MQCHLTAB sets the name of the JSON CCDT file
- MQCCDTURL sets the address of the JSON CCDT file
- MQSSLKEYR sets the location of the key
- MQAPPLNAME gives a name to the application for displays
- The shell will run the sample program amqsghac getting messages from queue APPQ on your queue manager
Change the “00” in QMpre and QMname to your student ID, then click Save.
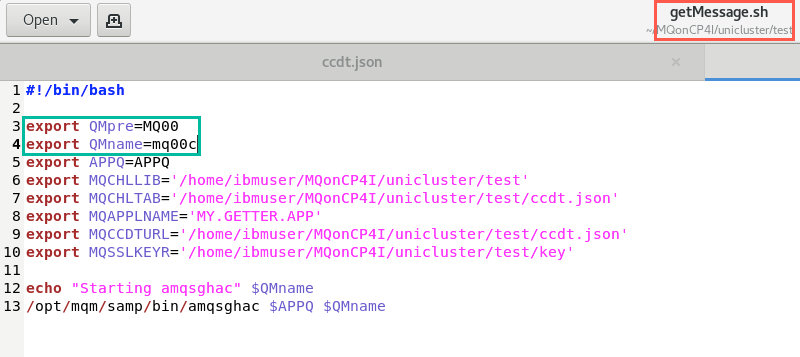
-
Open a new terminal window and enter the command:
MQonCP4I/unicluster/test/getMessage.sh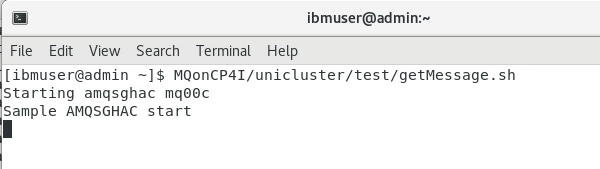
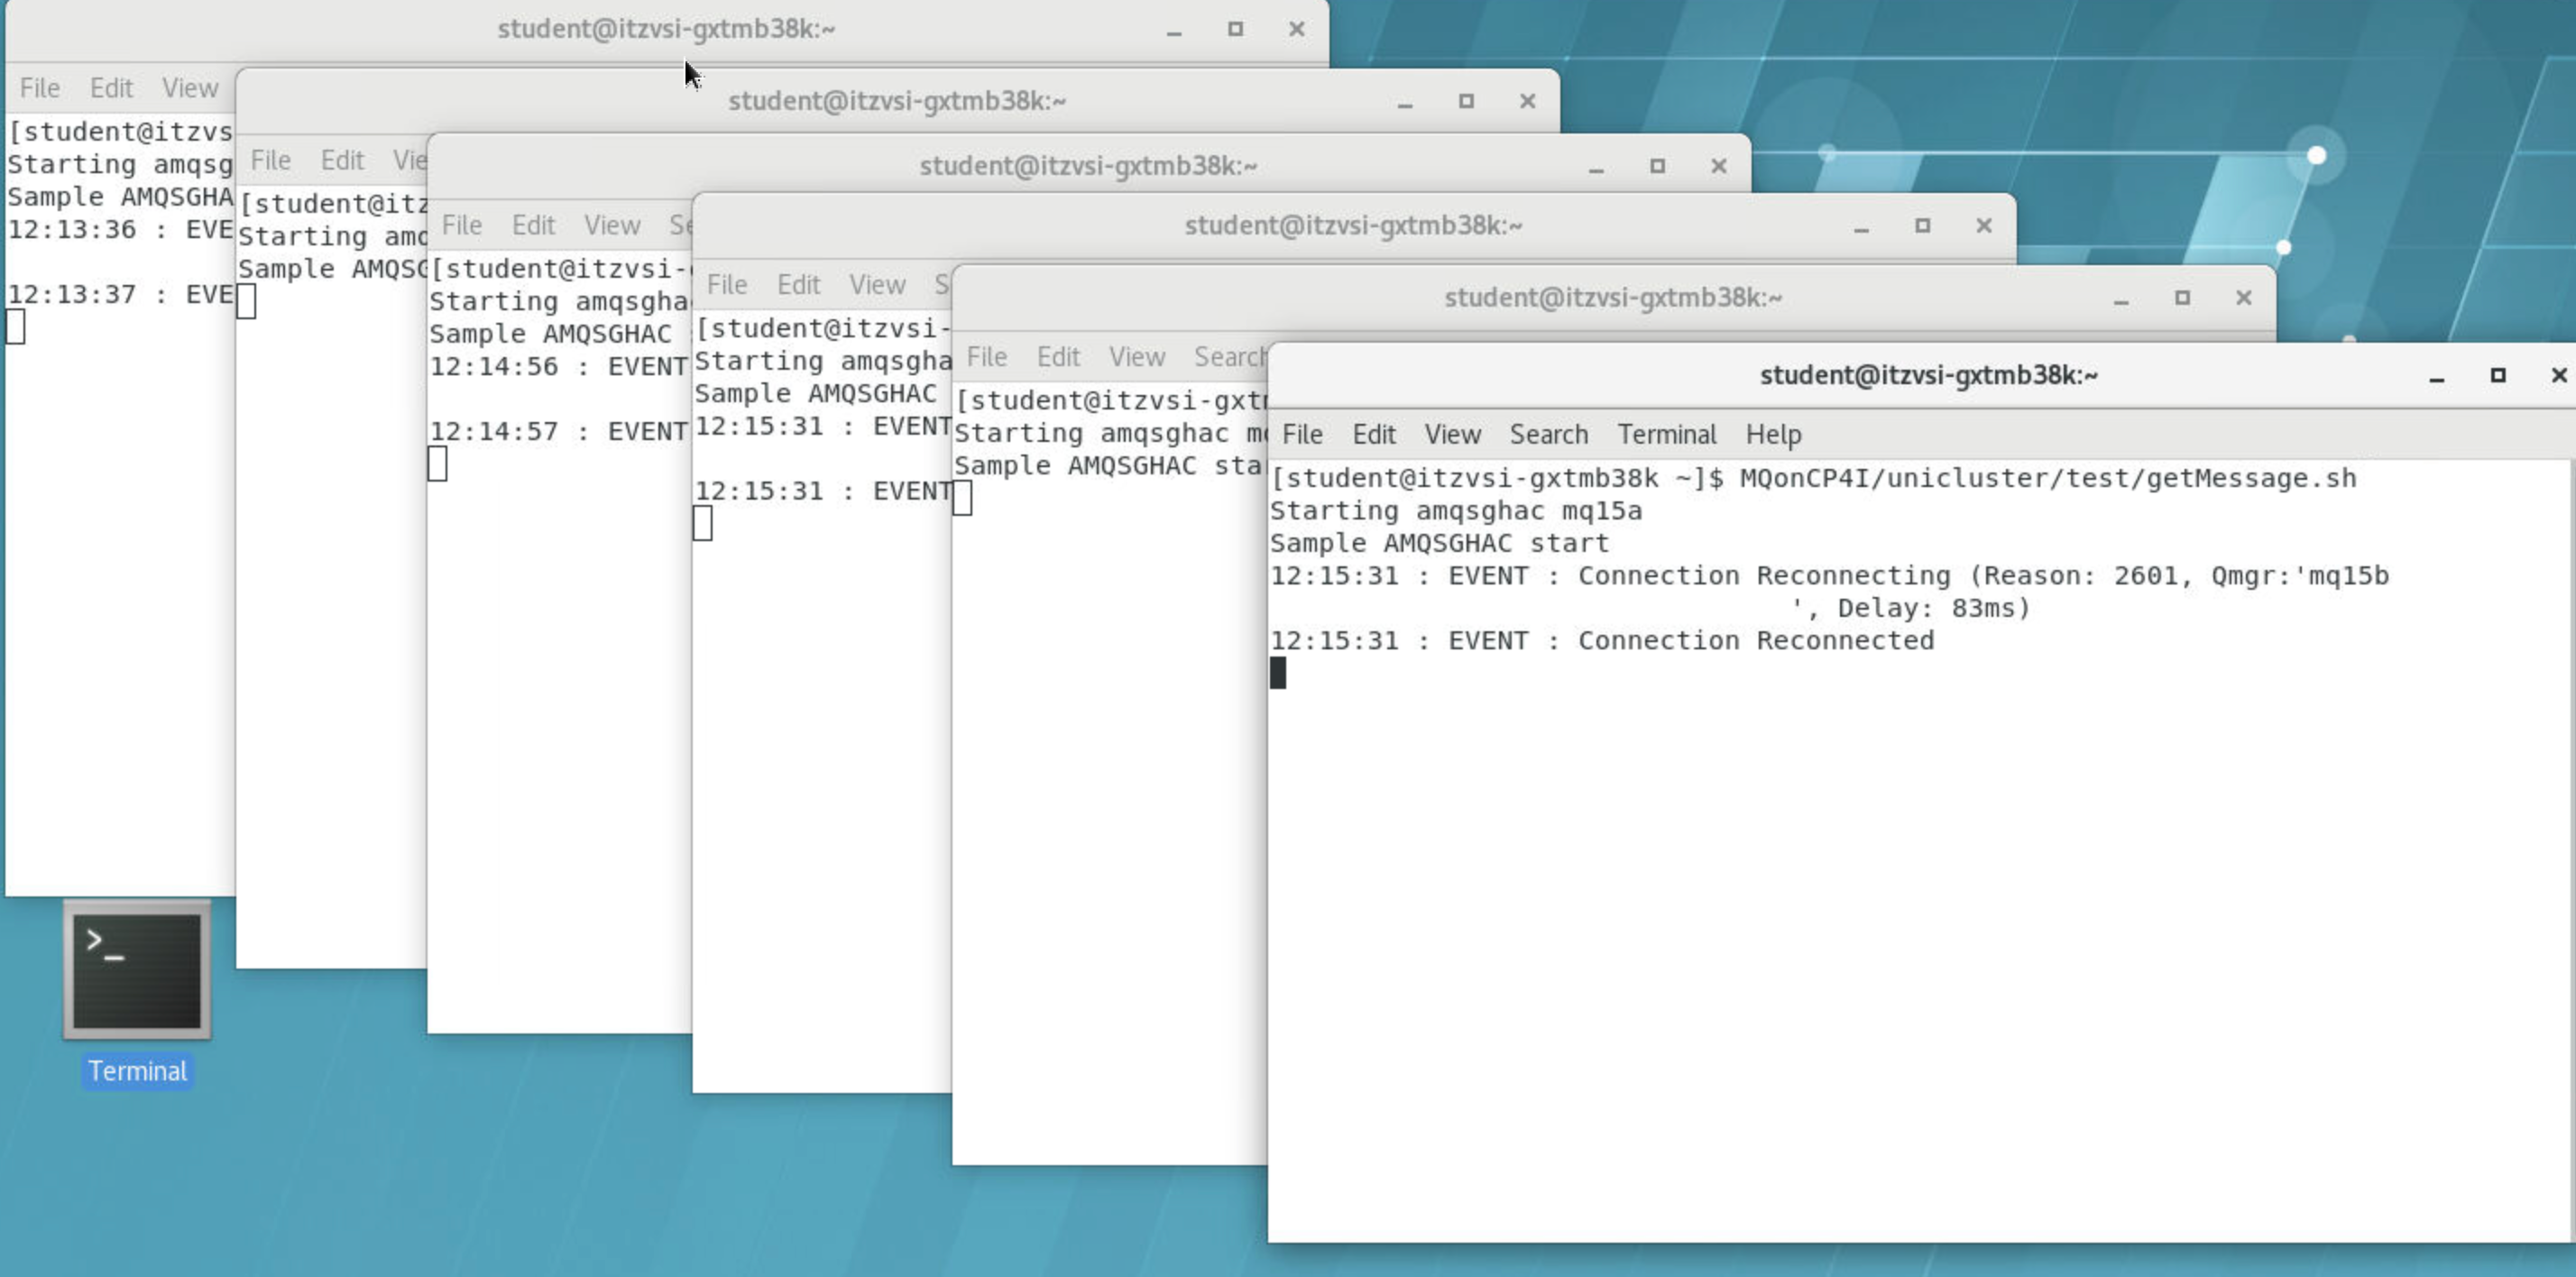
Do this 5 more times so that you have six terminals running the program.
-
Notice that each time you open a new terminal and run the shell again the programs start to rebalance and reconnect.
-
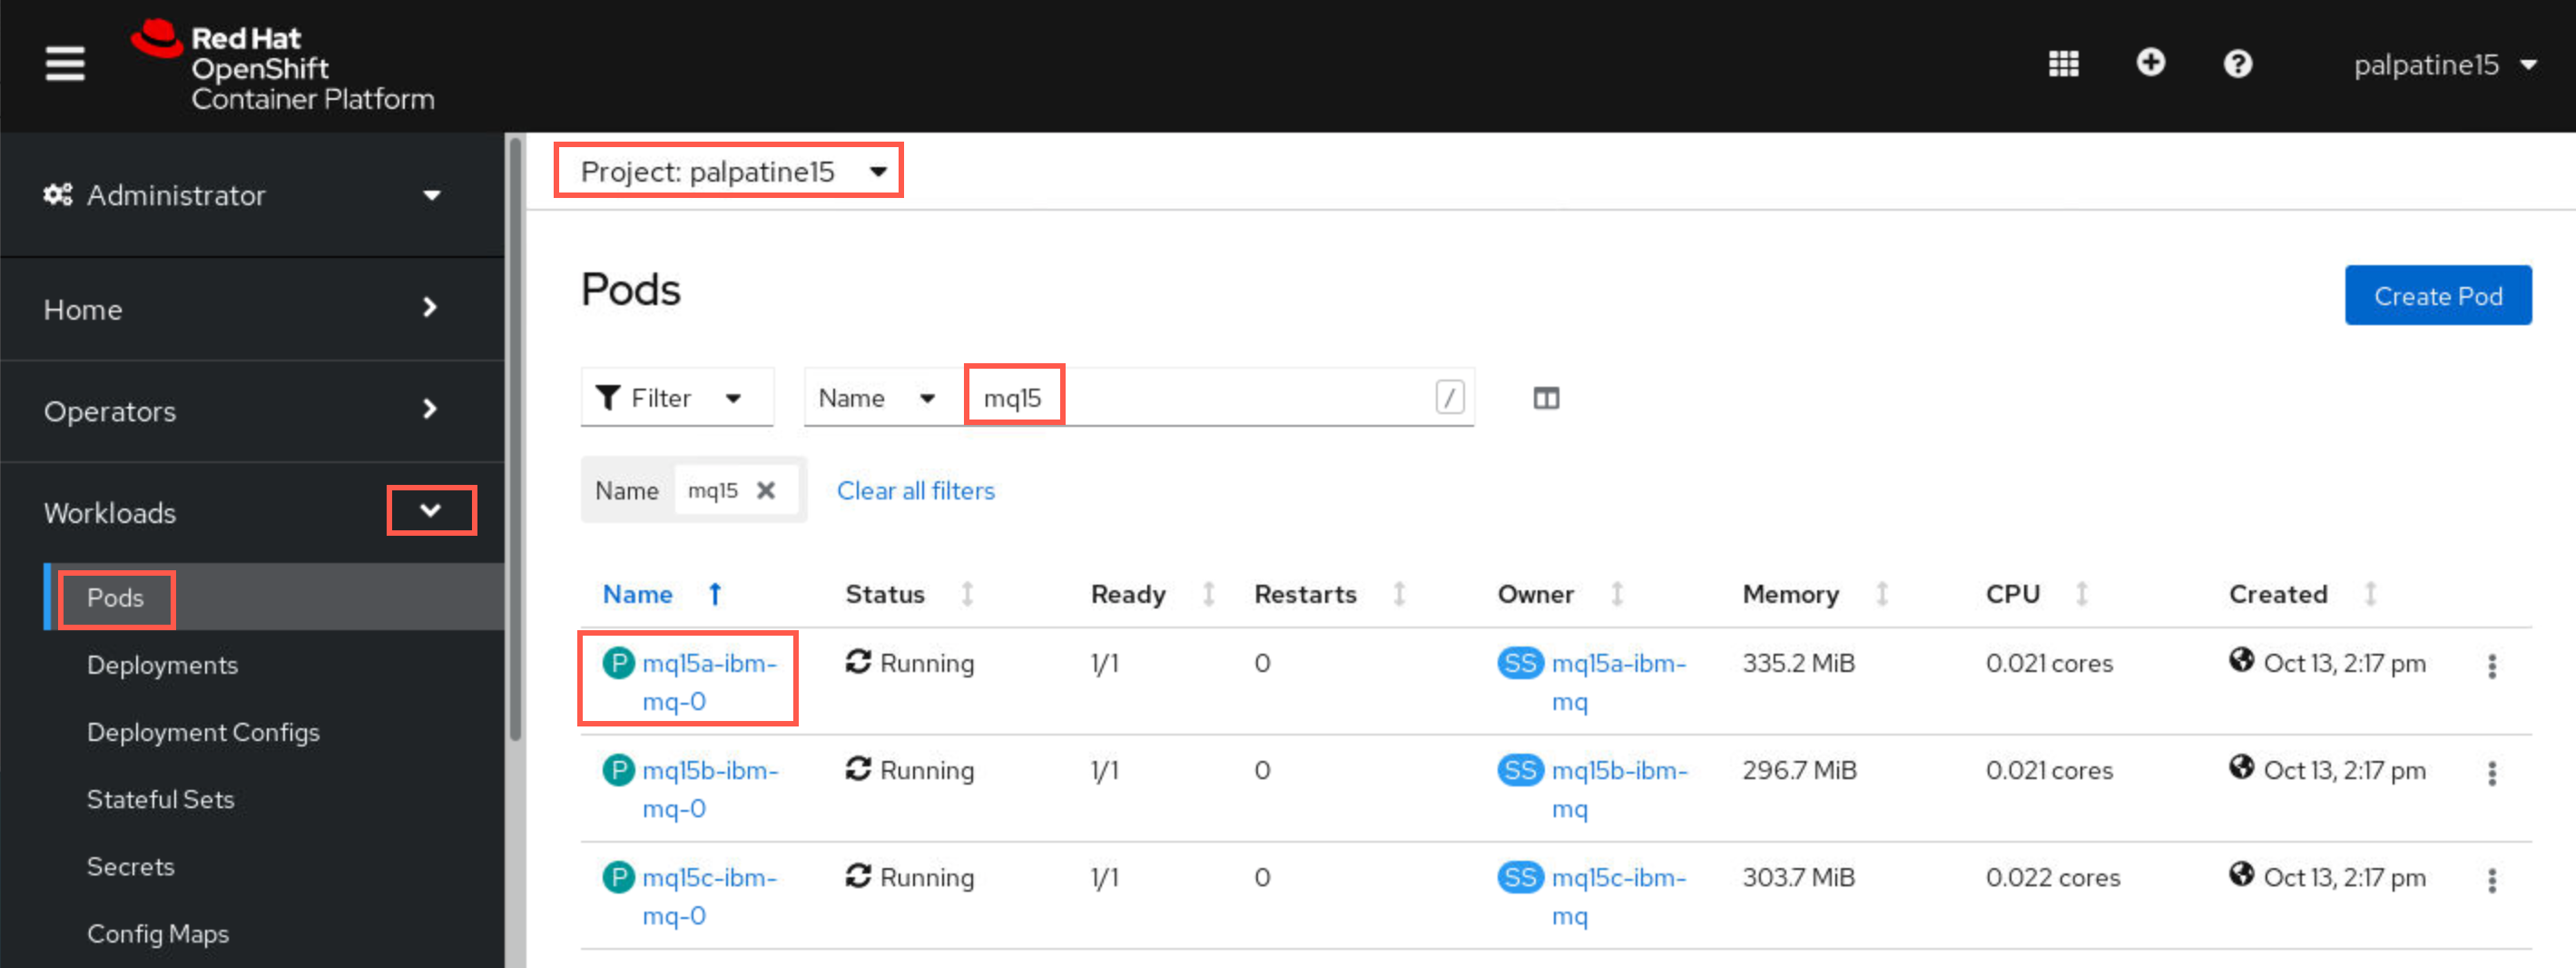
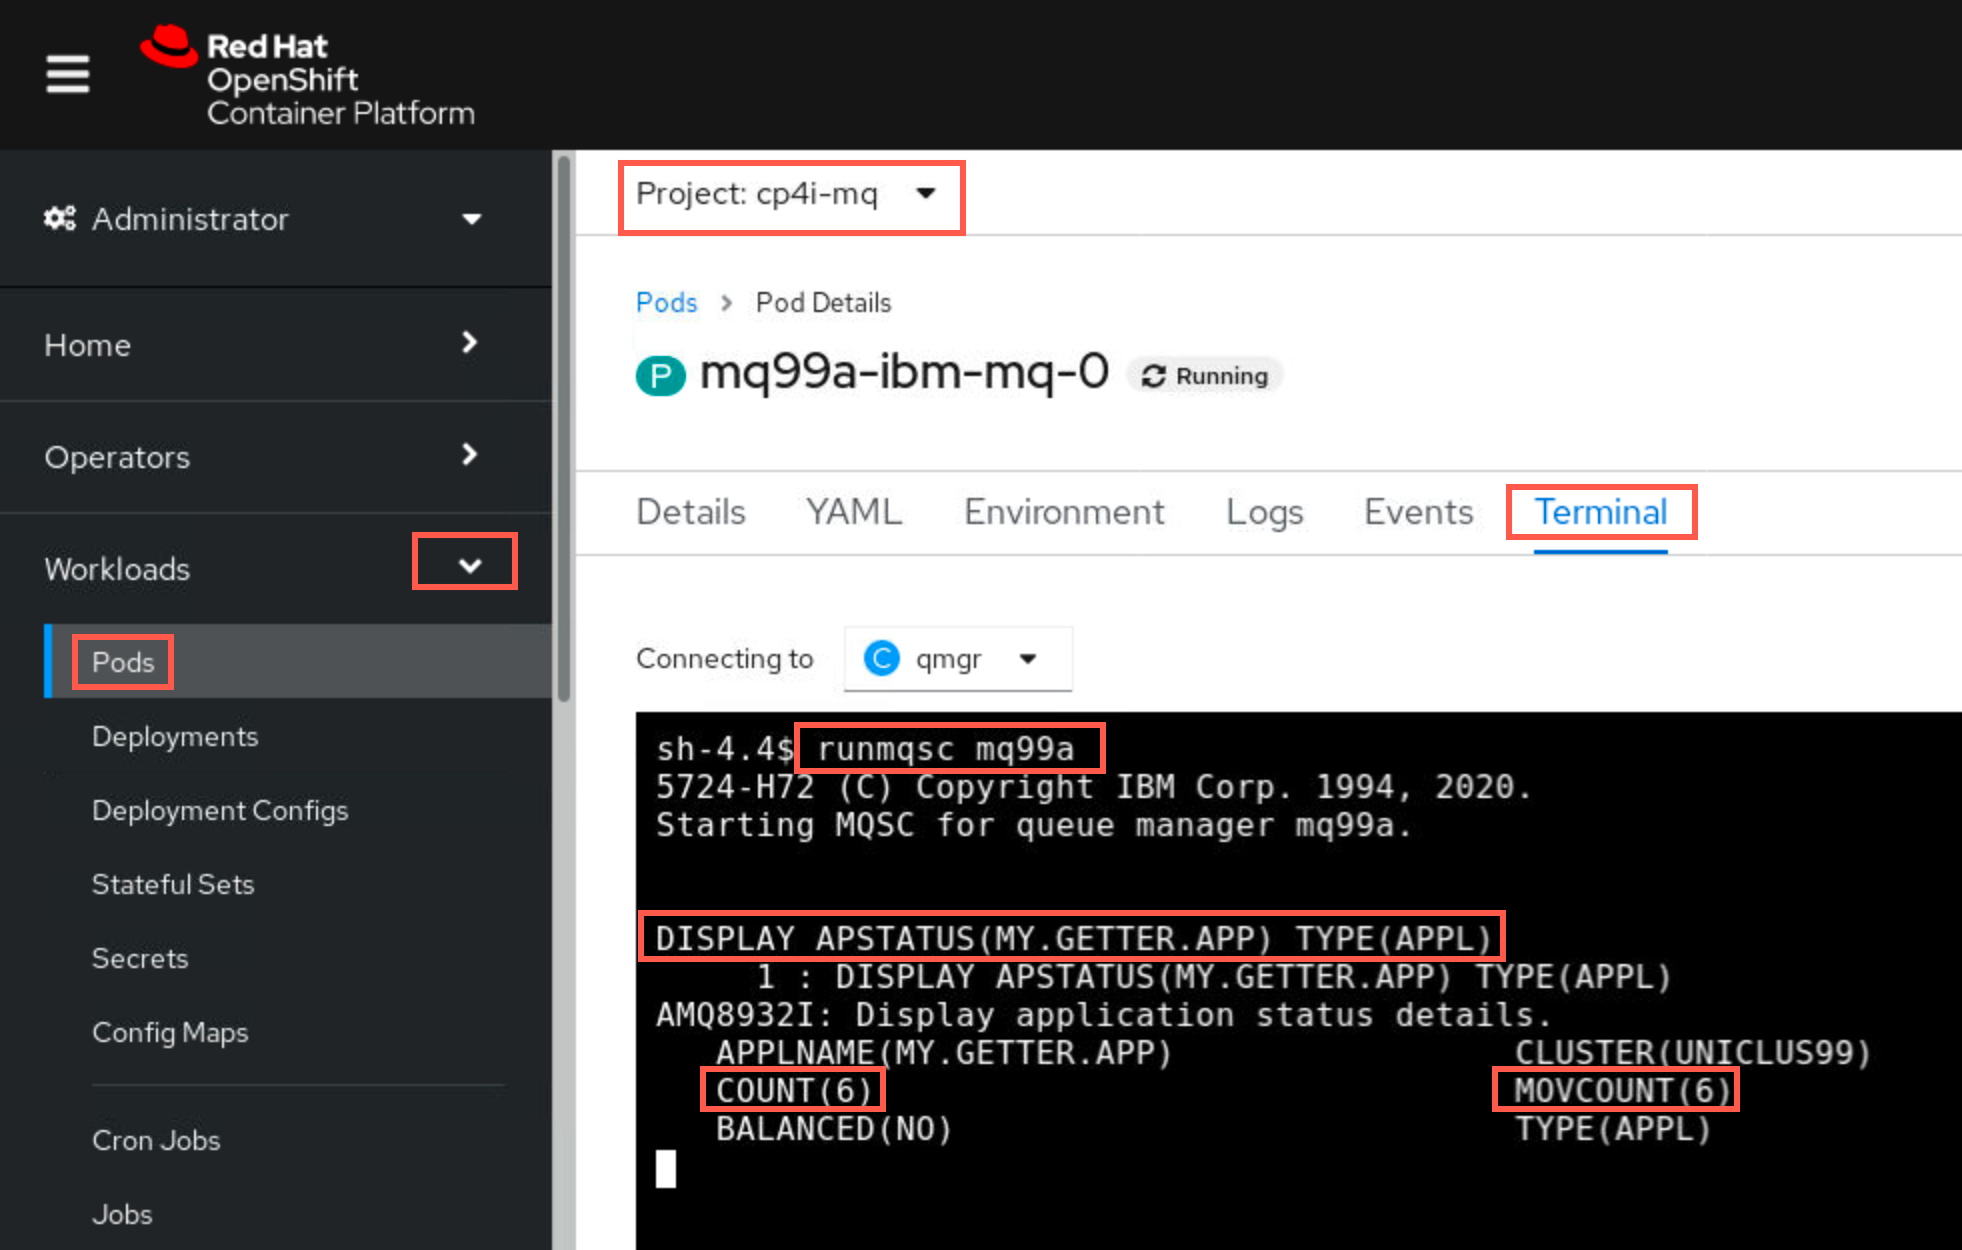
Return to the OpenShift Console browser tab. Make sure you are in the your project. Open Workload > Pods, use the filter to search for you queue managers, then click the hyperlink mqxxa-ibm-mq-0 pod.
-
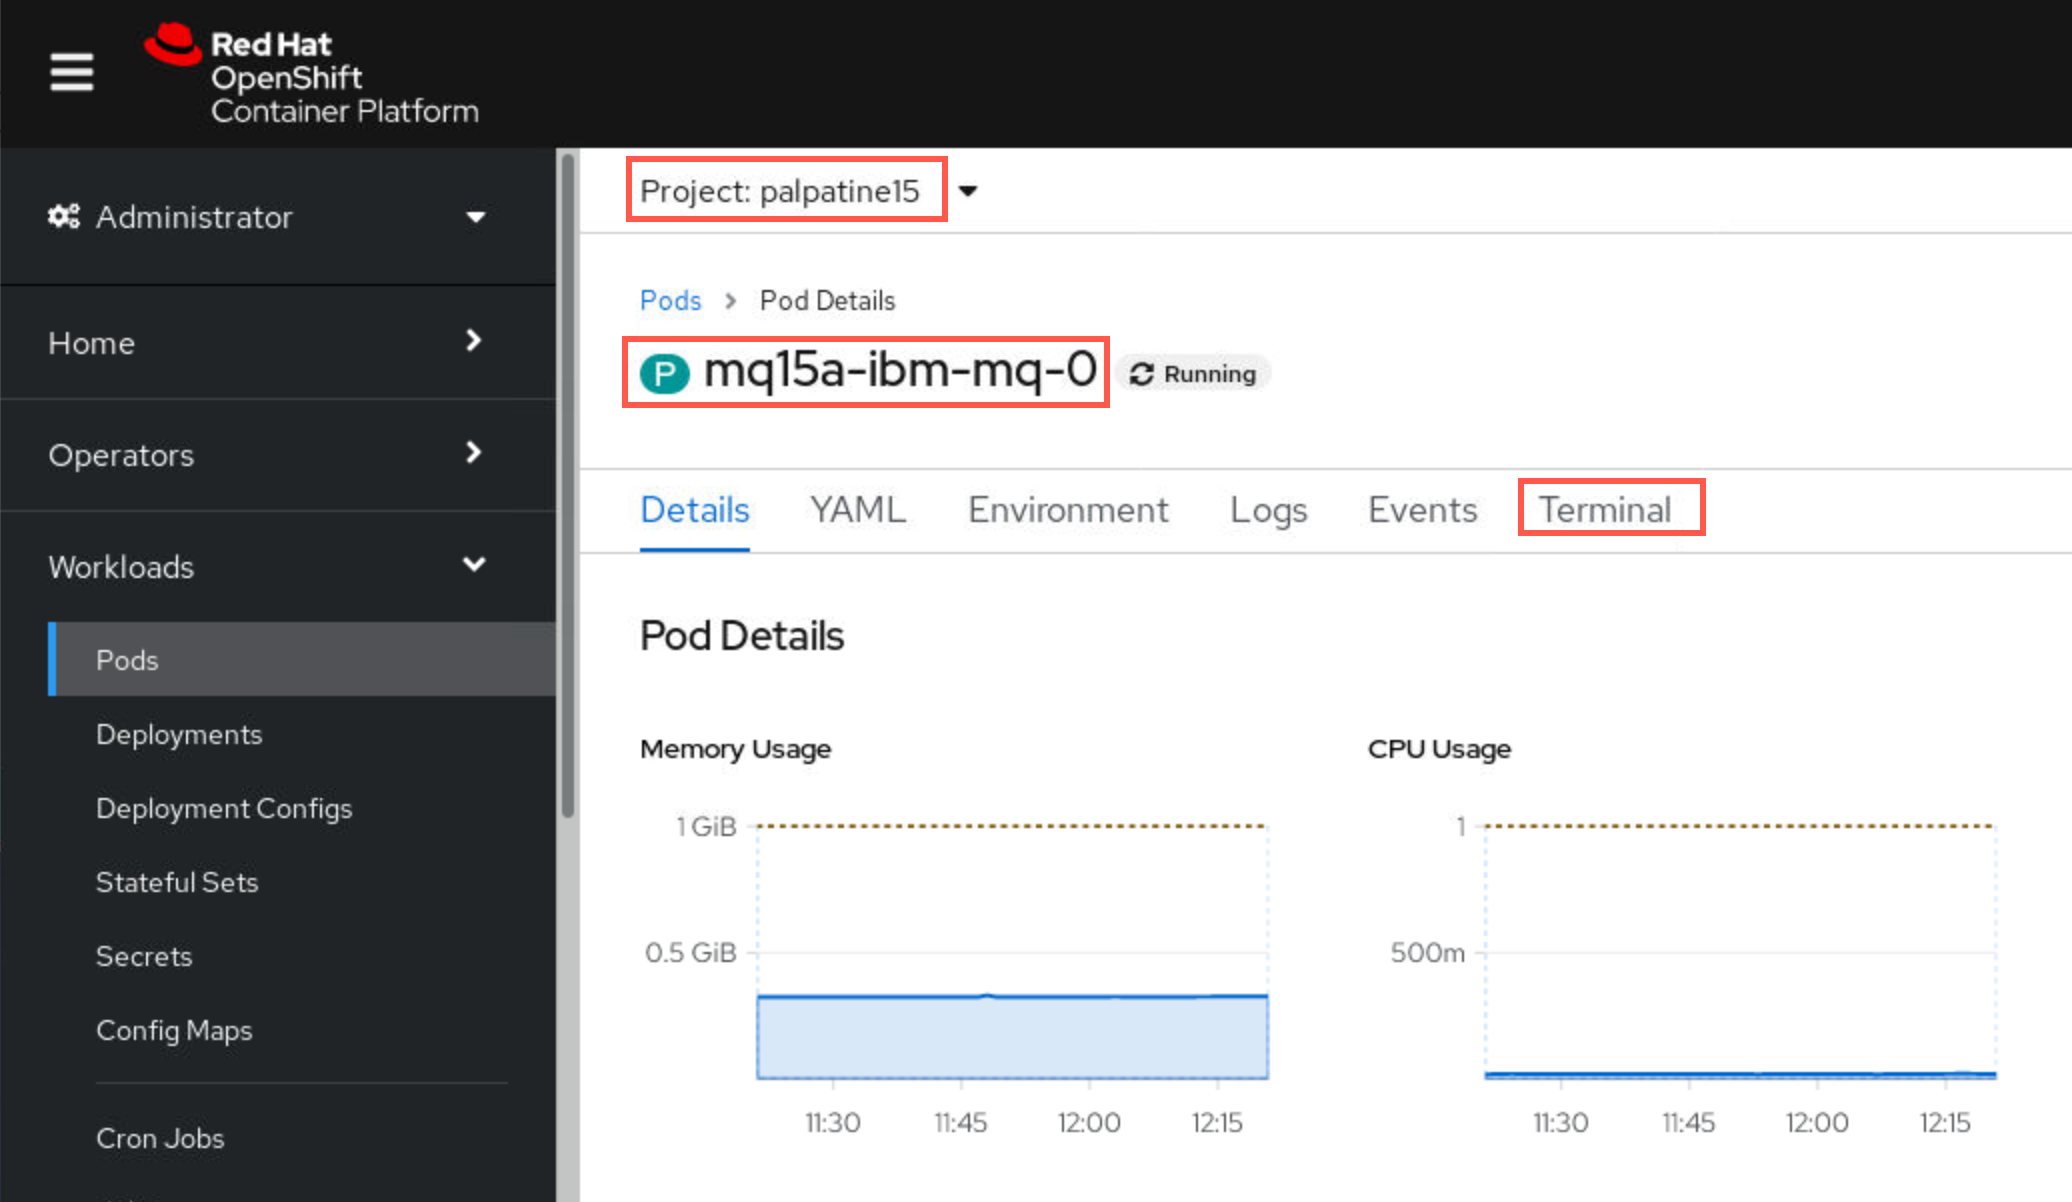
Click Terminal. This opens a terminal window in the container running inside that pod.
-
There is a new MQSC command, DISPLAY APSTATUS, which we shall now use to display the status of an application across all queue managers in a cluster.
Start runmqsc with following command substituting your student ID for xx:
runmqsc mqxxaRun the display APSTATUS command:
DISPLAY APSTATUS(MY.GETTER.APP) TYPE(APPL)COUNT is the number of instances of the specified application name currently running on this queue manager, while MOVCOUNT is the number of instances of the specified application name running on the queue manager which could be moved to another queue manager if required. You started the getMessage.sh six times.
-
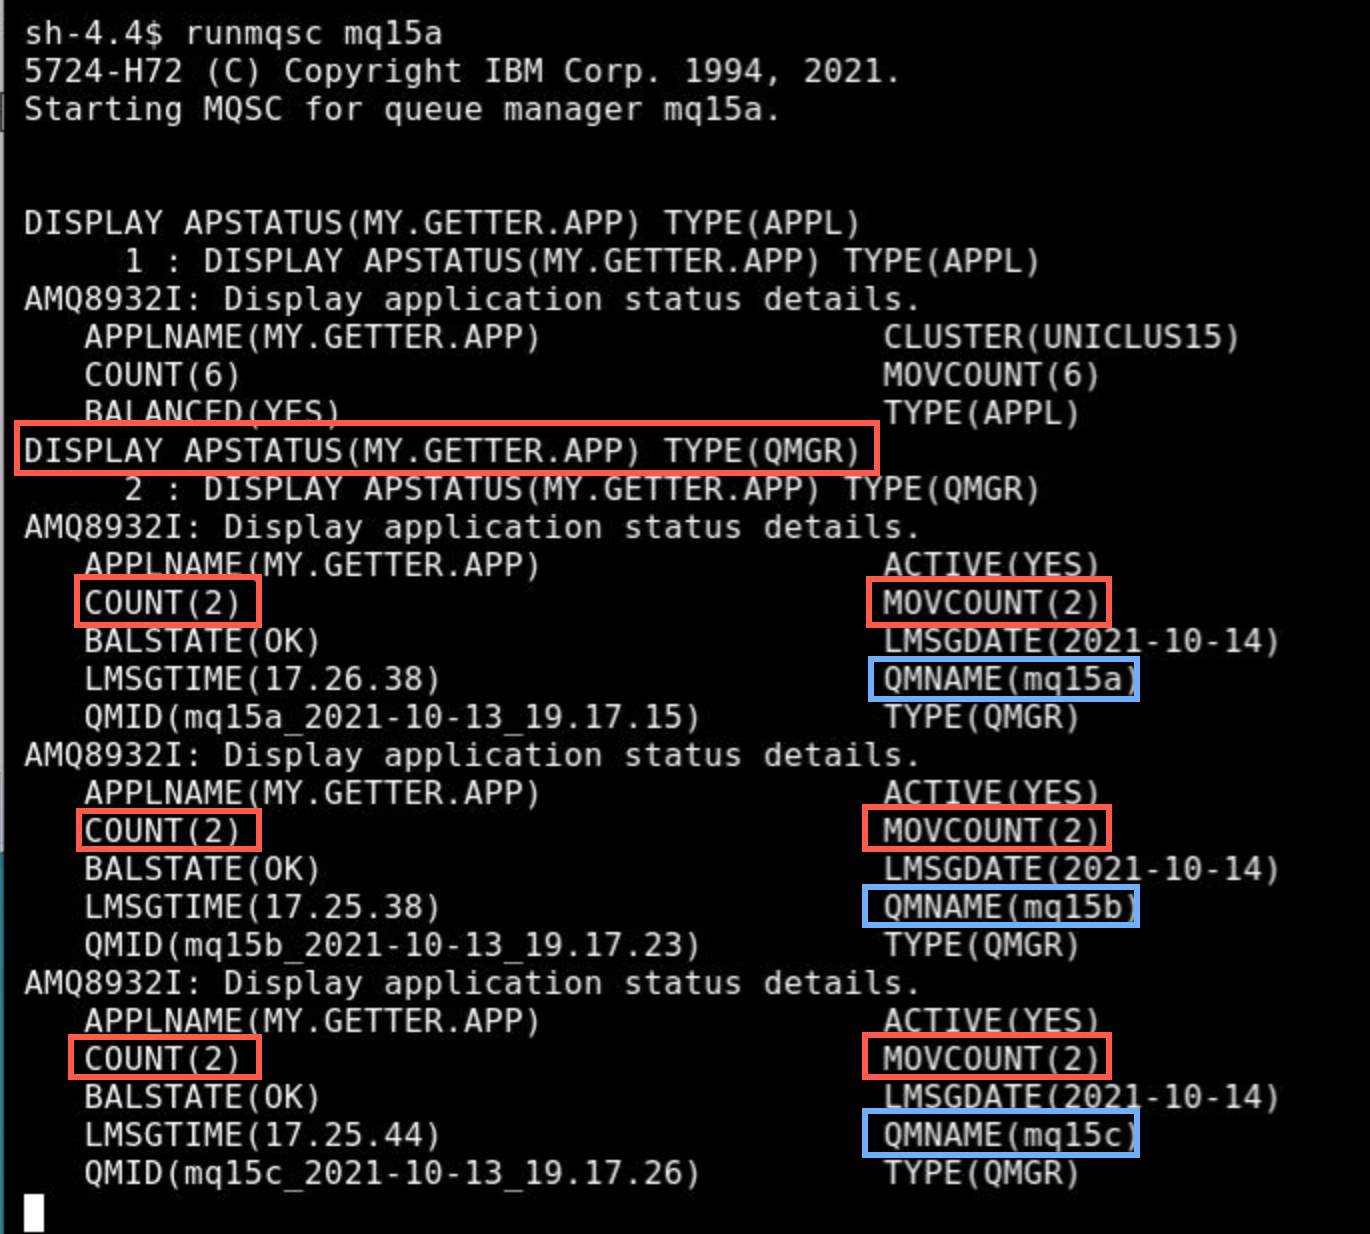
Click Expand to make the window larger. Repeat the command changing the TYPE to QMGR.
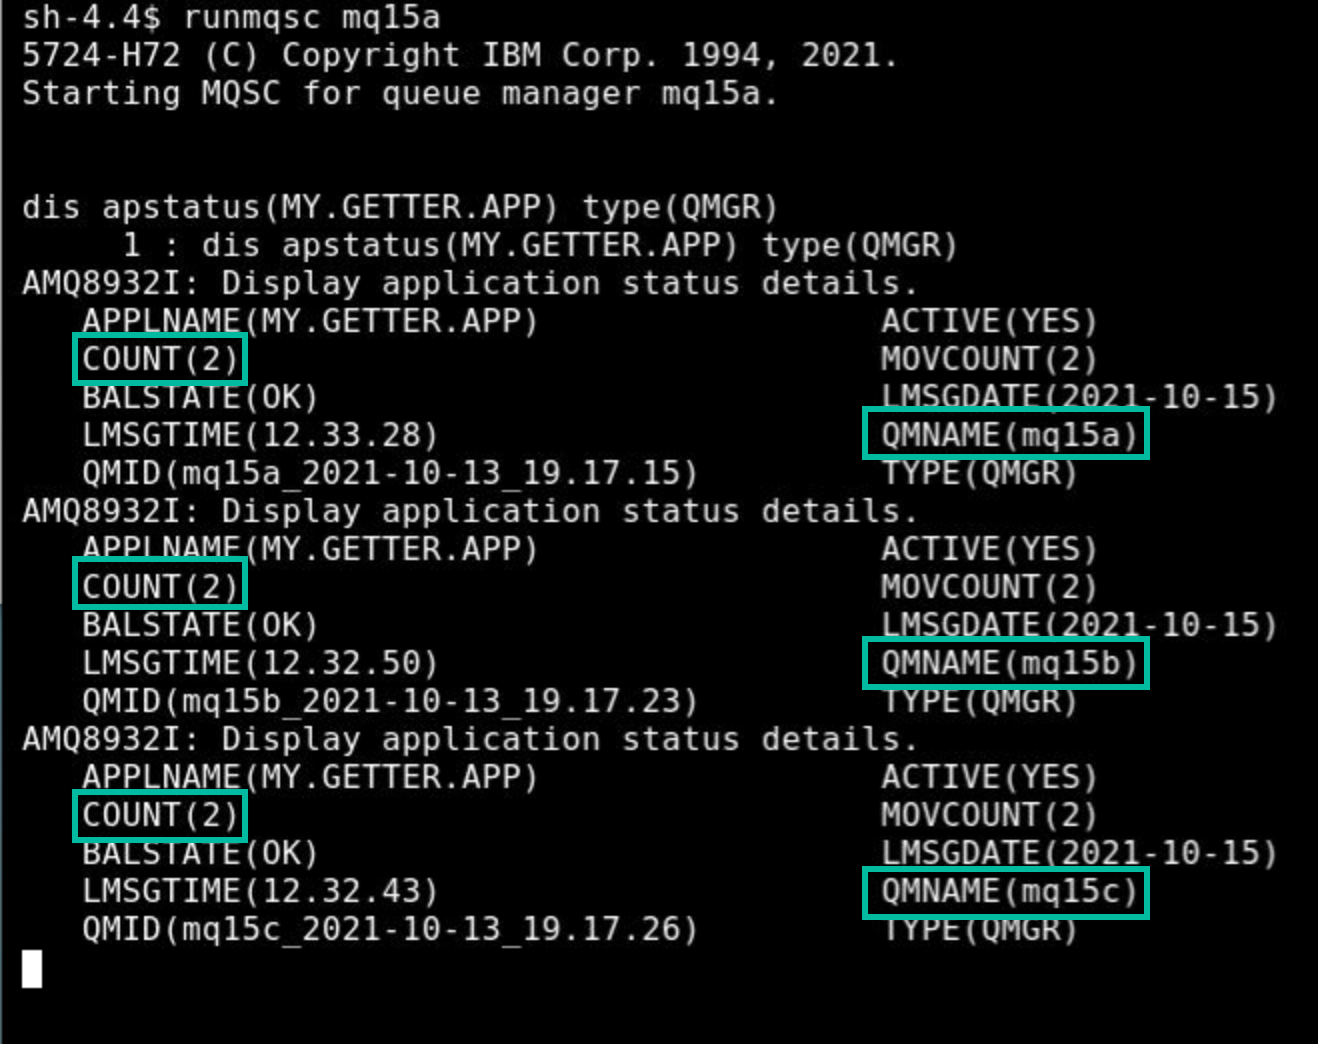
DISPLAY APSTATUS(MY.GETTER.APP) TYPE(QMGR)At first, all instances of the application will be running on mqxxa and none on the other two queue managers. However, by the time you run this command, the instances will probably be shared across all queue managers as shown below.
This display shows how the applications have been rebalanced. Notice that each queue manager in the cluster is now running two of the client applications making a total of six rebalanced.
Click Collapse to return the window to normal size. Enter end to stop runmqsc.
end -
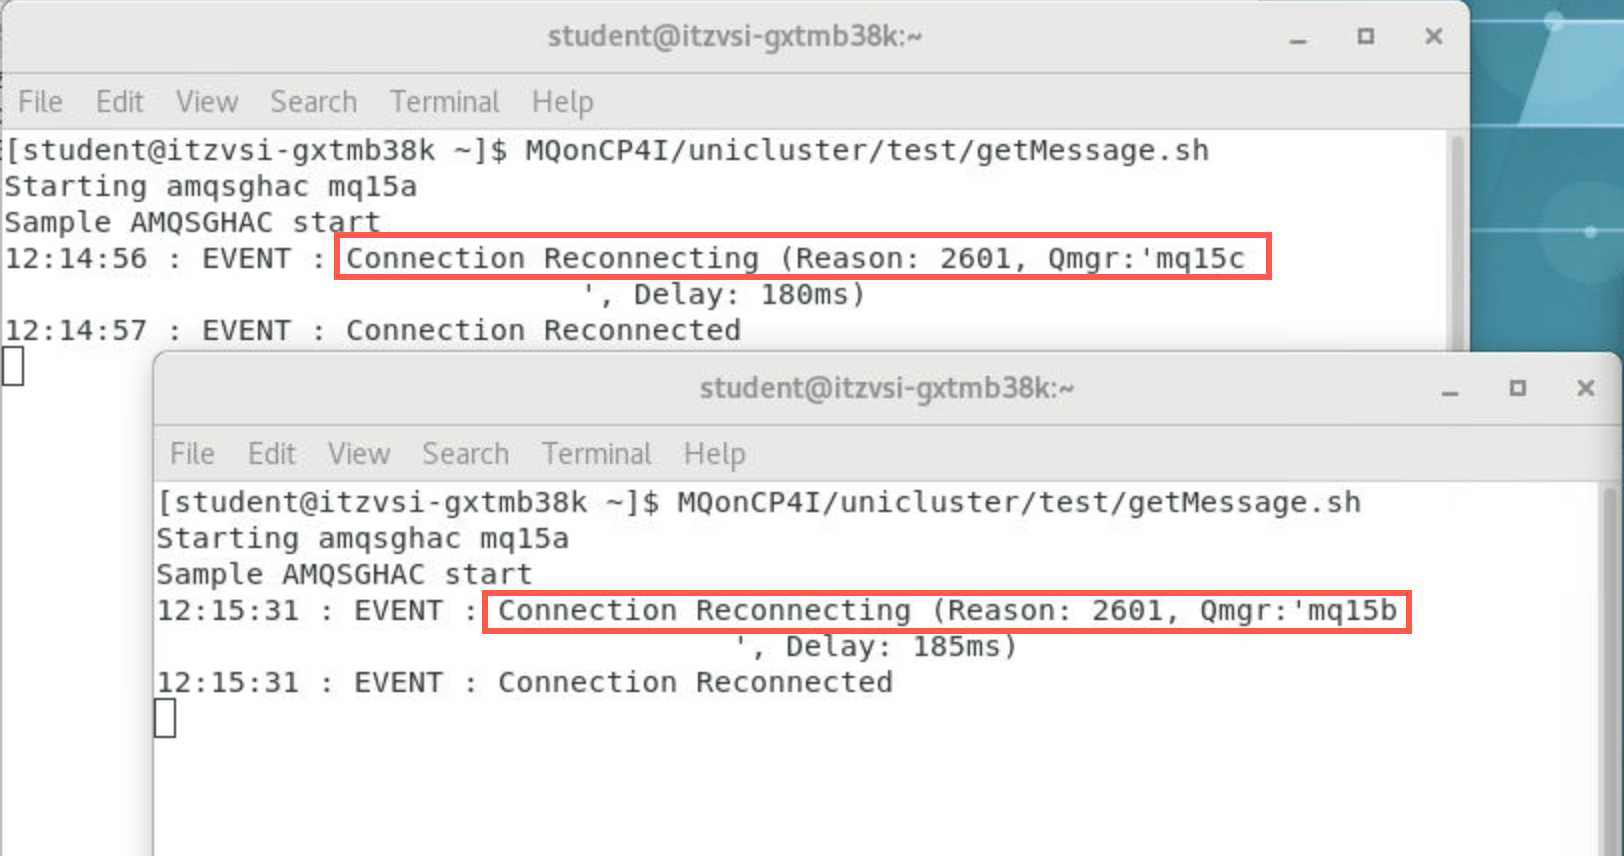
Some of the application instances will show reconnection events as the workload is rebalanced to queue managers mqxxb and mqxxc.
Launch putting application
We shall launch another sample which will put messages to each queue manager in the cluster. The running samples should then pick up these messages and display them. In this lab, we are using one putting application to send messages to all getting applications using cluster workload balancing. You could set up the same scenario with one or more putting applications per queue manager and application rebalancing would work in the same way that you’ve seen for getting applications.
-
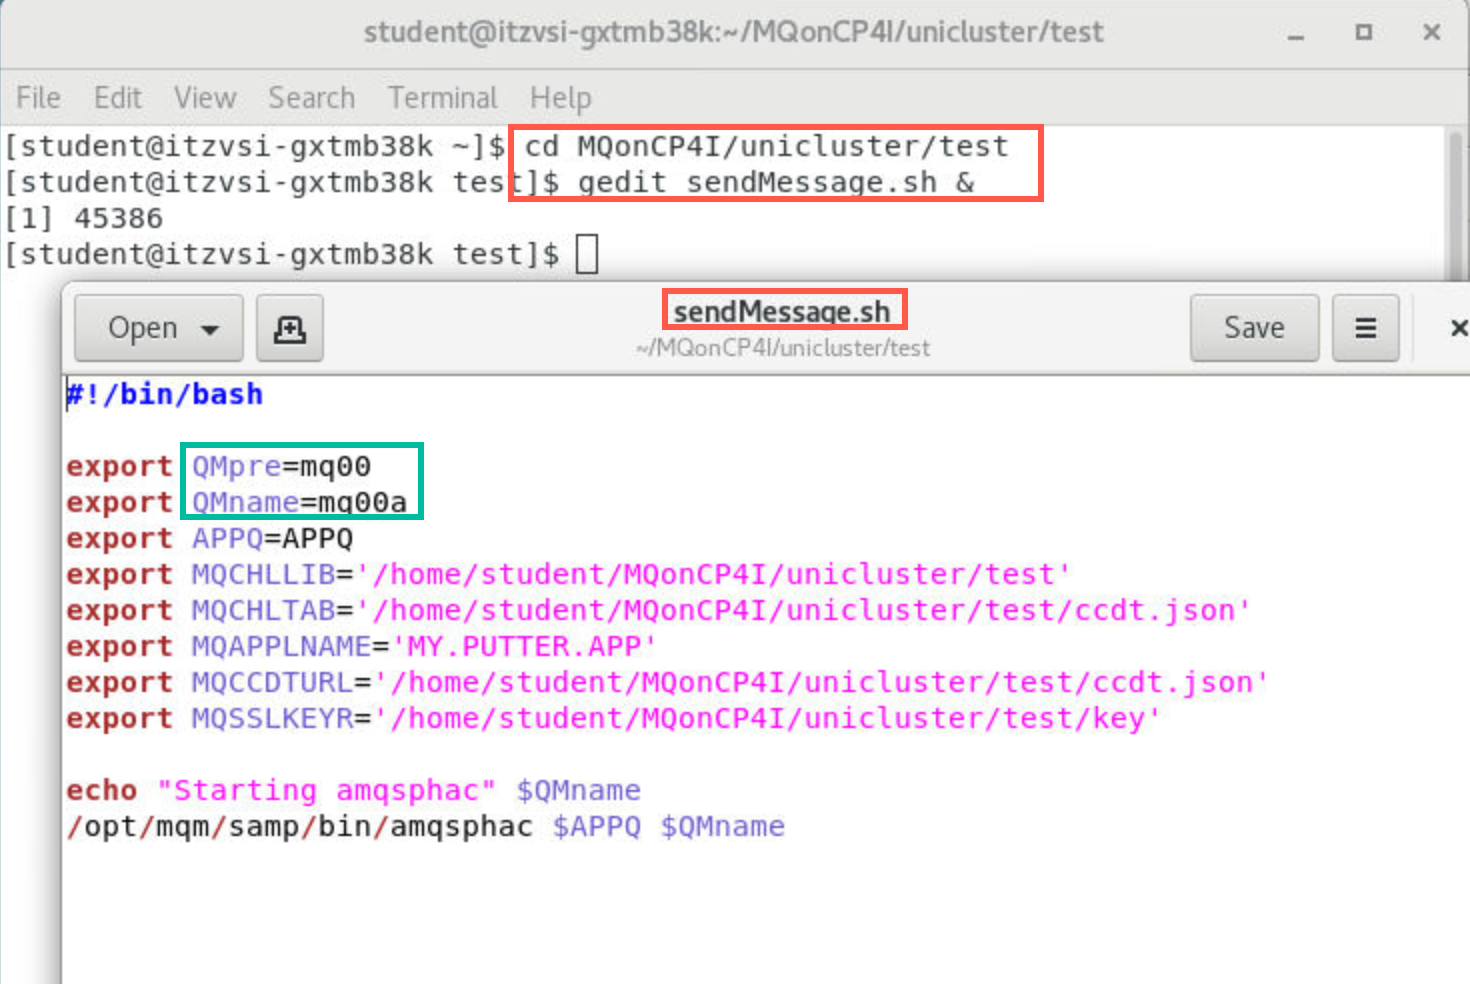
Open a new terminal window and navigate to /home/student/MQonCP4I/unicluster/test. Open an edit session for sendMessage.sh. Review the export commands observing:
- MQCHLLIB (sets the folder of the JSON CCDT file
- MQCHLTAB sets the name of the JSON CCDT file
- MQSSLKEYR sets the location of the key
- MQAPPLNAME gives a name to the application for displays
- The shell will run the sample program amqsphac putting messages to queue APPQ on your queue manager
Change 00 to your student ID, then click Save.
-
We shall be using the sample amqsphac in this scenario. In the terminal window, enter the following command:
./sendMessage.sh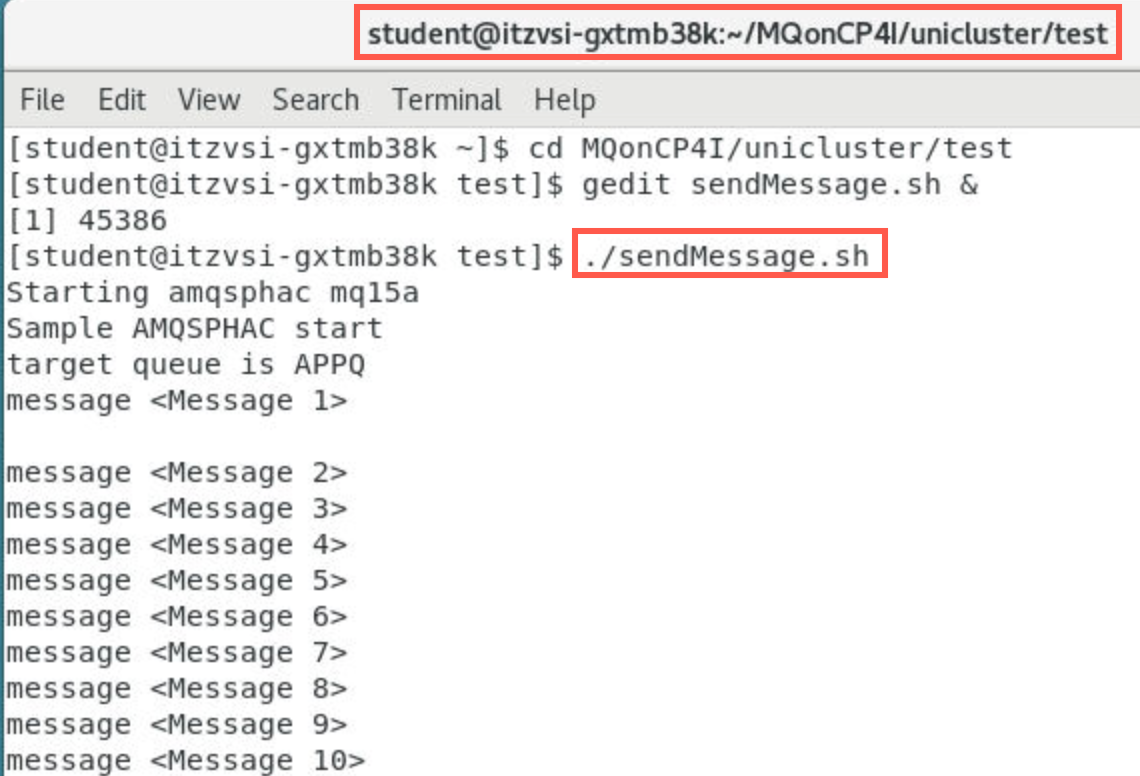
-
You should now see the generated messages split across the getting application sessions that are running. Each window will contain a subset, like this:
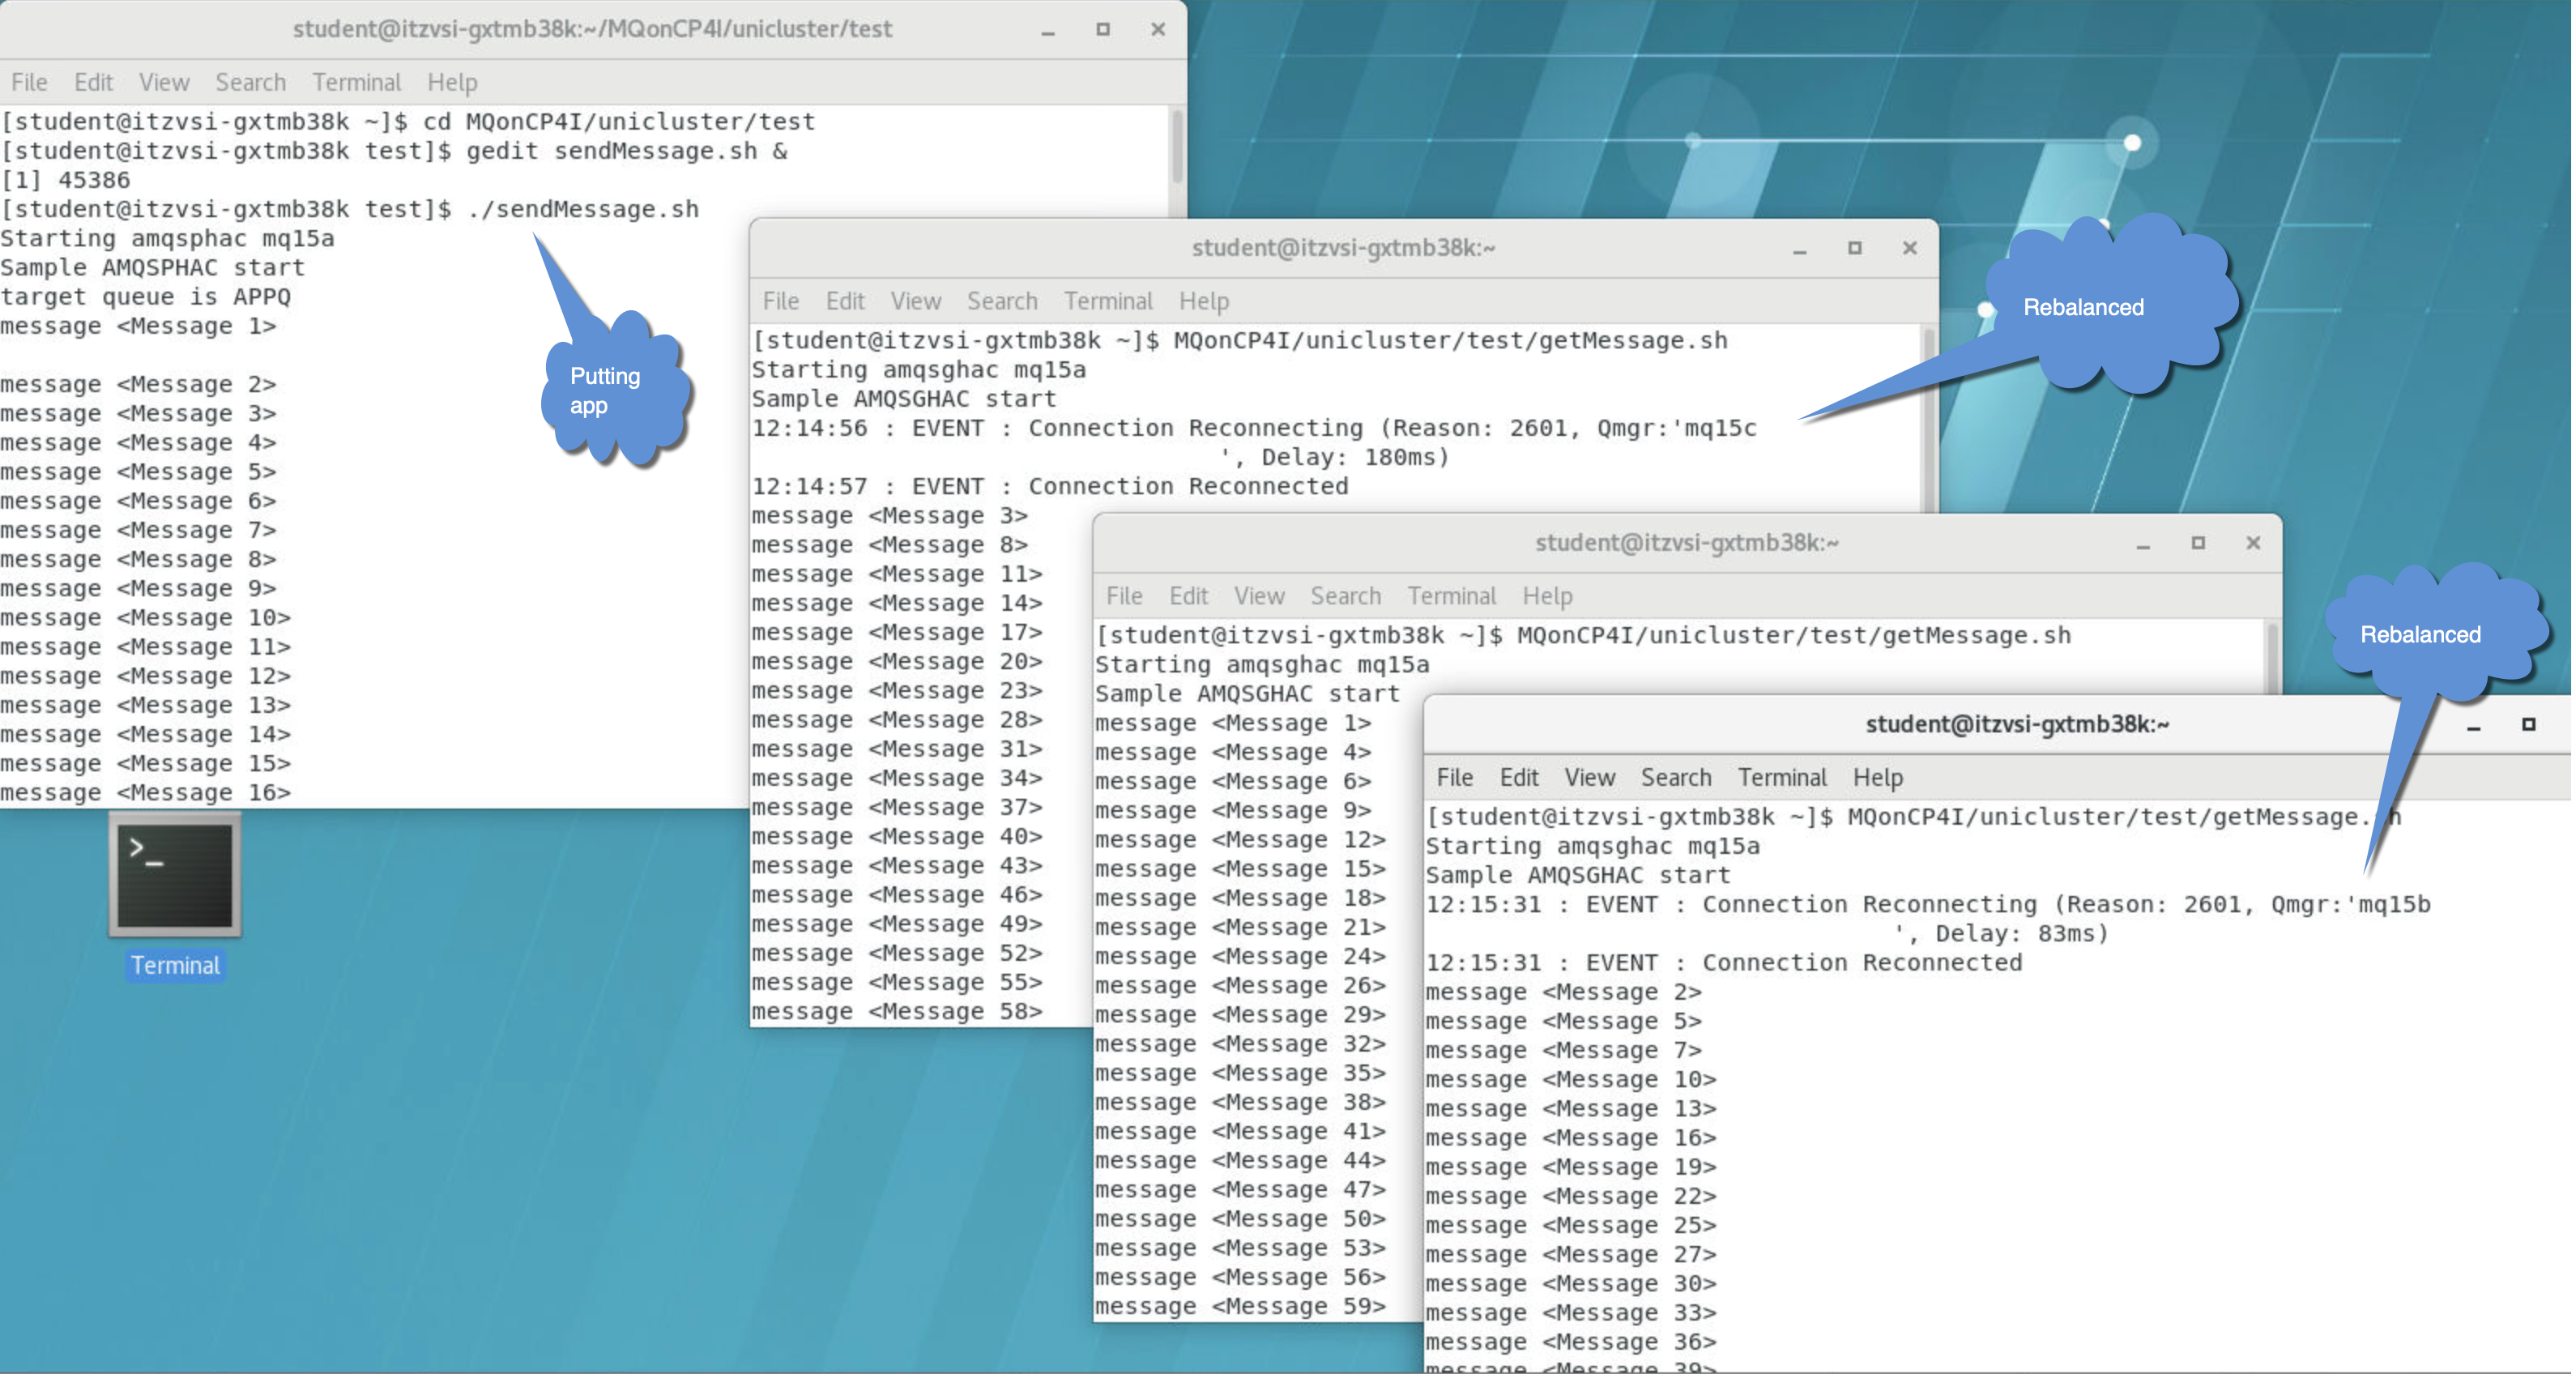
Note: the messages may not be evenly distributed across the getting applications instances.
Queue Manager maintenance
In this scenario, imagine a queue manager needs to be stopped for maintenance purposes. We shall demonstrate how doing this will cause the applications running on that queue manager to run instead on the remaining active queue managers in the Uniform Cluster. Once the maintenance is complete, the queue manager will be re-enabled.
When a queue manager is ended, the applications on that queue manager are usually lost. However, if the optional parameter -r is used, the applications will attempt to reconnect to a different queue manager.
-
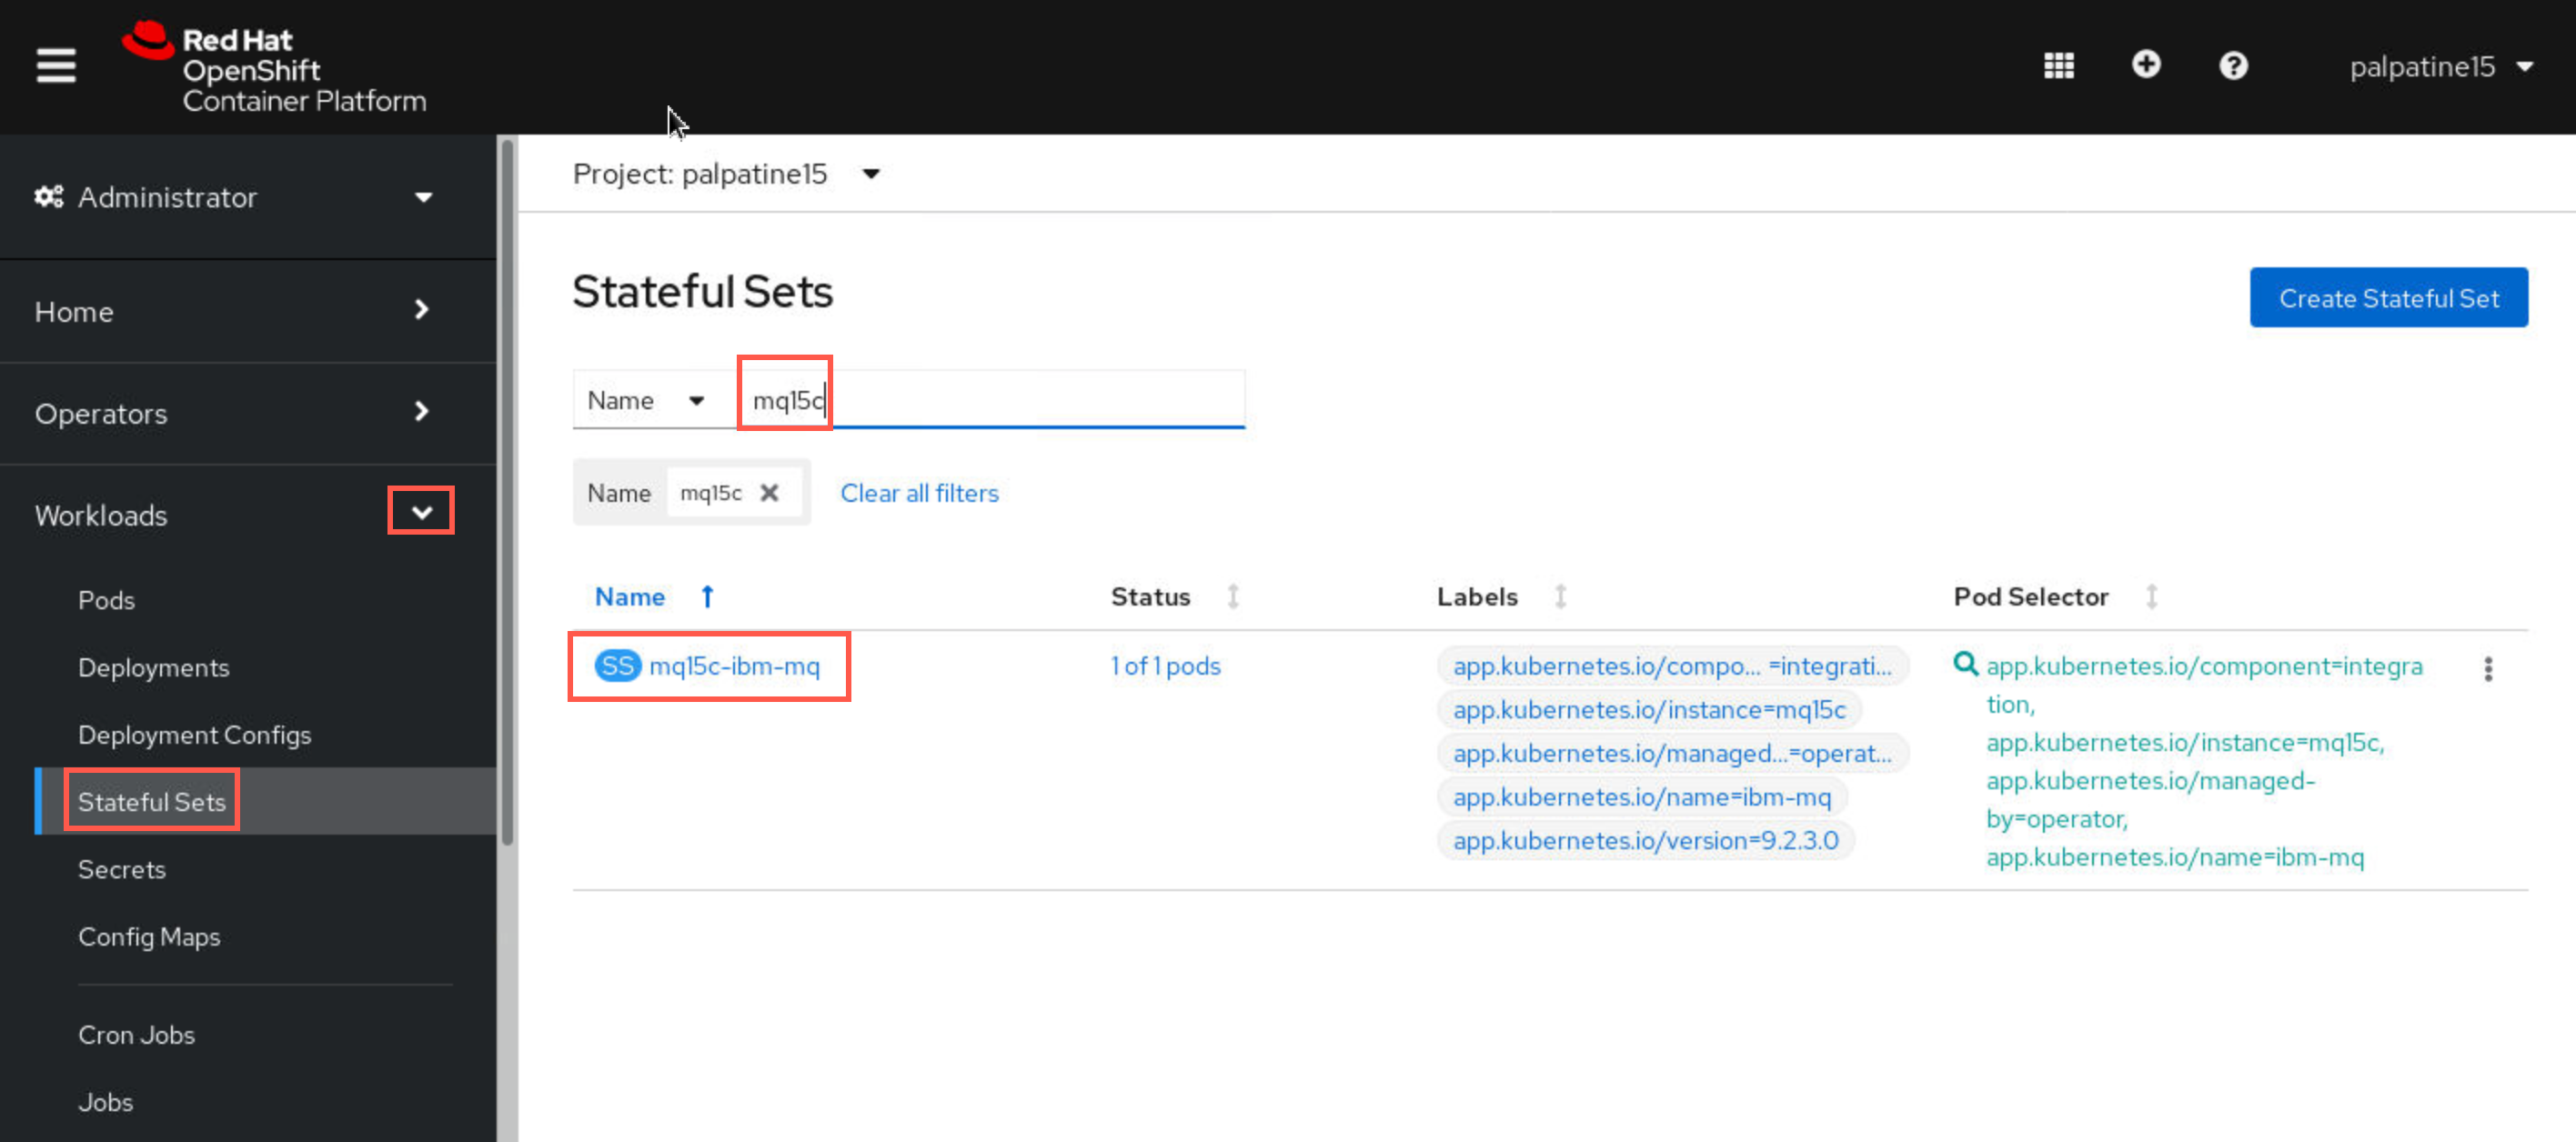
Return to the OpenShift Console tab in the web browser. You should still your project. Click the drop-down for Workloads and select Stateful Sets. Filter on your c queue manager. Click the hyperlink for your the Stateful Set.
-
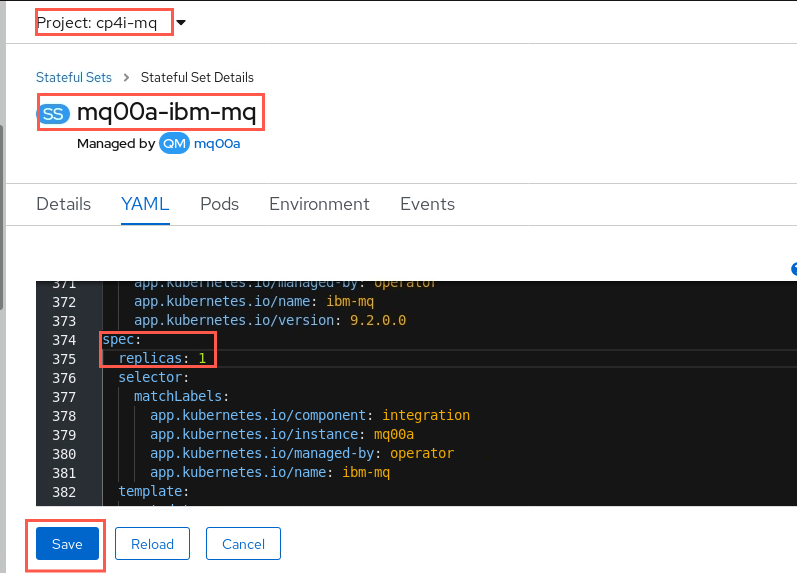
Click YAML which will open an editor for the Stateful Set. Scroll to the spec stanza around line 385. Change replicas to 0. This will remove the active container in effect stopping the queue manager.
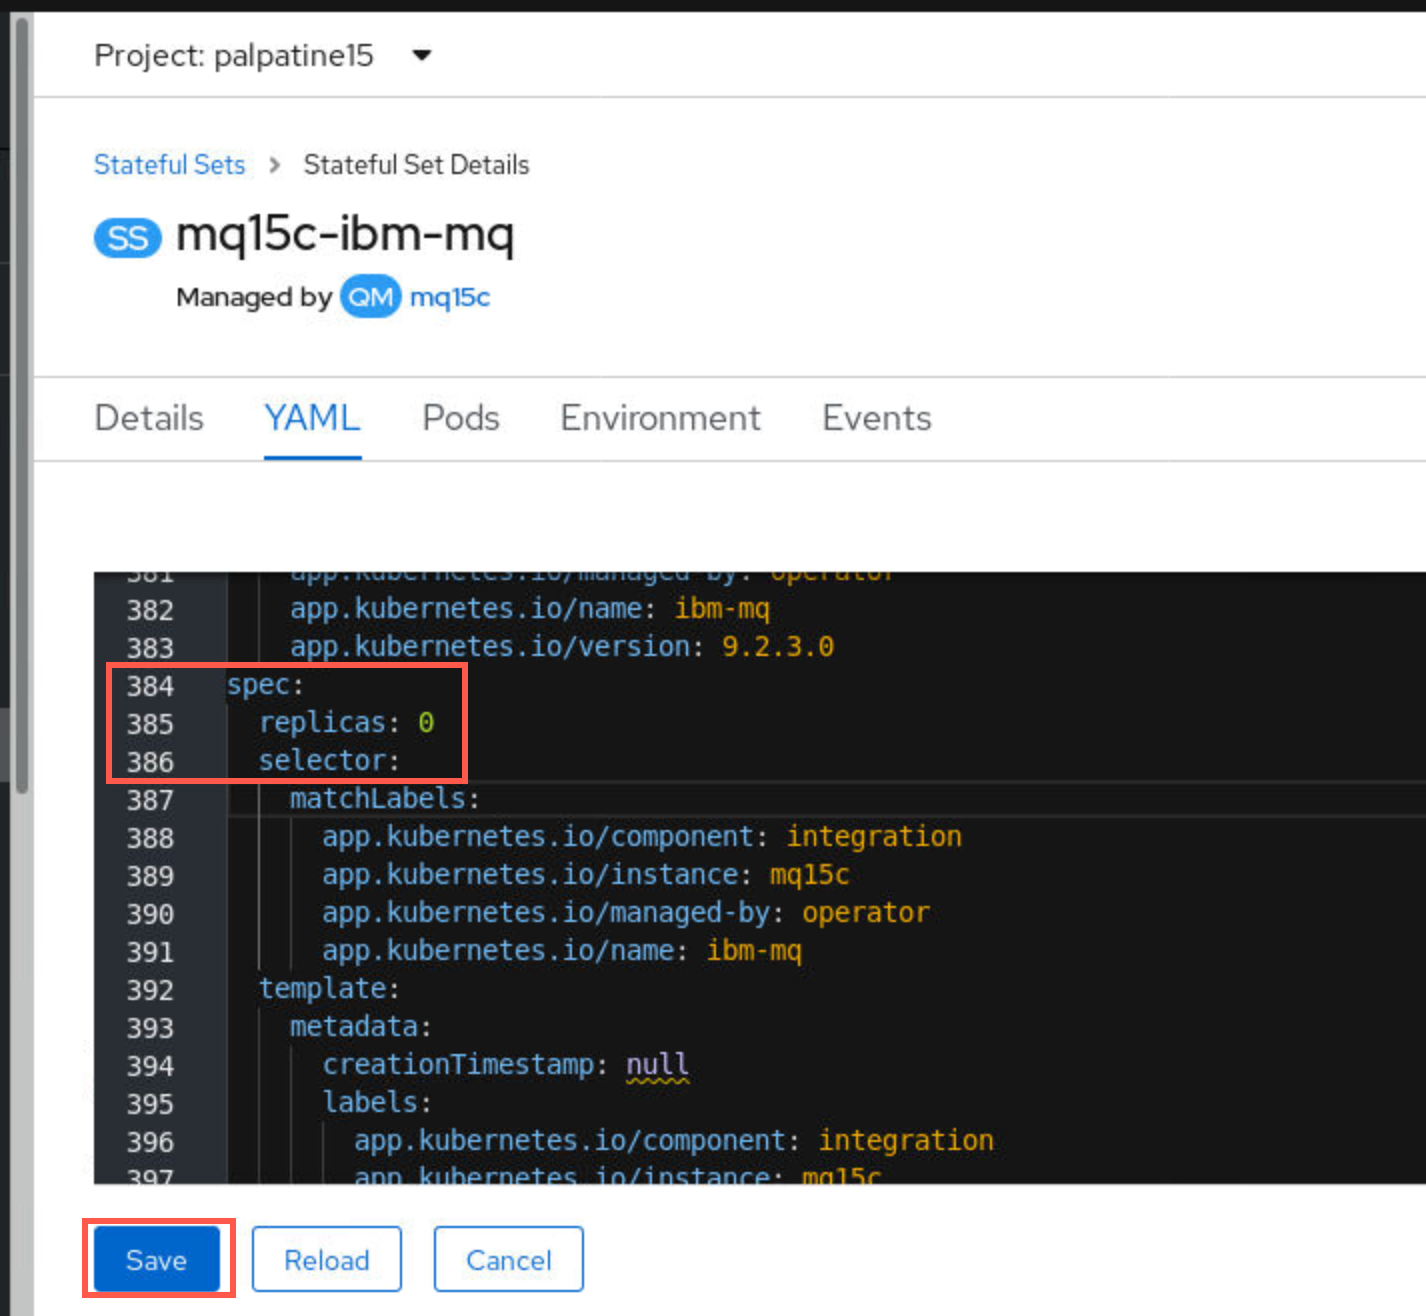
Click Save.
-
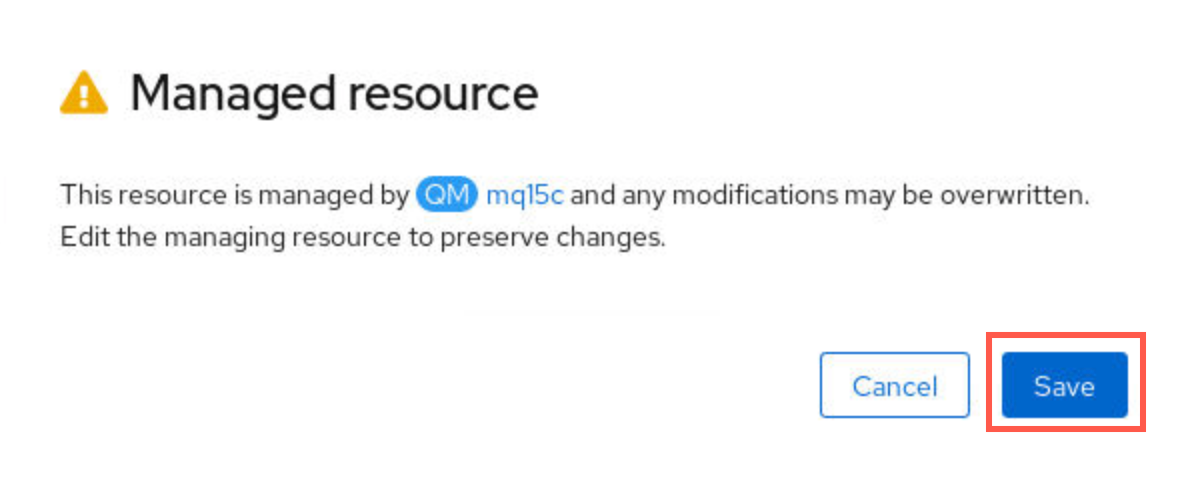
Click Save again on the Managed resource pop-up.
-
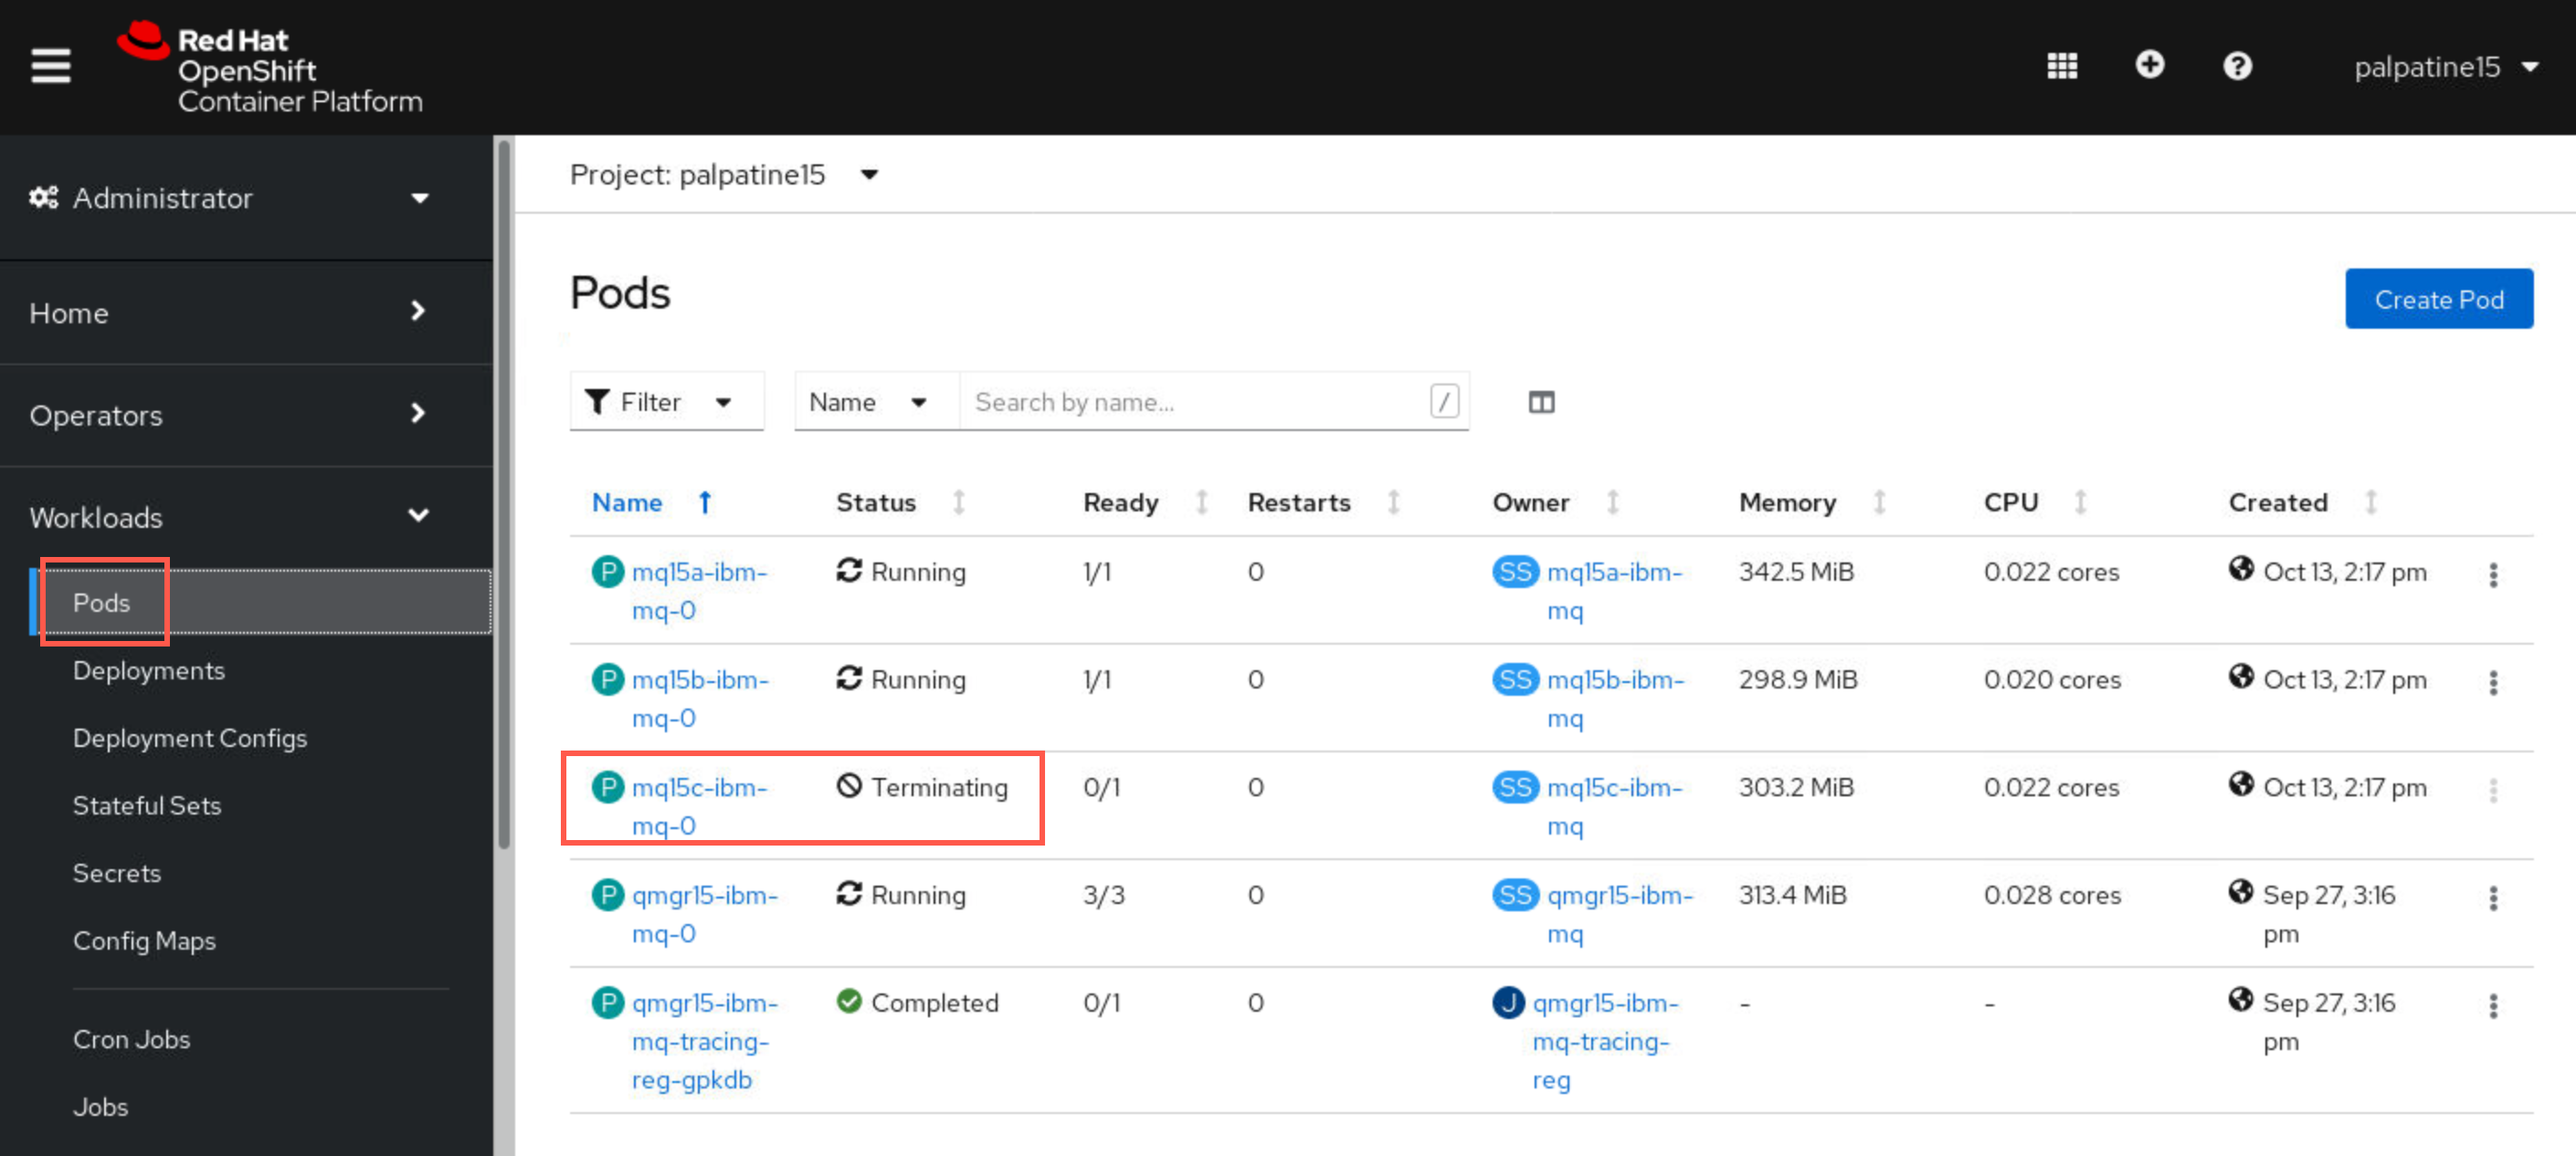
Click Pods in the side-bar and notice that the pod for mqxxc has been terminated.
 Tip:
Tip:
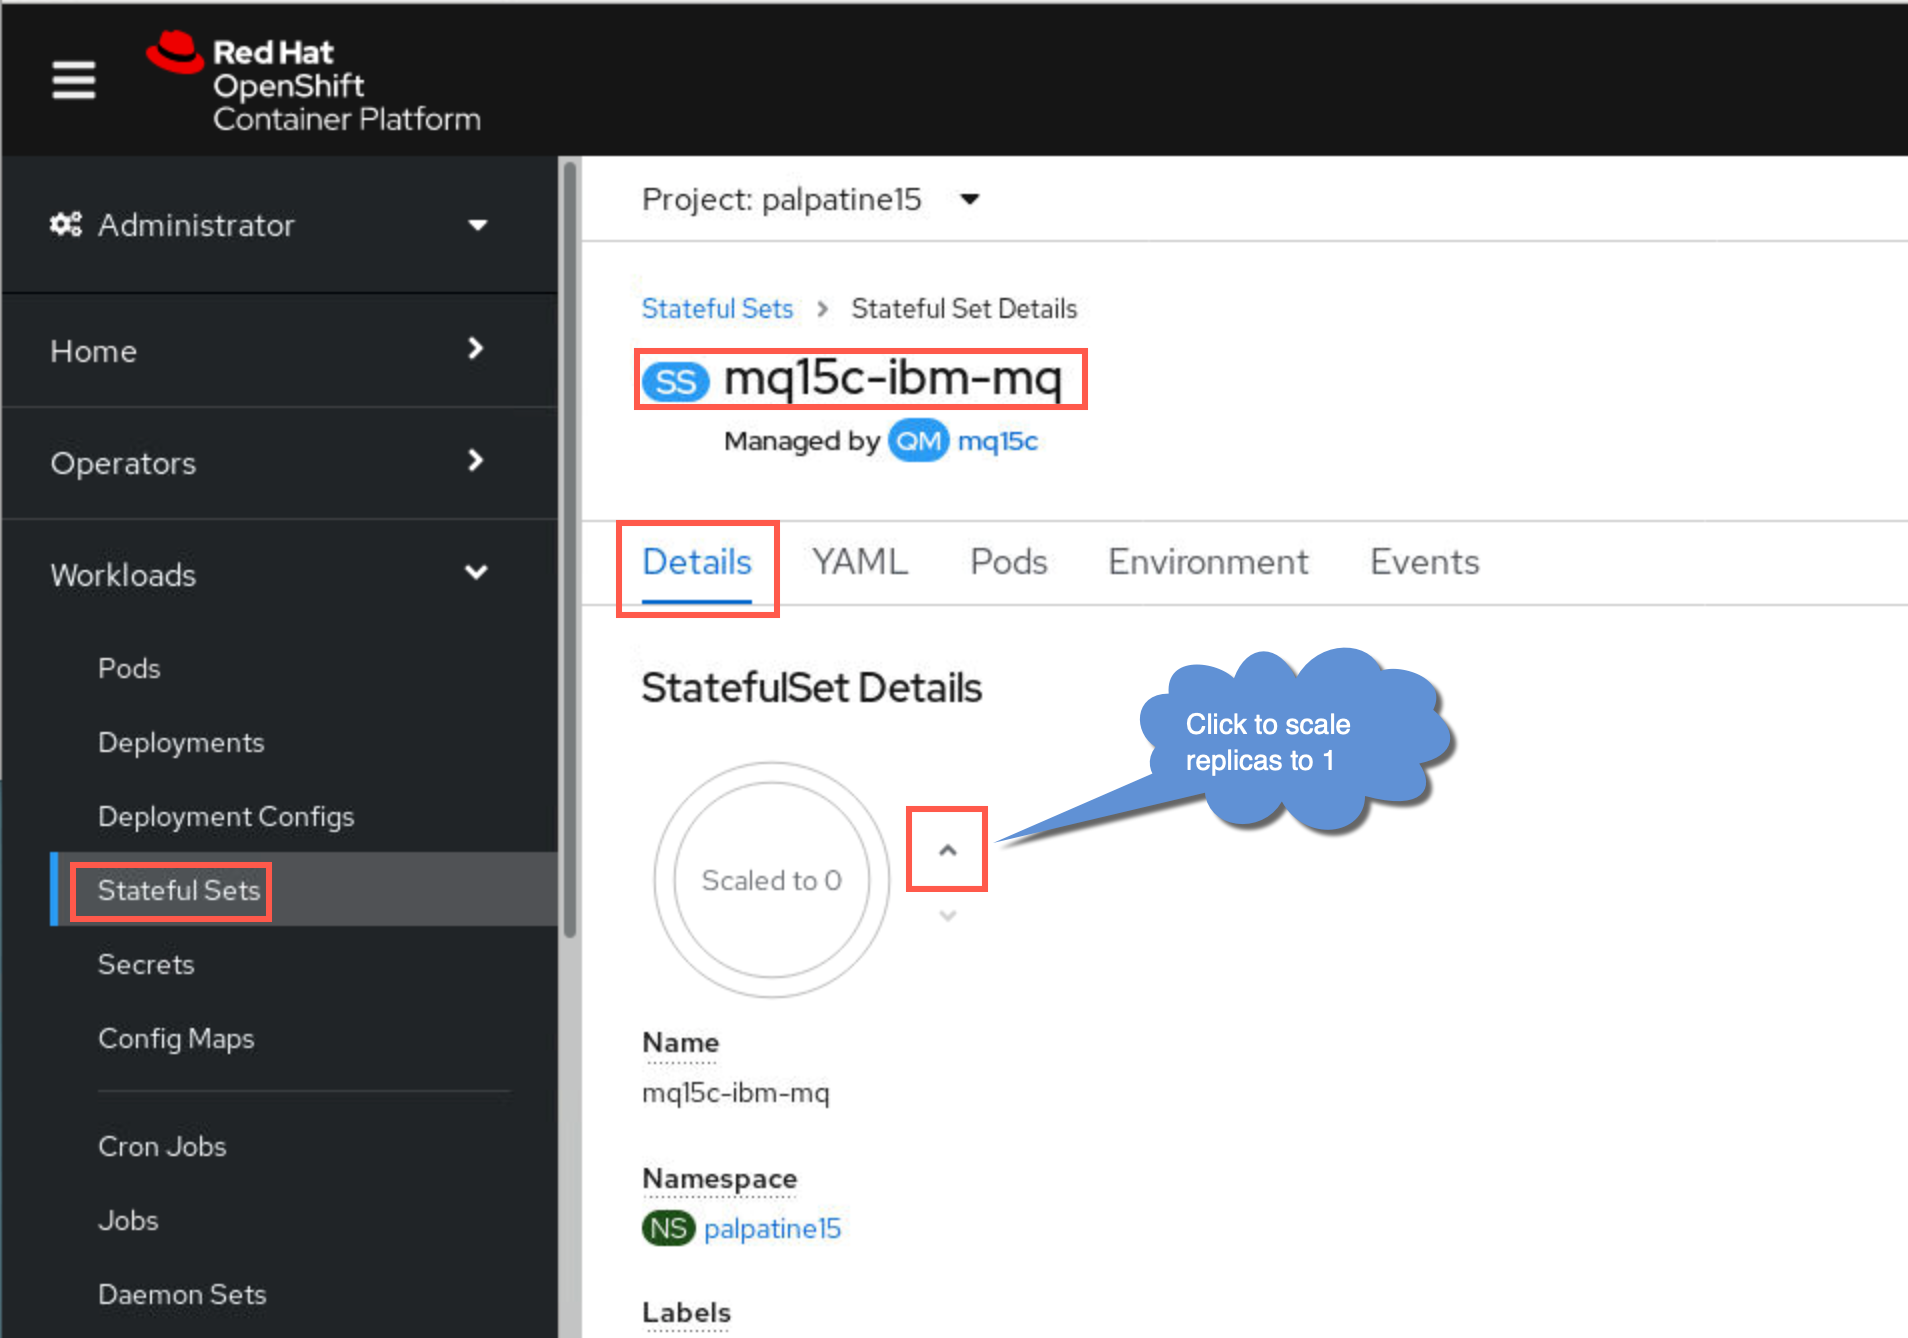
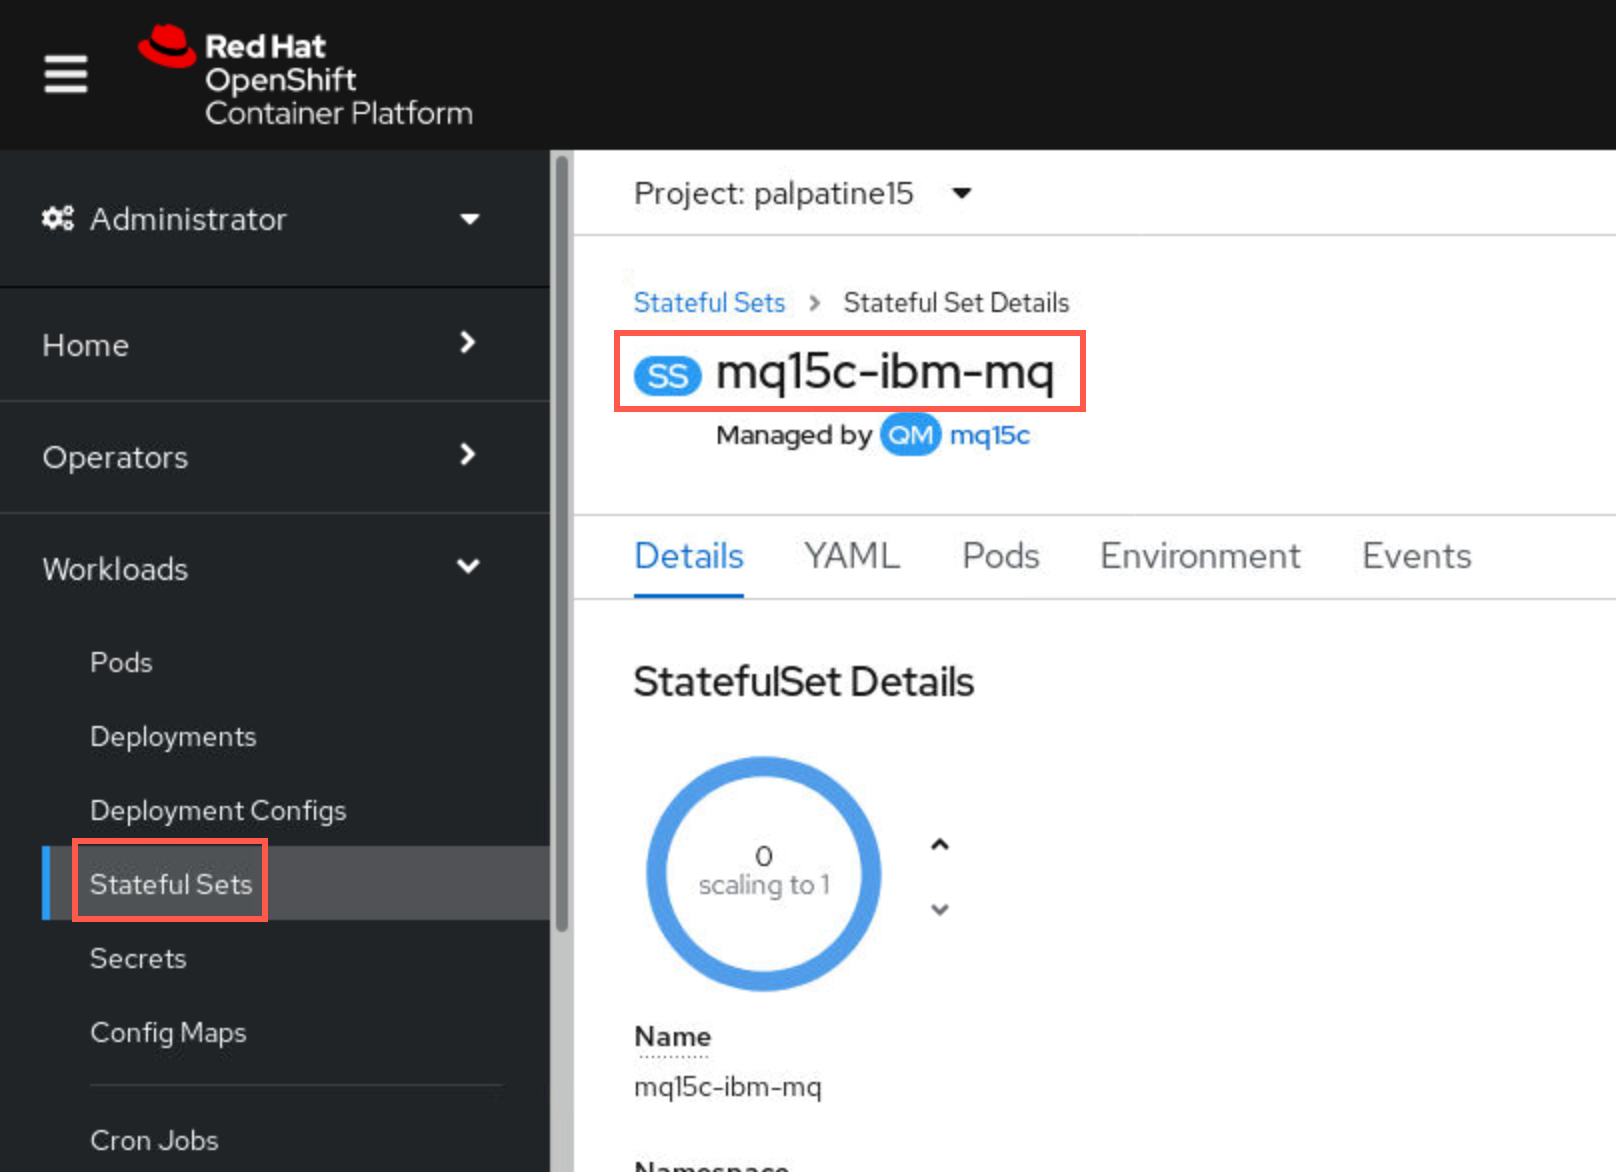
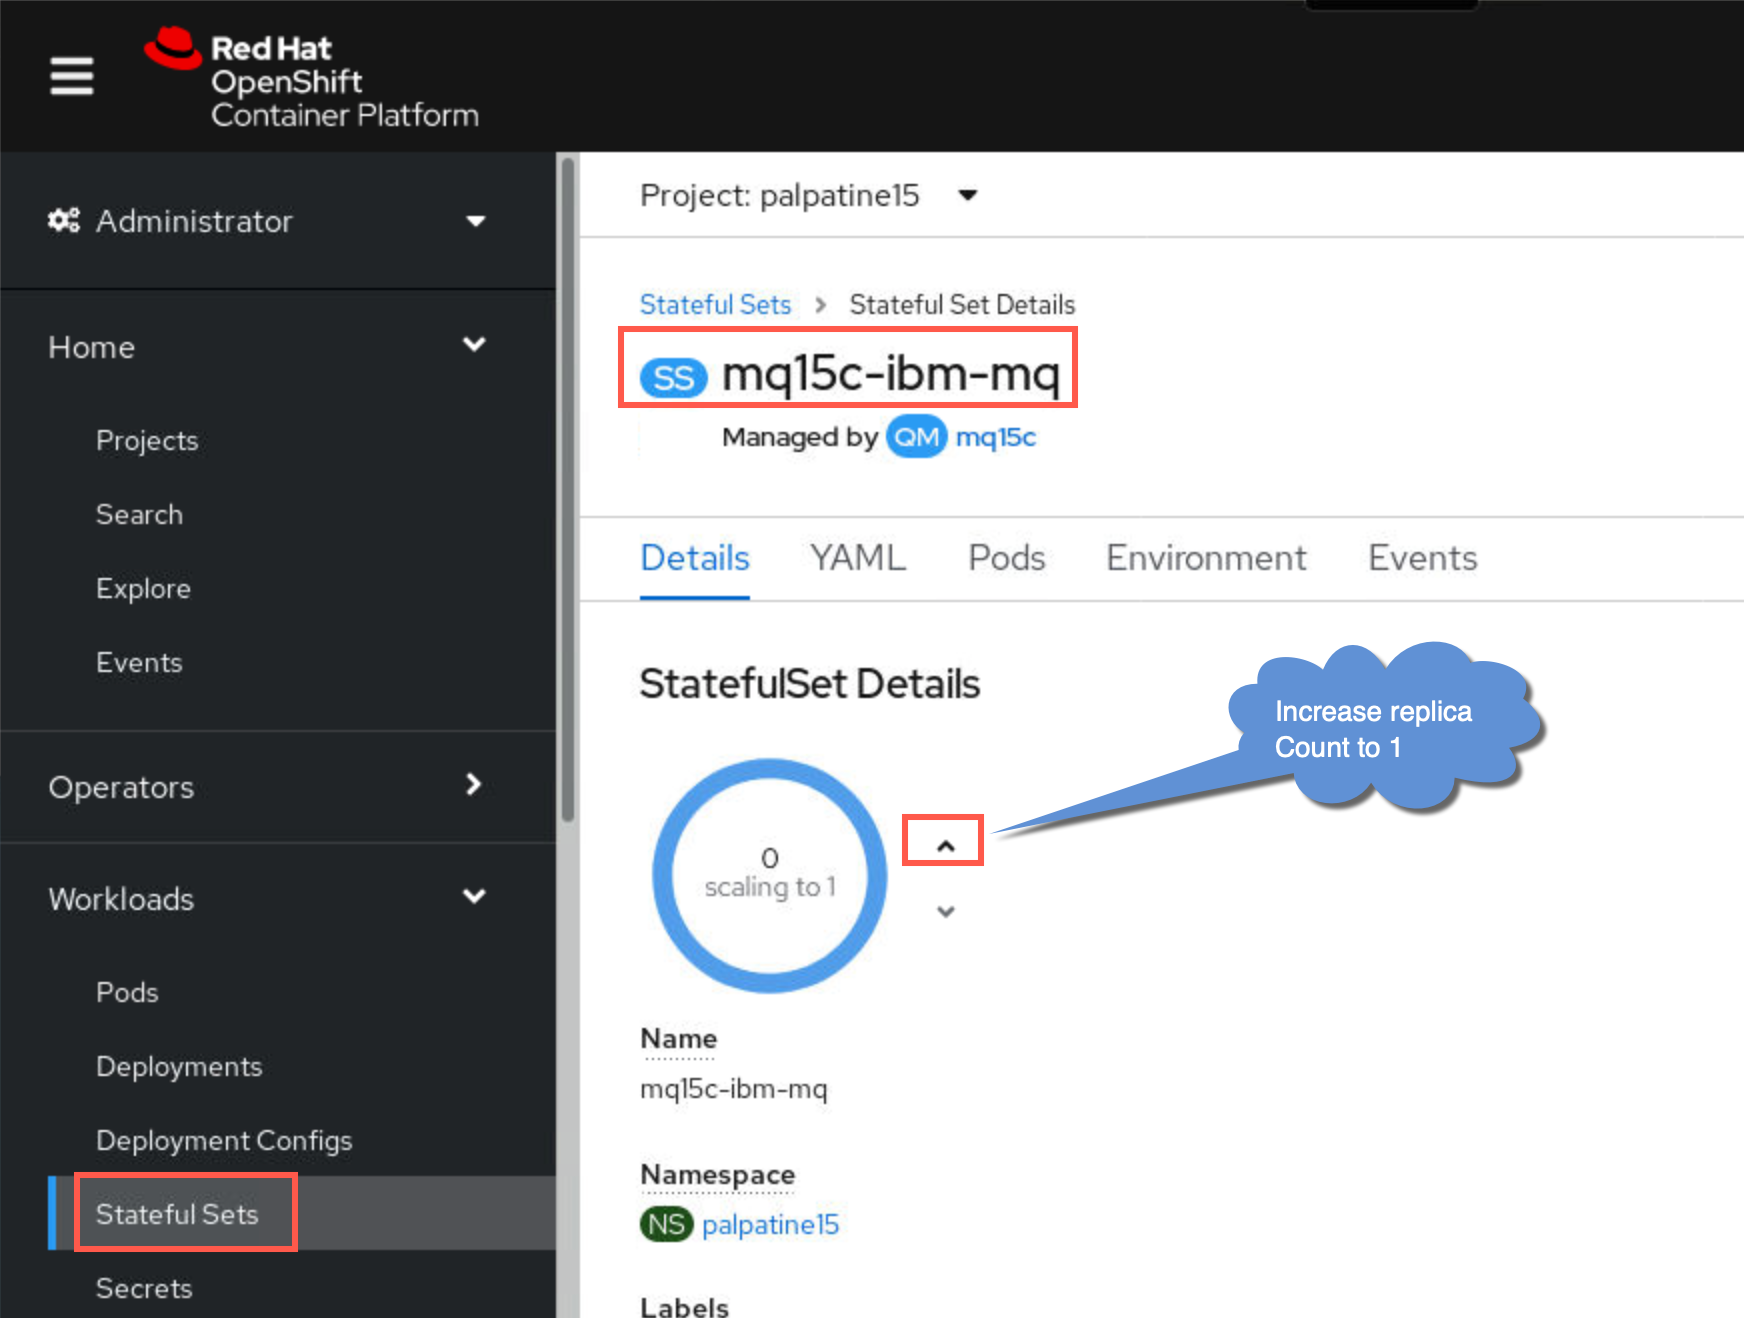
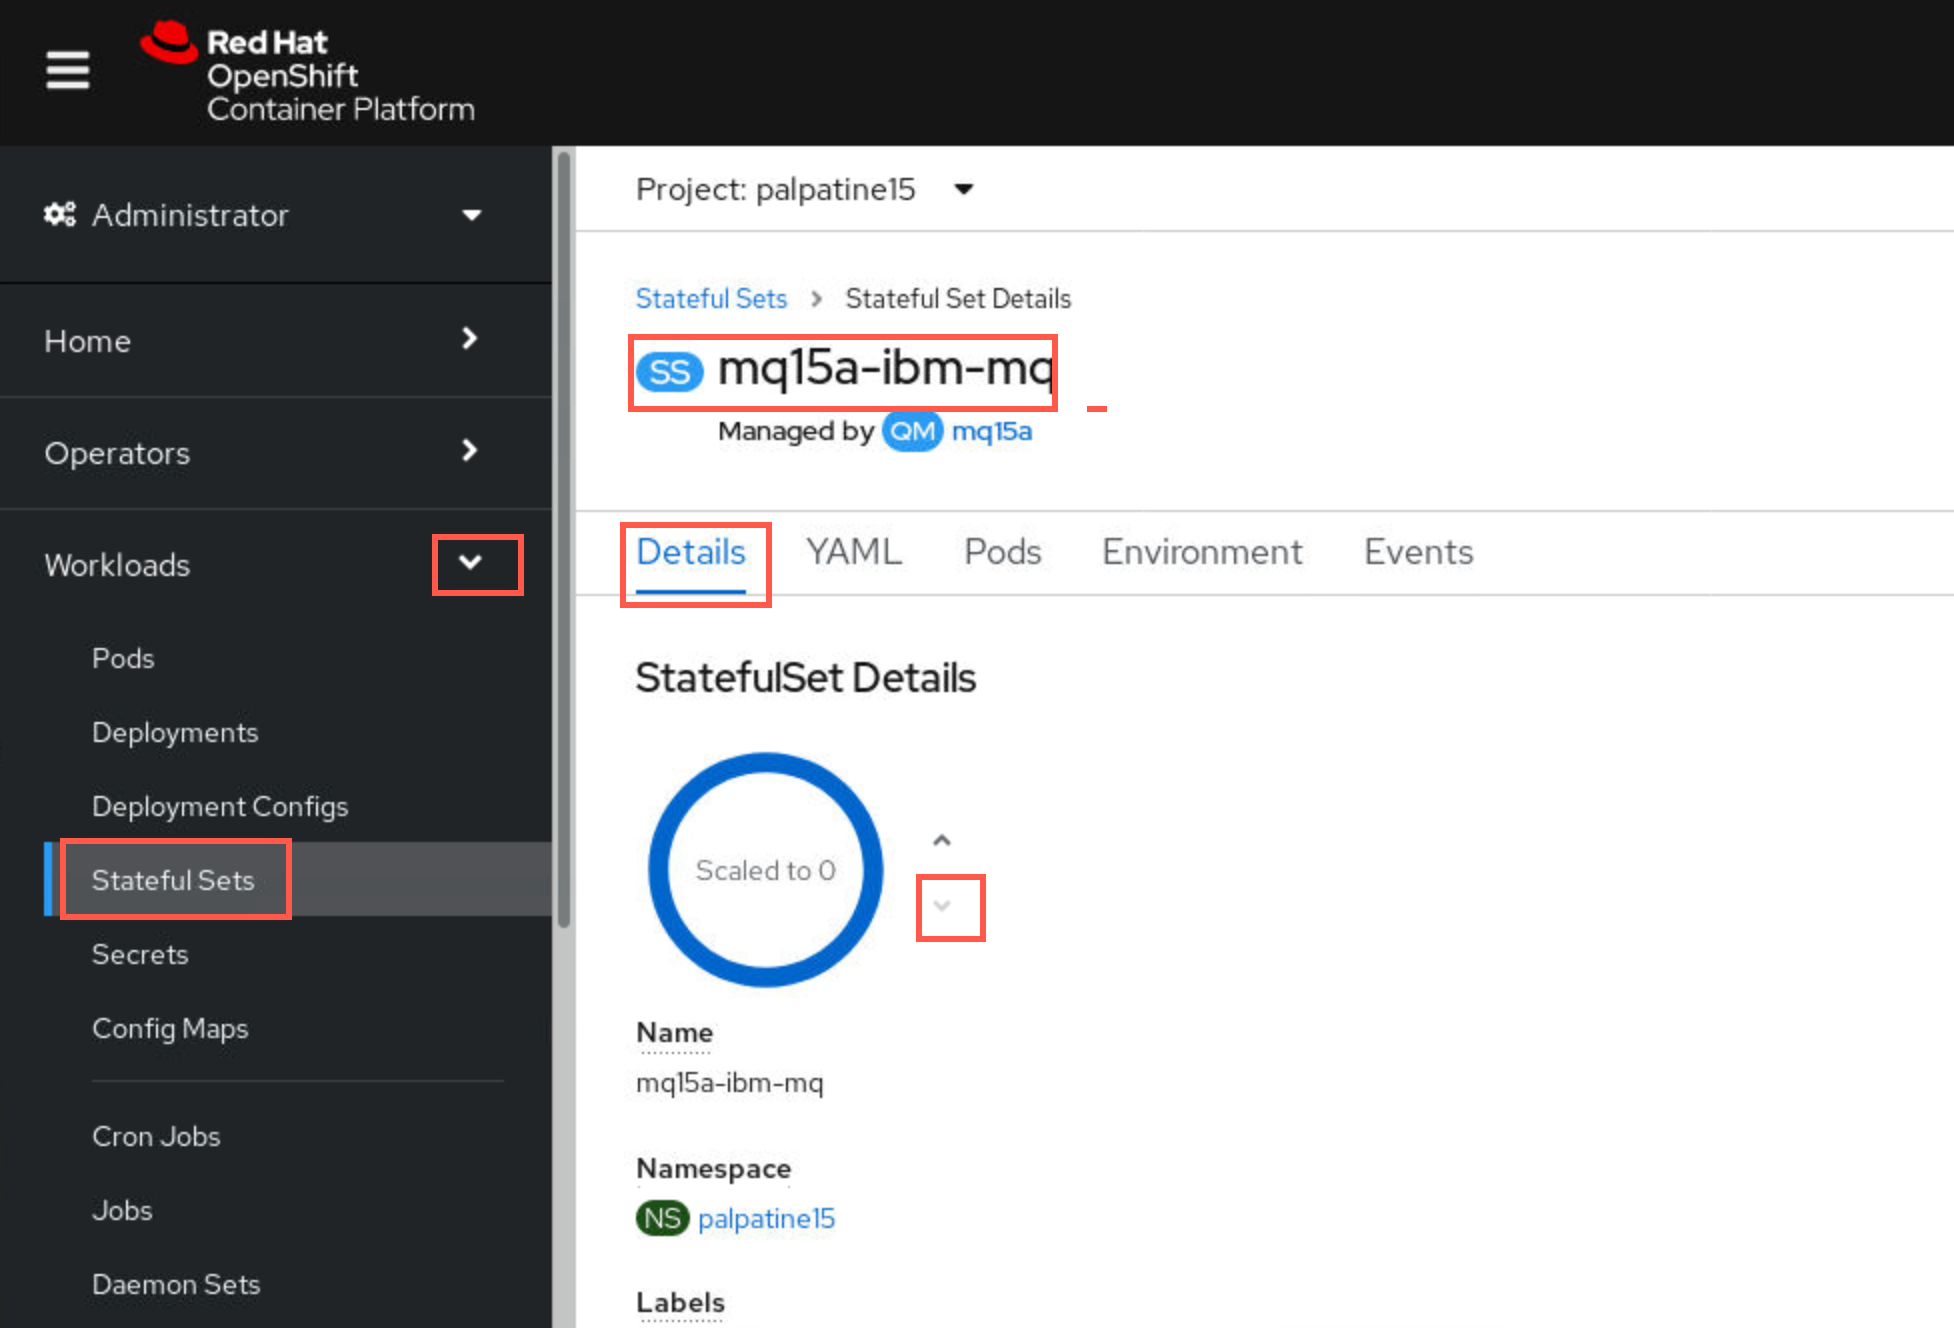
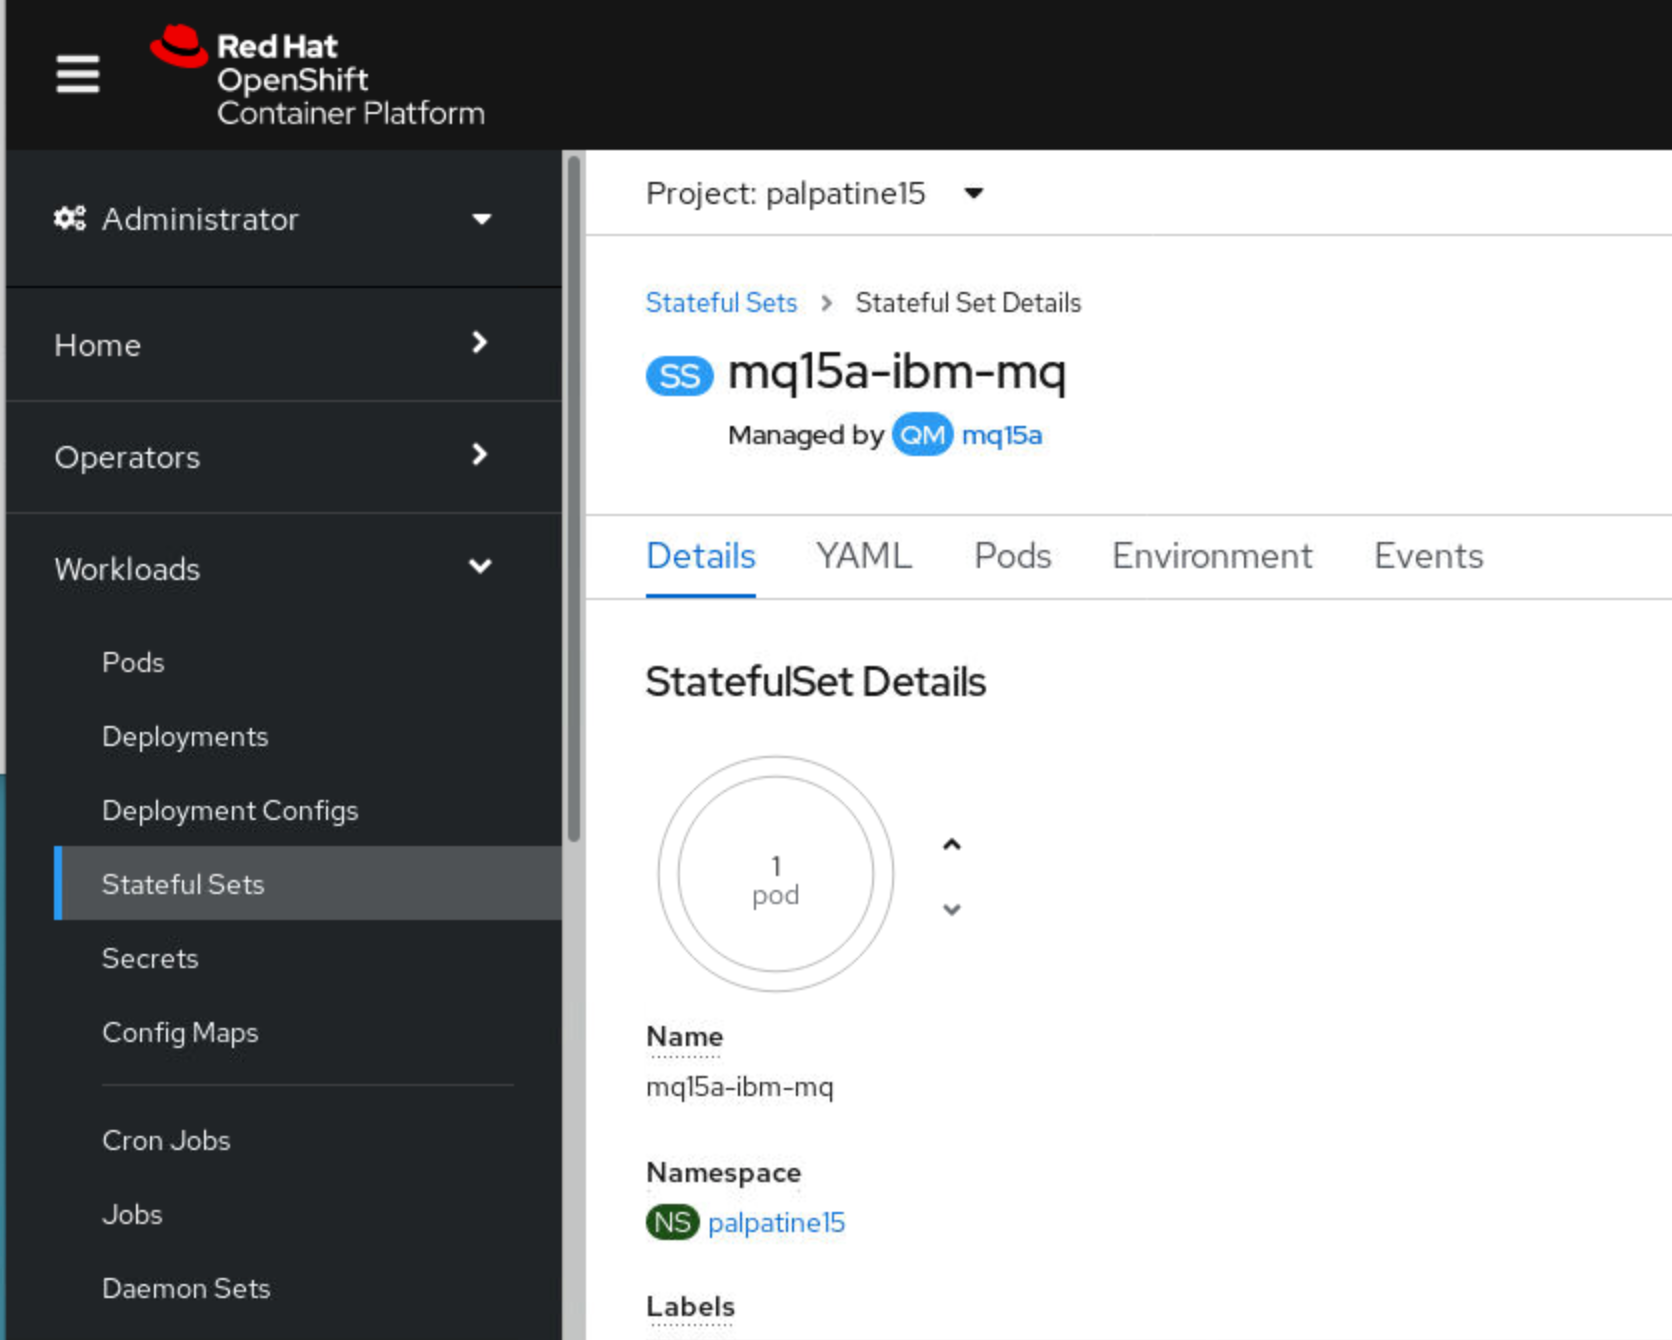
Now that you have seen the yaml code to change replicas, there is a much faster way to scale down the replicas in order to stop a queue manager. Instead of clicking the YAML tab in the StatefulSet click Details instead. Then just decrease the count by 1. To start the queue manager again, just increase the number back to 1. Use this pod counter when asked to stop or start the queue manager.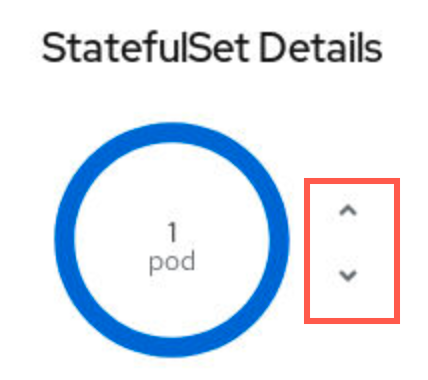
-
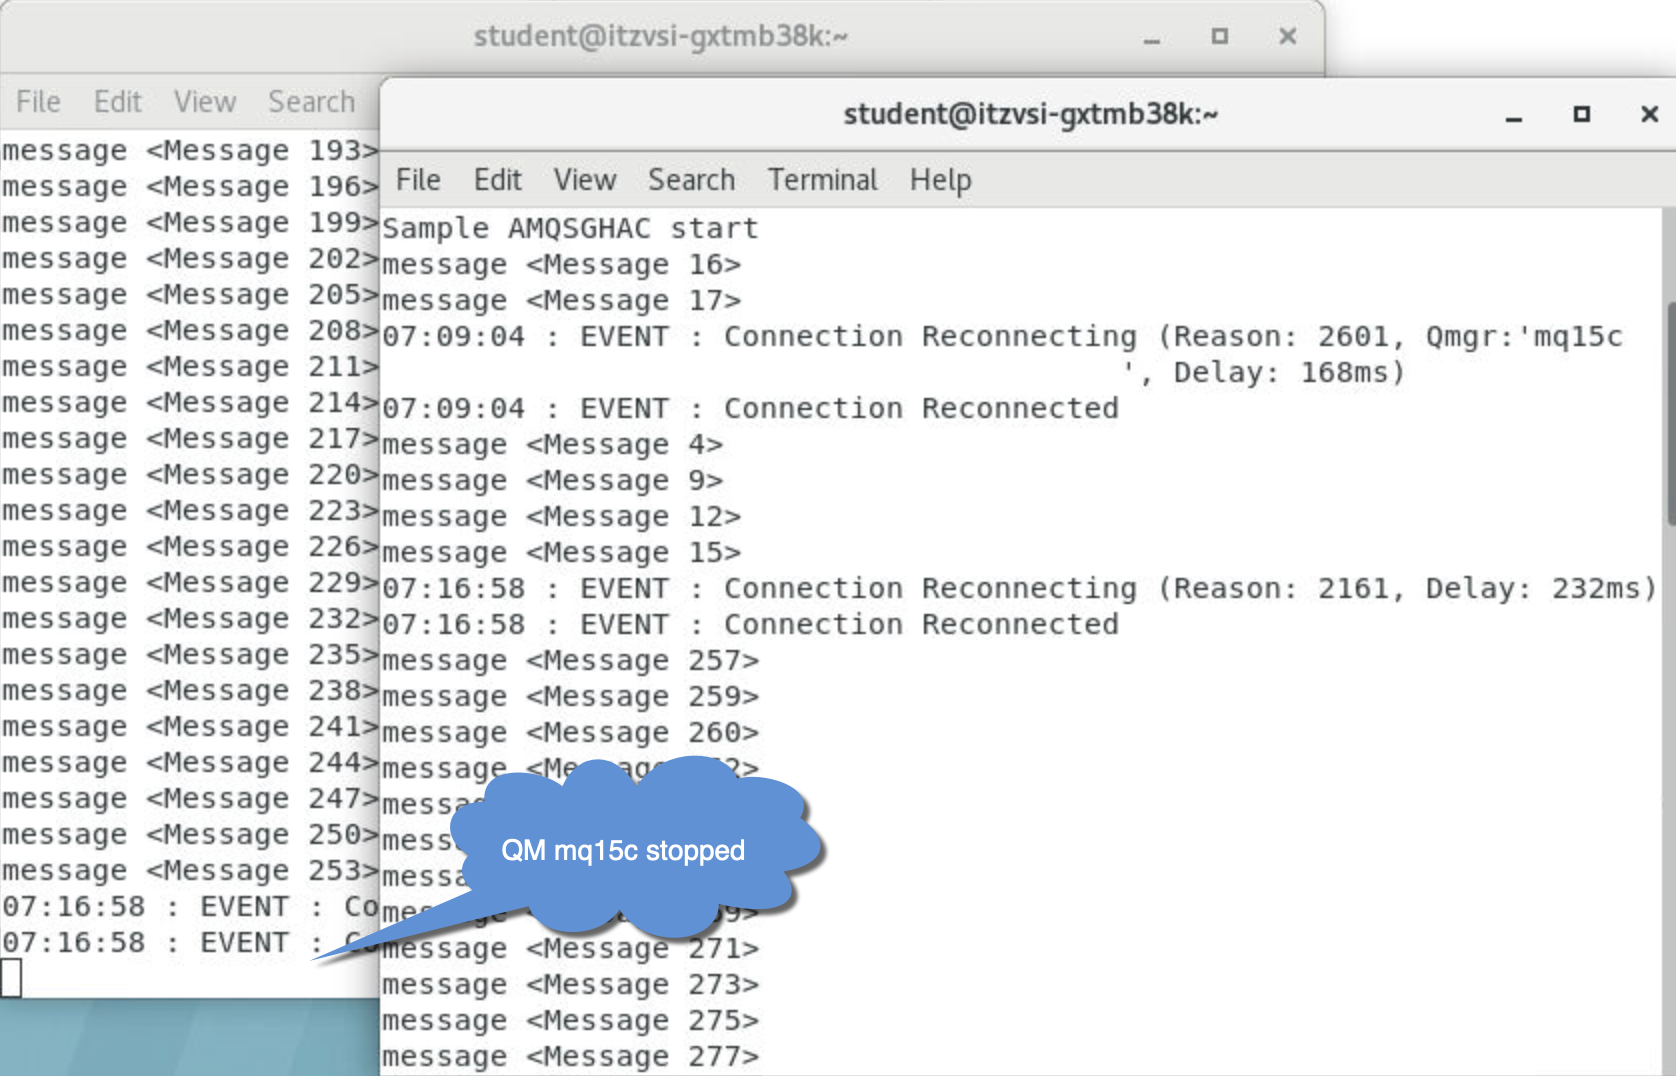
In the application windows, you’ll notice that the applications connected to mqxxc are now trying to reconnect.
-
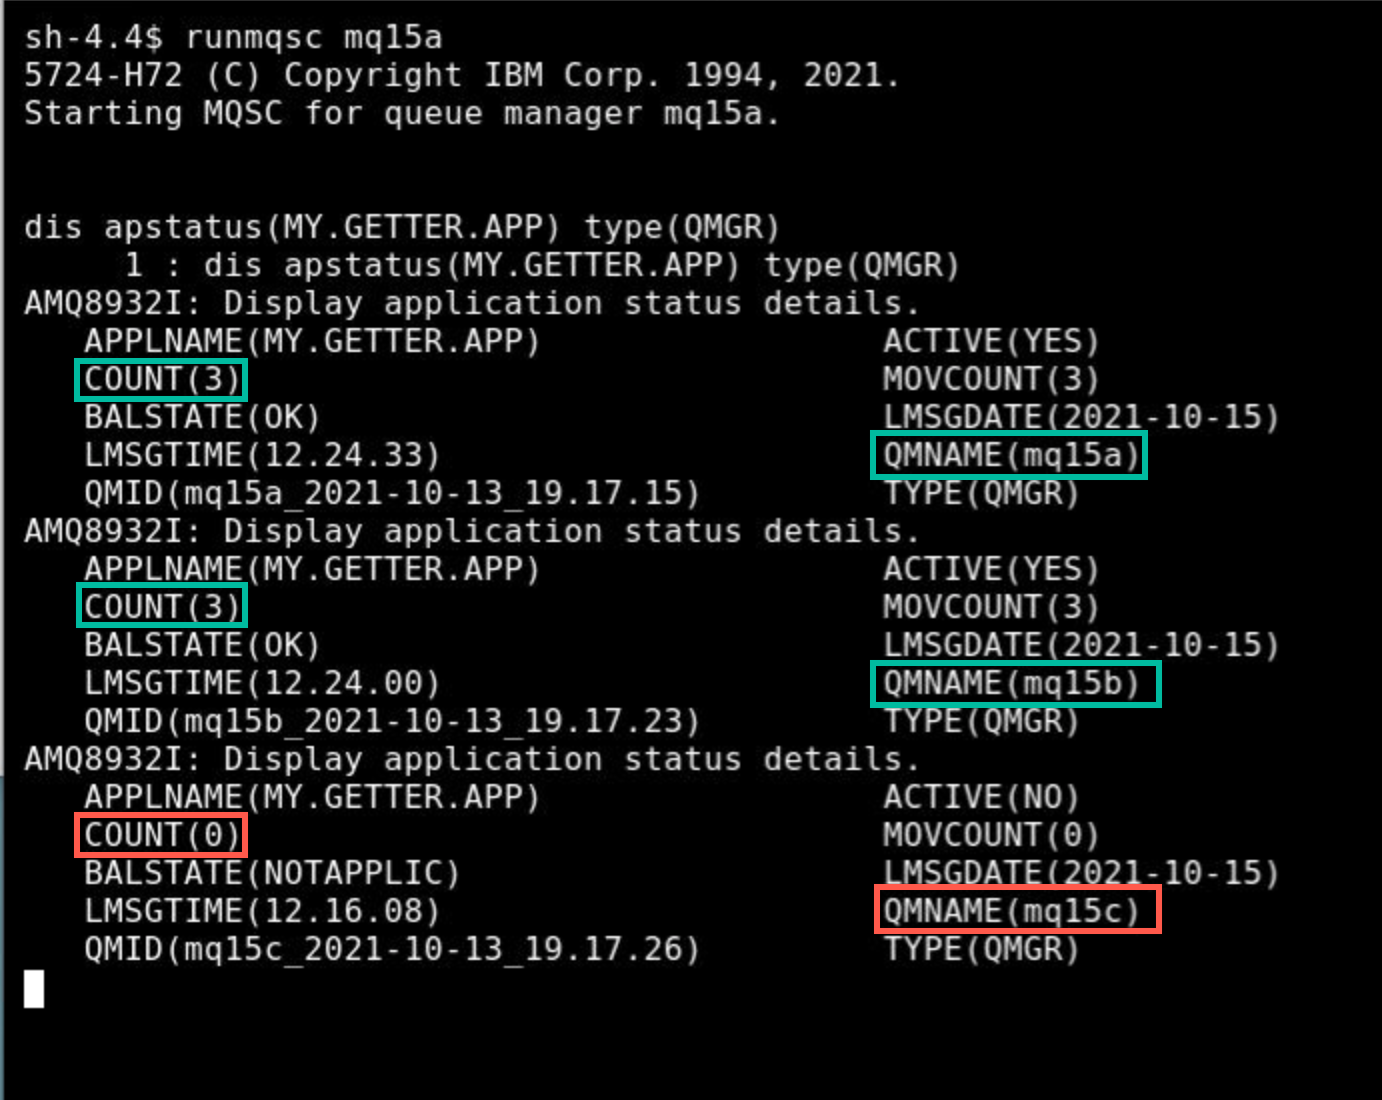
After a while, an application imbalance will be detected, and affected applications will be reconnected to the other available queue managers.
To see this happening, re-run the MQSC command DISPLAY APSTATUS on any active queue manager in the cluster. After a minute or two you should see all application instances now running on mq00a and mq00b:
-
Once you are happy that the applications have balanced out equally across the other queue managers, re-start the stopped queue manager by changing the spec > replicas back to one in Stateful Set mqxxc-ibm-mq.
-
In the application windows, you’ll notice that the application connected to mqxxc has now reconnected.
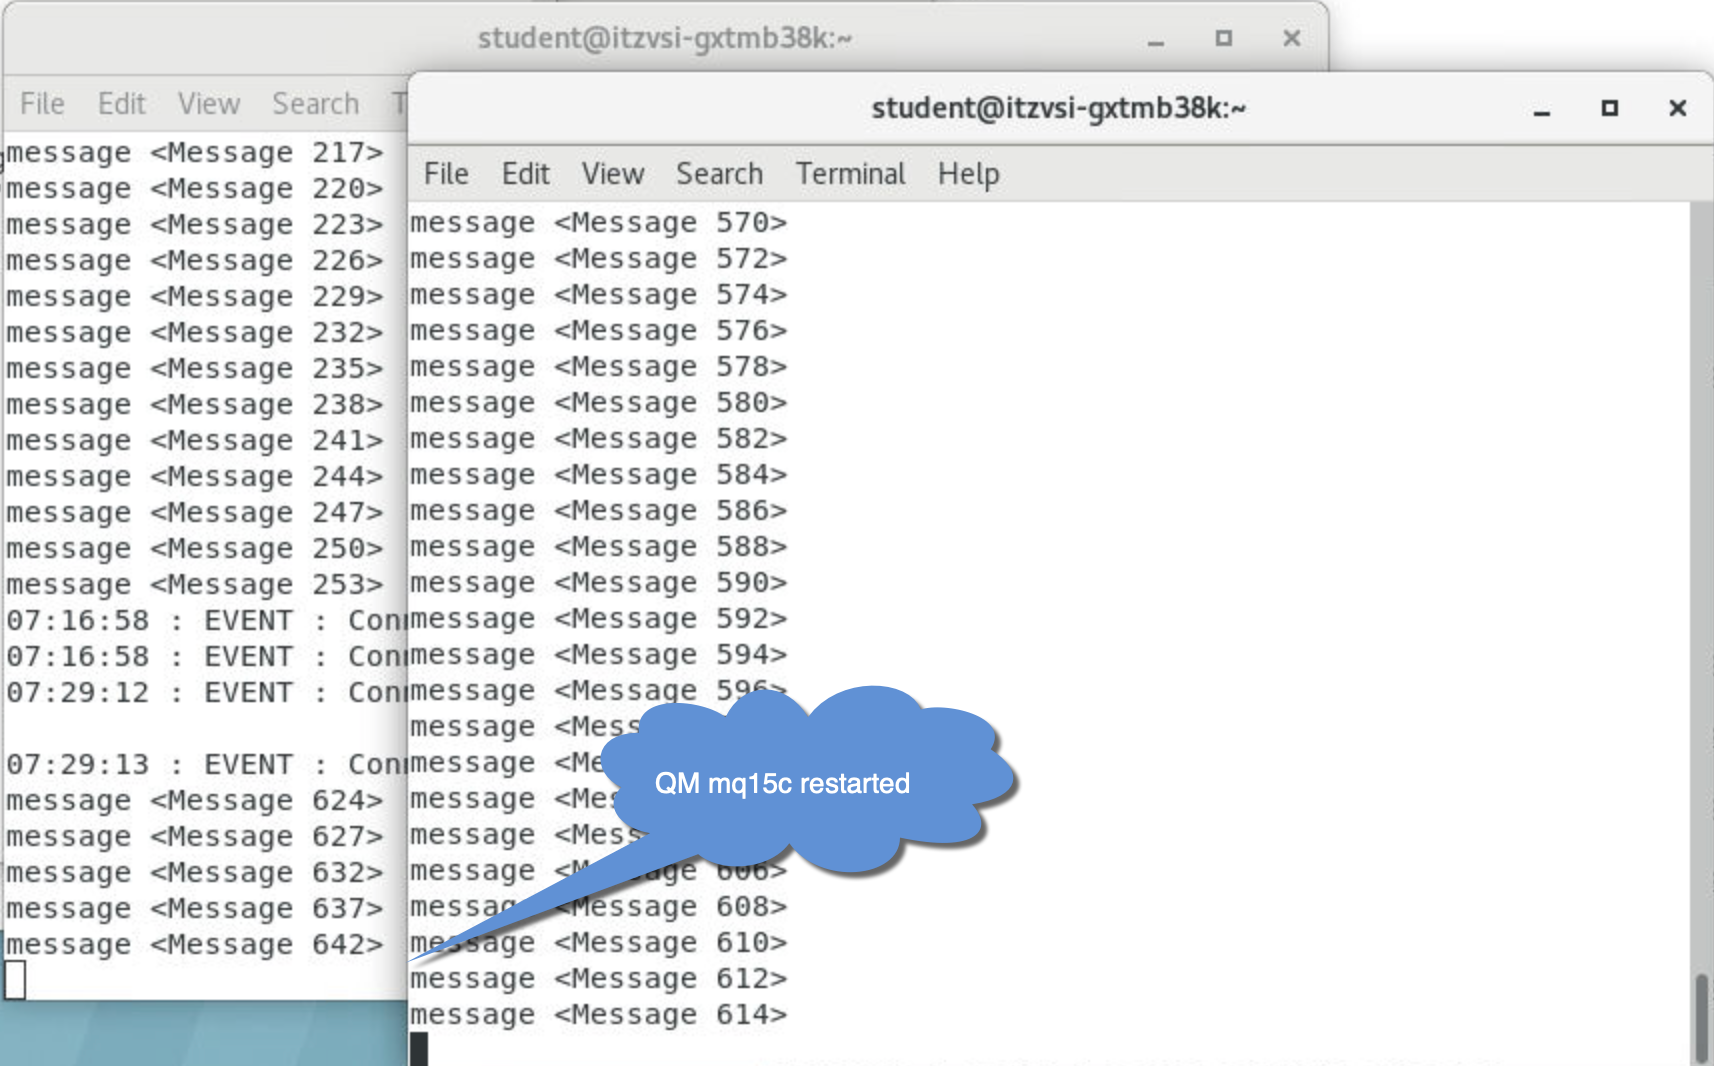
As this queue manager has started and has no applications connected, it will request some from the other queue managers in the cluster.
-
Display apstatus again and you’ll see that the applications are again rebalanced.
Metrics (new in 9.1.5)
The amqsrua sample application provides a way to consume MQ monitoring publications and display performance data published by queue managers. This data can include information about the CPU, memory, and disk usage. MQ v9.1.5 adds the ability to allow you to monitor usage statistics for each application you specify by adding the STATAPP class to the amqsrua command. You can use this information to help you understand how your applications are being moved between queue managers and to identify any anomalies.
The data is published every 10 seconds and is reported while the command runs.
Statistics available are:
- Instance count: number of instances of the specified application name currently running on this queue manager. See also COUNT from MQSC APSTATUS that we saw earlier.
- Movable instance count: number of instances of the specified application name running on this queue manager which could be moved to another queue manager if required. See also MOVCOUNT from MQSC APSTATUS that we saw earlier.
- Instance shortfall count: how far short of the mean instance count for the uniform cluster that this queue manager’s instance count is. This will be 0 if queue manager is not part of a uniform cluster.
- Instances started: number of new instances of the specified application name that have started on this queue manager in the last monitoring period (these may have previously moved from other queue managers or be completely new instances).
- Initiated outbound Instance moves: number of movable instances of the specified application that have been requested to move to another queue manager in the last monitoring period. This will be 0 if the queue manager is not part of a uniform cluster.
- Completed outbound instance moves: number of instances of the specified application that have ended following a request to move to another queue manager. This number includes those that are actioning the requested move, or that are ending for any other reason after being requested to move (note that it does not mean that the instances have successfully started on another queue manager). This will be 0 if the queue manager is not part of a uniform cluster.
- Instances ended during reconnect: number of instances of the specified application that have ended while in the middle of reconnecting to this queue manager (whether as a result of a move request from another queue manager, or as part of an HA fail over).
- Instances ended: number of instances of the specified application that have ended in the last monitoring period. This includes instances that have moved, and those that have failed during reconnection processing.
-
In the browser tab for OpenShift Console stop runmqsc for mqxxa by entering ctrl-C. Then run the amqsrua command as follows, i.e. with a class of STATAPP, a type of INSTANCE, and object of your getting application name. Change xx to your student ID.
/opt/mqm/samp/bin/amqsrua -m mqxxa -c STATAPP -t INSTANCE -o MY.GETTER.APP(Note: you can omit the class, type and object parameters and enter them when prompted instead).
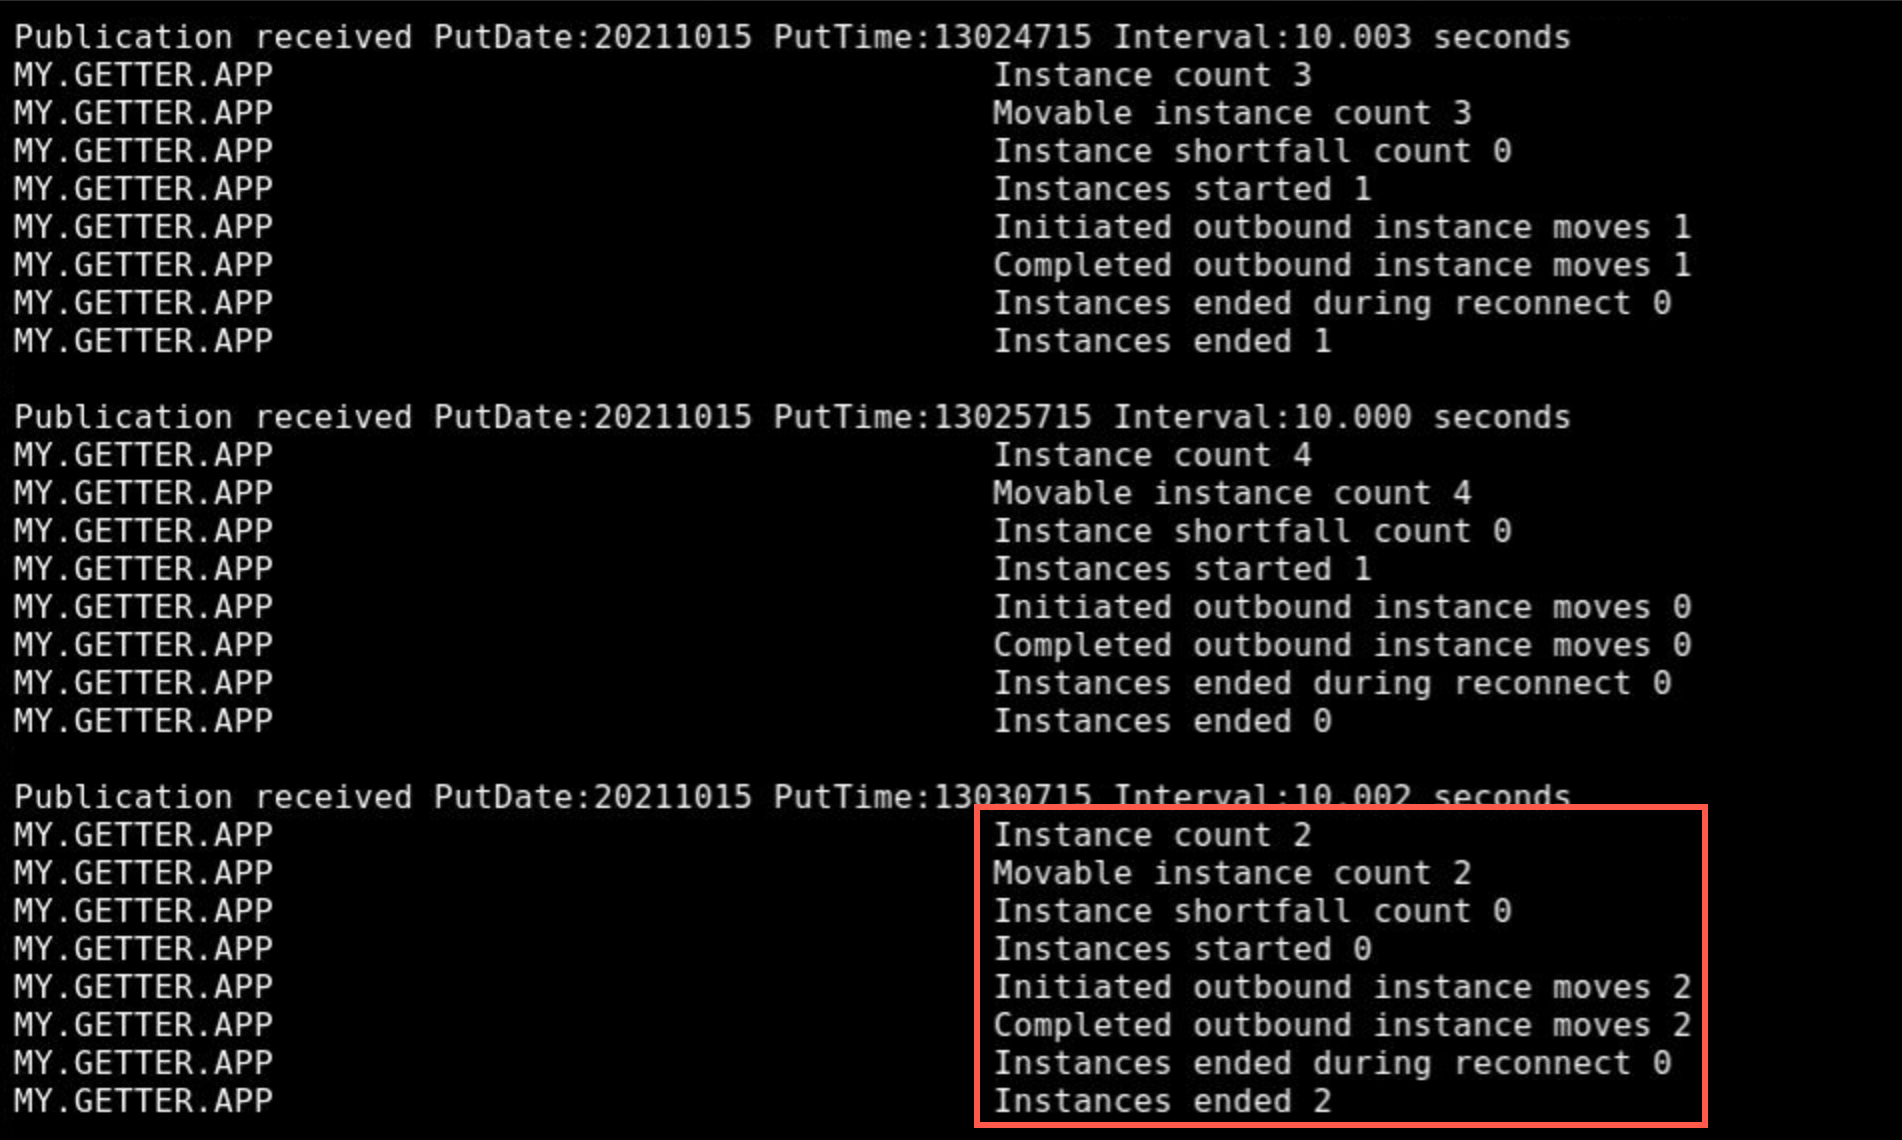
Initial stats are displayed and then updated every 10 seconds to show activity in the previous interval. You should see an Instance Count and Movable Instance Count of 2 as shown below. You may see different numbers for the other stats in the first interval, but these should be 0 in subsequent intervals.
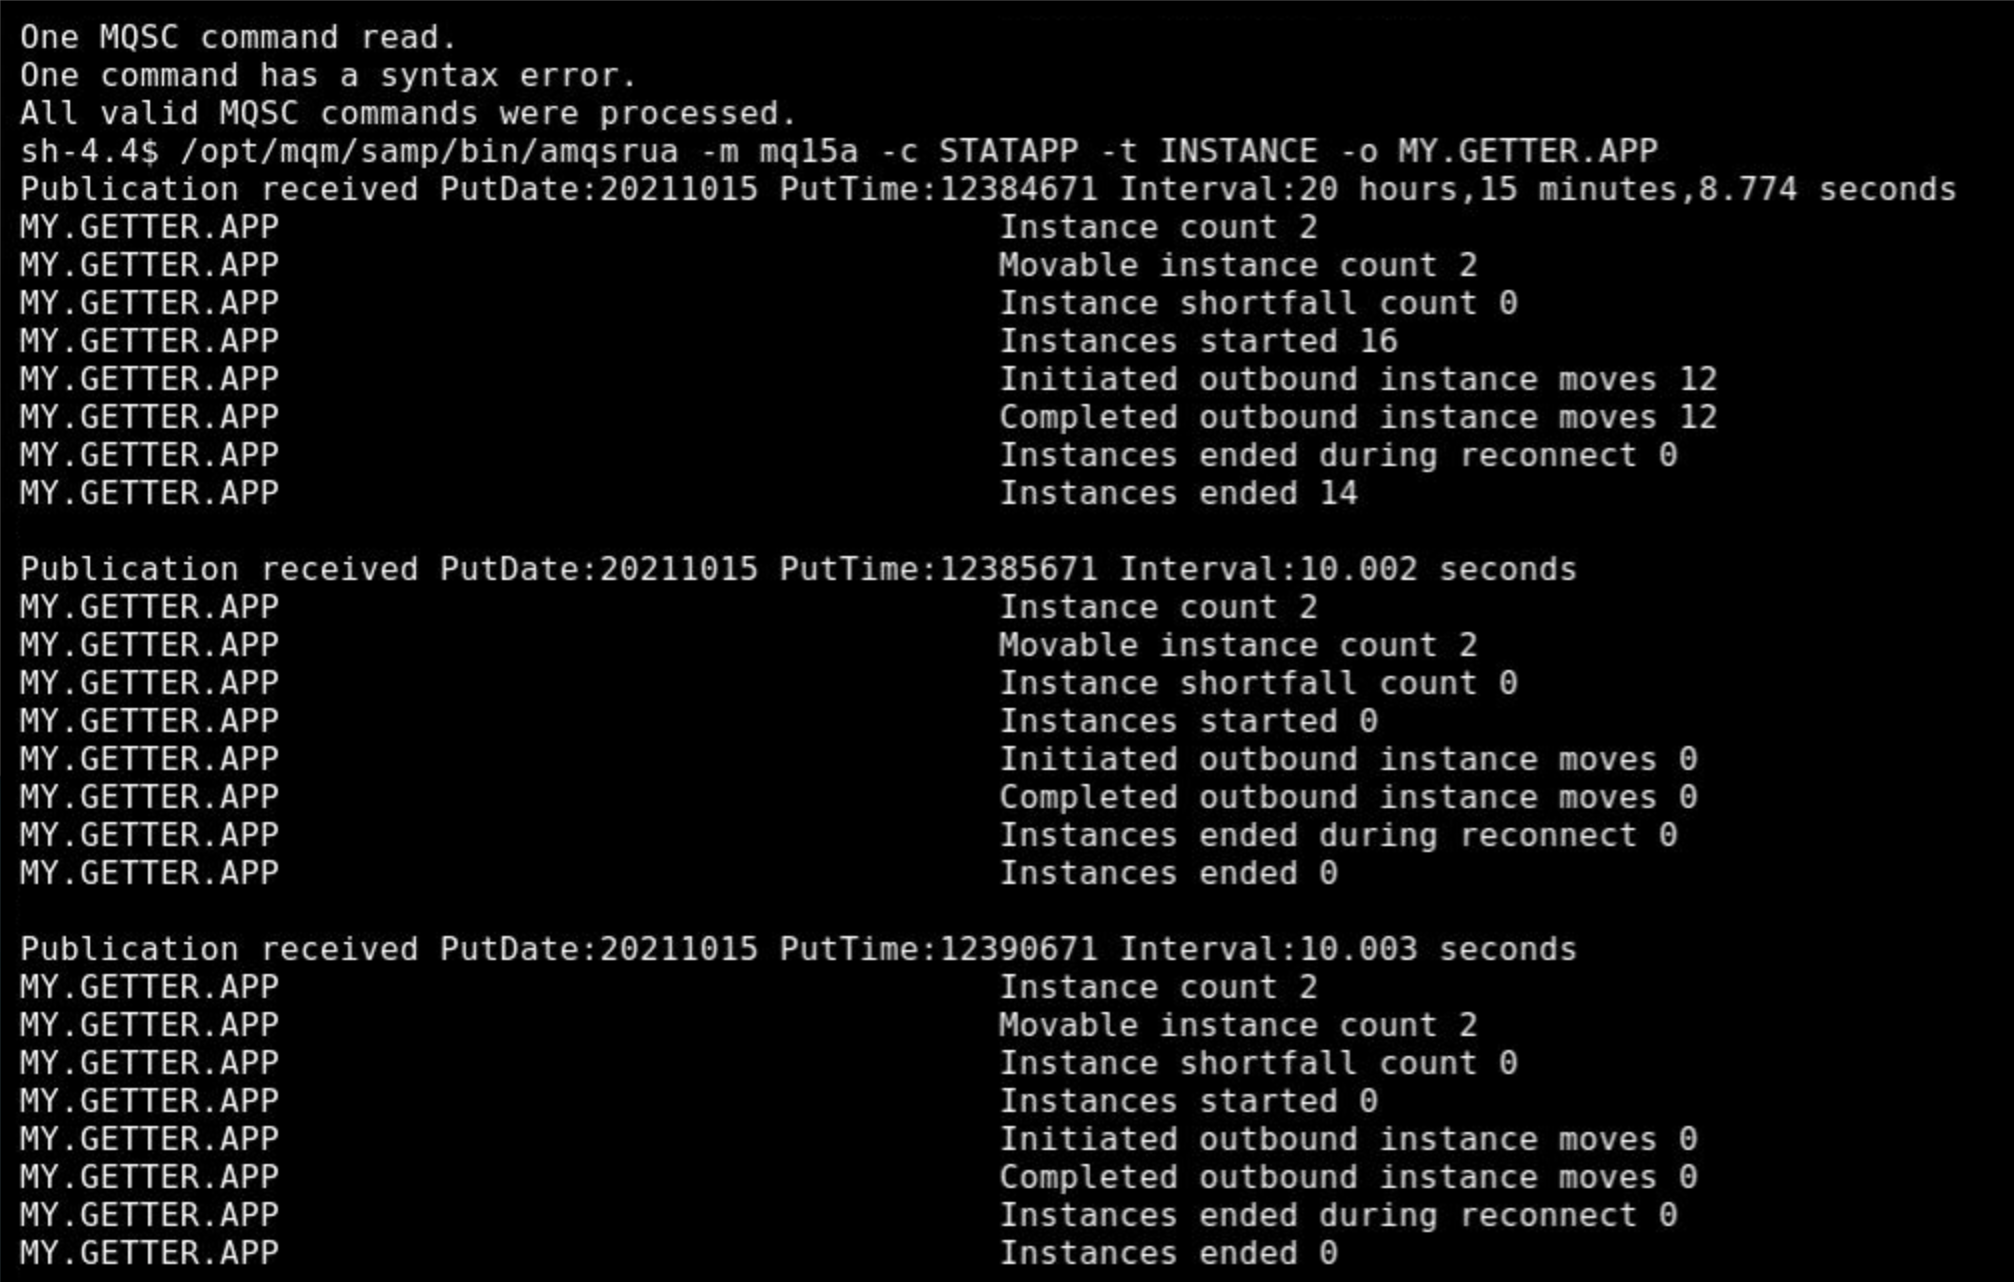
Refer to the description of these stats at the start of this section. Keep this command running.
-
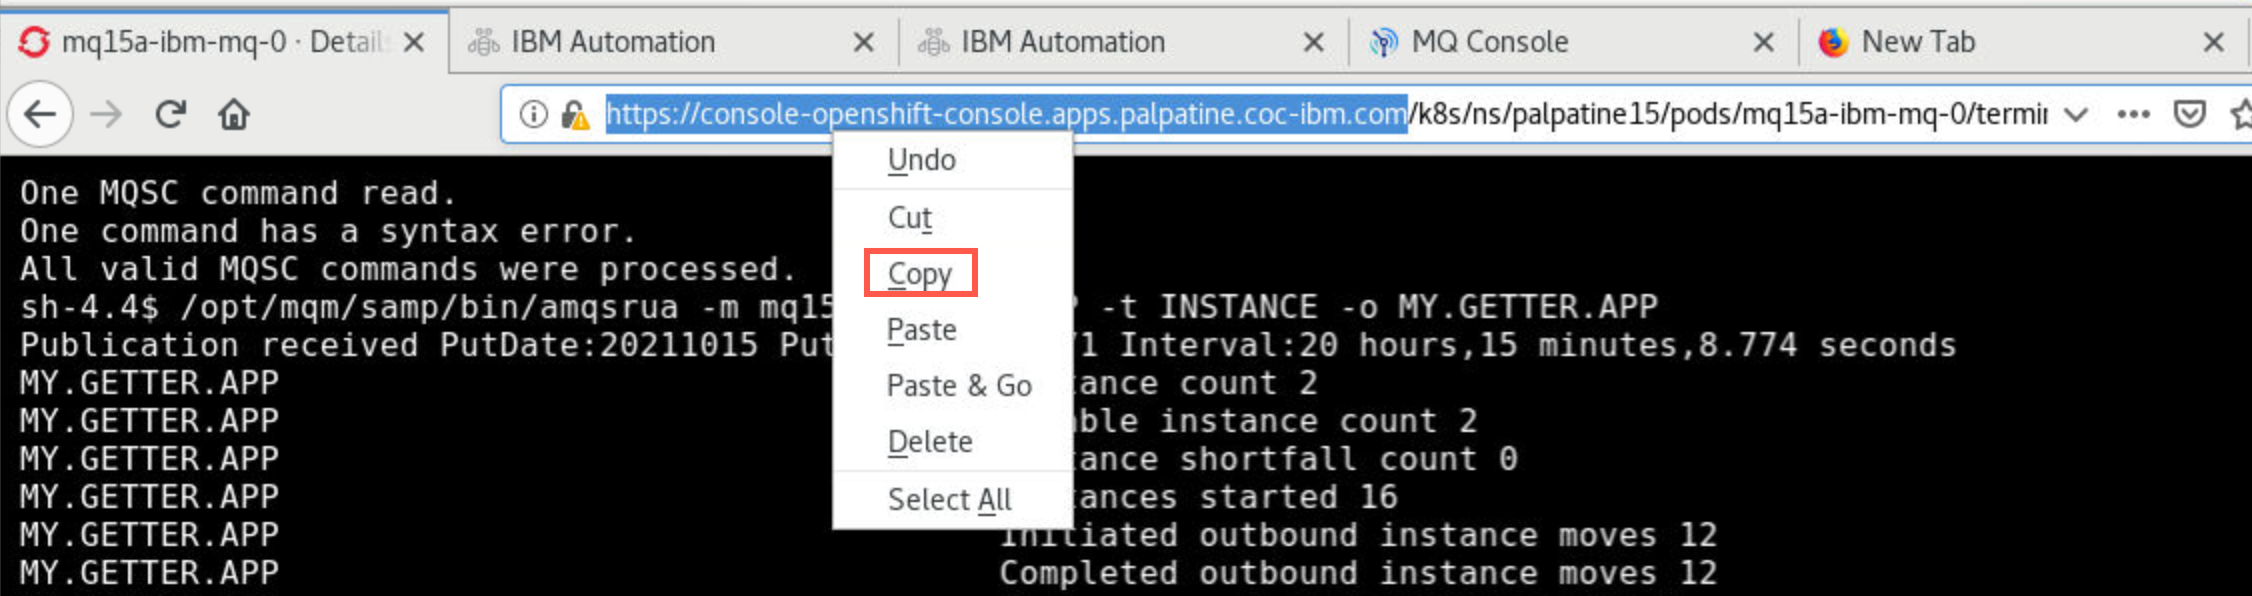
Copy the base URL of the Open Shift Console.
-
Open a new browser tab and paste the copied URL in the address bar. Change to your project if not already there.

-
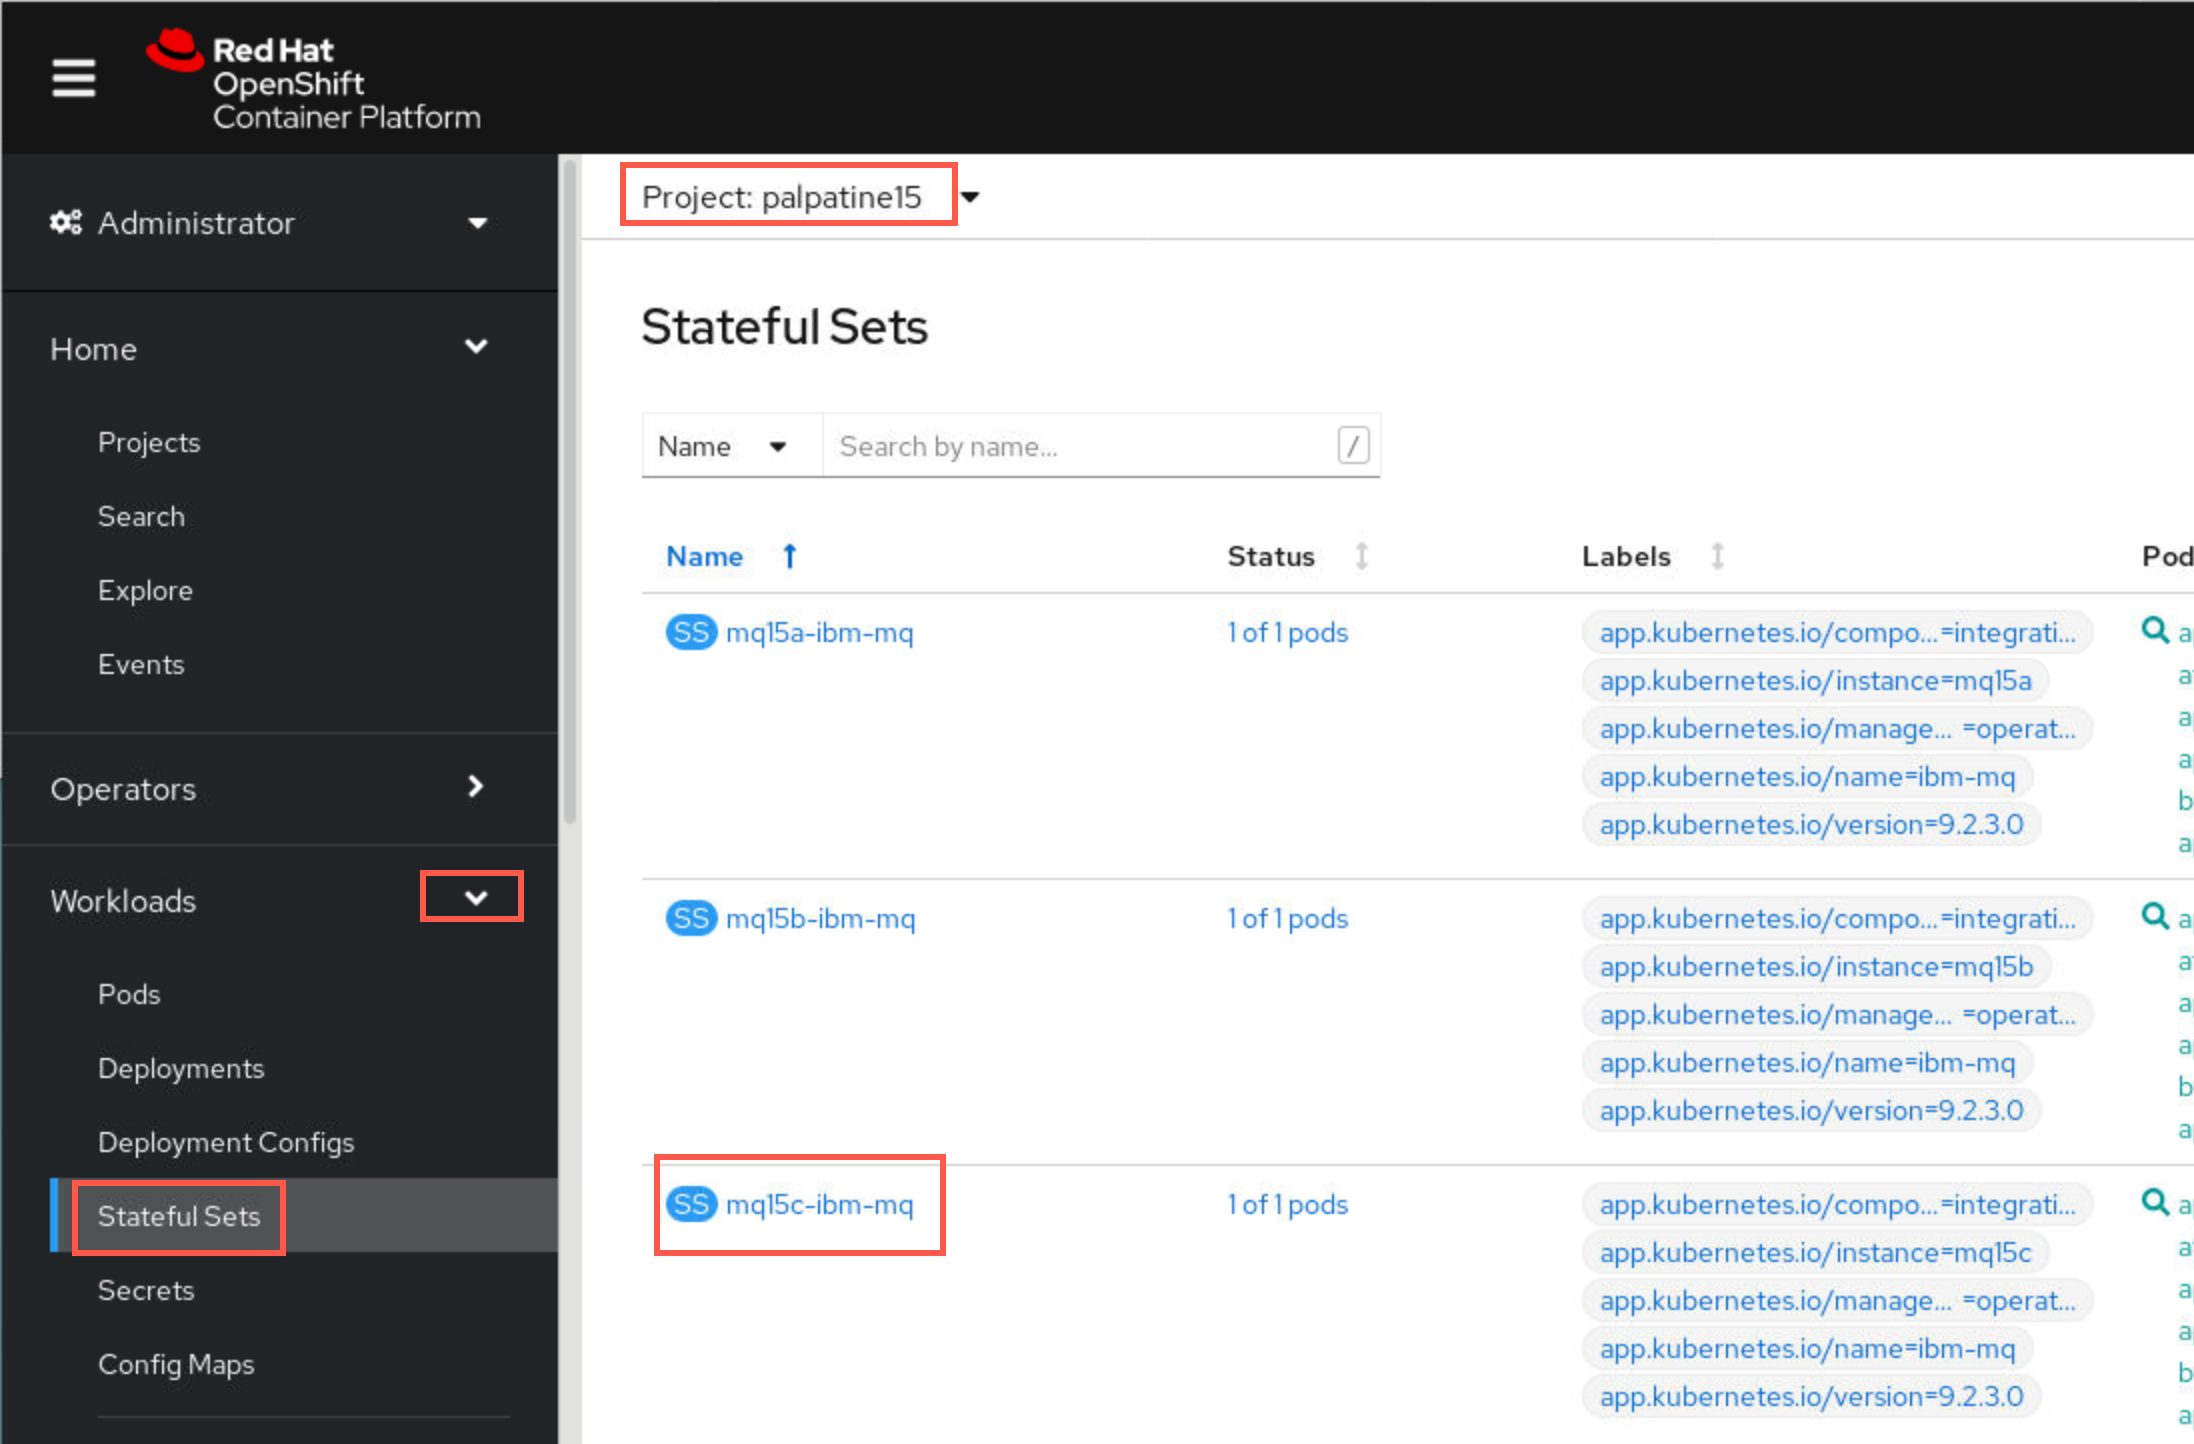
In this browser tab, expand Workloads, select Stateful Sets, then click the hyperlink for mqxxc-ibm-mq.
-
As you did previously, stop mqxxc by editing the YAML changing spec > replcas to zero and Click Save.
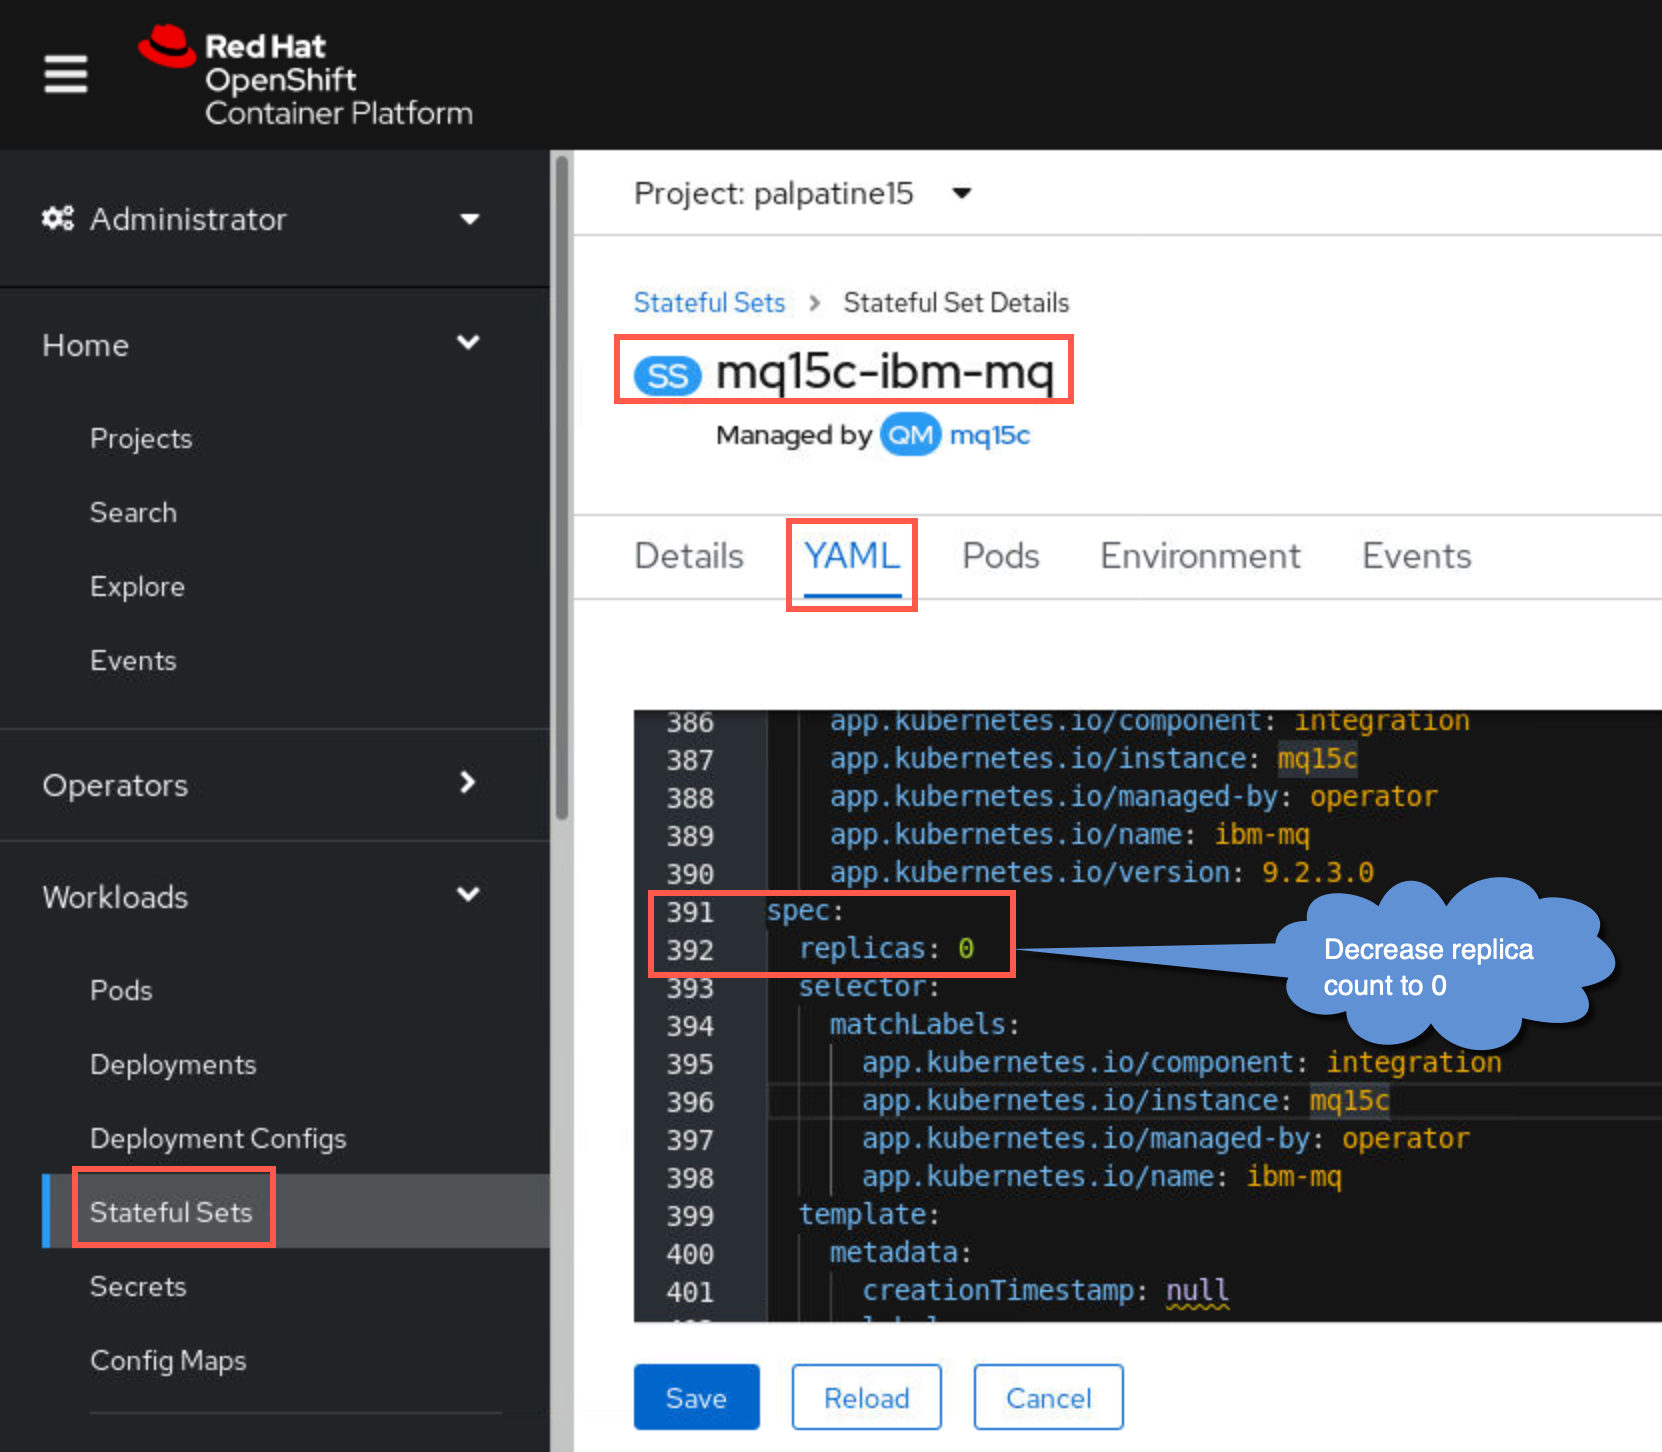
Click Save on the Managed resource pop-up.
Tip:
Don’t forget that you can use the Details chart to decrease replica count to zero.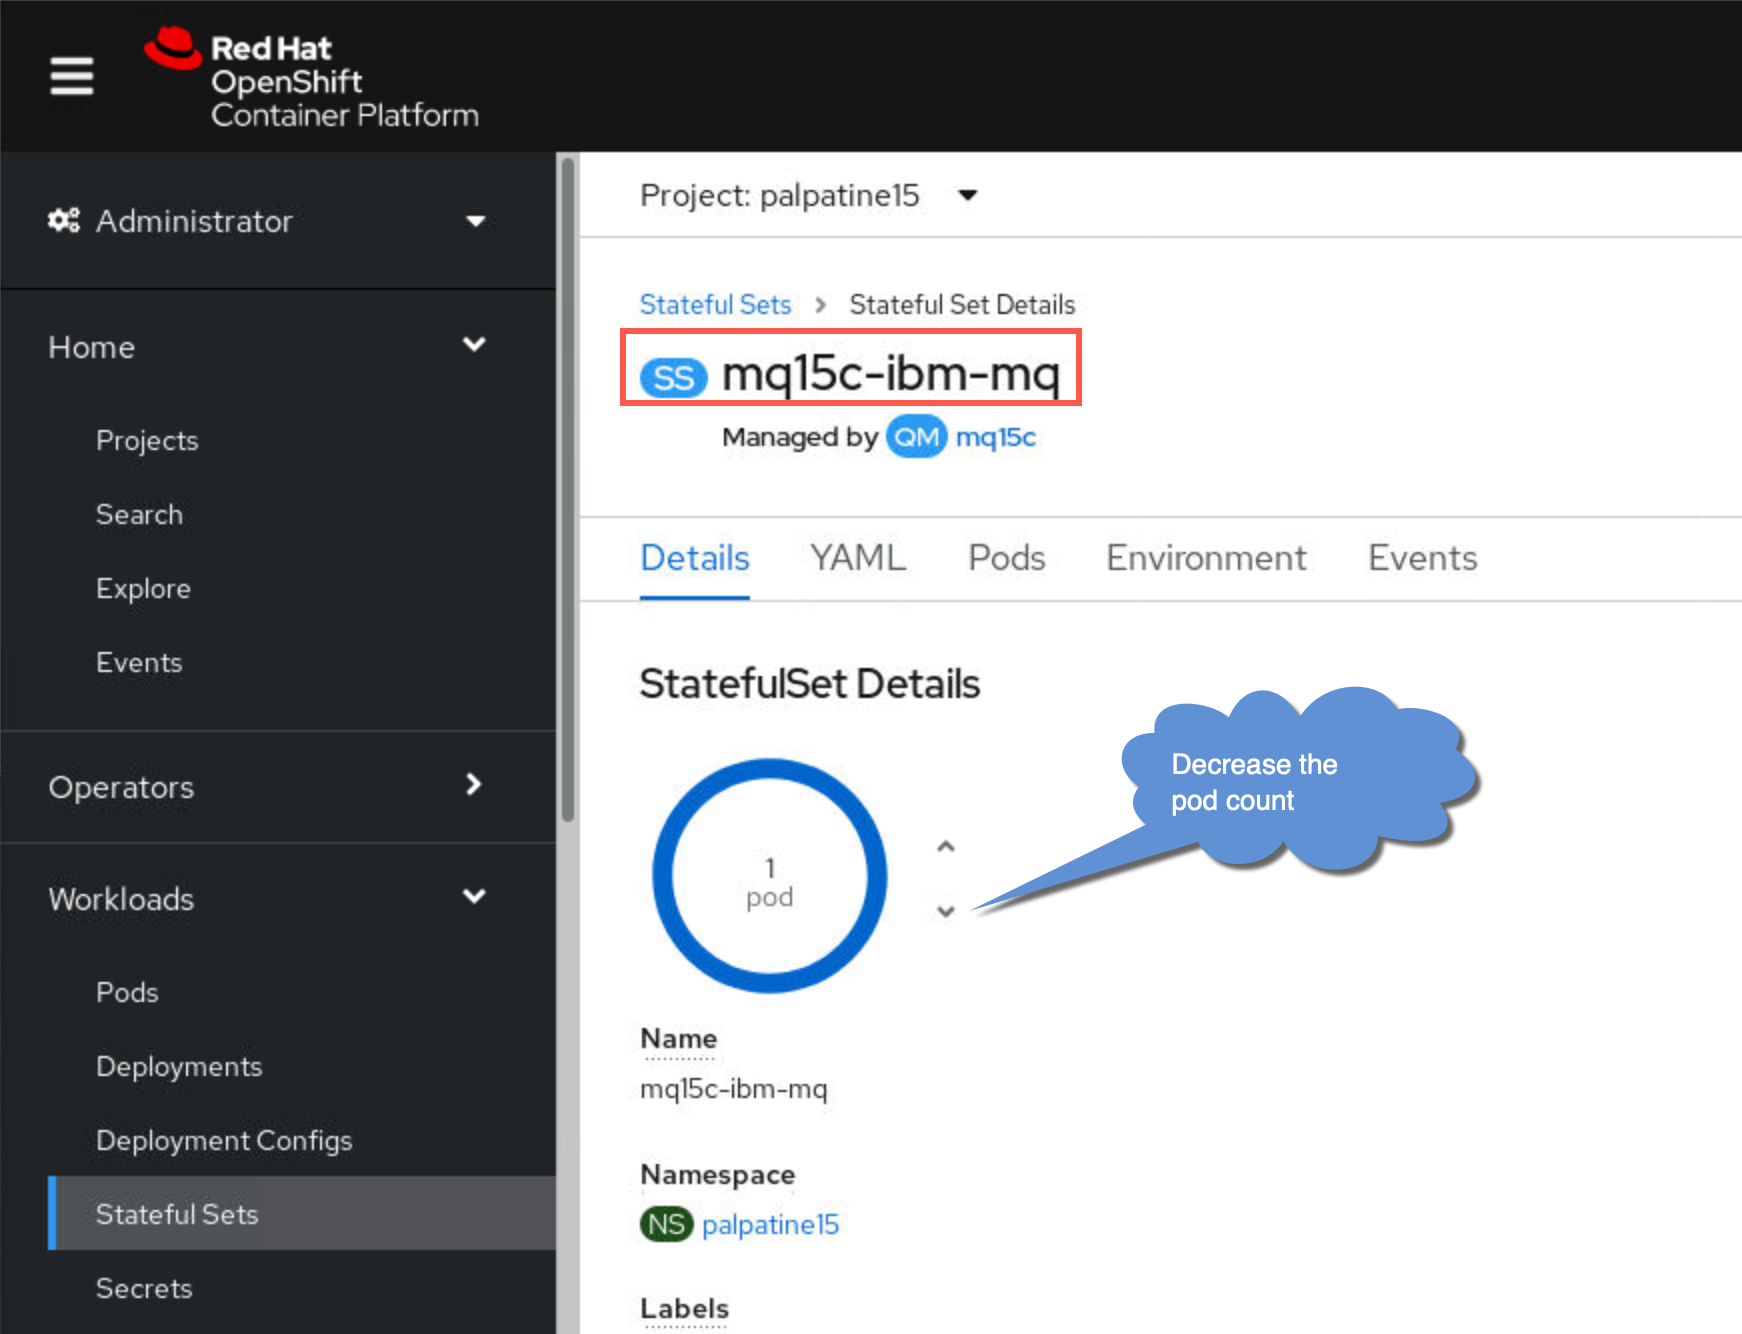
-
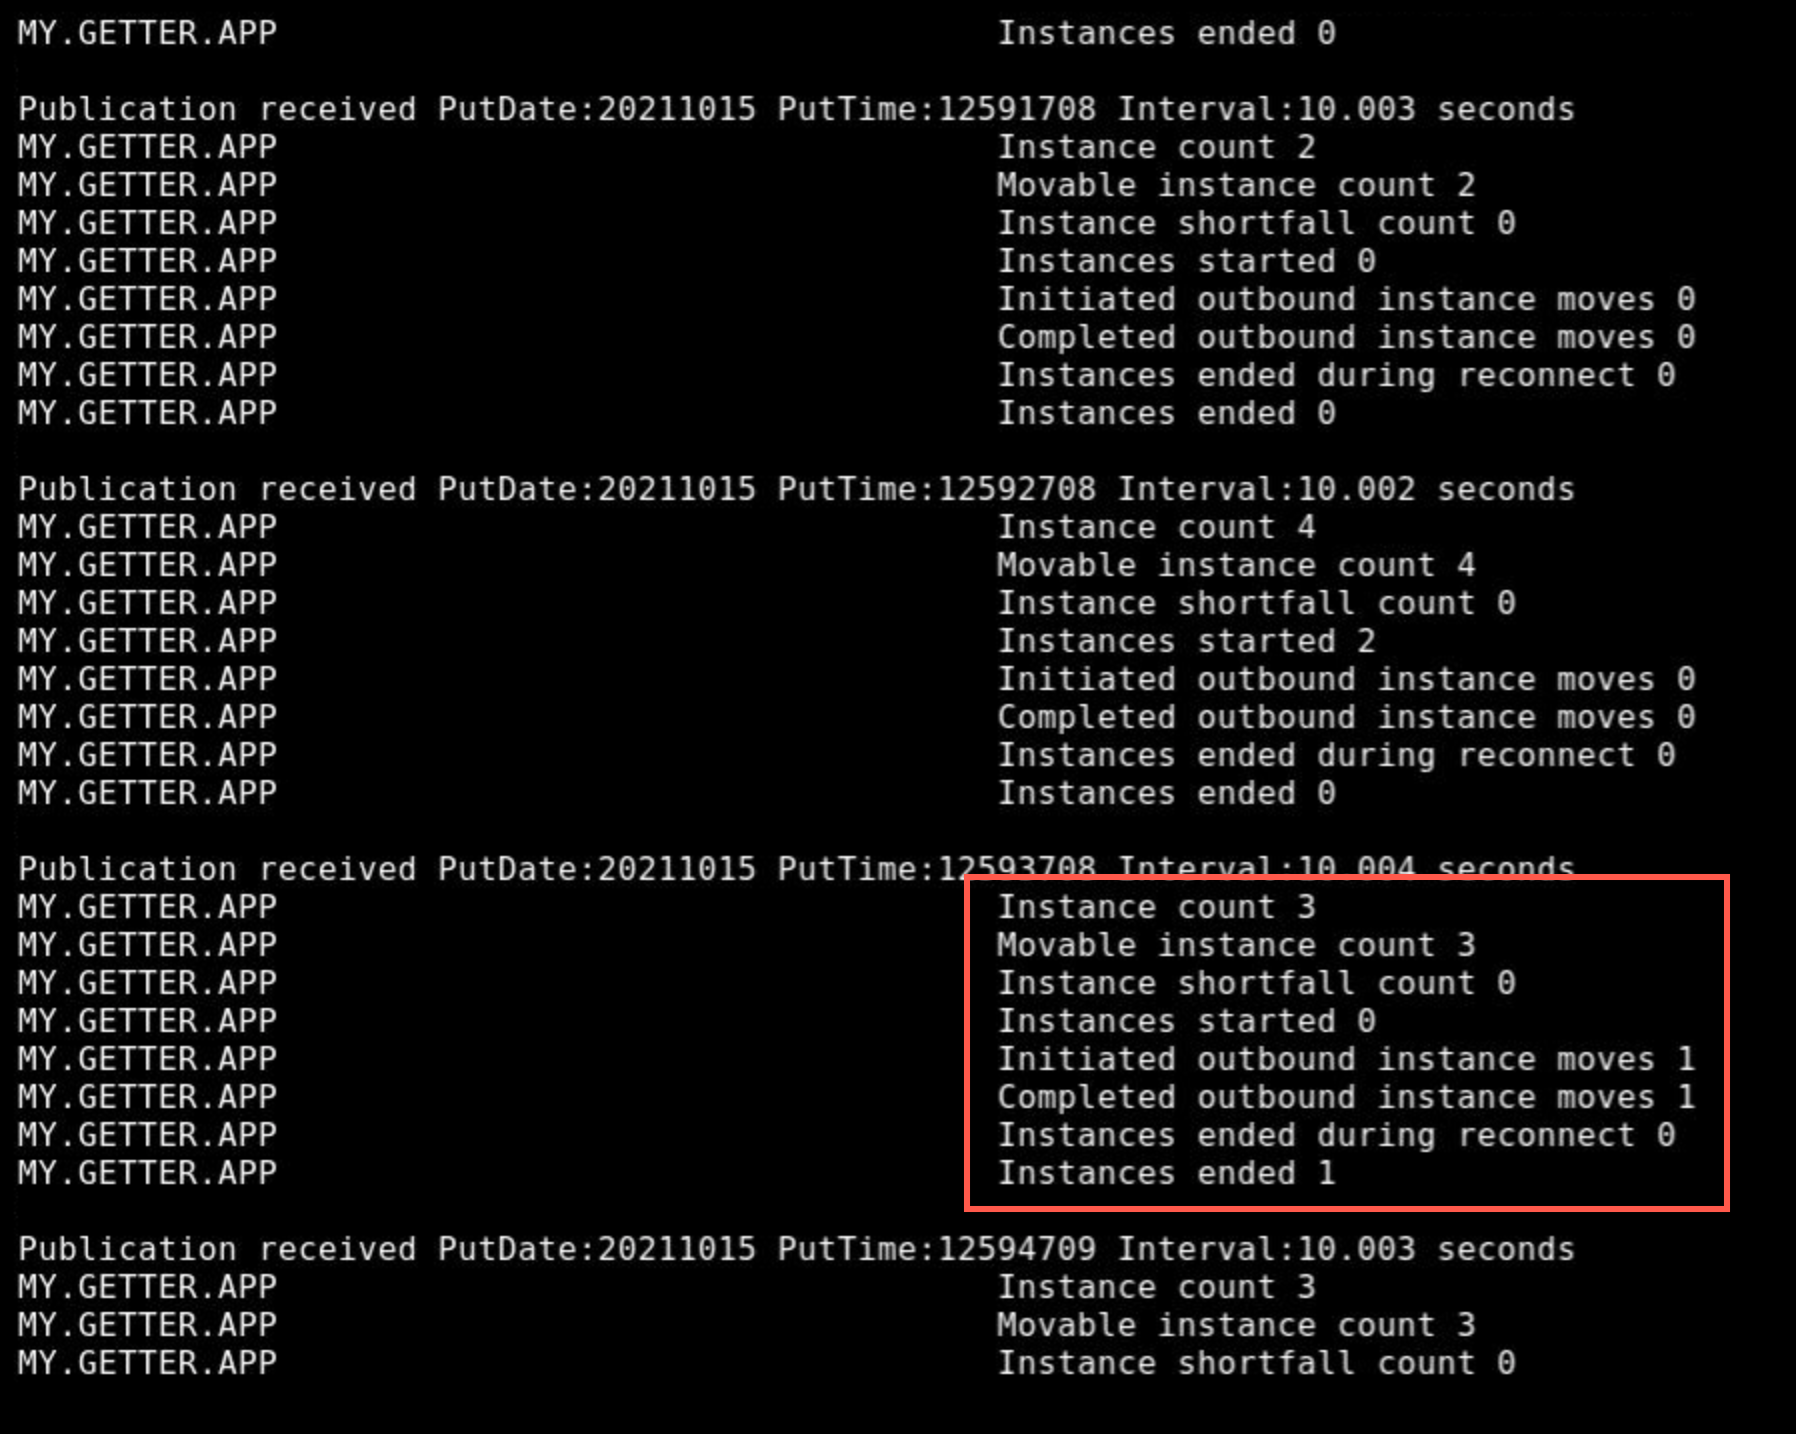
Refer back to the browser tab where you are running the amqsrua session. When the next update is shown (you may need to scroll to bottom), the following should have changed:
Instance Count & Movable Instance Count
there are now 3 instances of the application running on this queue manager;
Initiated & Completed Outbound Instance Moves, Instances ended
temporarily equal to 1 during the first interval as an instance is moved from mqxxc to this queue manager.
-
In the other console, restart mqxxc by increasing the replica count to 1. Use your preferred method either editing the YAML changing spec > replicas back to one and clicking Save or simply use the Details chart and click the up arrow.
-
Again, refer back to the amqsrua session. When the next update is shown, the stats will have changed again. There are now 2 instances running on this queue manager, one having been moved (back) to mqxxc. As this happens, the numbers of moved and ended instances are again temporarily equal to 1.
-
Stop the amqsrua session when you are ready, using ctrl-C.
-
Stop the putting application with ctrl-C. Leave the terminal window open as you will need it in the next secion.
Using CCDT Queue Manager Groups
So far we have connected our getting applications to mqxxa directly, and relied on the Uniform Cluster to rebalance them across the other queue managers over a period of time. There are 2 disadvantages to connecting in this way:
- When the applications initially connect, they all start out connected to mqxxa and there is a delay in the Uniform Cluster balancing them across the other queue managers
- If mqxxa is stopped unexpectedly or for maintenance, any applications connected to it will try to reconnect to mqxxa and fail. They will not attempt to connect to the other queue managers in the cluster. This will also be true if applications connected to other queue managers try to reconnect after an outage.
In this section, we shall see that by using Queue Manager Groups within our CCDT file we can decouple application instances from a particular queue manager and take advantage of the built-in load balancing capabilities available with CCDTs.
For a fuller description of the issues highlighted here, see step 5 of the following article:
Stop queue manager - application refers to queue manager directly
Now that you know how to stop and start queue managers in CP4i, you will not receive the detailed instructions as previously.
-
Stop mqxxa by scaling the replicas in its Stateful Set to zero.
-
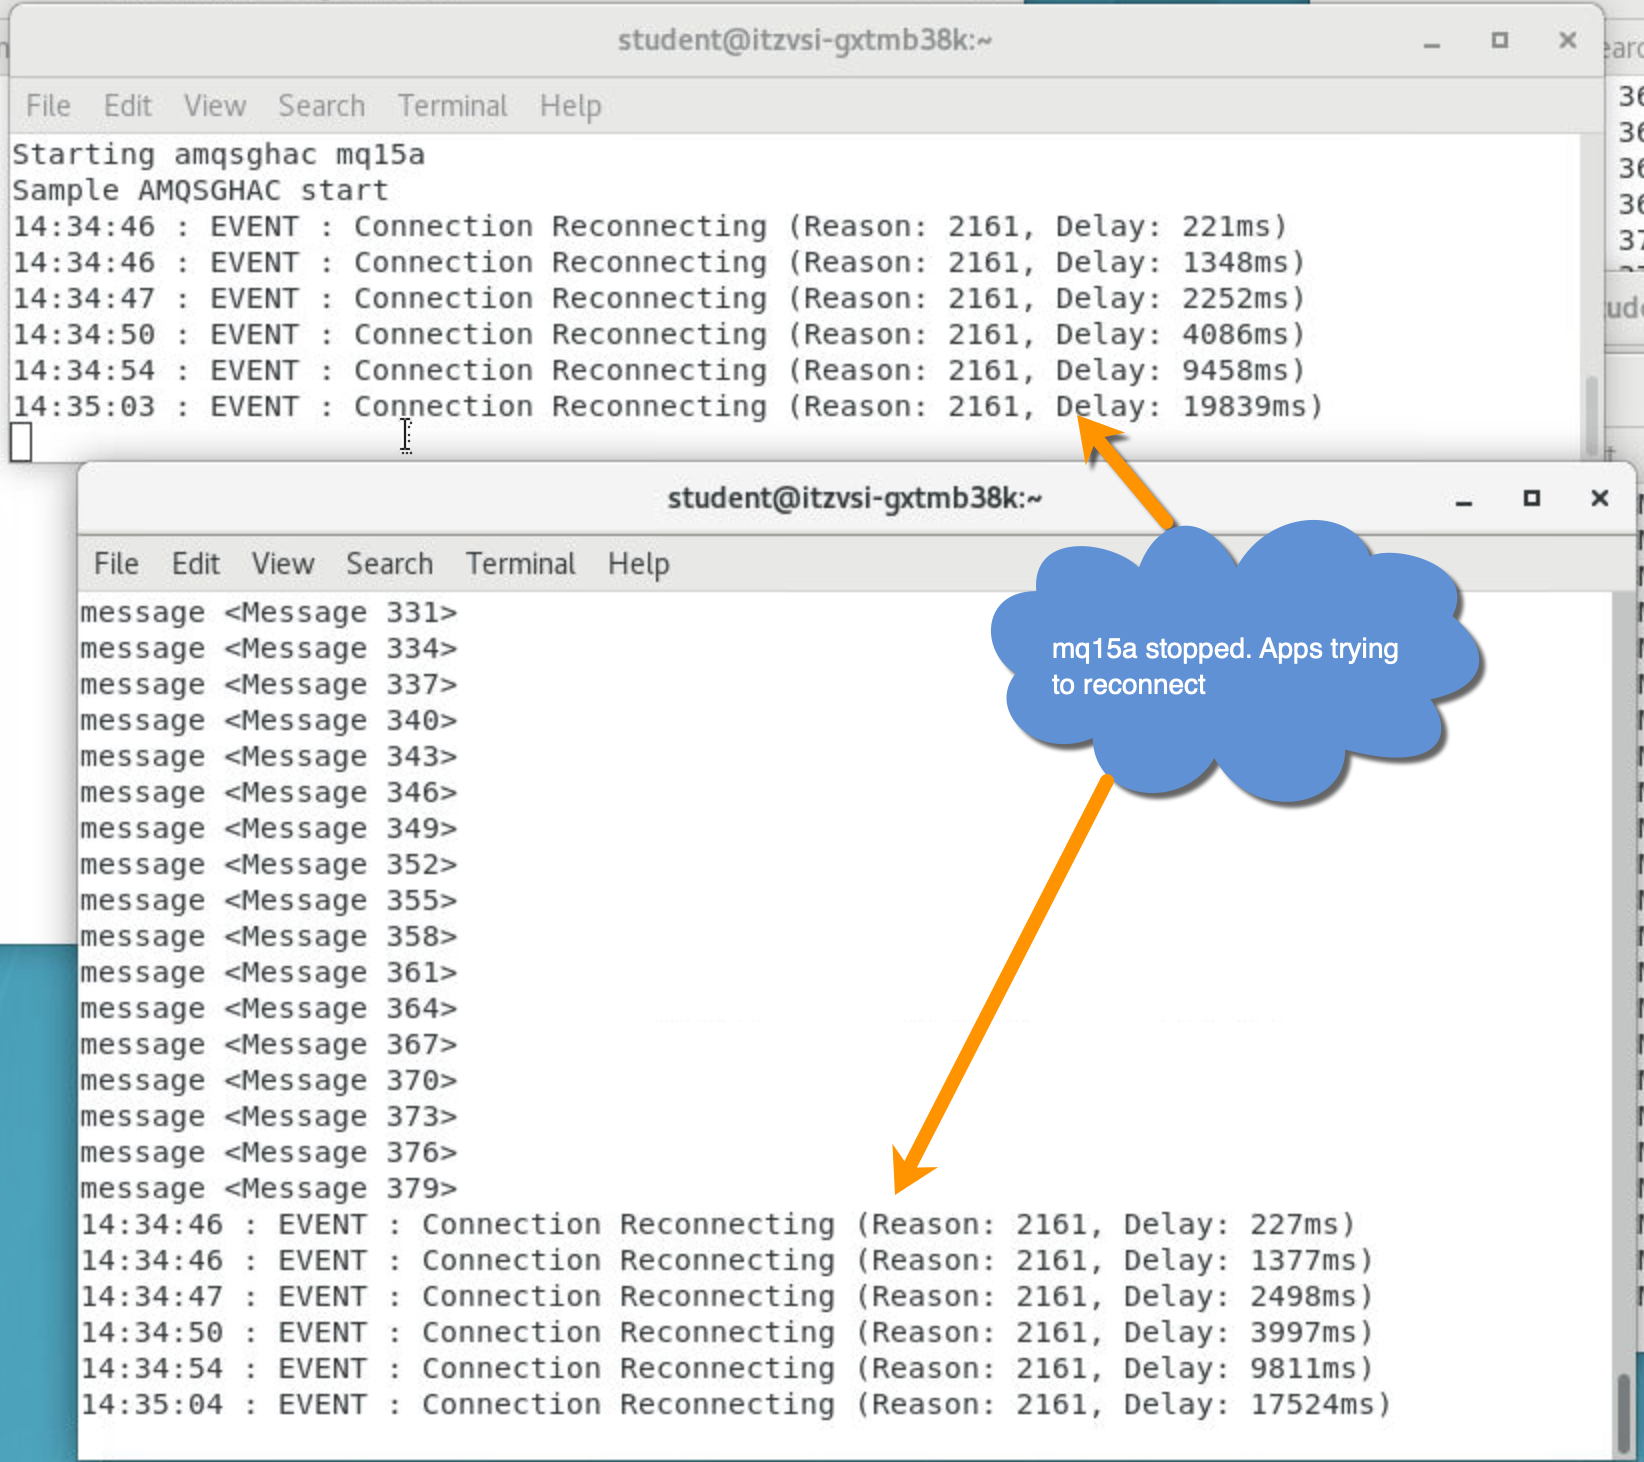
This time the getting application instances connected to mqxxa will continually try to reconnect to the stopped queue manager:
-
Now run the following MQSC command on any active queue manager in the cluster:
DISPLAY APSTATUS(MY.GETTER.APP) TYPE(APPL)After a while, there should be fewer than the 6 application instances that were originally present. You may need to run the command more than once until the rebalancing occurs.
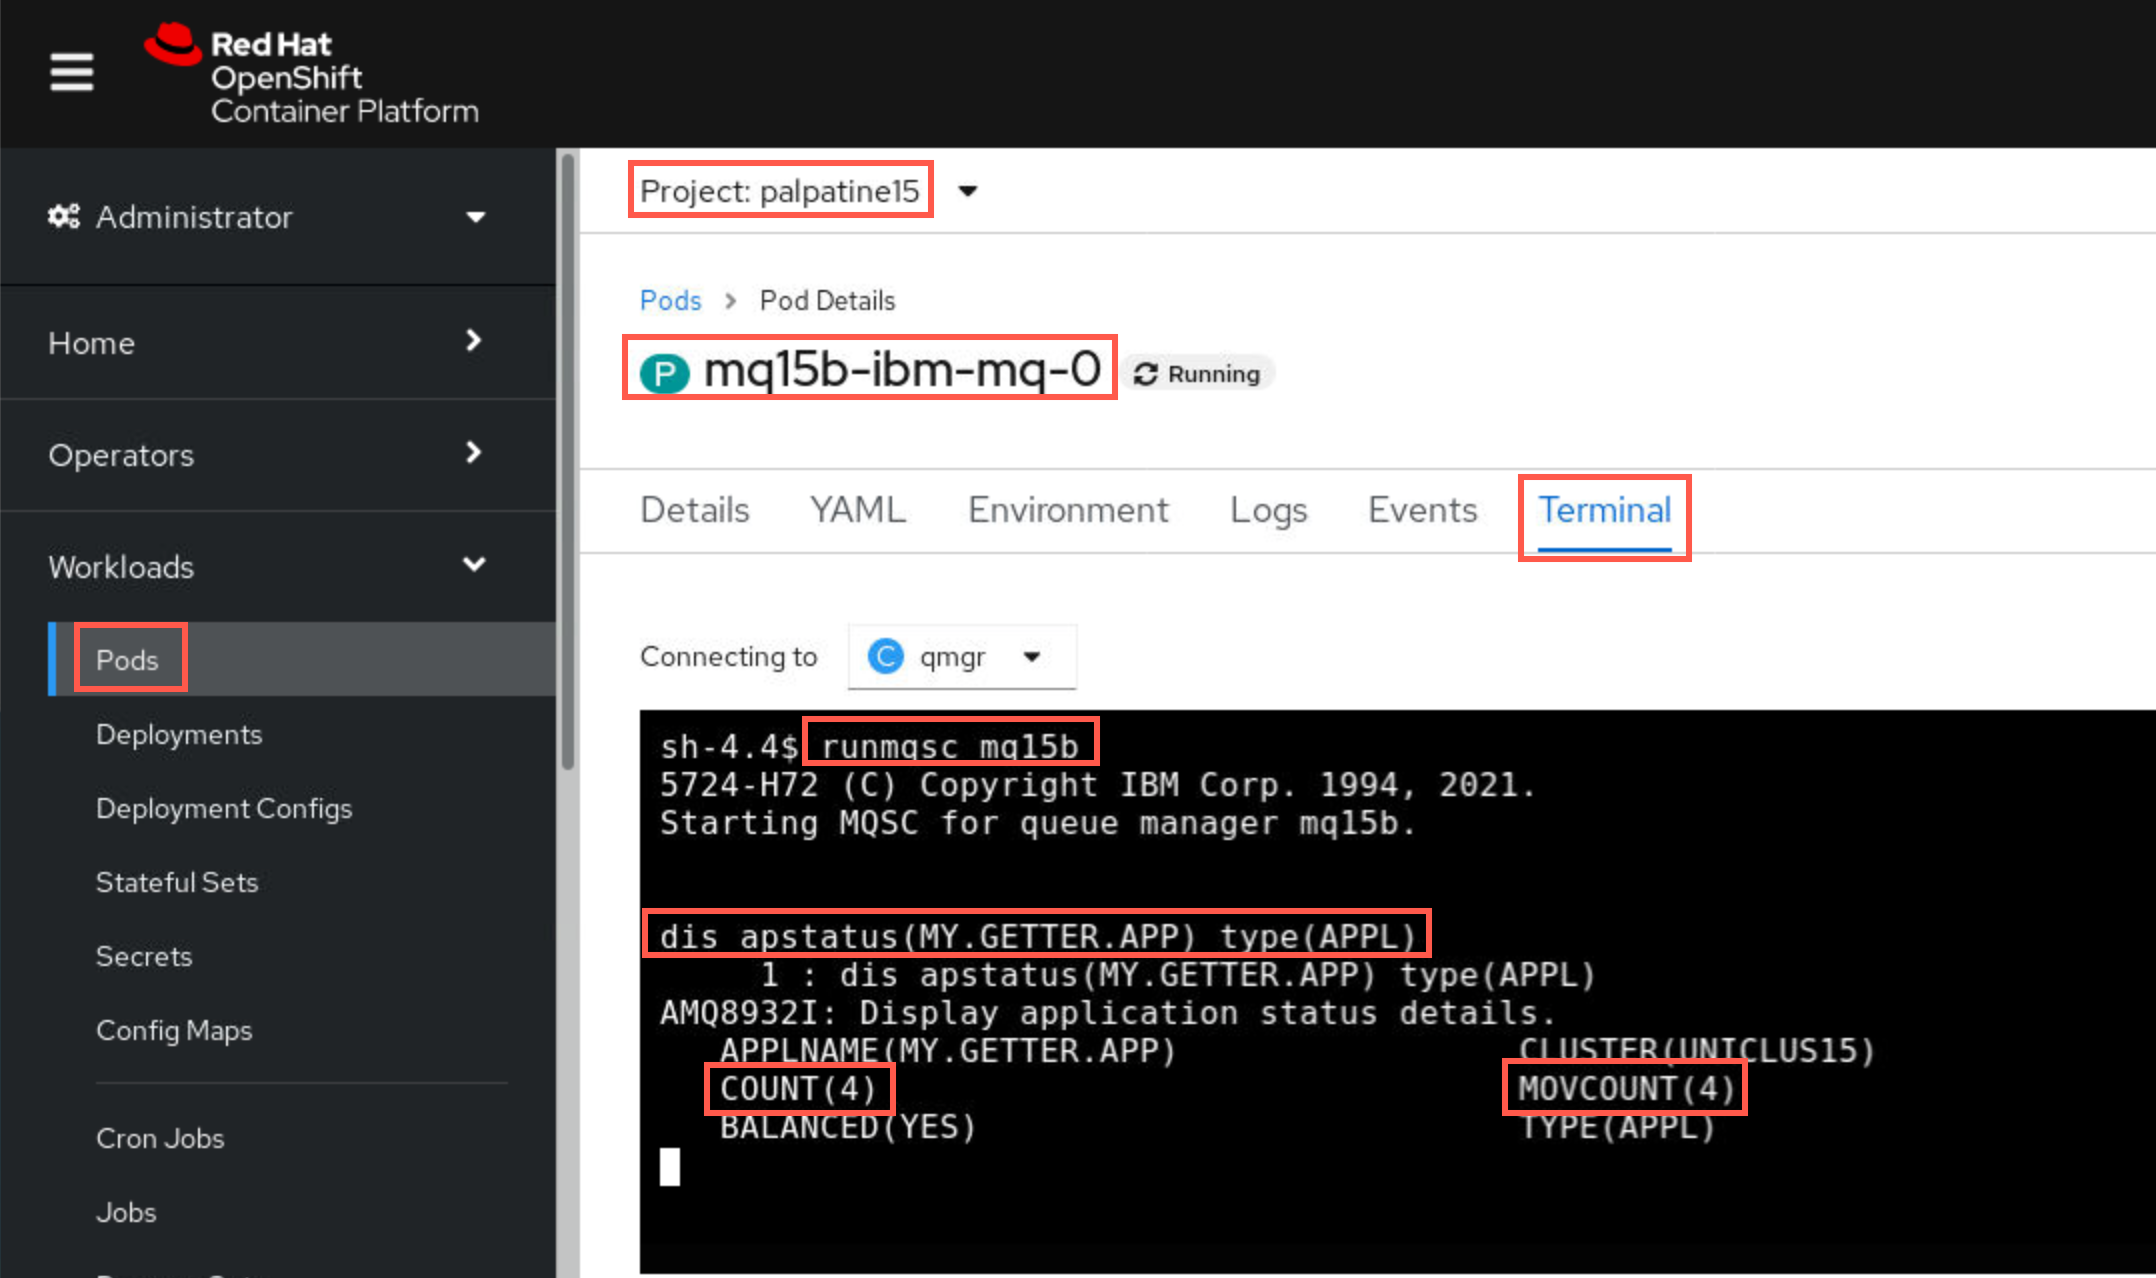
If it still shows COUNT(6) then run the command again with type(QMGR).
DISPLAY APSTATUS(MY.GETTER.APP) TYPE(QMGR)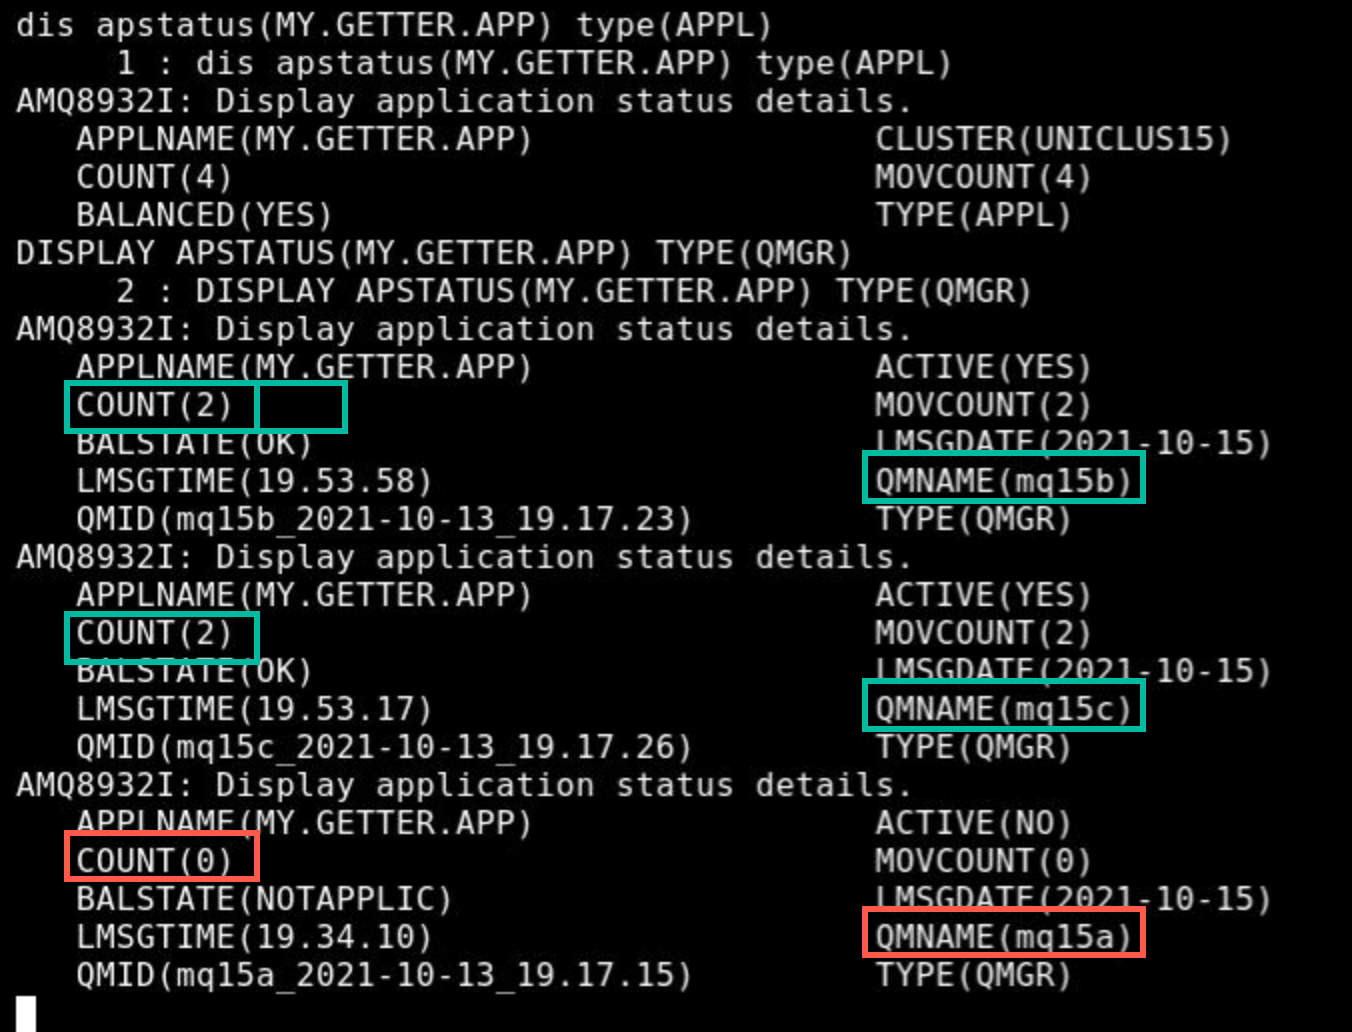
You can see that there are six, two each on mq00b and mq00c, but none on mq00a.
-
Now restart mqxxa by scaling the replicas back up to one.
Stop queue manager – application refers to CCDT Queue Manager Group
-
In the classroom environment, an updated CCDT file has been created for you to use: /home/student/MQonCP4I/unicluster/test/ccdt5.json.
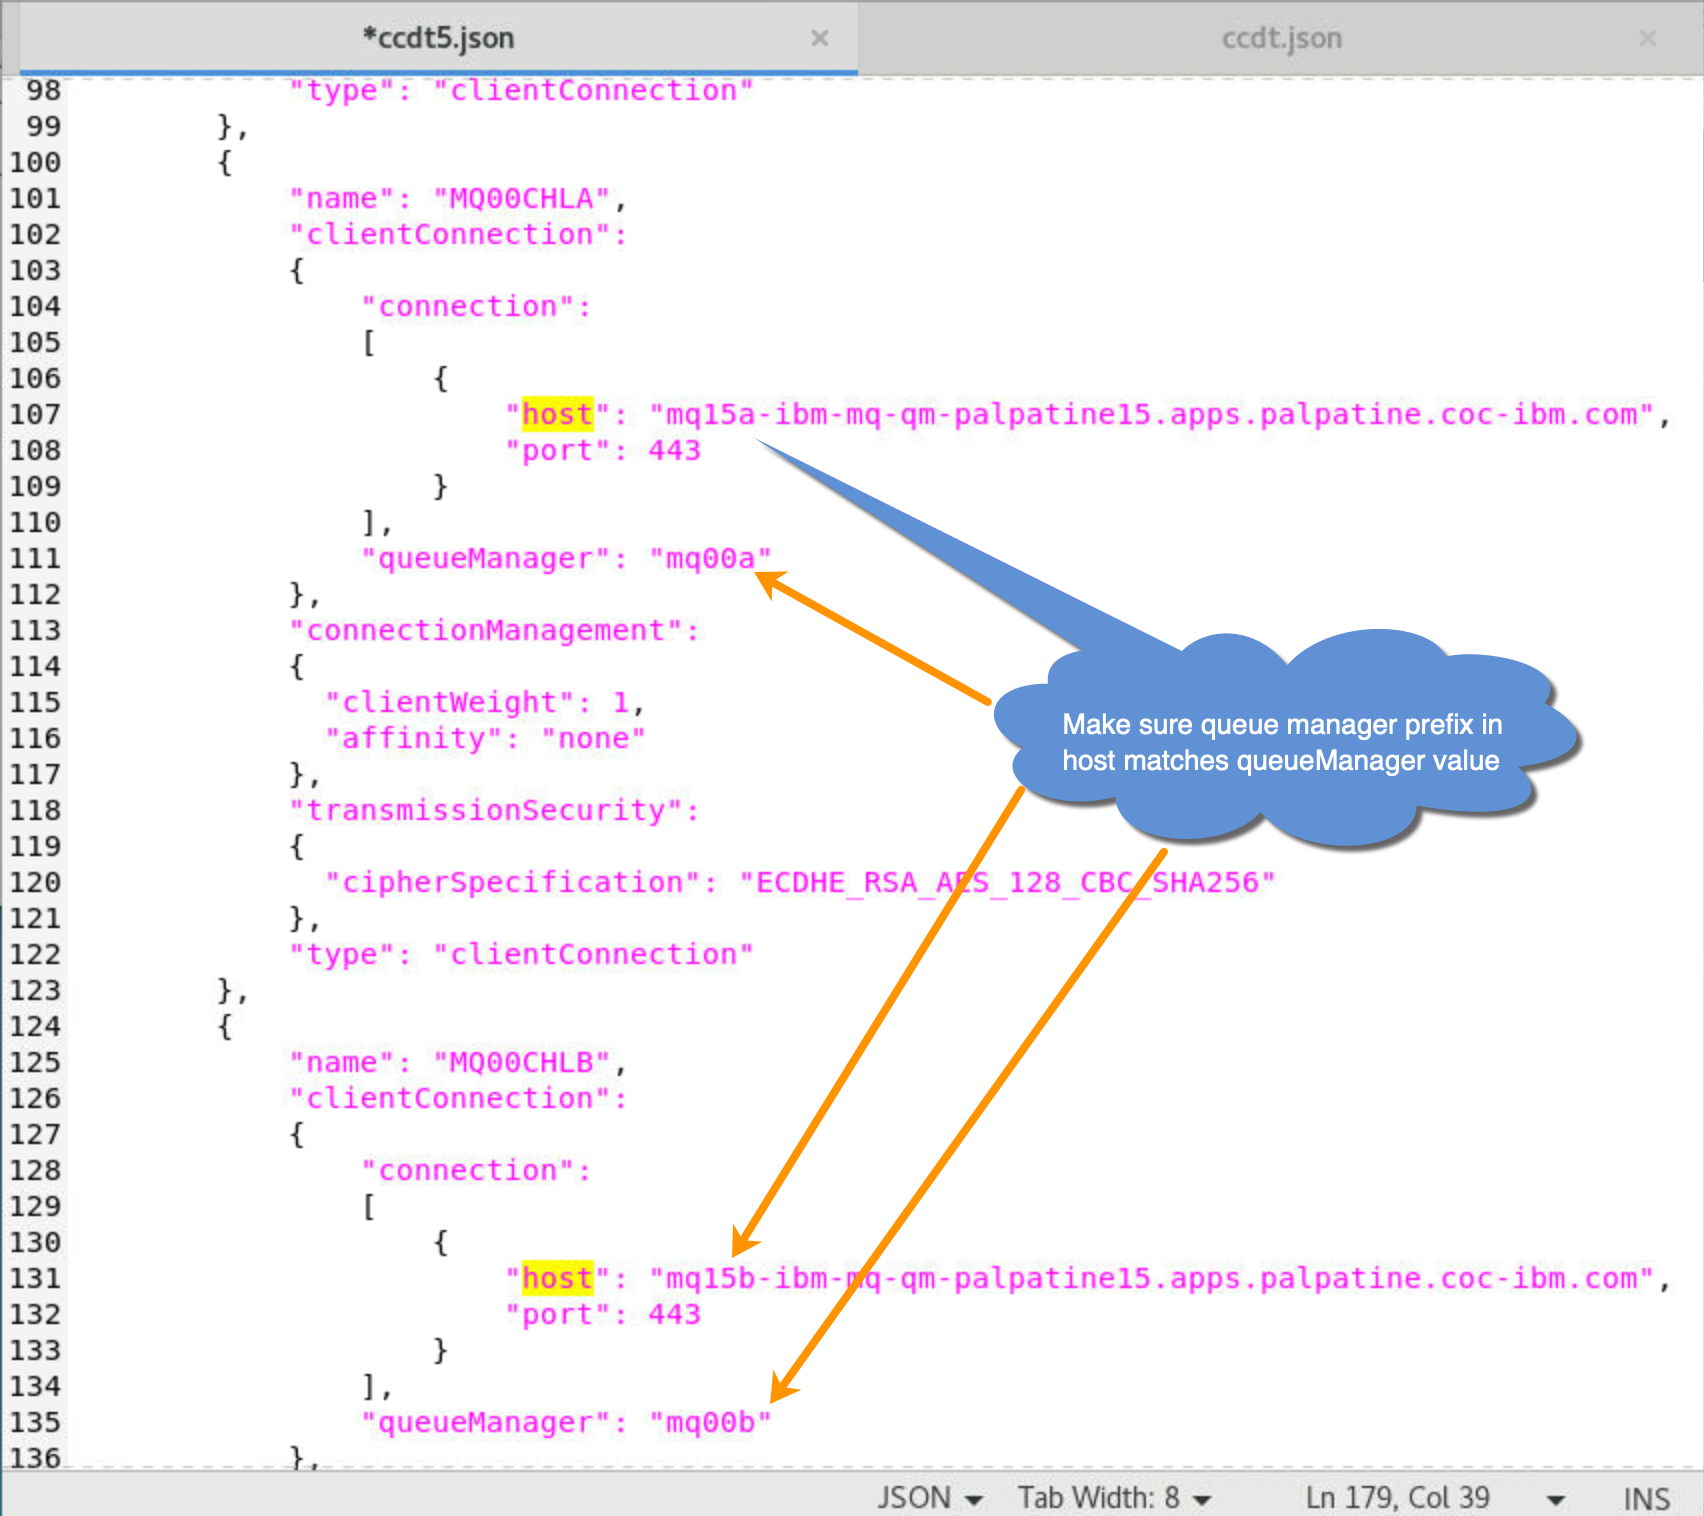
Open this file in the editor. Change the host values for each queue manager as you did in the ccdt.json file. You can copy the host parameter from ccdt.json, then paste it into the host fields in ccdt5.json. Make sure to change the queue manager prefix in the host field to match the queue manager value.
ccdt5.json has a stanza for an additional queue manager - mqxxd which will be added later in the lab. So now there are 8 hosts parameters to change. As well as containing the original set of direct references to the queue managers, it gives a queue manager group definition with a route to all queue managers using the name ANY_QM.
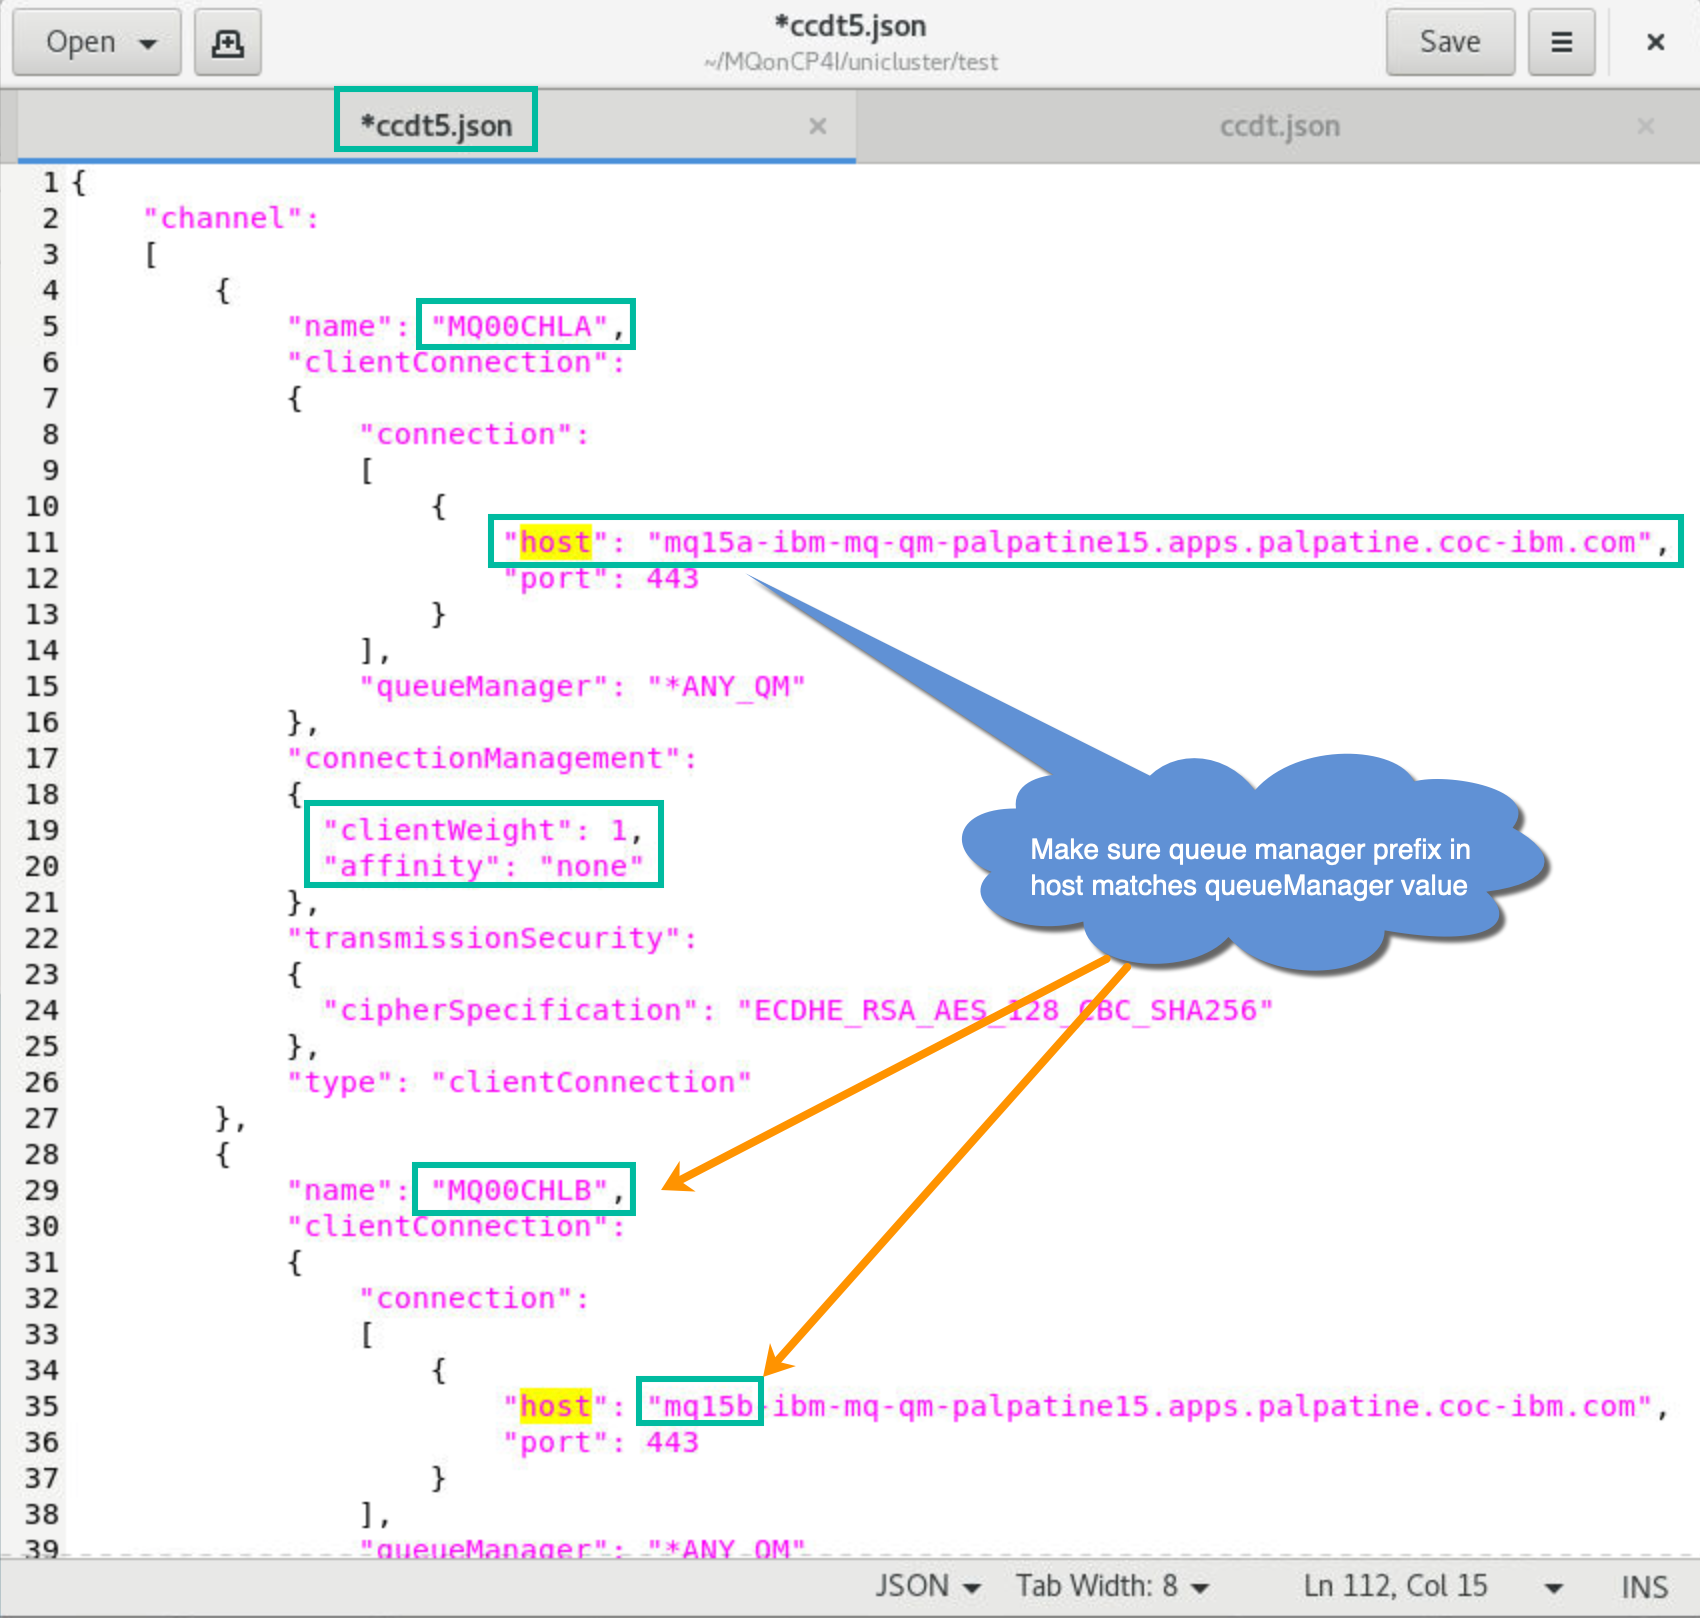 Note the two new attributes. These are defined under connectionManagement:
- clientWeight: a priority list for each client. The default value is zero. A client with a higher clientWeight will be picked over a client with a smaller value.
- affinity: setting the affinity to “none” will build up an ordered list of group connections to attempt to try in a random order, for any clients on a particular named host.
-
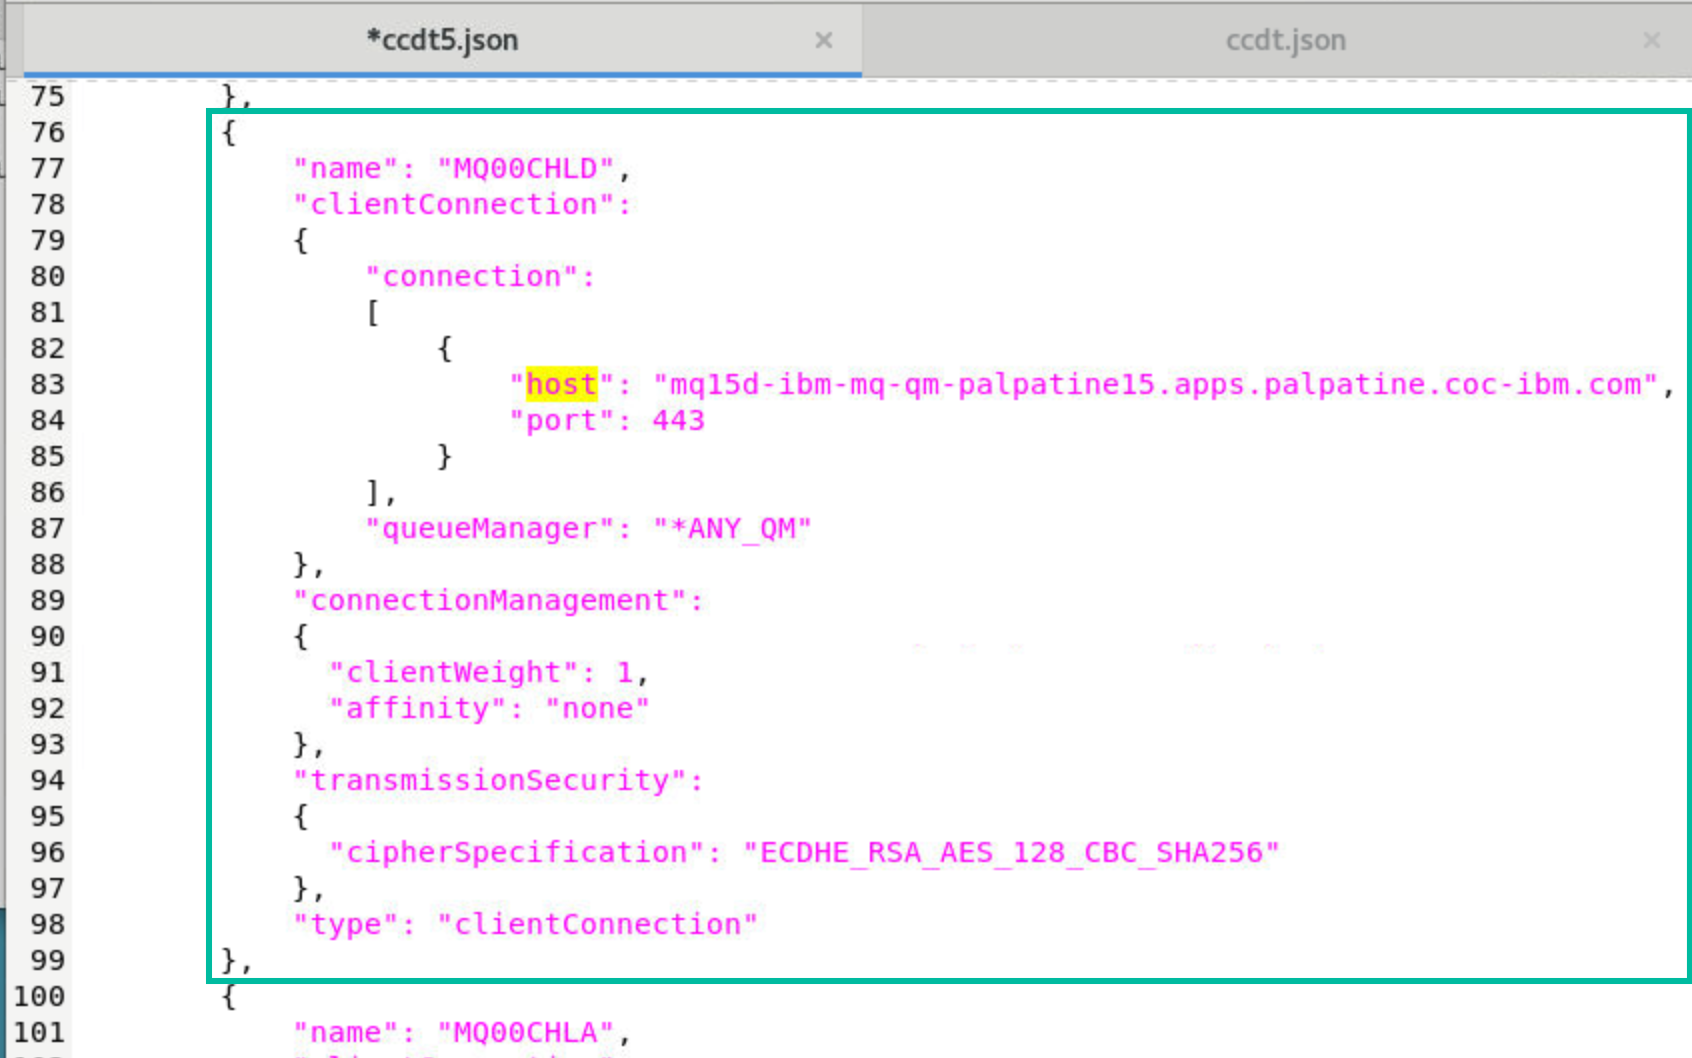
Scroll down the file to lines 76 - 99. This is the additional stanza for queue manager mqxxd with the ANY_QM group.
-
Lines 100 - 197 are the original values from ccdt.json plus the fourth queue manager - mqxxd.
Save file ccdt5.json.
-
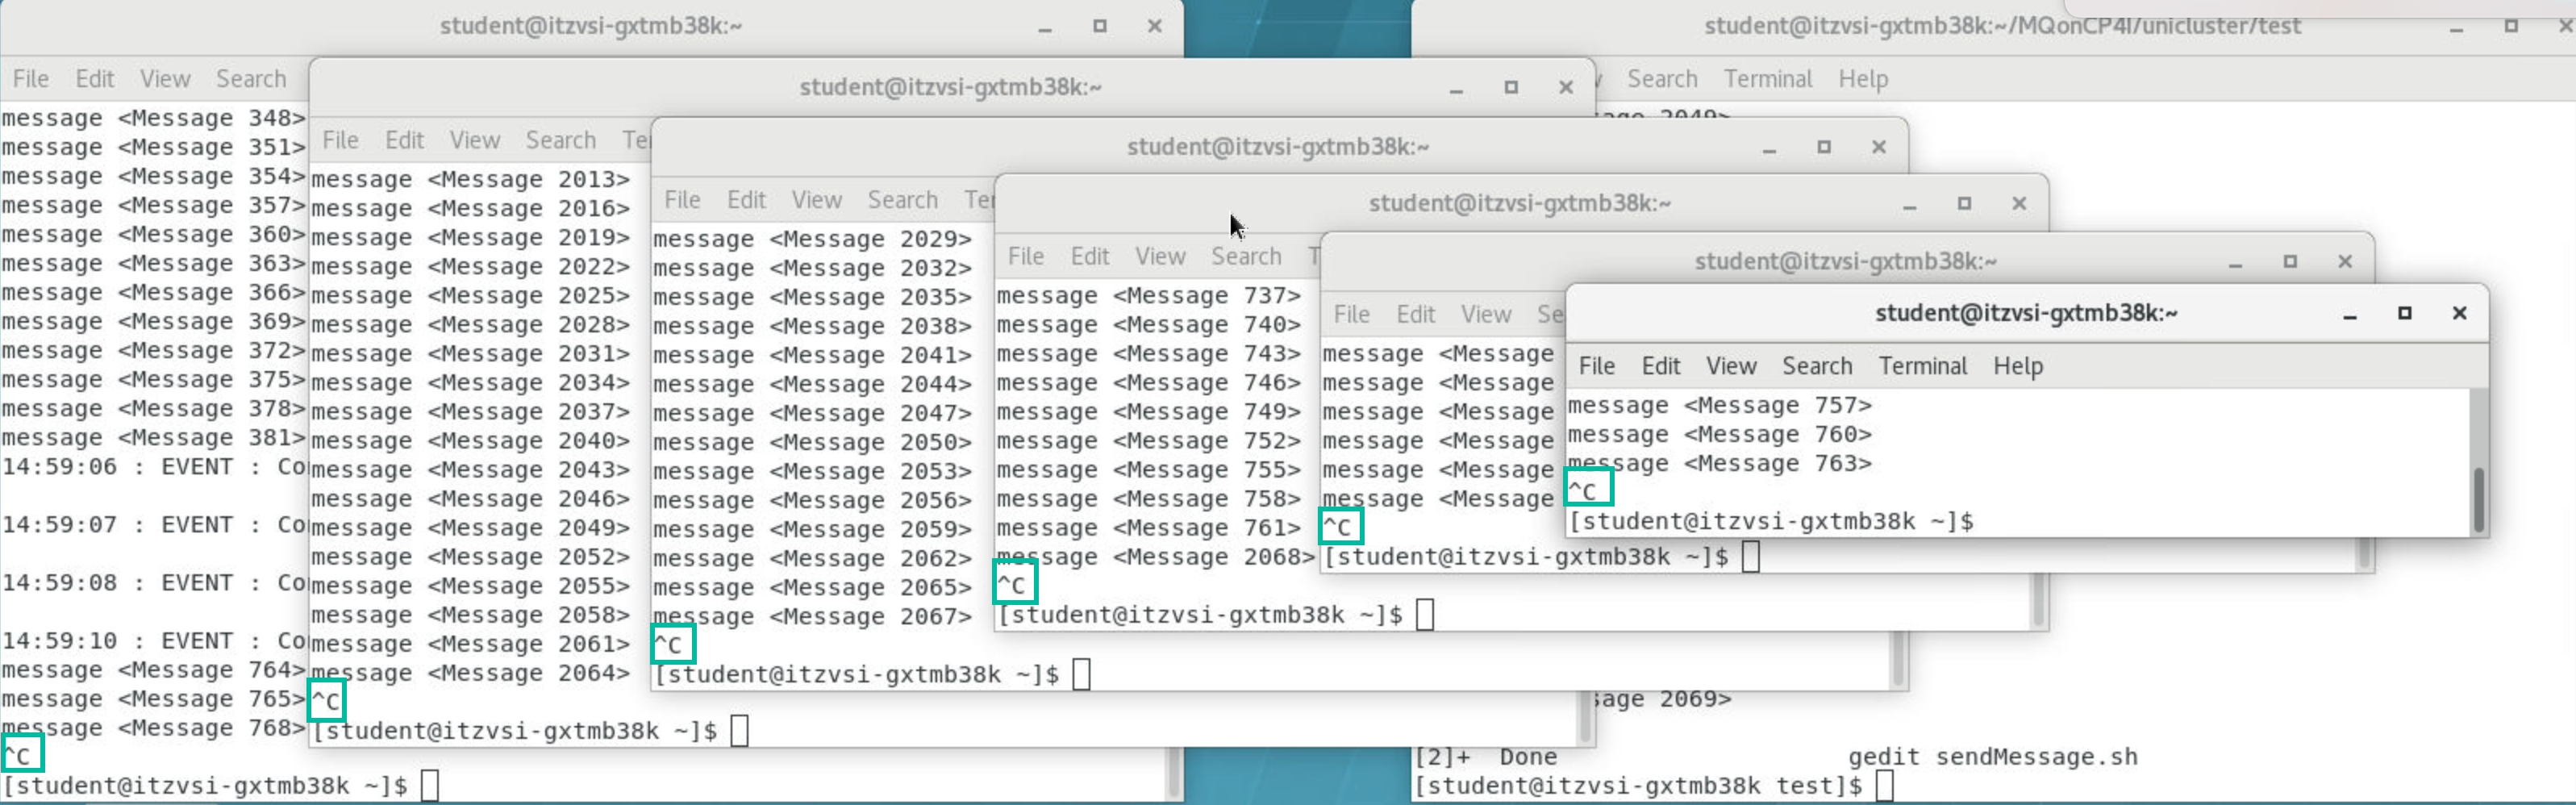
Now let’s put the updated CCDT to the test. First, stop the 6 running getting application instances that you started earlier by entering ctrl-C in each terminal. You may leave the termninal running.
-
Please note: the supplied updated CCDT5 file was originally created for a scenario with an additional queue manager called mqxxd. For completeness, we shall create that missing queue manager now.
-
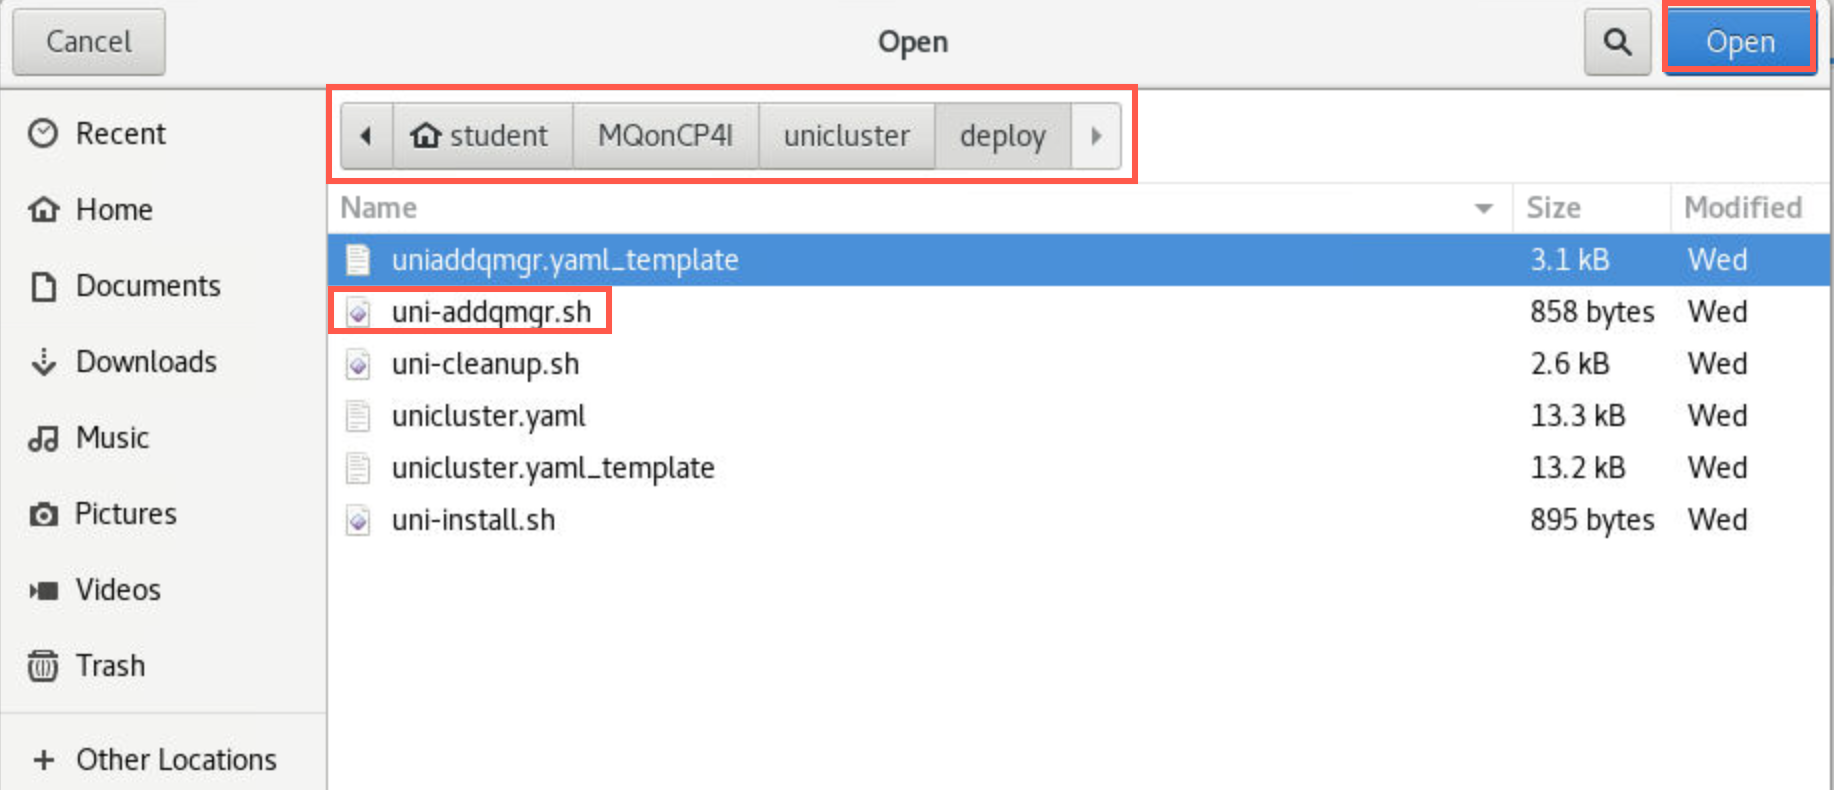
In your editor session (gedit), click Open > Other documents and navigate to /home/student/MQonCP4I/unicluster/deploy, then select uniaddqmgr.yaml_template and click Open.
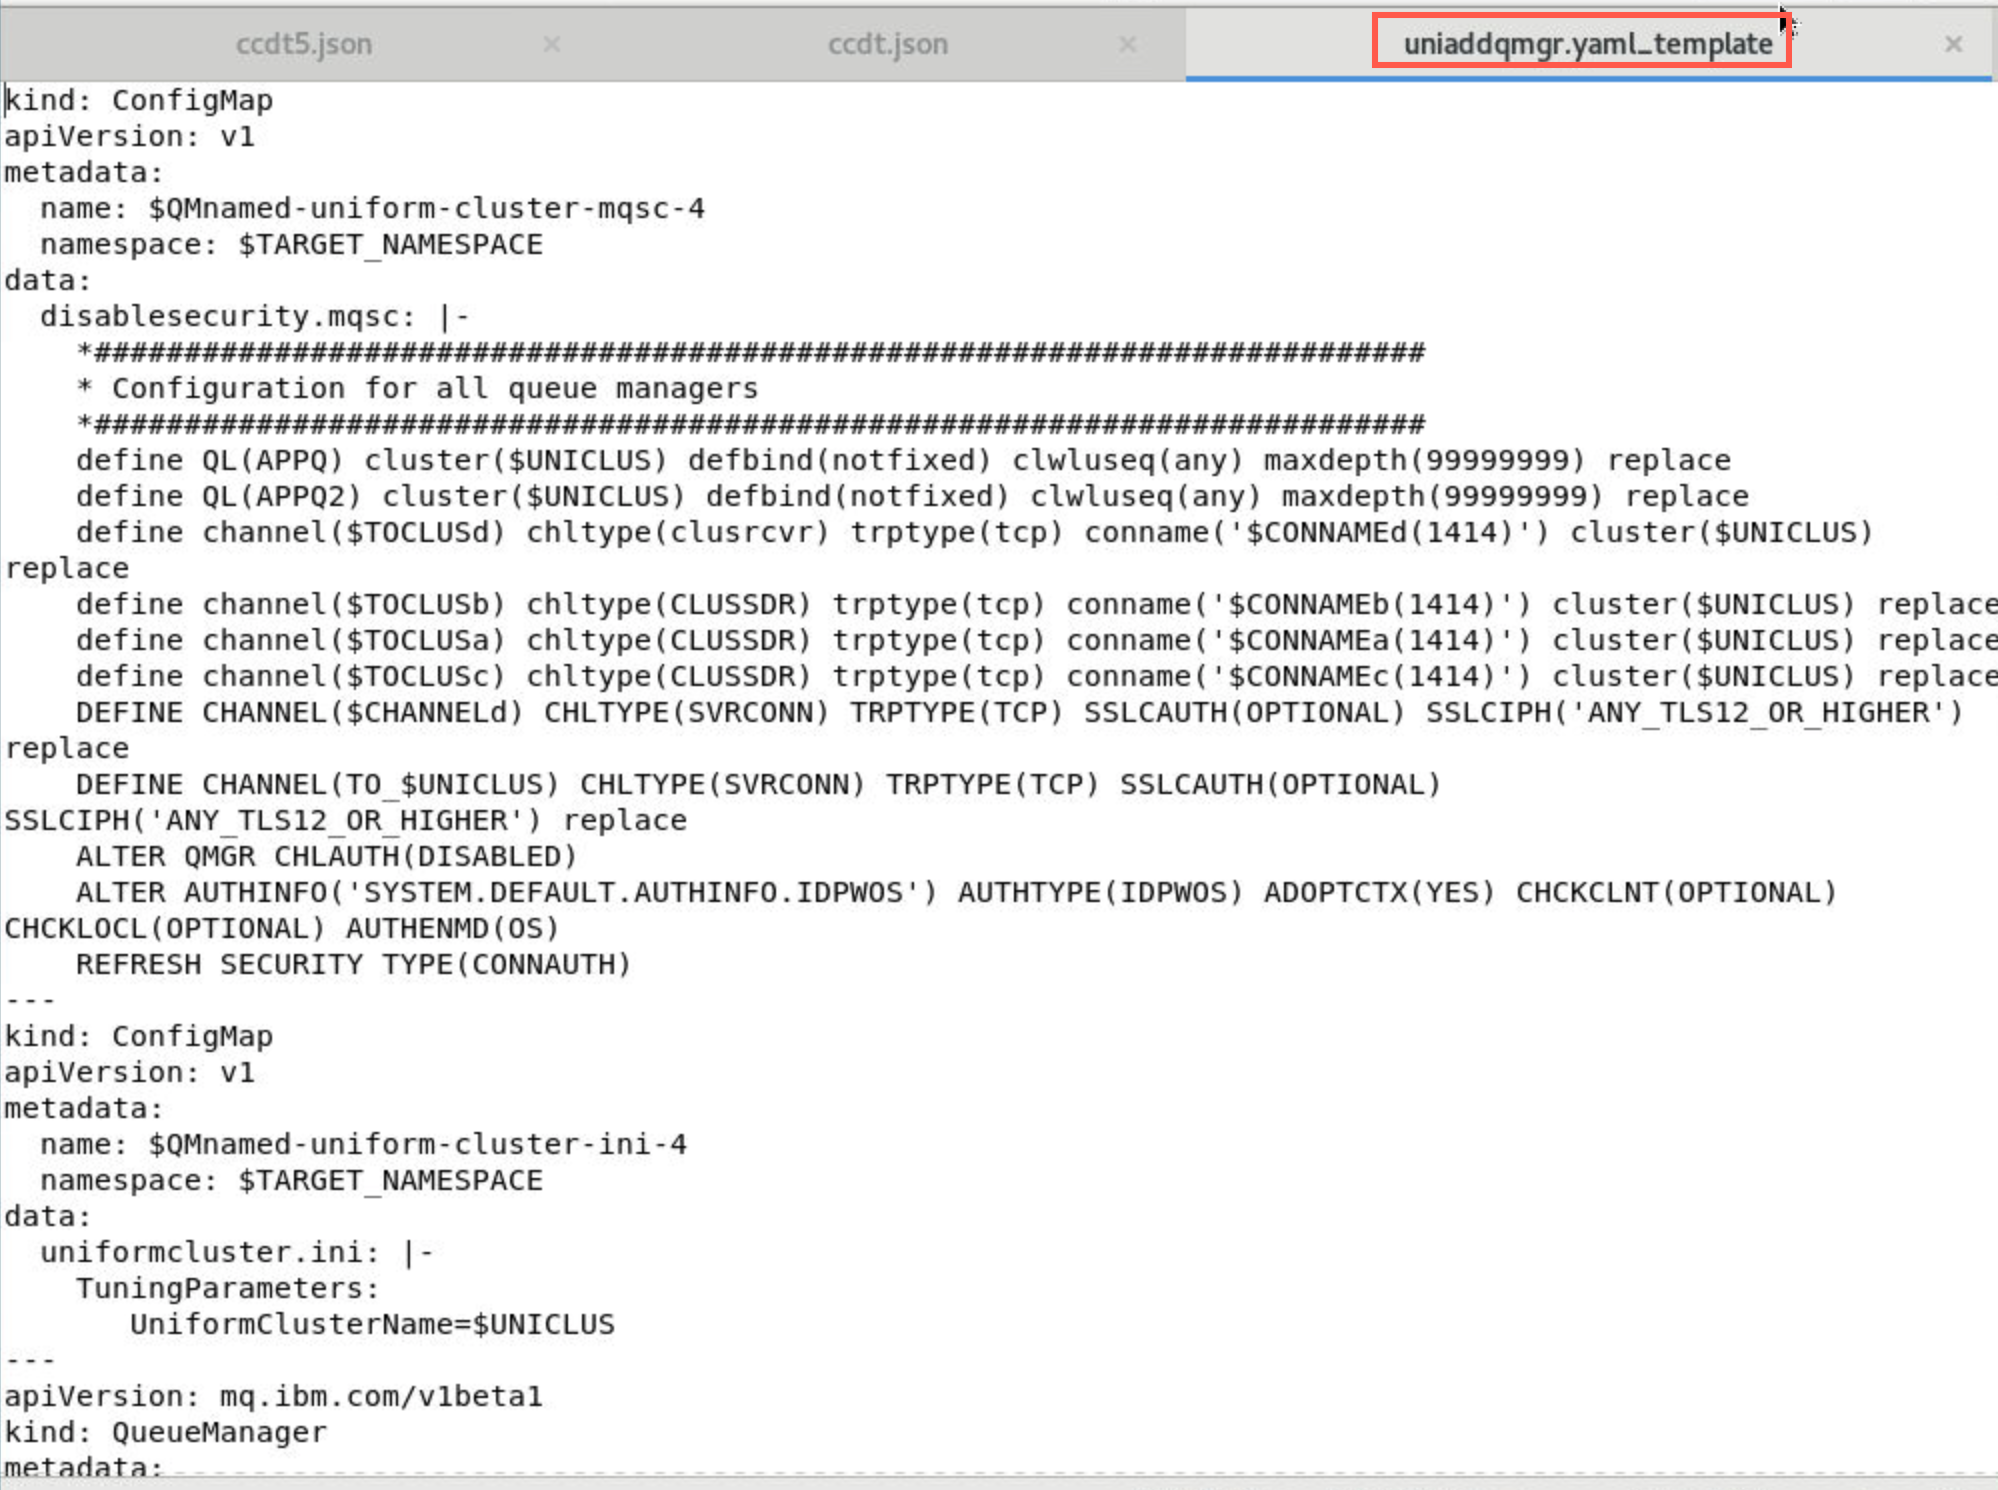
Do not change anything in this file. Review it observing that it will create qmxxd, configmaps for mqxxd, and a route for mqxxd. It will use the same secret as the other three queue managers.
-
Open another file in the editor:
/home/student/MQonCP4I/unicluster/deploy/uni-addqmgr.sh.
Review the export commands observing:
- MQCHLLIB sets the folder of the JSON CCDT file
- MQCHLTAB sets the name of the JSON CCDT file
- MQSSLKEYR sets the location of the key
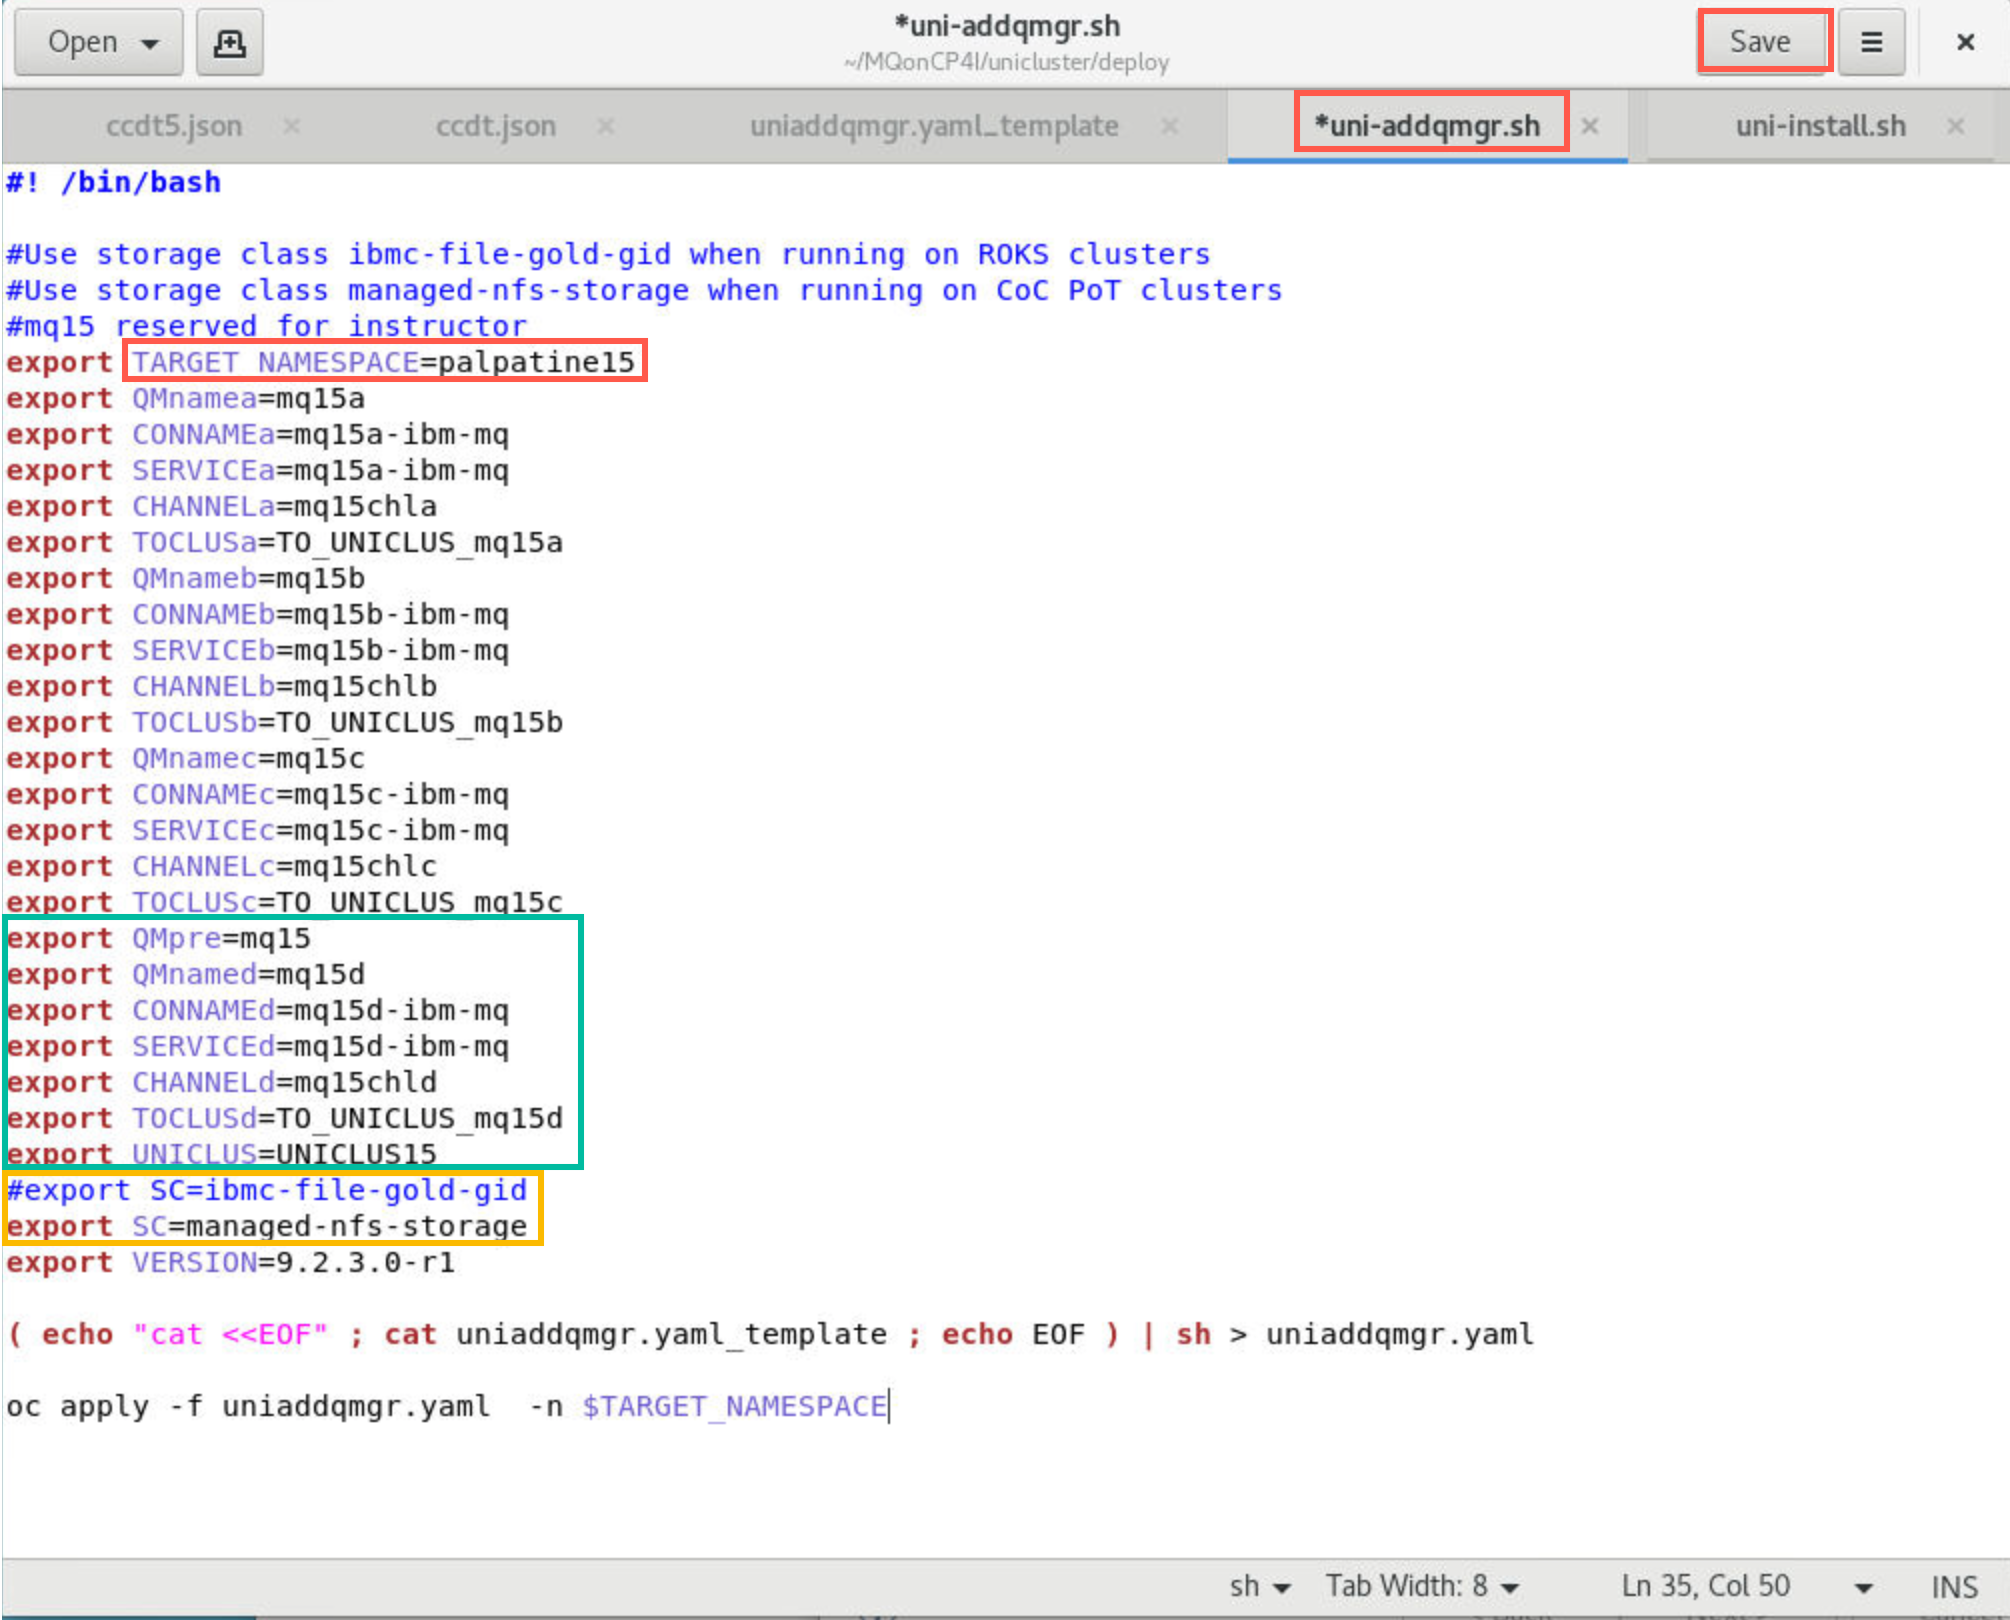
Change TARGET_NAMESPACE to your assigned project. As you did previously, execute find-and-replace to change 00 to your student ID. Click Save.
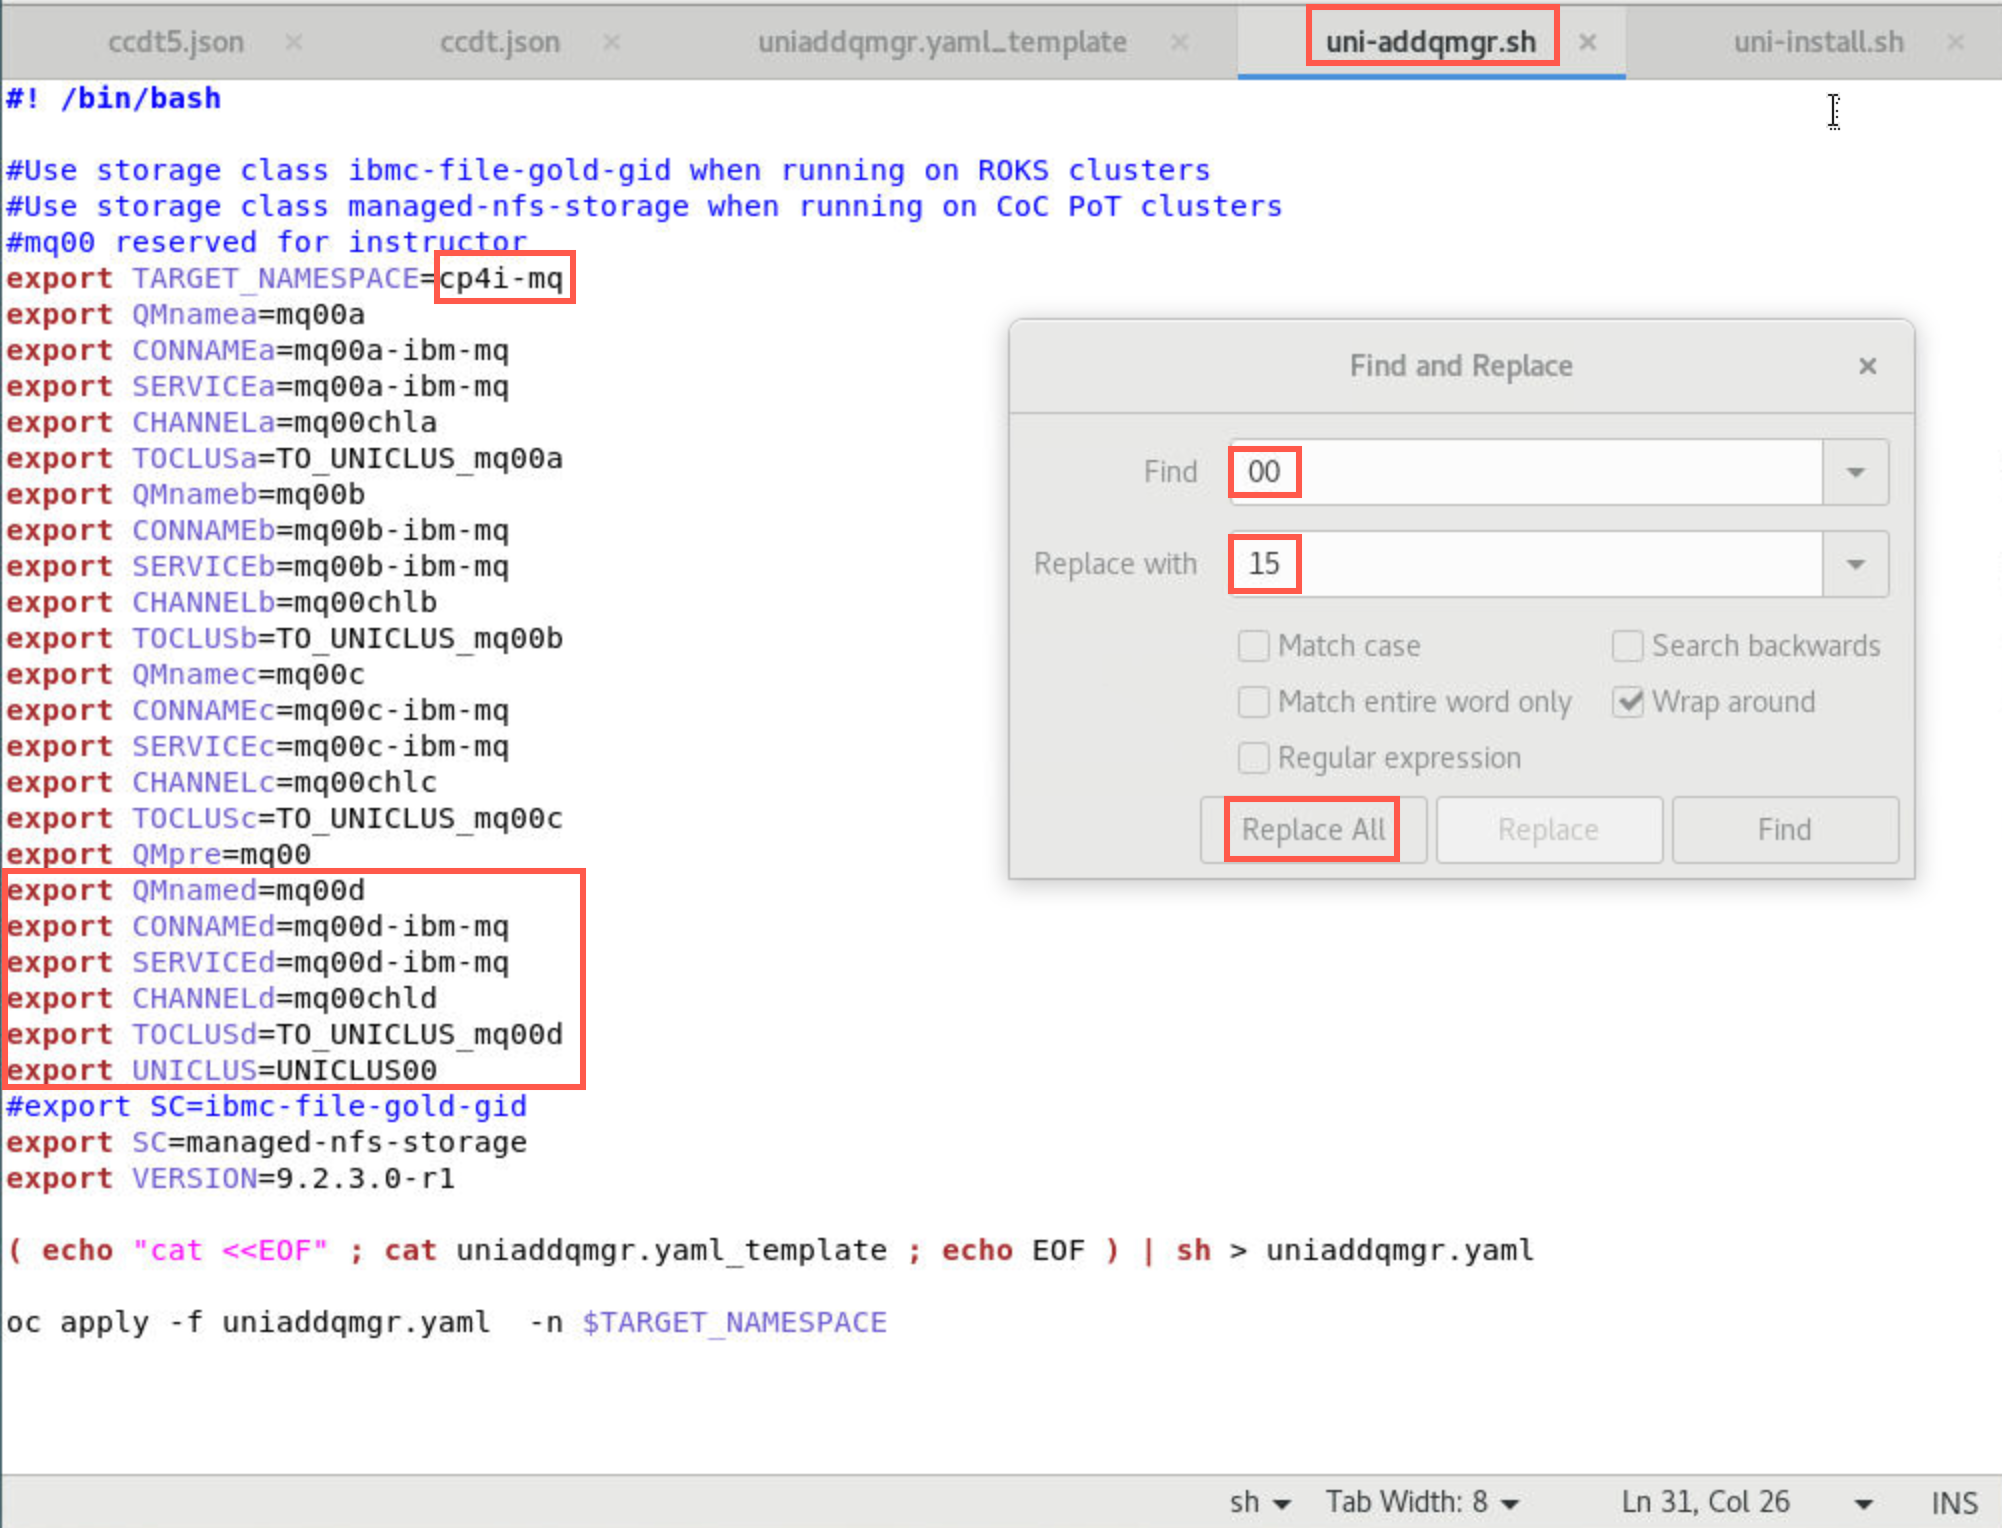
One of the environment variables is SC for Storage Class. If you are running on a ROKS cluster use the ibmc-file-gold-gid storage class and comment out the managed-nfs-storage line. If you are running on a CoC cluster use the managed-nfs-storage storage class and comment out the line for ibmc-file-gold-gid.
Save the file.
-
In one of the terminal windows navigate to /home/student/MQonCP4I/unicluster/deploy/.
Enter the following command to create the new queue manager:
./uni-addqmgr.sh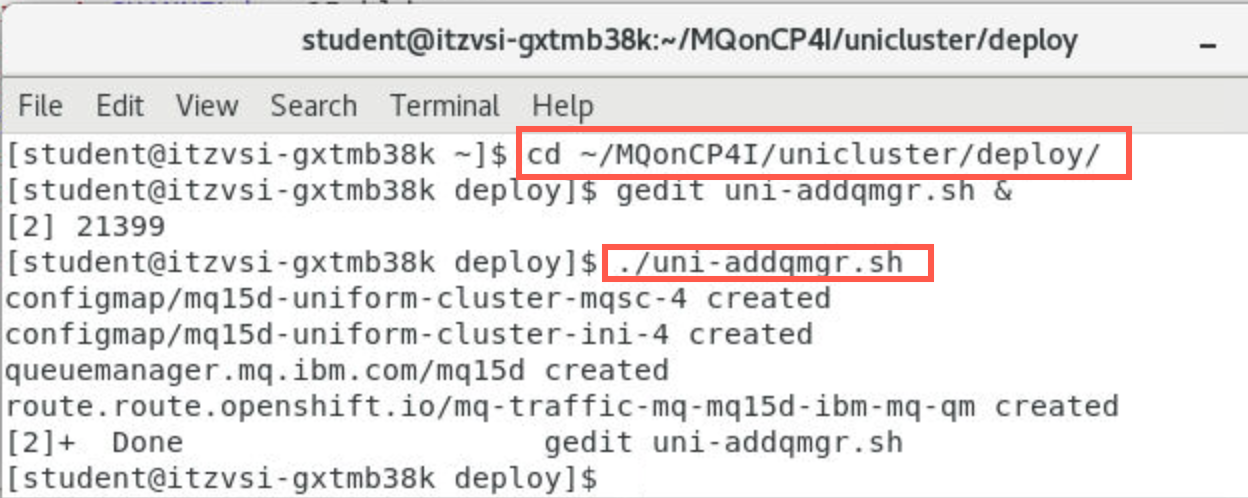
Like mqxxc, it will have a partial repository.
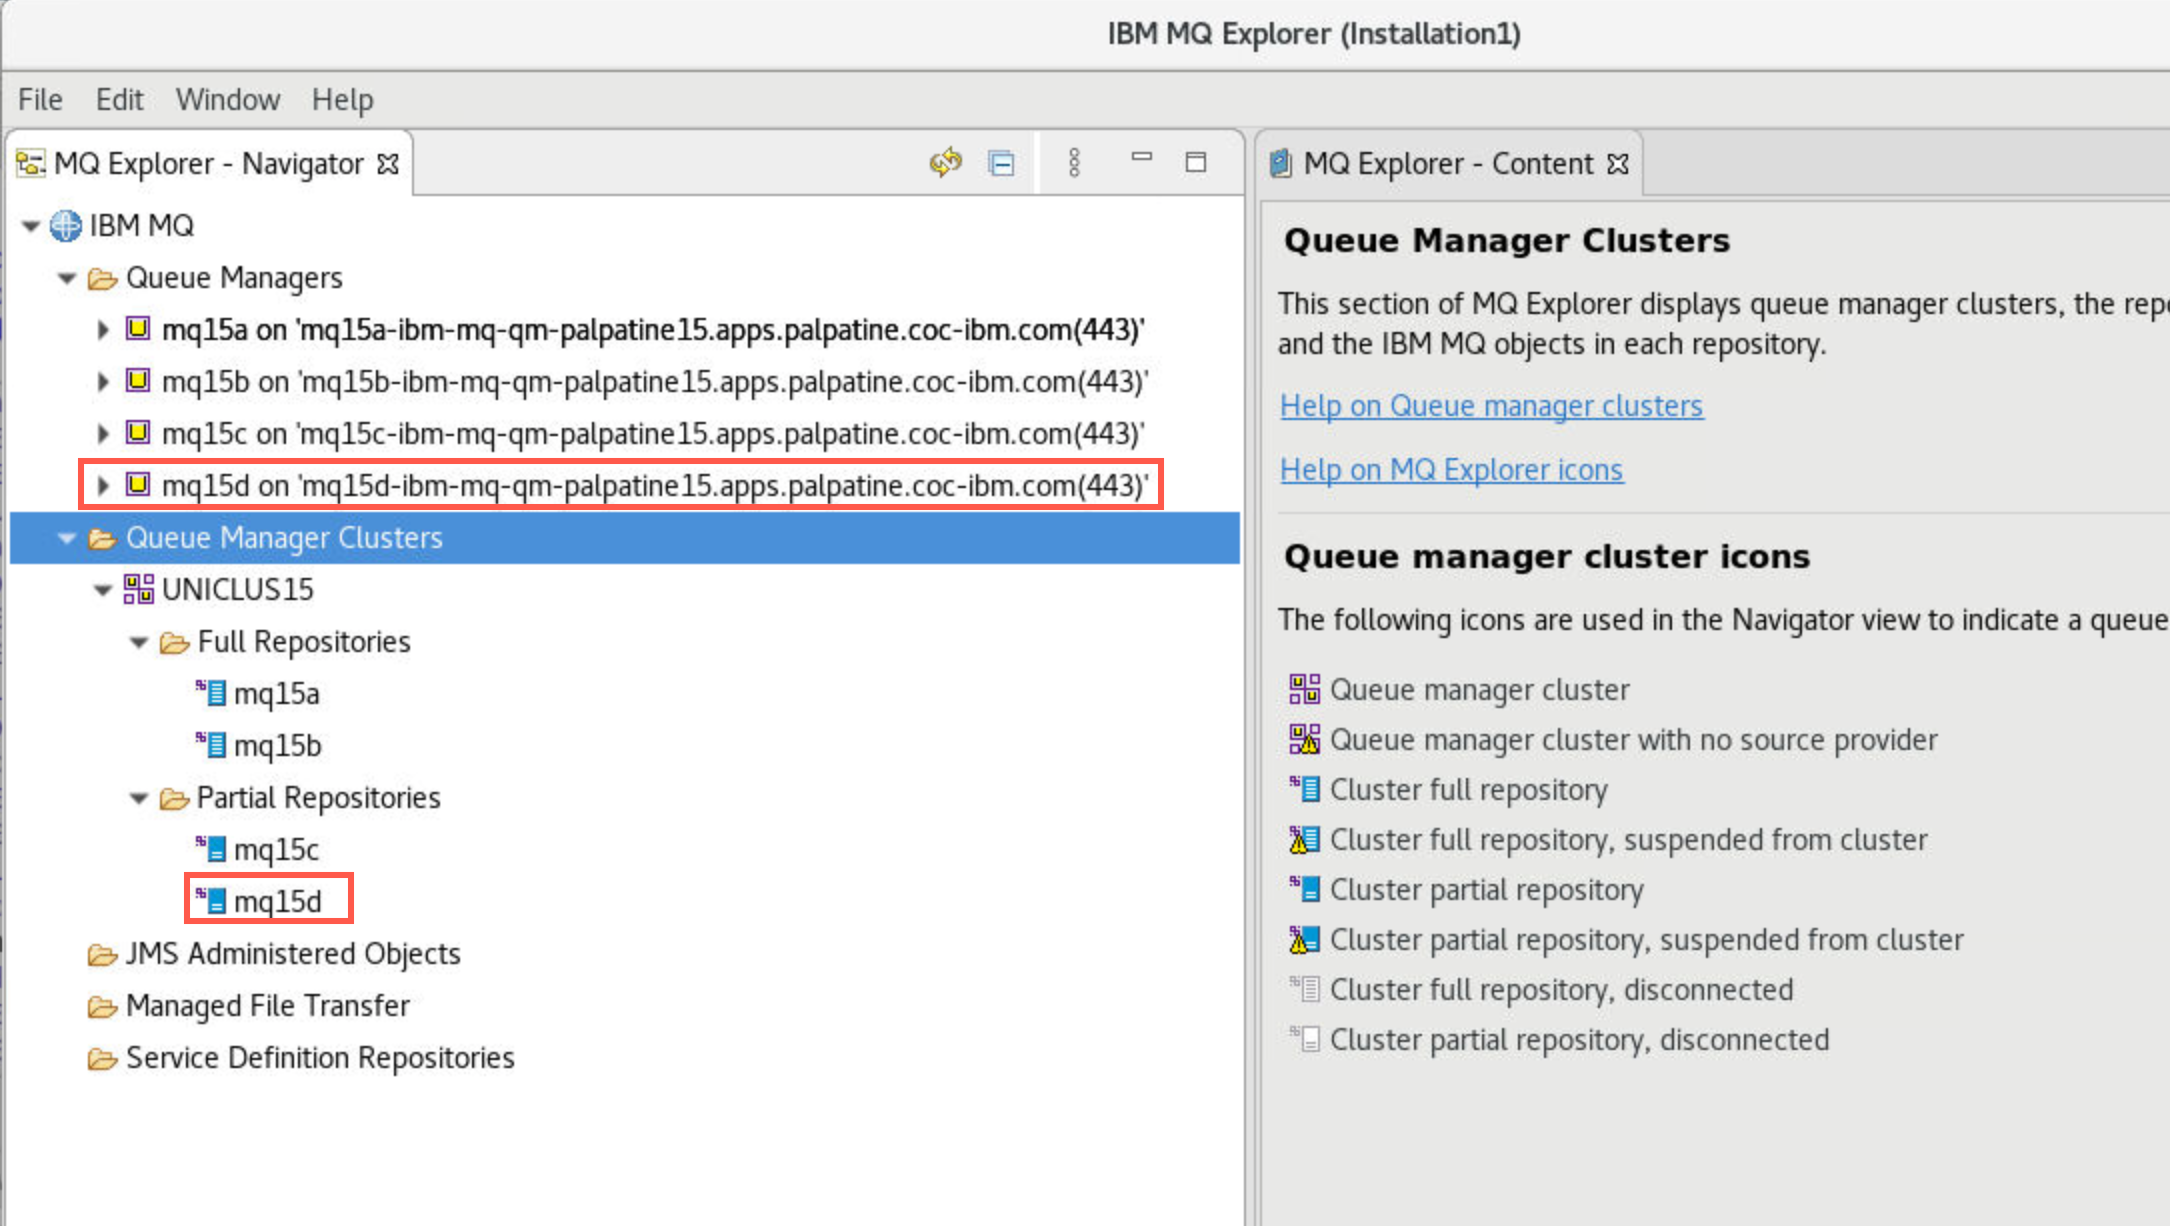
Note: You need to add mqxxd to MQExplorer to see it in the cluster display.
-
In the editor, open /home/student/MQonCP4I/unicluster/test/sClient.sh. Change 00 to your student ID. Change the path for MQCHLTAB and MQCCDTURL to /home/student/MQonCP4I/unicluster/test/ccdt5.json. Click Save.
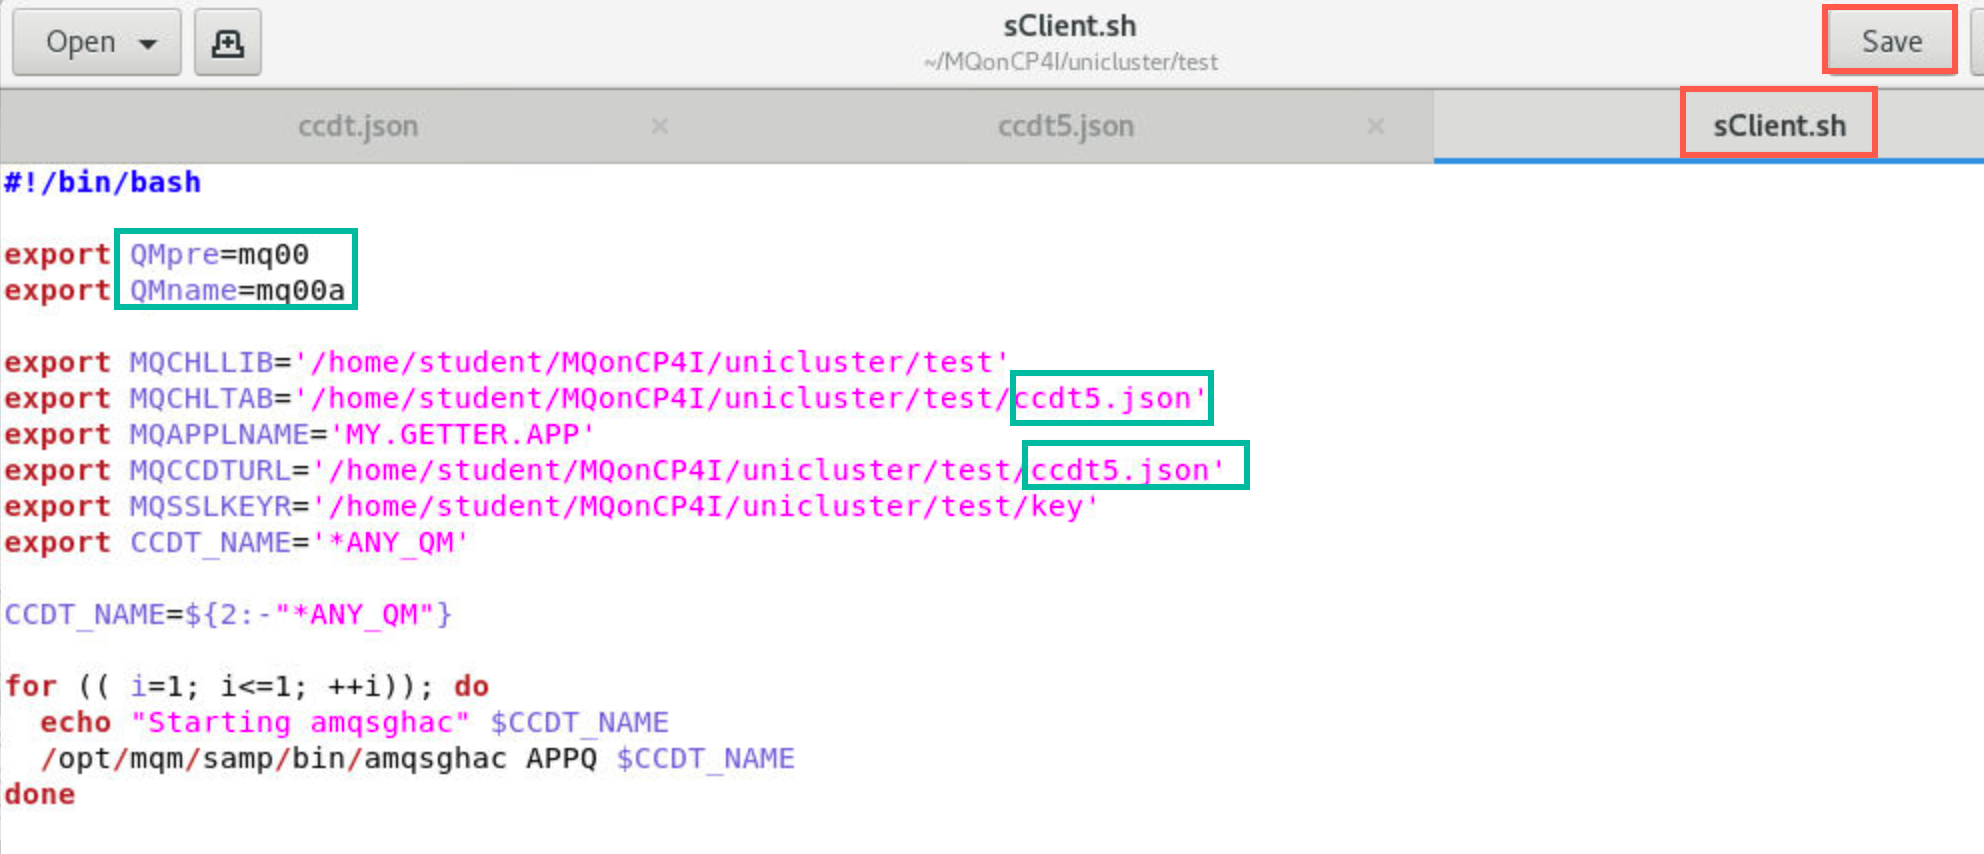
ccdt5.json includes mqxxd and entries for the queue manager group ANY_QM. The script will connect to an available queue manager and run the getting application amqsghac.
-
Open and make the same edits in rClient.sh.
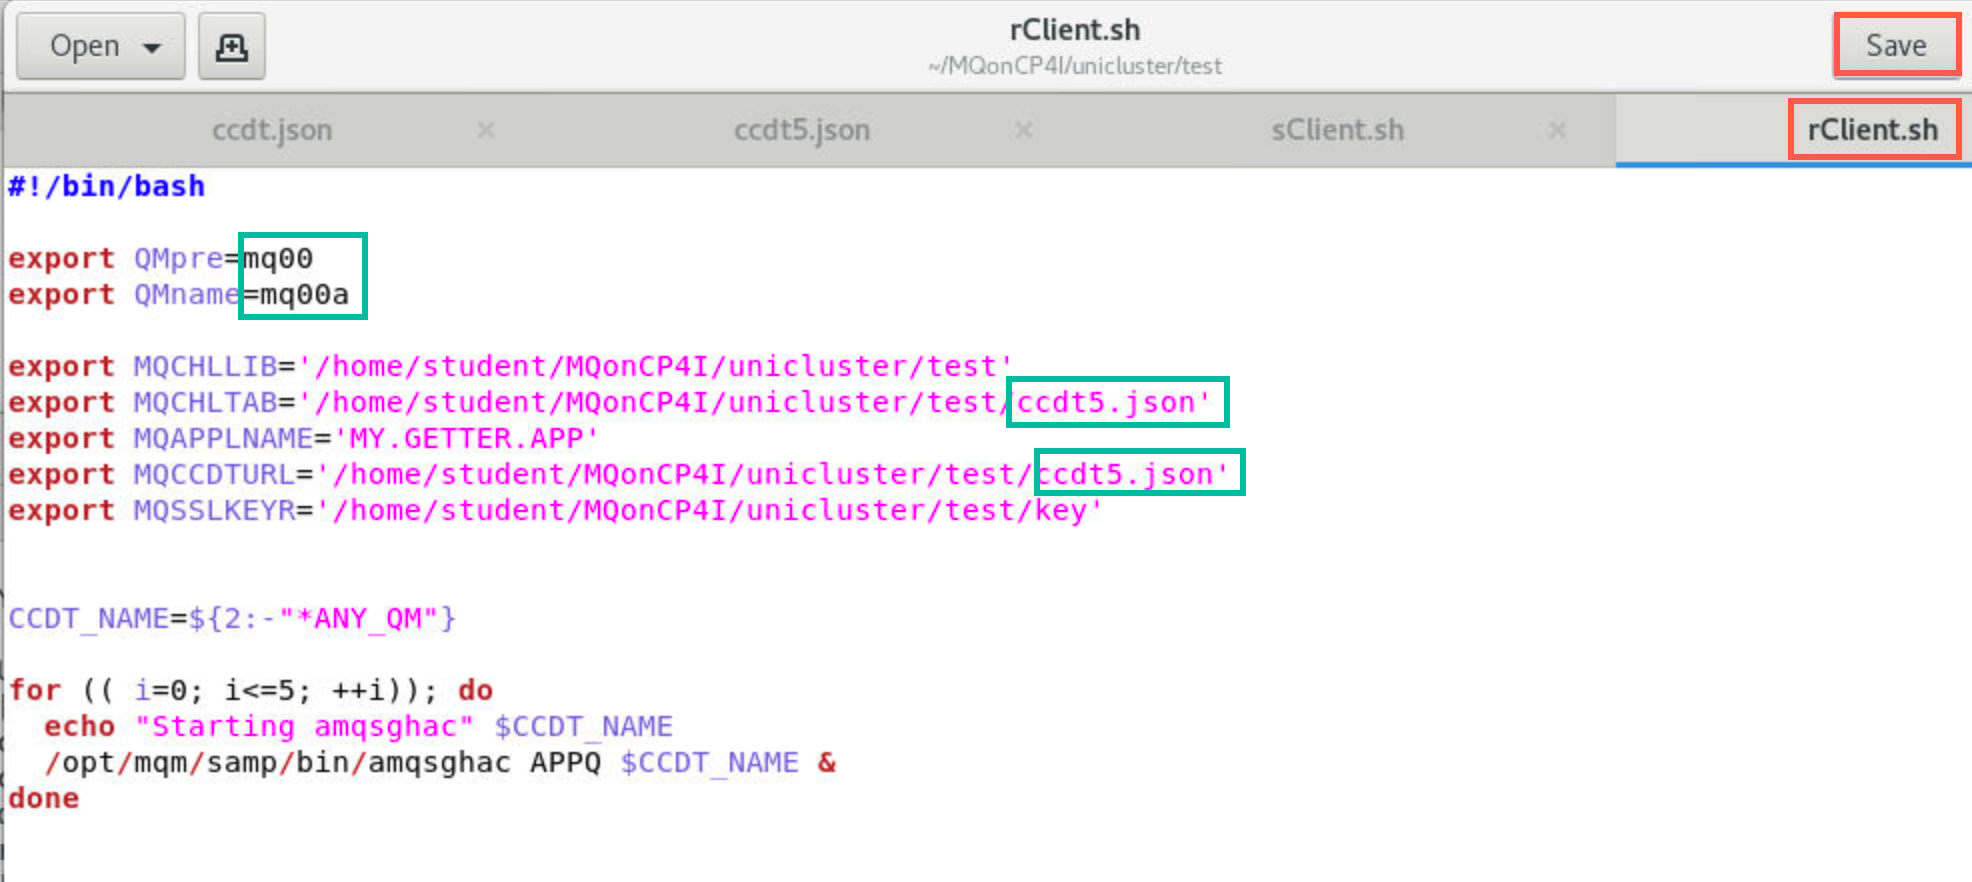
-
In the editor, open file /home/student/MQonCP4I/unicluster/test/showConns.sh. Make the necessary changes: 00 to your student ID and the paths for MQCHLTAB and MQCCDTURL to /home/student/MQonCP4I/unicluster/test/ccdt5.json.
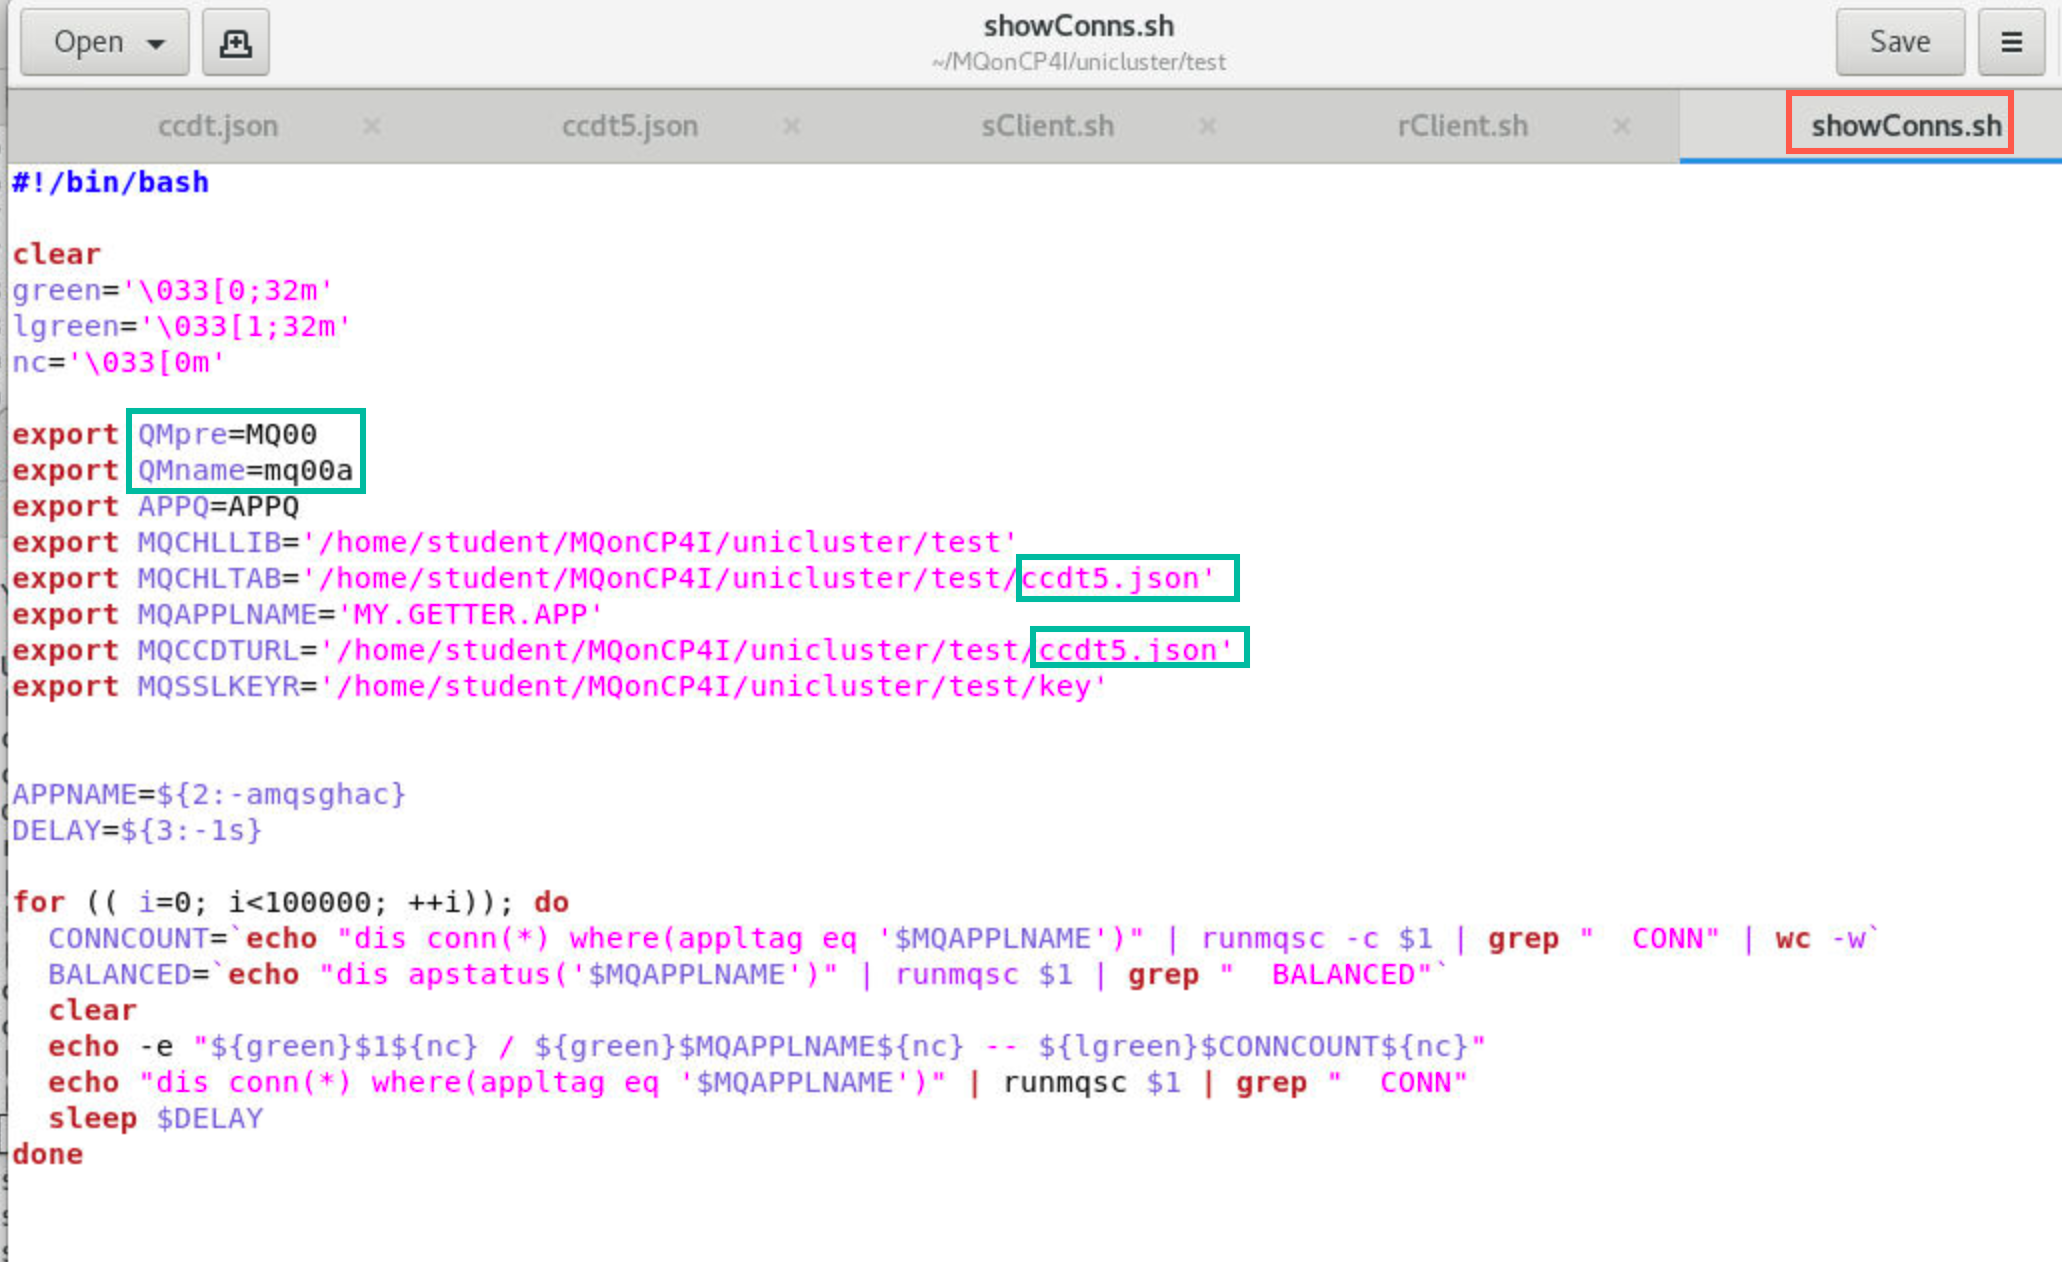
Script sClient.sh will start the getting application amqsghac using ccdt5.json and will continue to run in that terminal. Script rClient.sh however, will start six more client applications running getting application amqsghac in the background. The main difference being that displays for those six clients will all be displayed in that single terminal.
-
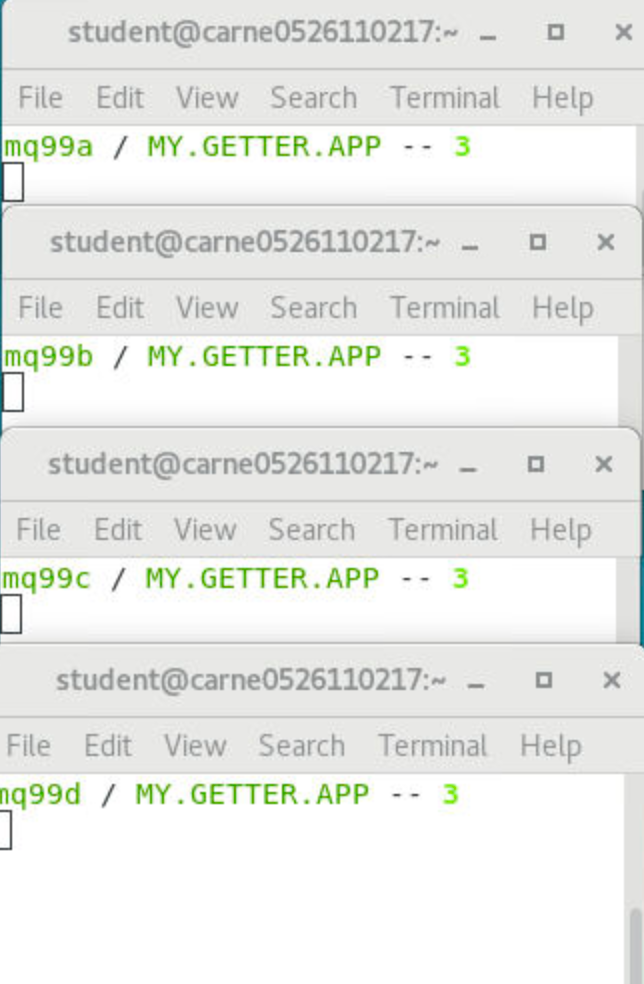
Before you start the getting applications, you will want to start a script which displays the queue managers and the number of applications connected to it. Open four new terminal windows. In each one enter the following command where “xx” is equal to your student ID and “z” is equal to “a”, “b”, “c”, or “d”.
MQonCP4I/unicluster/test/showConns.sh mqxxz
-
Position those four windows so you can see the diplays:
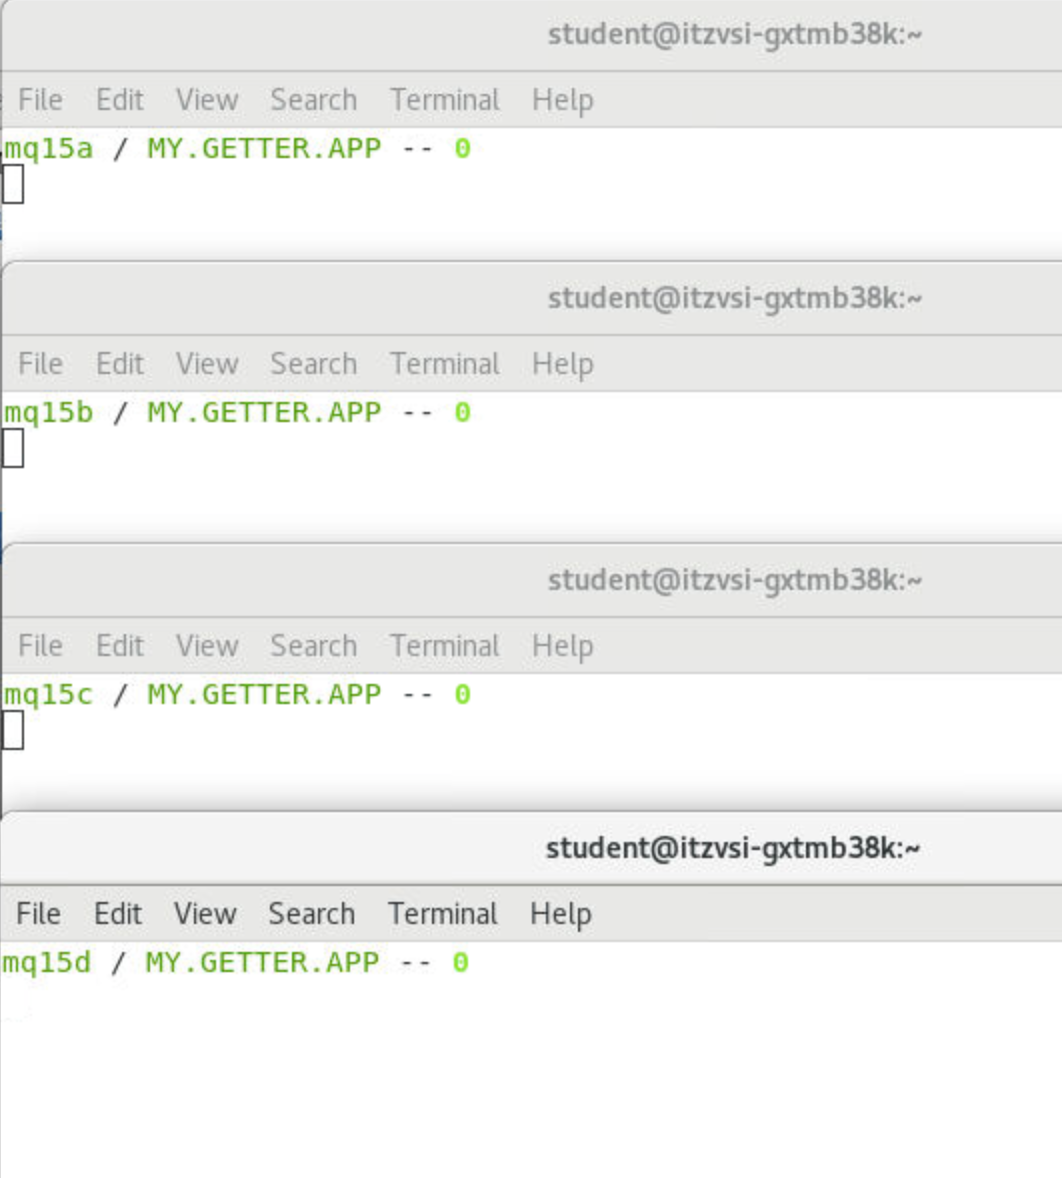
-
Now you are ready to start the getting applications. In each one of your open terminal windows, run the following command:
MQonCP4I/unicluster/test/sClient.sh
This time you are running the application with the queue manager group ANY_QM, prefixed with * which tells the client to connect to any queue manager in the ANY_QM group.
Again, you will need to run this command 6 times.
-
Observe the behavior as the queue managers rebalance the connections. Watch the windows runnning the showConns.sh scripts as well as the windows where the getting applications are running. The application instances will now attempt to connect to any of the queue managers defined in the queue manager group, and with the client weight and affinity options defined above, we should see each application instance connect to one of the queue managers in the Queue Manager Group and Uniform Cluster.
Eventually, the applications are evenly distributed across the queue managers.
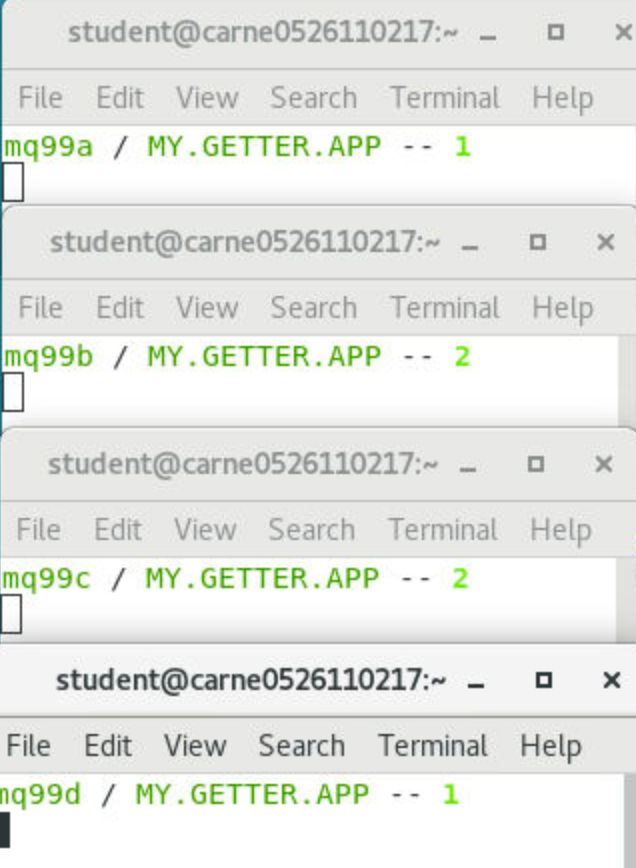
You can confirm this by watching the windows runnning the showConns.sh script or running the MQSC command DISPLAY APSTATUS on any active queue manager in the cluster.
-
In a command window, start the putting application by entering the following command:
./sendMessage.sh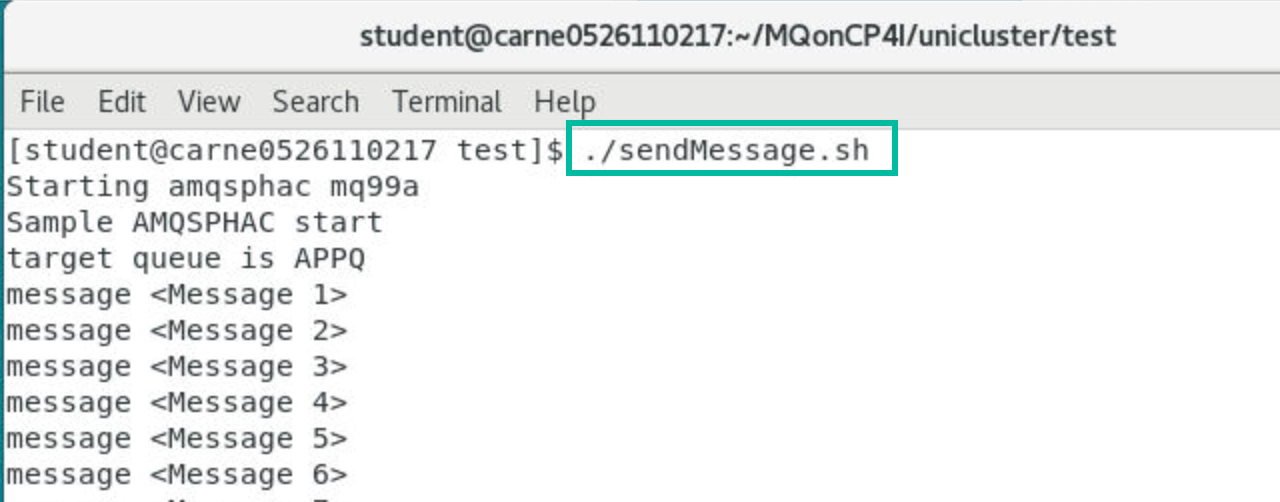
-
While showConns.sh displays show even distribution, you can also observe the application windows to see that the applications are getting an even distribution of messages.
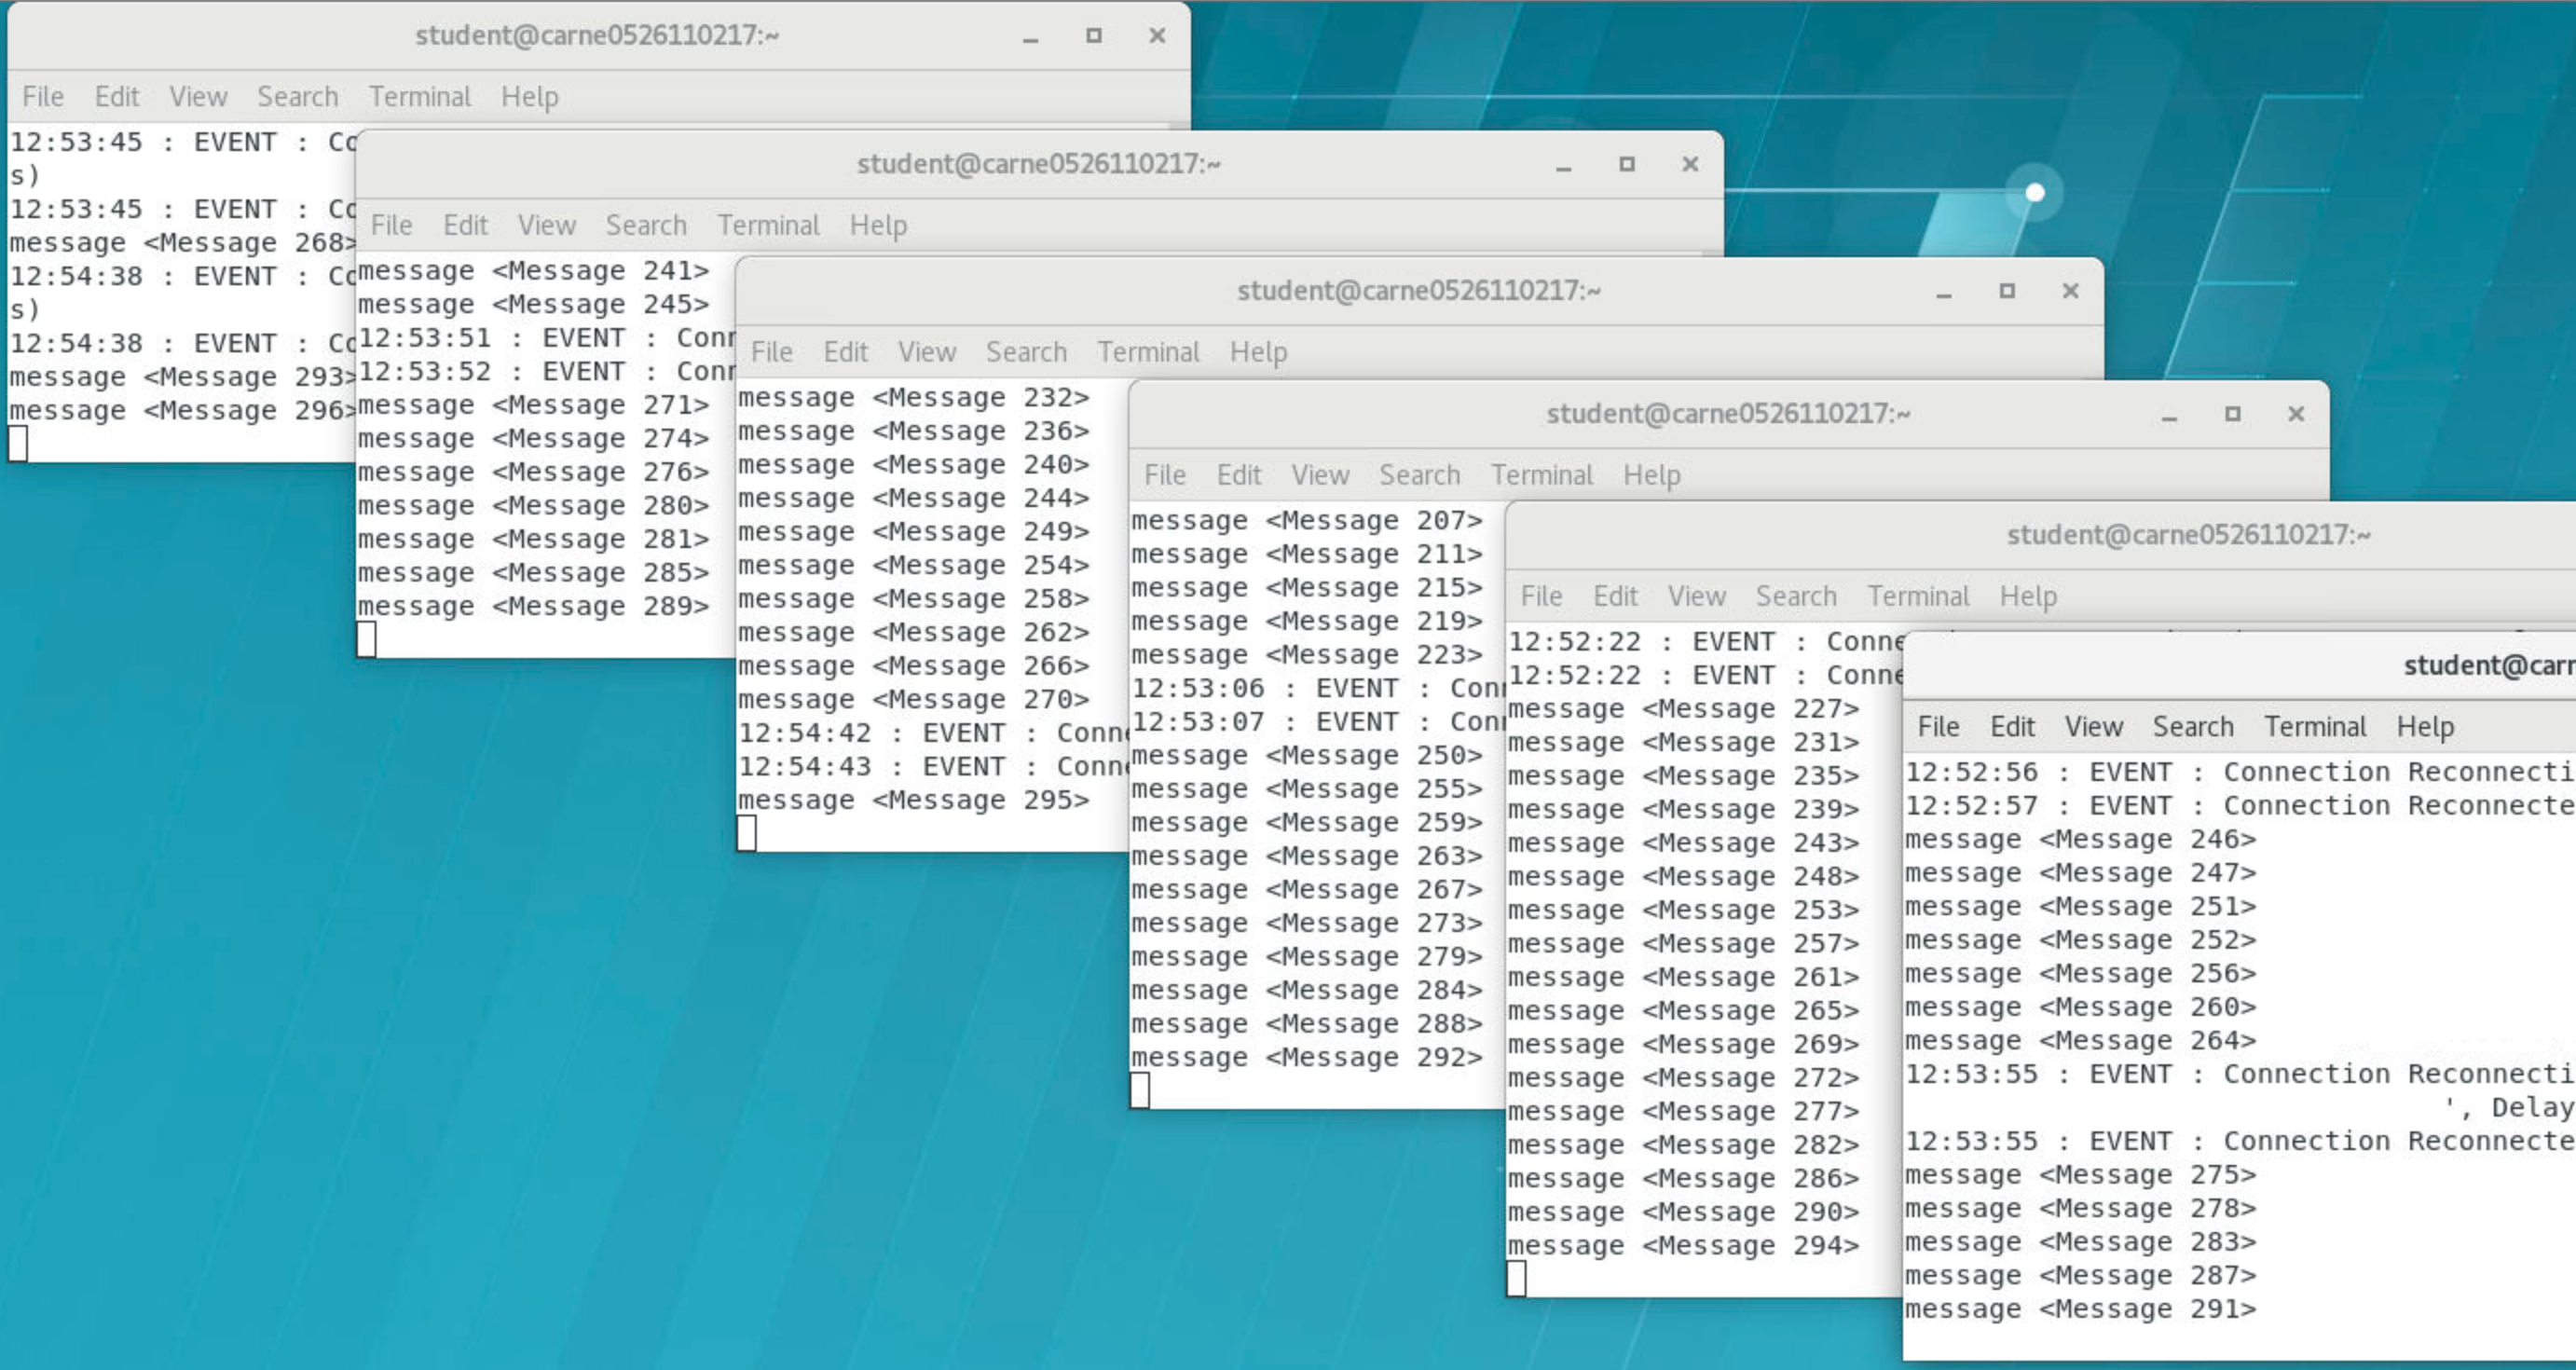
-
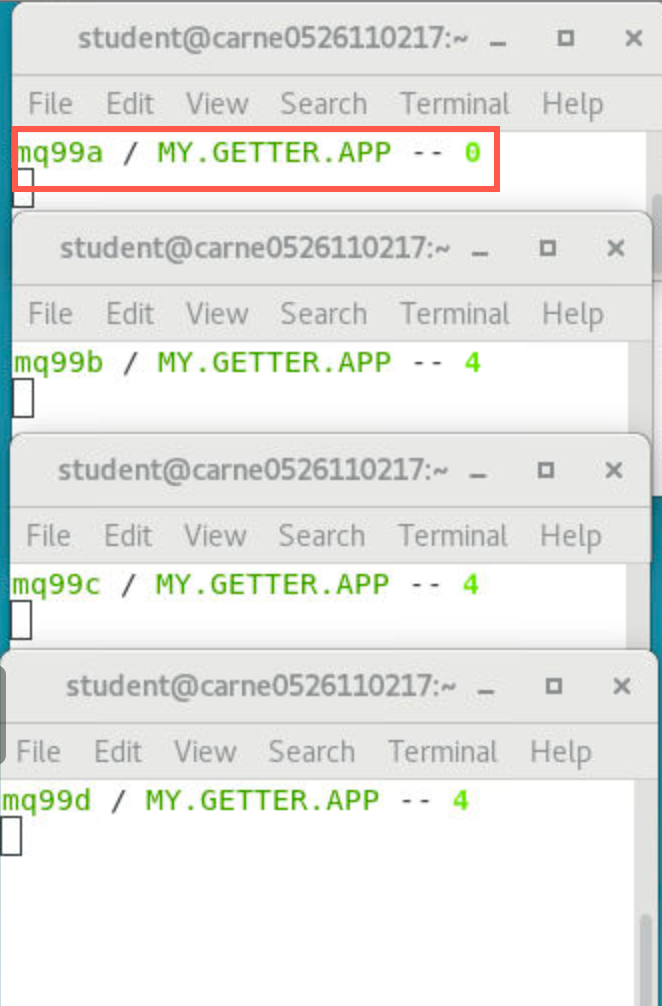
Now end mqxxa to force the applications to be rebalanced:
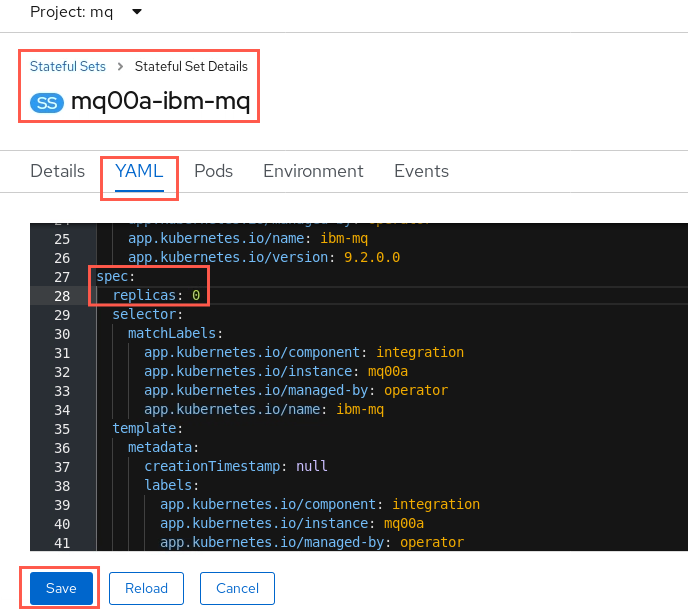
Rather than the applications getting stuck in a reconnect loop trying to connect to mqxxa as we saw using the previous version of the CCDT file, the applications now tied to the queue manager group ANY_QM will go through each of the definitions of ANY_QM and when able to successfully connect to one of the underlying queue managers, will do so. You should see this reported in a subset of the application instances:
-
Run the MQSC command DISPLAY APSTATUS on any active queue manager in the cluster (try it on mqxxd stateful set this time since it was added later). After a while, there should once more be 6 connections in total, as there were before mqxxa was shut down. Notice there are 6 total, but none on mqxxa

-
Restart mqxxa.
-
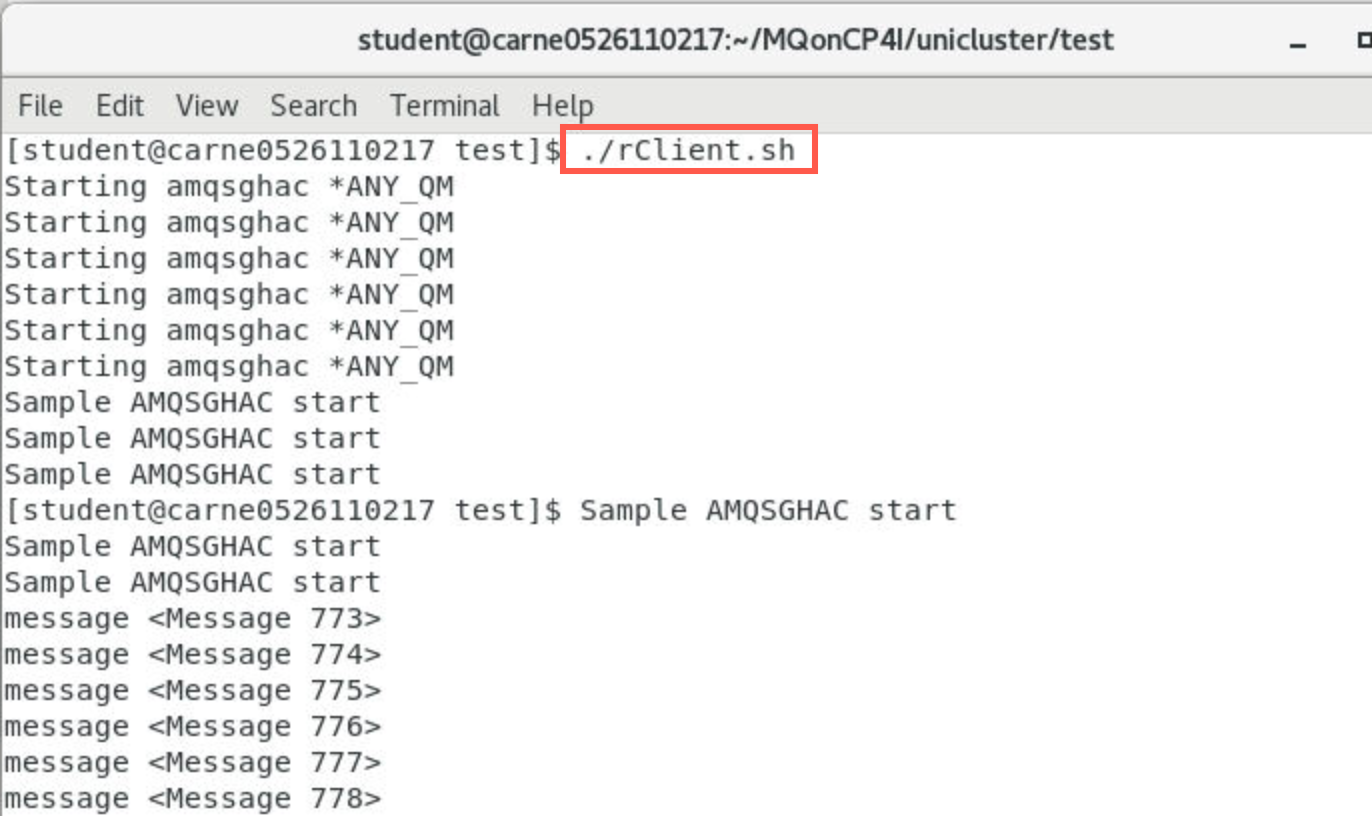
Open one more terminal window and run the following command:
MQonCP4I/unicluster/test/rClient.shSix more clients are started and you can see the messages that window is receiving.
-
Check the showConns.sh windows and you will see the applications evenly distributed again now totaling twelve.
Congratulations
You have completed this lab Uniform Clusters and Application Rebalancing.
Cleanup
-
In one of the terminal windows, run the following command to end the getting applications:
./killall.sh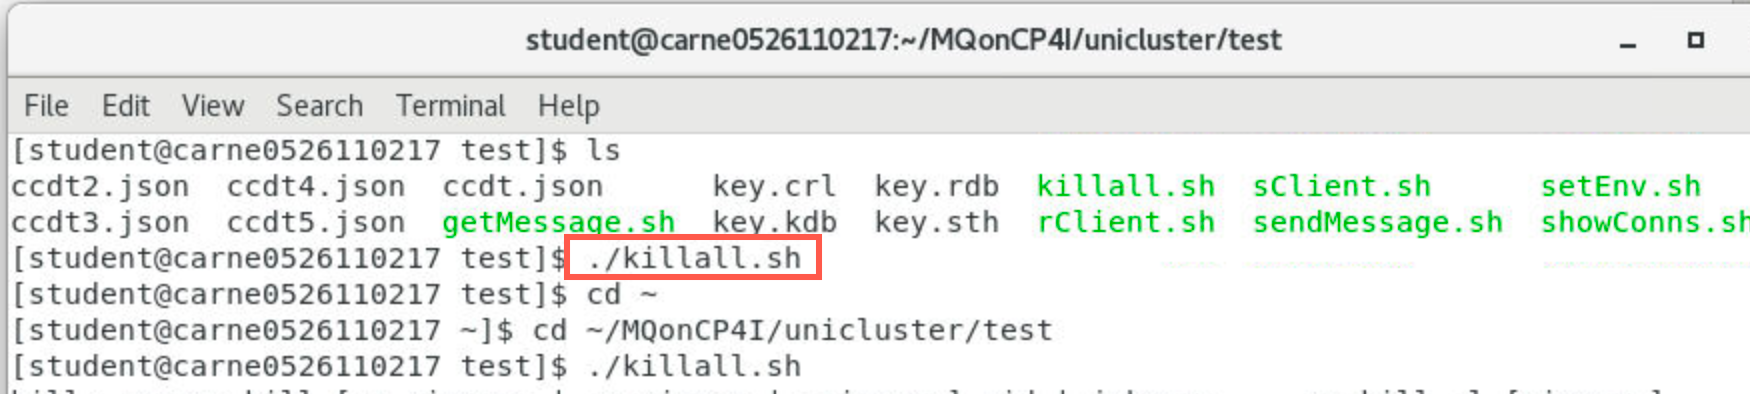
-
Close all the applications and terminal windows.
-
In a terminal window run the following command:
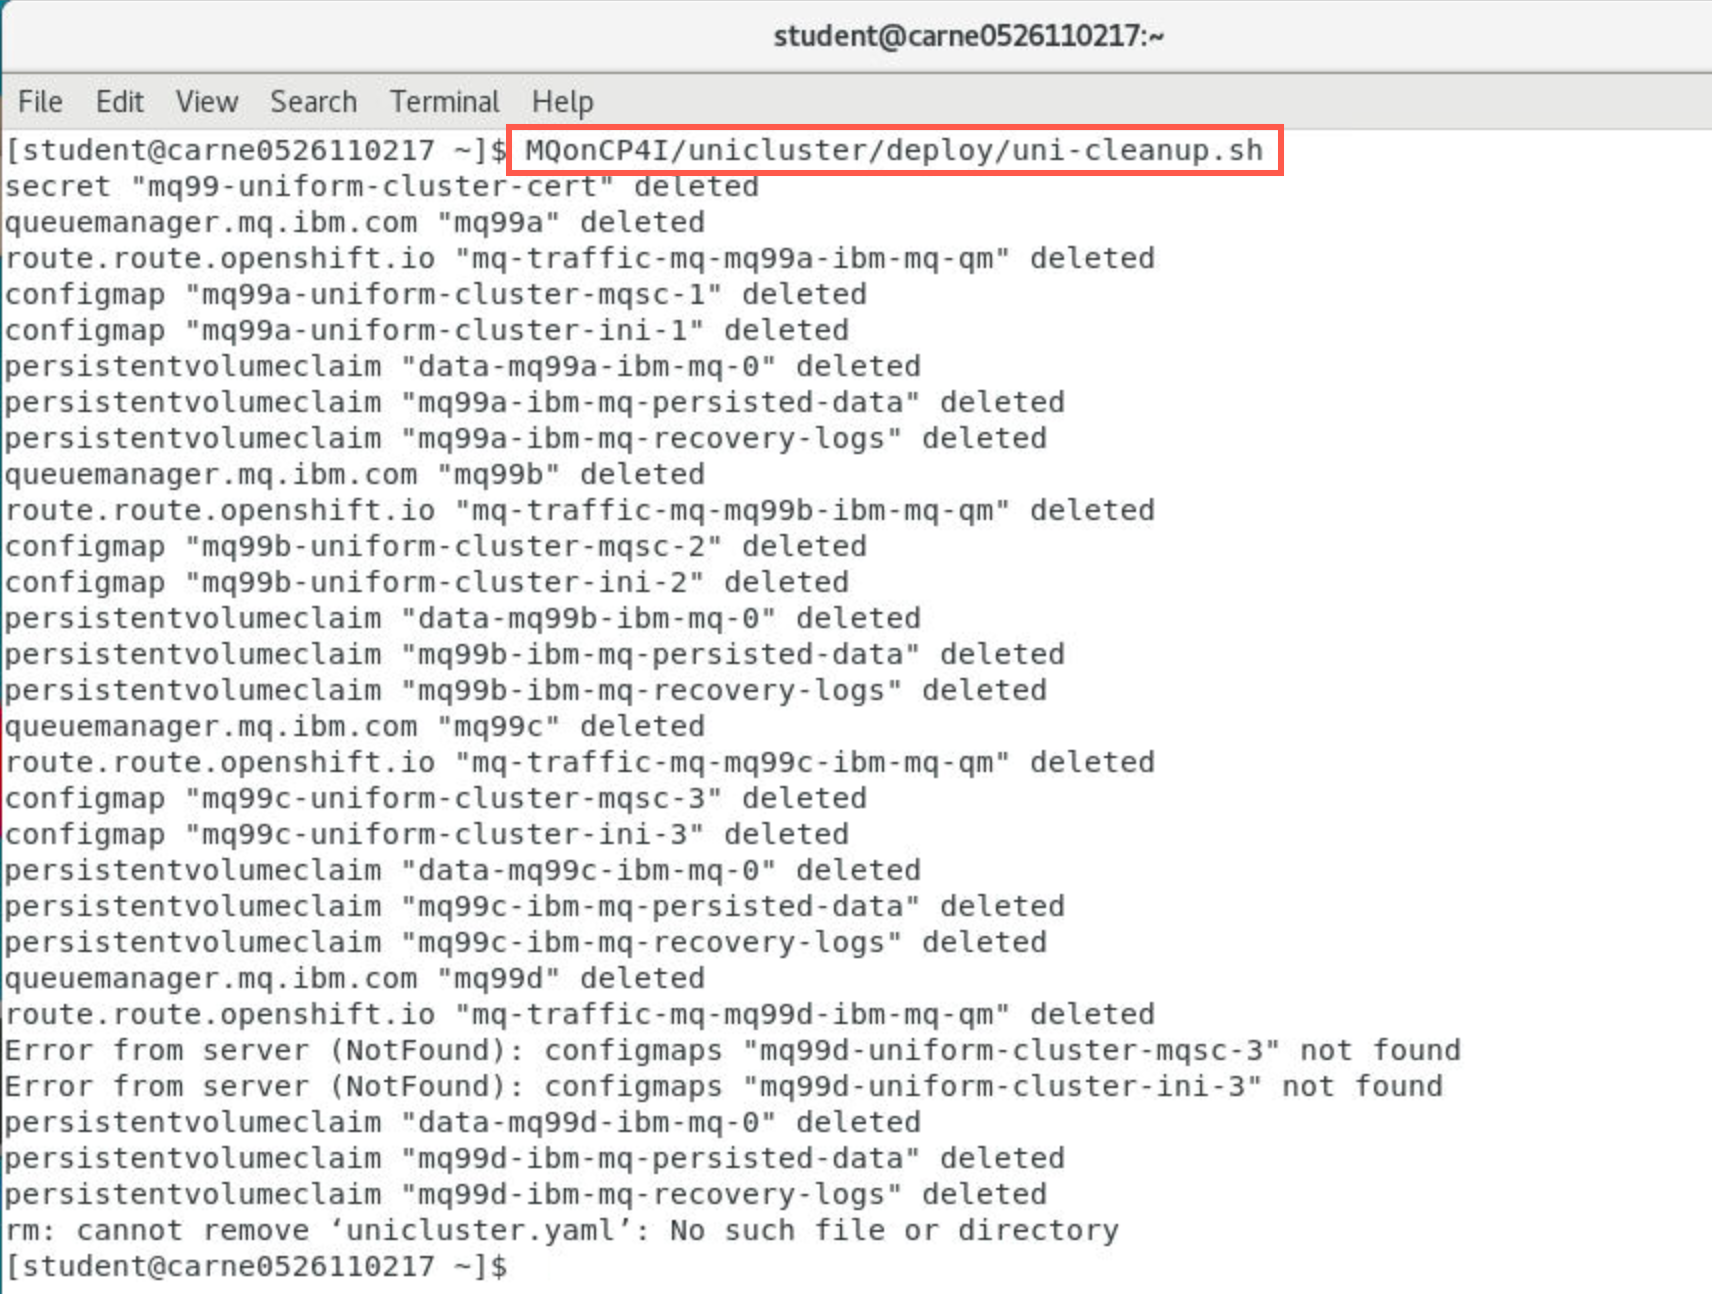
/home/student/MQonCP4I/unicluster/deploy/uni-cleanup.sh