Event Streams Geo-Replication
In this lab exercise you will learn about the geo-replication feature of Event Streams.
Introduction
You can deploy multiple instances of IBM Event Streams and use the included geo-replication feature to synchronize data between your clusters that are typically located in different geographical locations. The geo-replication feature creates copies of your selected topics to help with disaster recovery.
Geo-replication can help with various service availability scenarios, for example:
-
Supporting your high availability and disaster recovery plans: you can set up geo-replication to support your high availability and disaster recovery architecture, enabling the switching to other clusters if your primary ones experience a problem.
-
Making mission-critical data safe: you might have mission-critical data that your applications depend on to provide services. Using the geo-replication feature, you can back up your topics to several destinations to ensure their safety and availability.
-
Migrating data: you can ensure your topic data can be moved to another deployment, for example, when switching from a test to a production environment.
Note:
Geo-replication is only available in the paid-for version of IBM Event Streams (not available in the Community Edition).
How it works
The Kafka cluster where you have the topics that you want to make copies of is called the “origin cluster”.
The Kafka cluster where you want to copy the selected topics to is called the “destination cluster”.
So, one cluster is the origin where you want to copy the data from, while the other cluster is the destination where you want to copy the data to.
If you are using geo-replication for purposes of availability in the event of a data center outage or disaster, you must ensure that the origin cluster and destination cluster are installed on different systems that are isolated from each other. This ensures that any issues with the origin cluster do not affect the destination cluster.
Any of your IBM Event Streams clusters can become destination for geo-replication. At the same time, the origin cluster can also be a destination for topics from other sources.
Geo-replication not only copies the messages of a topic, but also copies the topic configuration, the topic’s metadata, its partitions, and even preserves the timestamps from the origin topic.
After geo-replication starts, the topics are kept in sync. If you add a new partition to the origin topic, the geo-replicator adds a partition to the copy of the topic on the destination cluster to maintain the correct message order on the geo-replicated topic. This behavior continues even when geo-replication is paused.
You can set up geo-replication by using the IBM Event Streams UI or CLI. When replication is set up and working, you can switch to another cluster when needed.
What to replicate
What topics you choose to replicate and how depend on the topic data, whether it is critical to your operations, and how you want to use it.
For example, you might have transaction data for your customers in topics. Such information is critical to your operations to run reliably, so you want to ensure they have back-up copies to switch to when needed. For such critical data, you might consider setting up several copies to ensure high availability. One way to do this is to set up geo-replication of 5 topics to one destination cluster, and the next 5 to another destination cluster, assuming you have 10 topics to replicate. Alternatively, you can replicate the same topics to two different destination clusters.
Another example would be storing of website analytics information, such as where users clicked and how many times they did so. Such information is likely to be less important than maintaining high availability for your operations, and you might choose not to replicate such topics, or only replicate them to one destination cluster.
Planning for geo-replication
Consider the following when planning for geo-replication:
-
If you want to use the CLI to set up geo-replication, ensure you have the IBM Event Streams CLI installed.
-
Prepare your destination cluster by setting the number of geo-replication workers.
-
Identify the topics you want to create copies of. This depends on the data stored in the topics, its use, and how critical it is to your operations.
-
Decide whether you want to include message history in the geo-replication, or only copy messages from the time of setting up geo-replication. By default, the message history is included in geo-replication. The amount of history is determined by the message retention option set when the topics were created on the origin cluster.
-
Decide whether the replicated topics on the destination cluster should have the same name as their corresponding topics on the origin cluster, or if a prefix should be added to the topic name. The prefix is the release name of the origin cluster. By default, the replicated topics on the destination cluster have the same name.
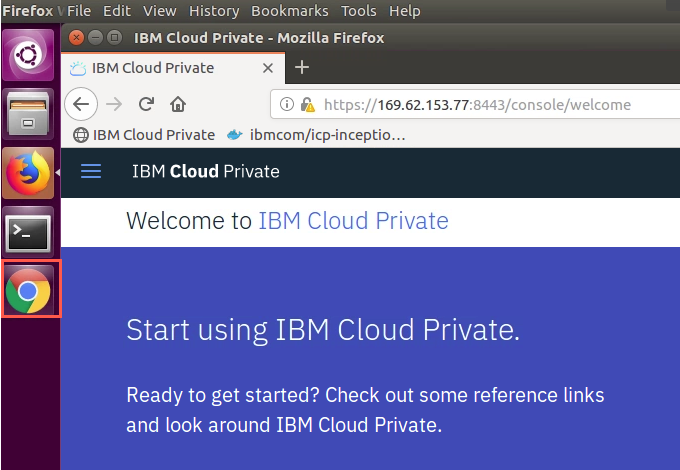
Step 1: Log in to IBM Cloud Private
Since IBM Event Streams (IES) runs on IBM Cloud Private (ICP) you will need to log into ICP to start the IES admin web UI. To demo IES geo-replication, you will need to log into two different ICP clusters. Both ICP clusters are running on Softlayer. In order to keep them separate, we suggest you use Google Chrome browser for one cluster and Firefox browser for the other. Here’s a suggestion and a little table in case you forget which is which later.
In order to keep the ICP clusters separate, we suggest you use Google Chrome browser for one cluster and Firefox browser for the other. Here’s a suggestion and a little table in case you forget which is which later.
| ICP Master Node | Browser | IES Cluster | Helm Release |
|---|---|---|---|
| 169.62.153.77 | Firefox | Source Cluster | esgeorep |
| 169.62.251.198 | Chrome | Destination Cluster | georep |
Use Firefox browser for the first ICP / Event Streams cluster
Use Firefox for the first IES cluster which will be the source cluster where you will create a topic to be replicated.
-
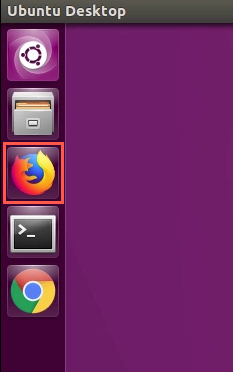
Open a Firefox browser from the icon on the sidebar.
-
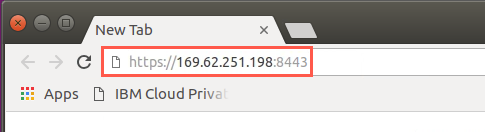
Navigate to https://169.62.153.77:8443 to open the ICP user interface (UI).
-
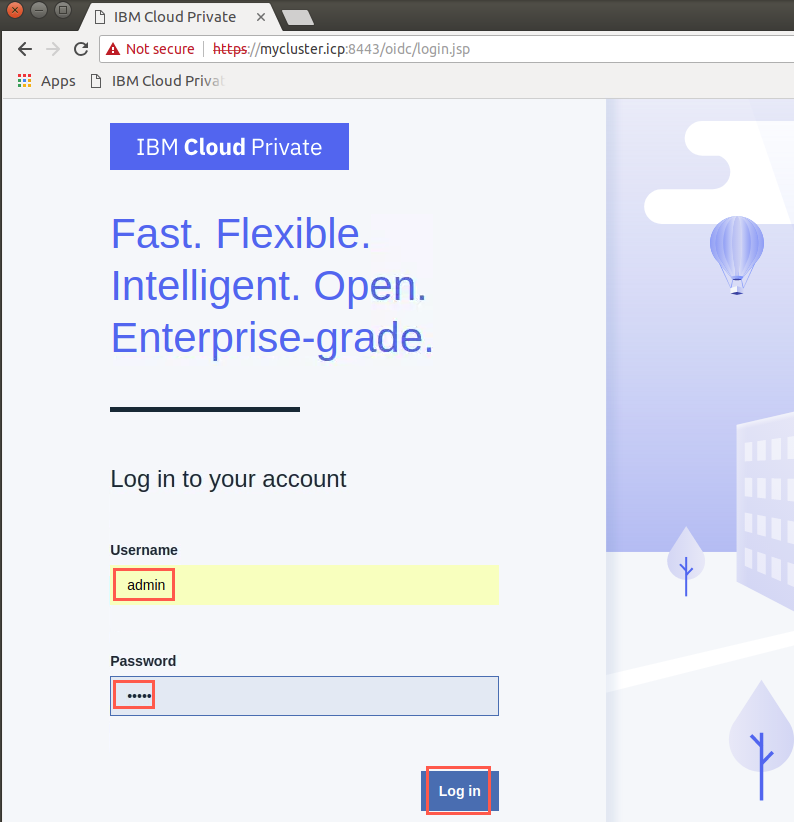
Enter admin / Trb4Ibm2 for the user and password. Click Log in.
Use Google Chrome browser for the second ICP / Event Streams cluster
Use Chrome for the second IES cluster which will be the destination cluster where you will replicate topics to.
-
Open a Chrome browser from the icon on the sidebar.
-
Click X to dismiss the warning about certificates.

-
Navigate to https://169.62.251.198:8443 to open the ICP user interface (UI).
-
Enter admin / admin for the user and password. Click Log in.
Step 2: Configure Geo-replication topic
-
Switch to Firefox (source cluster).
-
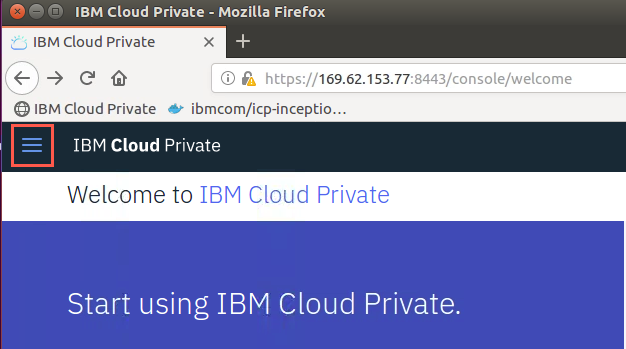
It is a good idea to synchronize the Helm Repositories to get the latest Helm charts before installing the Event Streams Helm chart. Click the hamburger icon to open the menu.
-
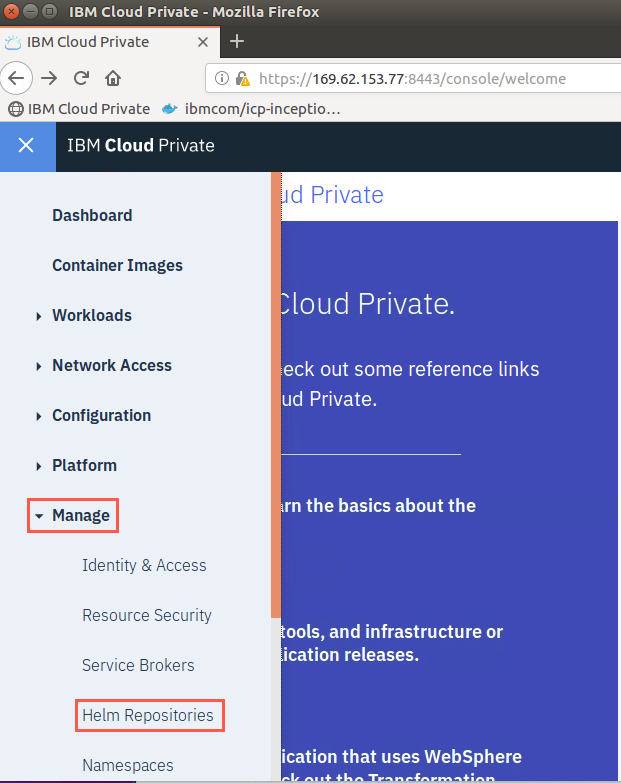
Expand Manage and select Helm Repositories.
-
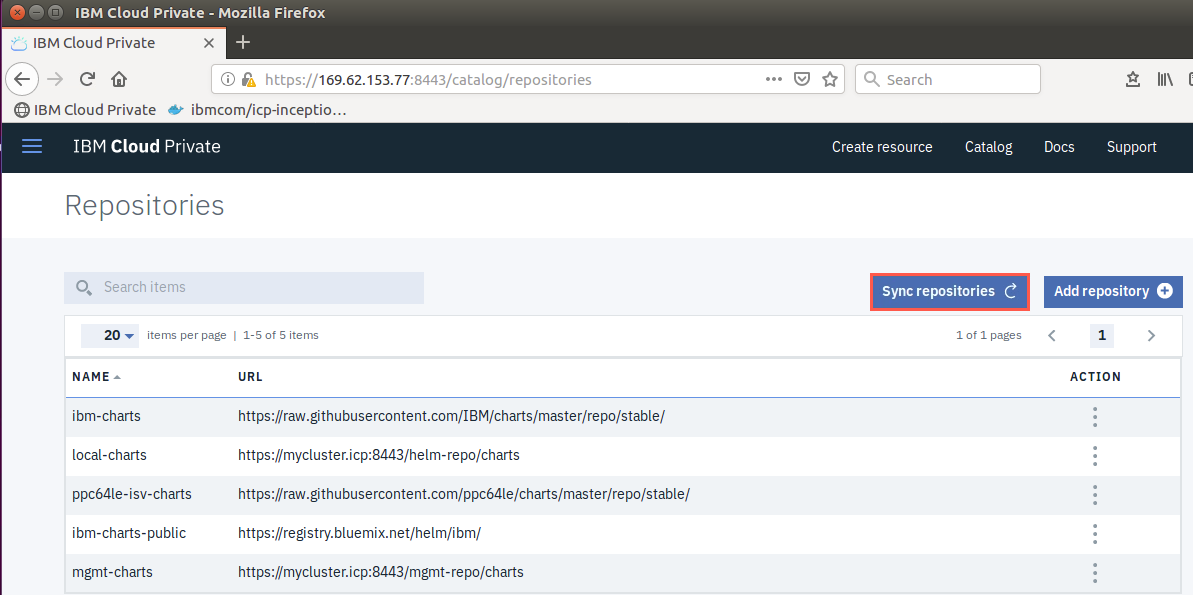
Click Sync repositories.
-
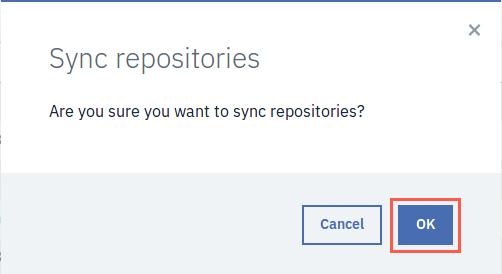
Click OK to confirm.
-
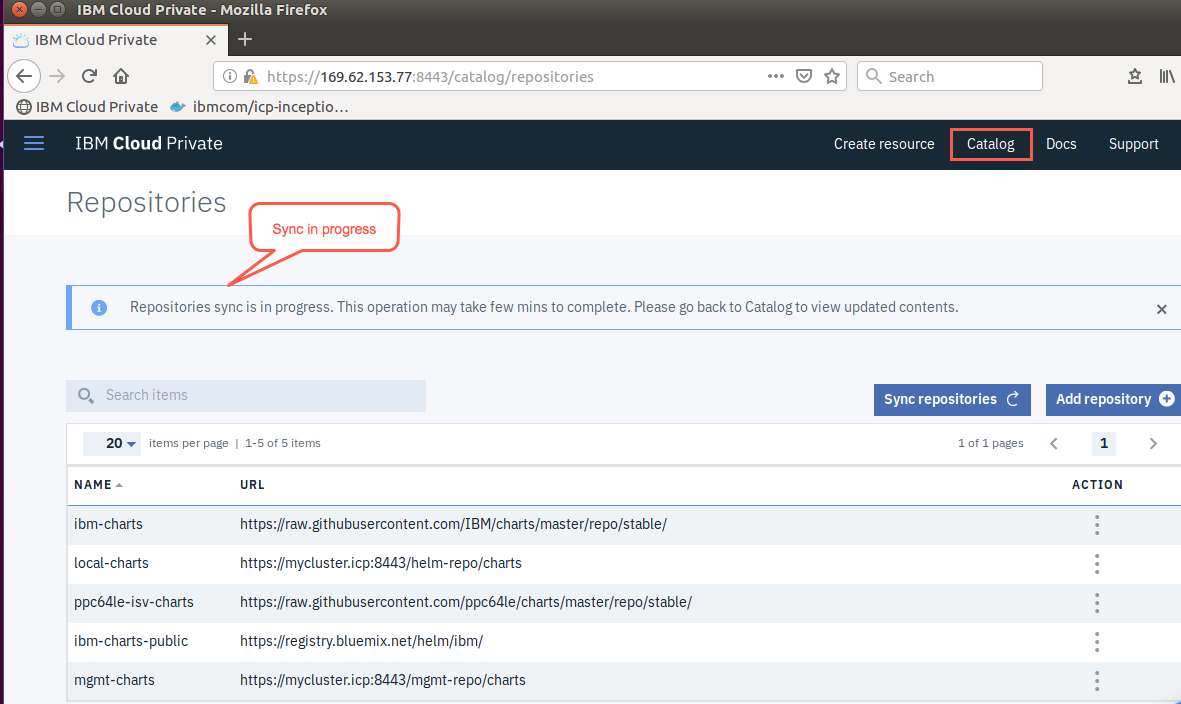
You will receive a pop-up indicating the sync is in progress. Click Catalog on the toolbar.
-
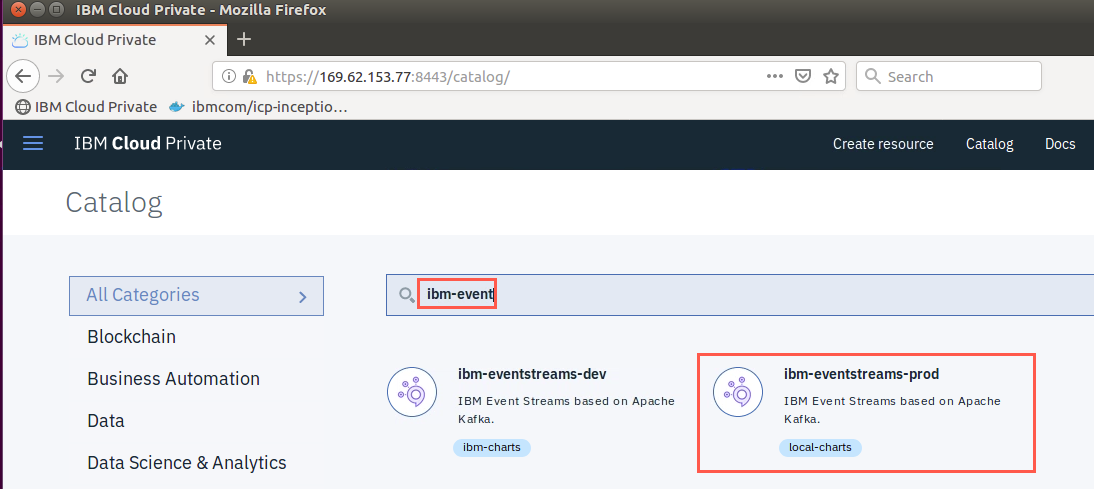
Type ibm-event in the search field, then click ibm-eventstreams-prod Helm chart.
-
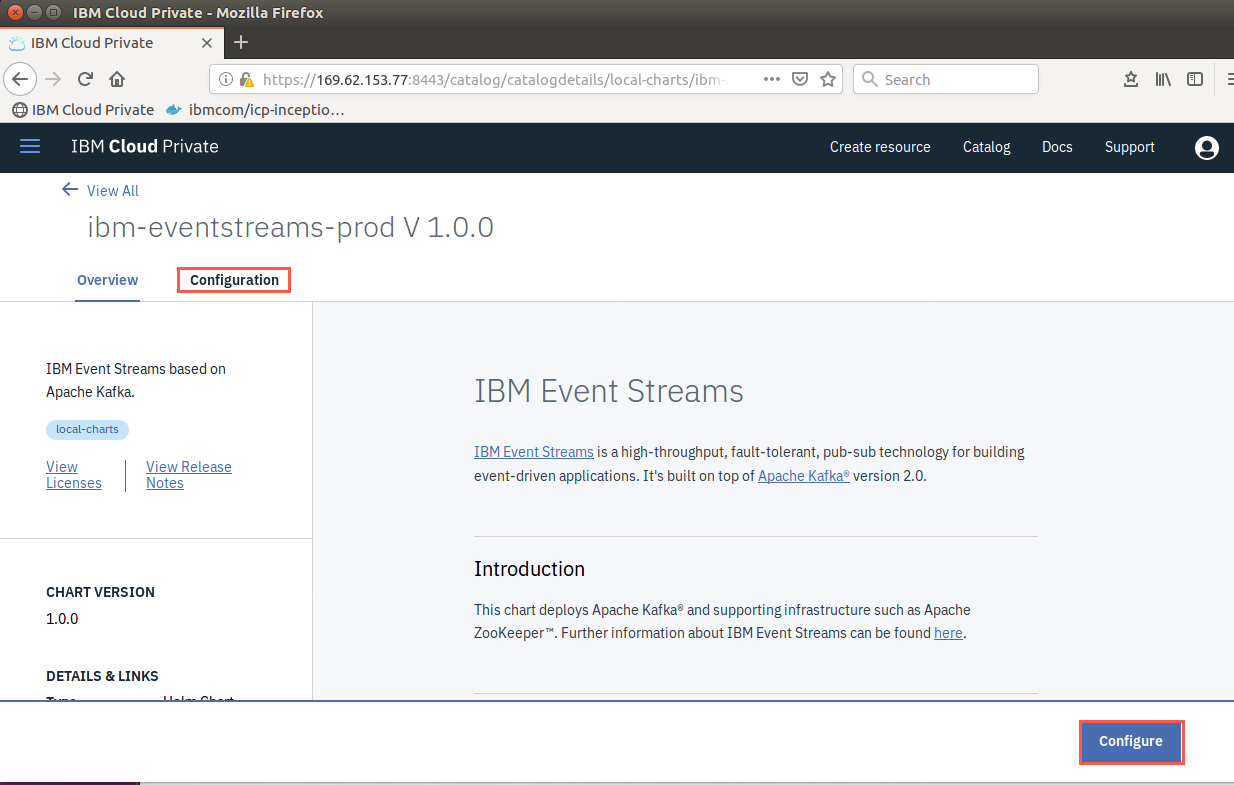
Click Configuration or the Configure button.
-
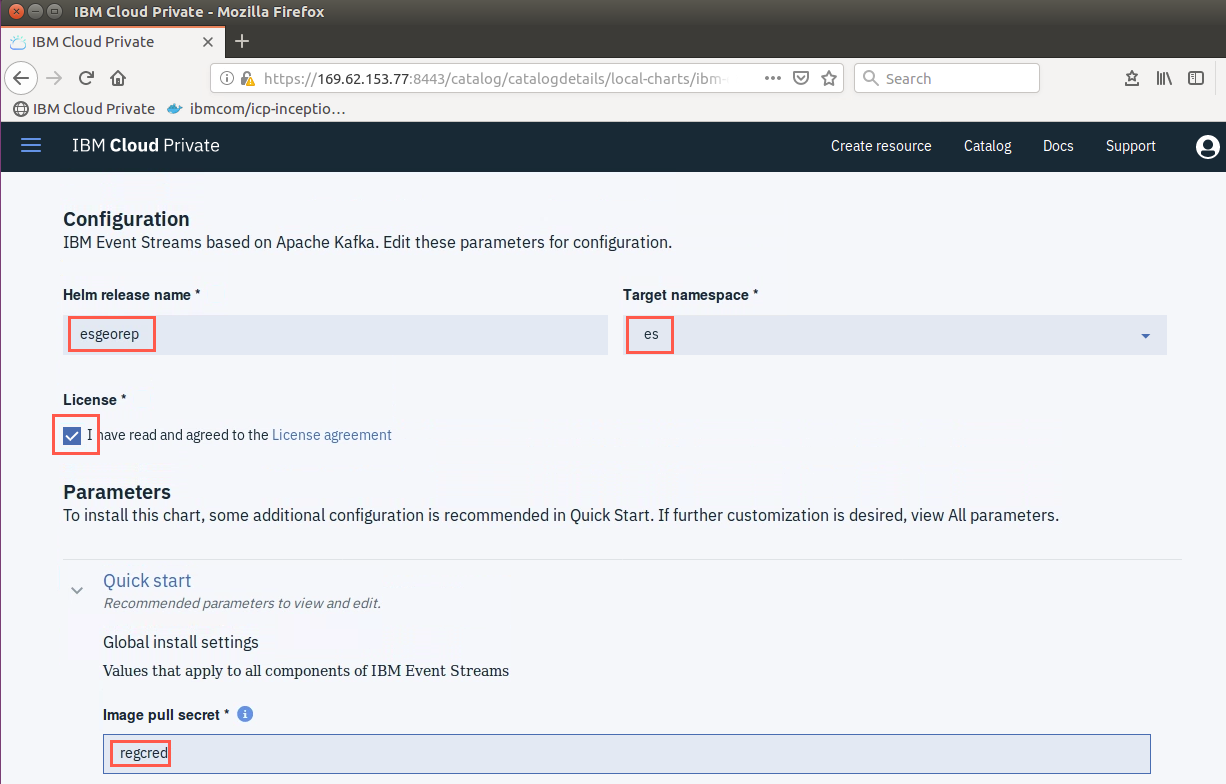
Enter esgeorep for the Helm release name, es in the Target namespace field, and regcred in the Image pull secret. Make sure to check the License checkbox.
-
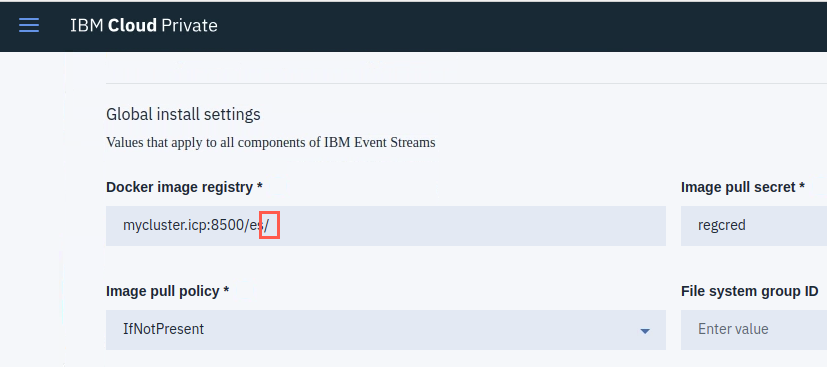
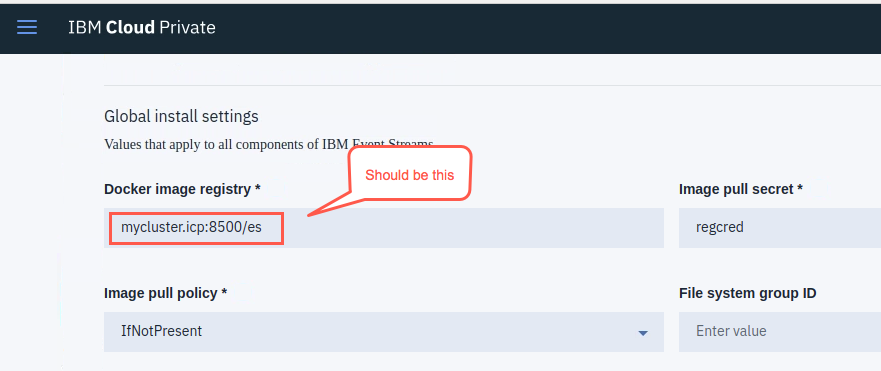
Scroll down, and delete the trailing “/” mark of the URL in the Docker image registry.
-
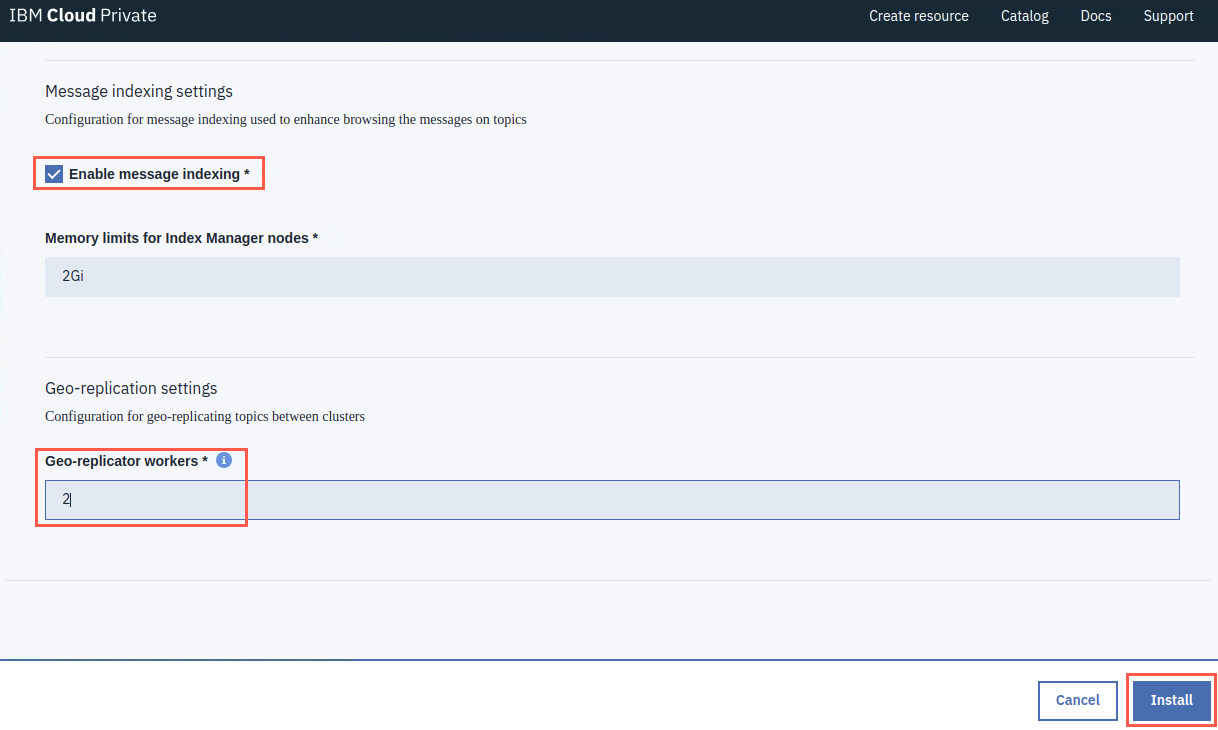
Scroll down to the bottom. Make sure that Enable message indexing is checked. Enter 2 in the Geo-replicator workers. This indicates the number of worker nodes that will perform the replication of messages to a destination node.
Click Install.
-
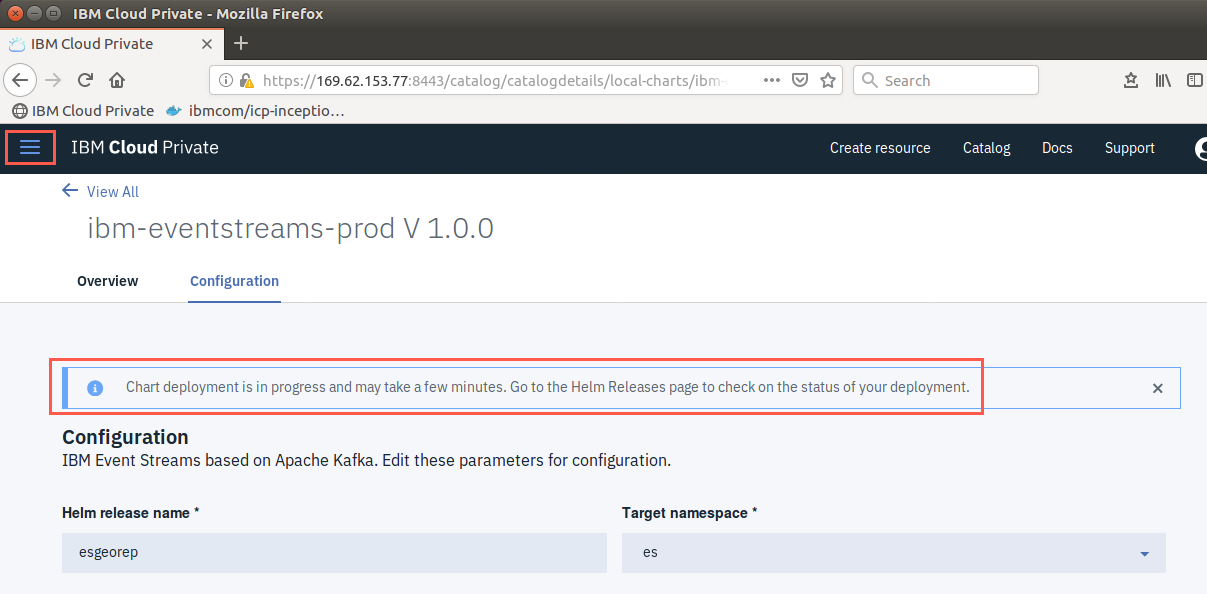
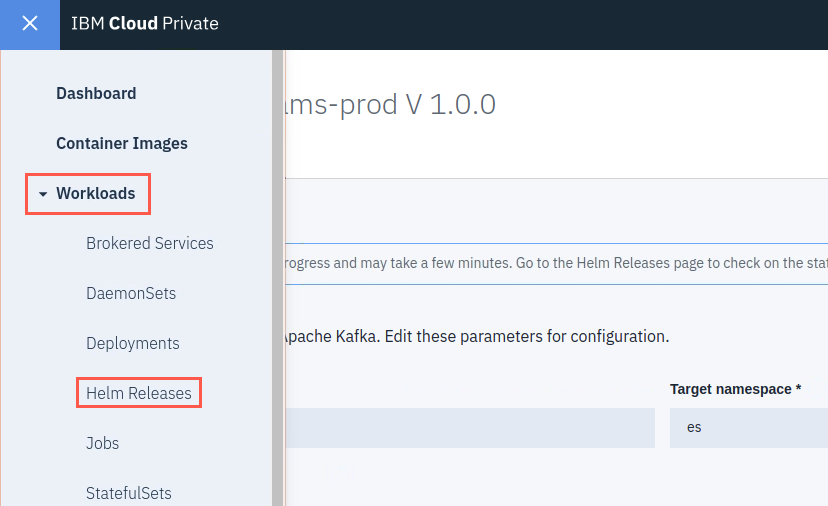
Scroll to the top of the window to see the message stating that the Chart deployment is in progress…. Click the “hamburger” icon to open ICP menu.
-
Expand Workloads and select Helm Releases.
-
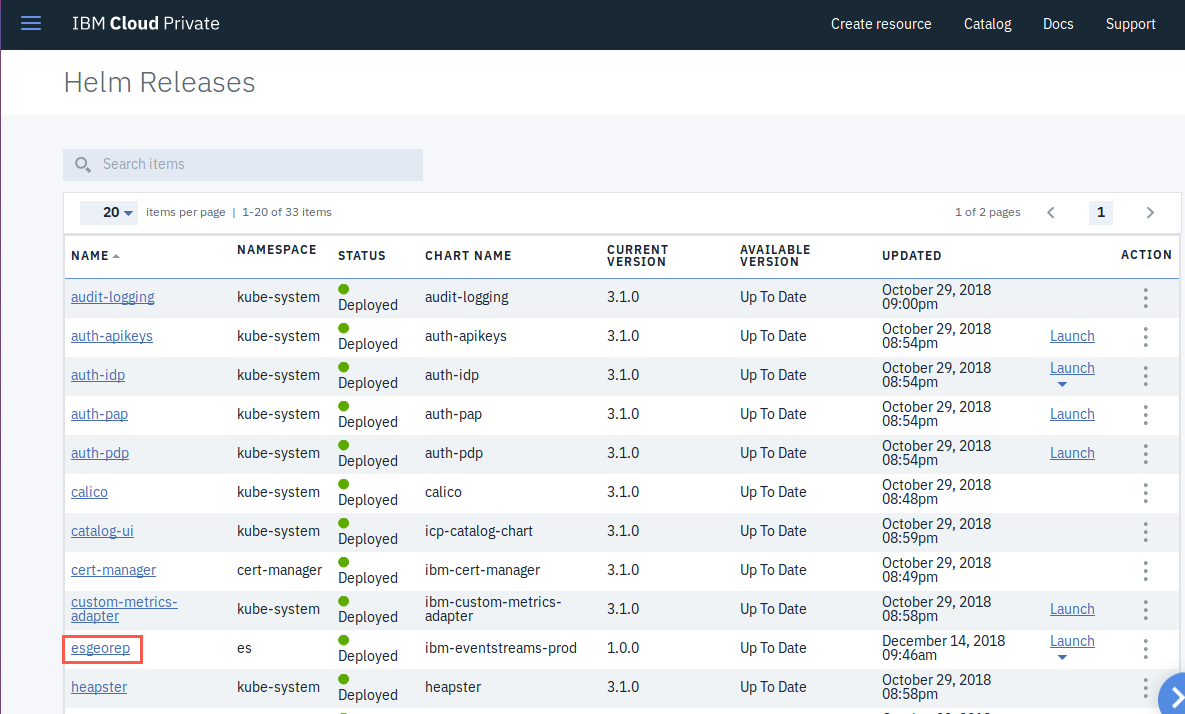
You may need to refresh the screen once or twice until you see the esgeorep Helm Release.
-
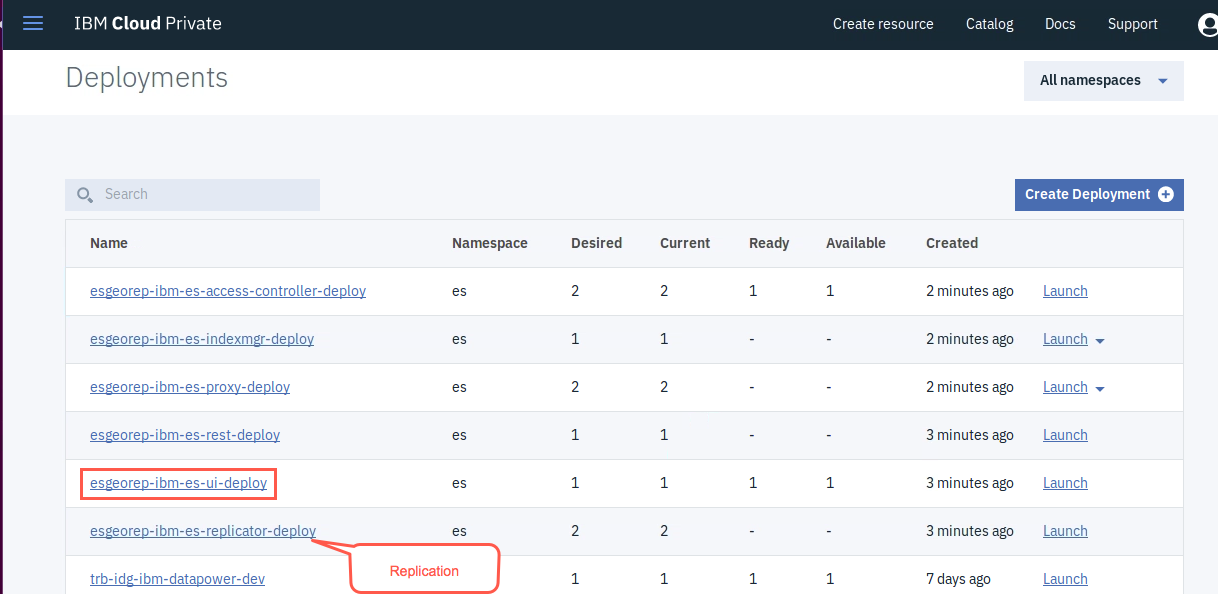
Click the menu icon again, expand Workloads. This time select Deployments. The new deployments for georeplab should be at the top. Notice the deployment for replication. Click the esgeorep-ibm-es-ui-deploy to open the deployment.
-
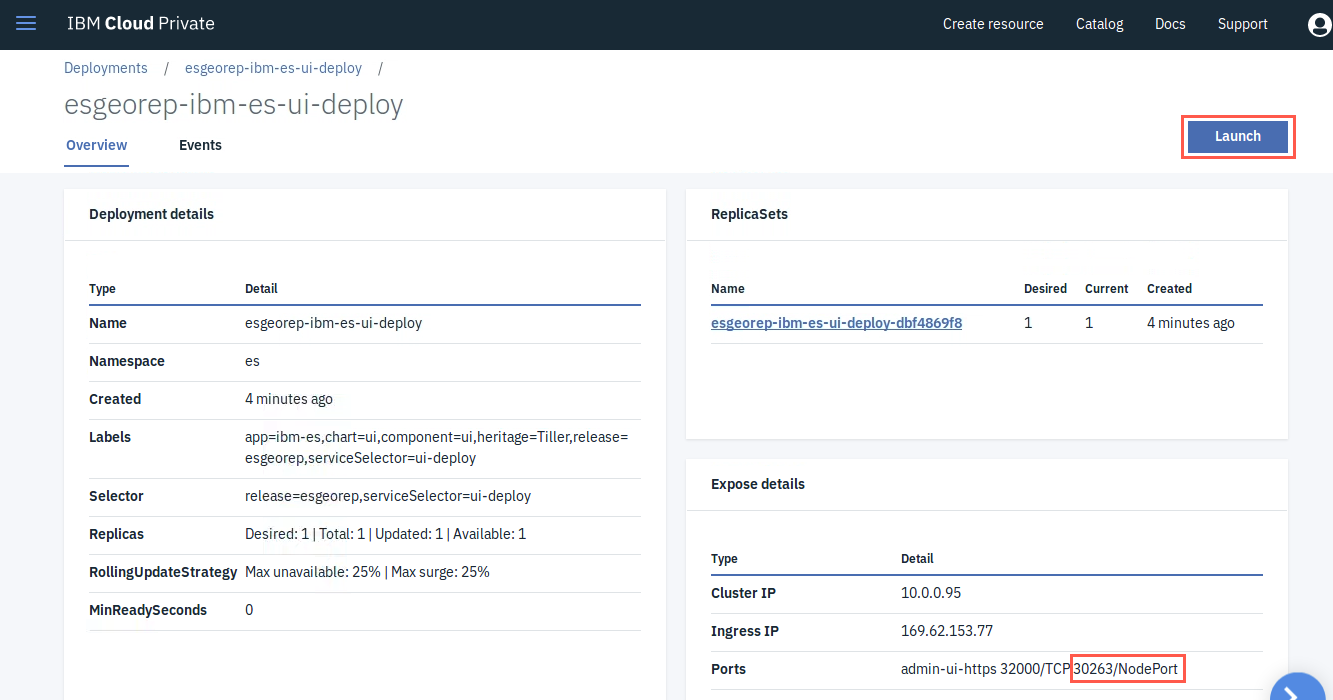
You will see the NodePort under Expose details - Ports. Yours may be different than the screenshot. This is the port for the admin webpage. You may want to record this as you may need it later. Click Launch to open the UI.
-
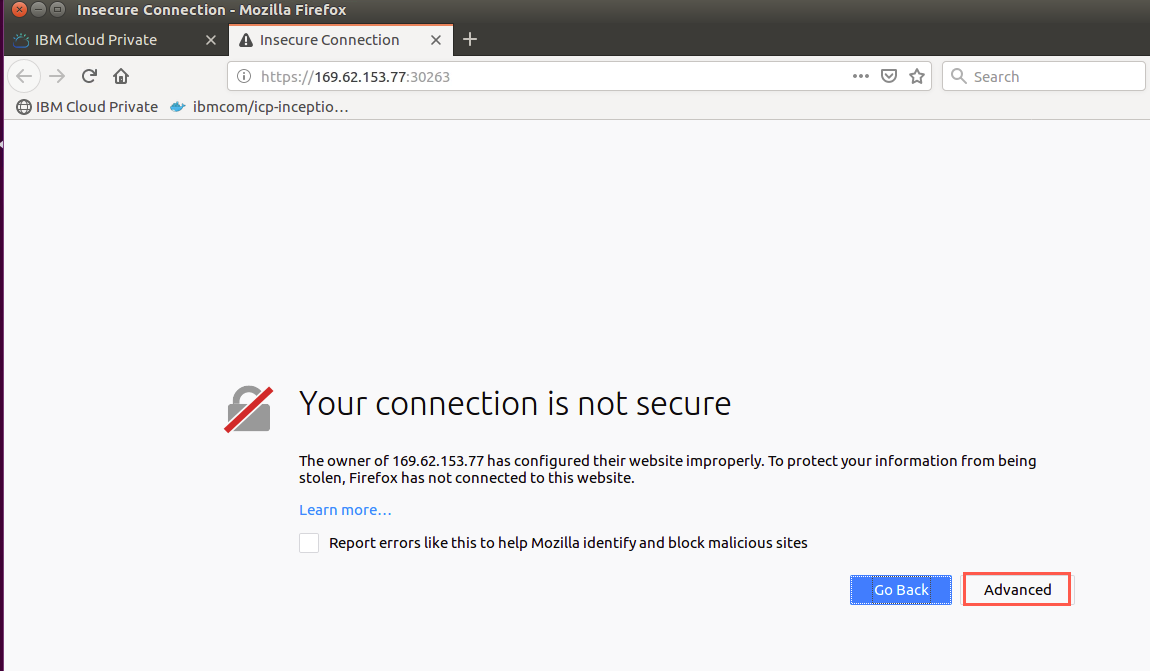
A new browser tab opens. If you receive the “Your connection is not secure” message, click Advanced.
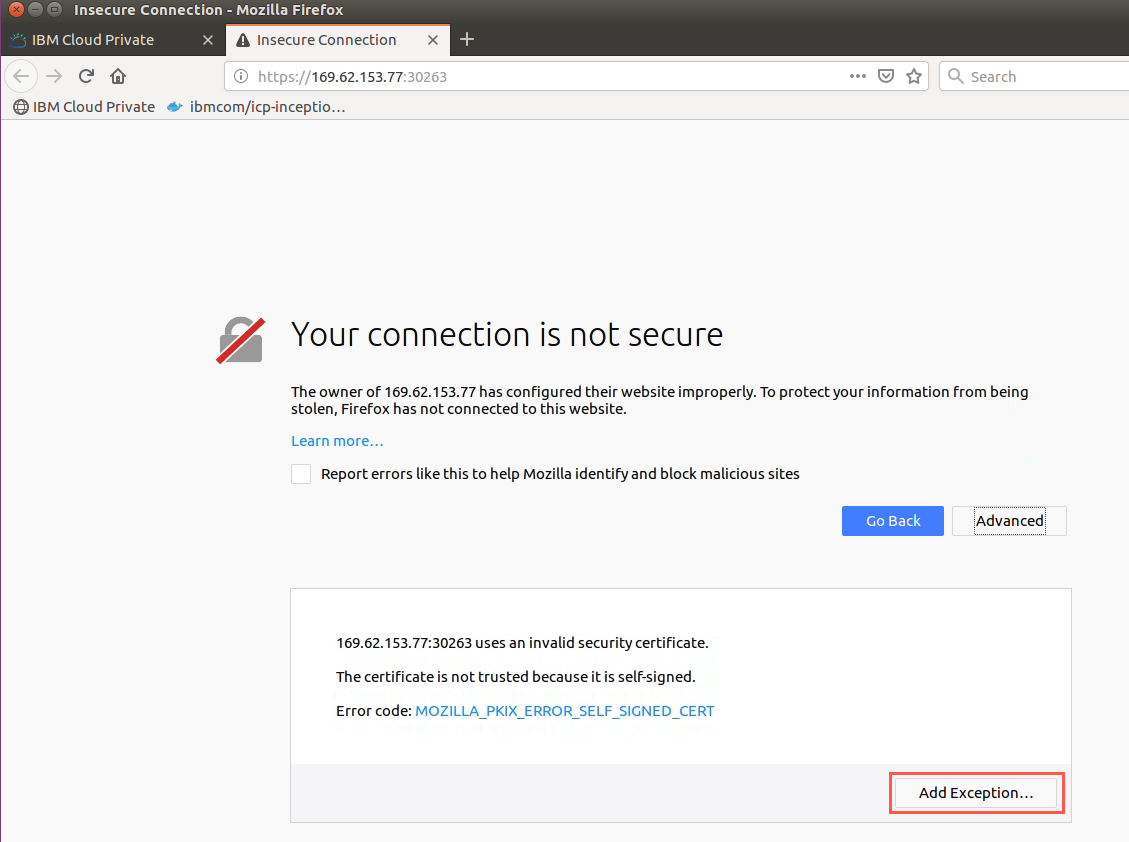
Click Add Exception on the “invalid security certificate” pop-up.
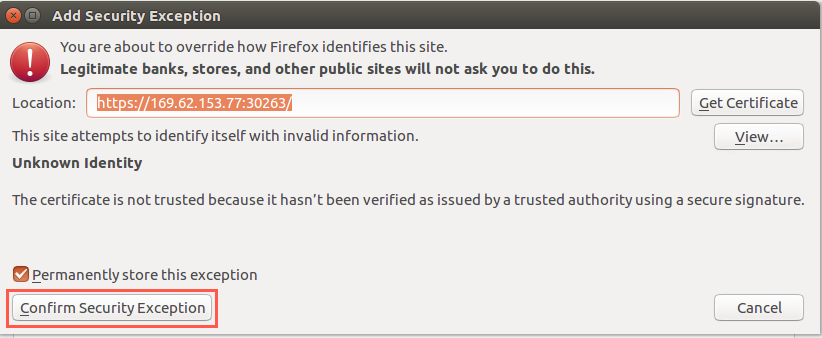
Click Confirm Security Exception.
-
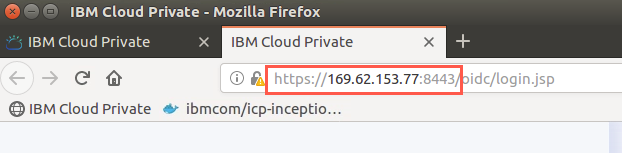
A new tab is opened in your browser with the ICP master node URL + the NodePort. If the page remains in a Loading… state, click the X to close the page and enter the address again. It should then load immediately.
-
You are presented with the ICP login screen again. Enter admin / Trb4Ibm2 for the user and password. Click Log in.
-
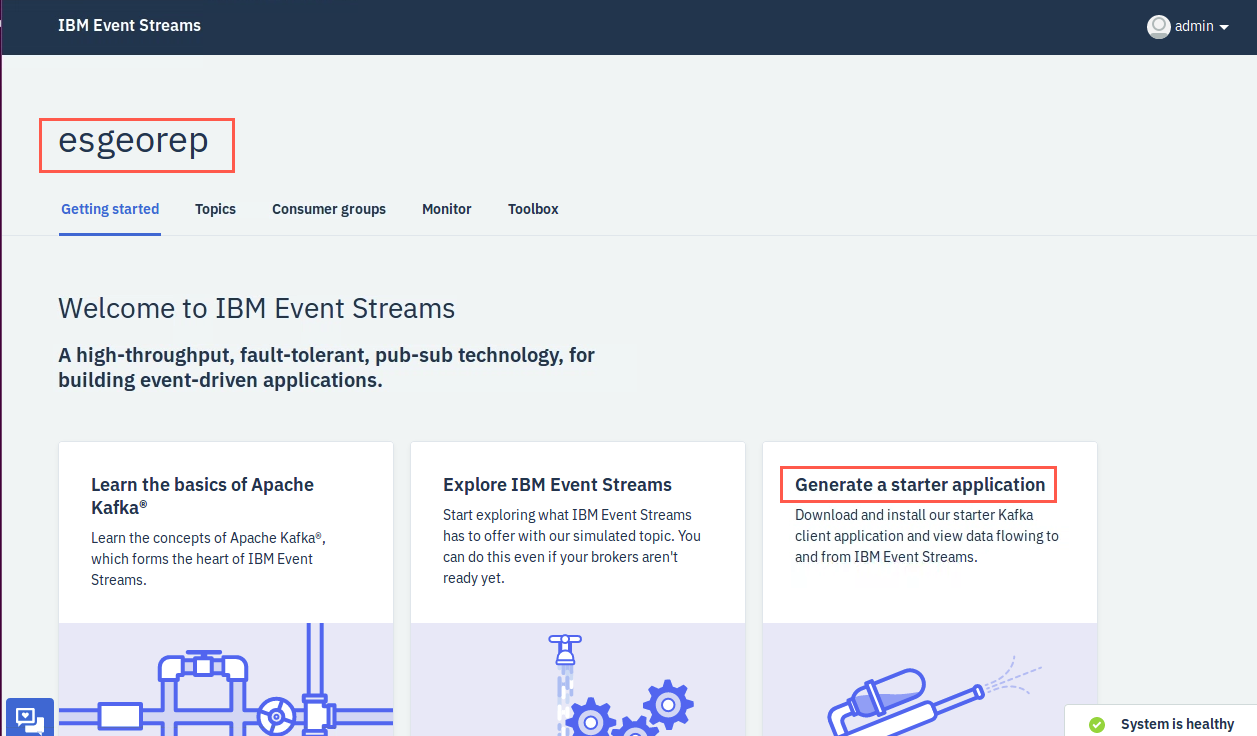
You are taken to the admin UI for your Event Streams Helm Release - esgeorep. Click Generate a starter application.
Step 3: Generate starter application and topic for replication
-
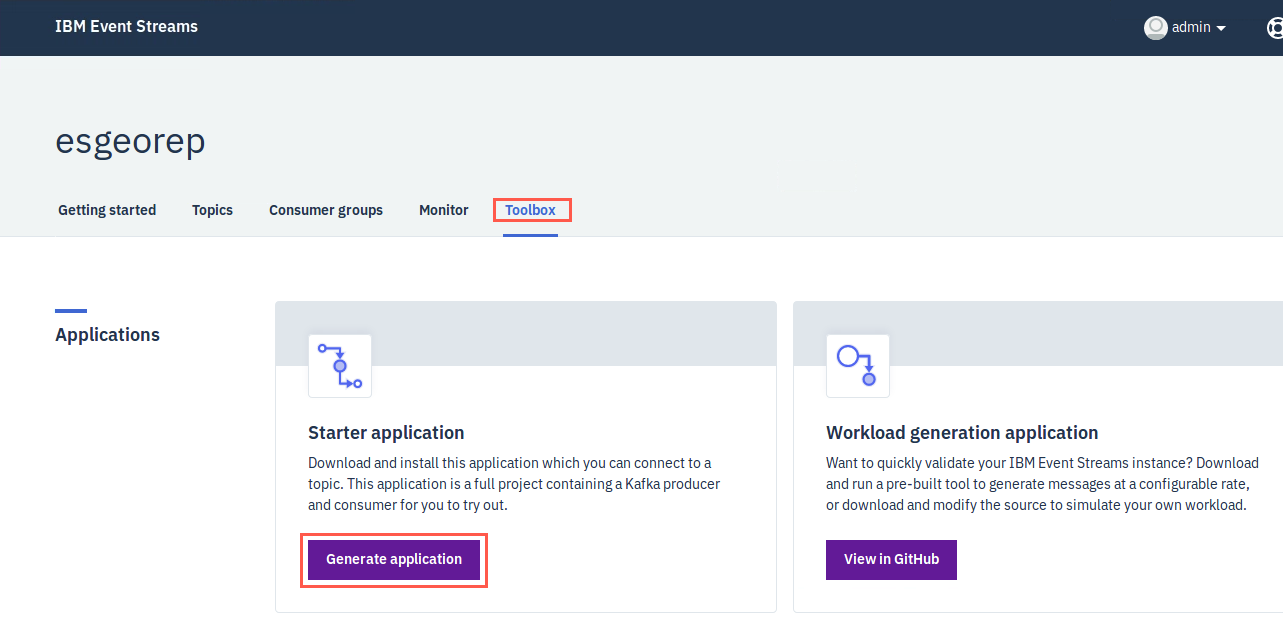
The Event Streams Toolbox opens. Click Generate application.
-
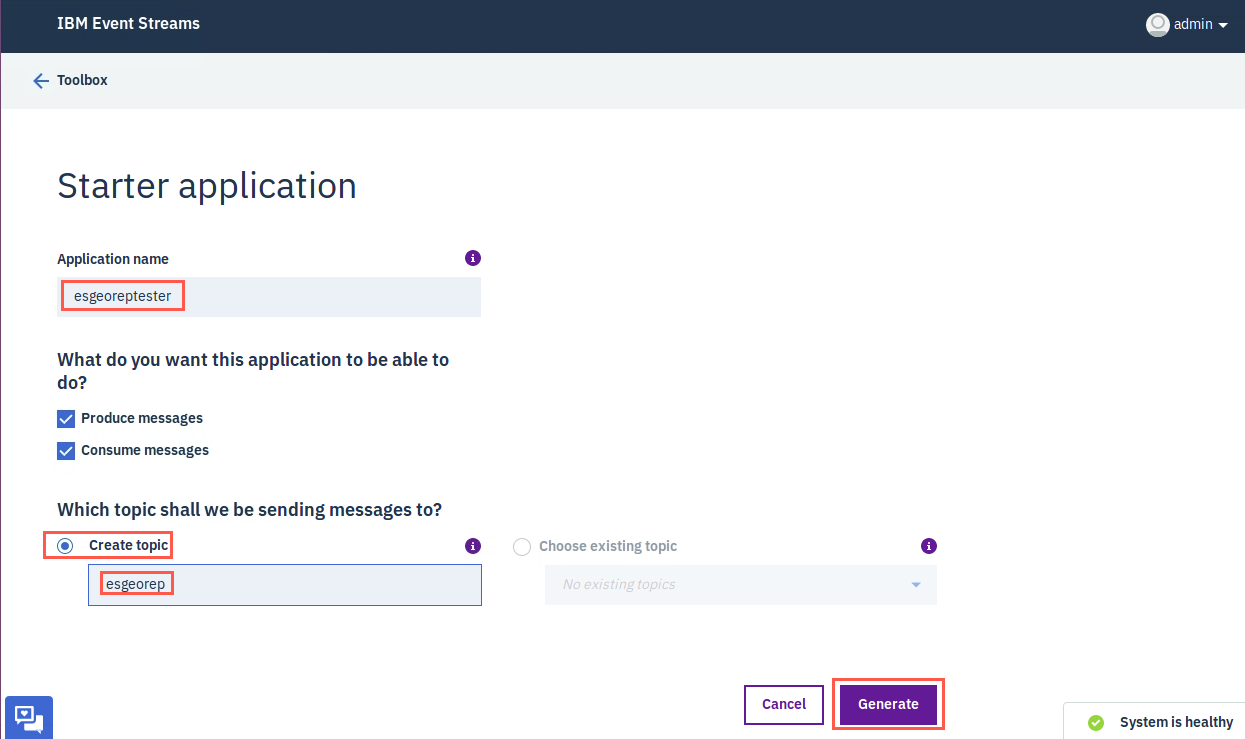
On the Starter application enter esgeoreptester for the Application name. Select Create topic (default). Enter a topic name, ie. esgeorep. Click Generate.
-
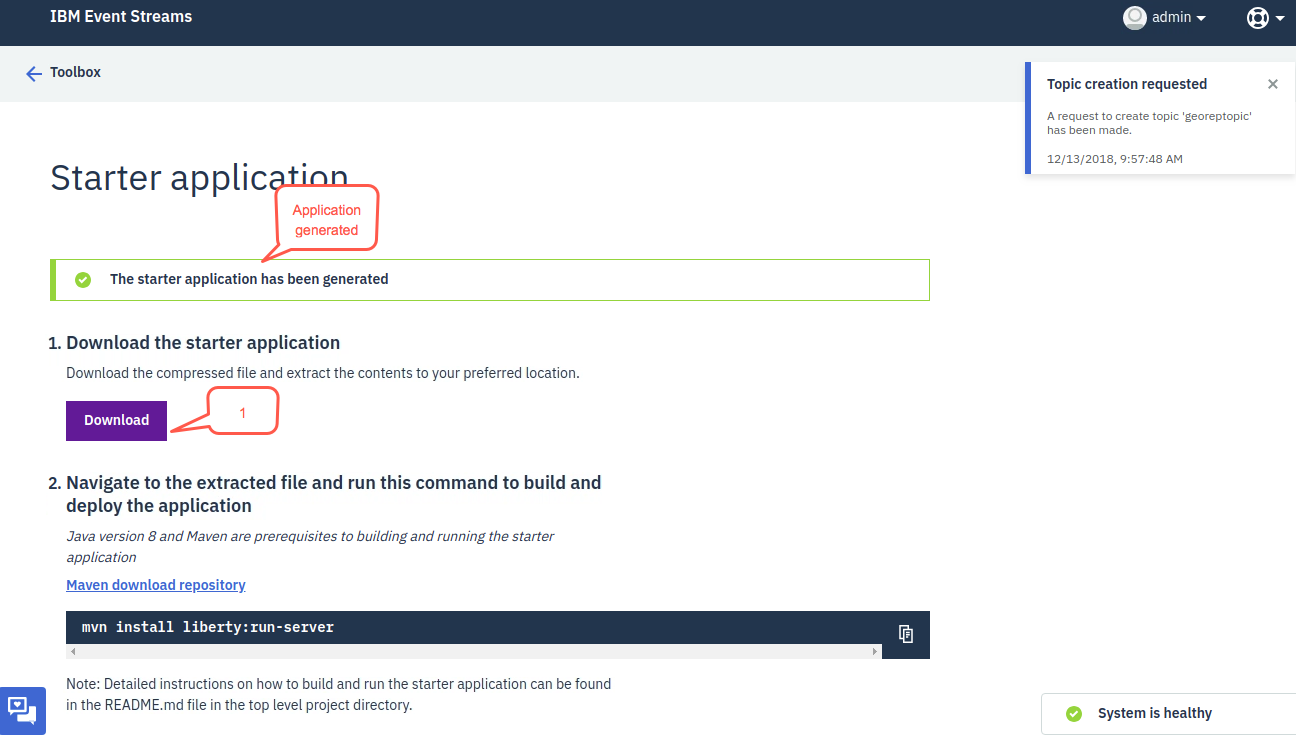
It will take a moment for the Starter application to be generated. Once you see the status message The Starter application has been generated you may complete the steps that are listed on the page. The first step is to download the Starter application that was generated. Click the Download button and save the archive file to the Downloads directory.
-
Next you will need to locate and unpack the file that was downloaded. Open a command prompt window. Create a new subdirectory in the Downloads directory to contain and build the app. Enter the following commands to extract the starter application. If you are asked if you want to replace any files answer A for all.
 cd Downloads
 mkdir esgeorep
 cd esgeorep
 unzip ~/IBMEventStreams_esgeoreptester.zip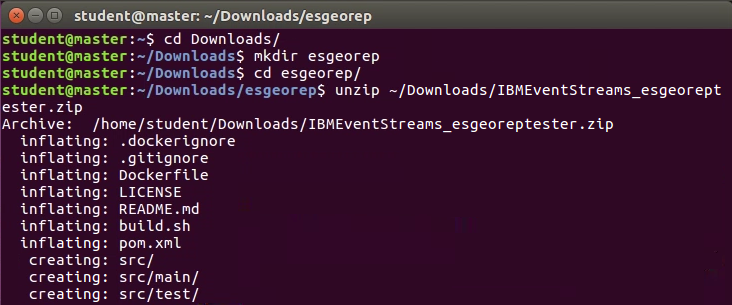
-
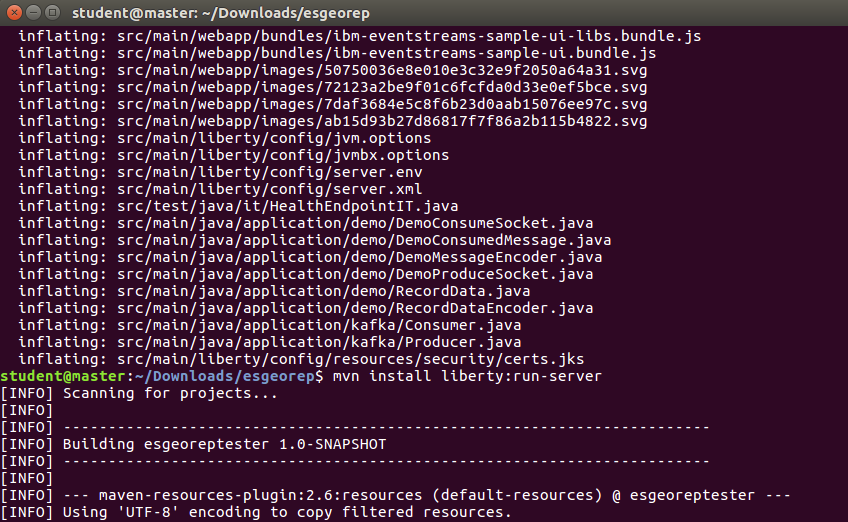
You will now build the application as you did in Lab 4, with Maven. Maven is a build utility that is used to create Java applications. It has been installed, along with Java, in the virtual machine for this lab exercise. The archive that was extracted contains a pom.xml file that provides the directions for Maven to generate the Starter application. Use the following command to build and launch the Starter application.
 ```
 mvn install liberty:run-server
 ```
-
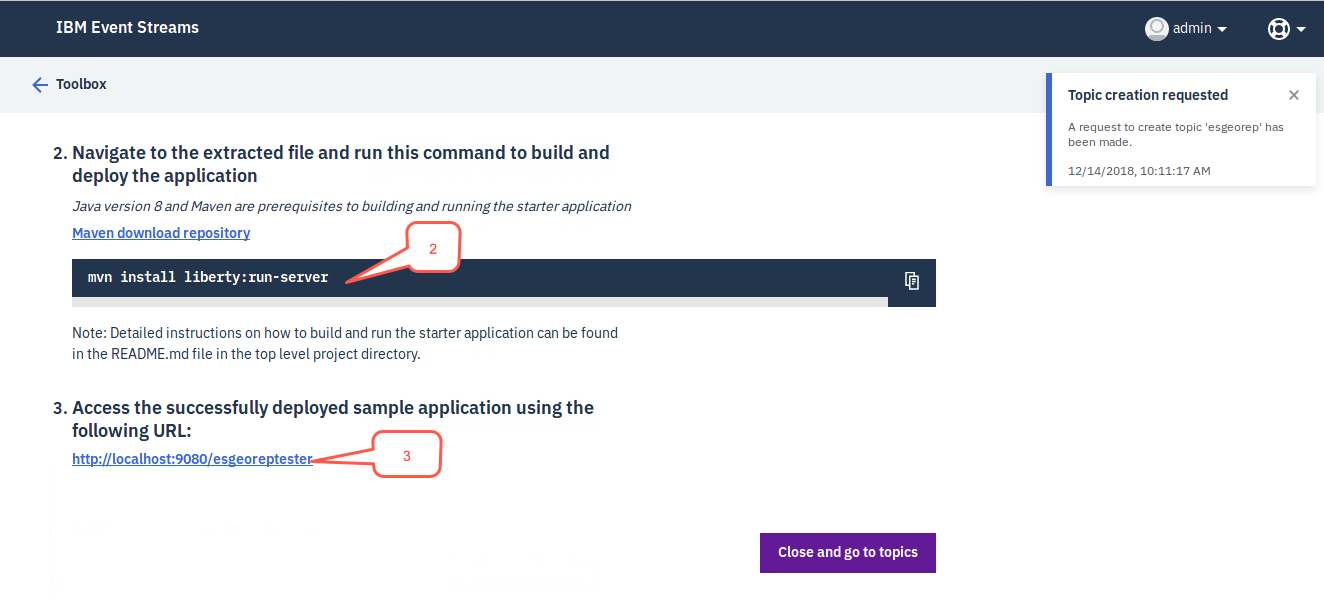
Now that you have built the application, you can launch it by clicking the hyperlink - http://localhost:9080/georeptester.
-
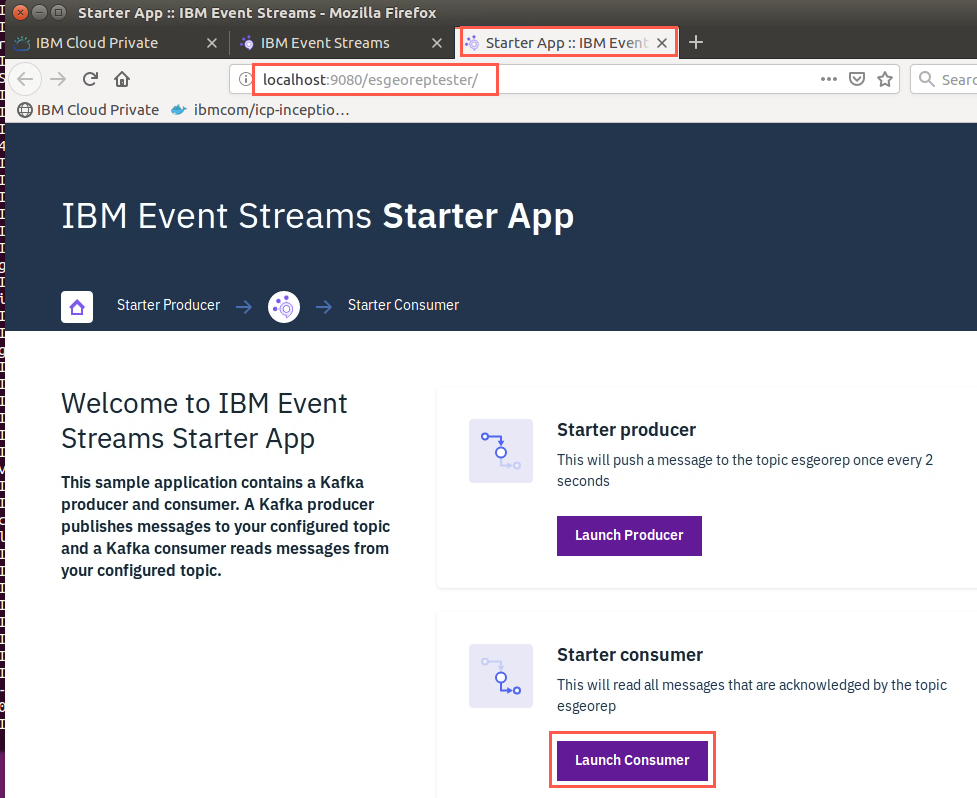
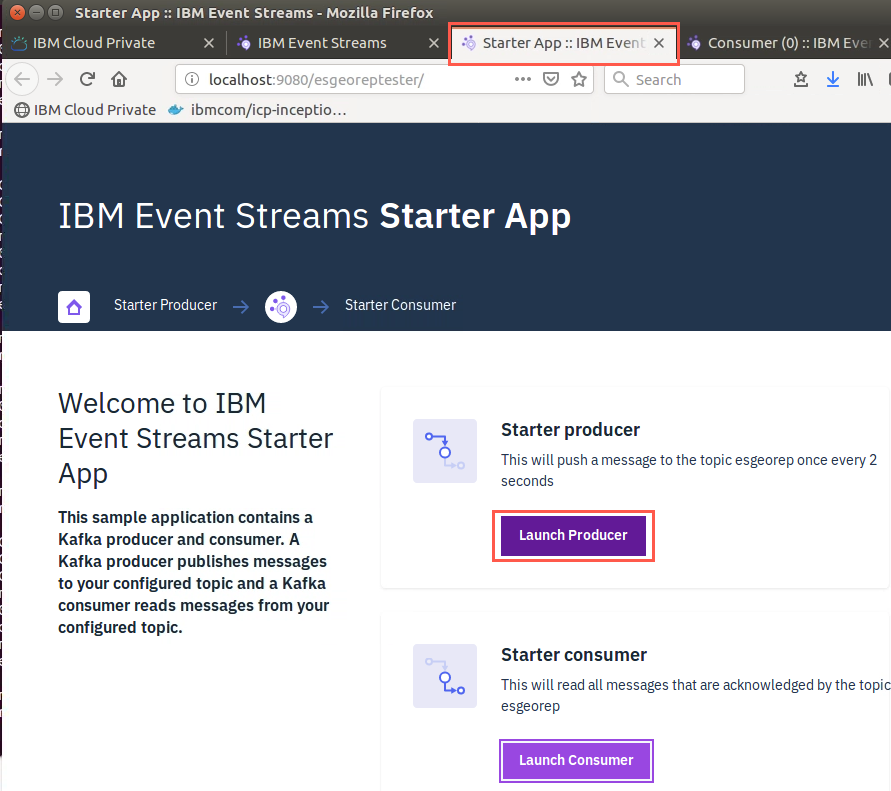
Another browser tab opens with a name Starter App::IBMEventStreams_esgeoreptester. Click Launch Consumer.
-
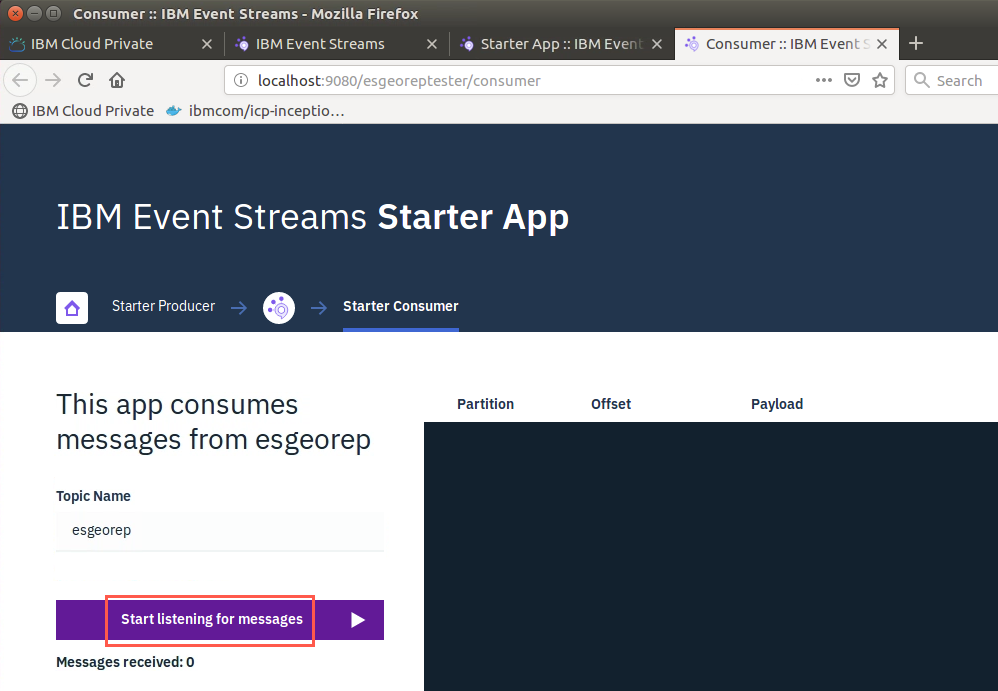
Another browser tab opens with the name Consumer(0)::IBMEventStreams_esergeoreptester for the starter application consumer. Click Start listening for messages.
-
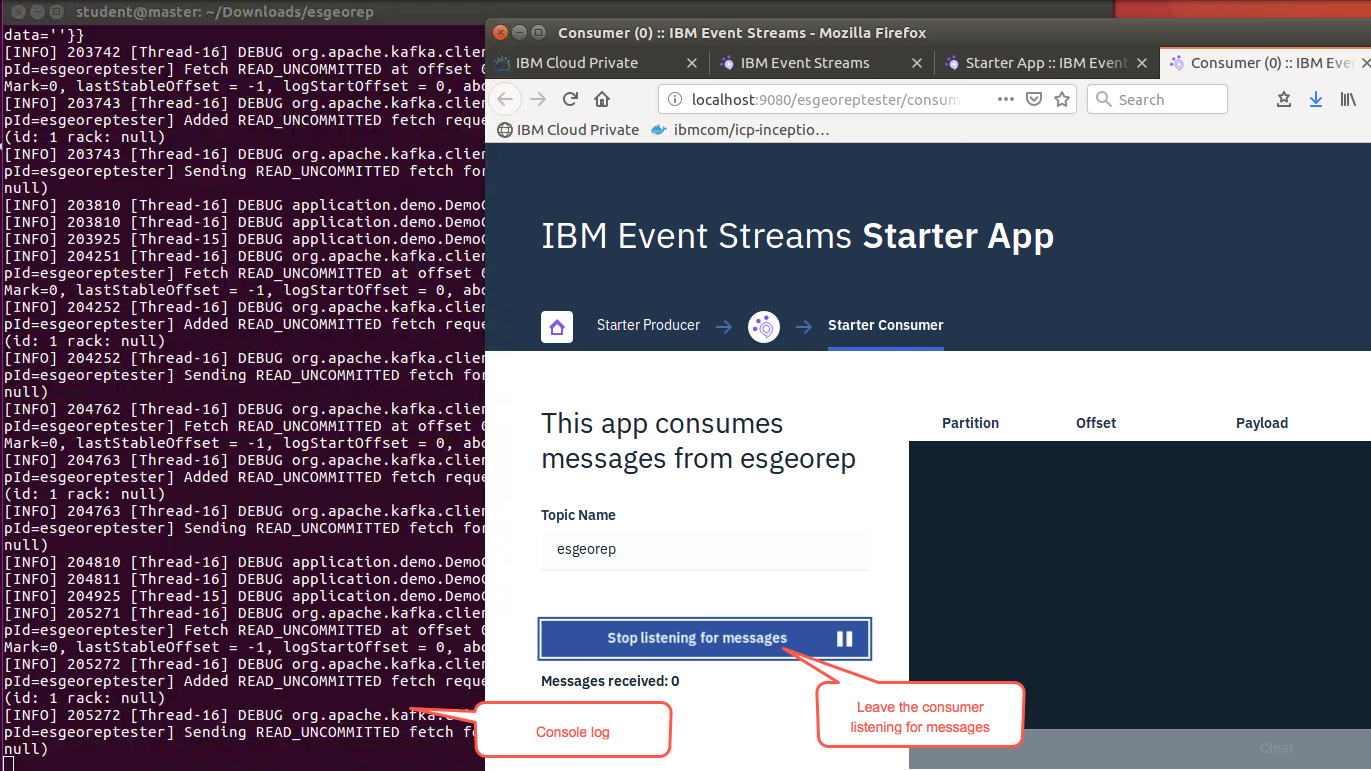
You can see the activity in the command console. The consumer status changes to Stop listening for messages. Do not click this. Leave the consumer listening for messages.
-
Return to the Start App… tab and click Launch Producer.
-
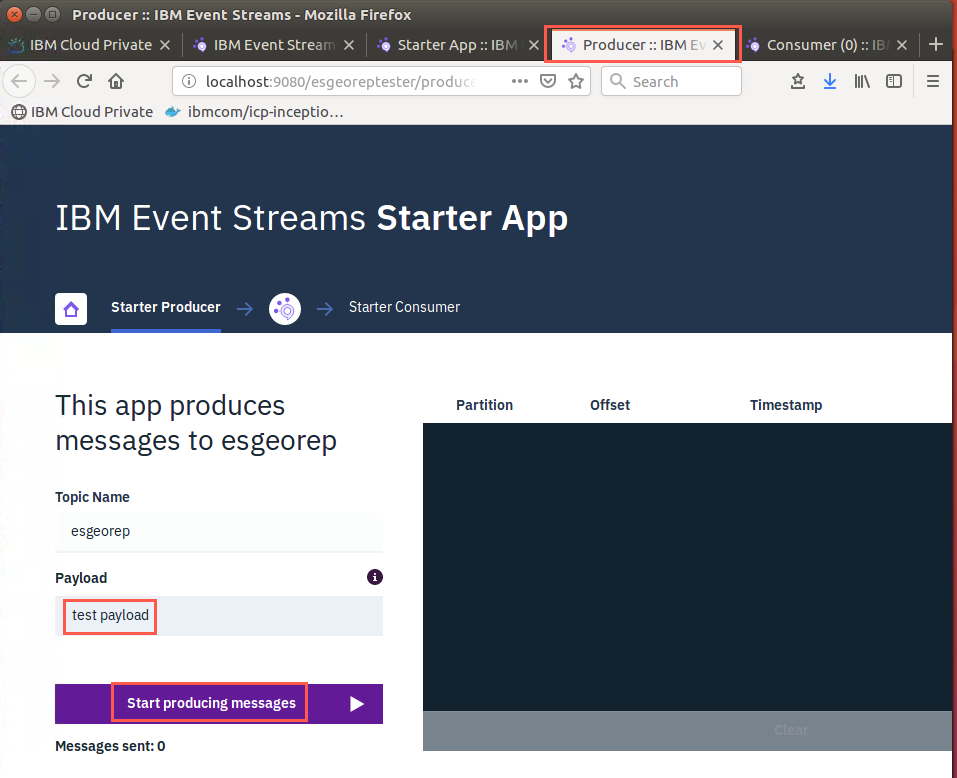
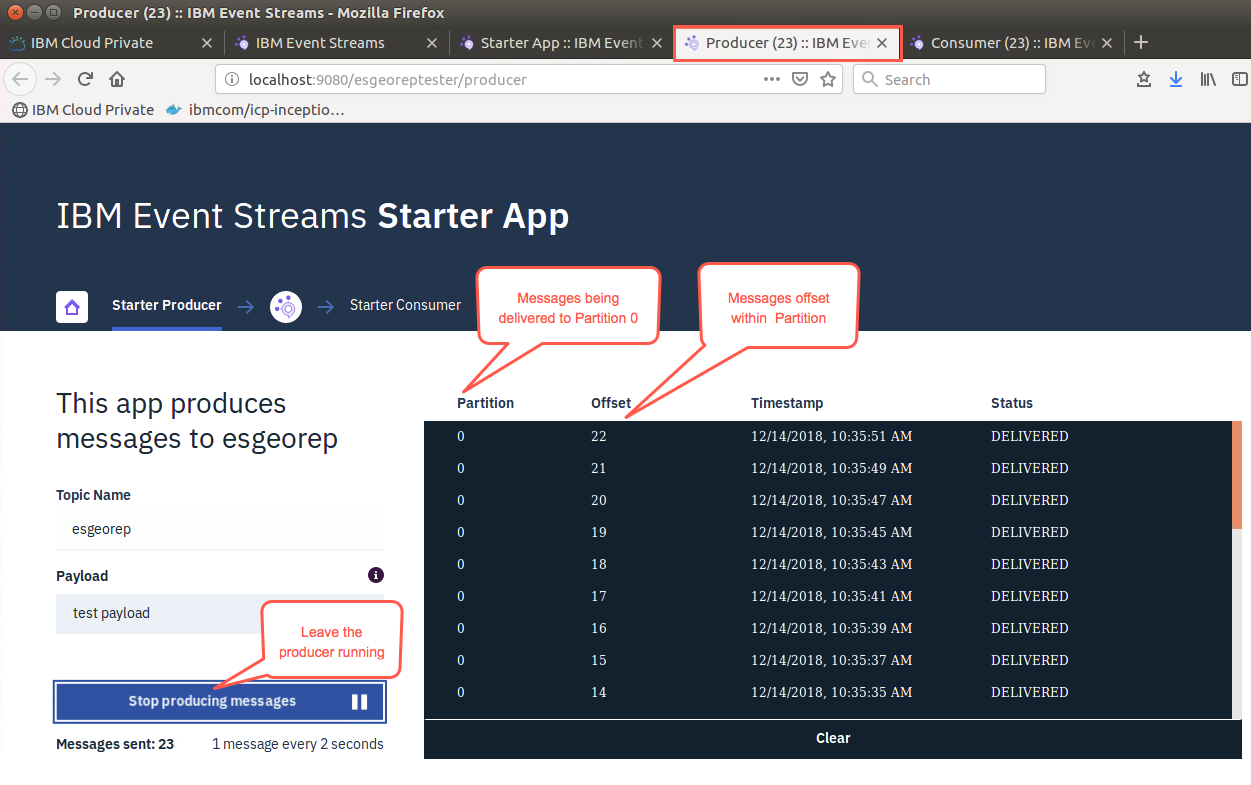
Yet another browser tab opens with the name Producer::IBMEventStreams_esgeoreptester. Notice the payload which the producer will send in the messages. Click Start producing messages.
-
You can see the partition where the messages are being delivered and the offset of the messages. Leave the producer running so you will have messages to replicate.
-
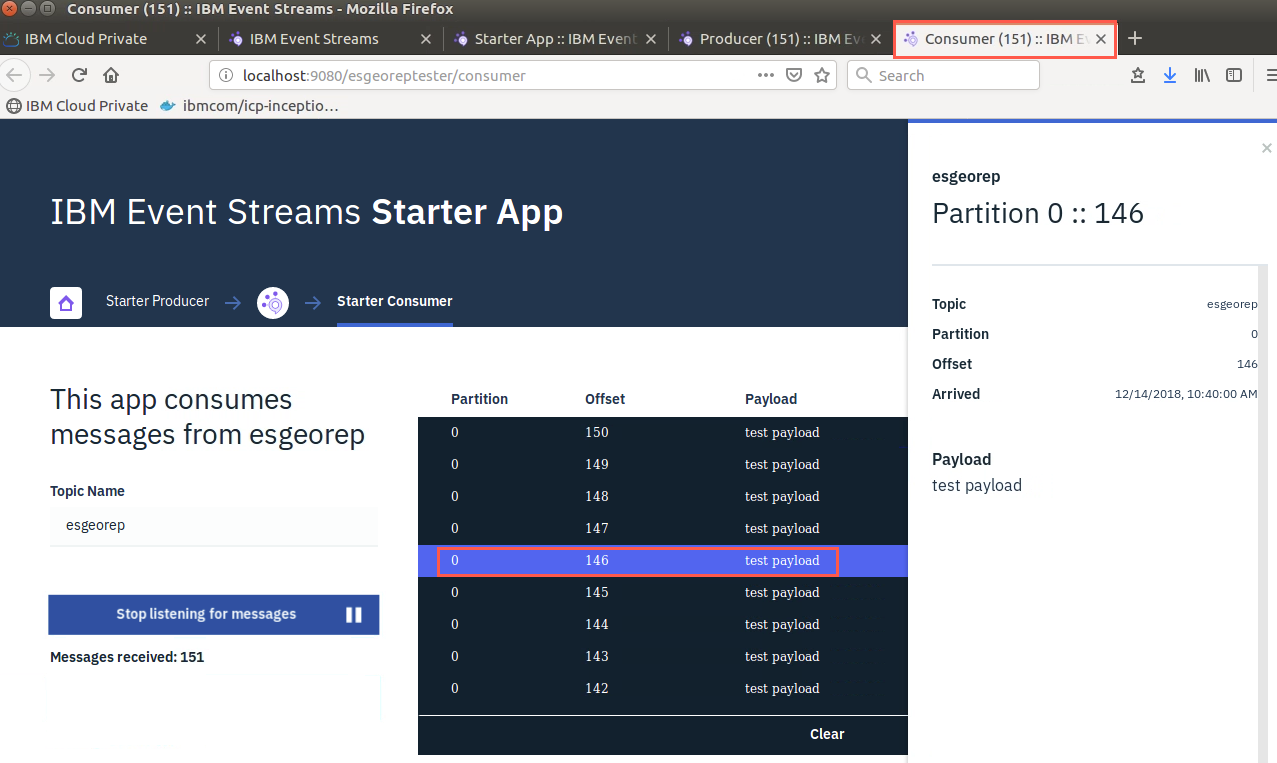
Switch to the consumer tab and observe that messages are in fact being delivered and the consumer is reading them. You can see the message offset and the payload. Click on a message to see the details for that particular message.
Replicate messages to remote cluster
-
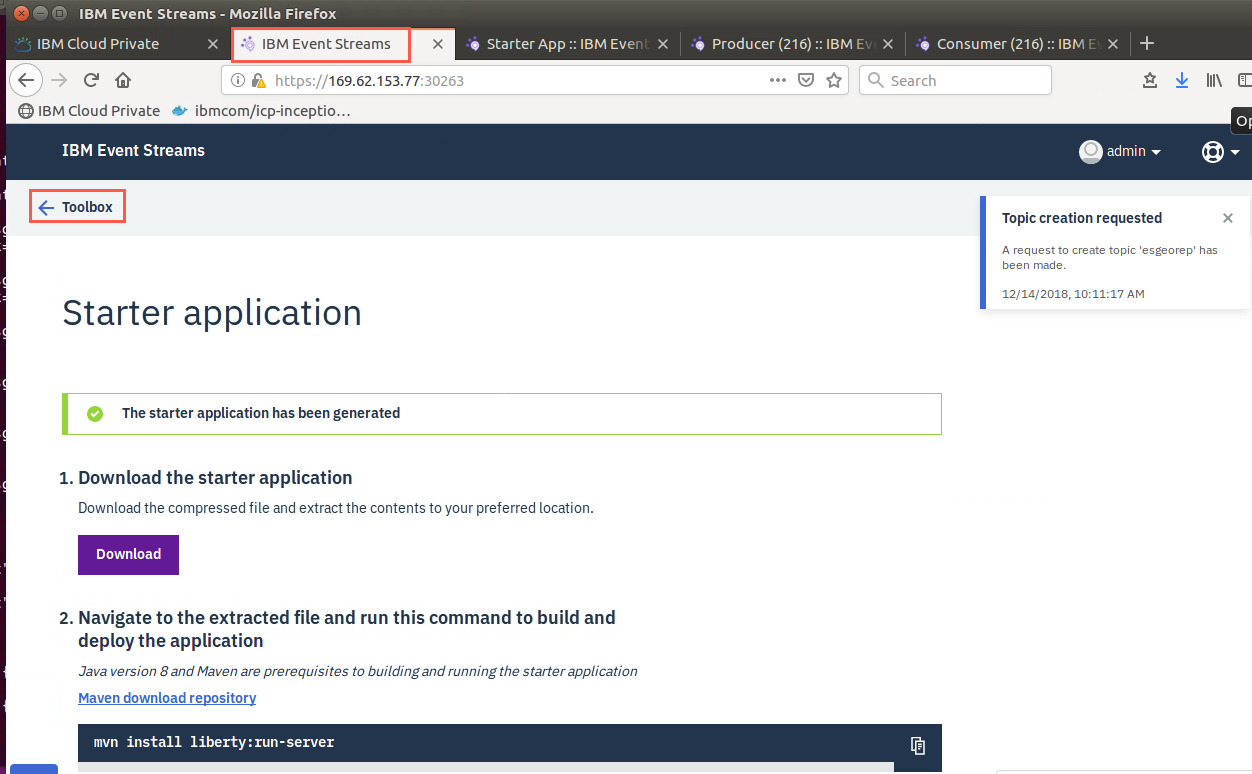
Return to the IBM Event Streams browser tab. Click the Toolbox back link.
-
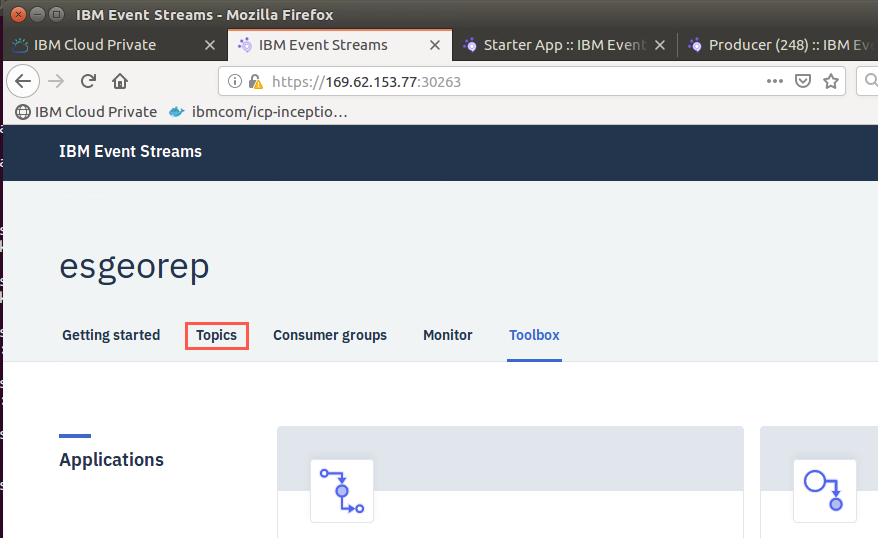
Click Topics.
-
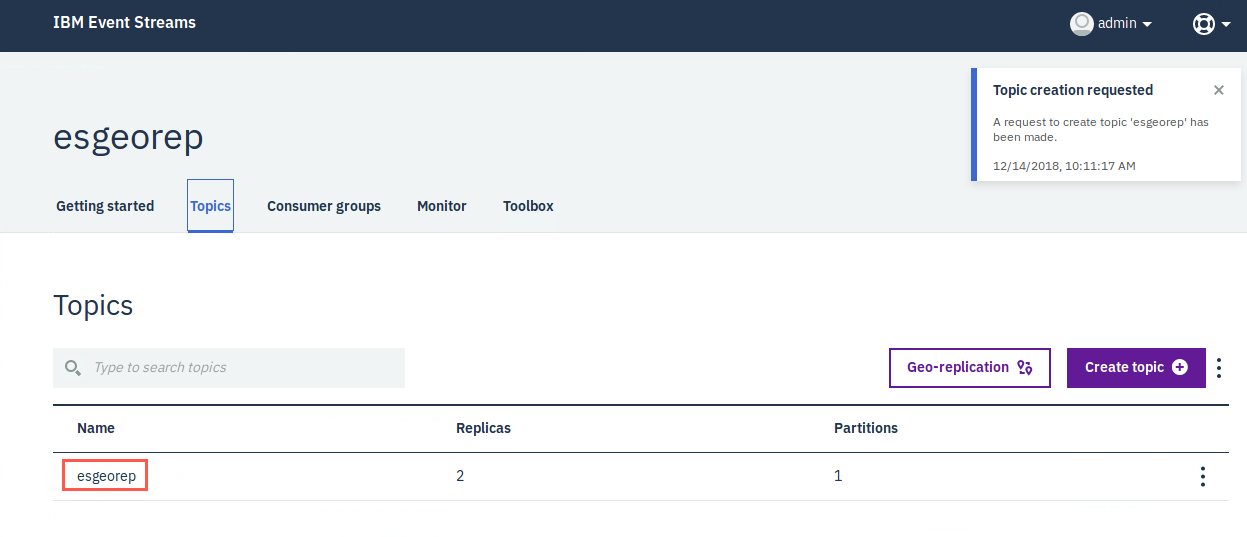
You see the esgeorep topic that you created with the starter application. Click the topic to open the message detail.
-
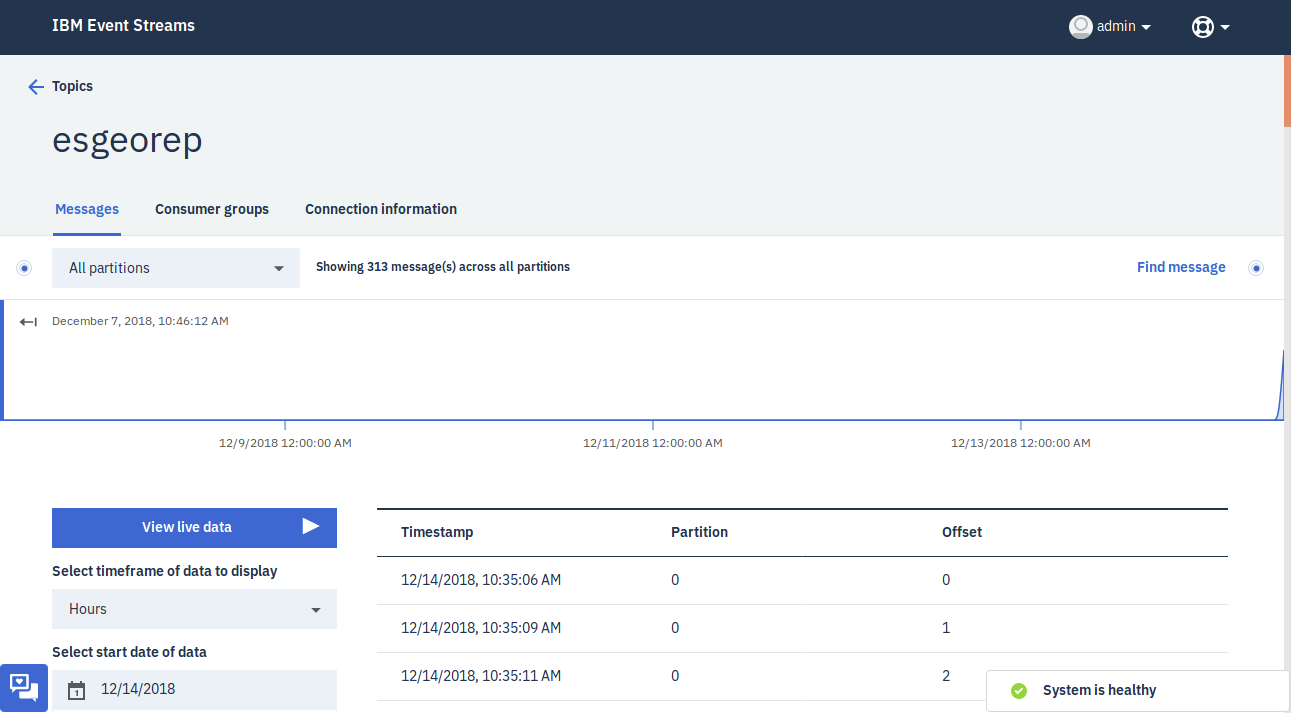
You are presented with a display of messages that have been produced, a graphical timeline display, and metadata about the messages.
-
Click the Topics back button to return.
-
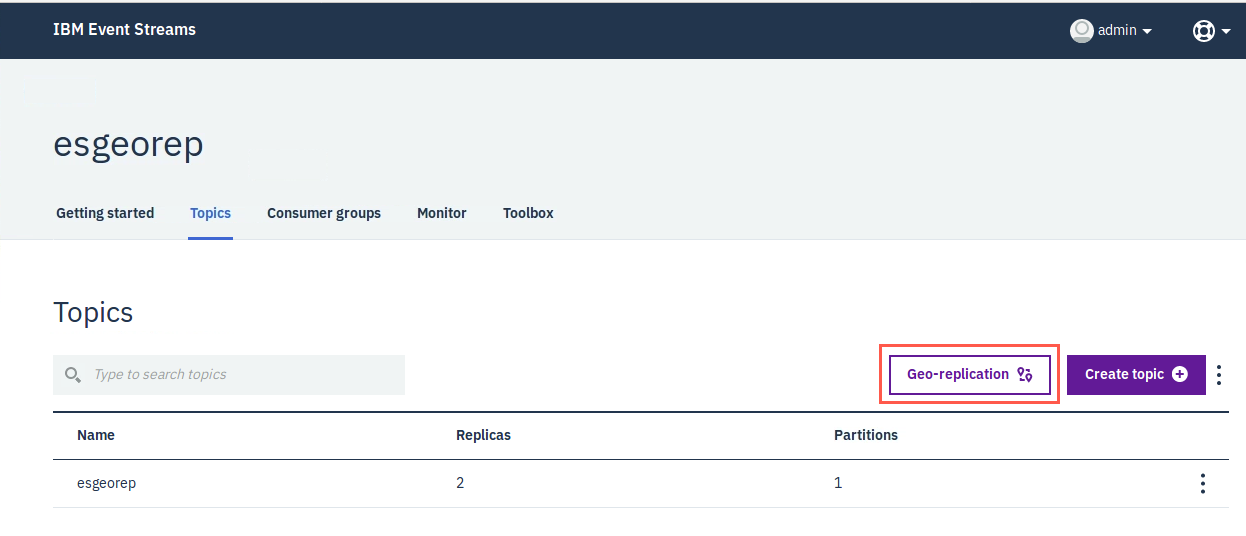
Click Geo-replication.
-
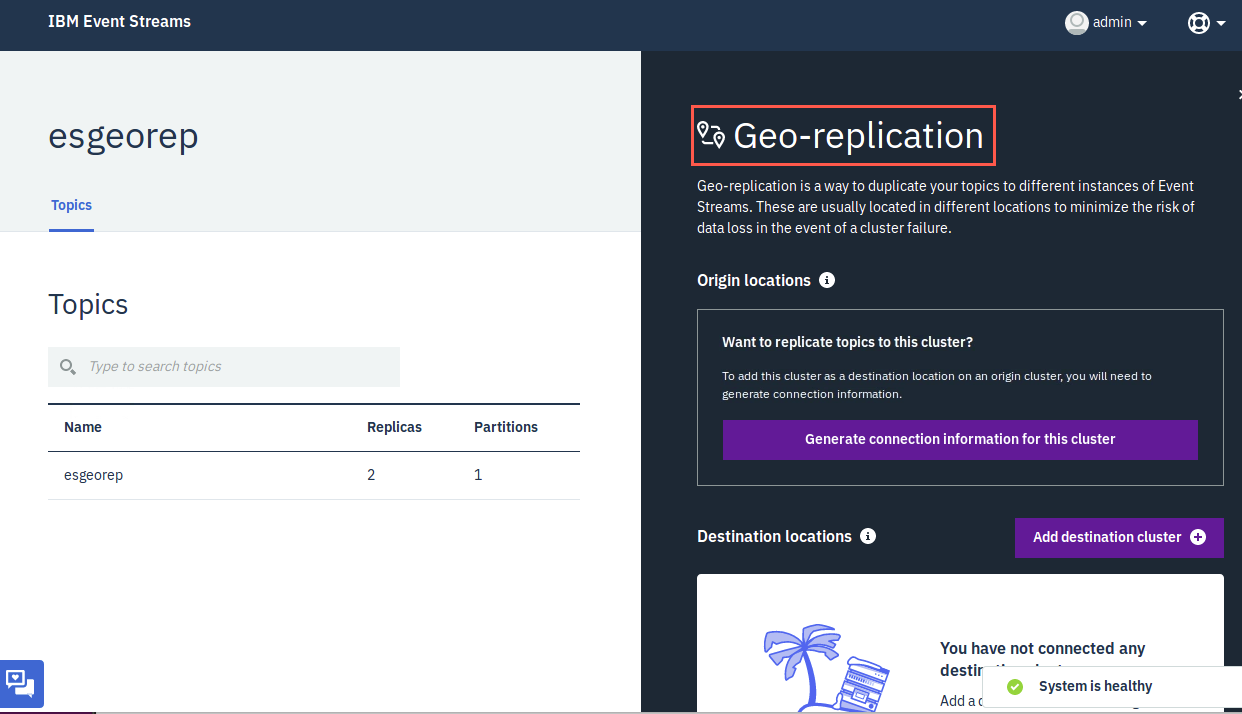
The Geo-replication panel appears. It is split in two, with the local topics display on the left and the geo-replication information on the right. Once you define a remote cluster, its topics will display on the right.
Acquire destination information
In order to replicate messages to a remote cluster, you must acquire the connection information for that cluster.
-
Swith to the Chrome browser (destination cluster).
-
You should have a browser tab already open on the destination ICP cluster at: https://169.62.251.198:8443.
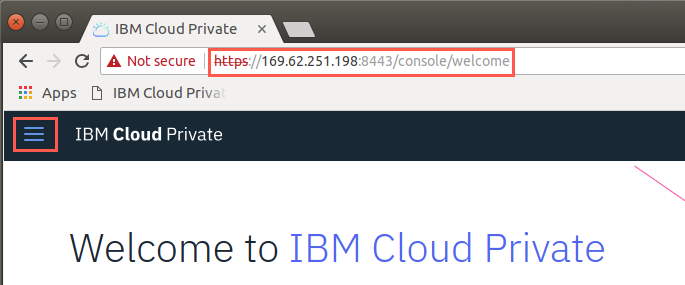
- It is a good idea to synchronize the Helm Repositories to get the latest Helm charts before installing the Event Streams Helm chart. Click the hamburger icon to open the menu.
-
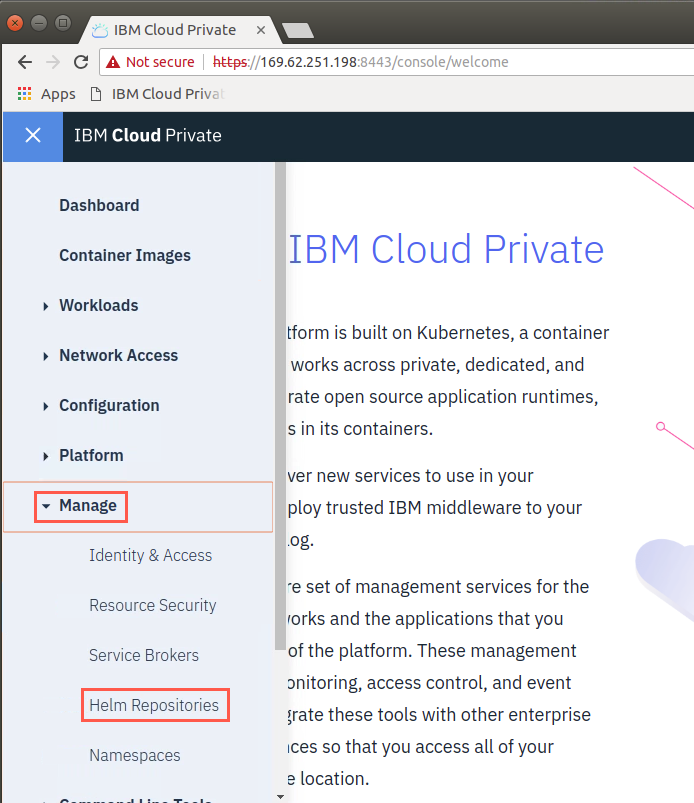
Expand Manage and select Helm Repositories.
-
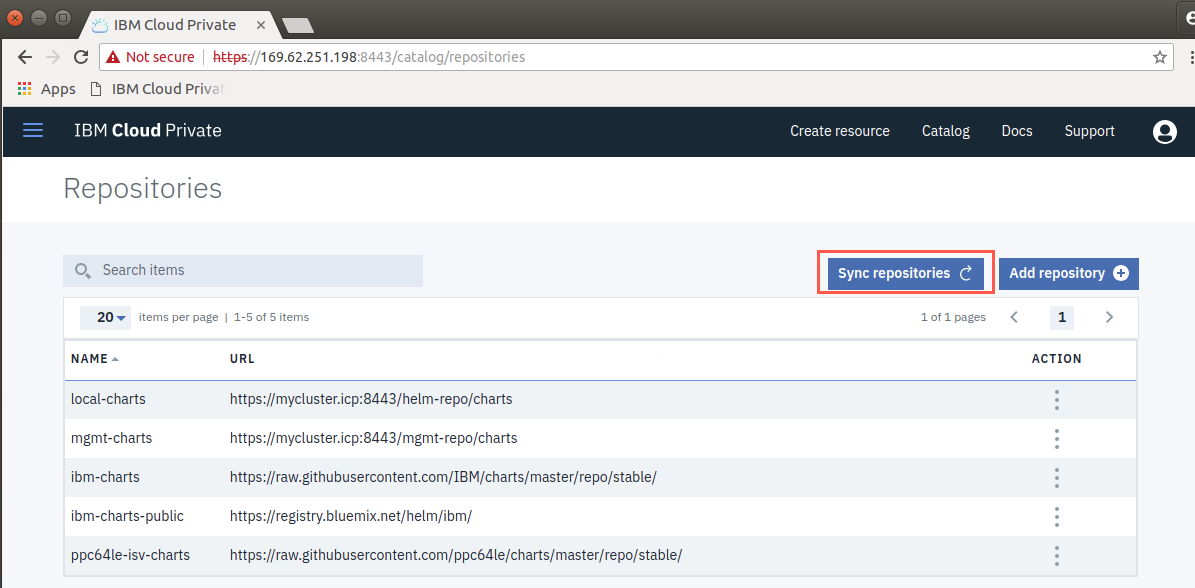
Click Sync repositories.
-
Click OK to confirm.
-
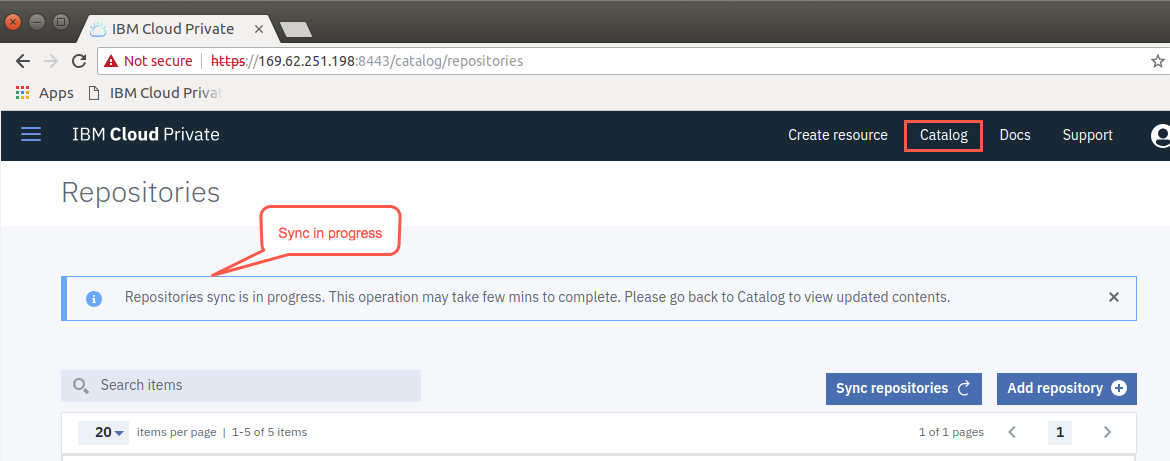
You will receive a pop-up indicating the sync is in progress. Click Catalog on the toolbar.
-
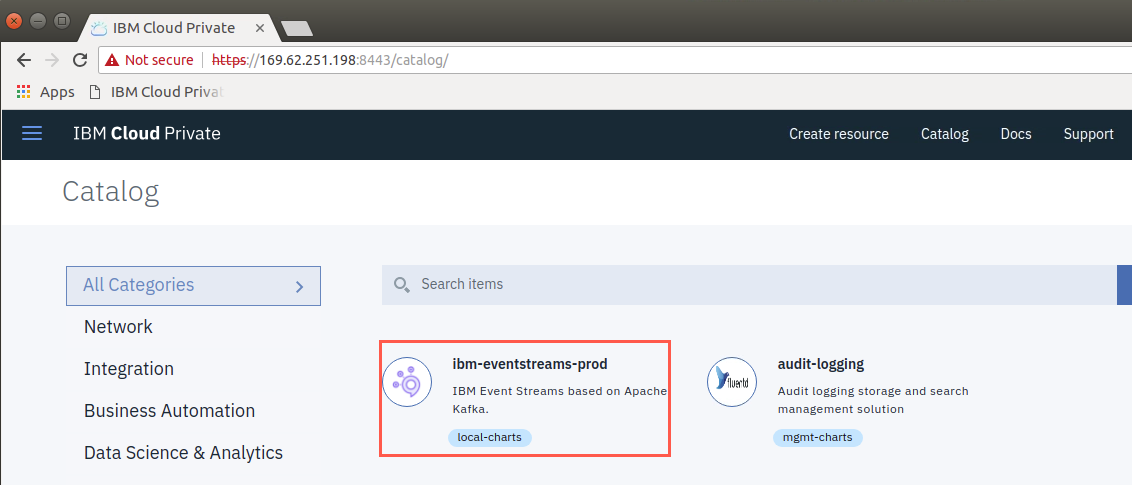
Click ibm-eventstreams-prod helm chart.
-
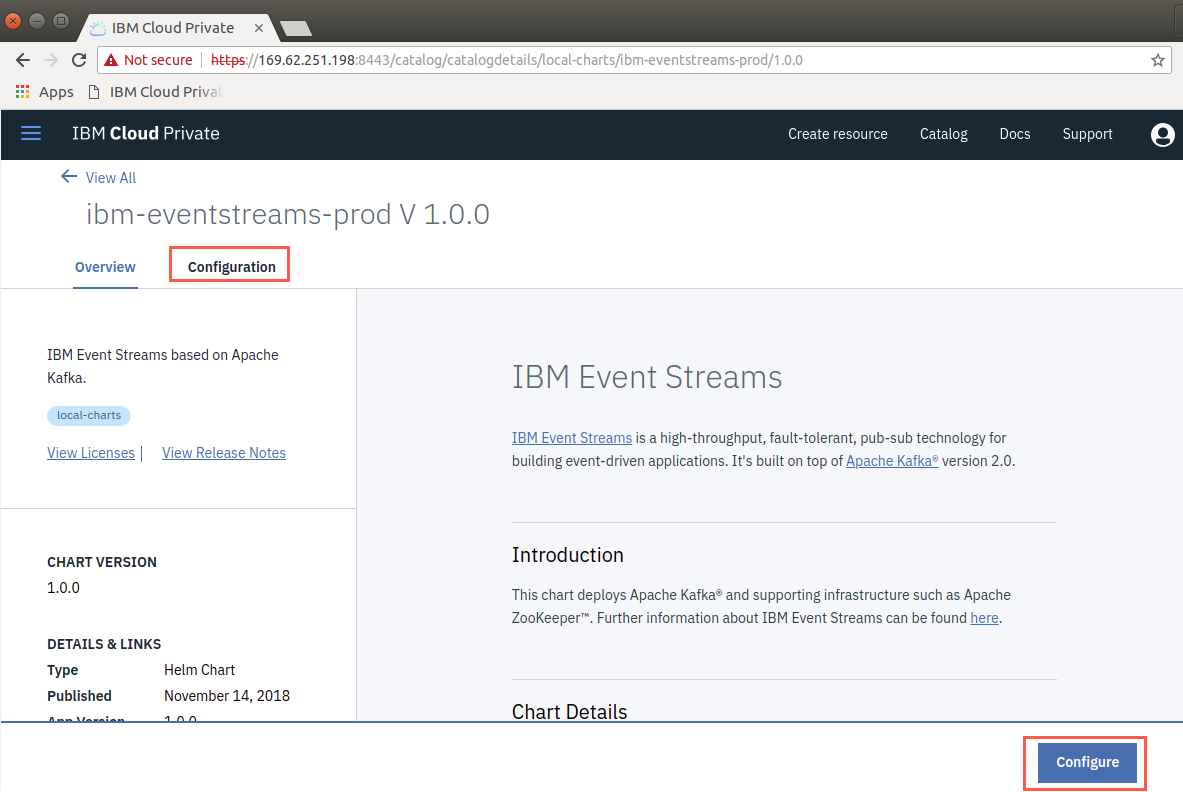
Click Configuration or the Configure button.
-
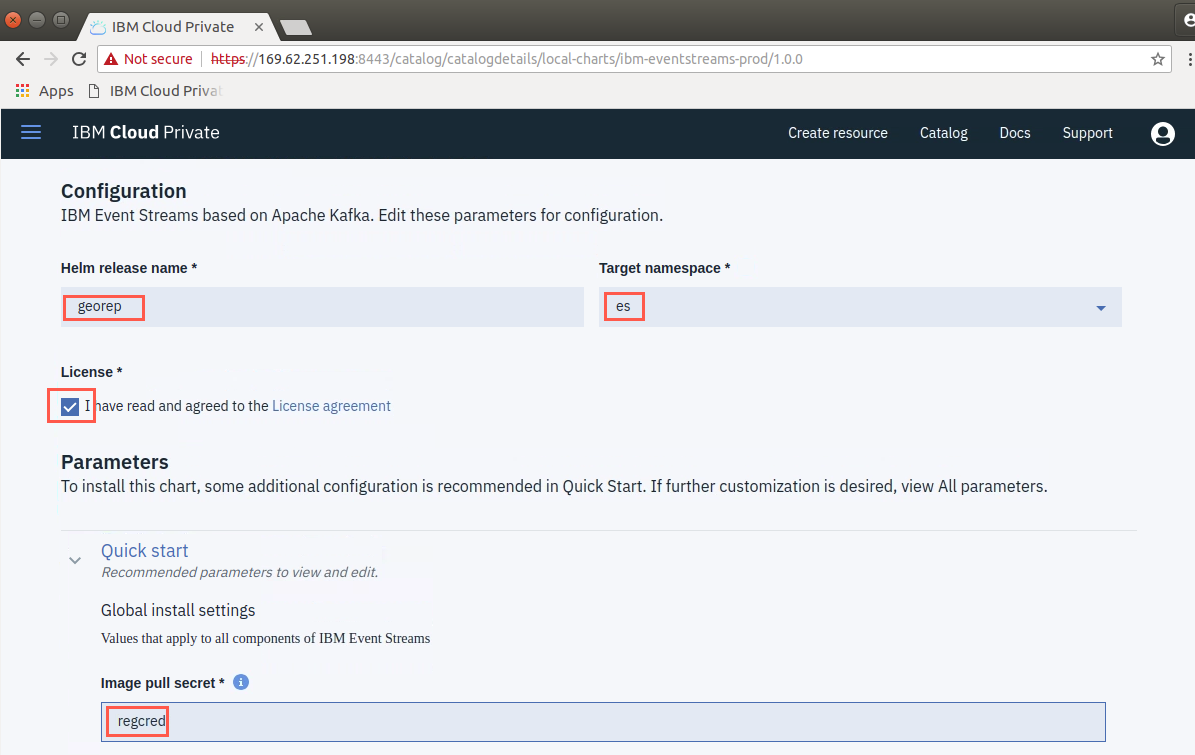
Enter georep for the Helm release name, es in the Target namespace field, and regcred in the Image pull secret. Make sure to check the License checkbox.
-
Scroll down, and delete the trailing “/” mark of the URL in the Docker image registry.
-
Scroll down to the bottom. Make sure that Enable message indexing is checked. Enter 2 in the Geo-replicator workers. This indicates the number of worker nodes that will perform the replication of messages to a destination node.
Click Install.
-
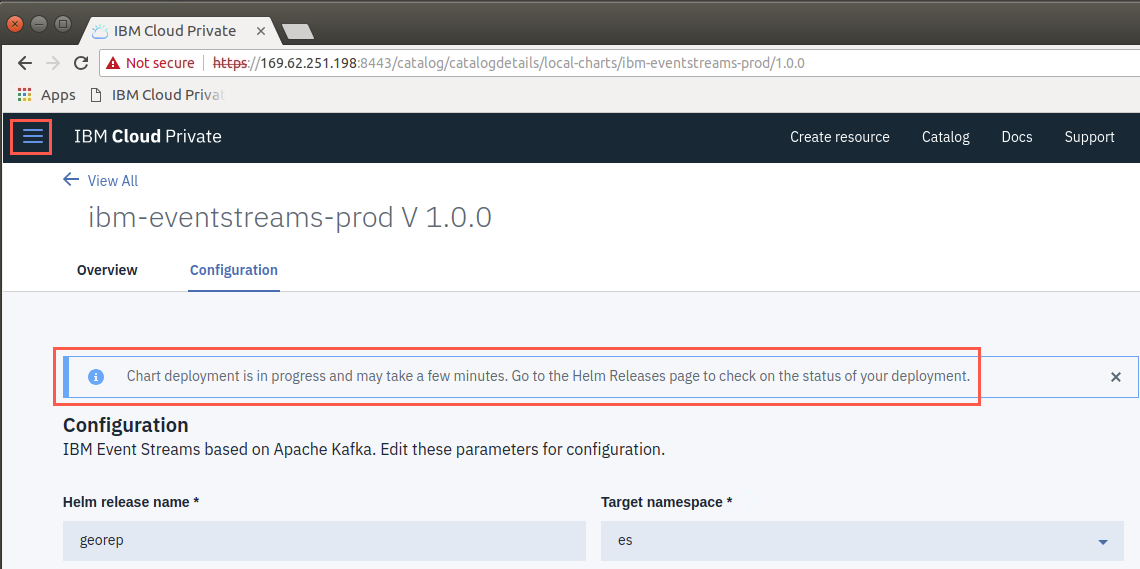
Scroll to the top of the window to see the message stating that the Chart deployment is in progress…. Click the “hamburger” icon to open ICP menu.
-
Expand Workloads and select Helm Releases.
-
You may need to refresh the screen once or twice until you see the georep Helm Release.
-
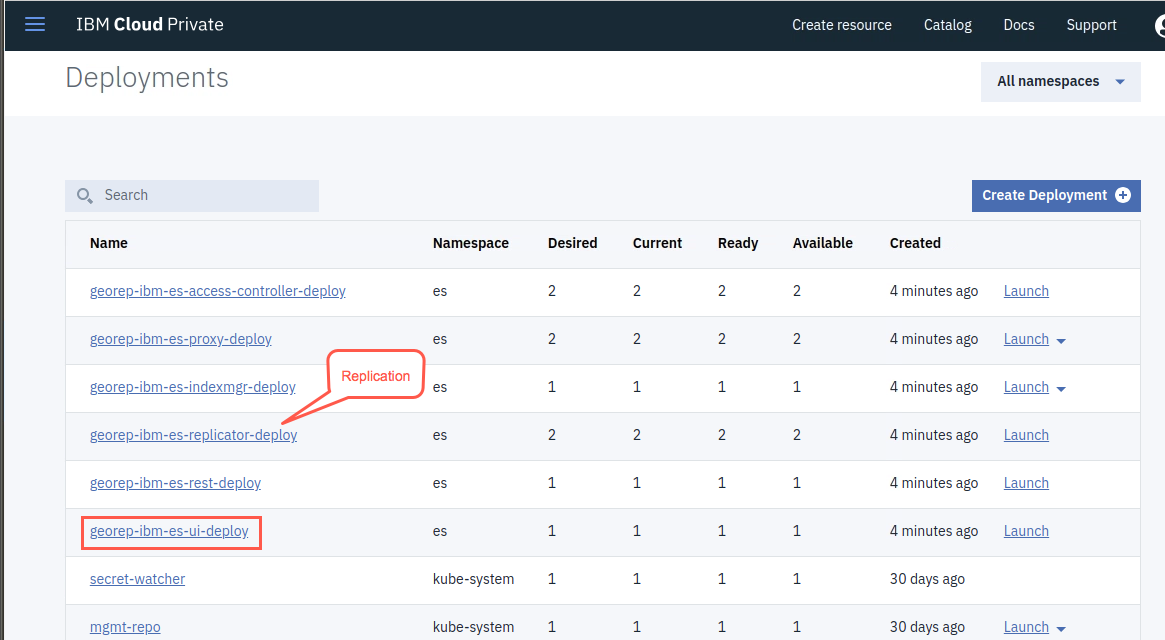
Click the menu icon again, expand Workloads. This time select Deployments. The new deployments for georeplab should be at the top. Notice the deployment for replication. Click the georep-ibm-es-ui-deploy to open the deployment.
-
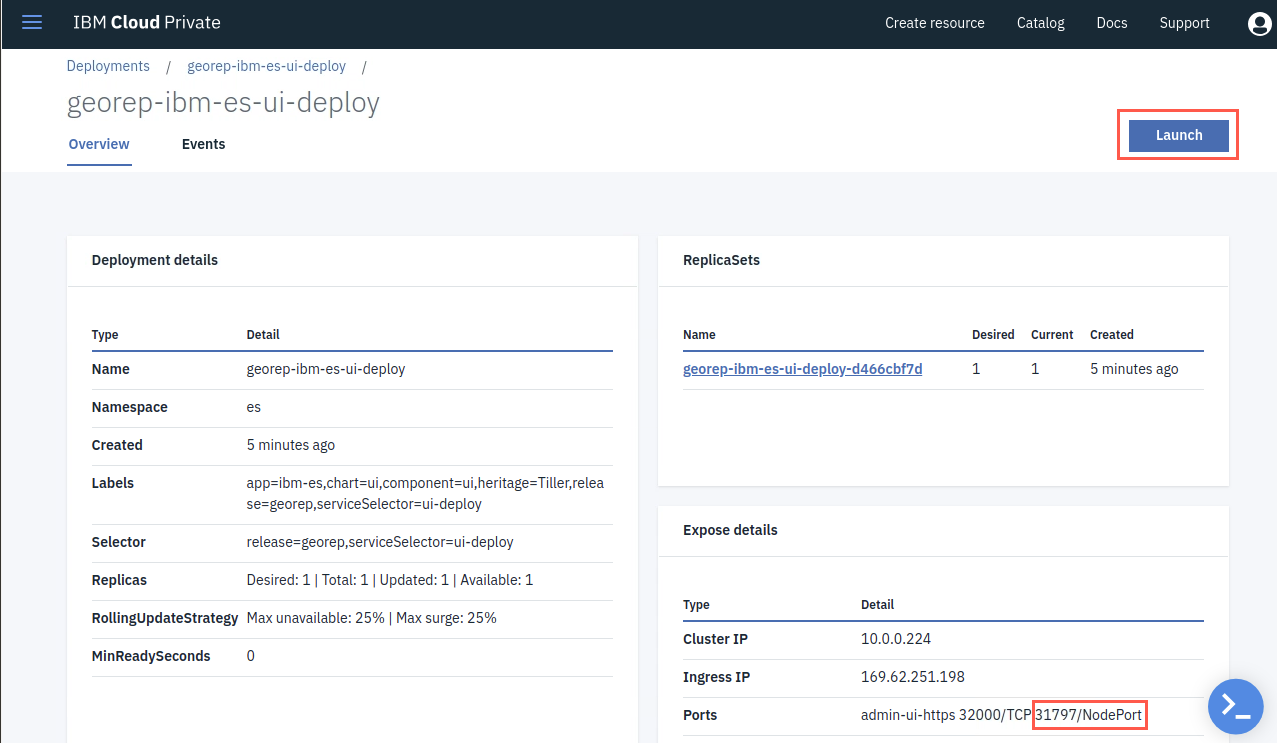
You will see the NodePort under Expose details - Ports. Yours may be different than the screenshot. This is the port for the admin webpage. You may want to record this as you may need it later. Click Launch to open the UI.
-
A new browser tab opens. If you receive the “Your connection is not secure” message, click Advanced. Confirm anything the security exceptions. The screens differ slightly from Firefox, but the process is pretty much the same.
-
A new tab is opened in your browser with the ICP master node URL + the NodePort. If the page remains in a Loading… state, click the X to close the page and enter the address again. It should then load immediately.
-
You are presented with the ICP login screen again. Enter admin / admin for the user and password. Click Log in.
-
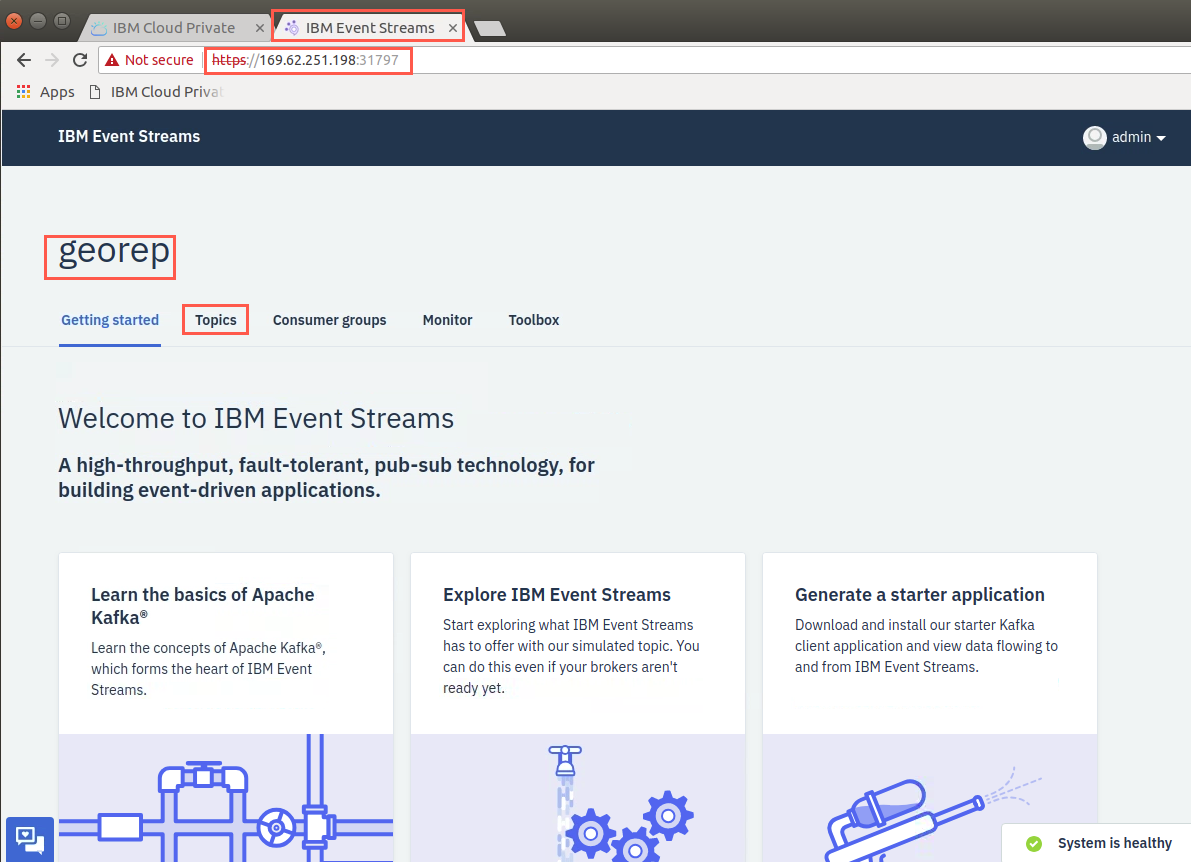
Click Topics.
-
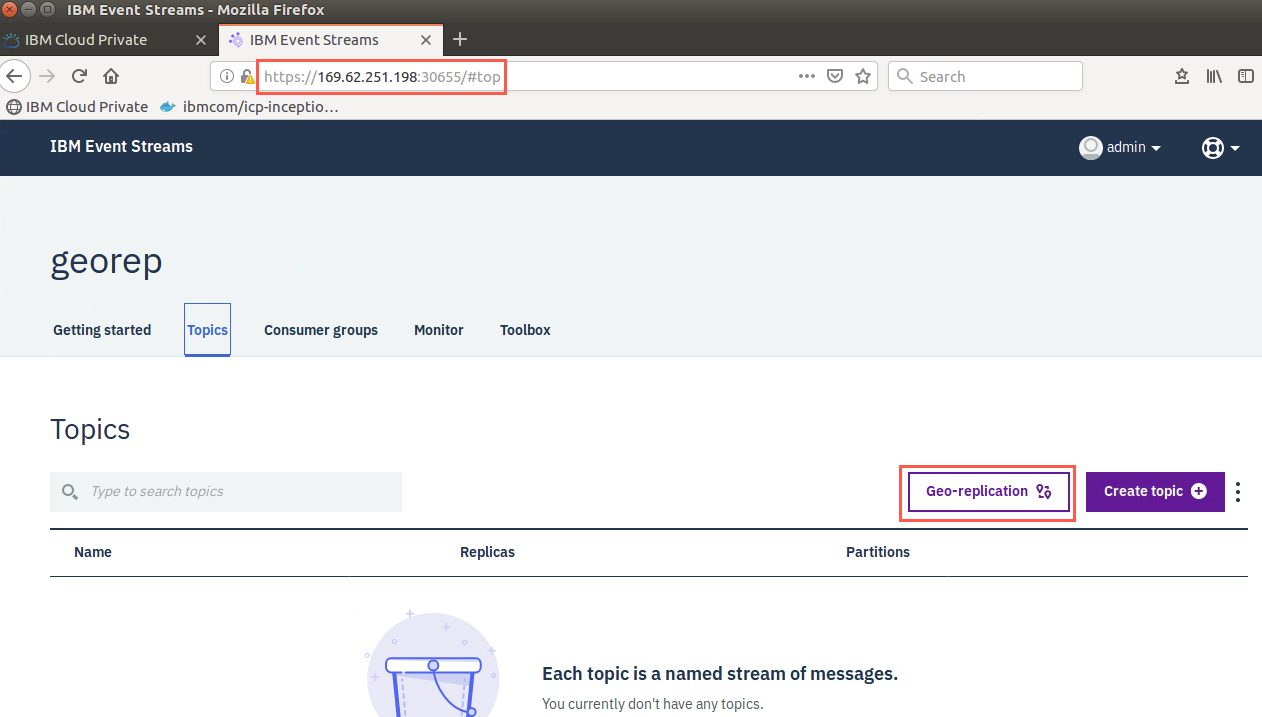
There may or may not be topics in the topic list. You can ignore any that are there. Click Geo-replication./
-
You will see the split screen geo-replication menu with the local topics on the right and any remote topics on the right under Geo-replication. Again, ignore any references to other clusters or topics as this is the common replication site for the Event Streams PoT.
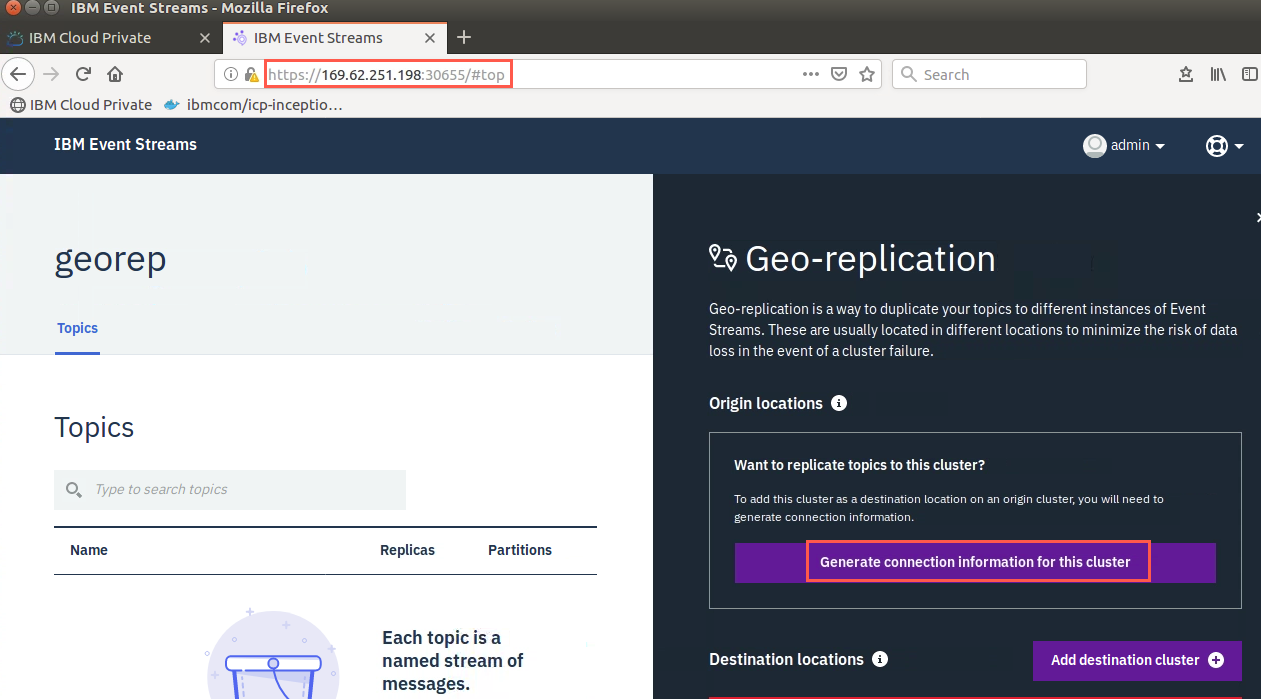
Read the notes on the page. You want to replicate messages to this cluster, so you need the connection information to route to this cluster. Click the Generate connection information for this cluster button.
-
Don’t blink because you may miss a message that the connection information is being generated. Once generated, you need to copy the information. Click Copy connection information button.
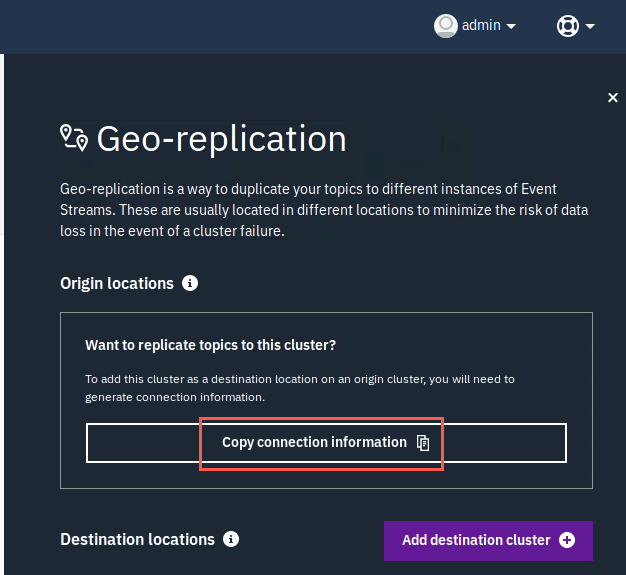
You have now copied the connection information to the clipboard and you will receive a green checkmark saying that the info is copied.
-
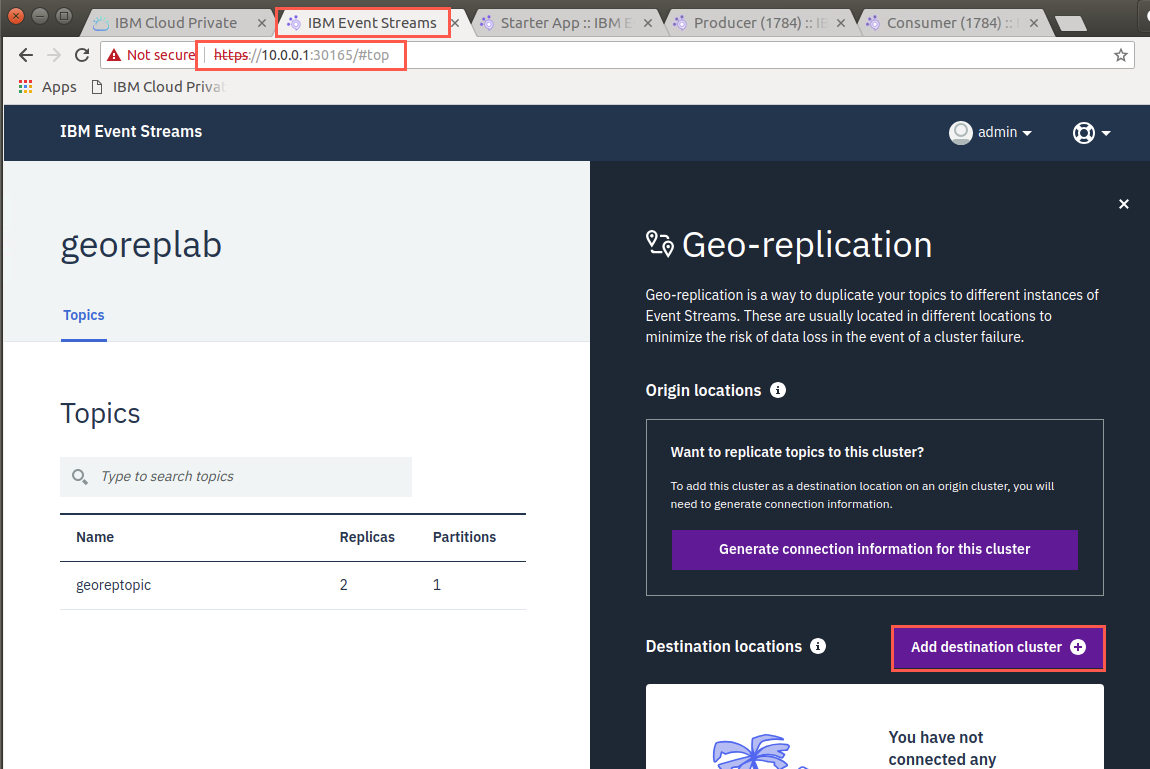
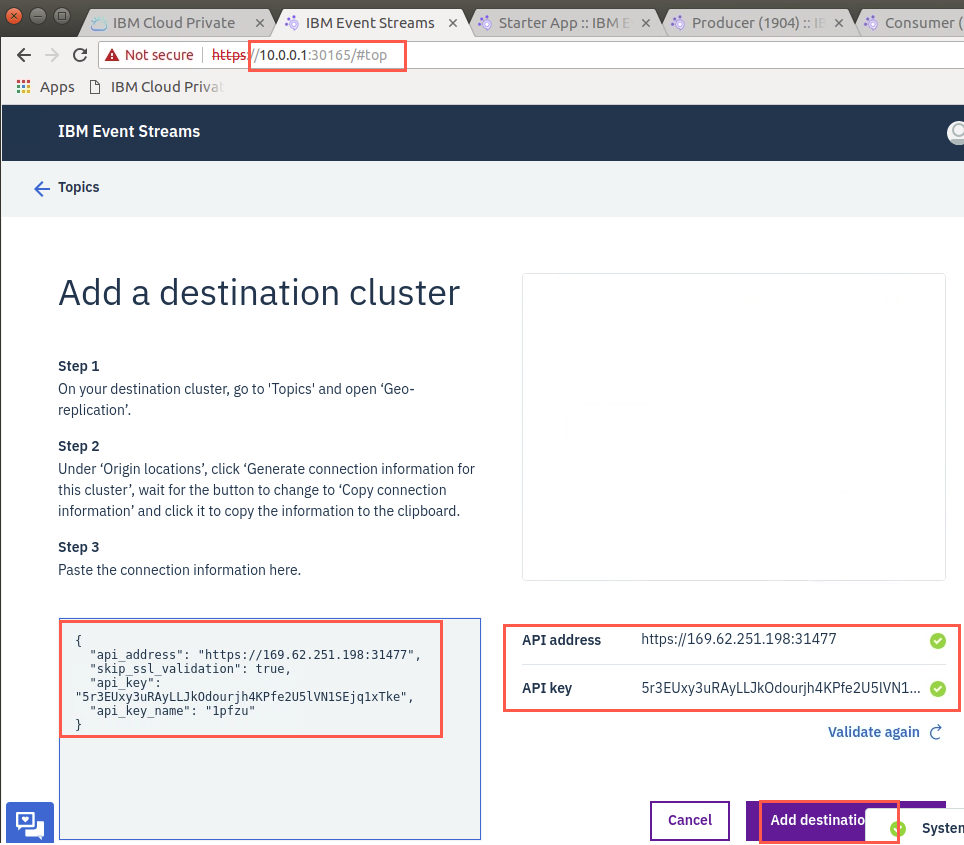
Return to the other Firefox browser, where you have the soure Event Streams cluster. Click Add destination cluster.
-
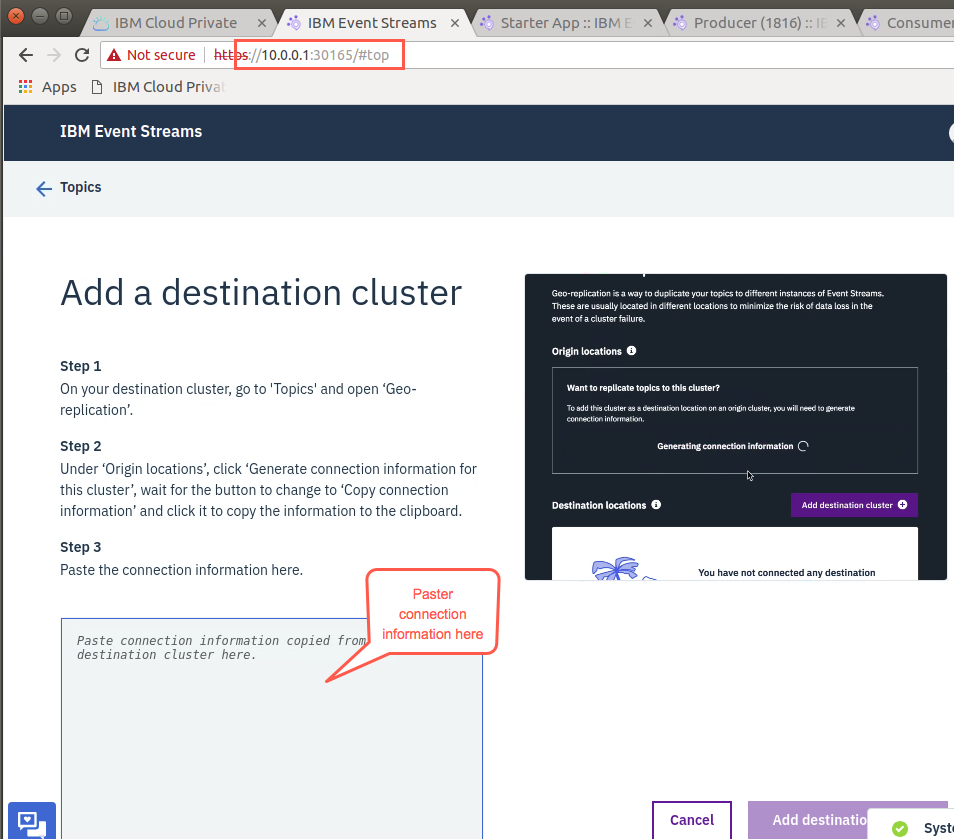
Paste the copied connection information in the box provided.
-
Event Streams immediately tries to validate the information. If correct, you will receive green checkmarks. Click Add destination folder.
-
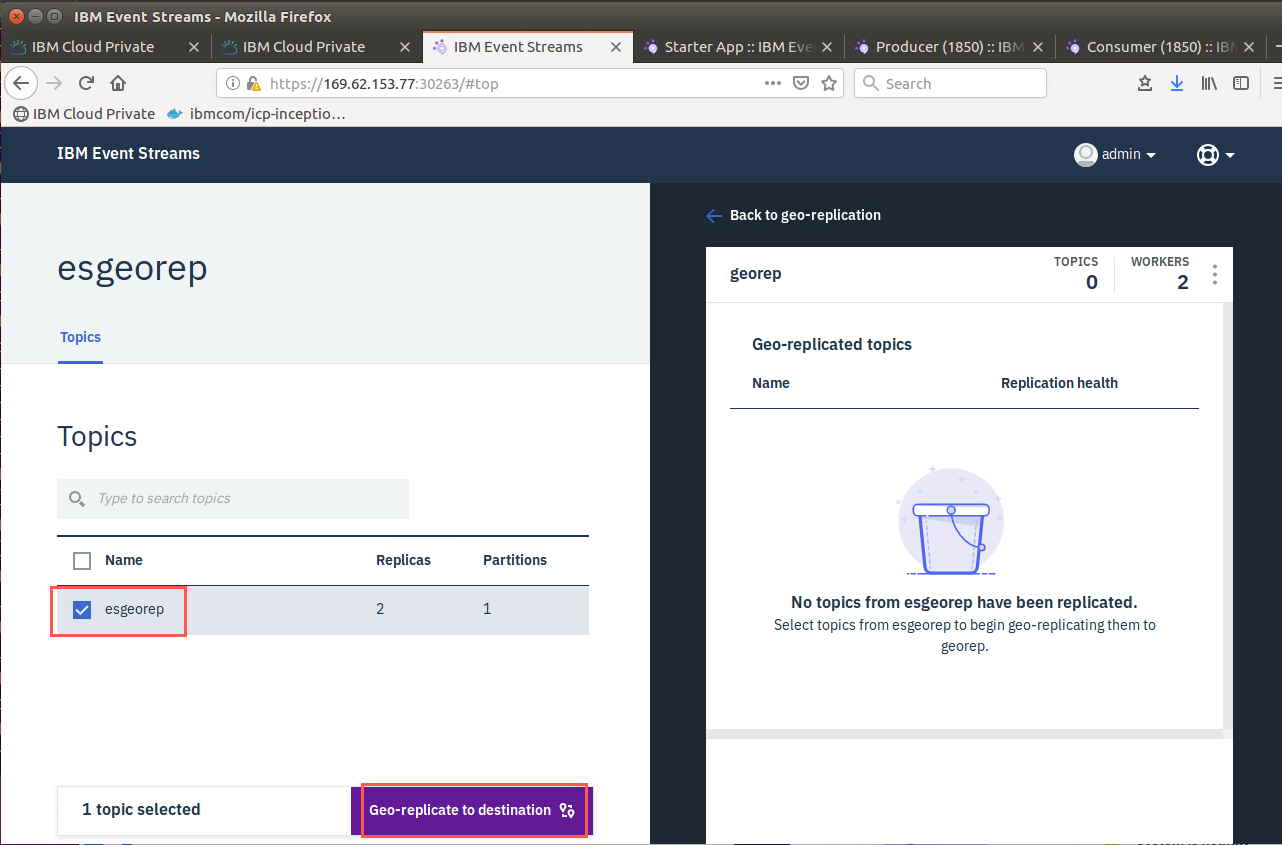
Remember, it was stated previously that the remote cluster is shown on the right. So you see the Helm Release georep on the remote cluster is ready for geo-replication with two workers assigned, but no topics yet.
On the left, you see your local Helm Release esgeorep with available topics for replicattion. esgeorep is the only one available since it is the only topic you created.
Click the check box for esgeorep and click the Geo-replicate to destination button.
-
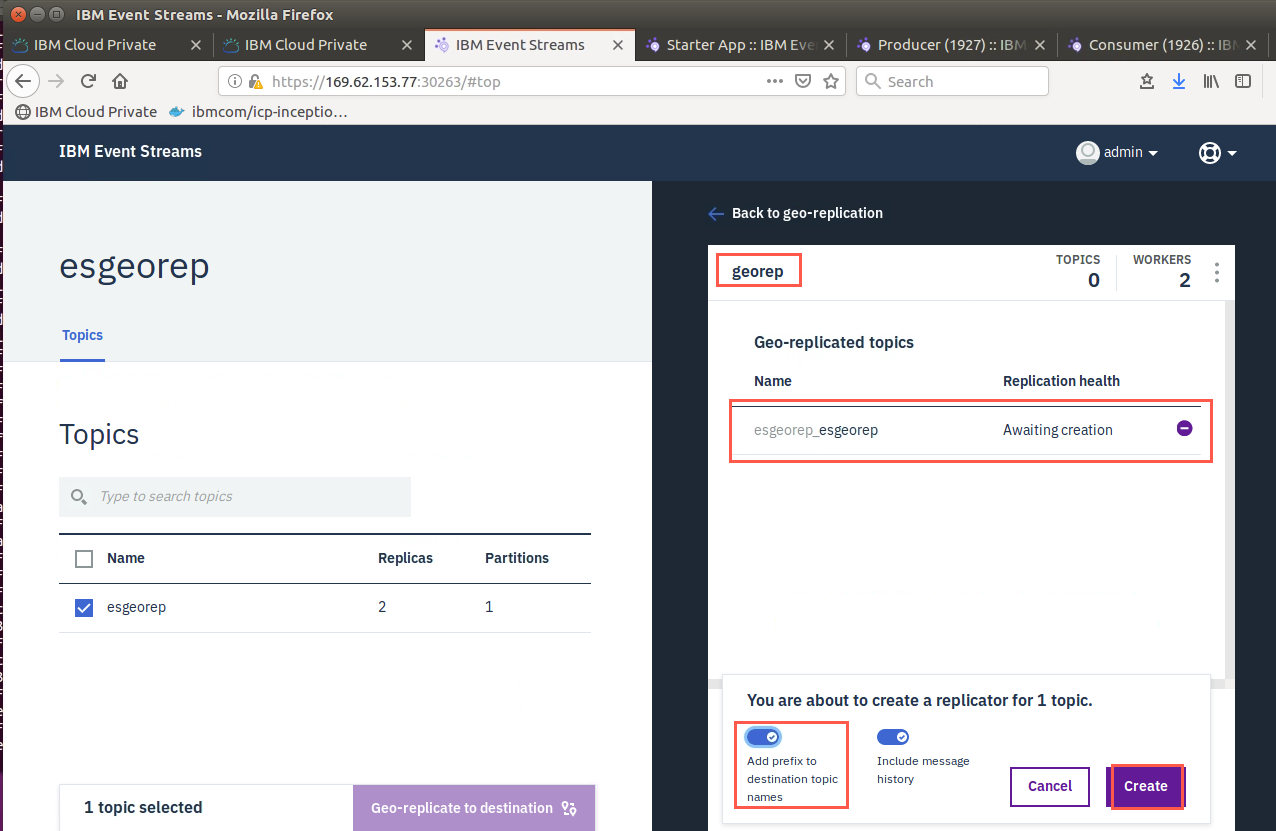
On the right side of the screen, you see that georep has received the request and wants you to confirm that it is OK to create topic esgeorep on the remote cluster. You also have buttons to add a prefix the destination topic and to include message history.
-
Your starter app has been producing messages, so leave Include message history checked. Since source cluster may be replicating topics to this cluster, you should add a prefix. Event Streams adds the source cluster name as the prefix. In this case, the cluster name and topic are the same so it produces esgeorep_esgeorep.
Click Create.
-
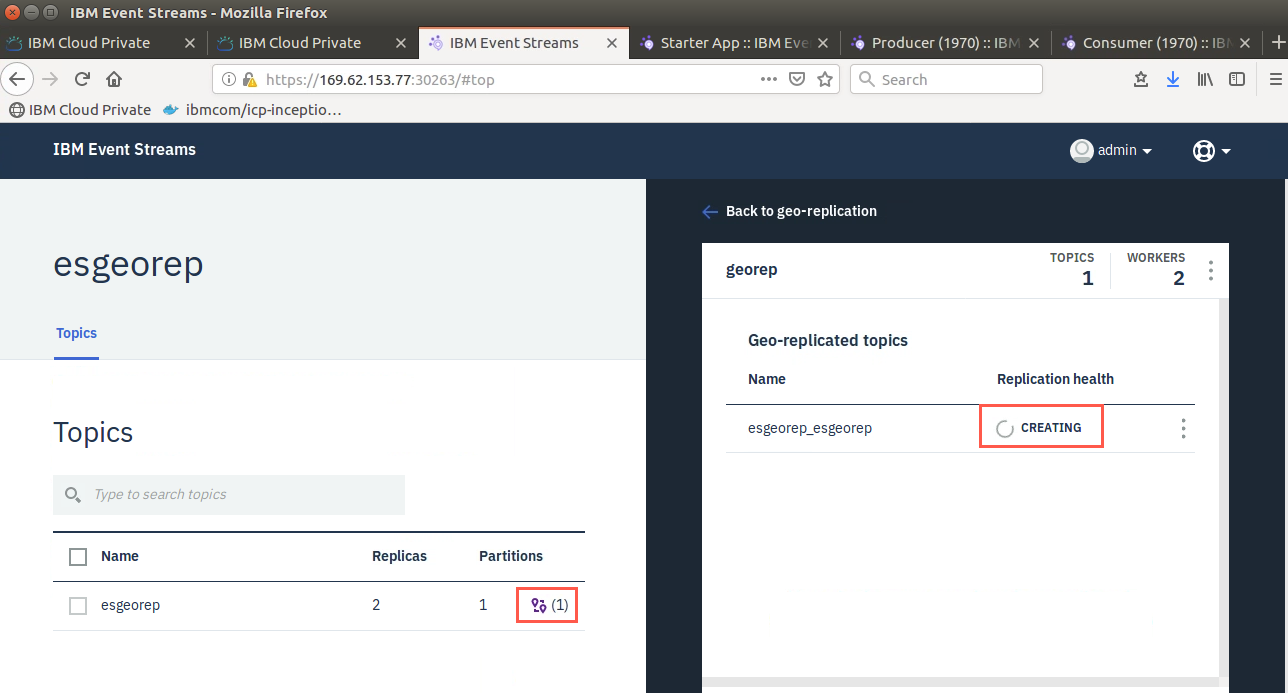
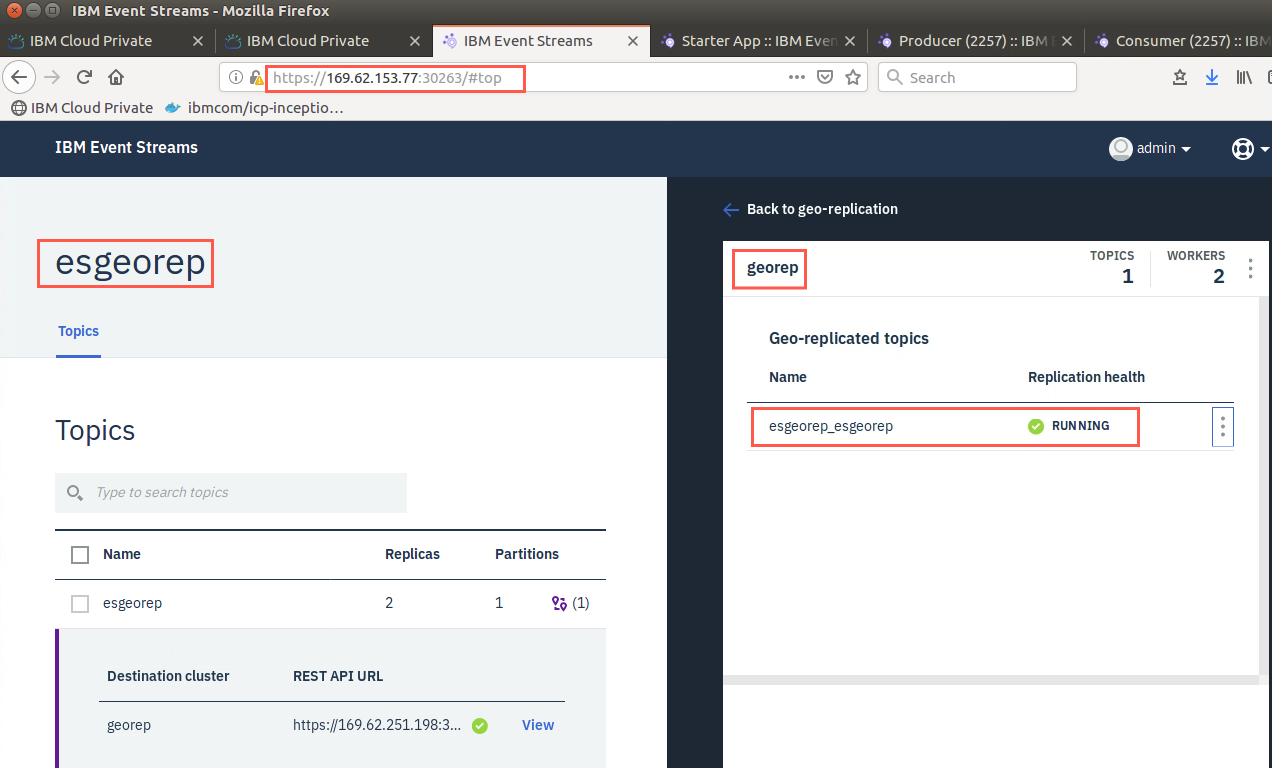
The status changes to Creating on the remote cluster (georep). Notice on the topic name now has the prefix of esgeorep_esgeorep. The topic on the local cluster retains the original topic nanme esgeorep and is marked with a replication icon on the local cluster.
-
On georep the status eventually changes to Assigning, then Running.
-
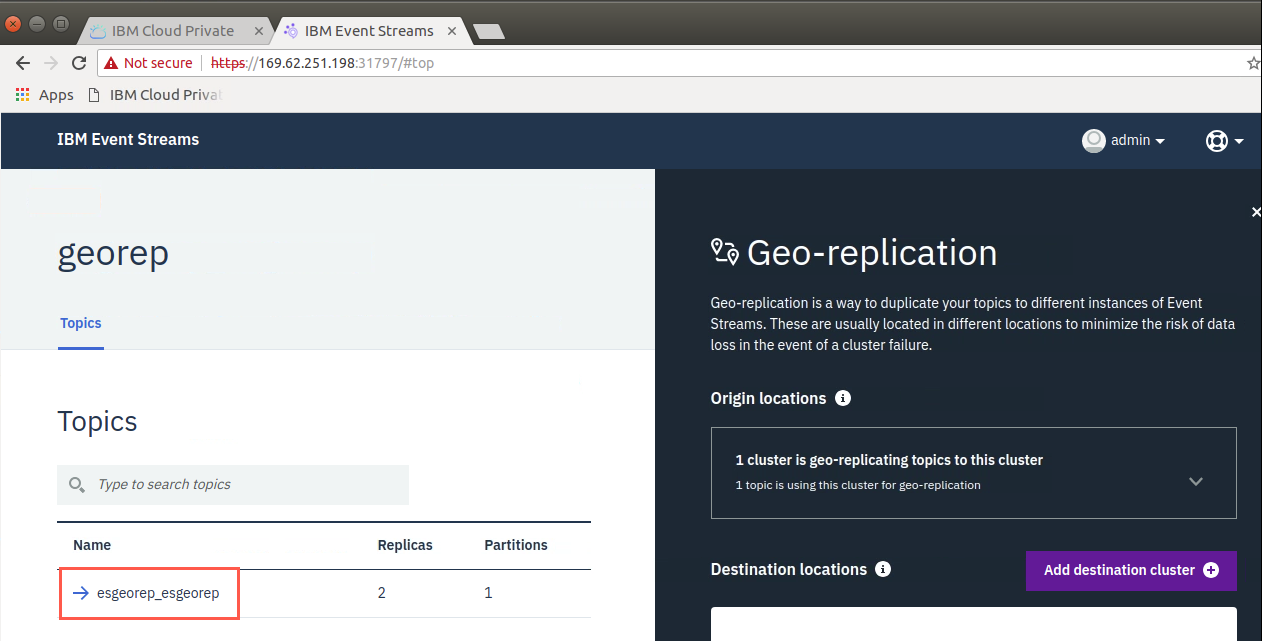
Switch to the Chrome browser (destination cluster). You will see a new topic on the local cluster (georep) named esgerep_esgeorep. It has a right facing arrow indicating that it is being replicated from a remote cluster. As on the original, the topic has two replicas.
-
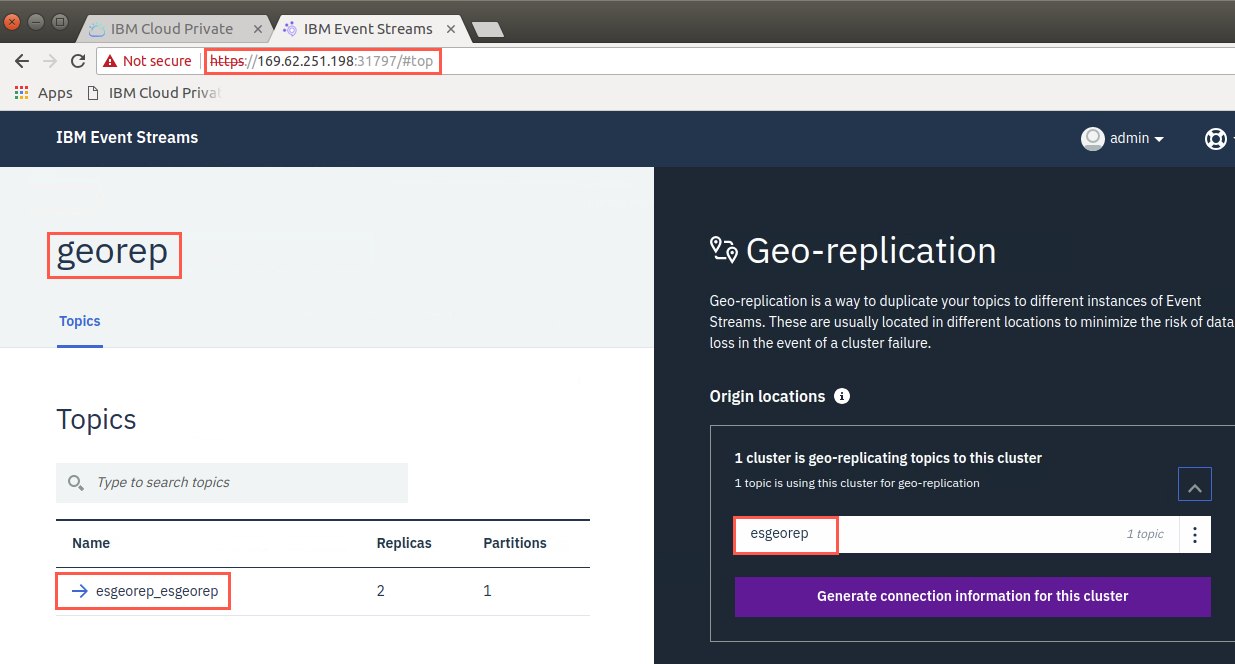
On the right side under Geo-replication, click the down arrow and you will see the original topic esgeorep. Clicking the elipsis, you have the option to pause replicators, stop replication, restart replicators, etc.
-
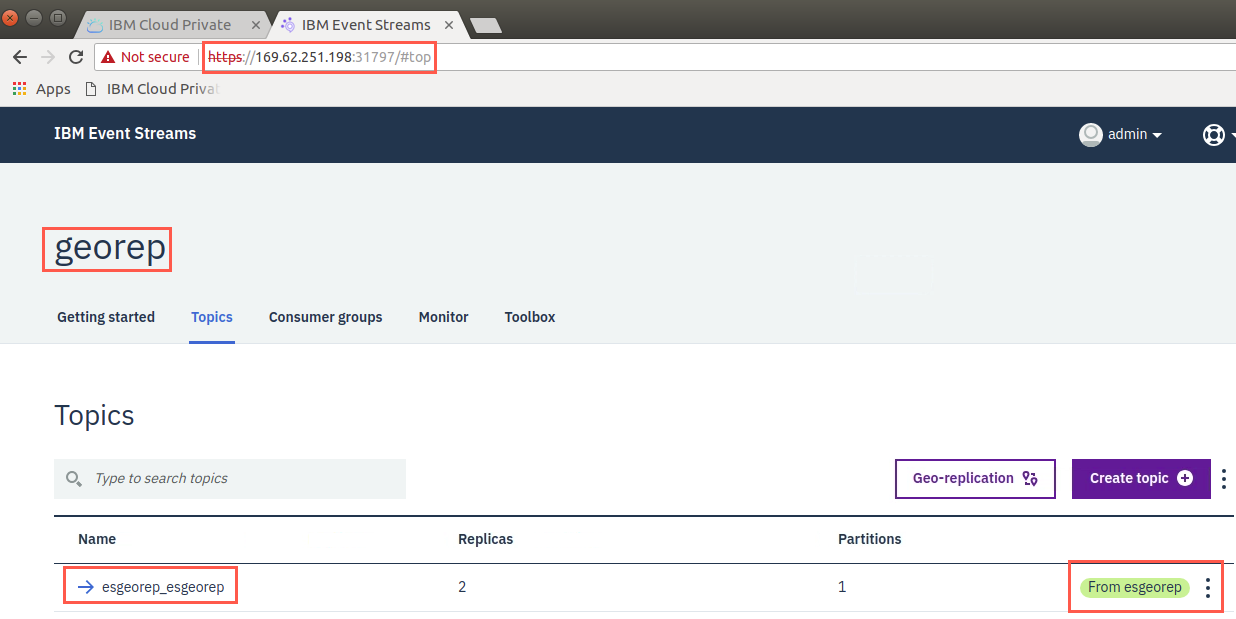
Close the Geo-replication pane by clicking the “X” in ther top right corner. You return to the full screen Topics display. You now see which cluster the topic esgeorep is coming from highlighted in green.
-
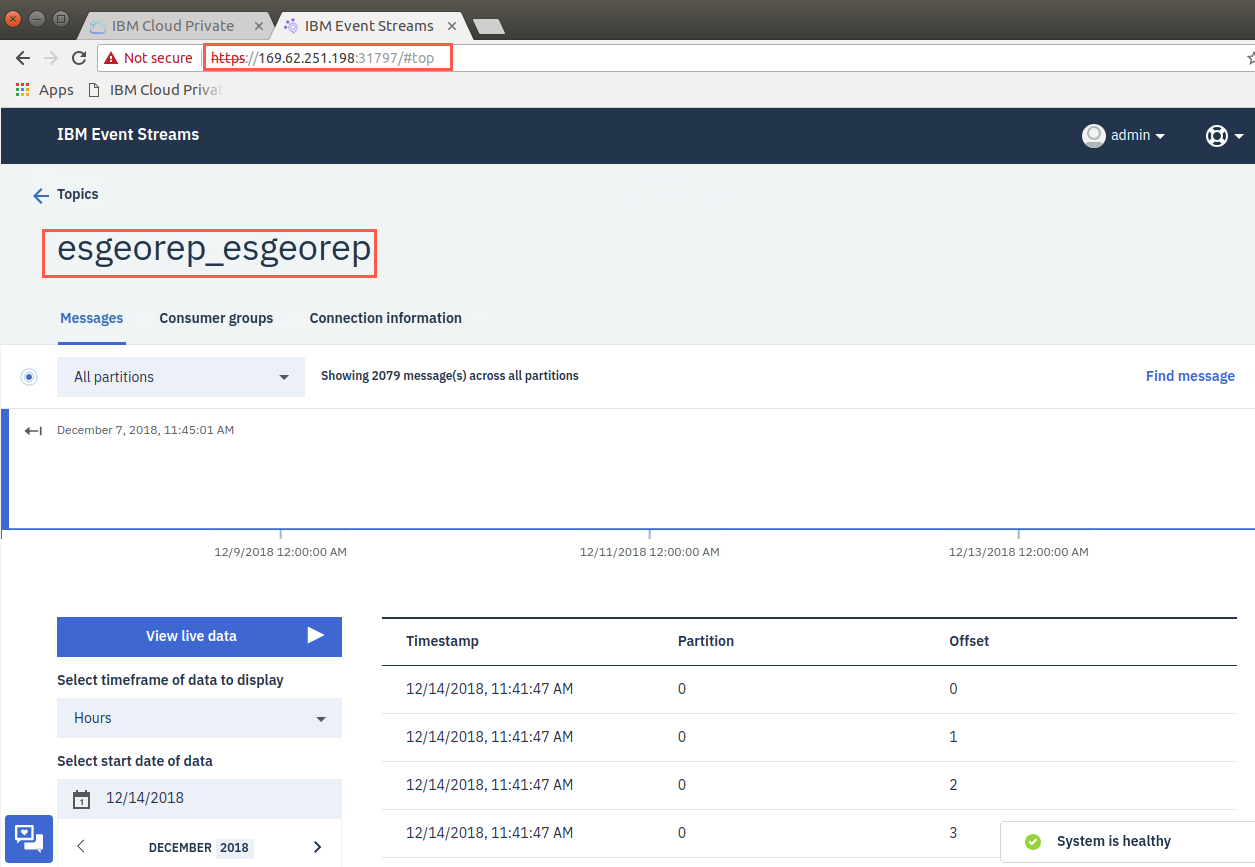
Click the topic name esgeorep_esgeorep and the messages will be displayed just like they were on the original cluster.
-
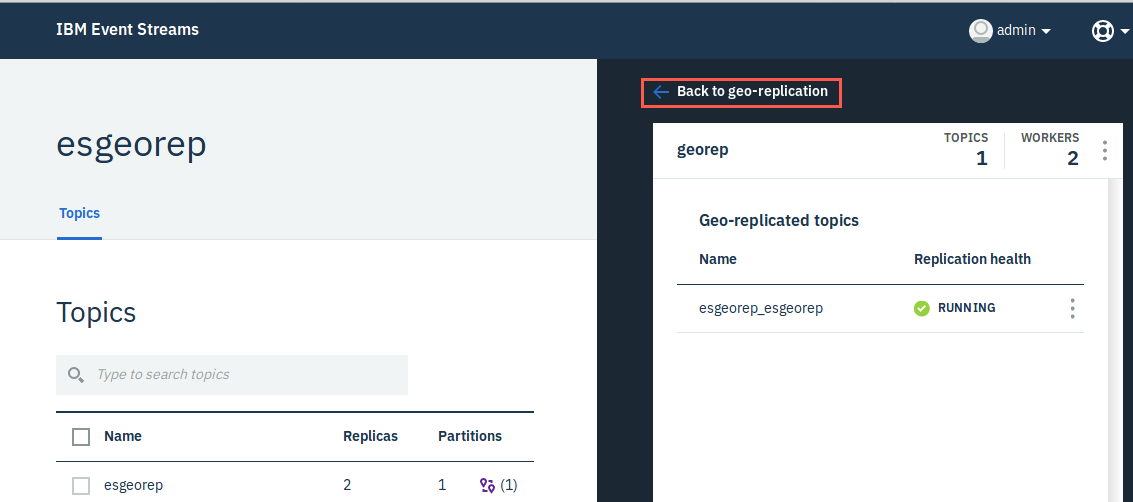
Switch back to the local cluster on the Firefox browser. In the right pane (remote cluster), click the “Back to geo-replication” button.
-
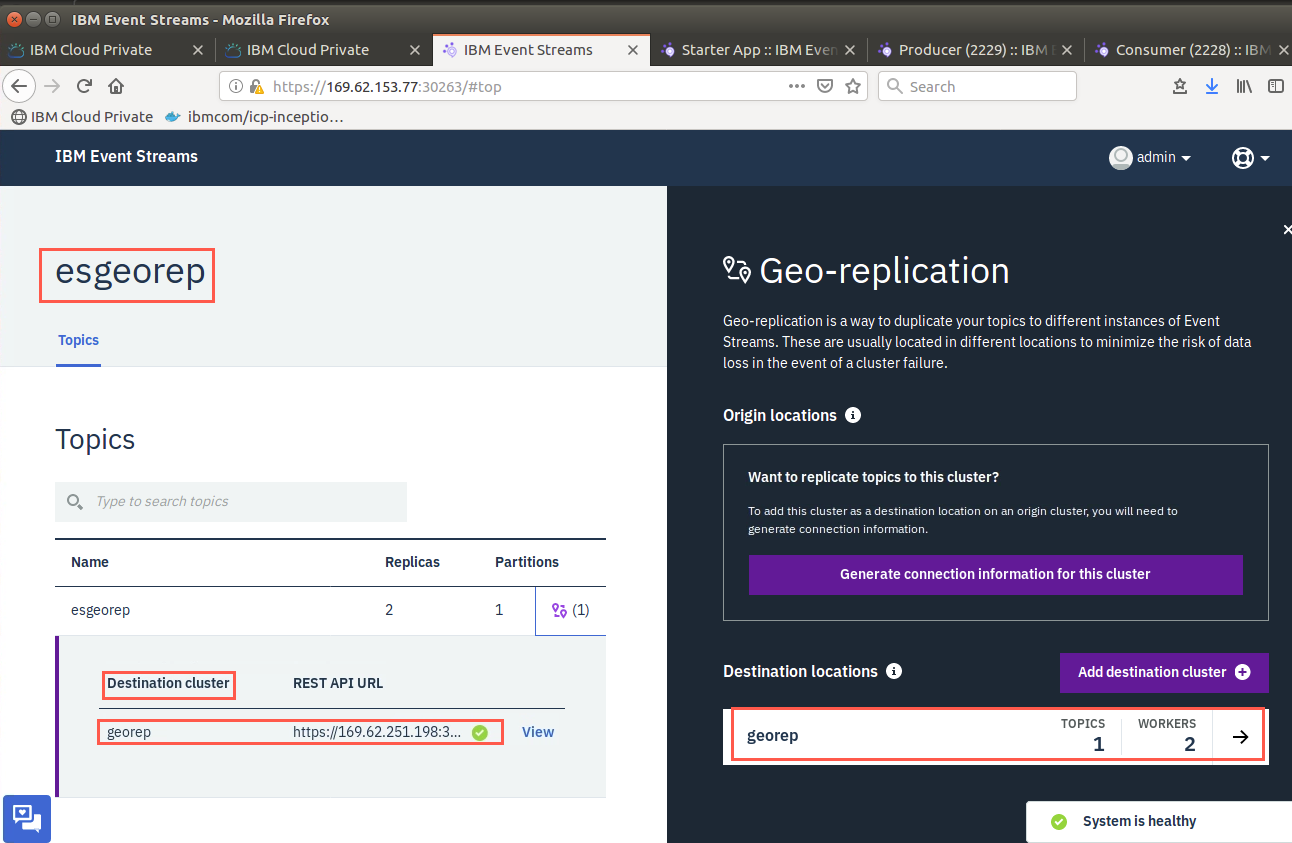
The display shows the topic in the right pane. In the left pane you see the name of the topic with the replication icon and the IP address of the remote cluster where the topic is being replicated.
Clean up the environment
-
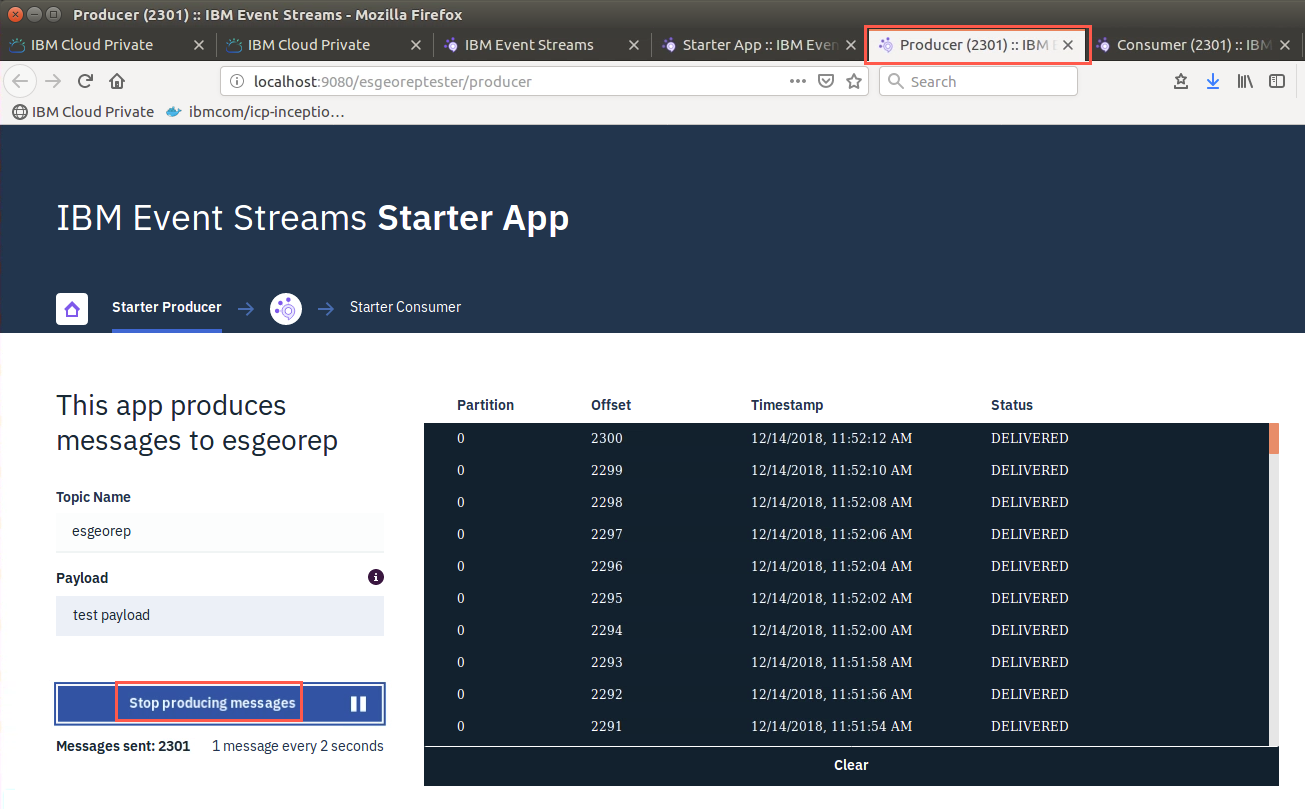
On the Firefox browser, click the Producer tab and click the “Stop producing messages” button.
-
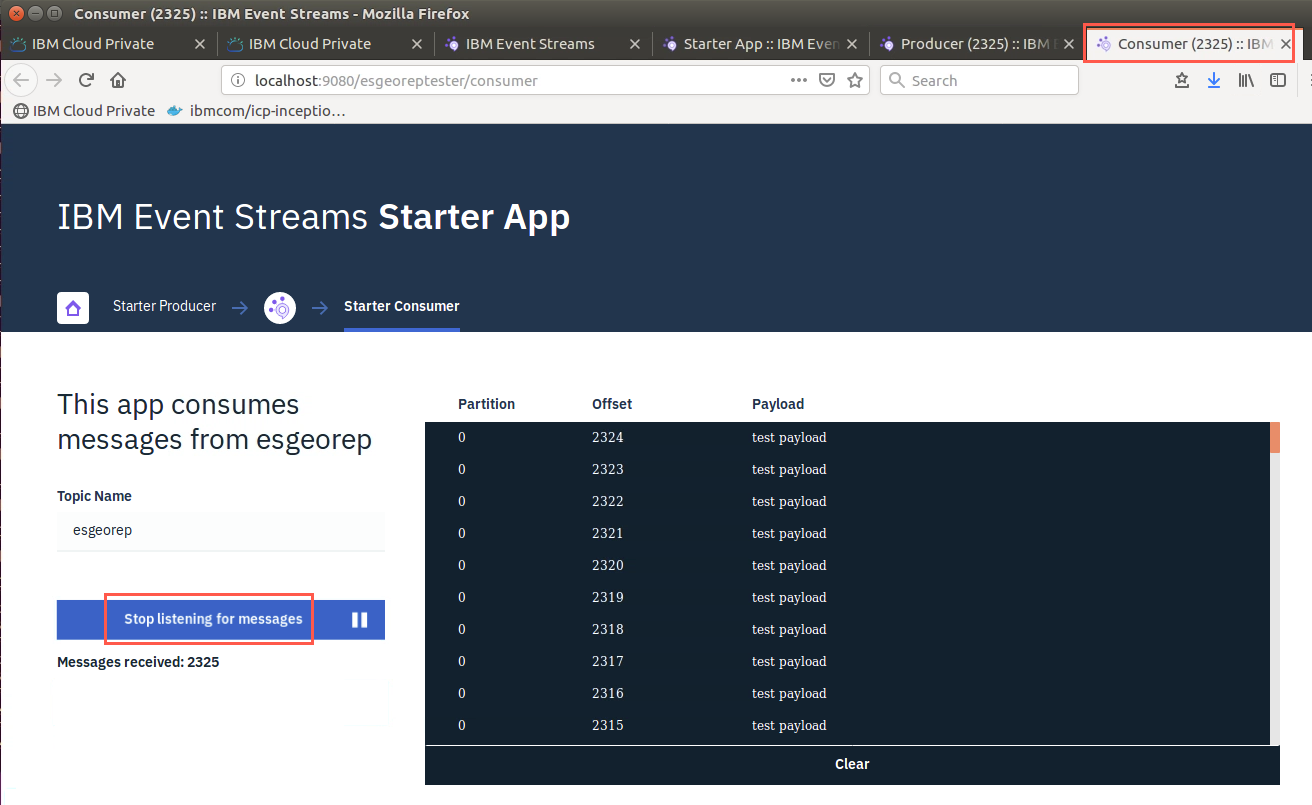
Click the Consumer tab and click the “Stop listening for messages” button.
-
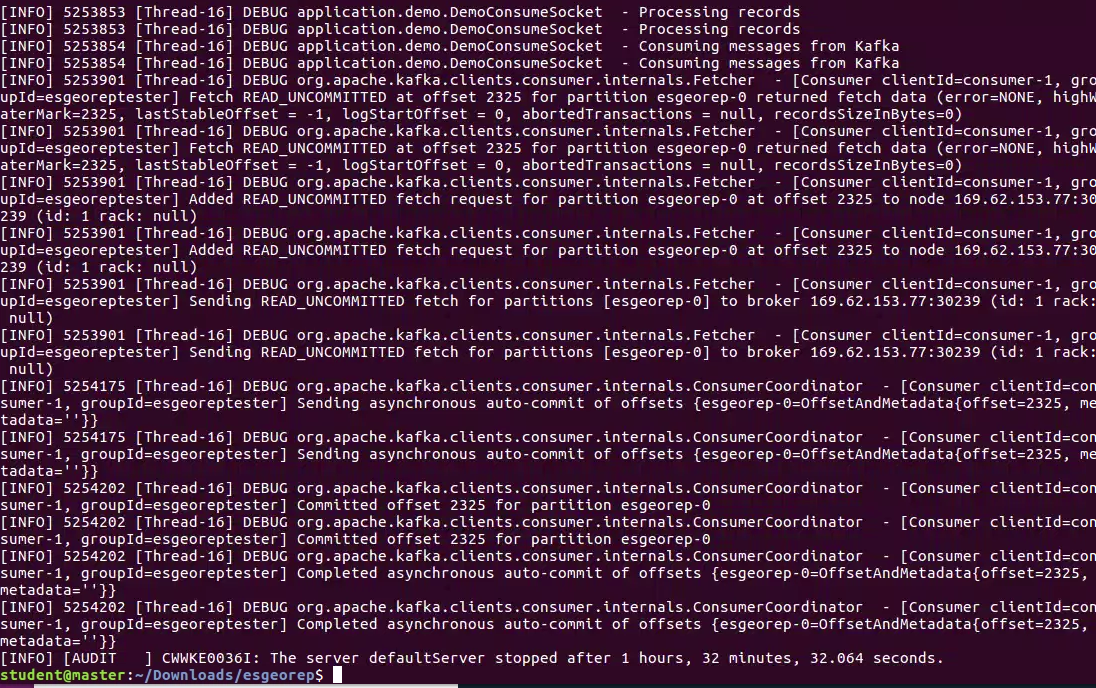
You should also close the Starter app… tab and close the terminal where the app was running.
Congratulations
You have successfully configured geo-replication and replicated Event Streams messages.
You have completed Lab 8 of the Event Streams PoT.