MQ-Appliance-PoT-9.4
MQ Appliance PoT Environment
The lab environment consists of multiple virtual appliances - MQAppl1, MQAppl2, MQAppl3, MQAppl4, MQAppl5, MQAppl6, and MQAppl7. Also included is a Windows 10 x64 VM which will be your desktop to perform console operations and testing during your PoT experience.
Use this PoT on TechZone for configuring the appliance at power-up (Lab 1), and upon successful completion, you may use it for Labs 3 - 6 and 9. Please read the section below for details.
You will be provided a URL to a TechZone environment to work in based on the template MQ Appliance PoT. Log on to the environment provided in an email or by the instructor.
Labs
There are three snapshots to work from:
-
Start at appliance power-up and configure the appliance
Lab 1 - VMs required:
- Windows 10 x64
- MQAppl7
Note:
MQAppl1 is the solution for MQAppl7 setup. -
Appliances are setup and you want to configure them for high availability
Lab 2 - VMs required:
- Windows 10 x64
- MQAppl5
- MQAppl6
Note:
MQAppl1 and MQAppl2 are the solution for MQAppl5 and MQAppl6 HA configuration. -
Appliances are setup and configured for high availability, and now you want to set up a disaster recovery environment
Lab 8 - VMs required:
- Windows 10 x64
- MQAppl1
- MQAppl3
-
Random labs - no specific order
Lab 7 - VMs required:
- Windows 10 x64
- MQAppl4
Labs 3, 4, 5, 6, 9 - VMs required:
- Windows 10 x64
- MQAppl1
Start Windows desktop
The environment should be started. You will use the Windows desktop in all of the labs, so start it now.
-
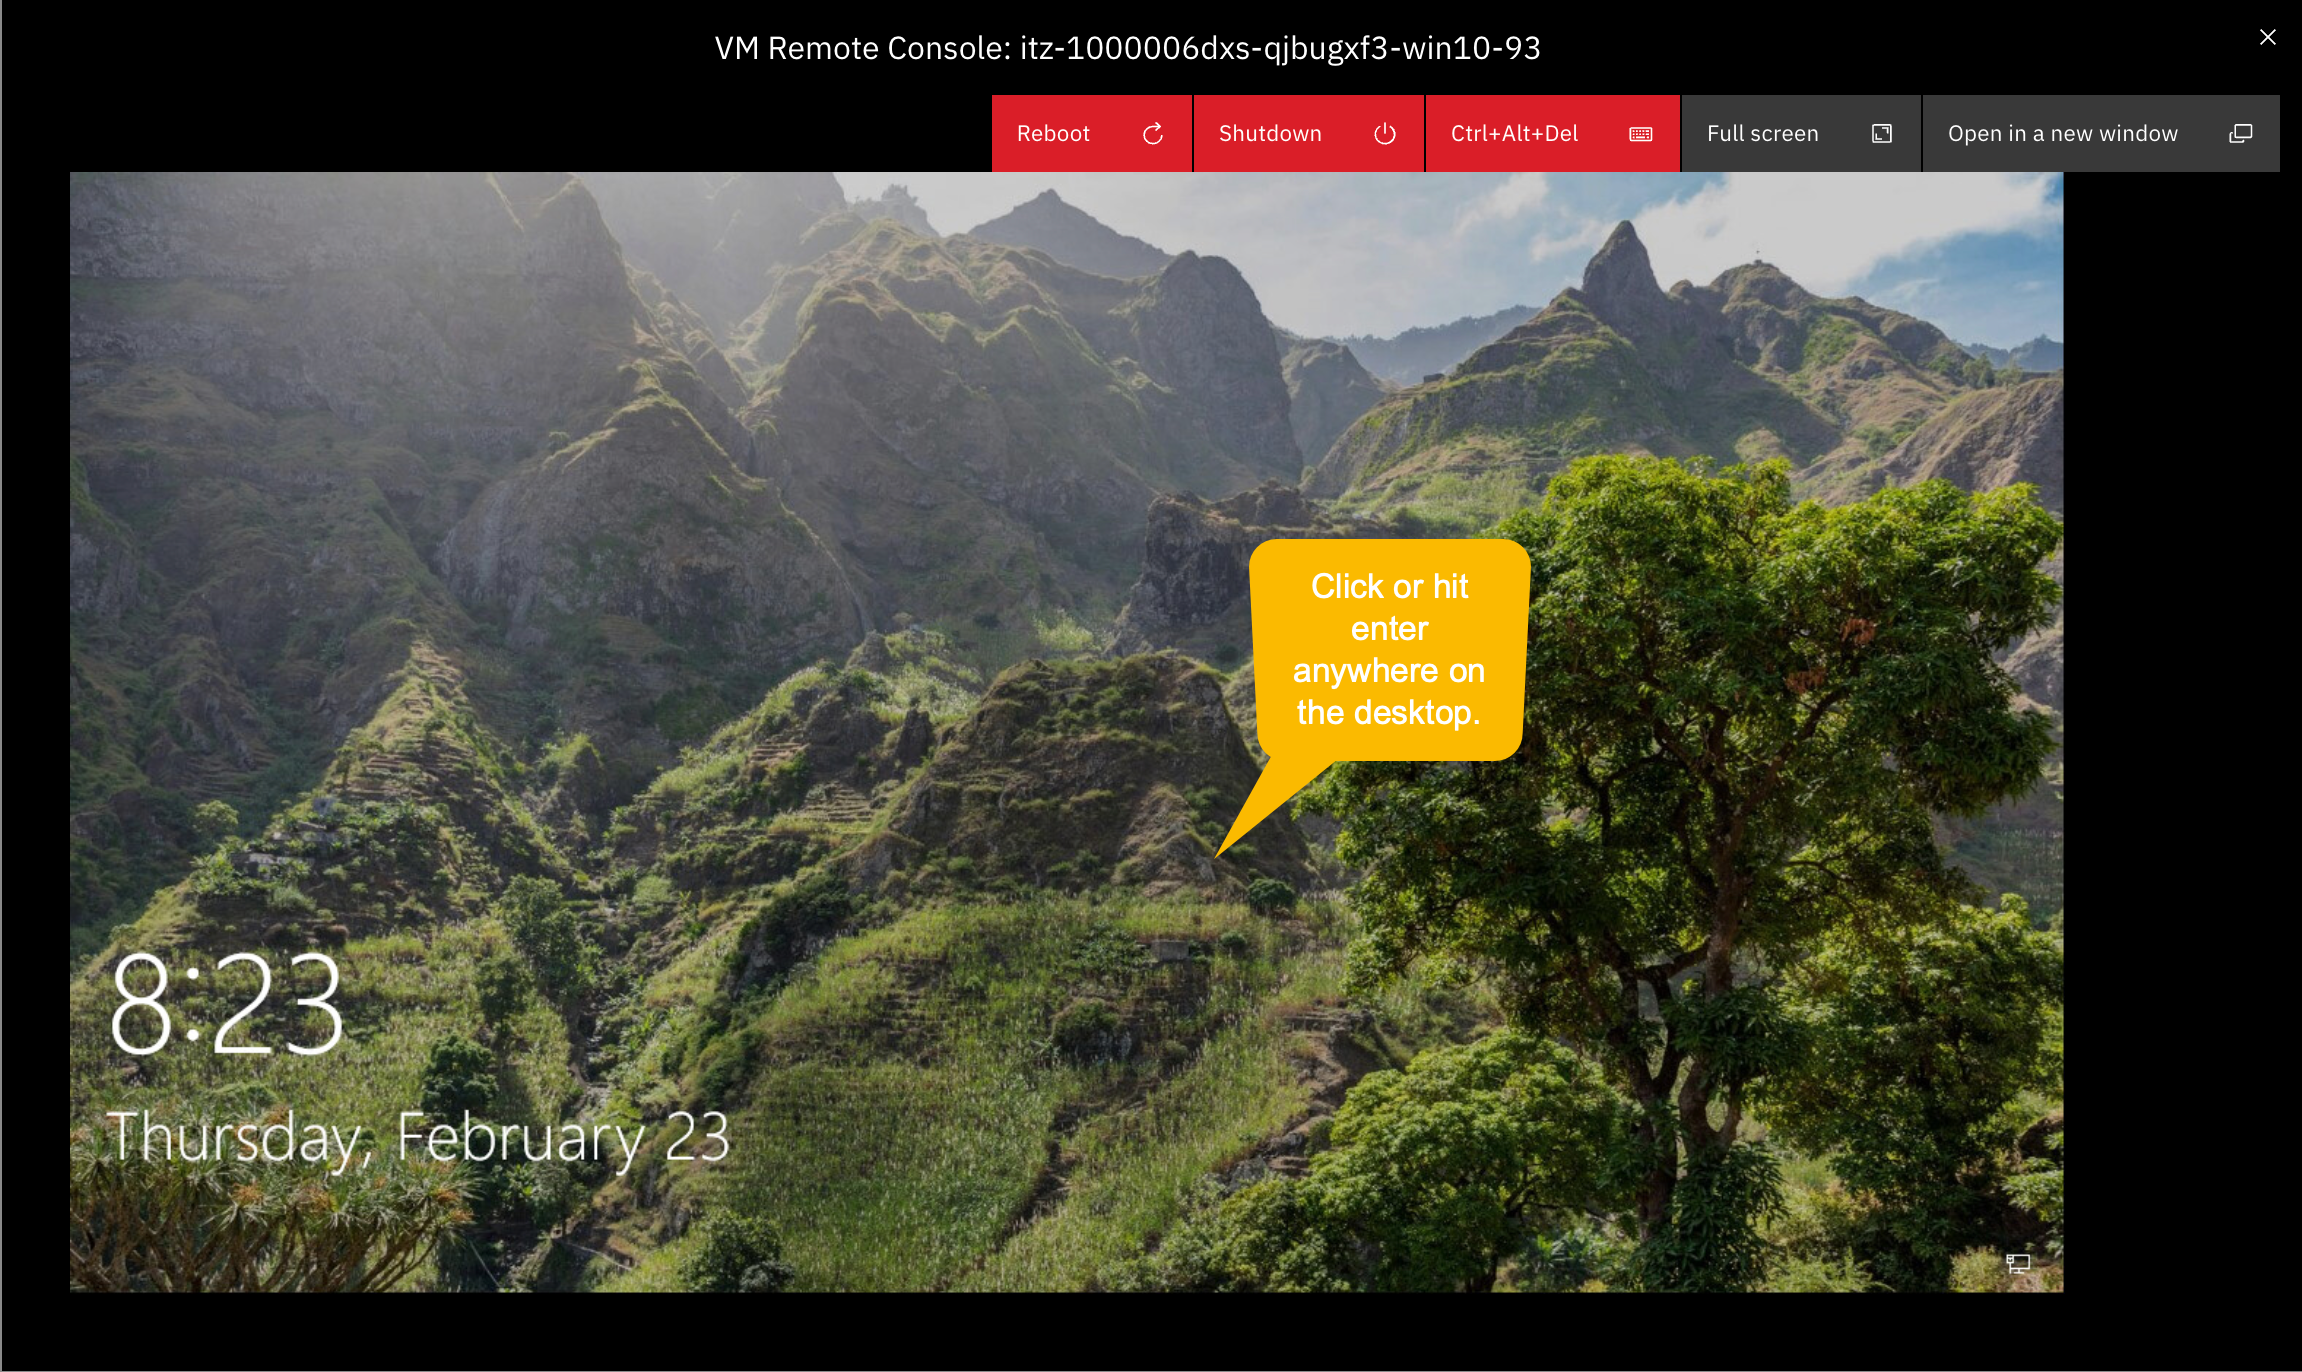
Click the win10-93 VM.

-
The Windows desktop opens. To login, hit enter or click the mouse anywhere on the desktop.
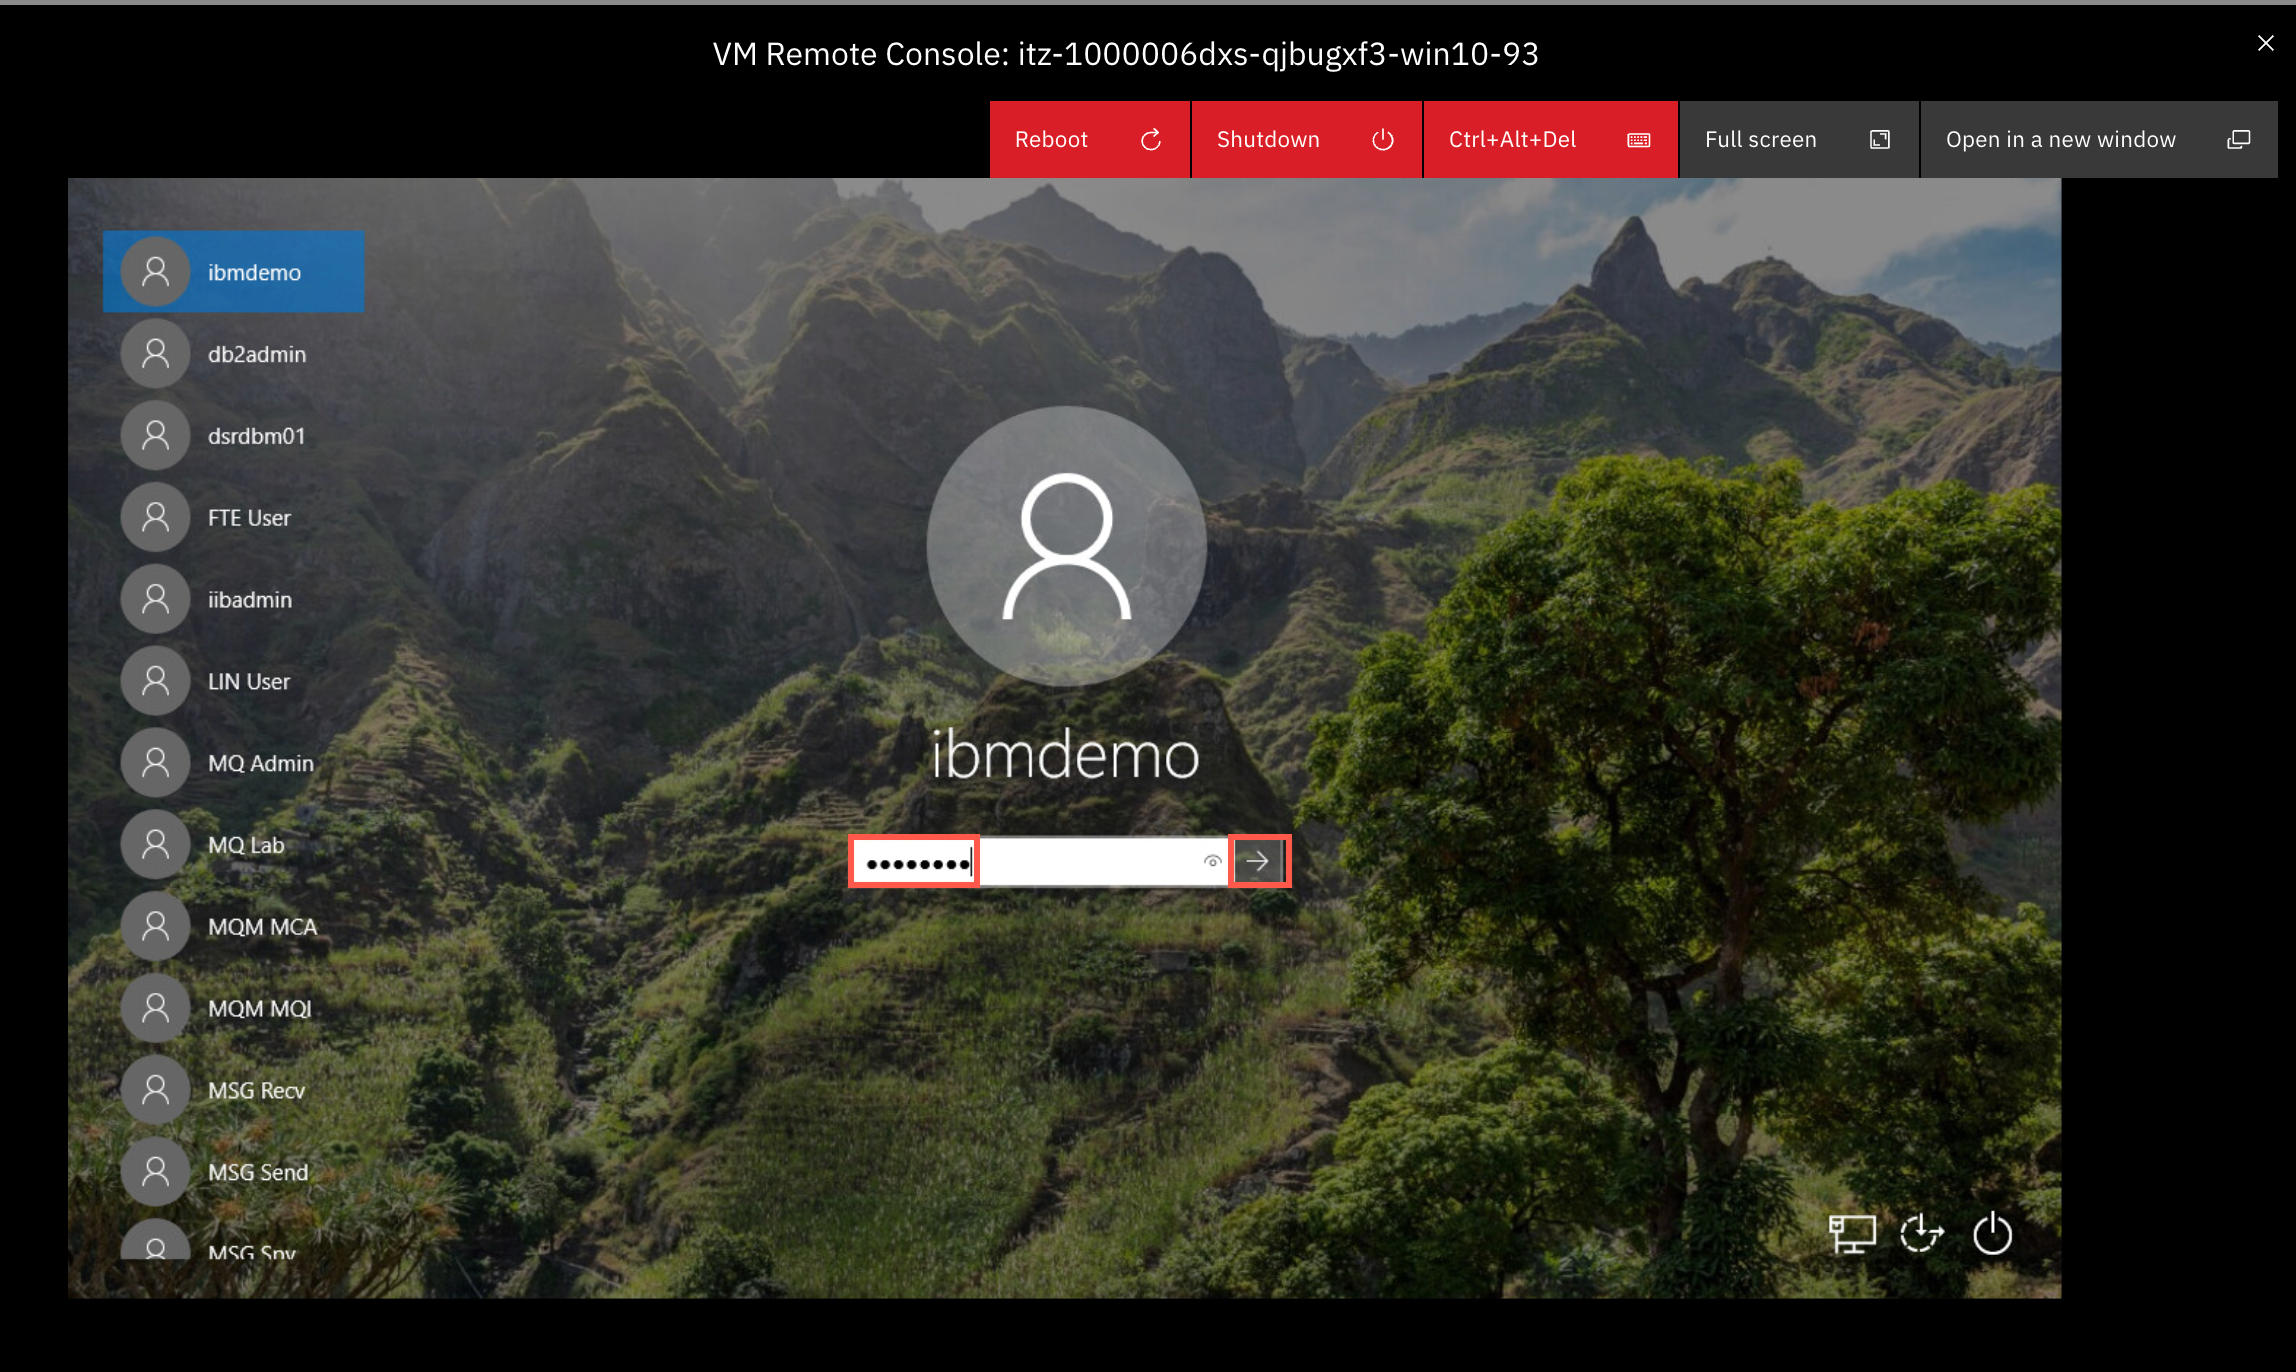
-
You will sign on as ibmdemo. Enter passw0rd for the password and hit enter or click the arrow.
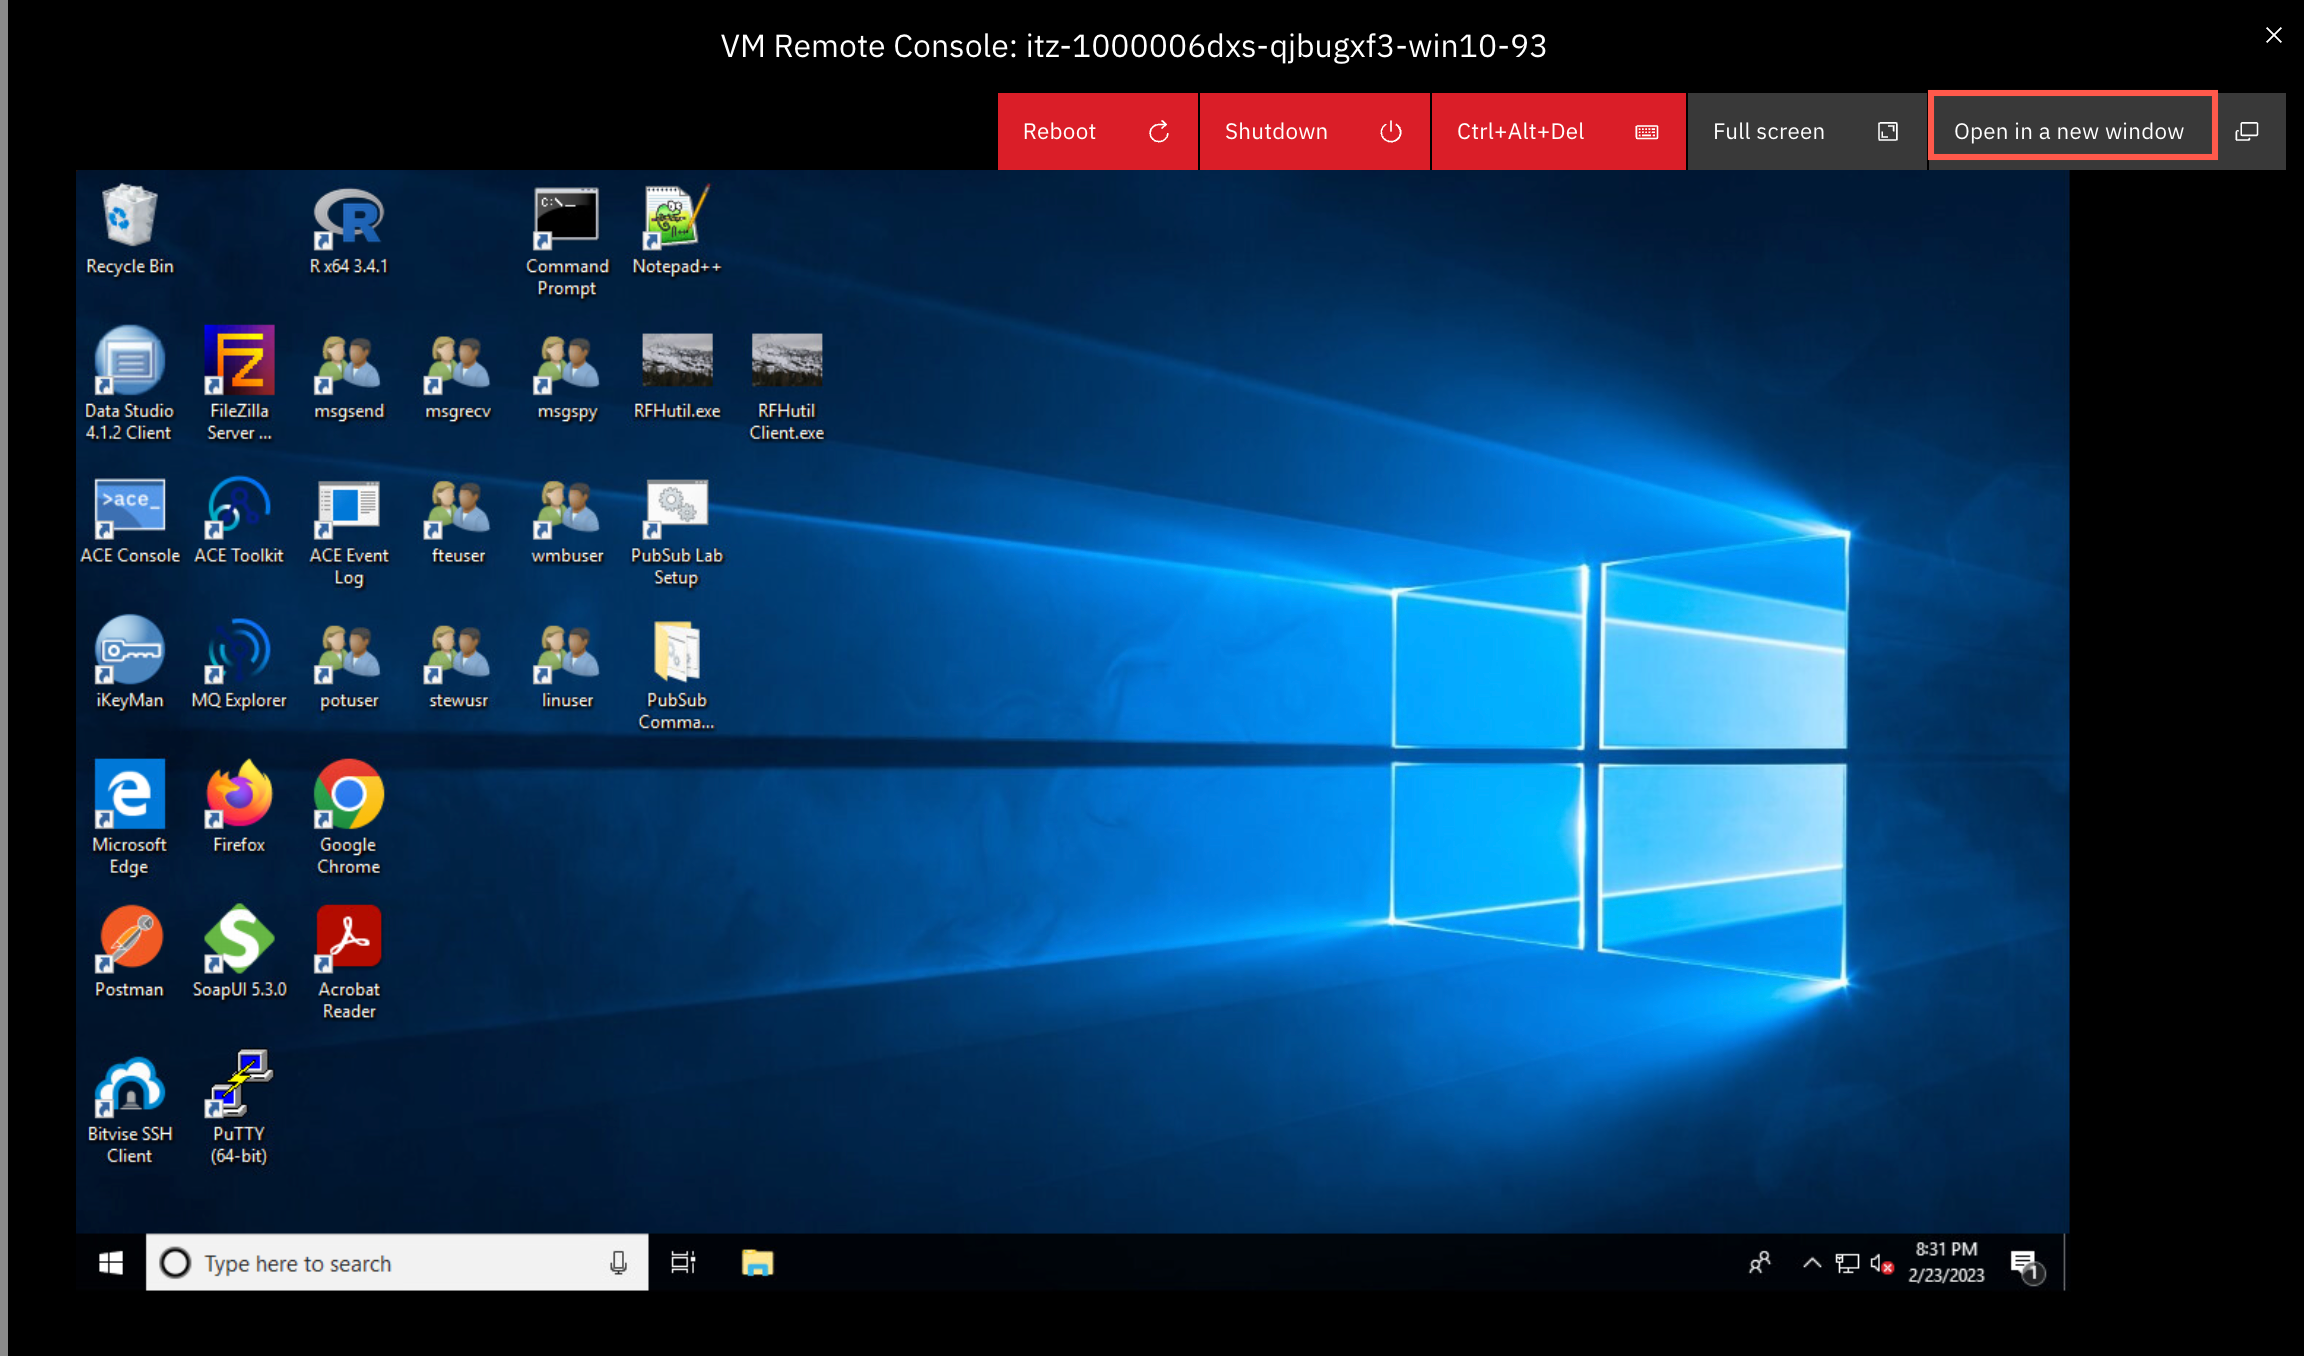
-
Ignore and close any pop-ups. Click Open in a new window.
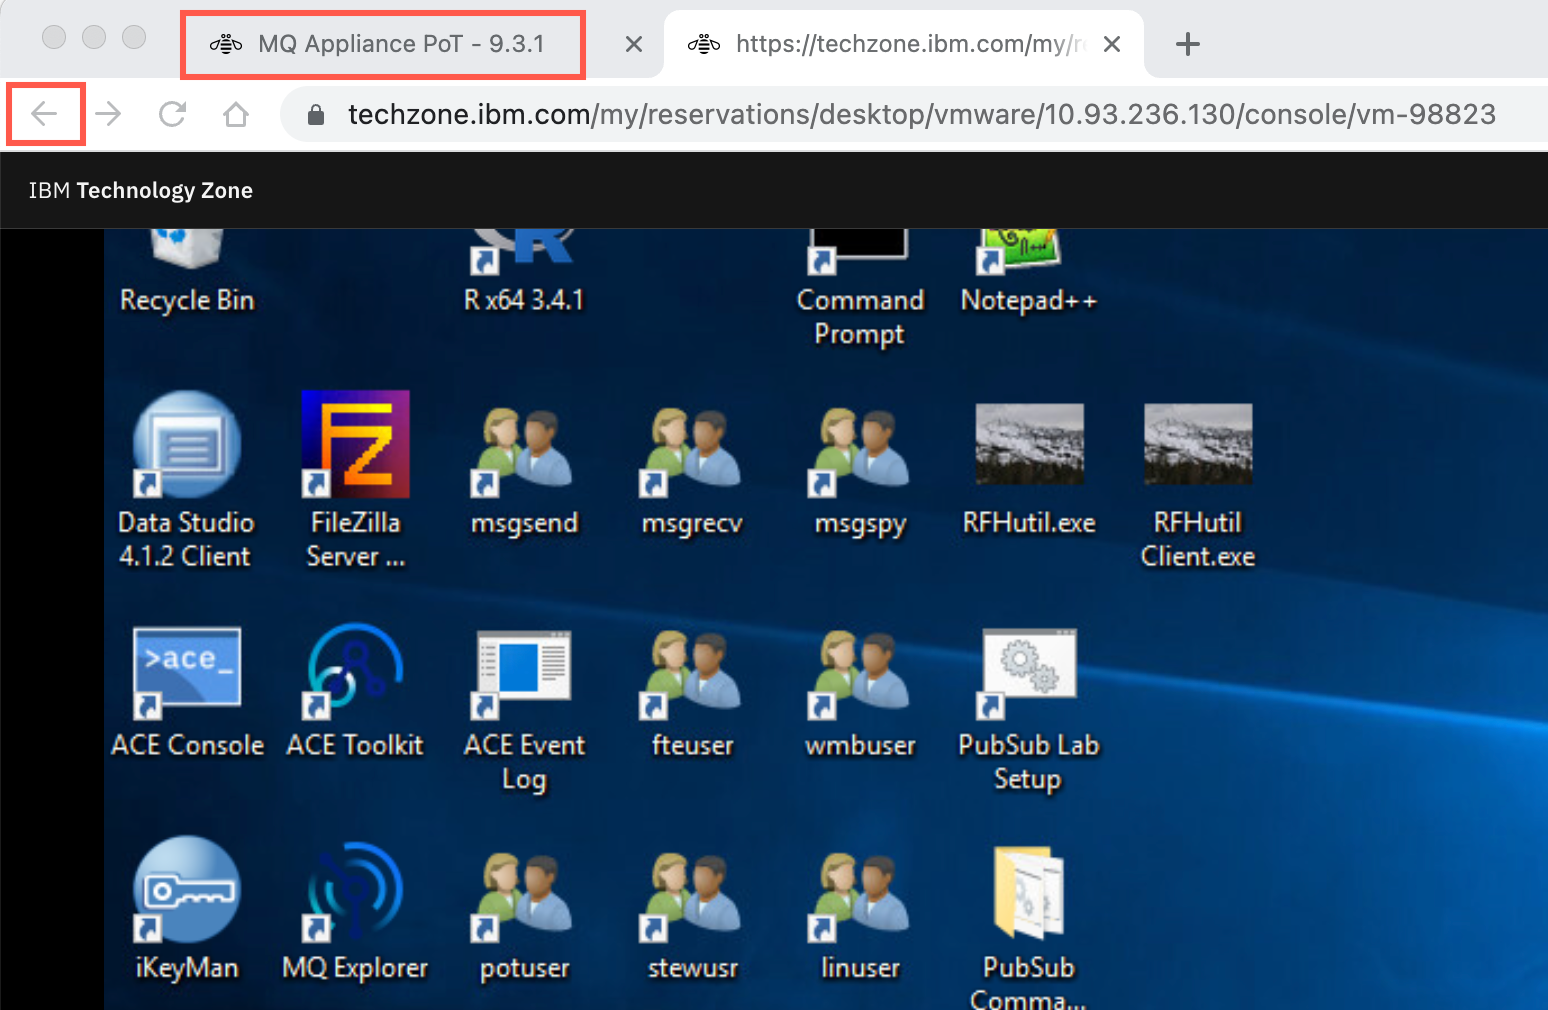
-
Return to the previous browser tab. Click the browser back button to return to the main environment page. There you can open any of the other VMs. This is especially important for Lab 1 to open the MQAppl7 VM.
MQ Appliance Console
Note:
Be aware when using the MQ Appliance Console on the virtual appliance you will not be able to copy / paste commands from the lab guides. You may want to use Putty on the Windows VM to connect to the appliances. Using Putty you can adjust the screen size, scroll up and down, and copy / paste. You will also only need to work on one VM instead of switching between the VMs. Be aware that you cannot use Putty in Lab 1 until you have completed the Install Wizard (which enables the use of SSH).
IP Addresses
This document details all of the IP addresses you need for the appliances in the labs.
Use the tables below to guide you through the initial set up of MQAppl7 in Lab 1 and also MQAppl5 and MQAppl6 if you choose to manually configure the appliances for the HA and DR labs.
The network adapters are described here. Pay particular attention to eth1, eth2, and eth3 and eth4. They are the adapters used for HA and DR.
Ensure you enter the addresses exactly as shown here in conjunction with the lab instructions.
MQAppl1 Addresses
Note that the IP addresses of eth1 through eth4 MUST be entered in CIDR notation as shown below.
| Virtual Adapter Network Name | Appliance Ethernet Interface | Usage | DHCP | IP Address | Gateway Addresses |
|---|---|---|---|---|---|
| Network 1 | eth0 | Management and client traffic | Yes | 10.0.0.1 | |
| HA1 | eth1 | HA primary connection | No | 10.0.1.1 | 10.0.1.254 |
| HA2 | eth2 | HA alternate connection | No | 10.0.2.1 | 10.0.2.254 |
| HArep | eth3 | HA replication connection | No | 10.0.3.1 | 10.0.3.254 |
| DRrep | eth4 | DR replication connection | No | 10.0.4.1 | 10.0.4.254 |
MQAppl2 Addresses
Note that the IP addresses of eth1 through eth4 MUST be entered in CIDR notation as shown below.
| Virtual Adapter Network Name | Appliance Ethernet Interface | Usage | DHCP | IP Address | Gateway Addresses |
|---|---|---|---|---|---|
| Network 1 | eth0 | Management and client traffic | Yes | 10.0.0.2 | |
| HA1 | eth1 | HA primary connection | No | 10.0.1.2 | 10.0.1.254 |
| HA2 | eth2 | HA alternate connection | No | 10.0.2.2 | 10.0.2.254 |
| HArep | eth3 | HA replication connection | No | 10.0.3.2 | 10.0.3.254 |
| DRrep | eth4 | DR replication connection | No | 10.0.4.2 | 10.0.4.254 |
MQAppl3 Addresses
Note that the IP addresses of eth1 through eth4 MUST be entered in CIDR notation as shown below.
| Virtual Adapter Network Name | Appliance Ethernet Interface | Usage | DHCP | IP Address | Gateway Addresses |
|---|---|---|---|---|---|
| Network 1 | eth0 | Management and client traffic | Yes | 10.0.0.3 | |
| HA1 | eth1 | HA primary connection | No | 10.0.1.3 | 10.0.1.254 |
| HA2 | eth2 | HA alternate connection | No | 10.0.2.3 | 10.0.2.254 |
| HArep | eth3 | HA replication connection | No | 10.0.3.3 | 10.0.3.254 |
| DRrep | eth4 | DR replication connection | No | 10.0.4.3 | 10.0.4.254 |
MQAppl4 Addresses
Note that the IP addresses of eth1 through eth4 MUST be entered in CIDR notation as shown below.
| Virtual Adapter Network Name | Appliance Ethernet Interface | Usage | DHCP | IP Address | Gateway Addresses |
|---|---|---|---|---|---|
| Network 1 | eth0 | Management and client traffic | Yes | 10.0.0.4 | |
| HA1 | eth1 | HA primary connection | No | 10.0.1.4 | 10.0.1.254 |
| HA2 | eth2 | HA alternate connection | No | 10.0.2.4 | 10.0.2.254 |
| HArep | eth3 | HA replication connection | No | 10.0.3.4 | 10.0.3.254 |
| DRrep | eth4 | DR replication connection | No | 10.0.4.4 | 10.0.4.254 |
MQAppl5 Addresses
Note that the IP addresses of eth1 through eth4 MUST be entered in CIDR notation as shown below.
| Virtual Adapter Network Name | Appliance Ethernet Interface | Usage | DHCP | IP Address | Gateway Addresses |
|---|---|---|---|---|---|
| Network 1 | eth0 | Management and client traffic | Yes | 10.0.0.5 | |
| HA1 | eth1 | HA primary connection | No | 10.0.1.5 | 10.0.1.254 |
| HA2 | eth2 | HA alternate connection | No | 10.0.2.5 | 10.0.2.254 |
| HArep | eth3 | HA replication connection | No | 10.0.3.5 | 10.0.3.254 |
| DRrep | eth4 | DR replication connection | No | 10.0.4.5 | 10.0.4.254 |
MQAppl6 Addresses
Note that the IP addresses of eth1 through eth4 MUST be entered in CIDR notation as shown below.
| Virtual Adapter Network Name | Appliance Ethernet Interface | Usage | DHCP | IP Address | Gateway Addresses |
|---|---|---|---|---|---|
| Network 1 | eth0 | Management and client traffic | Yes | 10.0.0.6 | |
| HA1 | eth1 | HA primary connection | No | 10.0.1.6 | 10.0.1.254 |
| HA2 | eth2 | HA alternate connection | No | 10.0.2.6 | 10.0.2.254 |
| HArep | eth3 | HA replication connection | No | 10.0.3.6 | 10.0.3.254 |
| DRrep | eth4 | DR replication connection | No | 10.0.4.6 | 10.0.4.254 |
MQAppl7 Addresses
Note that the IP addresses of eth1 through eth4 MUST be entered in CIDR notation as shown below.
| Virtual Adapter Network Name | Appliance Ethernet Interface | Usage | DHCP | IP Address | Gateway Addresses |
|---|---|---|---|---|---|
| Network 1 | eth0 | Management and client traffic | Yes | 10.0.0.7 | |
| HA1 | eth1 | HA primary connection | No | 10.0.1.7 | 10.0.1.254 |
| HA2 | eth2 | HA alternate connection | No | 10.0.2.7 | 10.0.2.254 |
| HArep | eth3 | HA replication connection | No | 10.0.3.7 | 10.0.3.254 |
| DRrep | eth4 | DR replication connection | No | 10.0.4.7 | 10.0.4.254 |