MQ-Appliance-PoT-9.4
Lab 1 - Getting started with the MQ Appliance
In this lab, you will configure the appliance and test that the basic configuration is working as expected.
VMs required:
- Windows
- MQAppl7
This lab simulates the initial configuration of a physical MQ Appliance. When you are setting up a new MQ Appliance for the first time, you must connect a serial cable to the appliance through the Serial “Console Connector.” When shipped, this is the ONLY port that is available to use, all others are unconfigured. So this process configures the network adapters, as well as optionally (which you do in this lab) remote access via SSH and the MQ web console.
Open the virtual appliance (MQAppl7)
-
Click the XXXXXXX_WM605G_XX_MQAAPL7 VM.
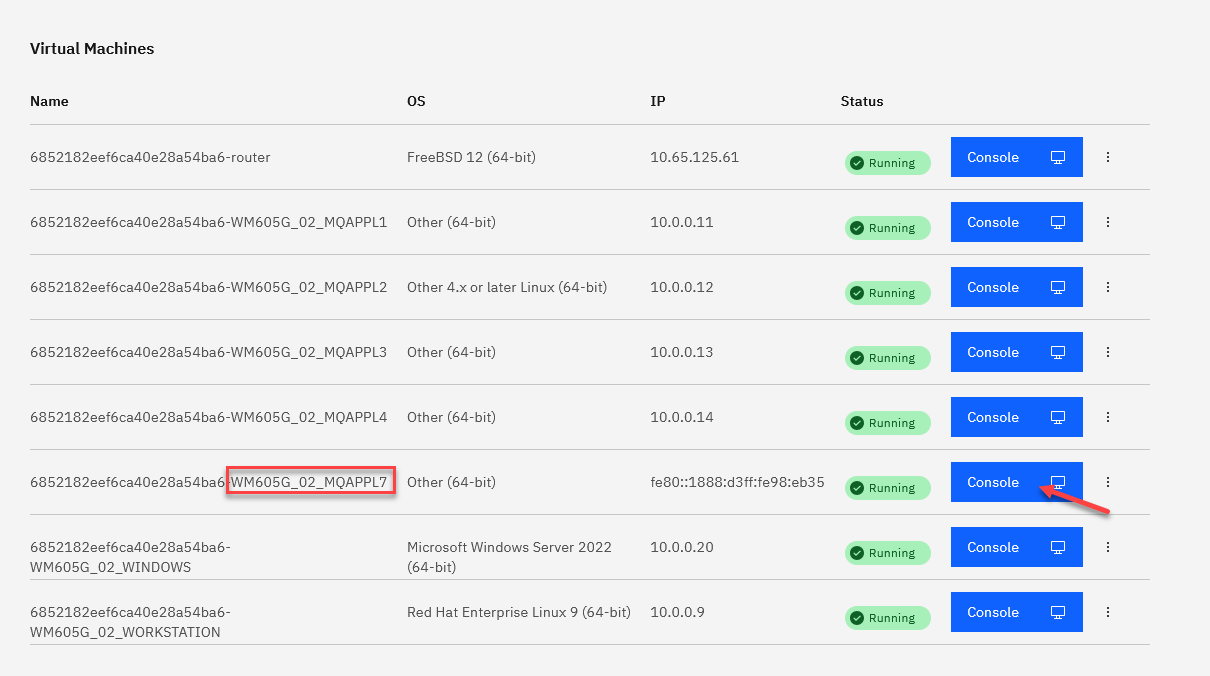
-
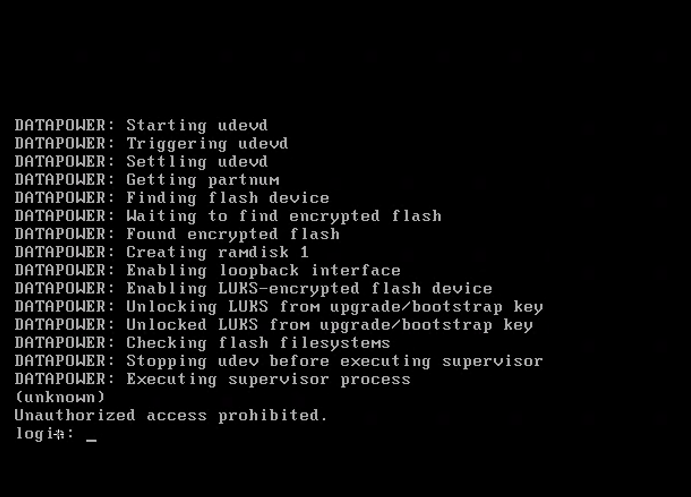
Wait for the virtual machine to power on.
-
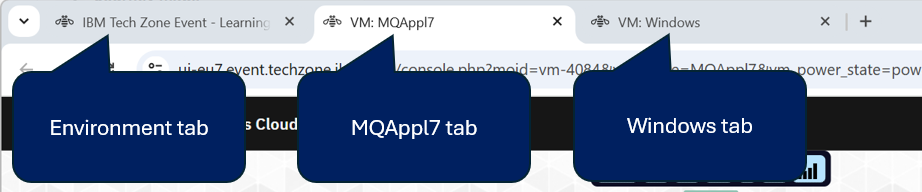
Return to the original tab and open the XXXXXXX_WM605G_XX_WINDOWS machine.
-
You now have three browser tabs open, Windows in one, the current appliance console for MQAppl7, and one to return to the environment.
Basic appliance configuration
-
Enter admin as the login user name.
-
Enter admin as the initial password.
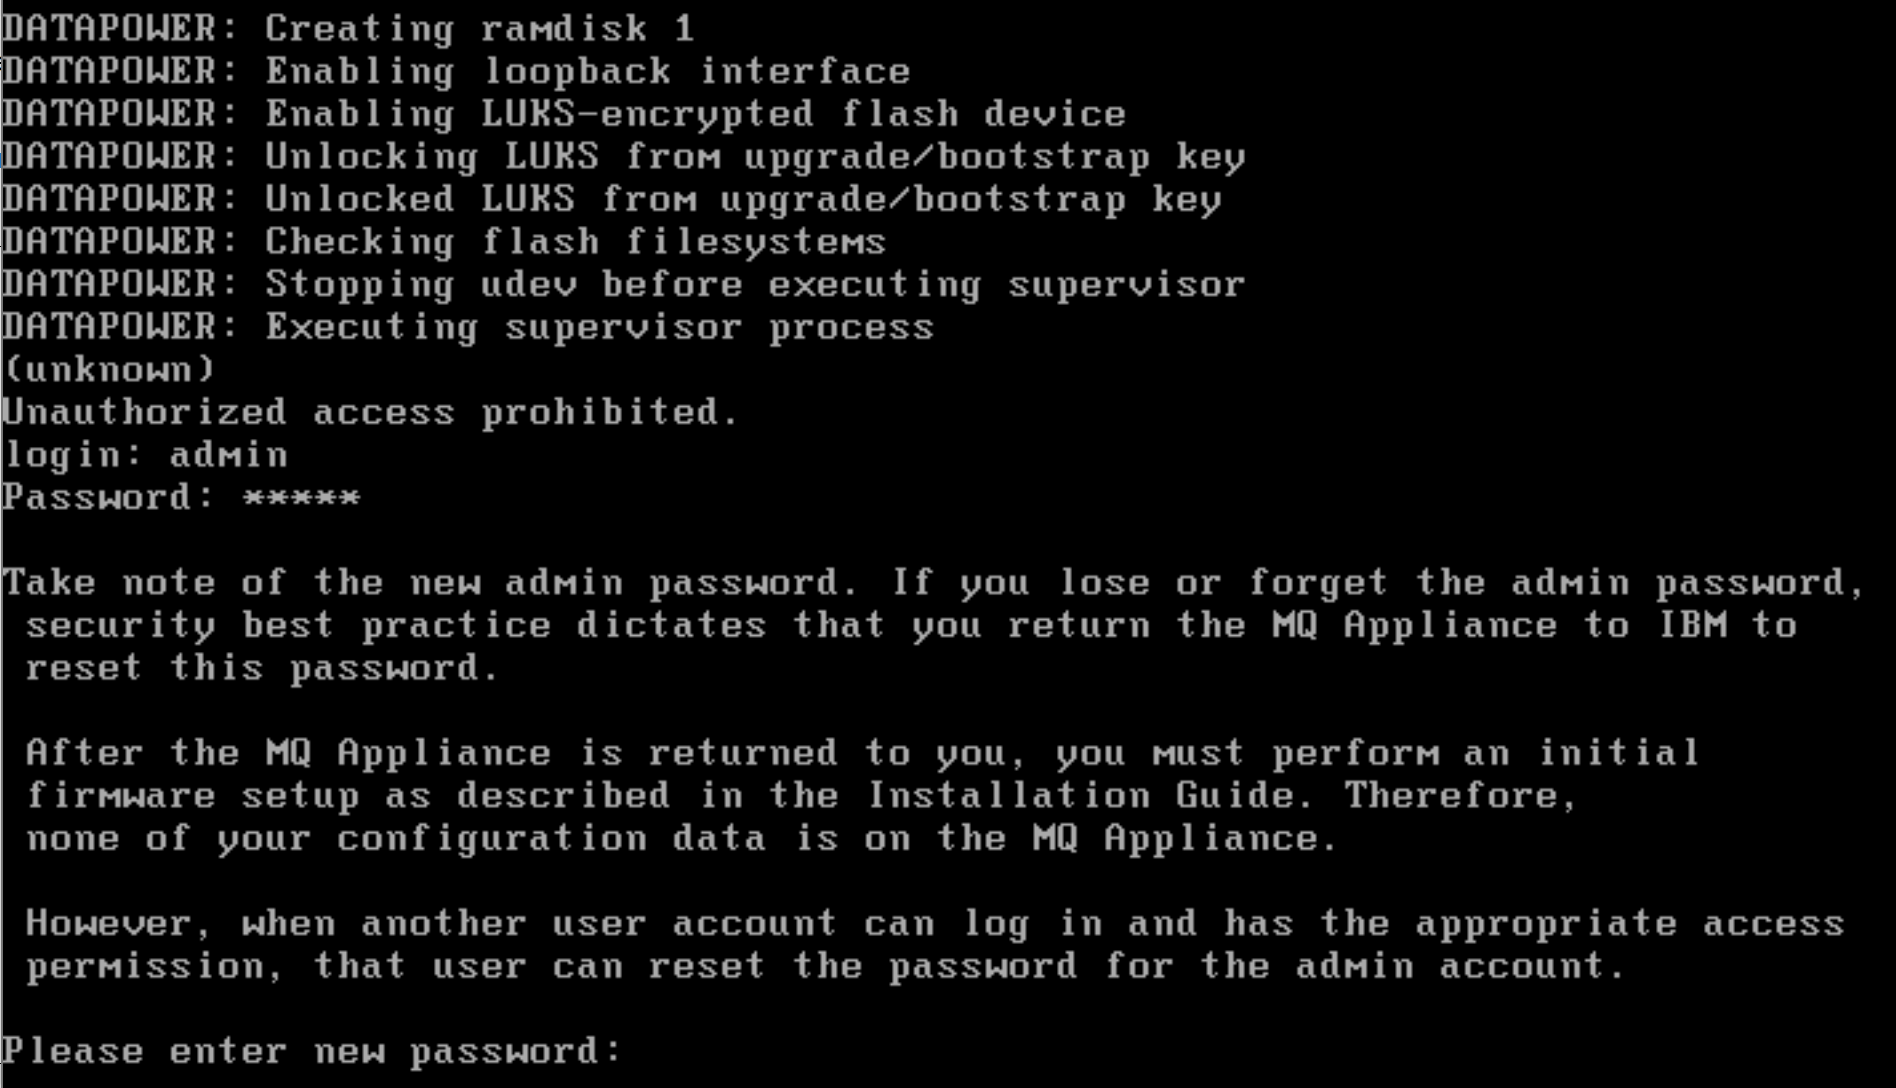
-
Enter Passw0rd! (note the “0”) next to “Please enter new password”.
-
Enter Passw0rd! (note the “0”) next to “Please re-enter new password to confirm”.
WARNING:
You may use any password you like. However, please be sure to remember whatever you use. If you forget your password on a real appliance, you may have to return the appliance to IBM to be reset.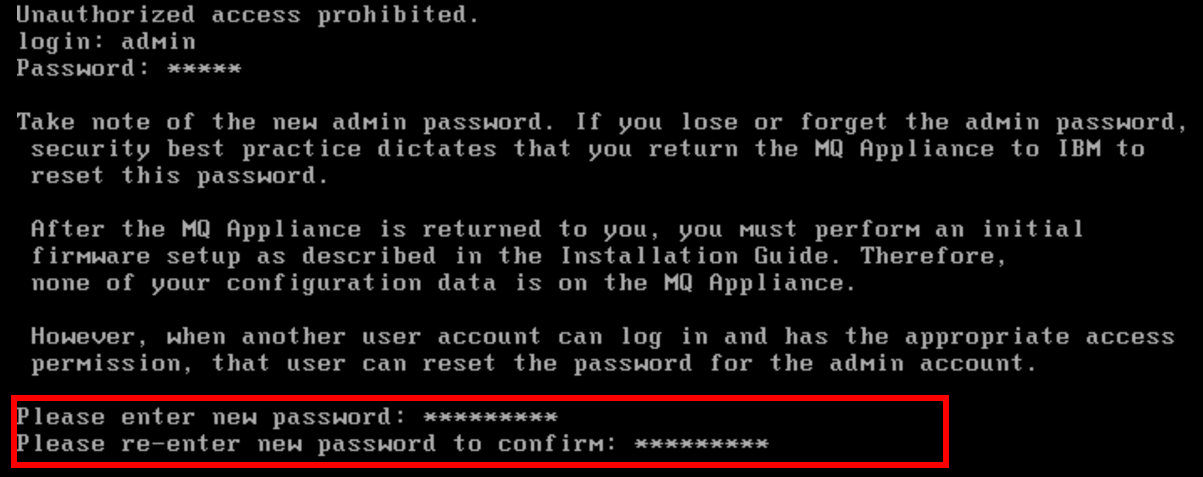
-
Enter y next to “Do you want to run the Install Wizard?”
Note:
You will need to press enter after typing each entry. Or you may just hit enter to accept the default for the entry.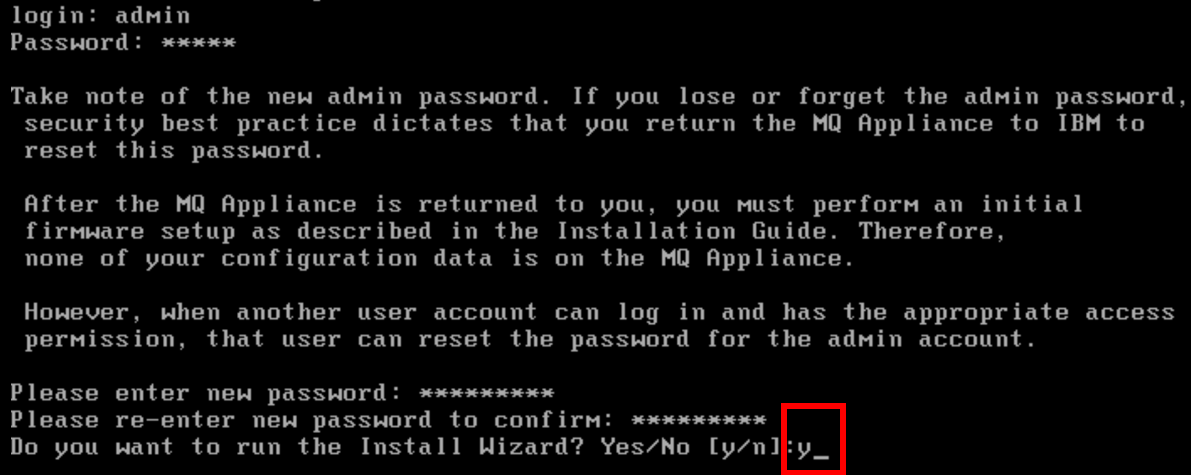
-
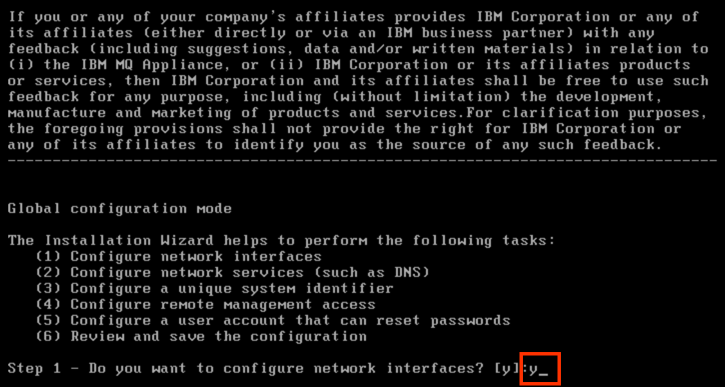
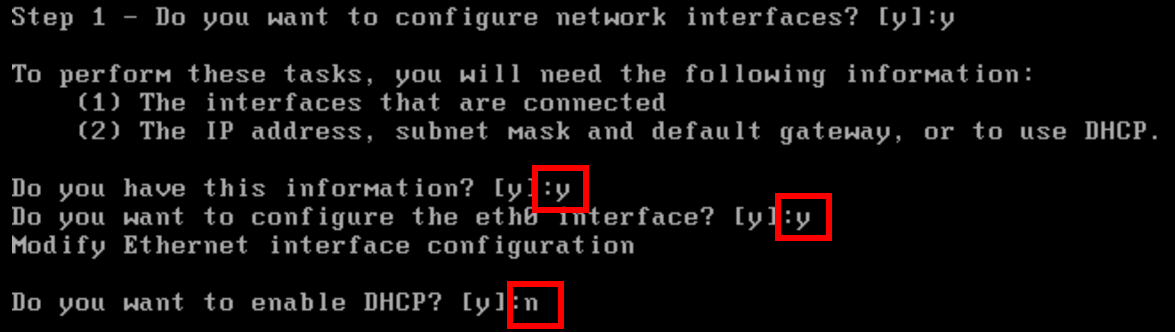
Enter y next to “Step 1 – Do you want to configure network interfaces?”
-
Enter y next to “Do you have this information?”
-
Enter y next to “Do you want to configure the eth0 interface?”
-
Enter n next to “Do you want to enable DHCP?”
Note Please be careful to follow the IP configuration exactly. If you have any concerns please as an instructor.
-
Enter 10.0.0.17/24 as the IP address.
-
Enter 10.0.0.1 as the default gateway address.

-
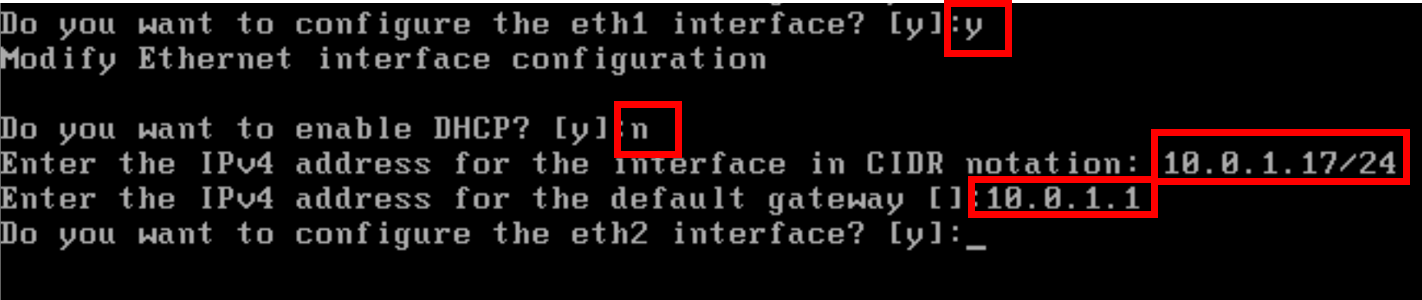
Enter y to the question - “Do you want to configure the eth1 interface?”
-
Enter n to the question - “Do you want to enable DHCP?”
-
Enter 10.0.1.17/24 as the IP address.
-
Enter 10.0.1.1 as the default gateway address.
-
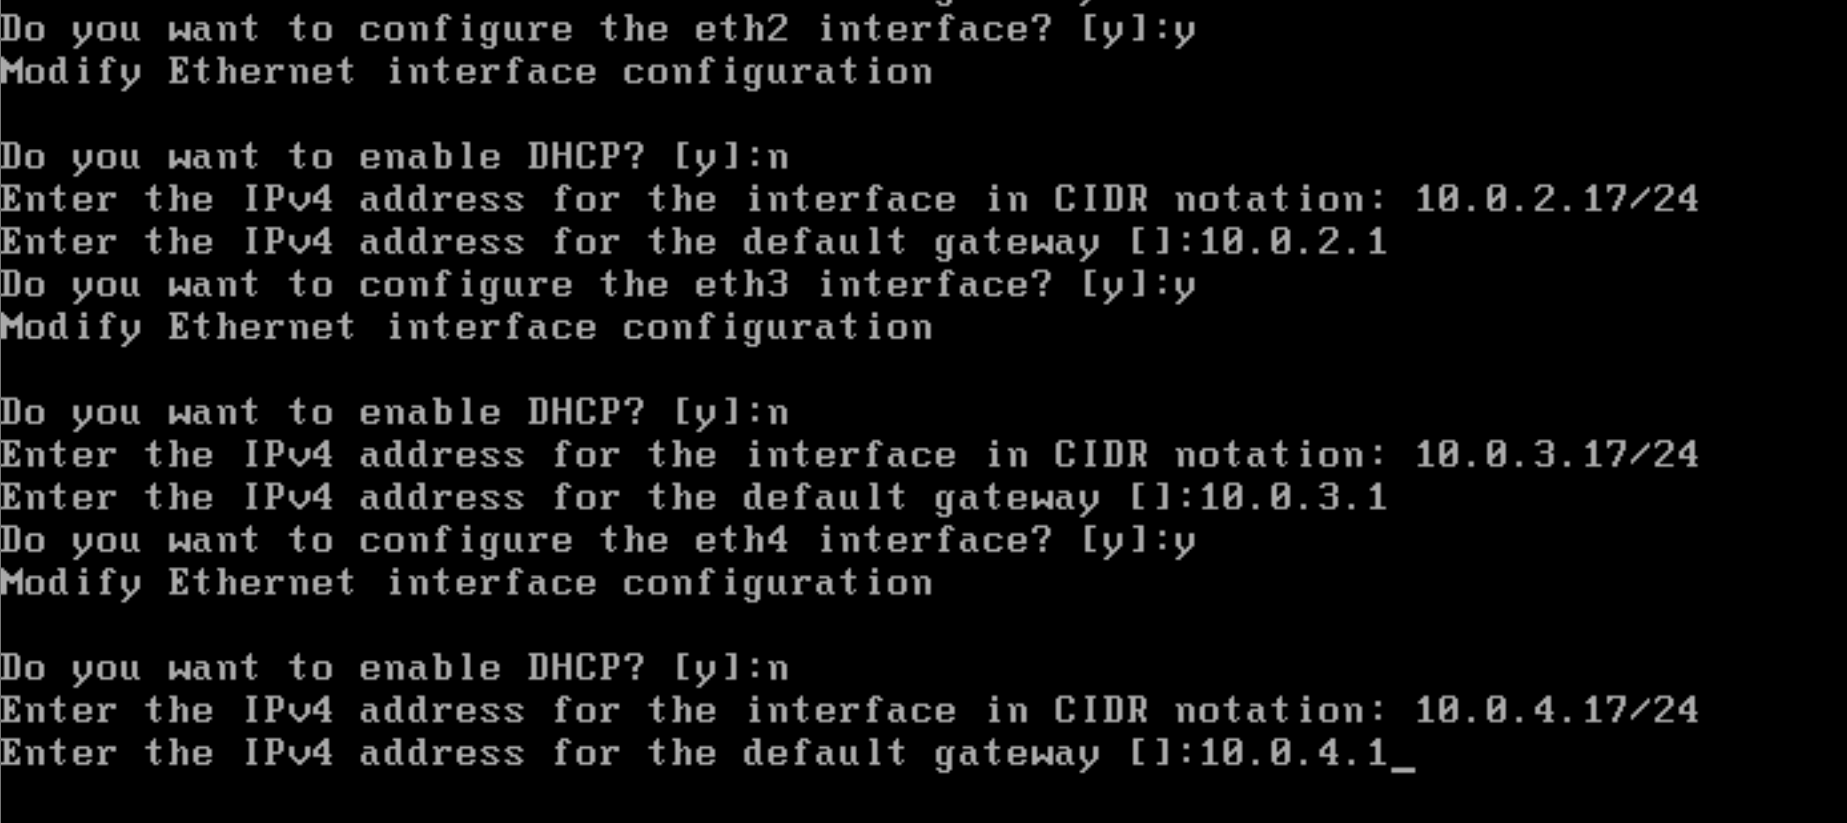
Enter y to the question - “Do you want to configure the eth2 interface?”
-
Enter n to the question - “Do you want to enable DHCP?”
-
Enter 10.0.2.17/24 as the IP address.
-
Enter 10.0.2.1 as the default gateway address.
-
Similarly configure eth3 and eth4 with address 10.0.3.17/24 with gateway 10.0.3.1 and address 10.0.4.17/24 with gateway 10.0.4.1 as shown in the below screen shot.
-
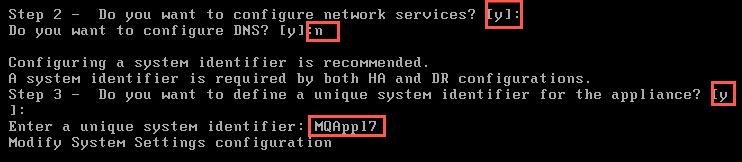
Enter y next to “Do you want to configure network services?”
-
Enter n next to “Do you want to configure DNS?”
-
Enter y next to Step 3 – Do you want to assign a unique identifier for the appliance?”
-
Enter a unique identifier for the appliance: MQAppl7.
NOTE:
A unique system identifier is required when using high availability, to uniquely identify each appliance within the high availability group. -
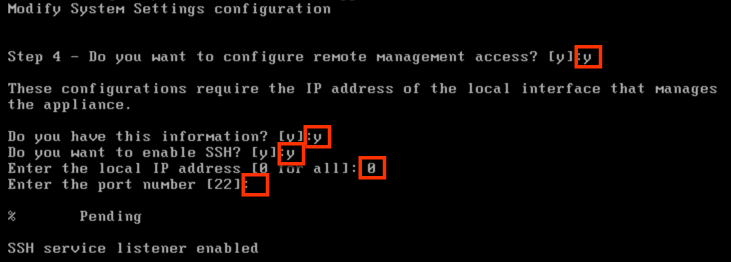
Enter y next to “Do you want to configure remote management access?”
-
Enter y next to “Do you have this information?”
-
Enter y next to “Do you want to enable SSH?”
-
Enter 0 next to Enter the local IP address
-
Press the Enter key to accept the default port (22).
-
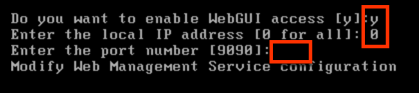
Enter y next to “Do you want to enable WebGUI access”.
-
Enter 0 next to “Enter the local IP address”
-
Press the Enter key to accept the default port (9090) for WebGUI access.
-
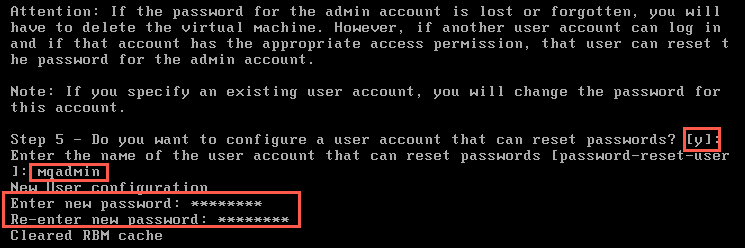
Enter y next to Step 5 – Do you want to configure a user account that can reset passwords?”
-
Enter a unique user name for the user account (make sure you make a note of whatever you choose), for example: mqadmin
-
Enter a password next to “Enter new password”, for example: Passw0rd!
-
Enter the same password next to “Re-enter new password”
-
Enter y next to “Do you want to review the current configuration?”
-
Enter y next to “Do you want to save the current configuration?”
-
Enter y next to “Overwrite previously saved configuration?”

NOTE:
If you are performing the configuration on the HTML5 client console, you will notice there are no scroll bars. However, you can use the shift+PgUp keyboard combination to scroll up and shift+PgDn to scroll down. This should allow you to see the entire configuration.The last step is to display the IP addresses of the adapters. This will be required later when you try to access the queue managers you create in the appliance.
-
Execute show ipaddress.
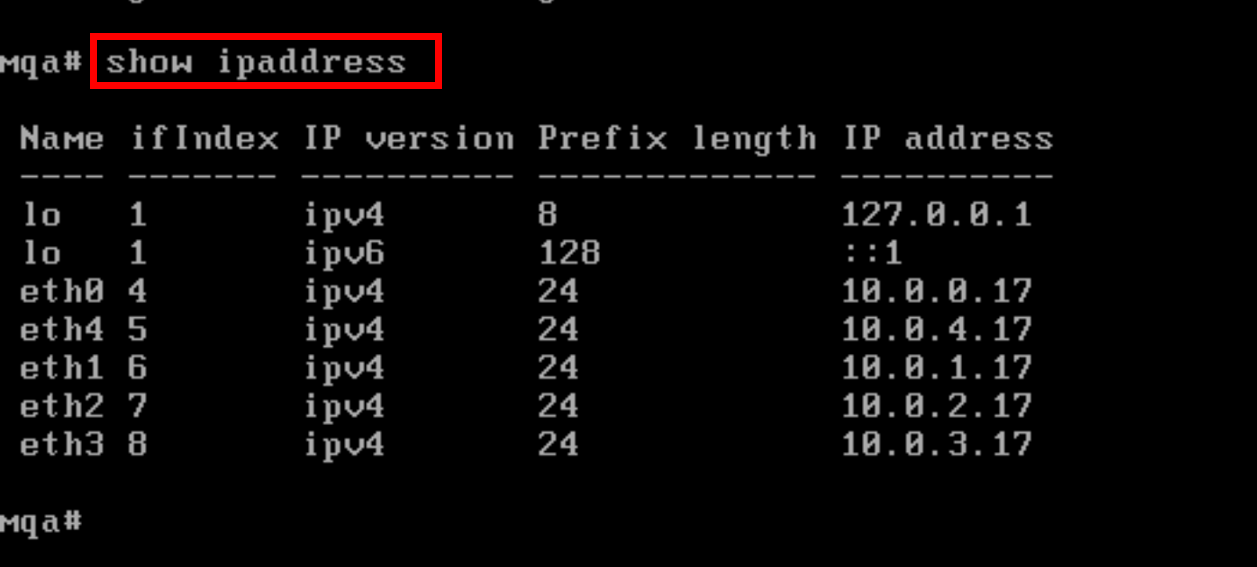
Ensure that the IP addresses match those shown in the screenshot above. They will be used to access the appliance.
The next step is to accept the license agreement. This must be done with the WebGUI.
-
Go to the Windows VM in your environment.
-
You should already be logged on. If not, log on to Windows with the user name admin and password IBMDem0s
-
Start FireFox web browser session.
-
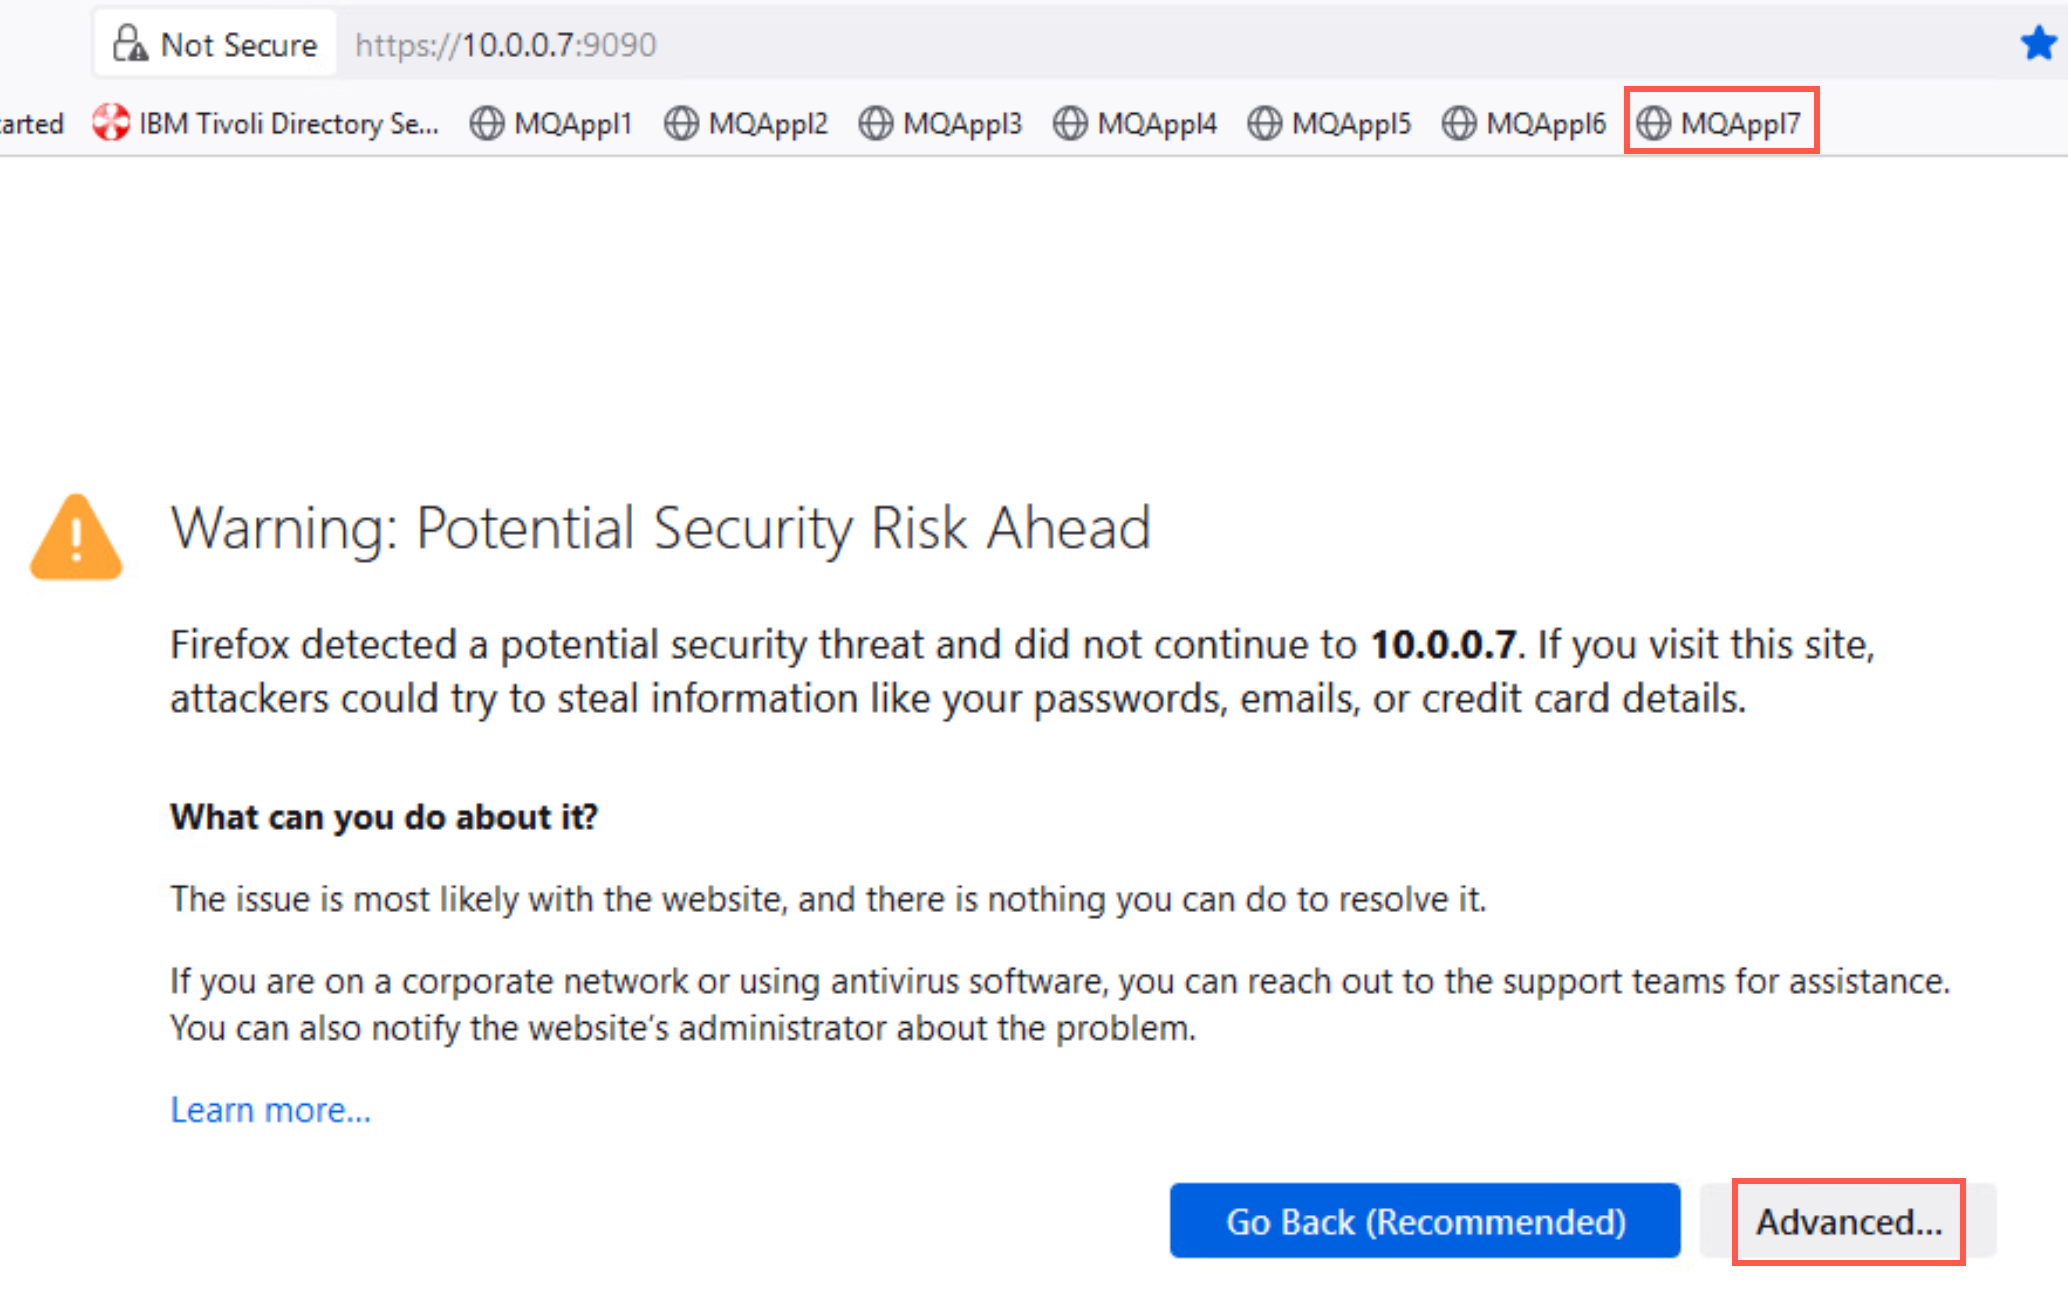
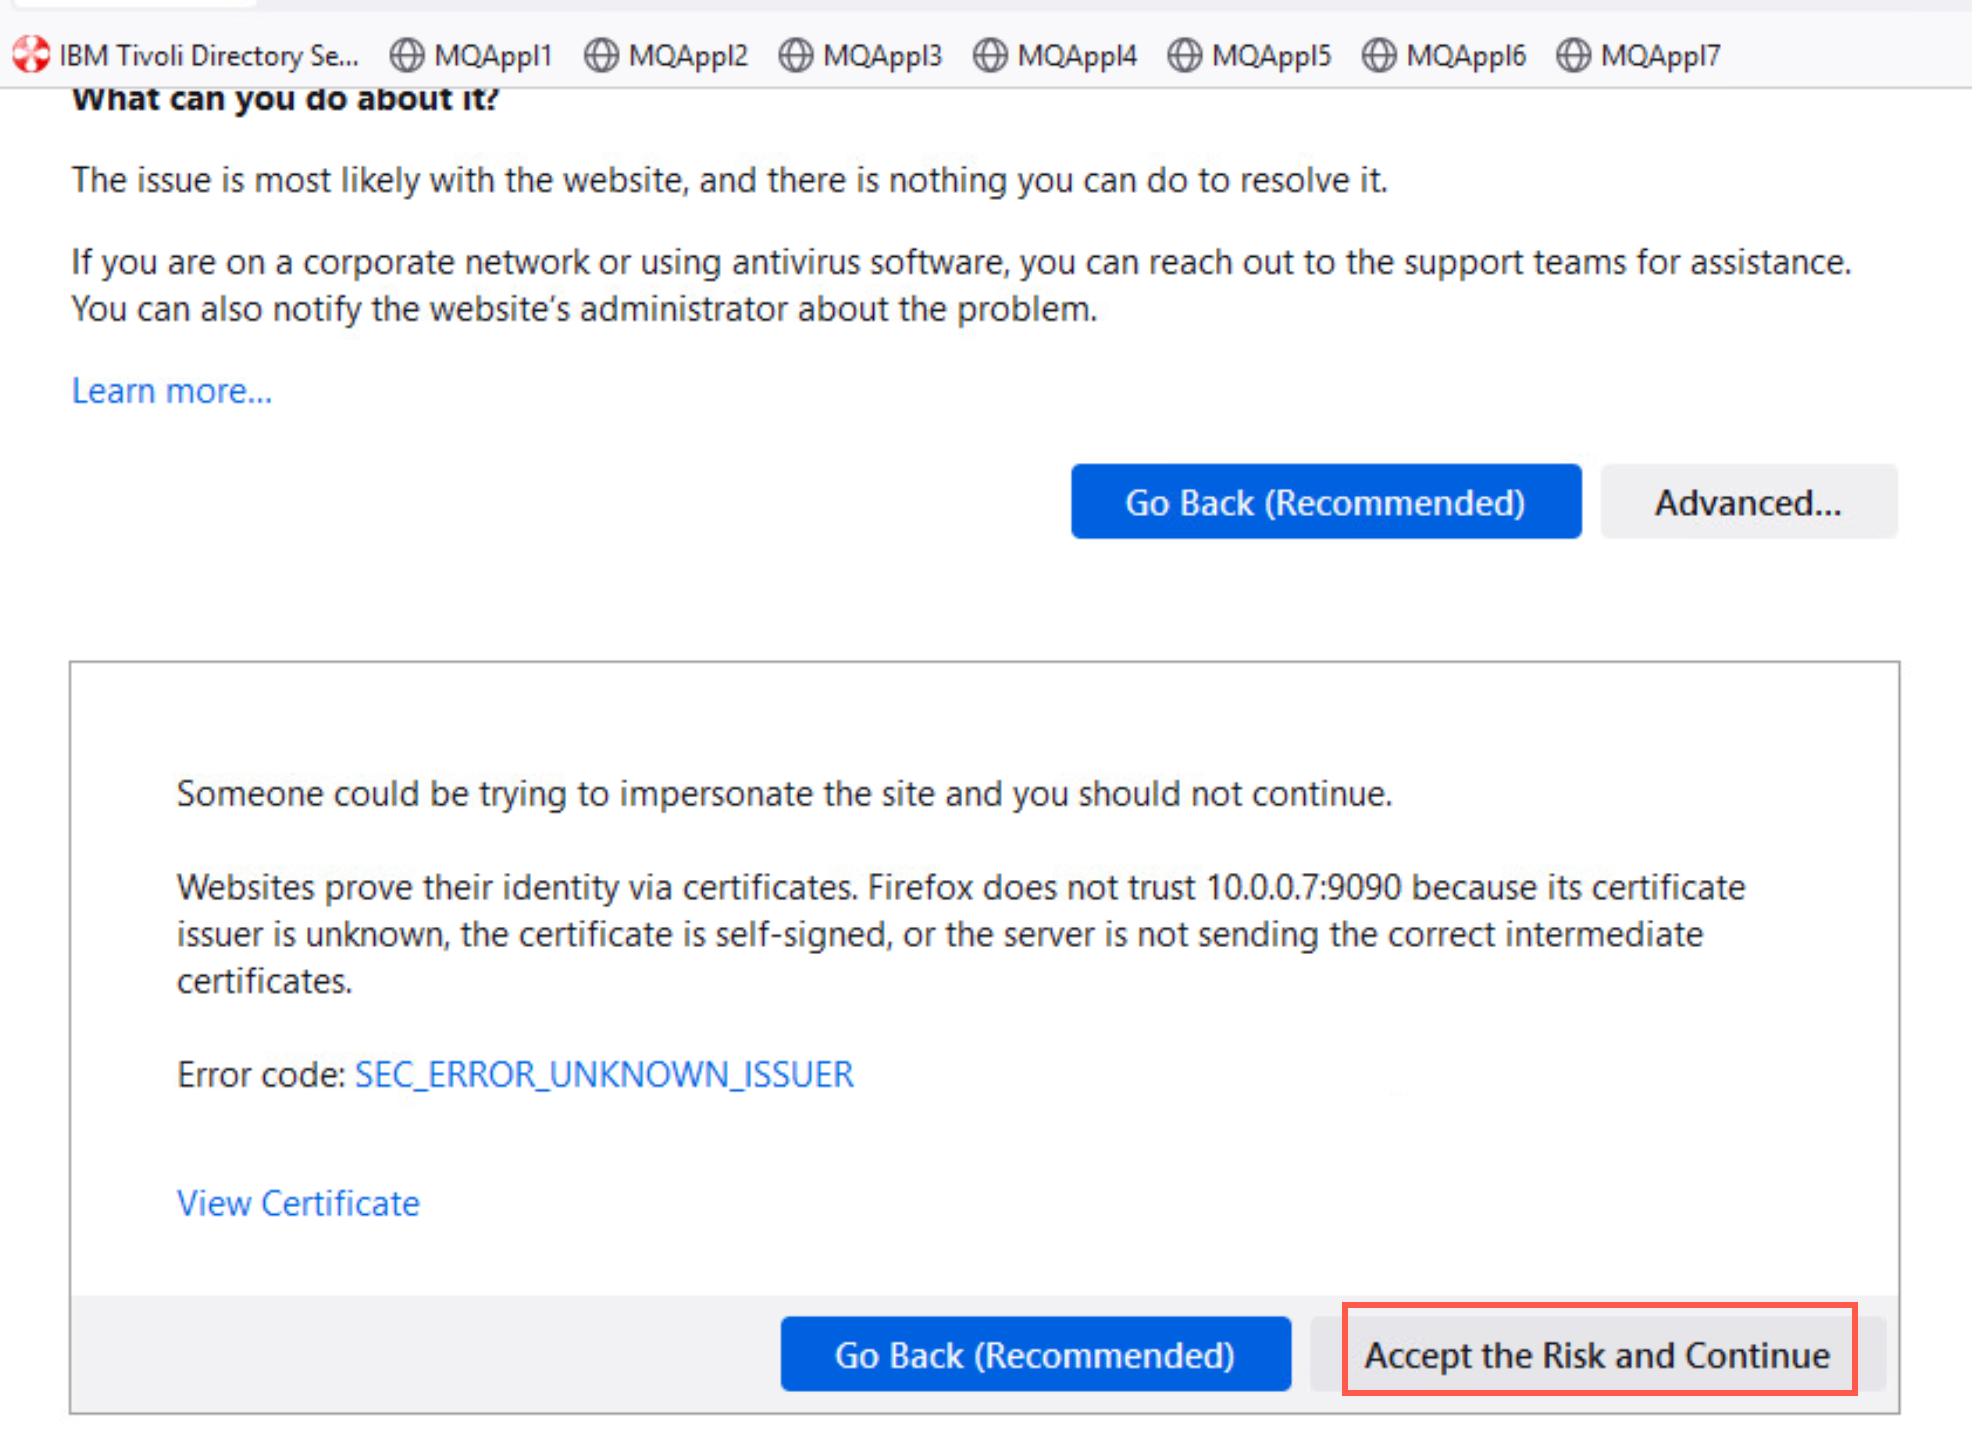
Navigate to https://<address of eth0>:9090 (or use the shortcut that is there for you). If you receive any warnings, allow the exception and continue.

-
If you receive any security exceptions, click Advanced, then Accept the Risk and Continue.
-
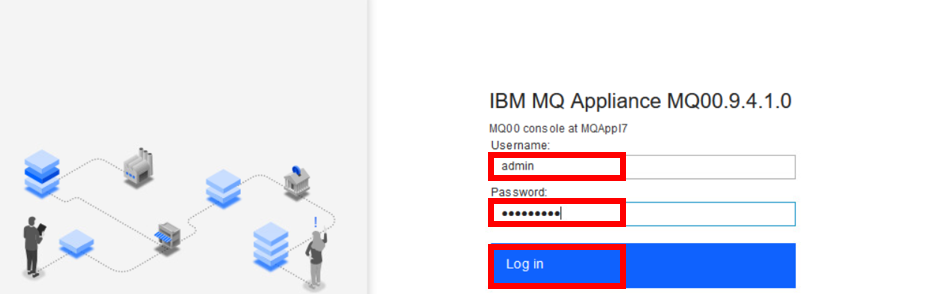
You will now see the console log in screen.
-
Enter admin as the User name.
-
Enter Passw0rd! (or whatever you chose earlier) as the Password.
-
Click Login.
-
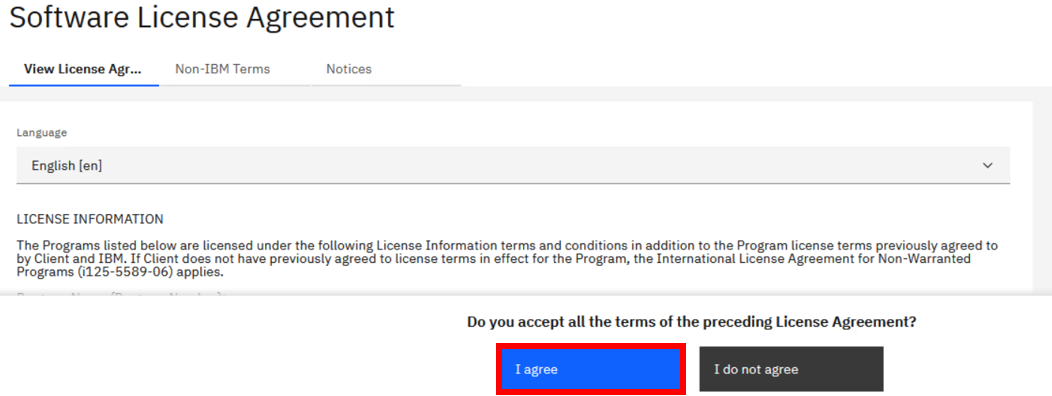
Click I agree to accept the license agreement.
-
The appliance will now process the license acceptance. All logged in users will now be disconnected.

-
After waiting a couple of minutes, click on the MQAppl7 bookmark to reload the page.
-
Log in with the admin user name, and password Passw0rd!.
NOTE:
Sometimes when you log back in you will be presented with the license page again, if this happens then wait a little longer and try clicking on the bookmark again. -
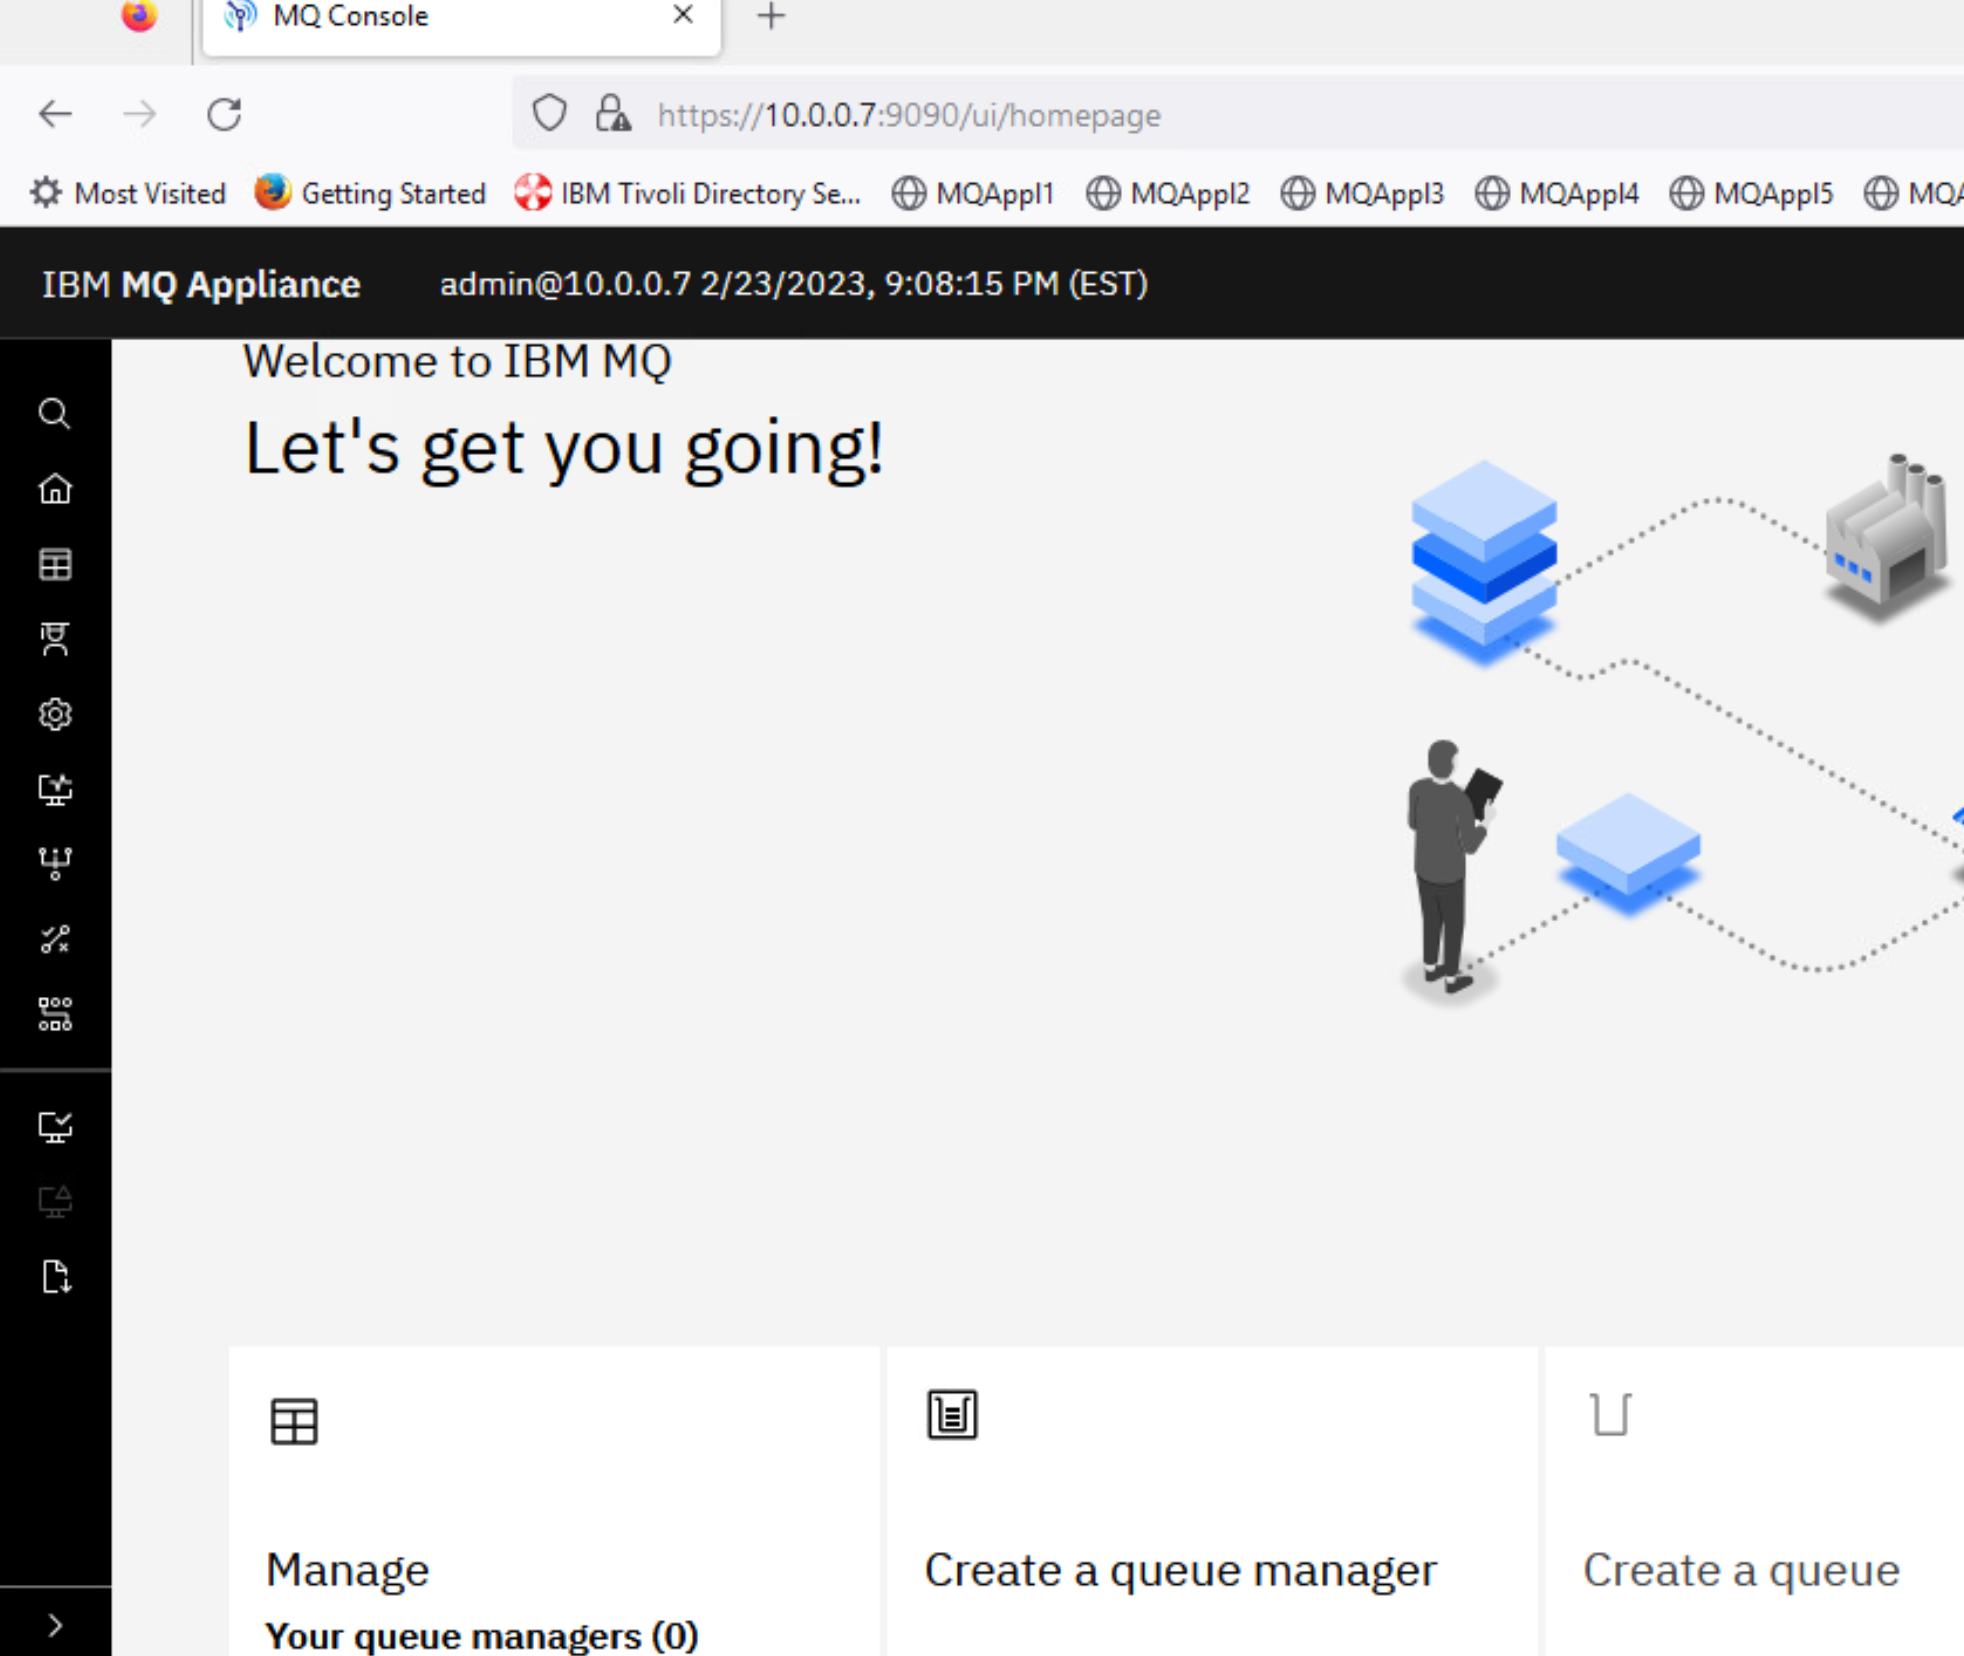
You are now logged on to the console.
After the setup of the MQApp7 in Lab 1 and for all other labs, you should use PuTTY to SSH to the appliances when you want to use the appliance CLI. With PuTTY, you can easily scroll and copy/paste.
Create and configure a queue manager
The next part of the lab will create and configure a queue manager. This will be done using the command line interface provided by the appliance console. This could also be done using a secure shell connection, using the port that was configured earlier (port 22 is the default), or via the web console.
The MQ appliance has the concept of modes. When the administrator logs in as admin, the shell will initially be an administrative shell. MQ commands are not part of the administration mode. The mqcli command can be used to change to MQ administration mode. Once in MQ administration mode, the normal administration commands are not available. To exit from MQ administration mode, use the exit command.
-
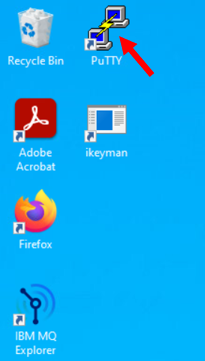
Open a PuTTY session by double-clicking the icon on the Windows desktop.
-
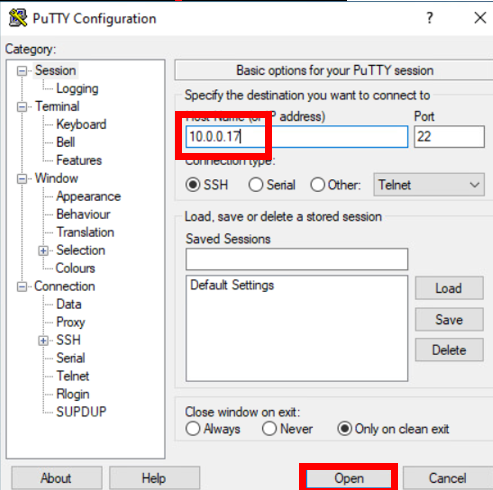
In the PuTTY window, enter the IP address for MQAppl7 10.0.0.17 and click Open.
-
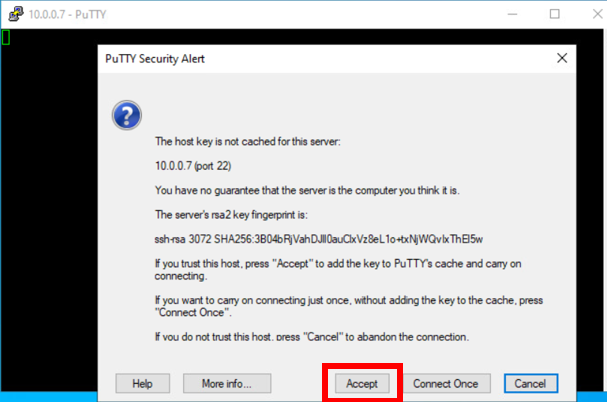
Click Yes to the security alert.
-
You will need to log on again as admin.
-
Enter Passw0rd! (or whatever was selected earlier) as the Password.
The help command will display all valid commands for the current mode.
-
Execute the help command.

-
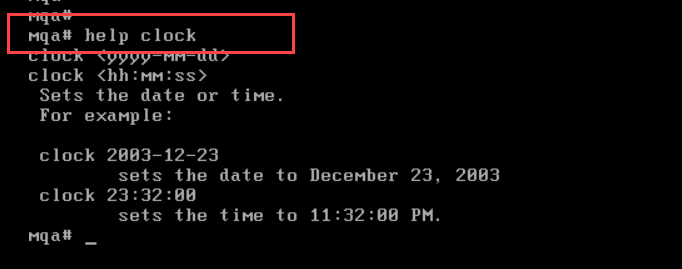
Details on a particular command can be displayed by adding the command to the help command.
-
Execute the help clock command.
-
Use the clock command to set the date and time (note as shown below that the date format is yyyy-mm-dd and the time uses the 24h clock).

In order to create a queue manager, the command line interface must be in MQ mode.
-
Execute the mqcli command.
You will now see the MQ command line interface prompt (mqcli).
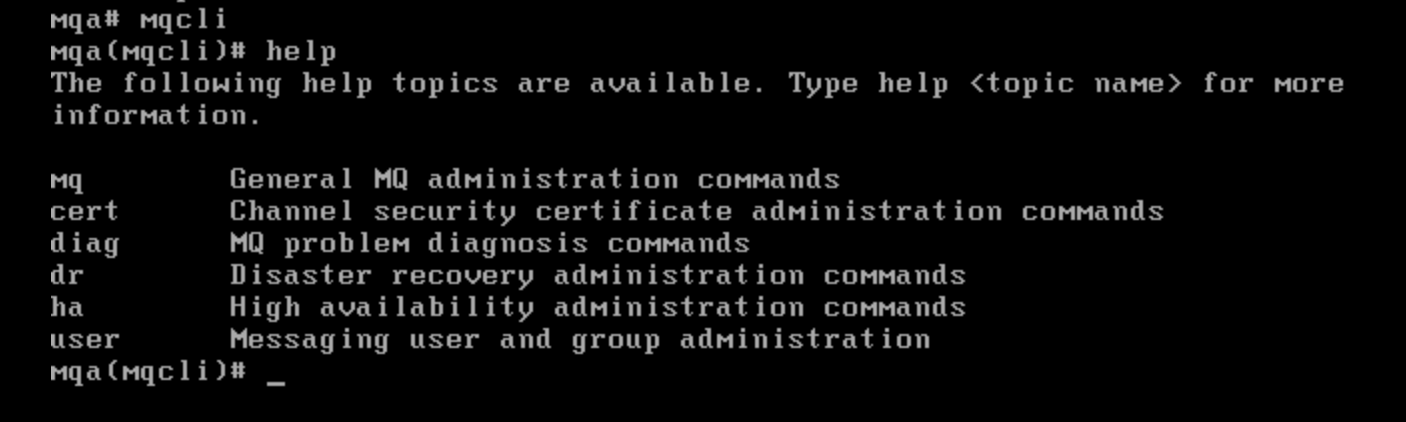
You can use the help command to display a list of available commands.
-
Execute the help command.
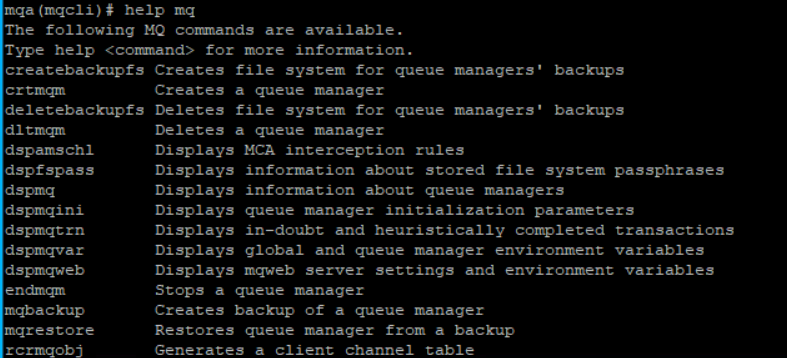
To see the actual MQ commands that are available use the help mq command.
-
Execute the help mq command.
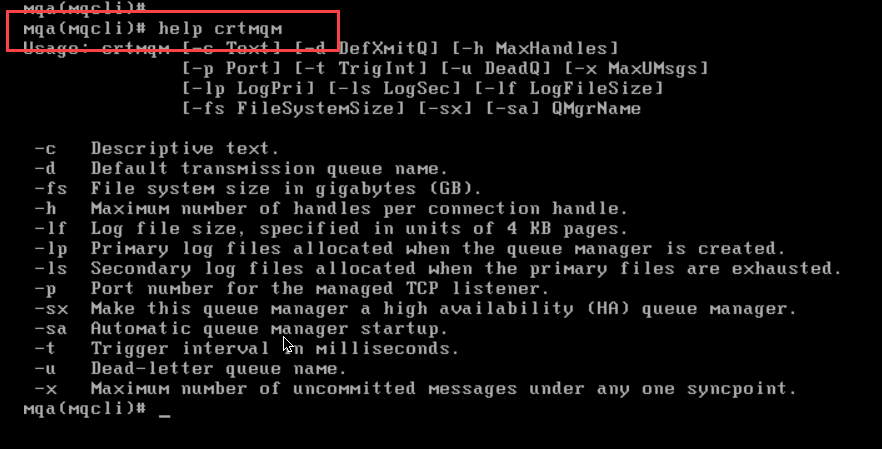
If you are unfamiliar with MQ command formats, the syntax for a particular MQ command can also be displayed using the help command.
-
You will create a queue manager, so review the syntax required for that.
Execute the help crtmqm command.
Note:
Remember that MQ is case sensitive.You will now create a queue manager named QM7 using the crtmqm command. The listener port will be 1414. The default file system size is set to 64GB on a real appliance, but you need to set it to only 2GB (using the -fs flag) on the virtual appliance.
-
Execute the following command:
crtmqm -p 1414 -u SYSTEM.DEAD.LETTER.QUEUE -fs 2 QM7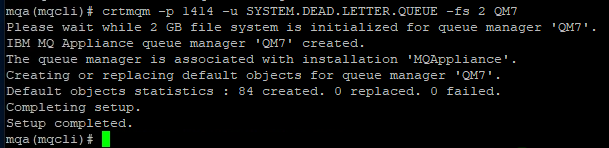
-
Execute the strmqm QM7 command to start the queue manager.
strmqm QM7
You can see that the queue manager is started and is at MQ v9.4.1.0. The status of the queue managers can be displayed with the dspmq command.
-
Execute the dspmq command.

The queue manager must now be configured to allow connections, including from MQ Explorer. This will be done in the next section of this lab.
Configuring the queue manager for connections
When a queue manager is first created, no external connections are allowed. The queue manager must now be configured to allow connections, including connections from MQ Explorer.
-
First, we will create a messaging user. Execute the following command:
usercreate -u ibmdemo -g mqm -p Passw0rd!
It is worth mentioning here that this user is different than the users that you have worked with previously. The other users are administrative users for the appliance; this is a messaging (MQ) user.
We now need to set up a SVRCONN channel for administration from MQ Explorer, but we must also setup the appropriate channel authentication and connection authorization to allow access to the channel and queue manager. This could also be performed from the command line. However, given that the commands are quite long to enter, we will use the web console to do this.
-
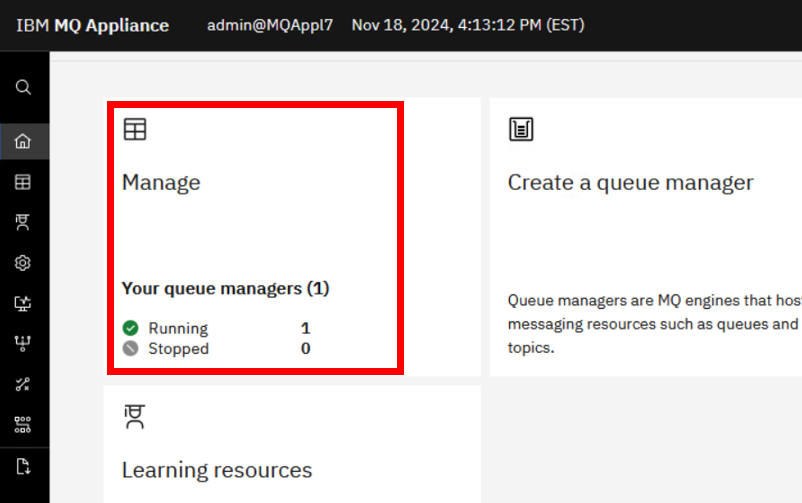
Swap back to the web console and log in again if you are not already logged in. Scroll down so you can see the whole window. Notice that the Manage tile shows that one queue manger is running (QM7). Click the Manage tile. We will use this one for administering QM7.
-
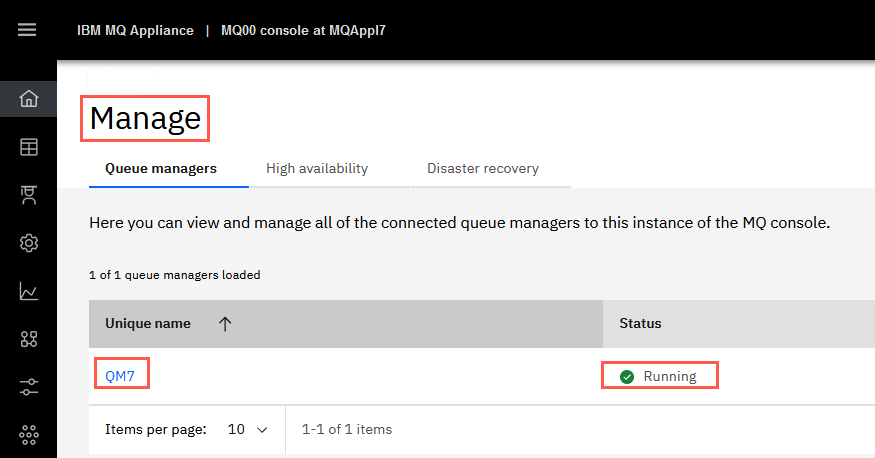
The Manage tab shows a list of queue managers defined on this appliance. You defined and started QM7 on the appliance’s command line. You can see that it is running.
-
Click the QM7 hyperlink. The details of the queue manager are now displayed and here you can manage the queue manager.
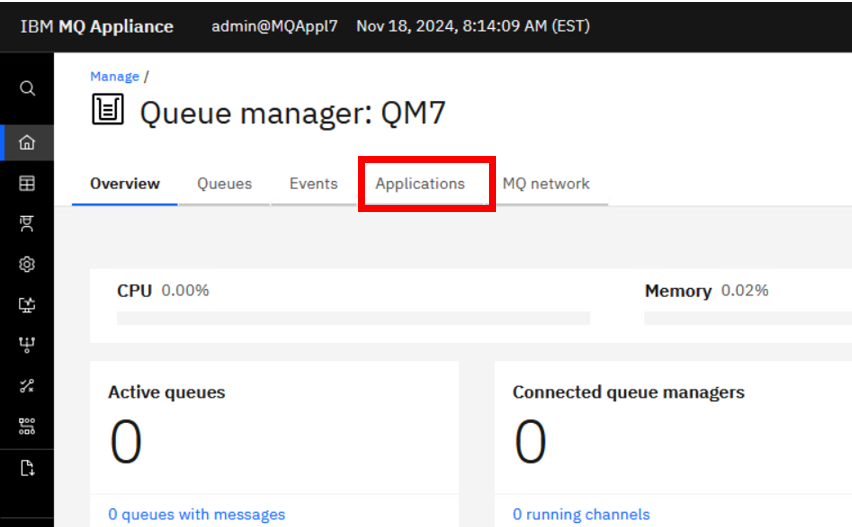
In this window you can select MQ objects to manage. This default opens to Overview. You can also navigate to Queues, Event, Applications, or MQ Network. Click Applications.
-
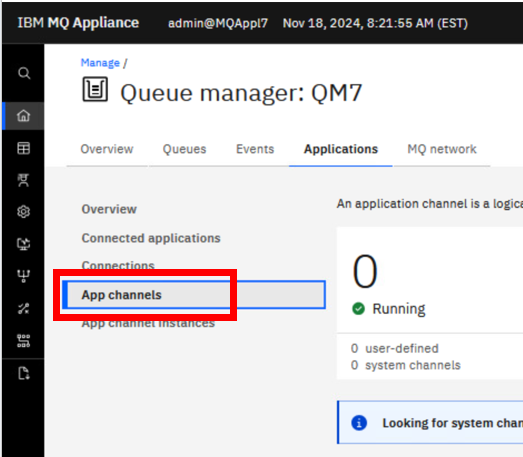
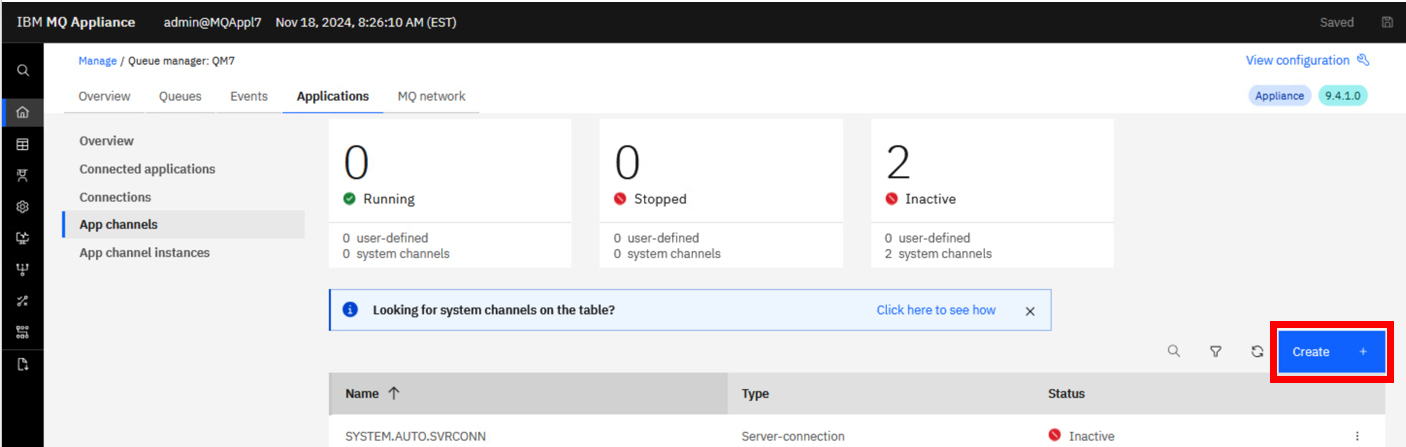
In the Application tab, you can view the connected application and create App channels, better known as server connection channels. Click App channels.
-
You have not created any channels yet, so none are shown. However, there are SYSTEM.* channels. Click the Filter icon (looks like a funnel), which will allow you to Show system channels. Click the button in that popup to show those channels (if you click the Filter again, it toggles the display off).

-
The System.* channels are now visible. You now need to create a SVRCONN channel for MQ Explorer. Click Create.
-
A definition of server connection channel is provided. Click Next. Enter the name for your server connection channel - SYSTEM.ADMIN.SVRCONN. Click Create.
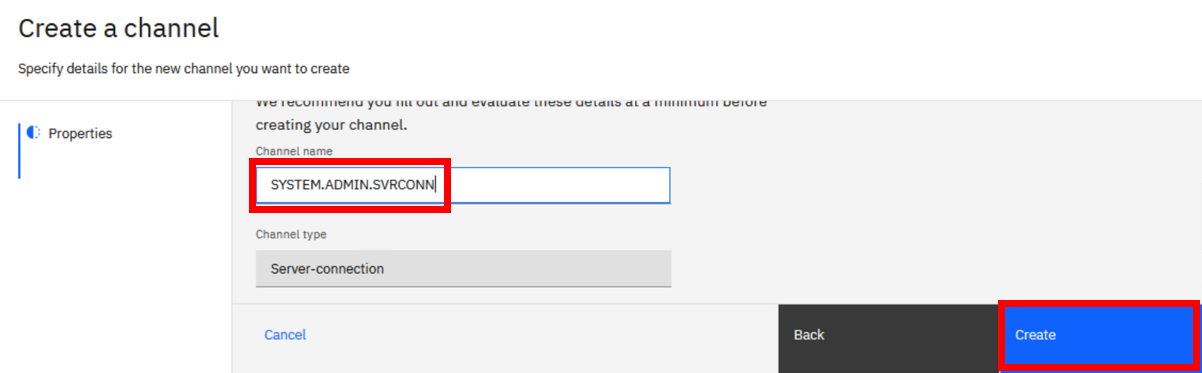
A green success message is displayed and the new channel appears in the list.

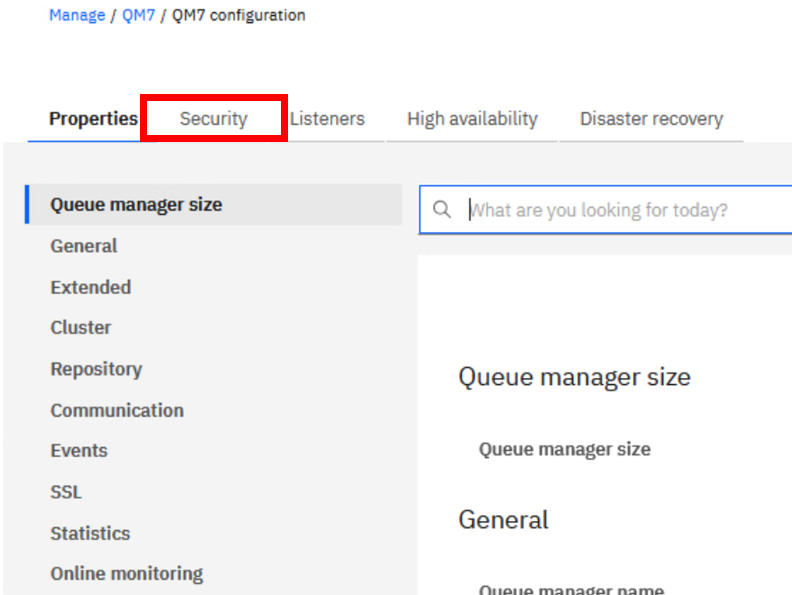
You now need to create the channel authentication record for this channel. Click View configuration in the top right corner. This will take you to the queue manager properties.
-
The queue manager configuration is divided into five sections - Properties, Security, Listeners, High availability, and Disaster recovery. Click Security.
-
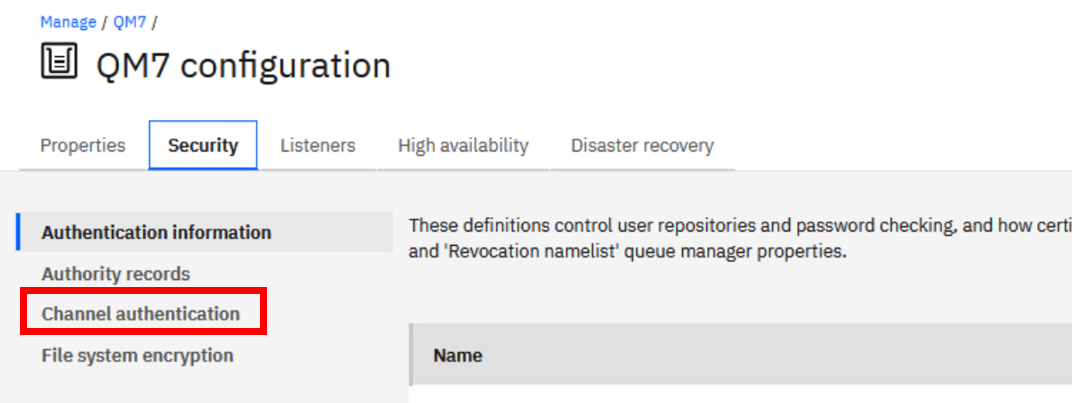
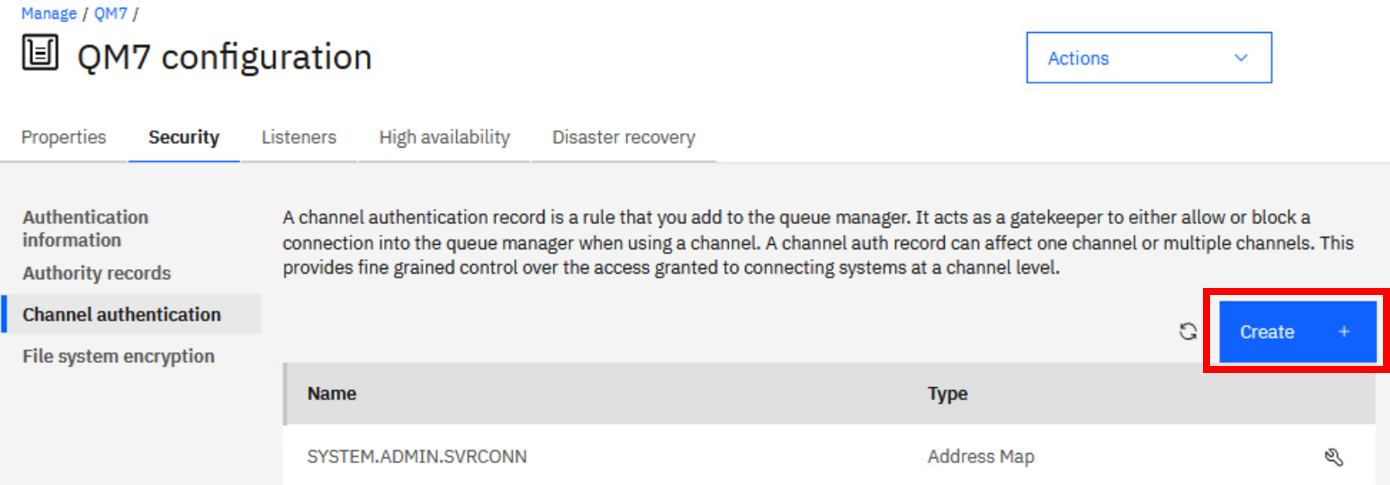
Objects in the Security section are Authentication information, Authority records, Channel authentication, and File system encryption. Click Channel authentication to create a new record.
-
The default records are displayed. Click Create.
-
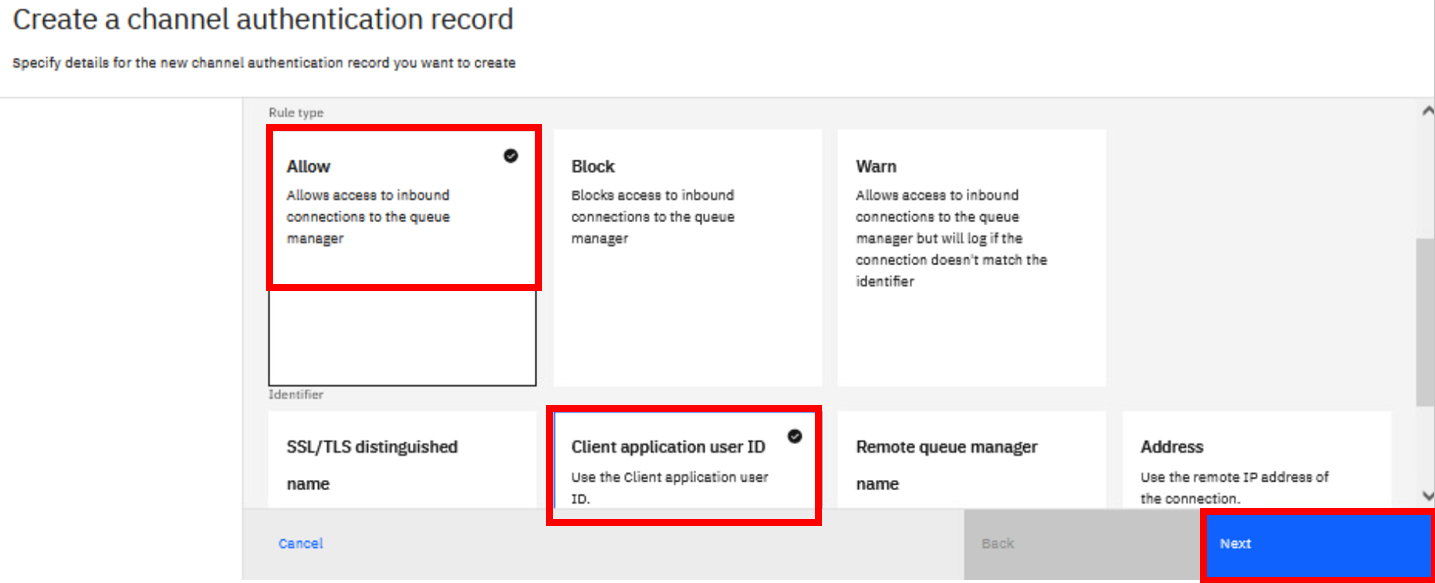
You will create a new channel authentication record that allows access to the new channel for your testuser that you created. Click on the Allow tile for the Rule type, and Client application user ID for the Identifier. Click Next.
-
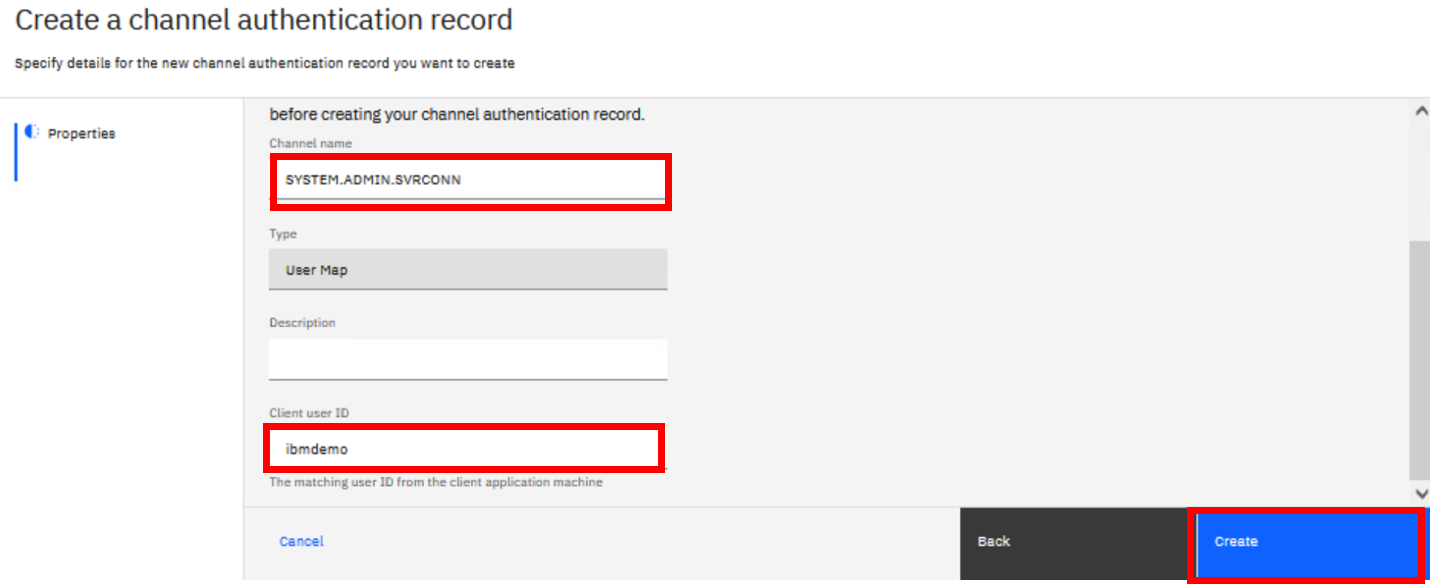
Enter the channel name SYSTEM.ADMIN.SVRCONN in the Channel name field. Enter ibmdemo in the Client user ID field. Notice that the rule type is auto-filled to User Map. Click Create.
-
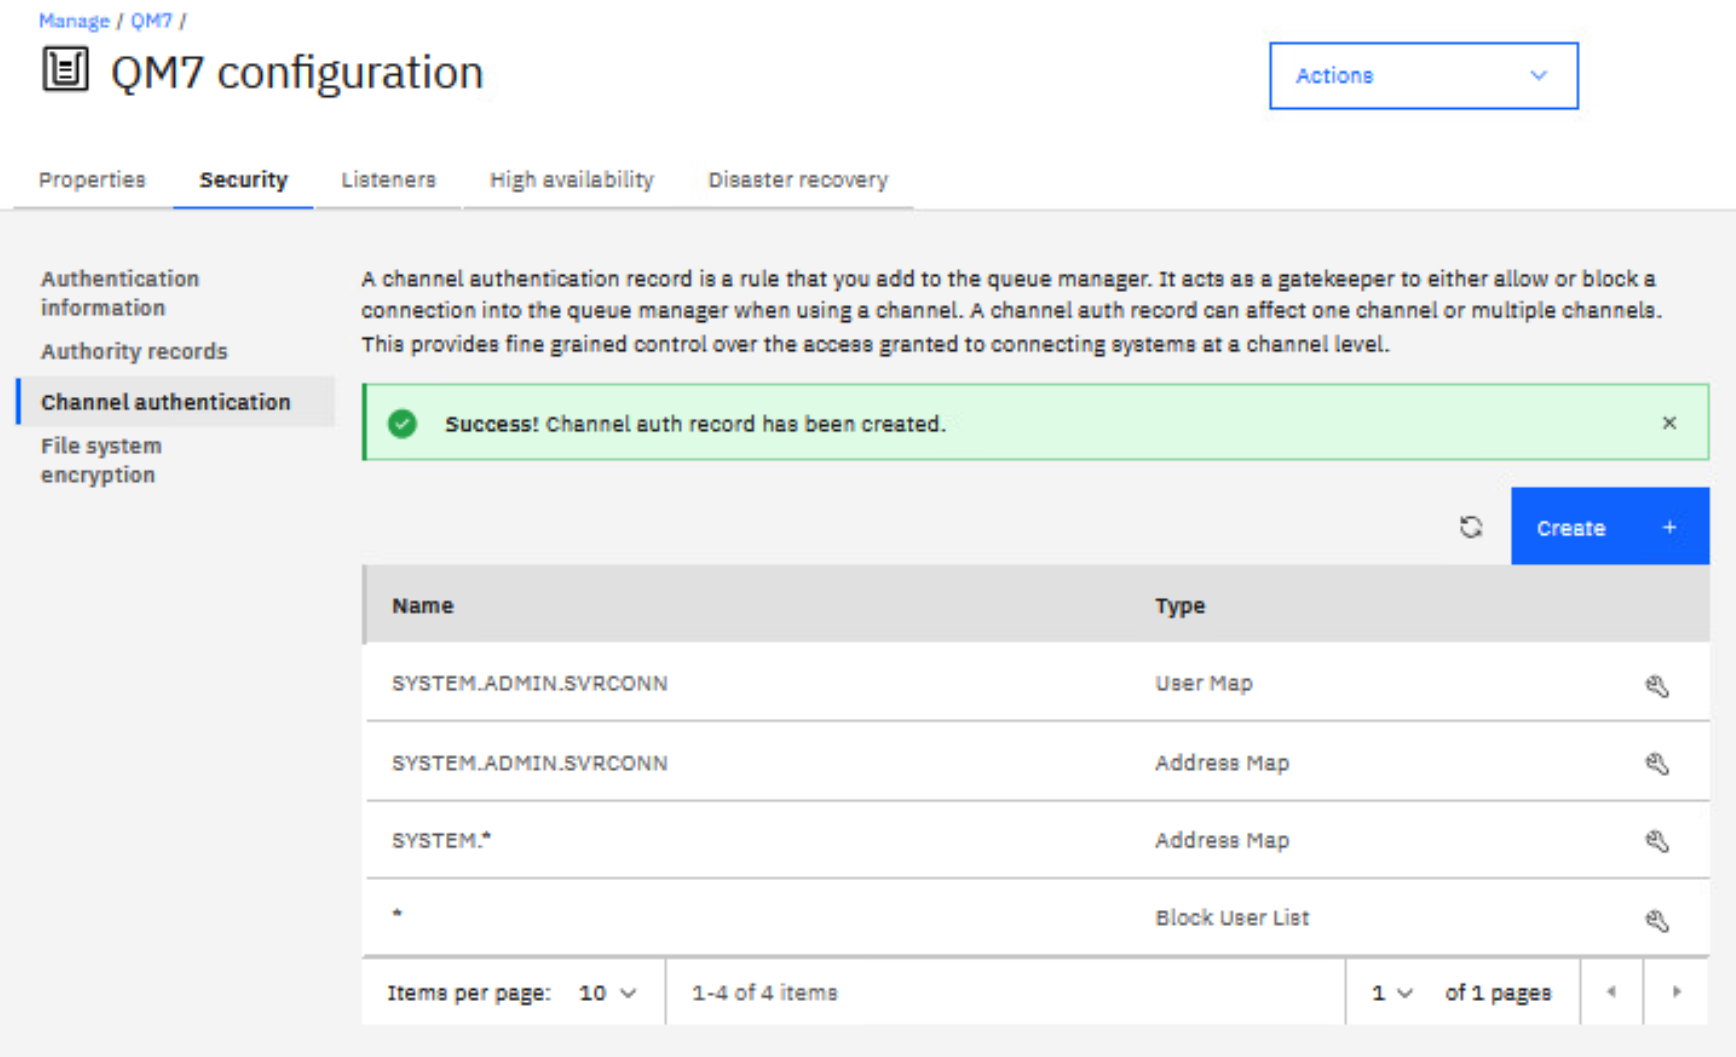
A green Success message is displayed. Click the wrench icon if you want to view or edit the rule.
-
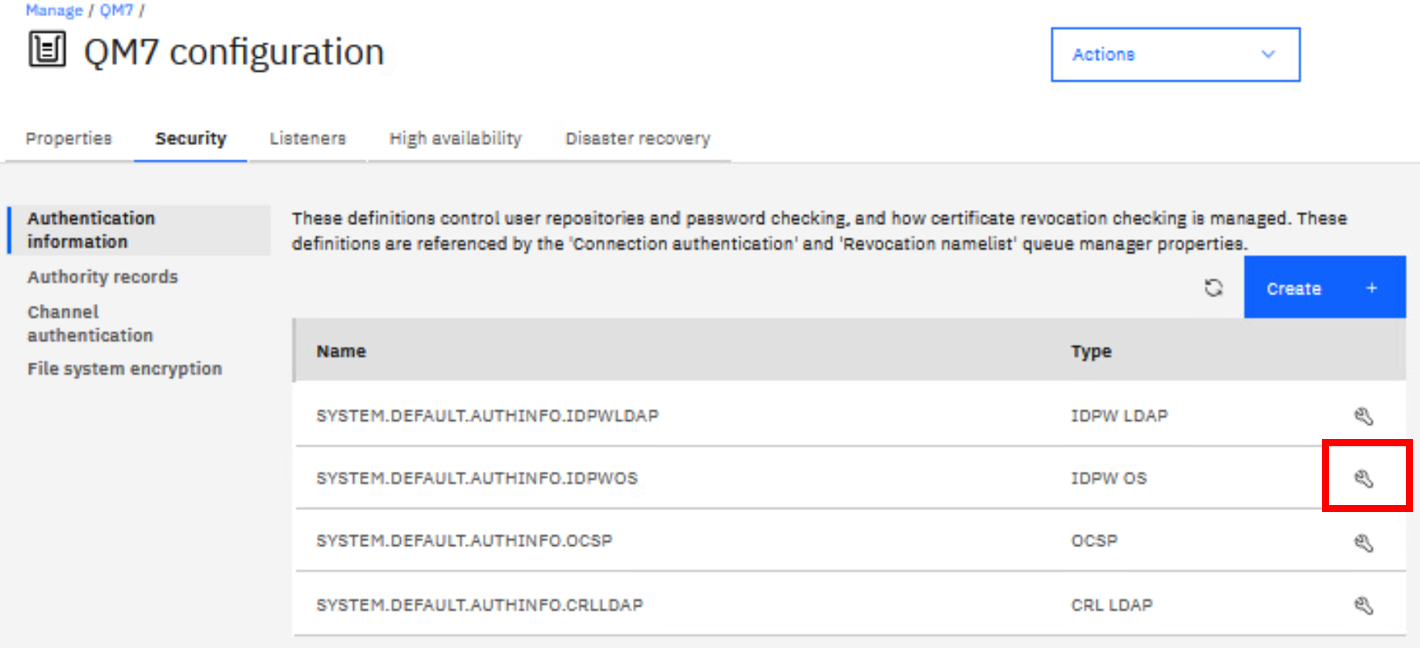
You also need to set the authentication object to accept the credentials as presented by the application. Click Authentication information.
-
Click the wrench for the IDPW OS object (that is, operating system userid and password checking).
-
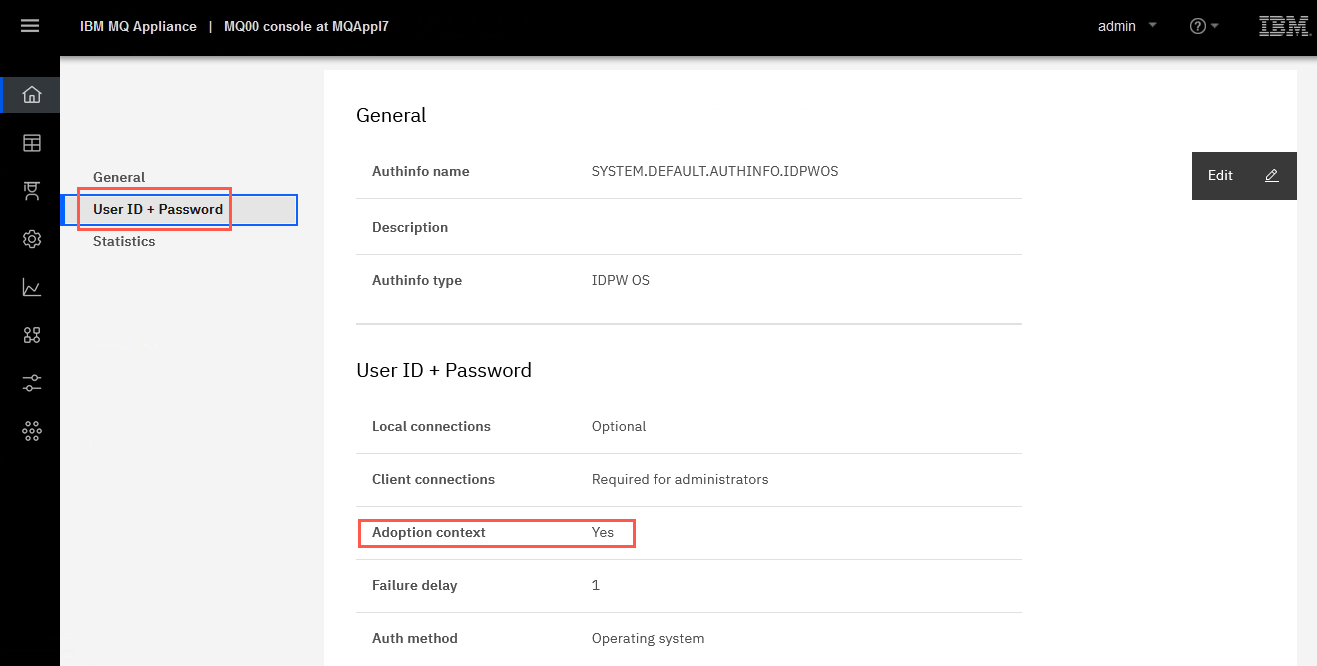
Select the User ID + password tab. The Adoption context is already set to Yes. There is nothing to change. But if a change was necessary, you could click edit and change the values.
-
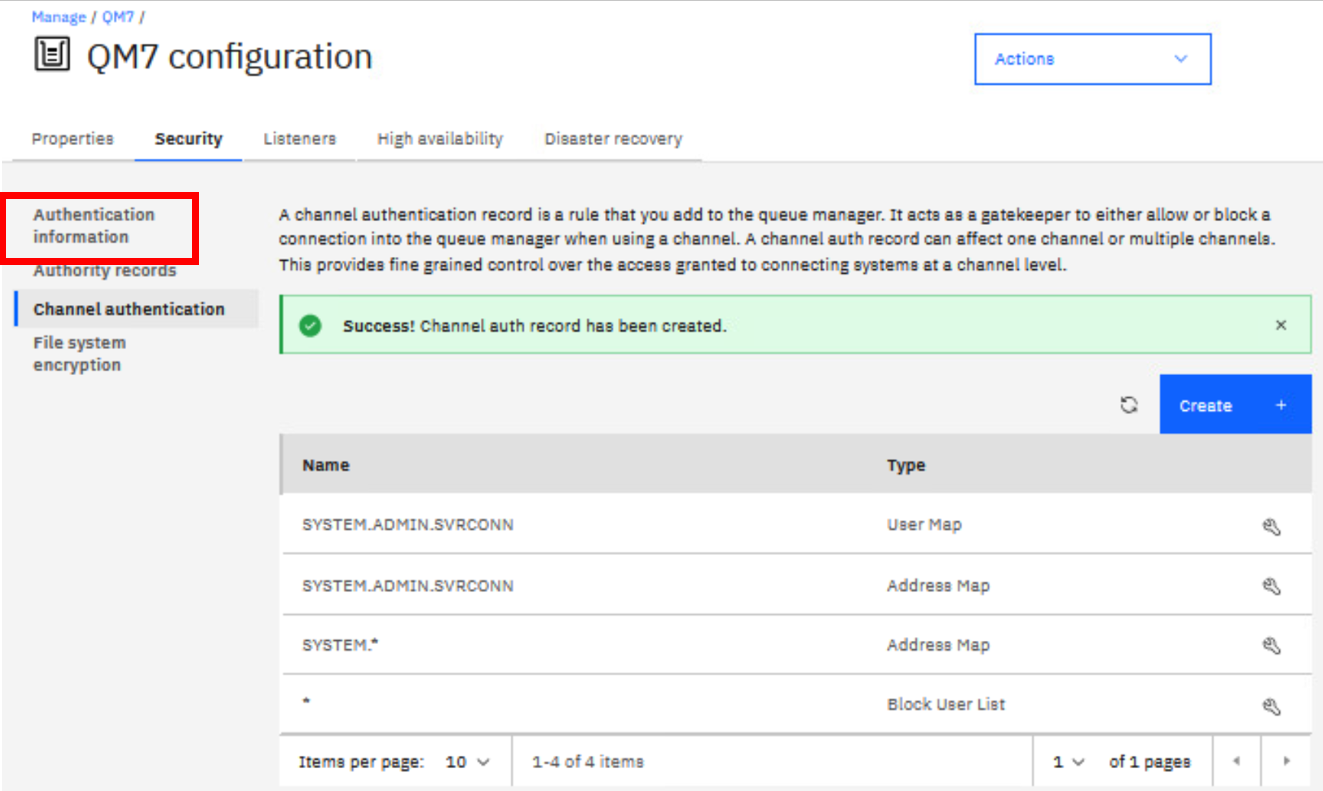
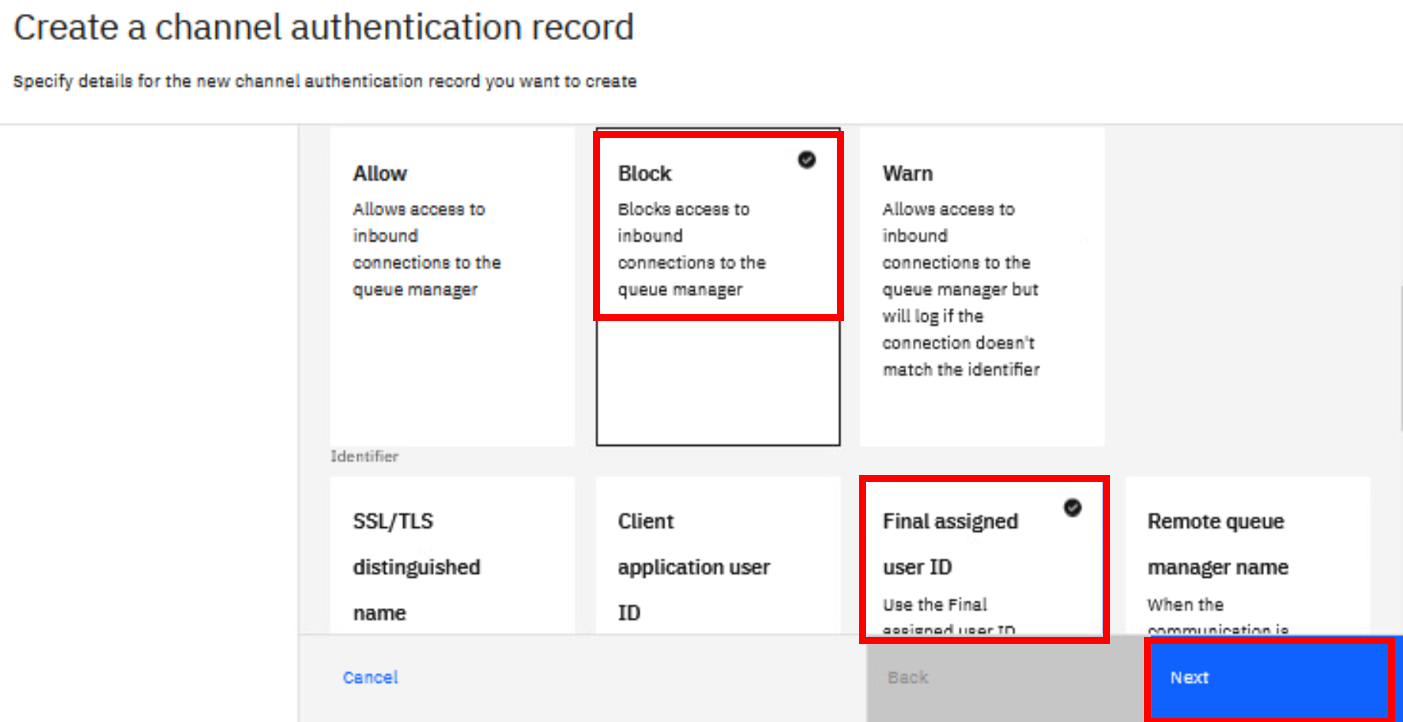
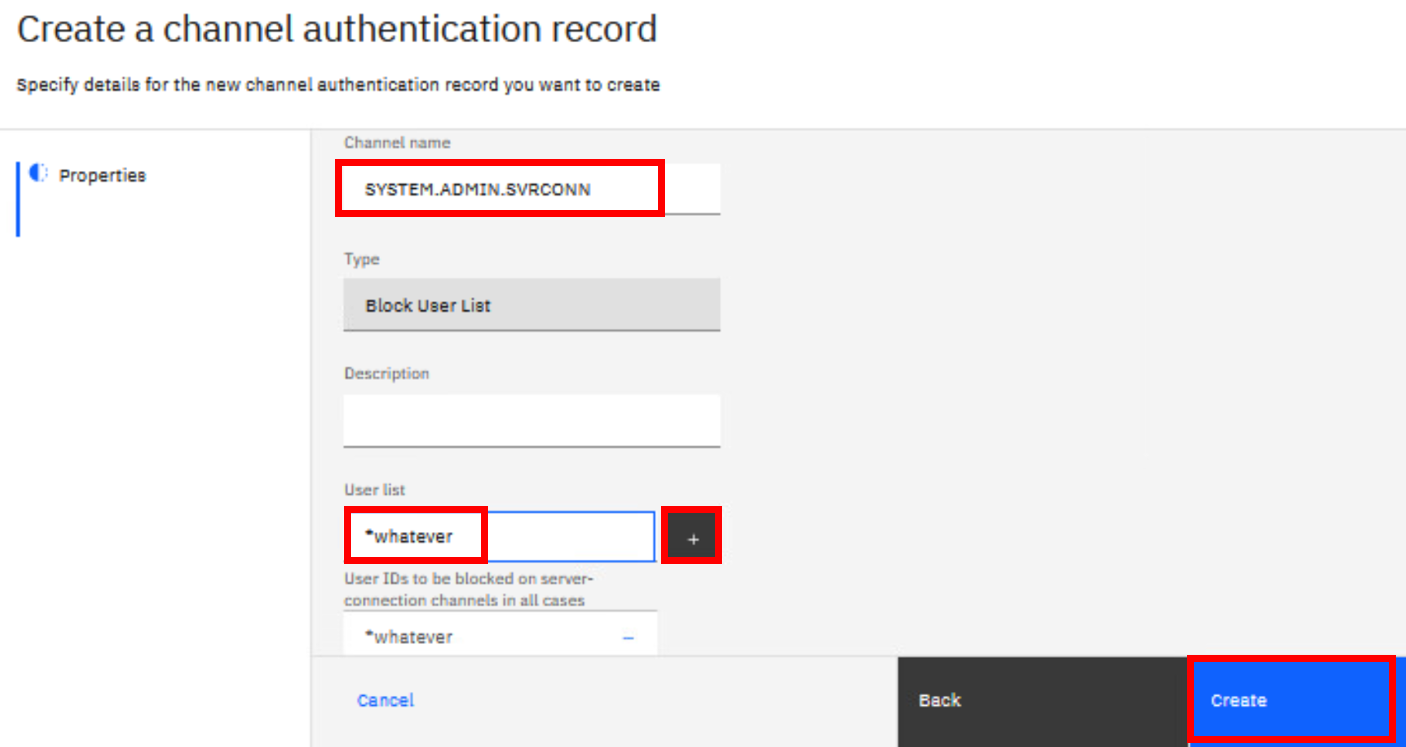
Click the browser back button to return to Security. Click the Channel authentication tab, then click the Create button to add another record. Click on the Block tile for the Rule type, and Final assigned user ID for the Identifier. Click Next.
-
Again enter SYSTEM.ADMIN.SVRCONN in the Channel name field. Enter *whatever in the User list field then click the “+” sign to add the list. Once the list is added, you can click Create.
-
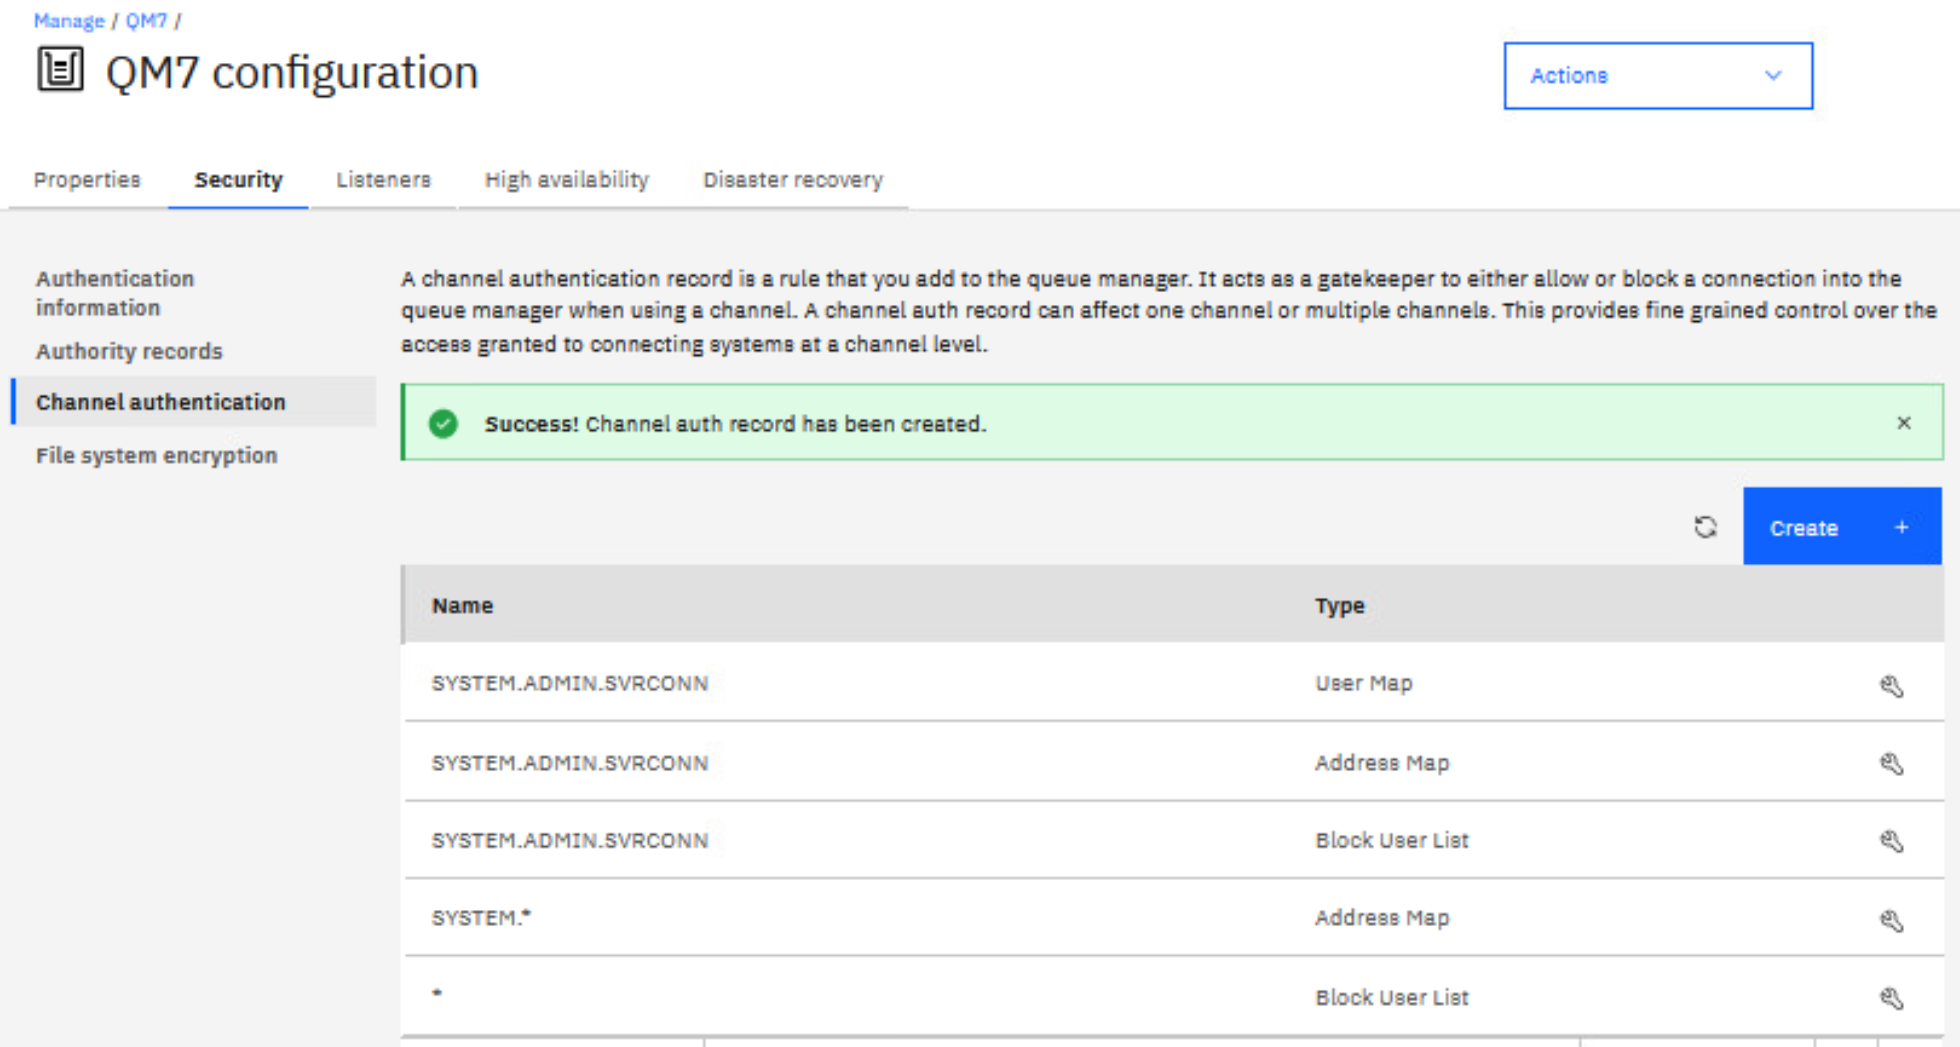
Once again you receive the green success message and all the rules are displayed.
-
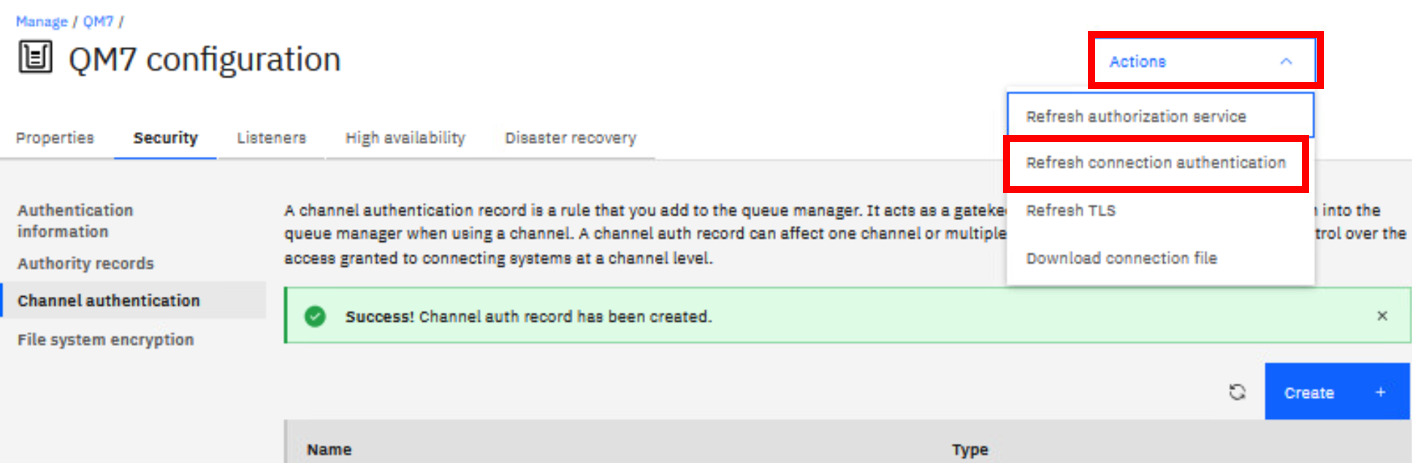
Last but not least, we need to refresh the queue manager security to pick up the changes in the CONNAUTH. Click the Actions drop down in the top right corner and select Refresh connection authentication.
-
Click Refresh to confirm you want to update the connection authentication records.

-
Start MQ Explorer on the Windows image.
-
In the Navigator pane, right-click Queue Managers.
-
Select Add Remote Queue Manager…

-
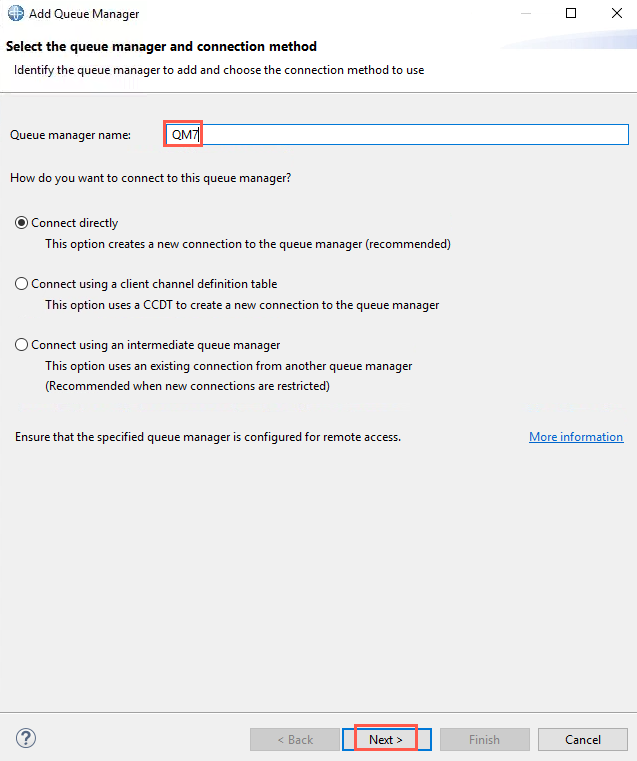
Enter QM7 as the Queue manager name. Click Next.
-
Enter the IP address of the MQAppl7 appliance.
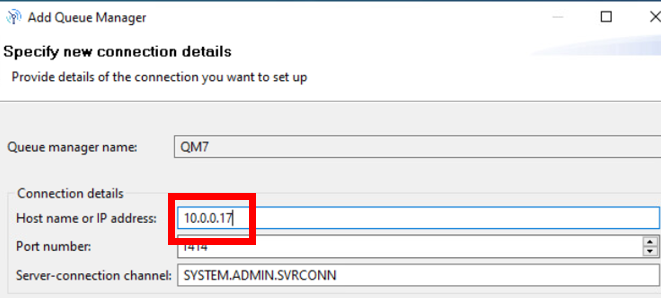
Click Next.
-
It is not possible to use security exits on the appliance, so click Next again.
-
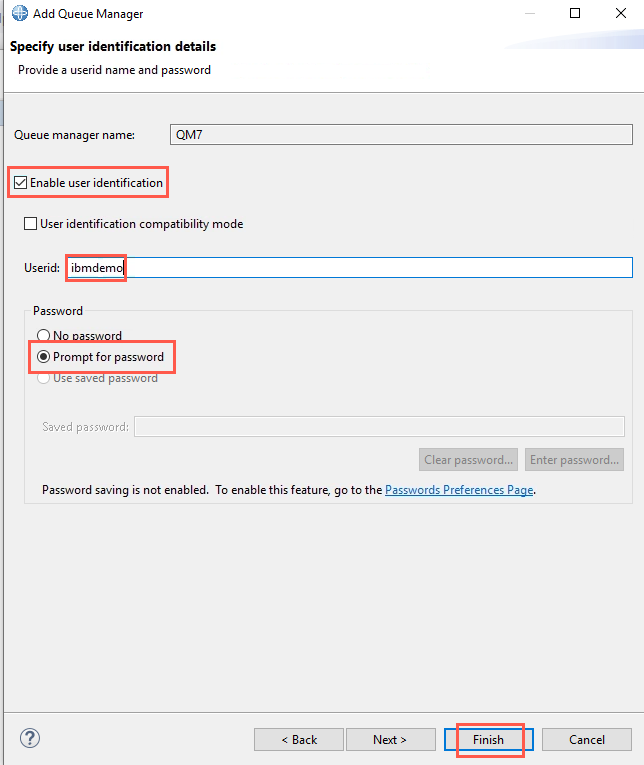
Select the check box next to Enable user identification.
-
Enter ibmdemo as the Userid.
-
Select the Prompt for password radio button.
Click Finish.
-
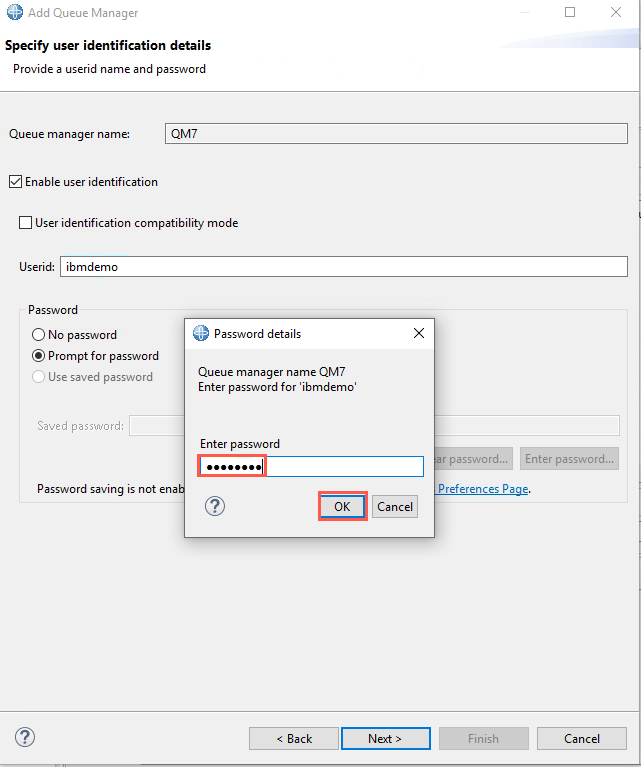
In the Password details popup, enter the password (“Passw0rd!”) and then click OK.
-
The queue manager should now be visible in MQ Explorer.
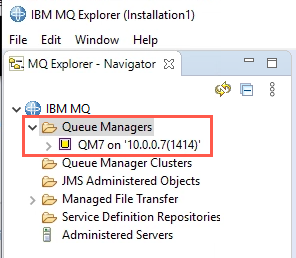
-
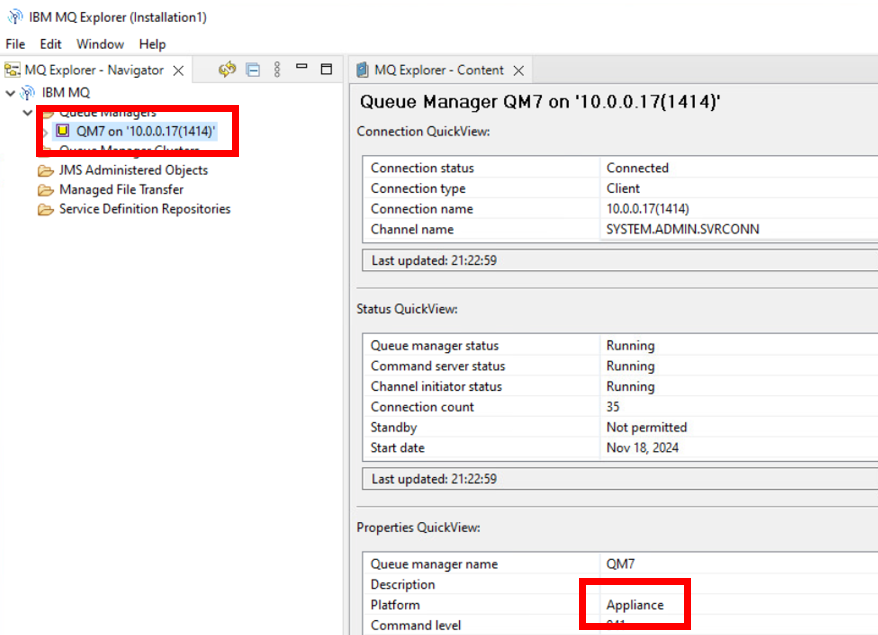
If you look at the Properties Quickview pane (click on the QM7 on ‘10.0.0.17(1414)’ entry in the Navigator to populate this pane), you will see that the MQ Explorer has identified that this is a queue manager running on an appliance.
You will need a couple of local queues for testing, so you will use the runmqsc interface on the appliance console to explore it.
-
Go back to the appliance command line console.
You access runmqsc in much the same way as you are used to.
-
From the mqcli (command line interface), enter:
runmqsc QM7
NOTE:
This command should show an output similar to the image. It may feel like it is loading since there will be no cursor but this command starts up quickly so you should be able to move onto the next step right away. -
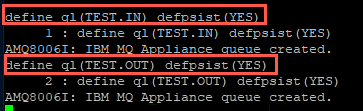
Create a new local queue named TEST.IN
define ql(TEST.IN) defpsist(YES)NOTE:
Theqlin this command is a Q and an L in lowercase. Sadly this font uses the same symbol for an uppercase i and for the number 1 so sometimes it is unclear. -
Create another queue named TEST.OUT
-
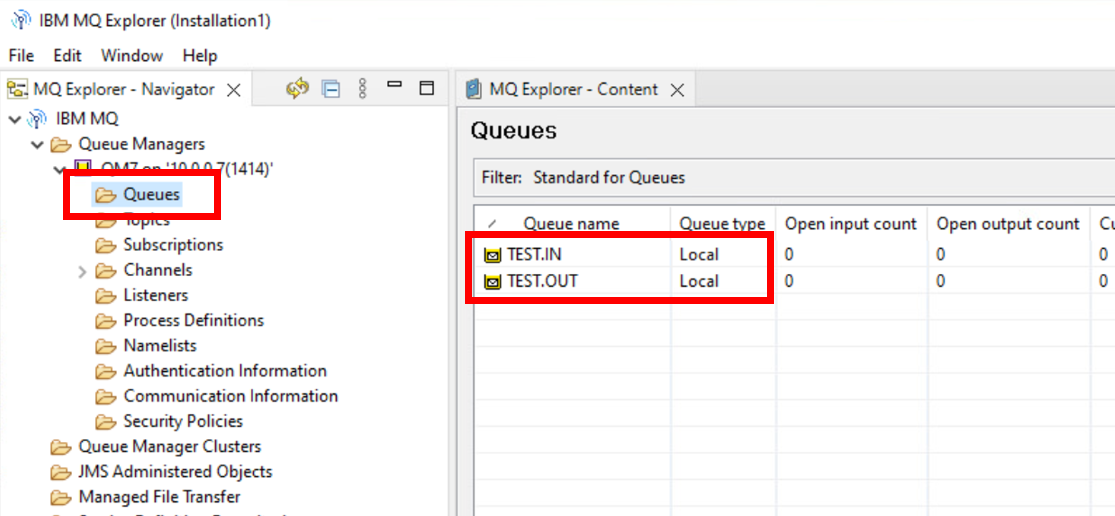
Type end to exit from runmqsc
-
Go back to MQ Explorer; both of these queues should be visible in MQ Explorer (drill down to the Queues folder in the Navigator).
Running applications against the appliance
The appliance has now been configured for administrative access with MQ Explorer and two queues have been created. The next part of the lab will run MQ applications against the appliance. The appliance must be configured to allow connections. A SVRCONN channel (USER.SVRCONN) will be created and configured to allow client access. The user (ibmdemo) that was created in the previous exercise will be used.
-
Return to the web console.
-
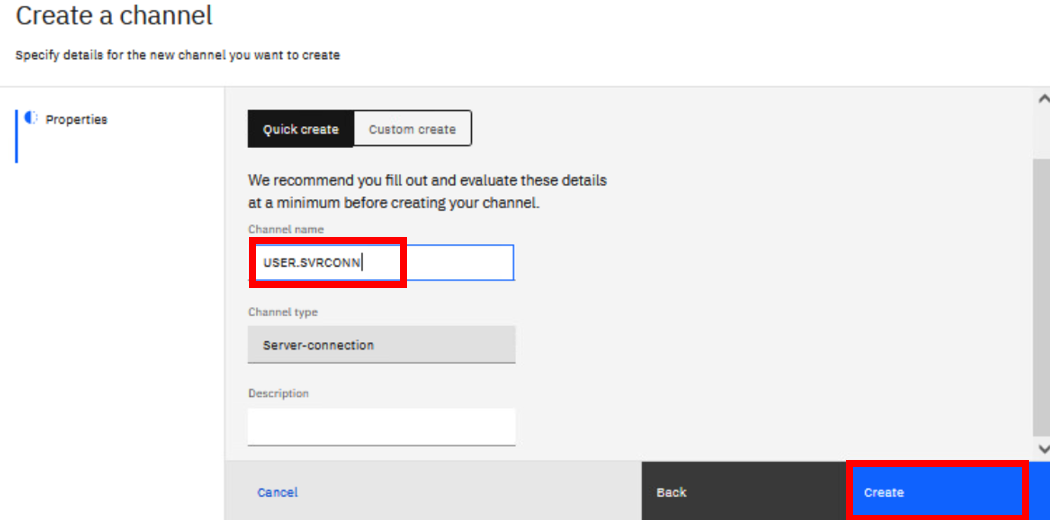
Click the QM7 breadcrumb in the top left to return the Manage page for QM7. As before, create a SVRCONN channel named USER.SVRCONN; click Applications > App channels > Create > Next.
-
As before, create a channel authentication record to allow the ibmdemo user access to the channel; click View Configuration > Security > Channel authentication > Create. Then Block > Final assigned user ID > USER.SVRCONN > *whatever.
The command would be:
SET CHLAUTH('USER.SVRCONN') TYPE(BLOCKUSER) USERLIST('\*whatever')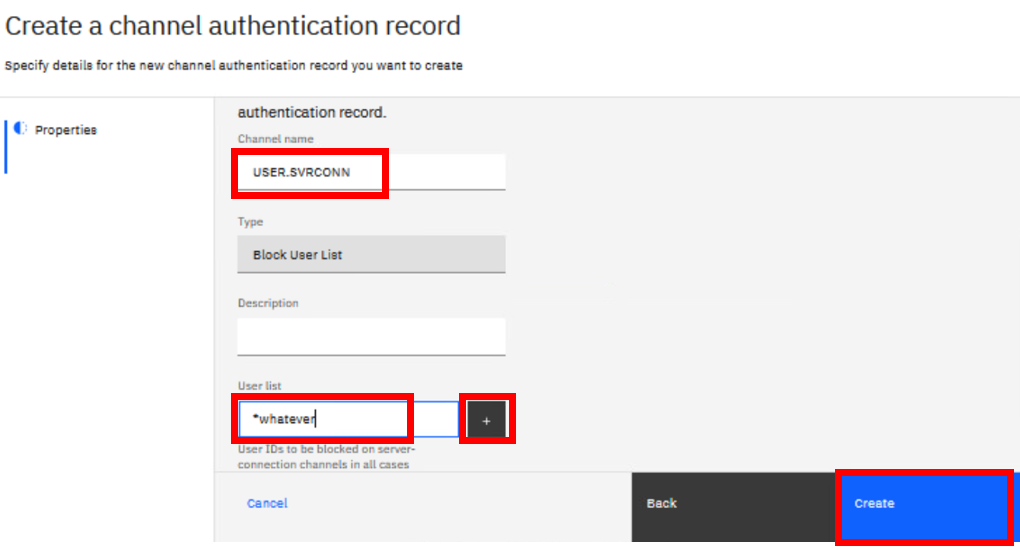
And refresh security: click Actions > Refresh connection authentication > Refresh.
You will now use RFHUtilc to test the configuration.
-
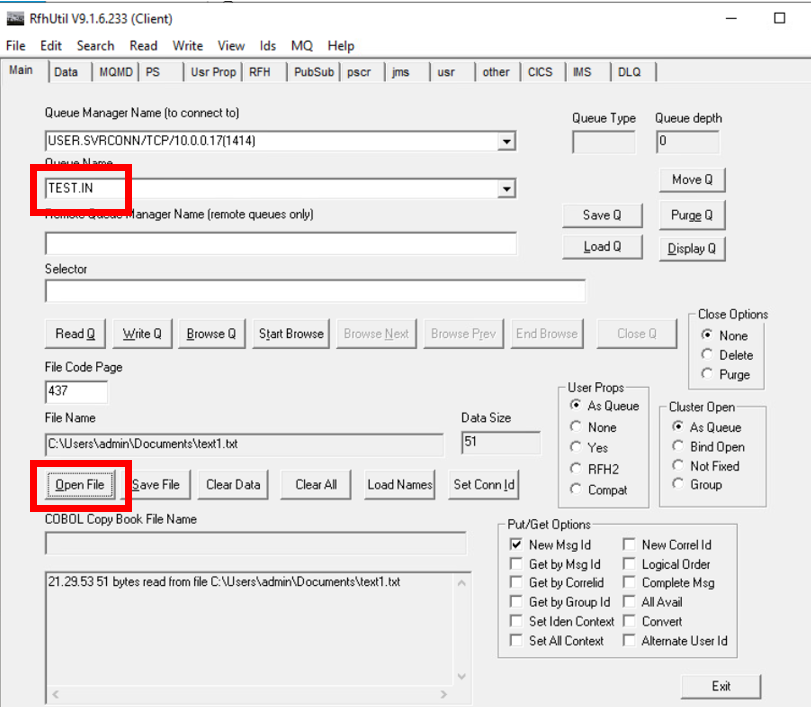
Open rfhutilc from the desktop.

-
Set the Queue manager to USER.SVRCONN/TCP/10.0.0.17(1414)
-
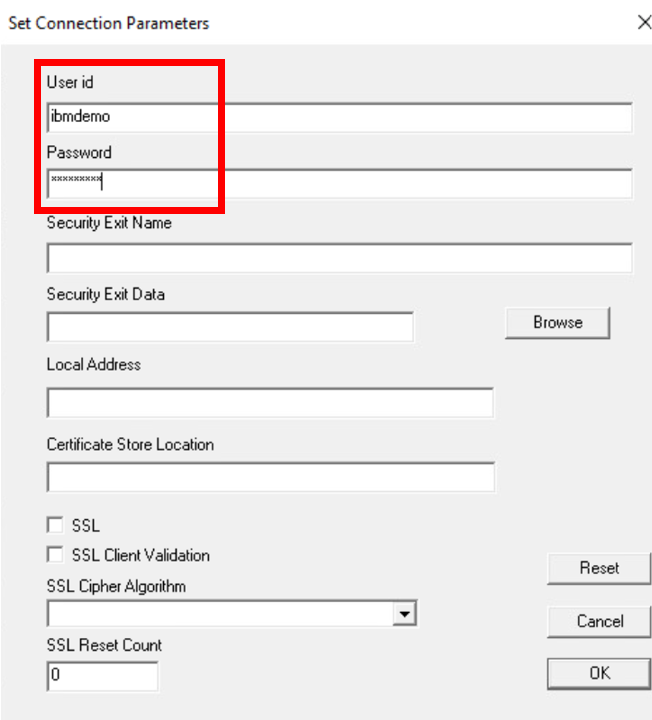
Click Set Conn Id.

-
Enter the Userid as ibmdemo.
-
Enter the Password as Passw0rd!.
-
Click OK.
The next step will load the drop-down box with the queues that are defined on the queue manager. It will connect to the queue manager to get the queue names.
-
Click Load Names.
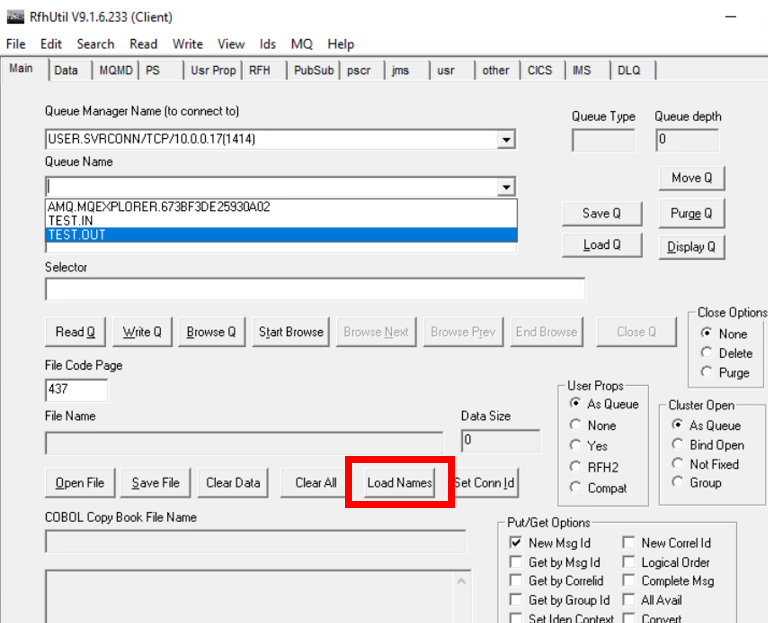
If successful, you see nothing happen.
-
Use the drop-down menu to select TEST.IN as the Queue Name.
-
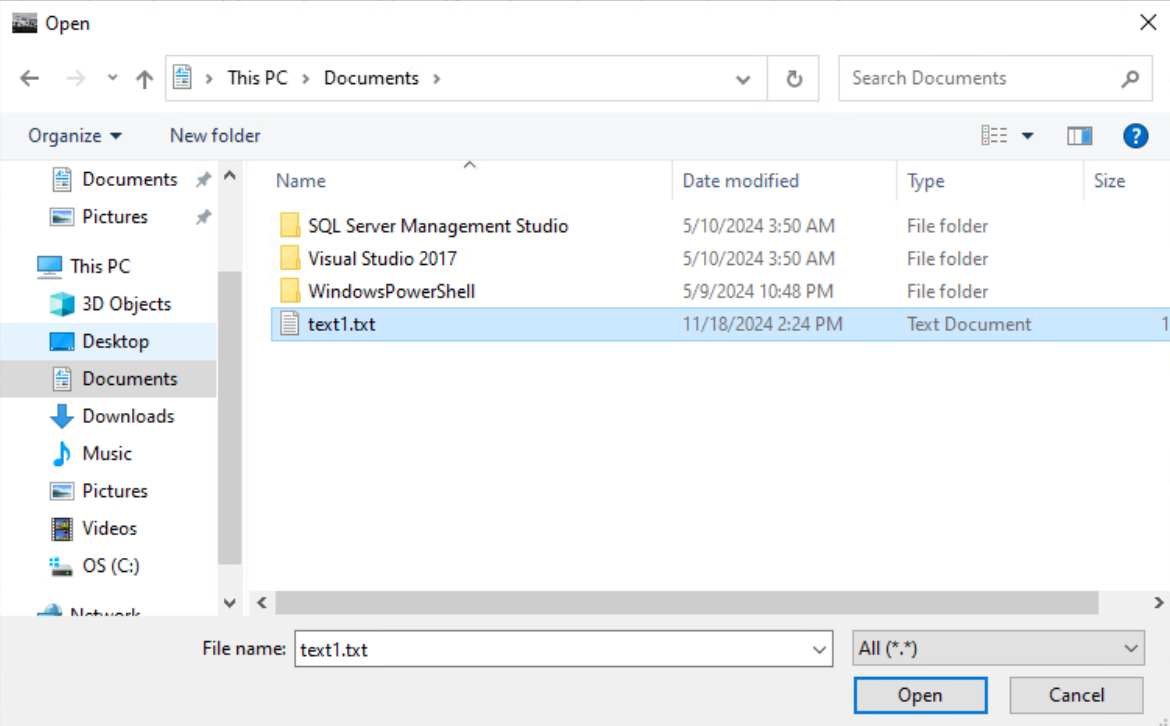
Click Open File.
-
Navigate to Documents folder .
-
Select the text1.txt file.
-
Click Open.
-
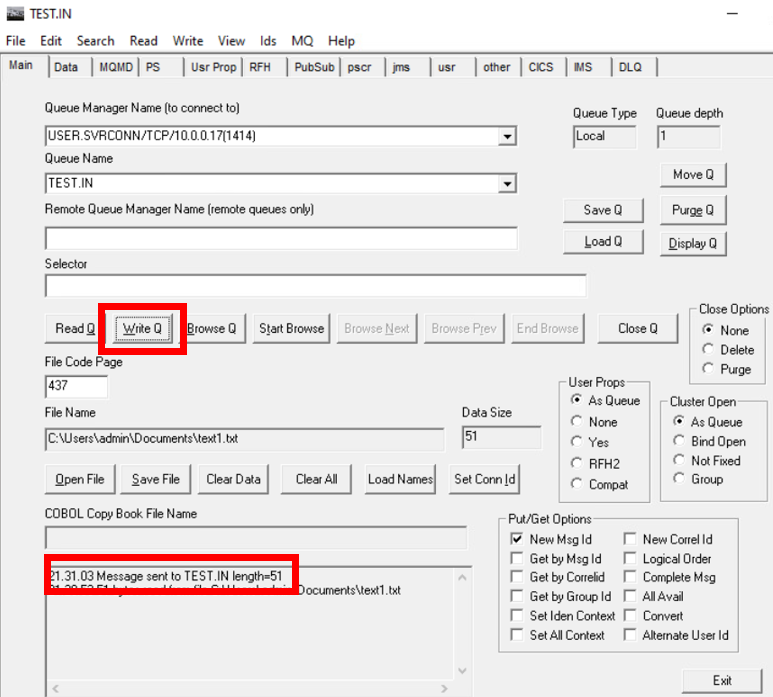
Click Write Q. This command puts the message to the TEST.IN queue.
-
Return to MQ Explorer.
-
Select the TEST.IN queue.
-
Click the right mouse button.
-
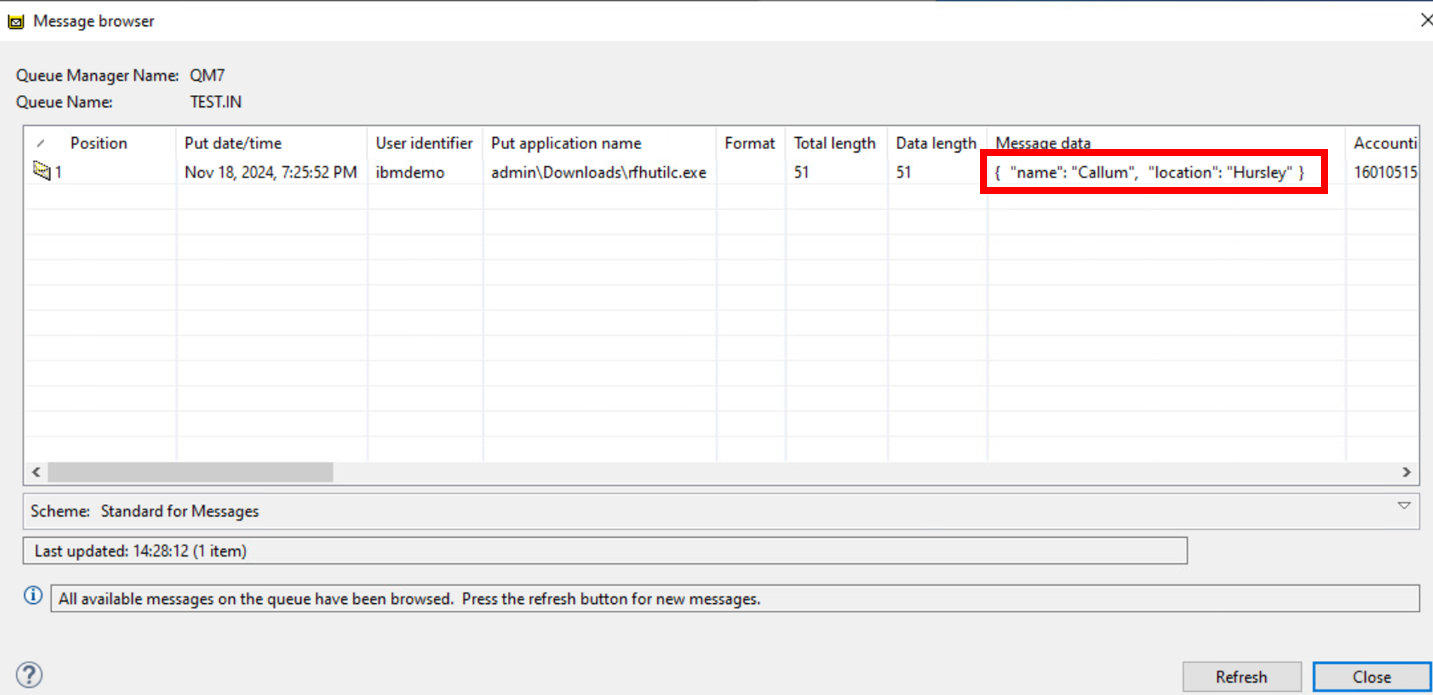
Select Browse Messages.
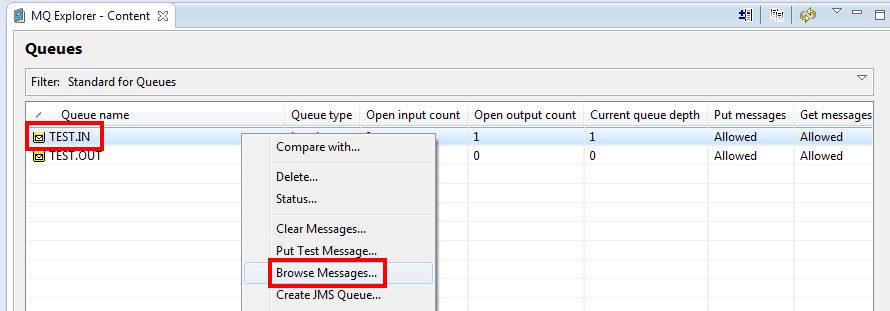
The message should be visible.
-
Click Close.
Completed the lab
Congratulations! You have completed the lab successfully.
NOTE To simplify the future labs we have pre-completed the Basic appliance configuration on the other appliances.