IBM Integration PoT Labs Home page
IBM API Connect
Add OAuth Security to your API and use Lifecycle Controls to Version Your API
Lab prerequisite: “Create and Secure an API with DataPower API Gateway”
Table of Contents
- 1. Introduction
- 2. Configure OAuth Security
- 3. Create an OAuth Service
- 4. Add the OAuth Service to the Sandbox Catalog
- 5. Update customer-database-agw API
- 6. Publish API
- 7. Test OAUTH Security
- 8. Test the OAuth Configuration
1. Introduction
In this lab, we will secure the Customer Database API that was created in the “Create and Secure an API with DataPower API Gateway” lab to protect the resources exposed by IBM API Connect. Consumers of our API will be required to obtain and provide a valid OAuth token before they can invoke the Customer Database API.
Pre-Requisite: Finish Create and Secure an API with DataPower API Gateway before this.
2. Configure OAuth Security
IBM API Connect is a full-featured OAuth 2.0 provider. The OAuth exchange works like any other API call, and thus we treat it as its own API.
In this section, you will create a new OAuth provider API, configure which grant type to use, and configure how it will authenticate user credentials.
2a. Configure Authentication URL User Registry
In order to configure user authentication, you must first define the Registry to use, which may be LDAP, local user registry, or an authentication URL. For this lab, you will implement an Authentication URL.
1.If you’re not logged before, follow these instructions to access to the API Manager -> Login to the API Manager
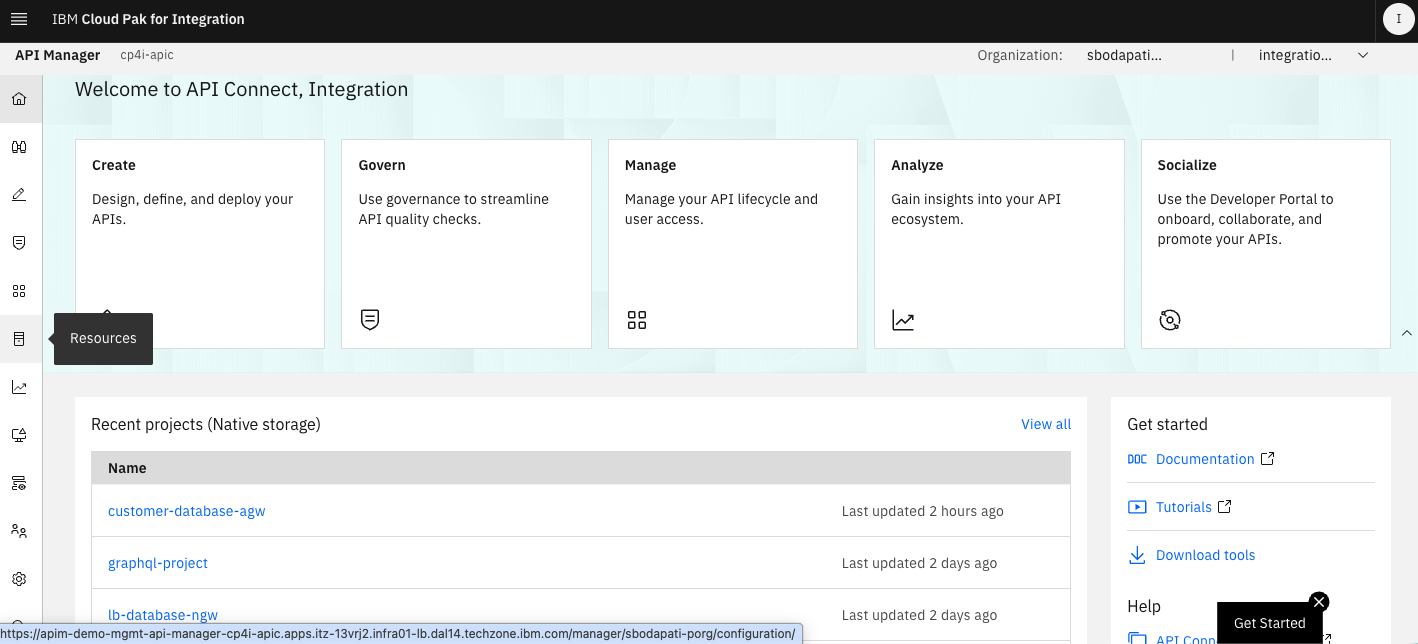
2. In the left menu, click on Resources. As you hover over the icon, you will see the item name.
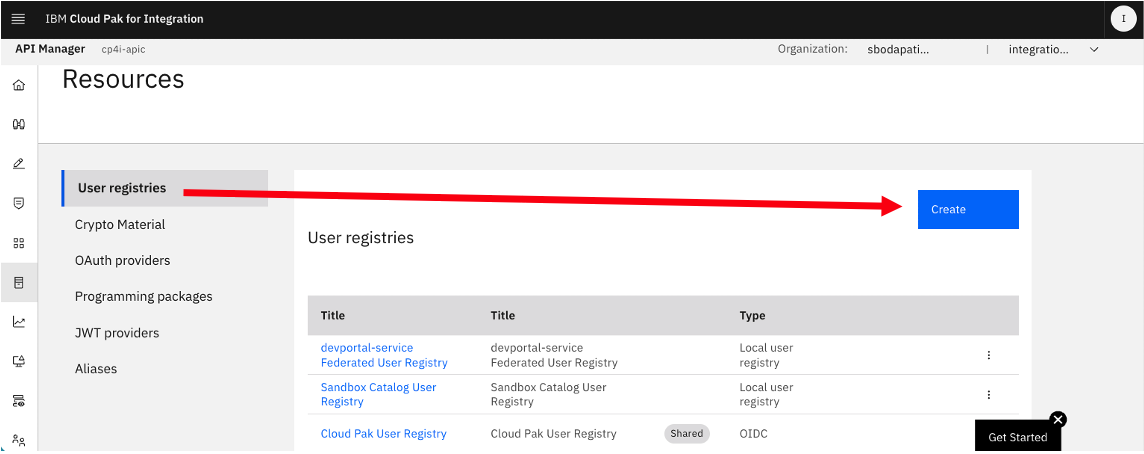
3. Make sure User registries is selected and click Create.
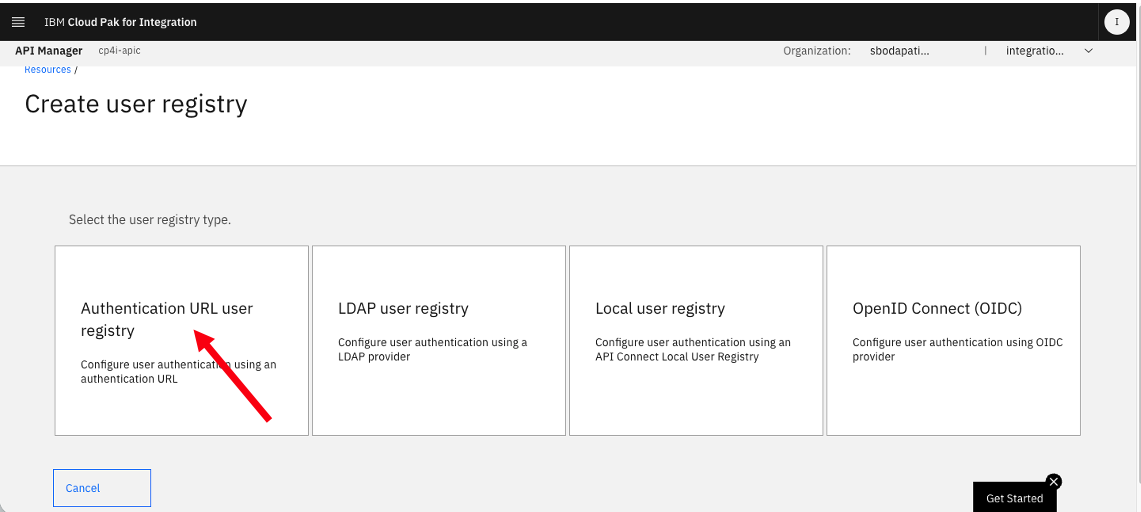
4. Click on Authentication URL user registry.
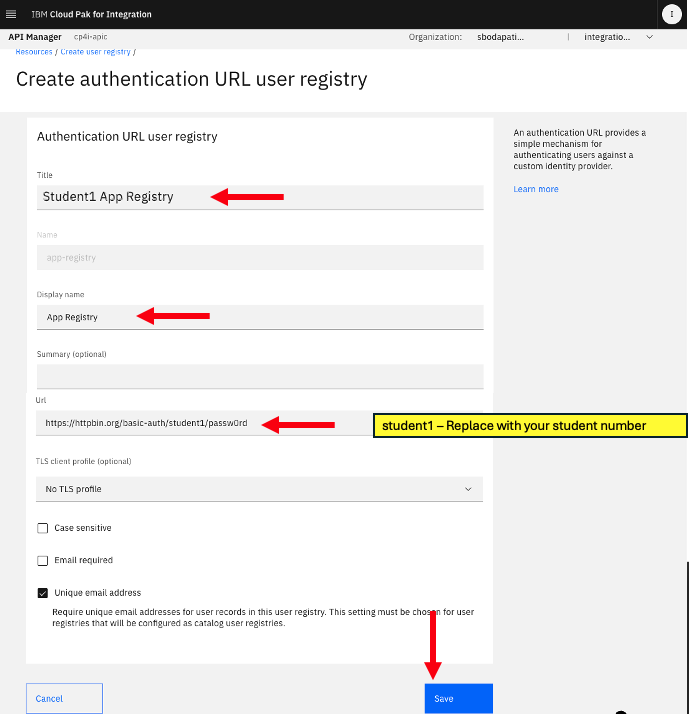
5. Enter Student(n) App Registry for the Title, https://httpbin.org/basic-auth/student(n)/passw0rd for the Url, and App Registry for the Display name. Click Save.
Note: Make sure to replace student(n) with your student number. Example student1
3. Create an OAuth Service
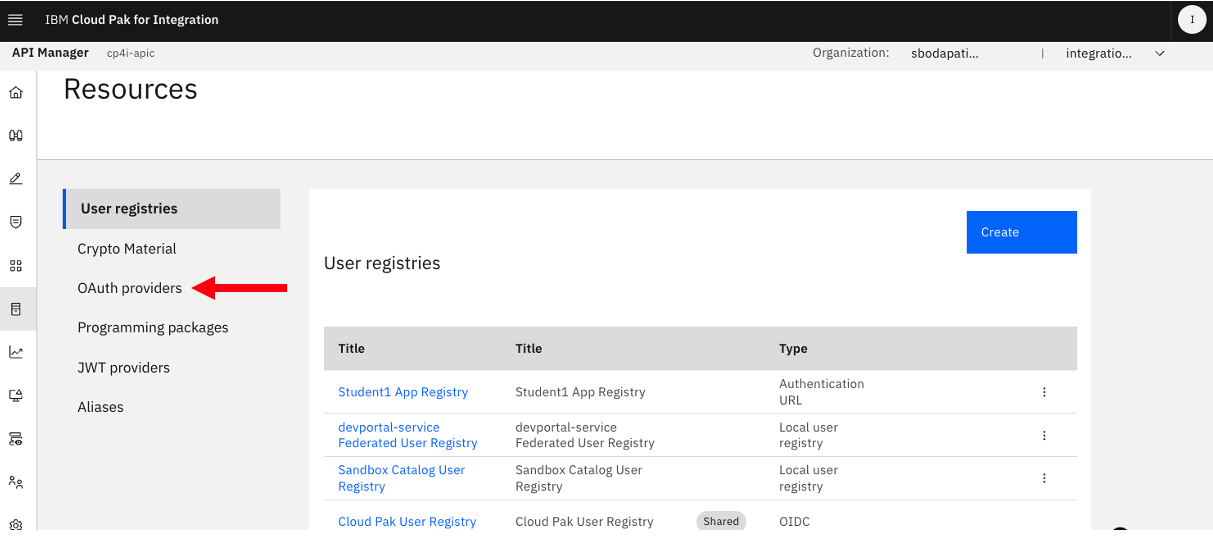
1. You should still be in Resources. If not, in the left menu, click Resources. Click on OAuth providers.
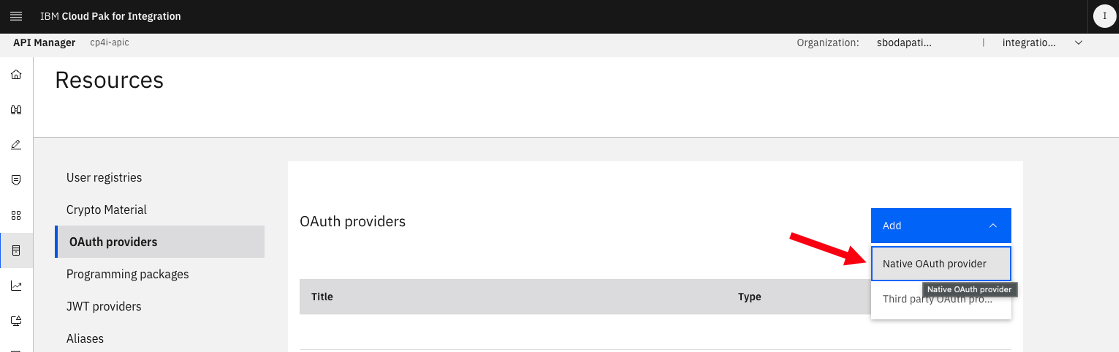
2. Click Add and select Native OAuth provider from the drop down.
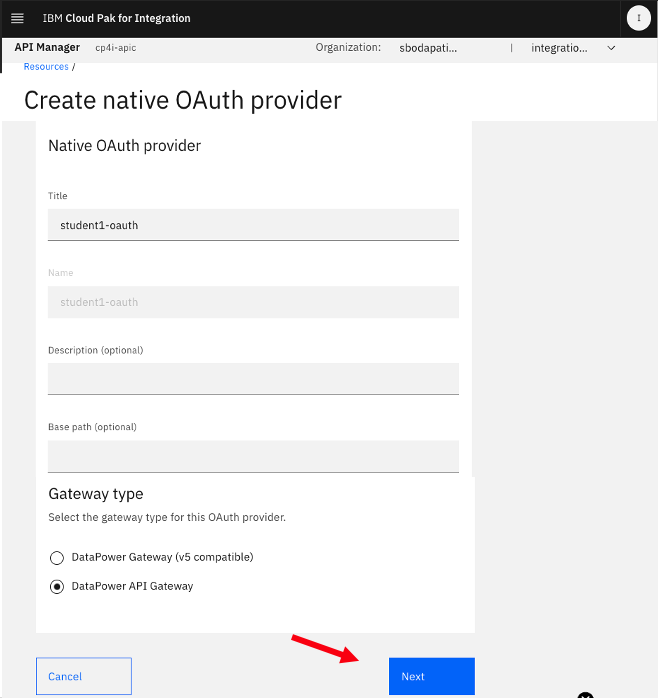
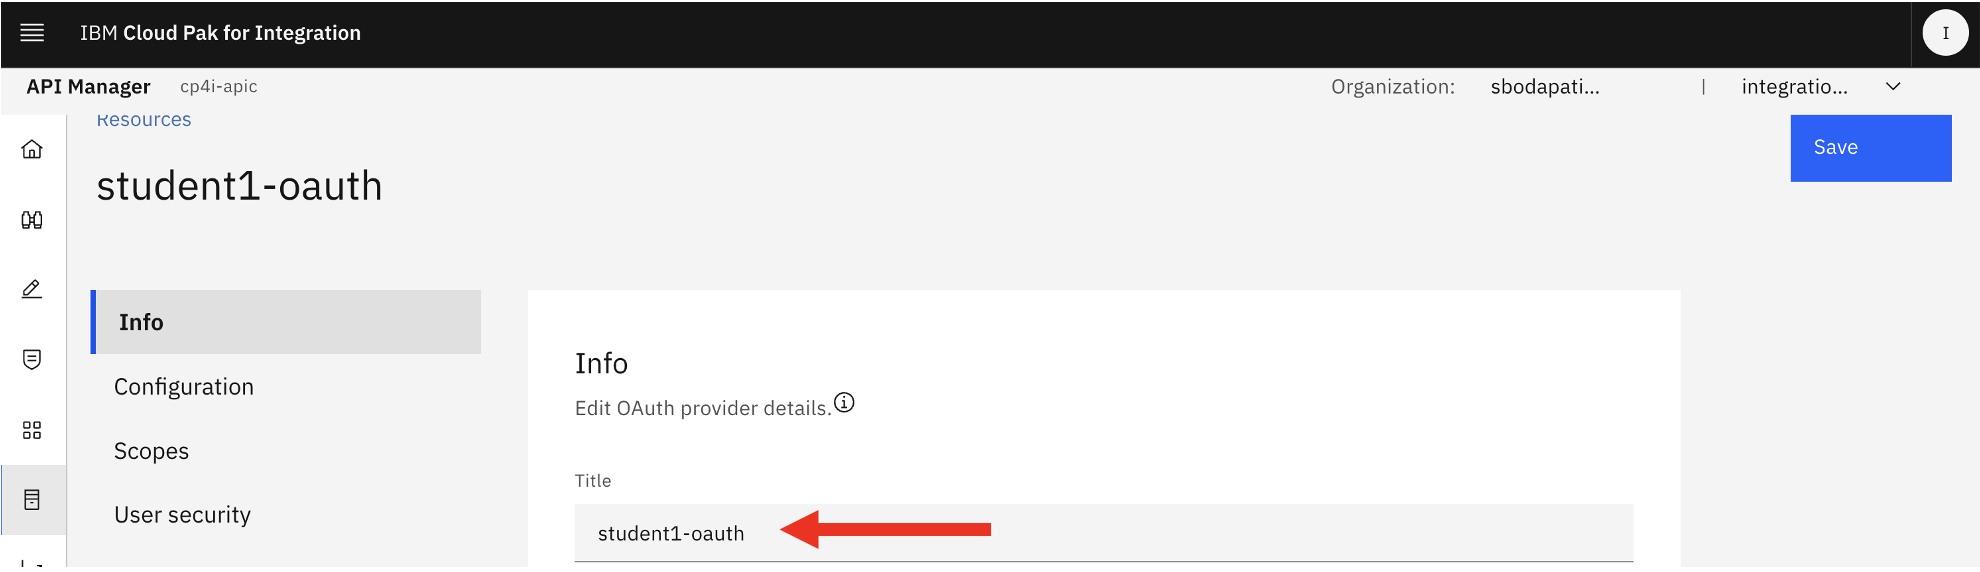
3. Enter student(n)-oauth for the Title and select DataPower API Gateway for the Gateway Type. Click Next.
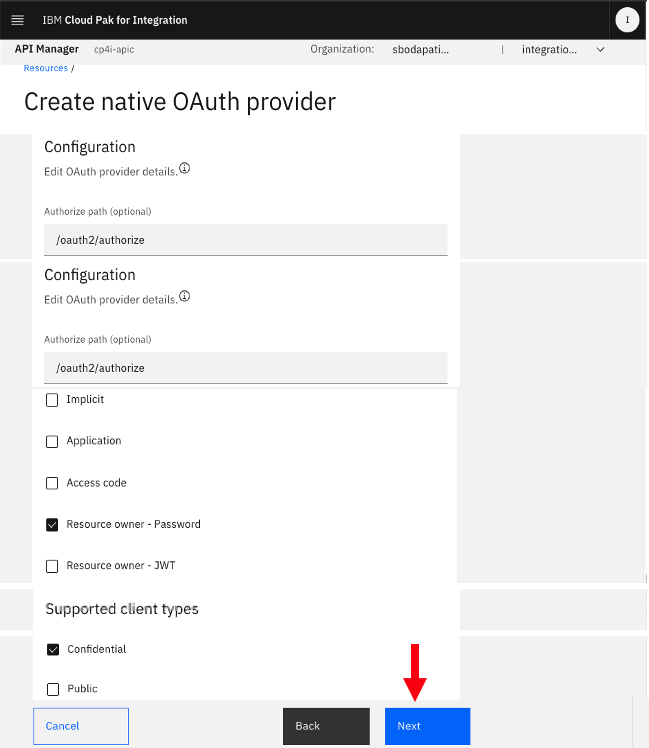
4. The Configuration screen will show the default Authorize and Token paths. For Supported grant types, select Resource owner - Password and deselect Access code. For Supported client types, select Confidential. Click Next.
5. One scope, sample_scope_1, is automatically created.
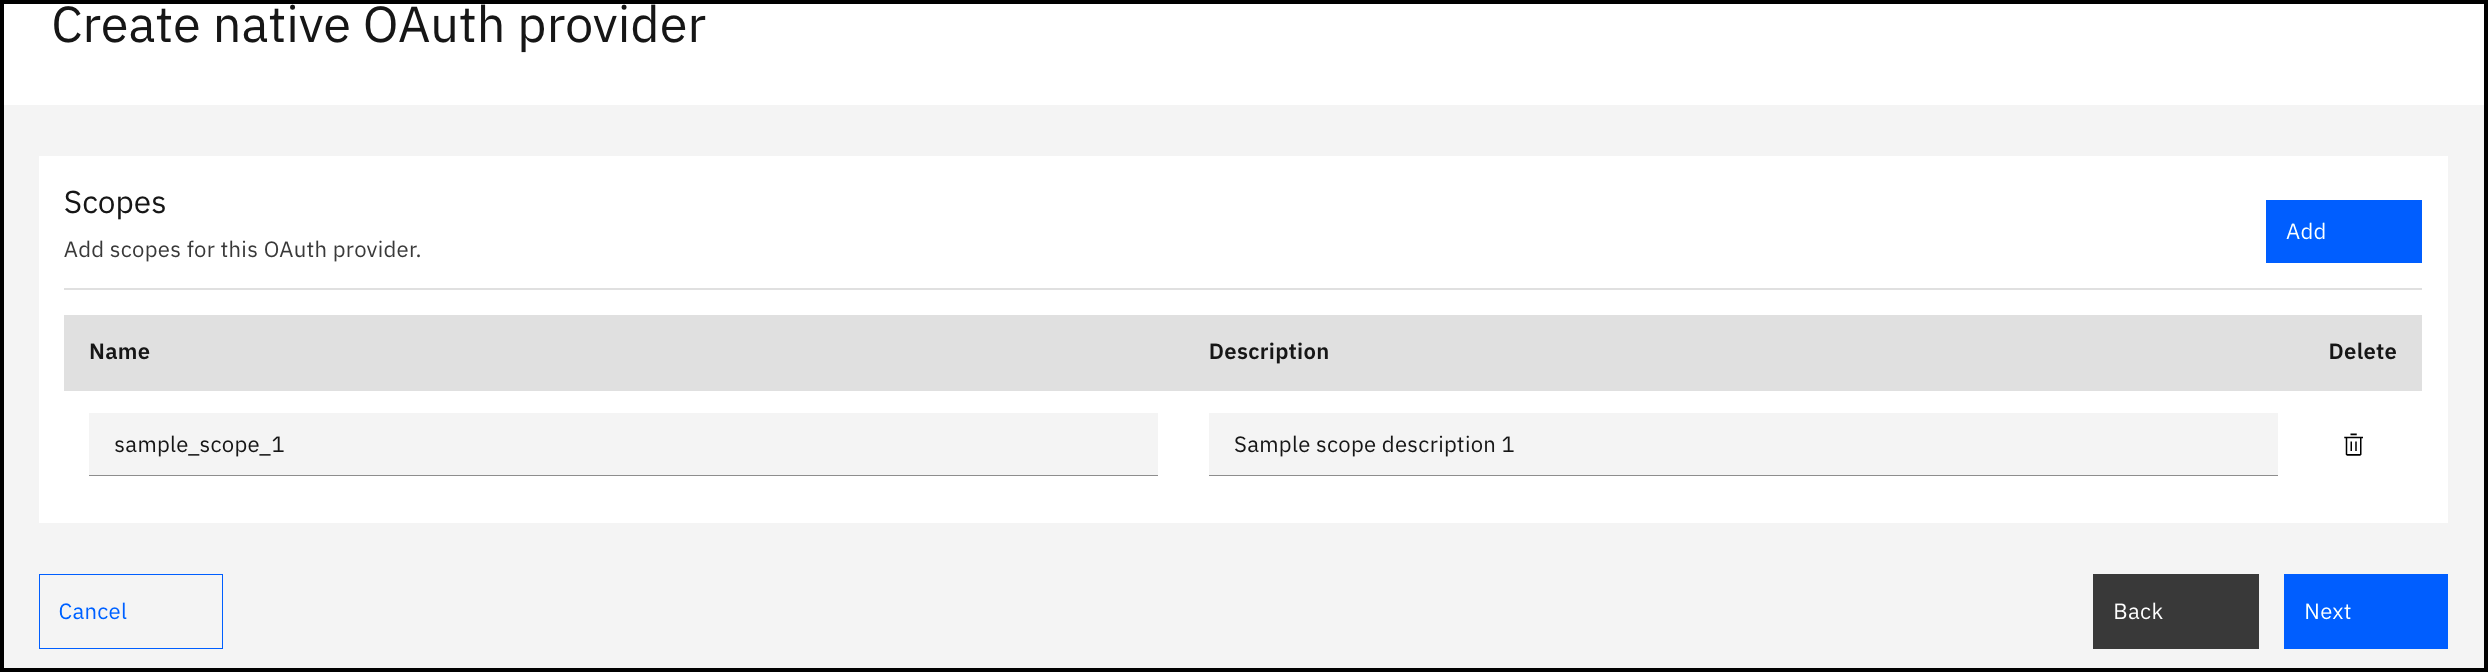
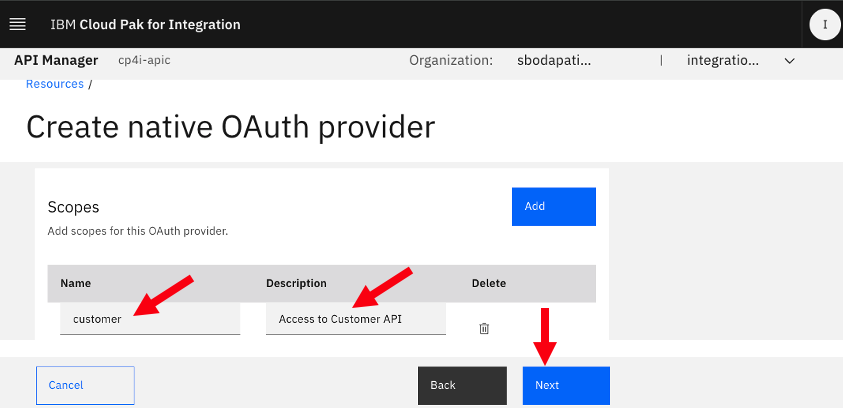
6. Replace sample_scope_1 with customer for Scope Name and replace Sample scope definition 1 with Access to Customer API for Scope Description. Click Next.
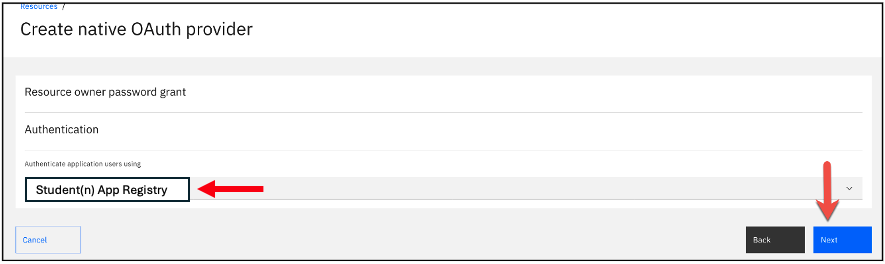
7. Accept the defaults (App Registry for Authenticate application users using) and click Next.
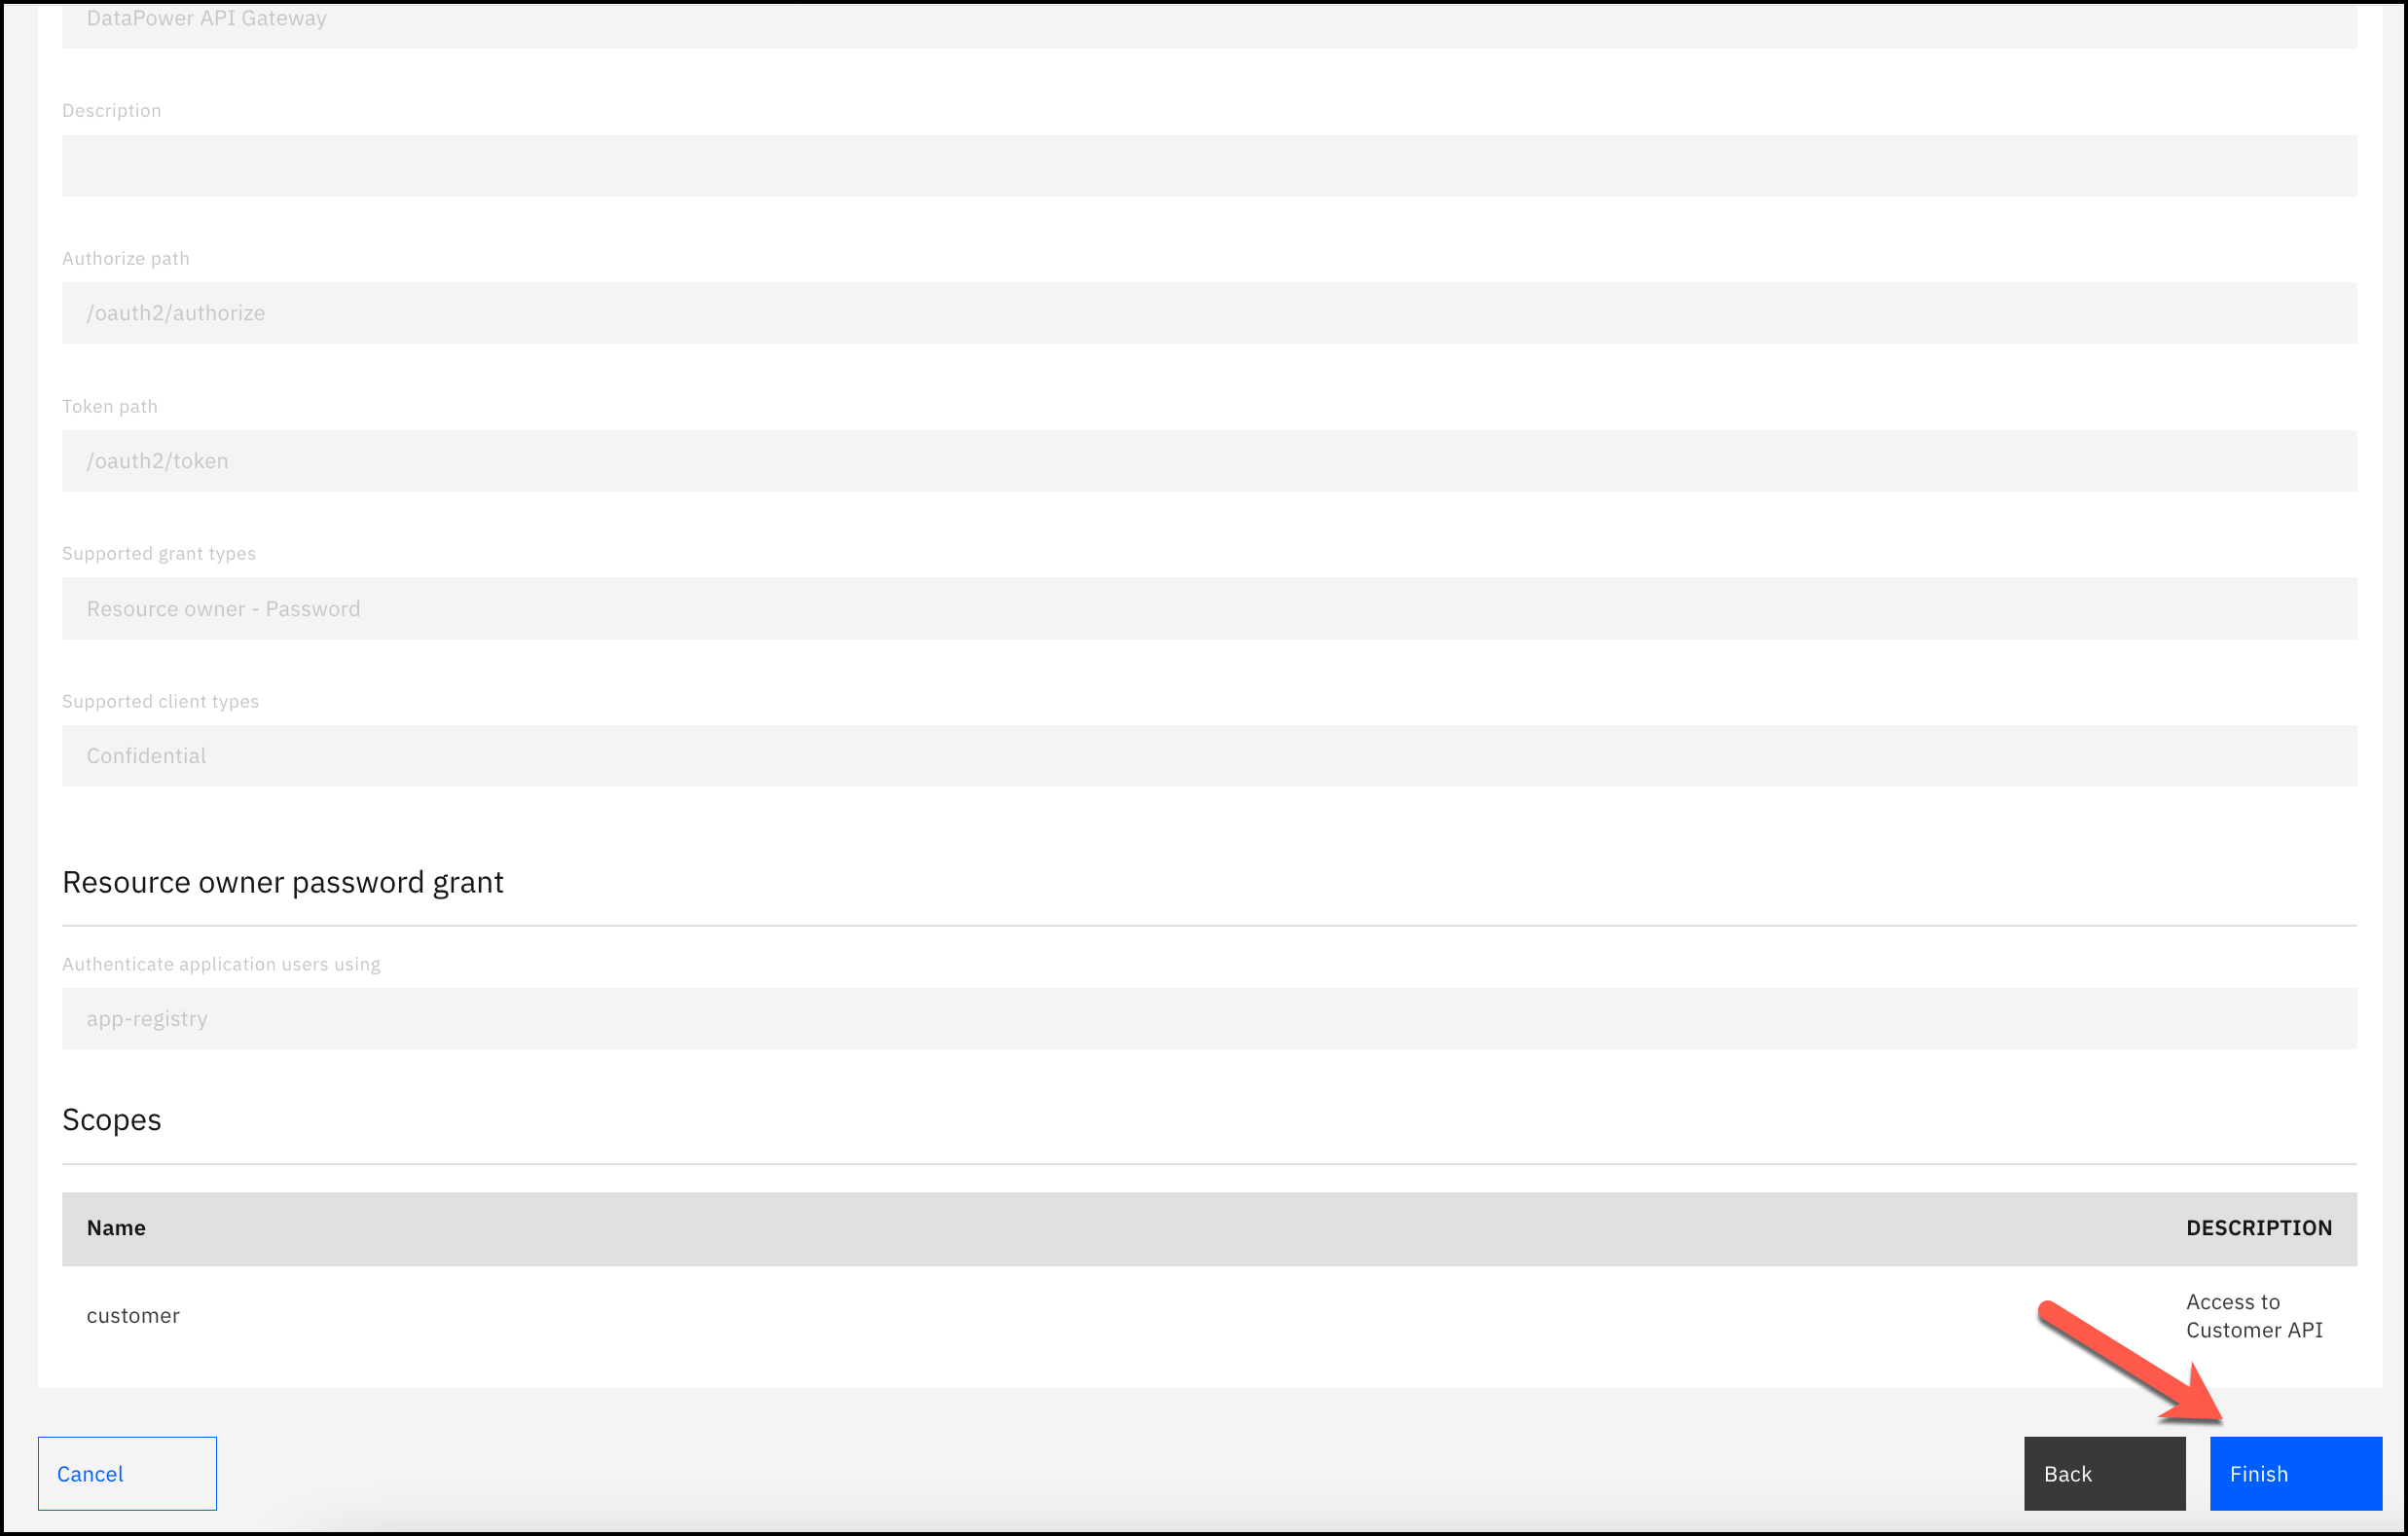
8. Review the OAuth configuration and click Finish.
9. Click Save.
4. Add the OAuth Service to the Sandbox Catalog
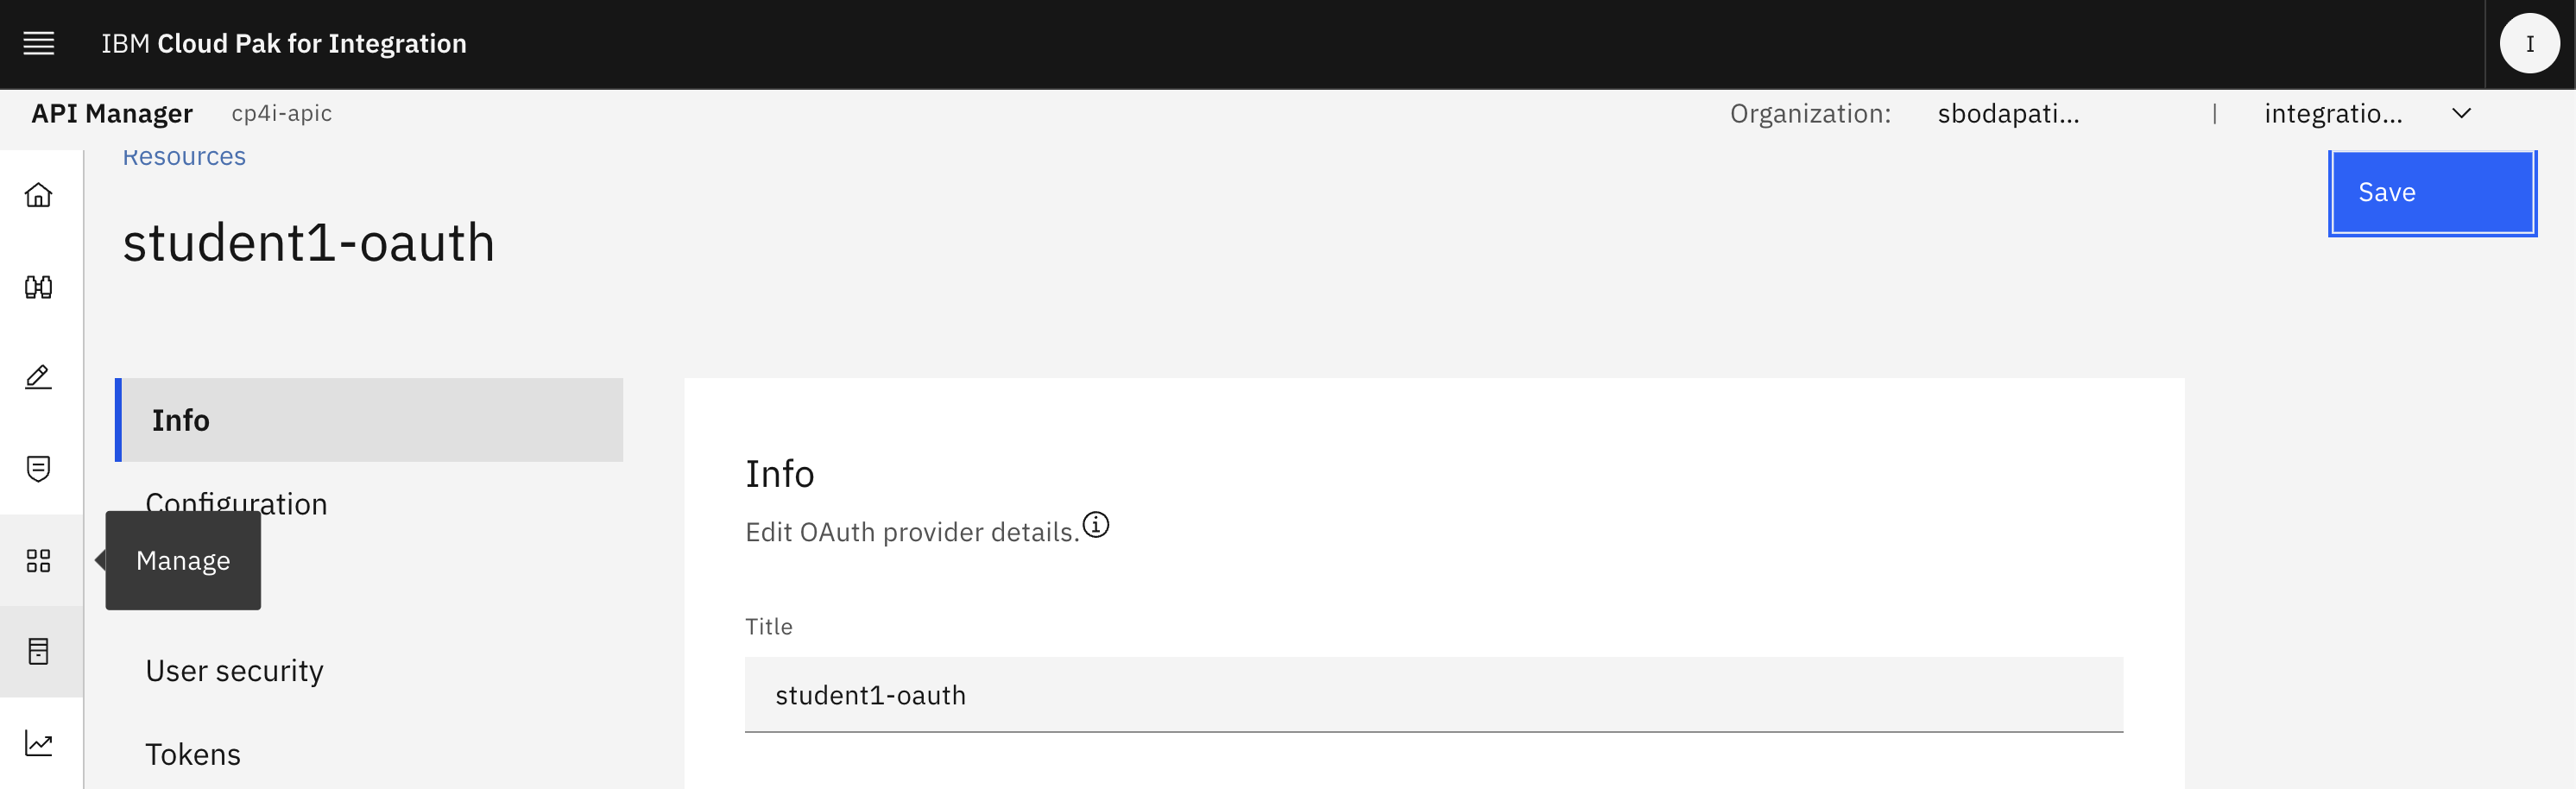
1. In the left menu, click on Manage.
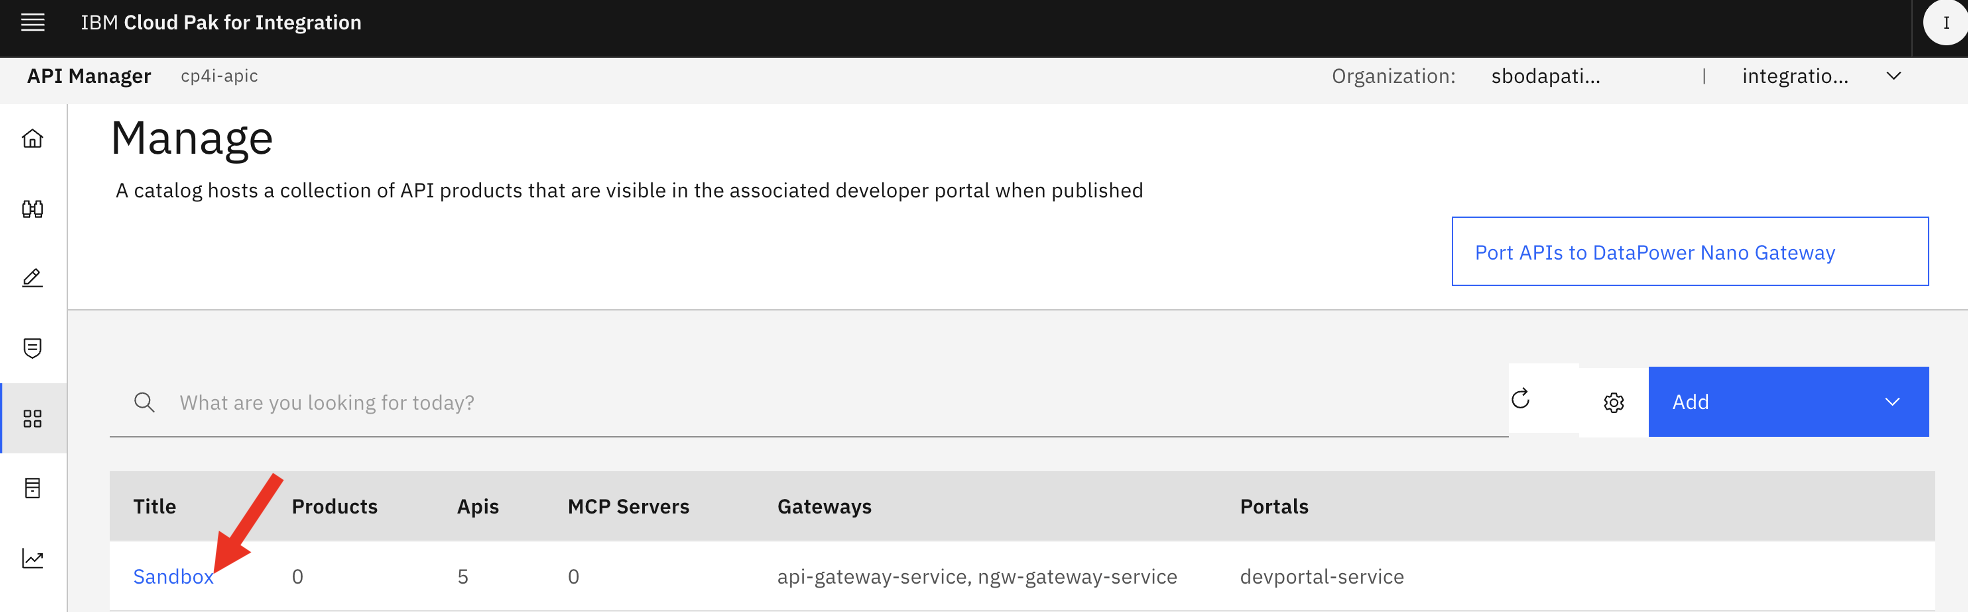
2. Click on Sandbox
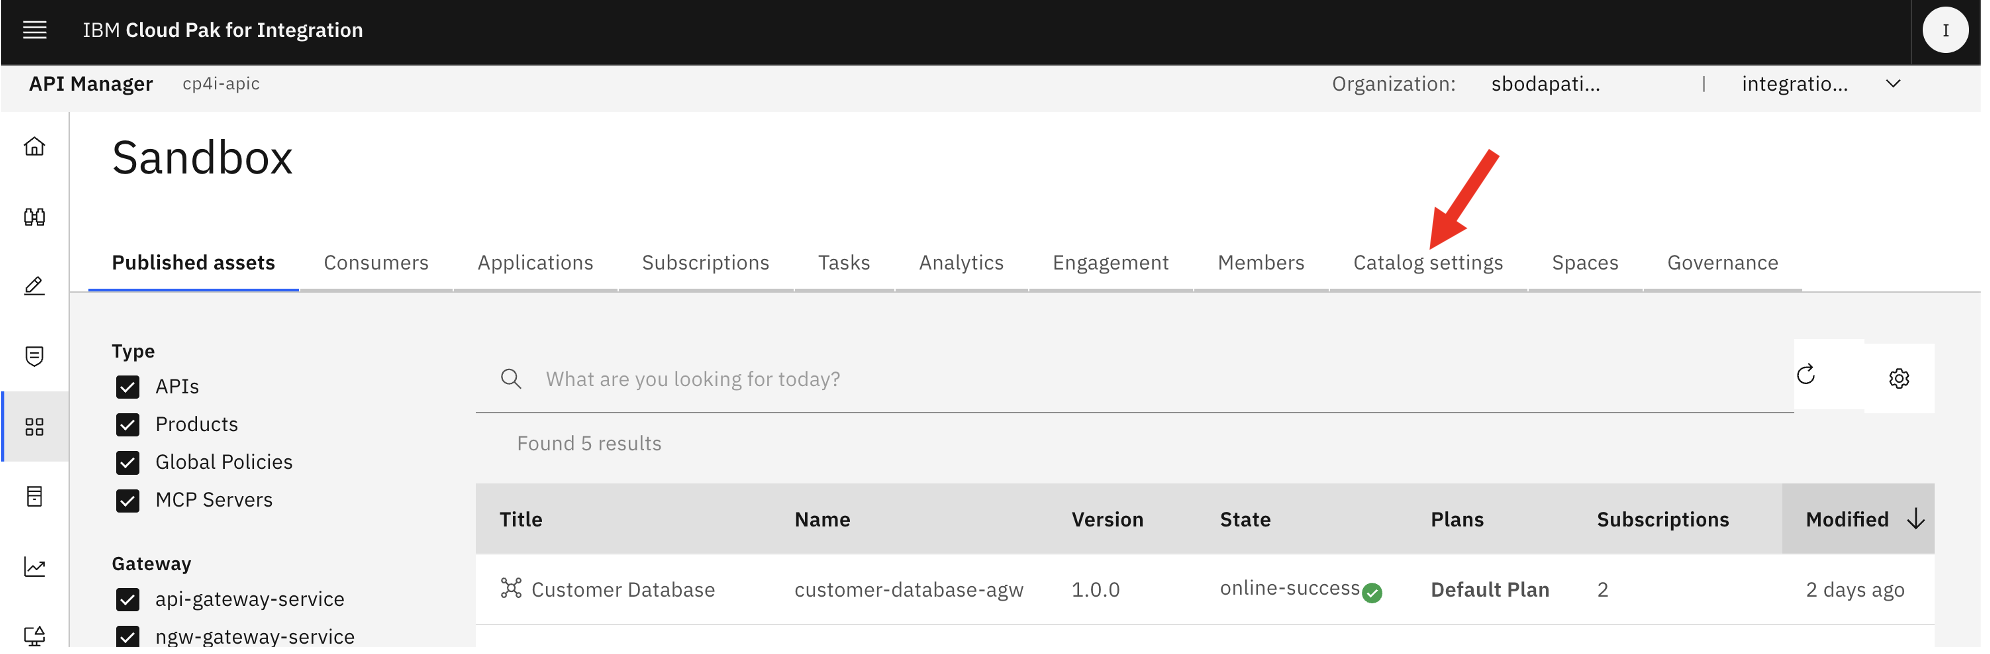
3. In the top menu, click on Catalog settings.
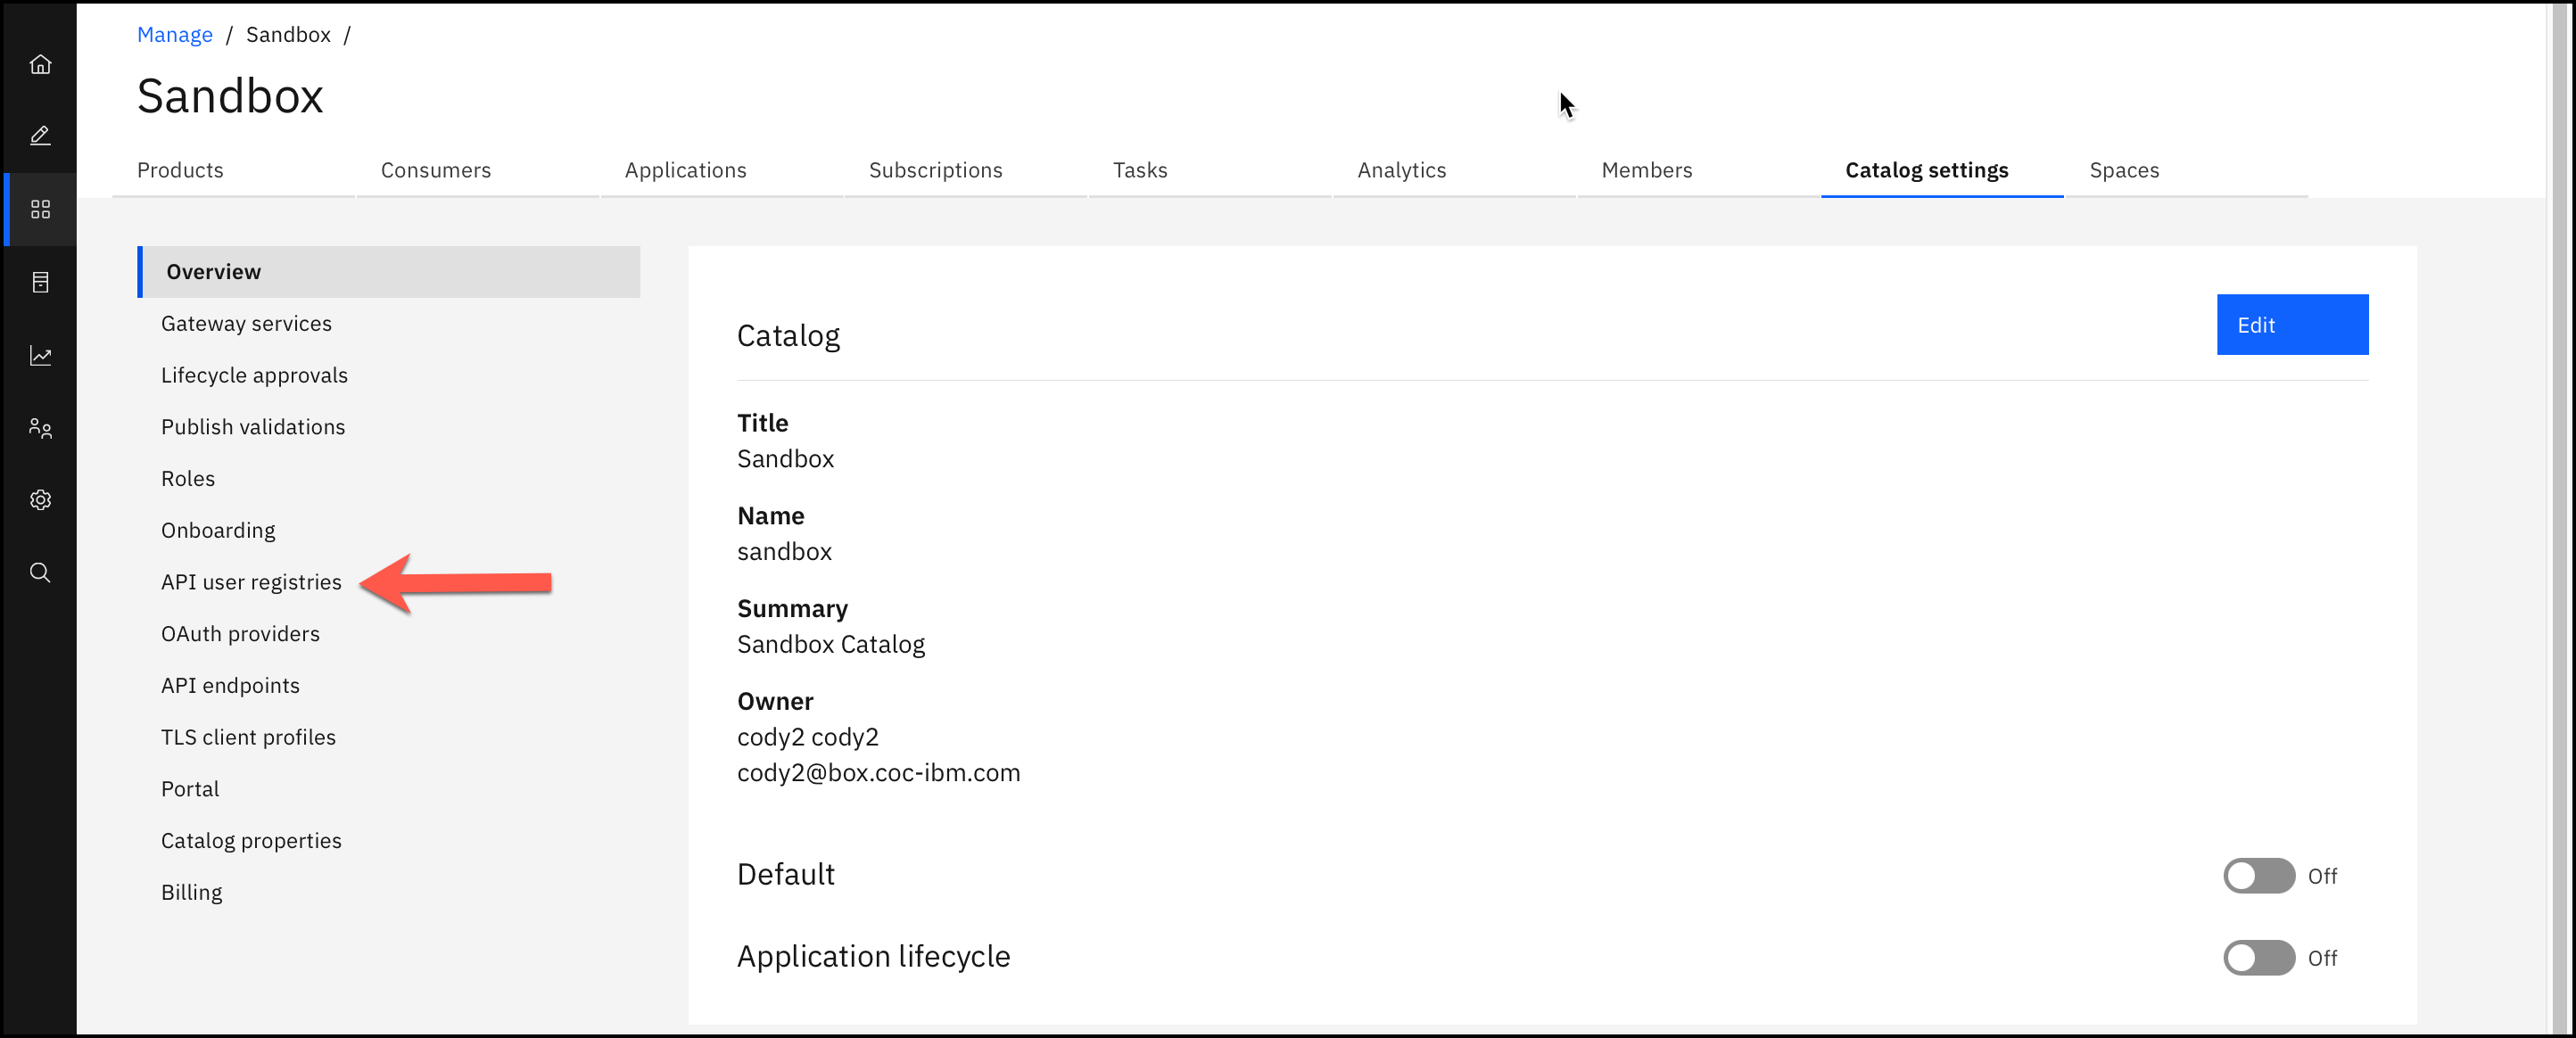
4. Click on API user registries.
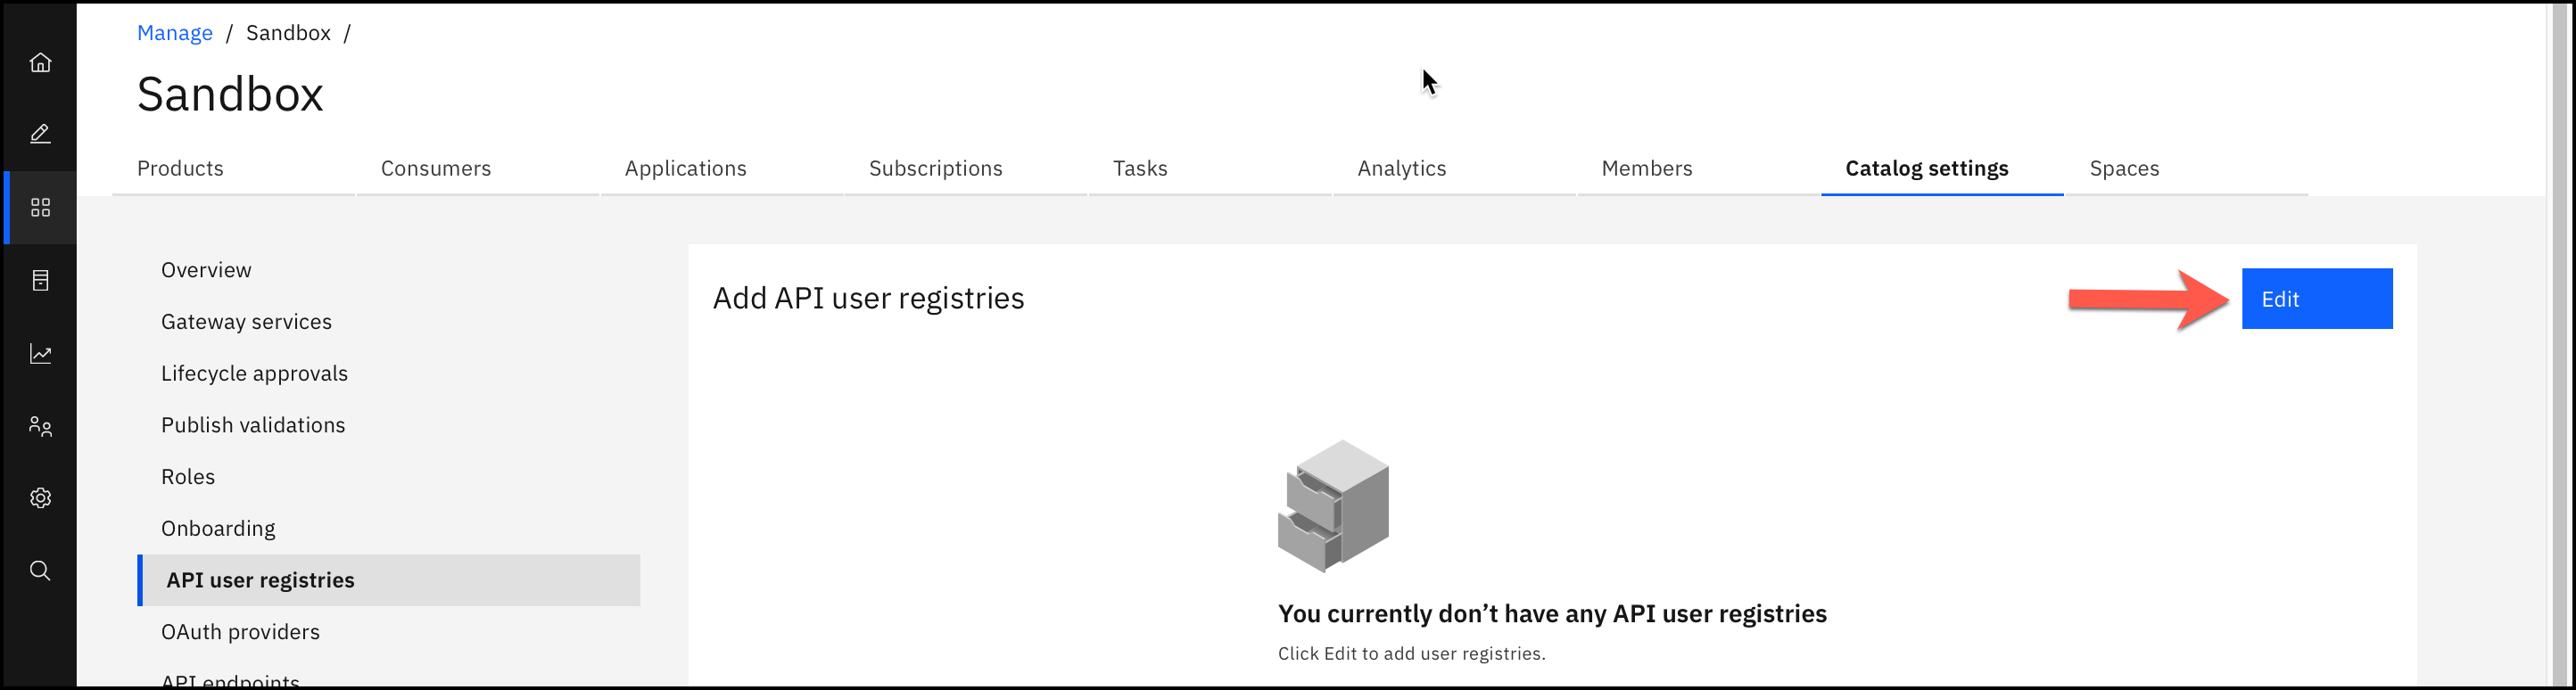
5. Click Edit.
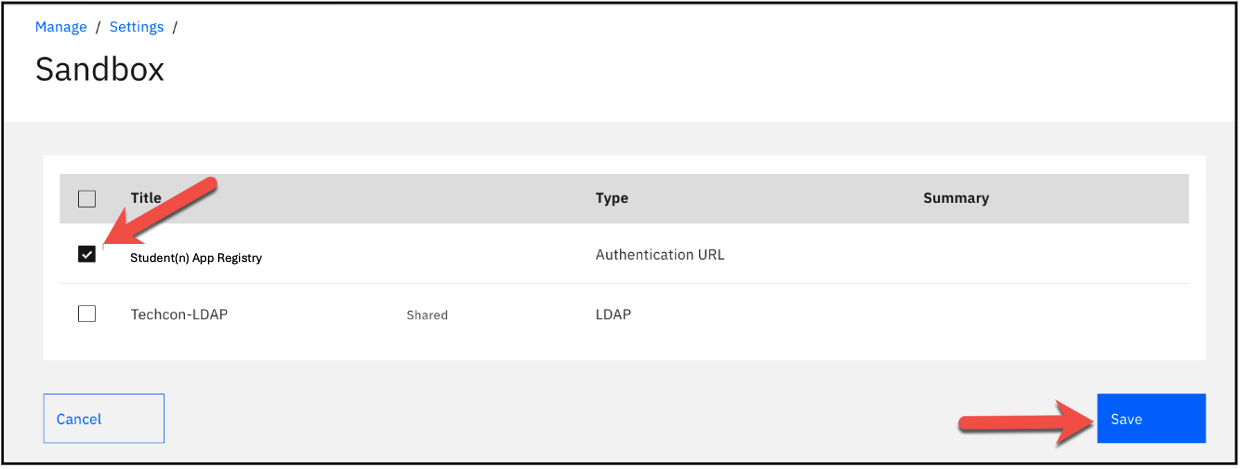
6. Select Student(n) App Registry and click Save.
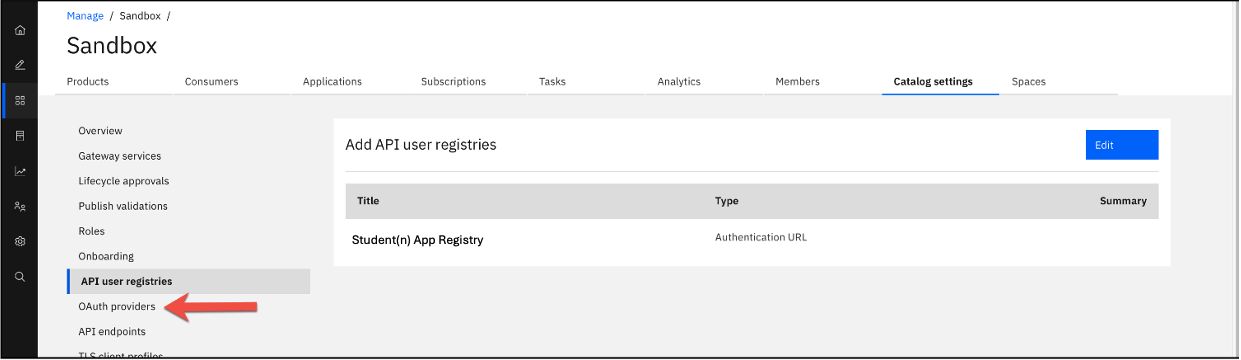
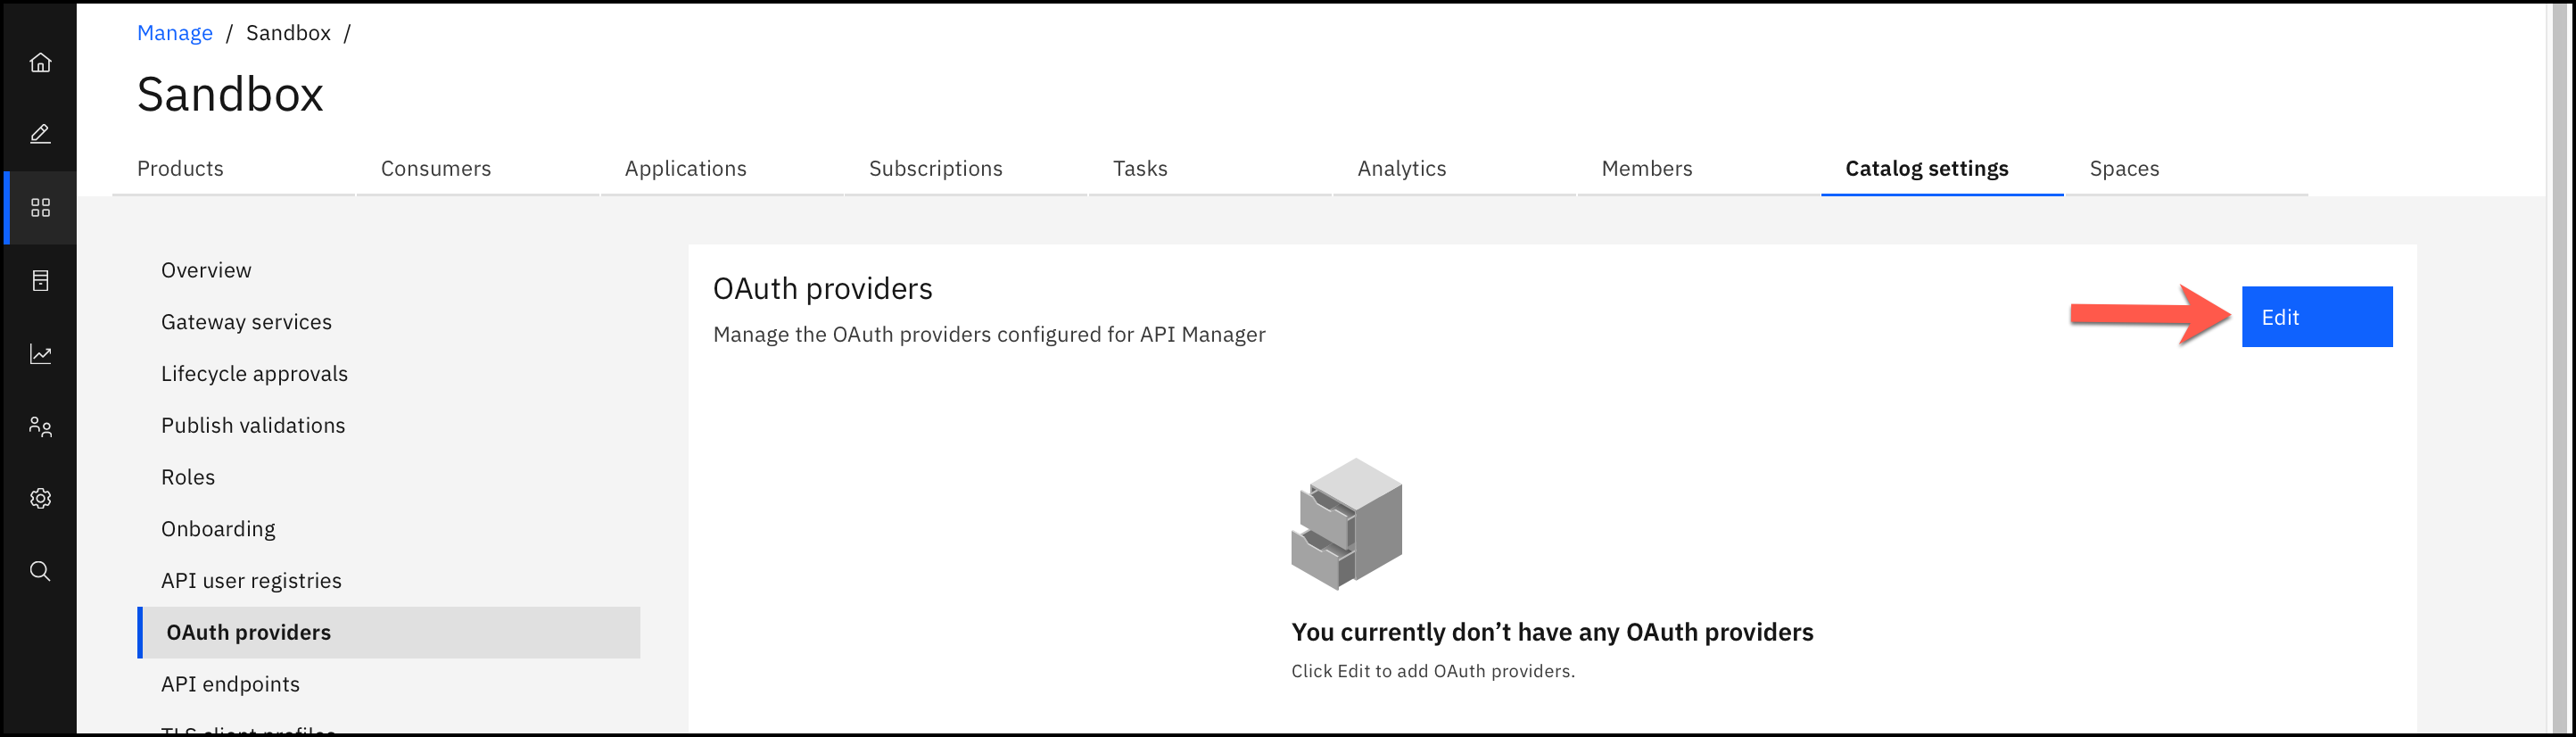
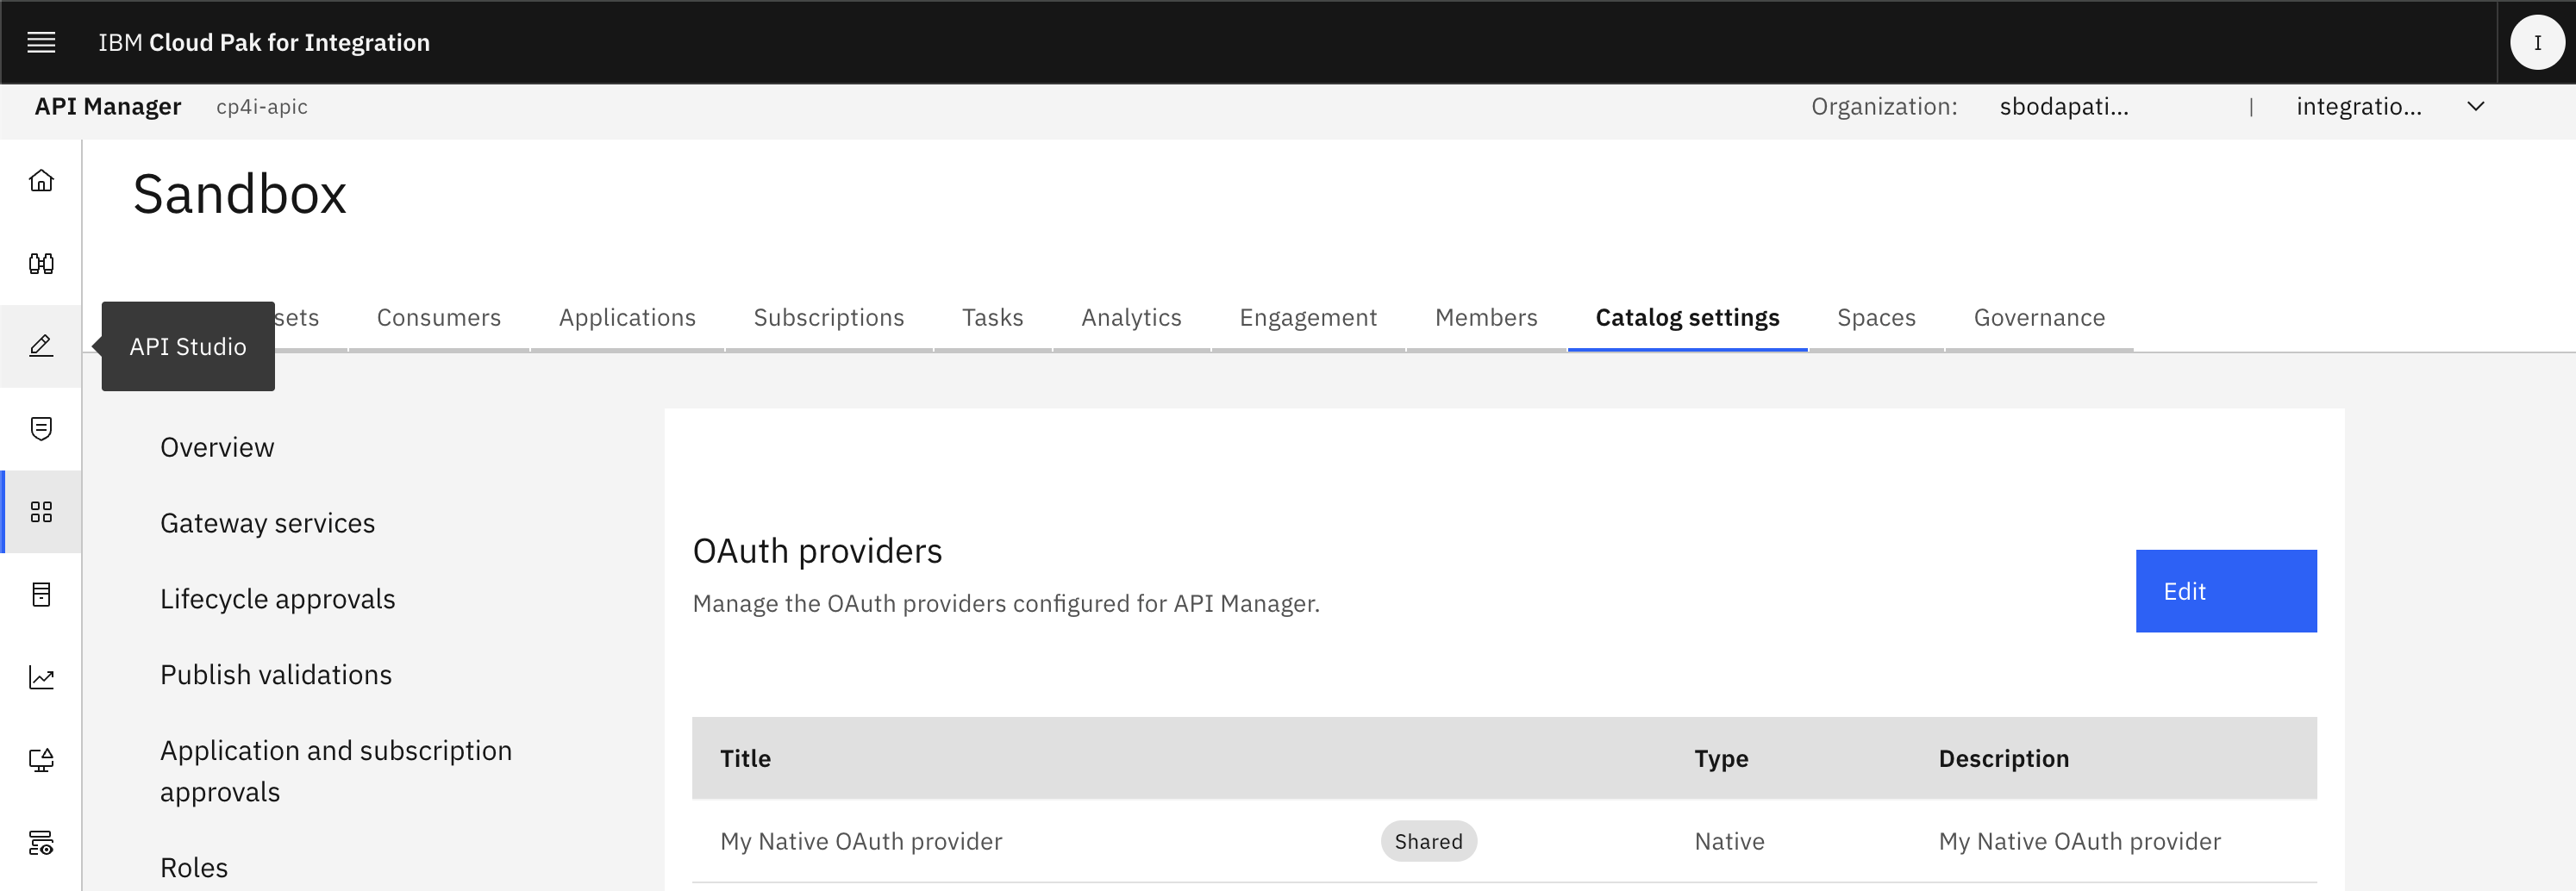
7. Click on OAuth providers.
8. Click Edit
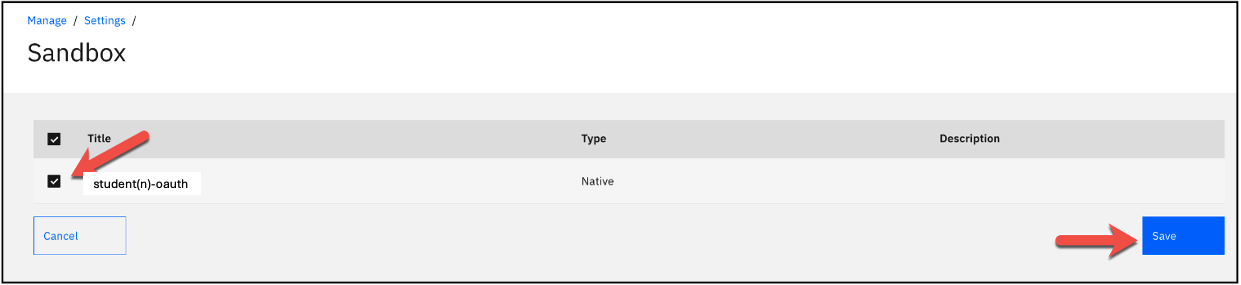
9. Select student1-oauth and click Save.
5. Update customer-database-agw API
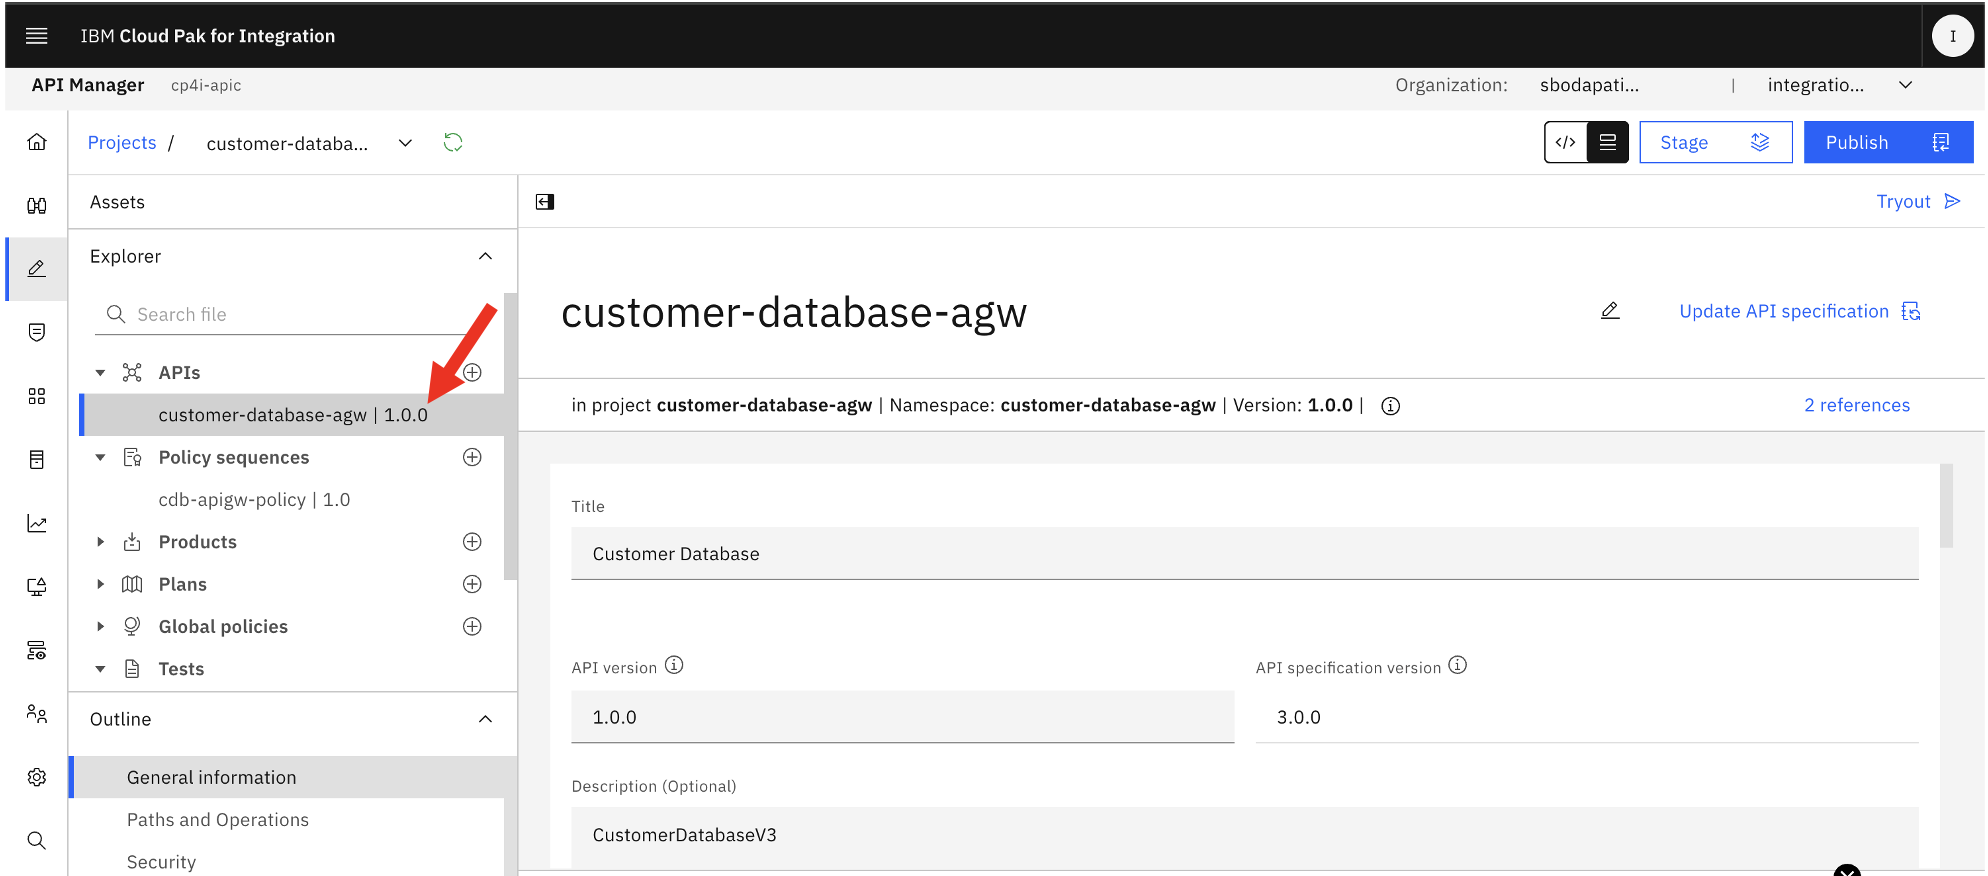
1. In the left menu, click on API Studio.
Select customer-database-agw project.
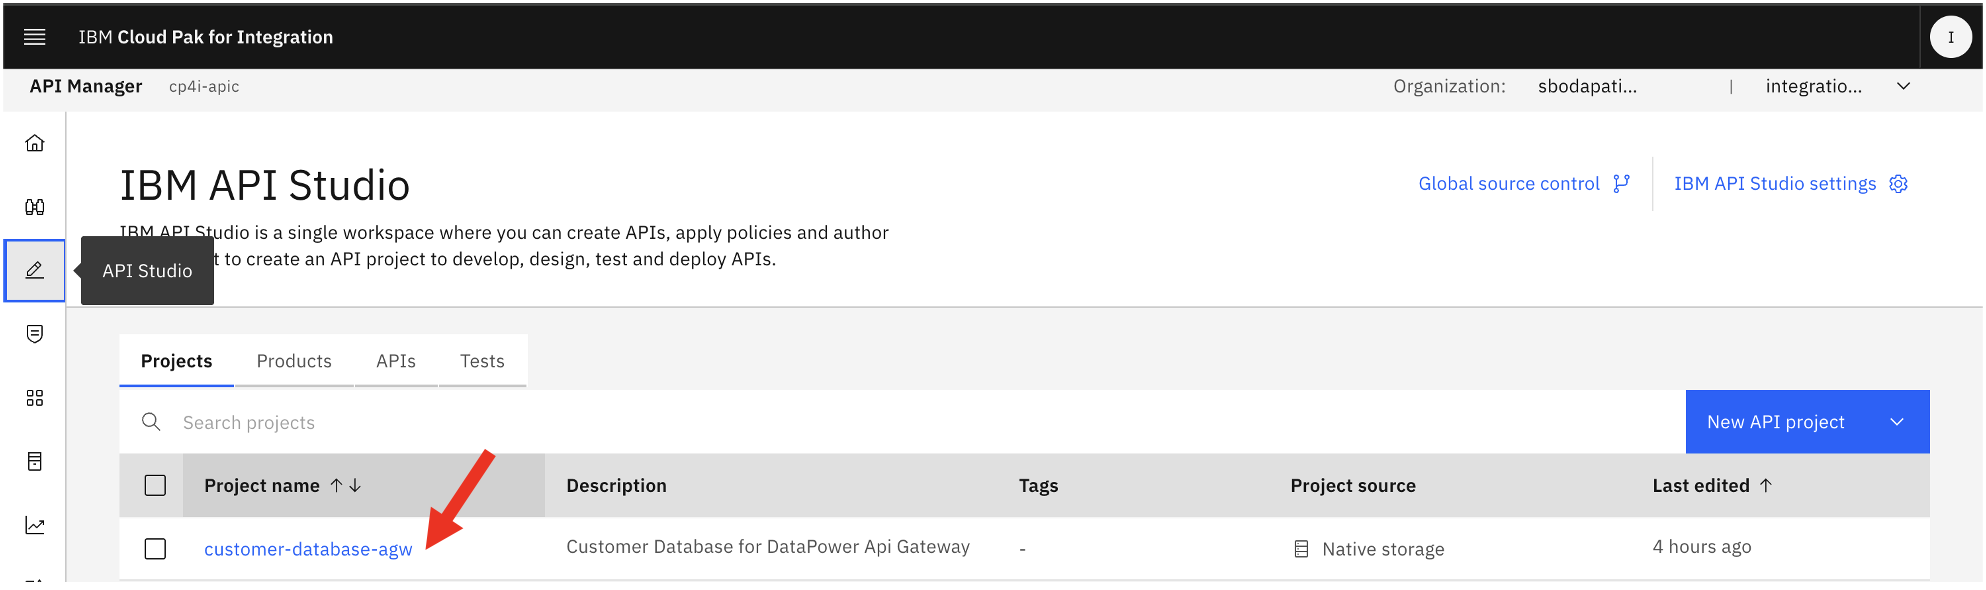
Click on your API, customer-database-agw.
Scoll down to Components section, then click on <Add a new security schema>.
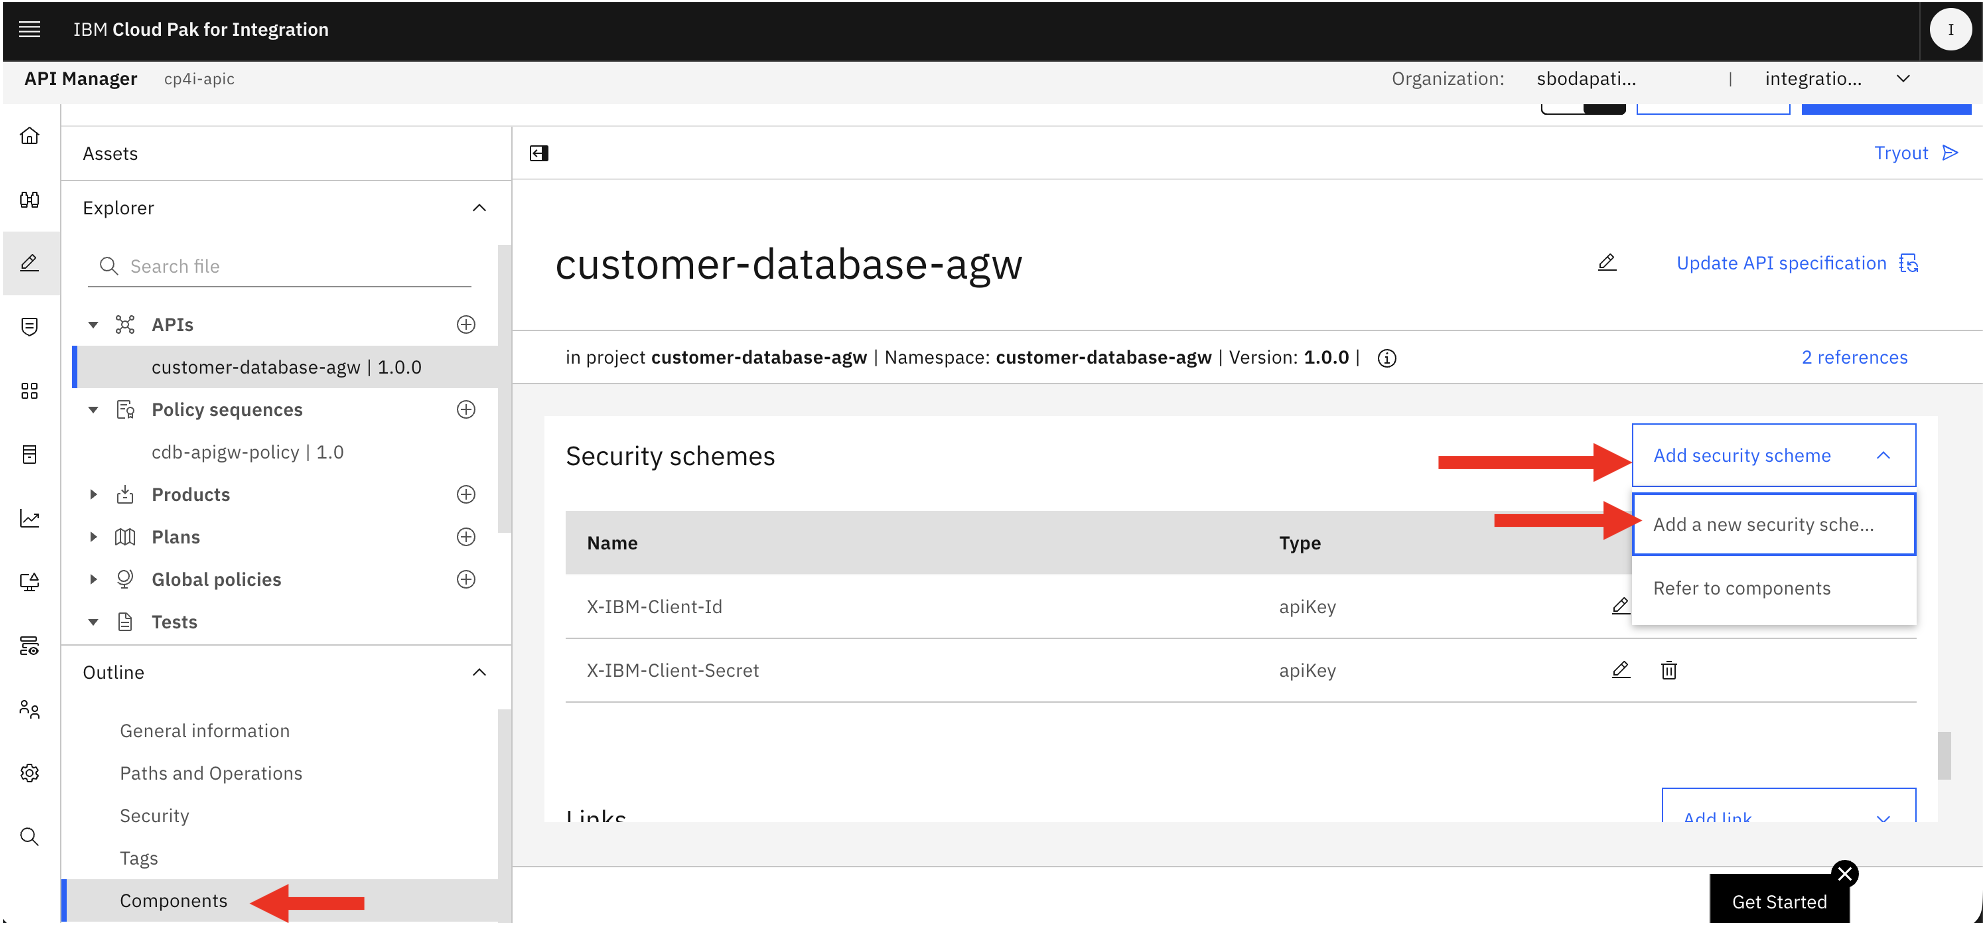
5a. Add OAuth Security
1. Select oauth-2, then enter Security schema key as oauth-1.
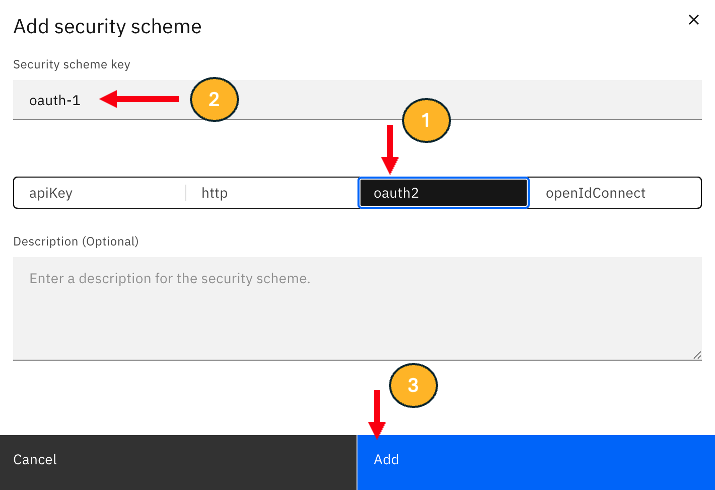
Click <Add>.
2. For the “Catalog” select Sandbox, for the “OAuth Provider” select student1-oauth, for the Scope” select **“Resource Owner - Password”.
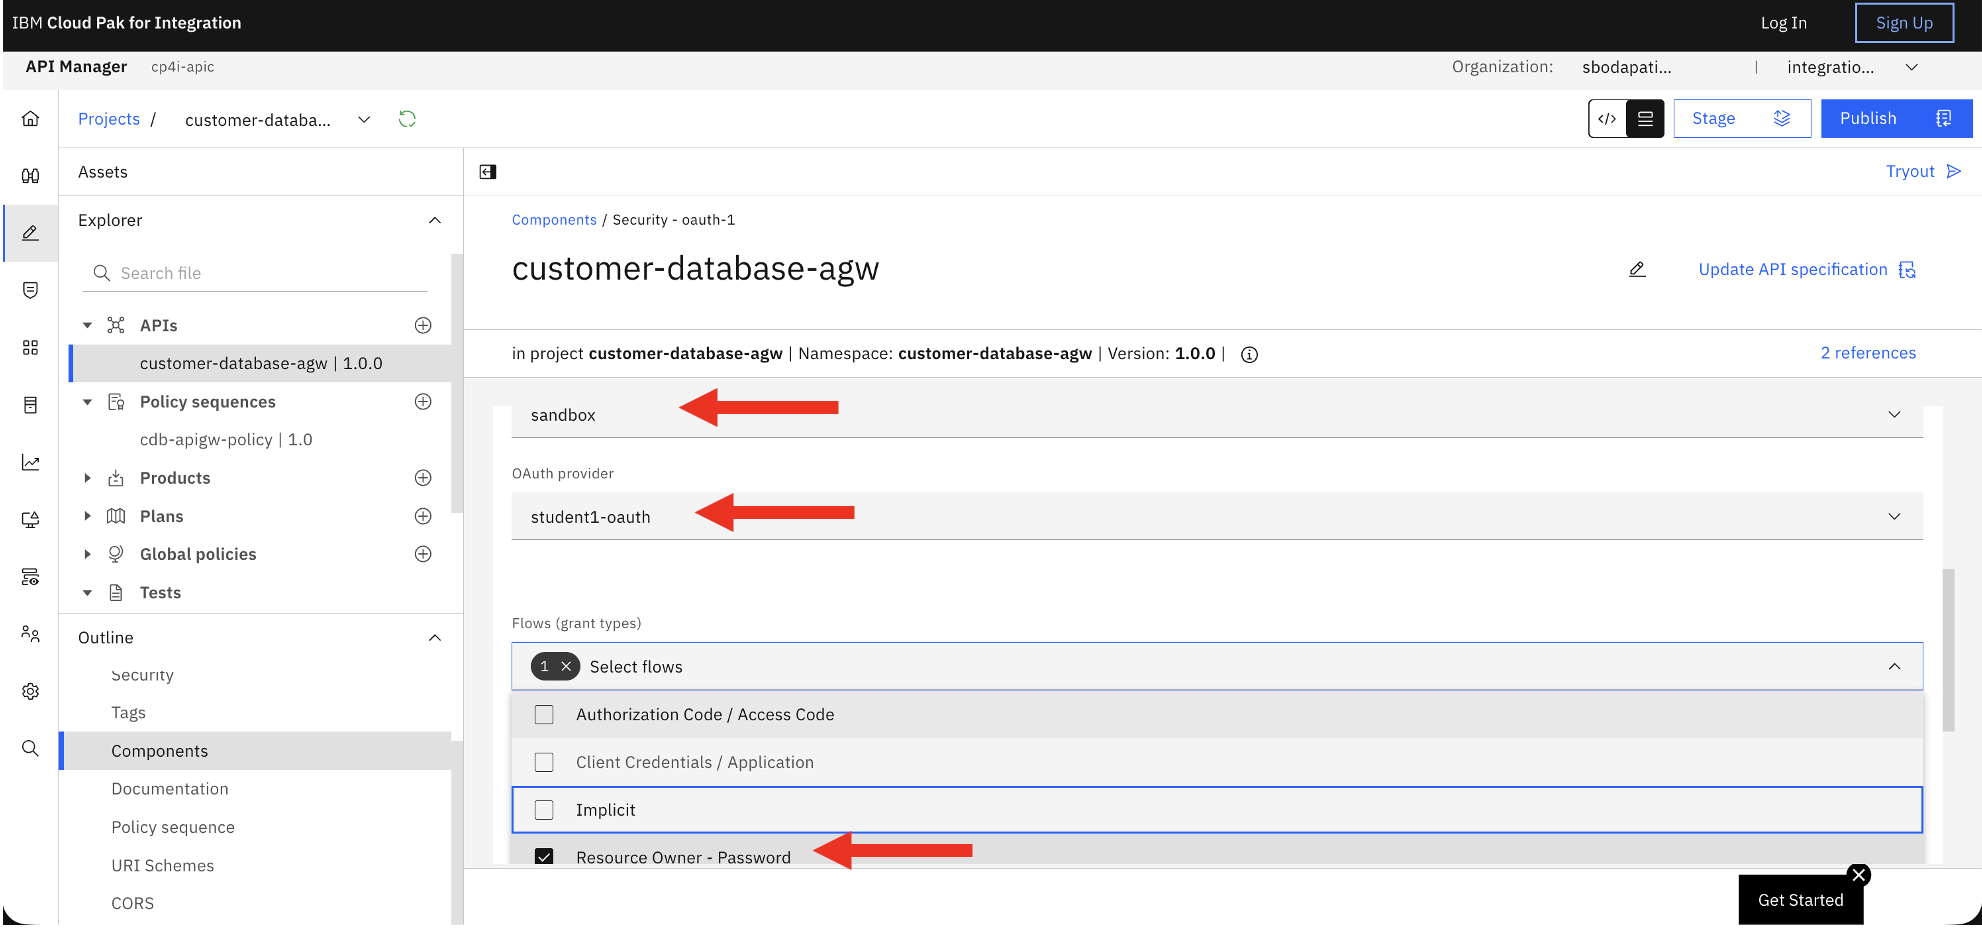
Scroll down, and you should see the “customer” scope, and it should select automatically.
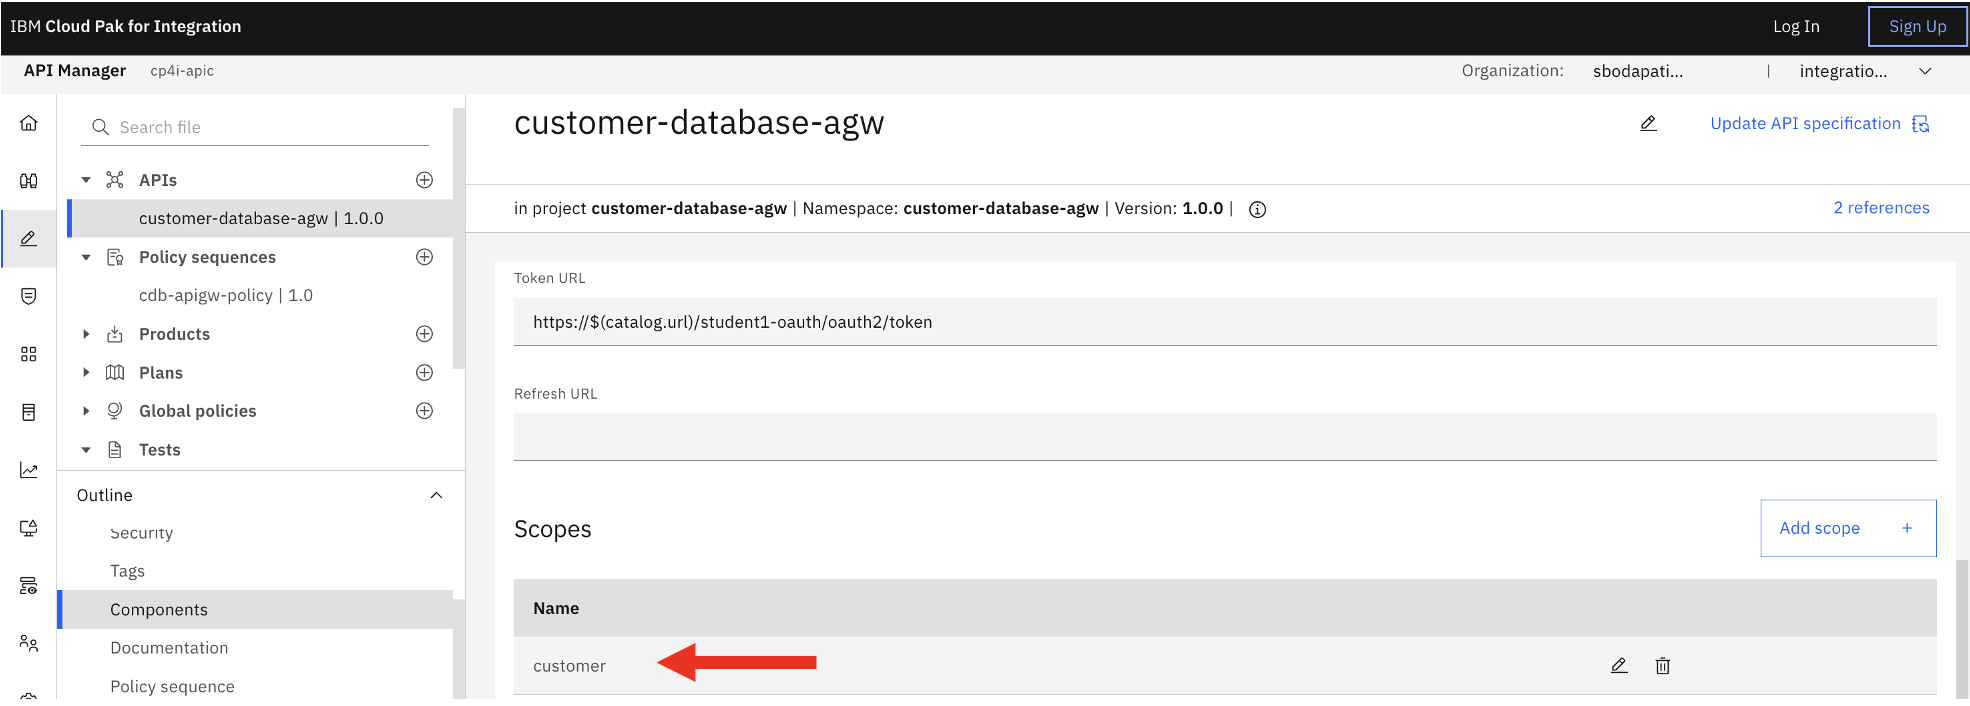
3. Add oauth-1 to the API Security. Click <Security> tab.
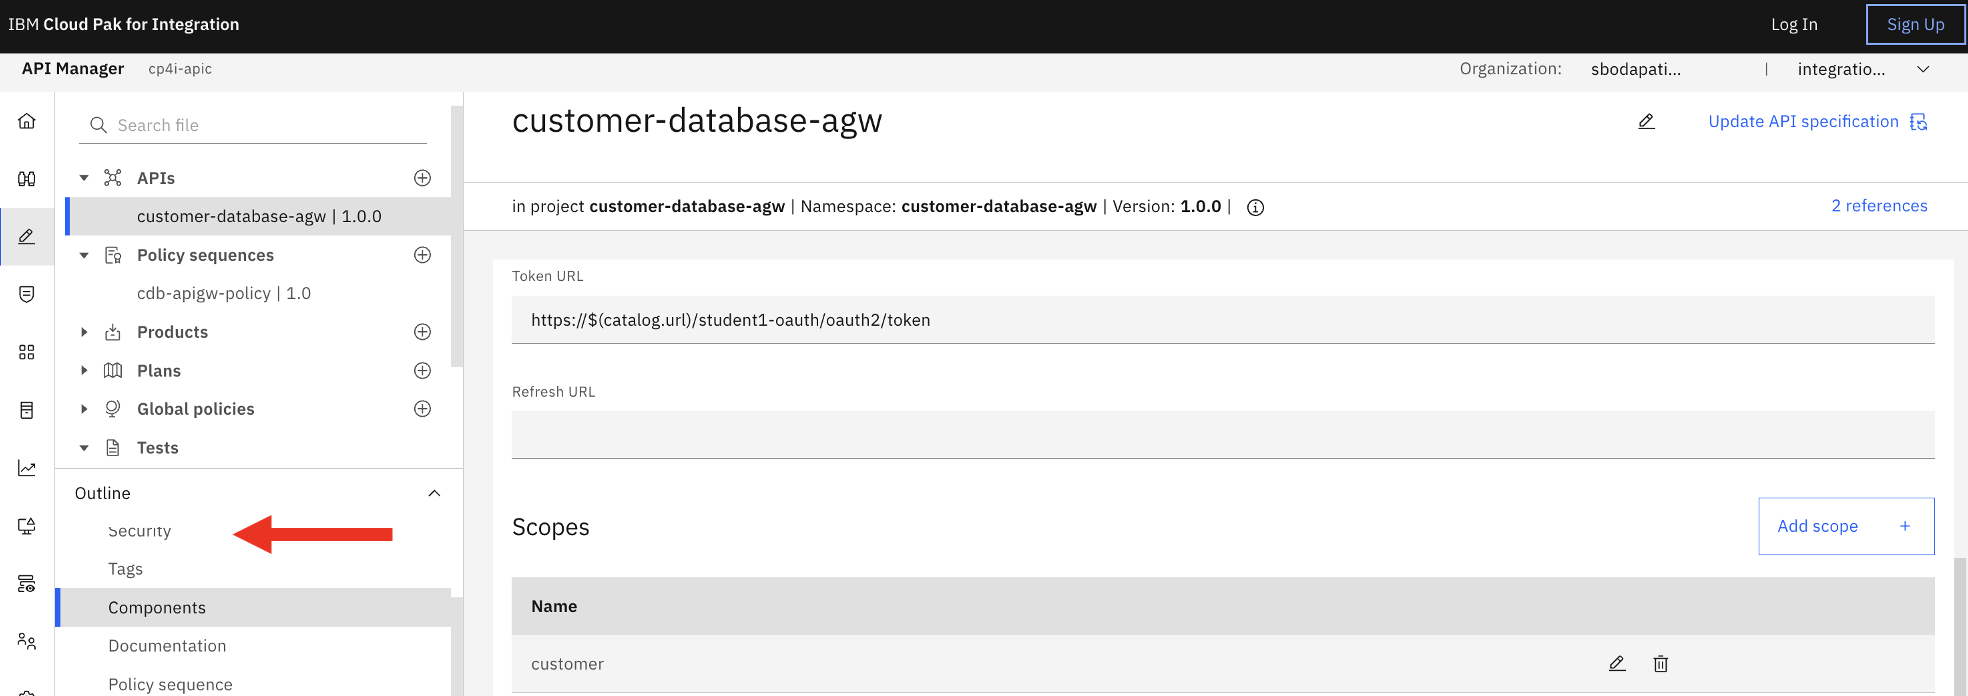
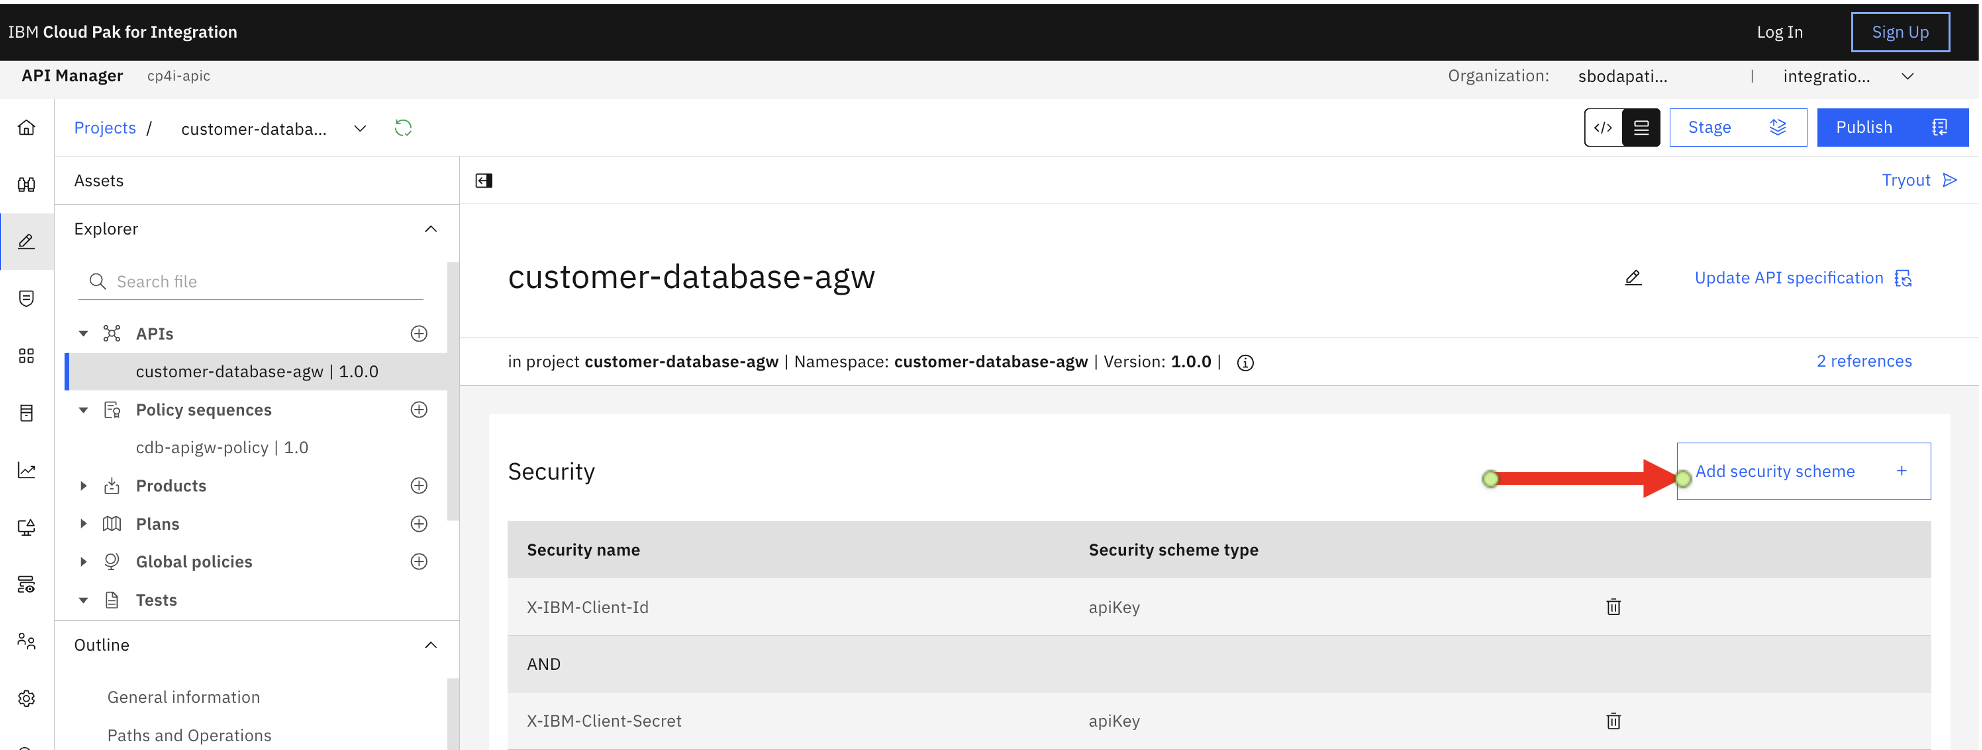
Click <Add security schema>.
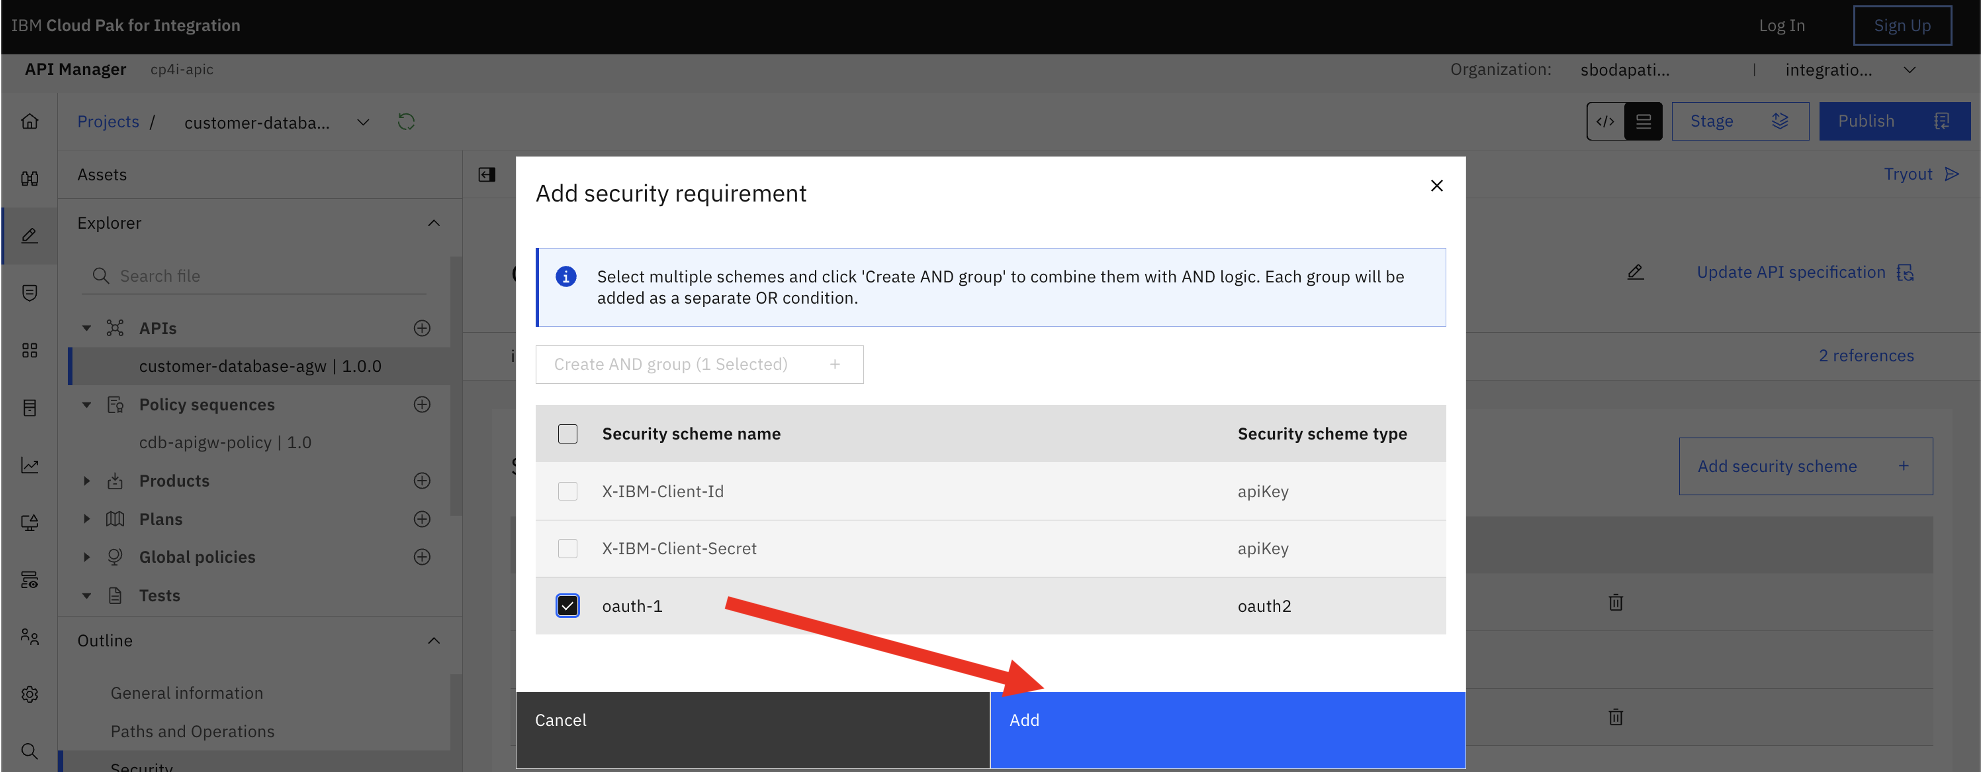
Select oauth-1, then click <Add>.
You should see oauth-1, along with ClientID, Secret.
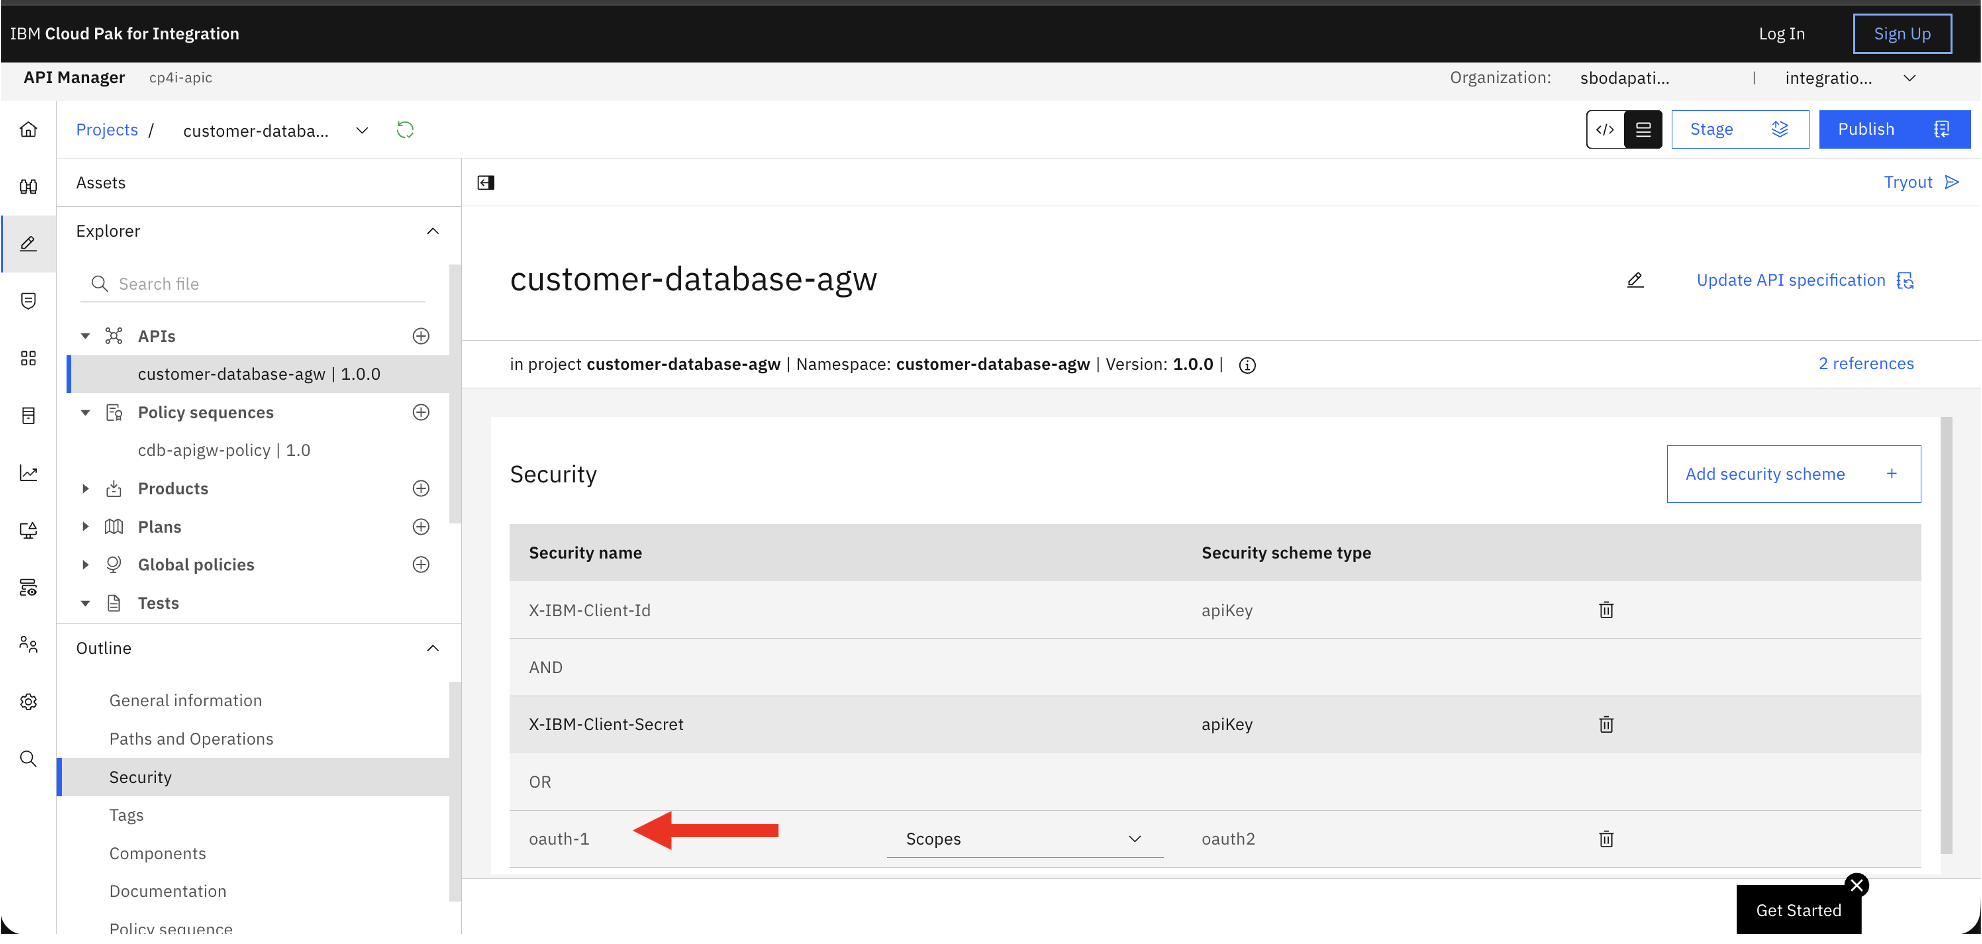
So, your API is now protected with multiple securities and the API consumers can use either security.
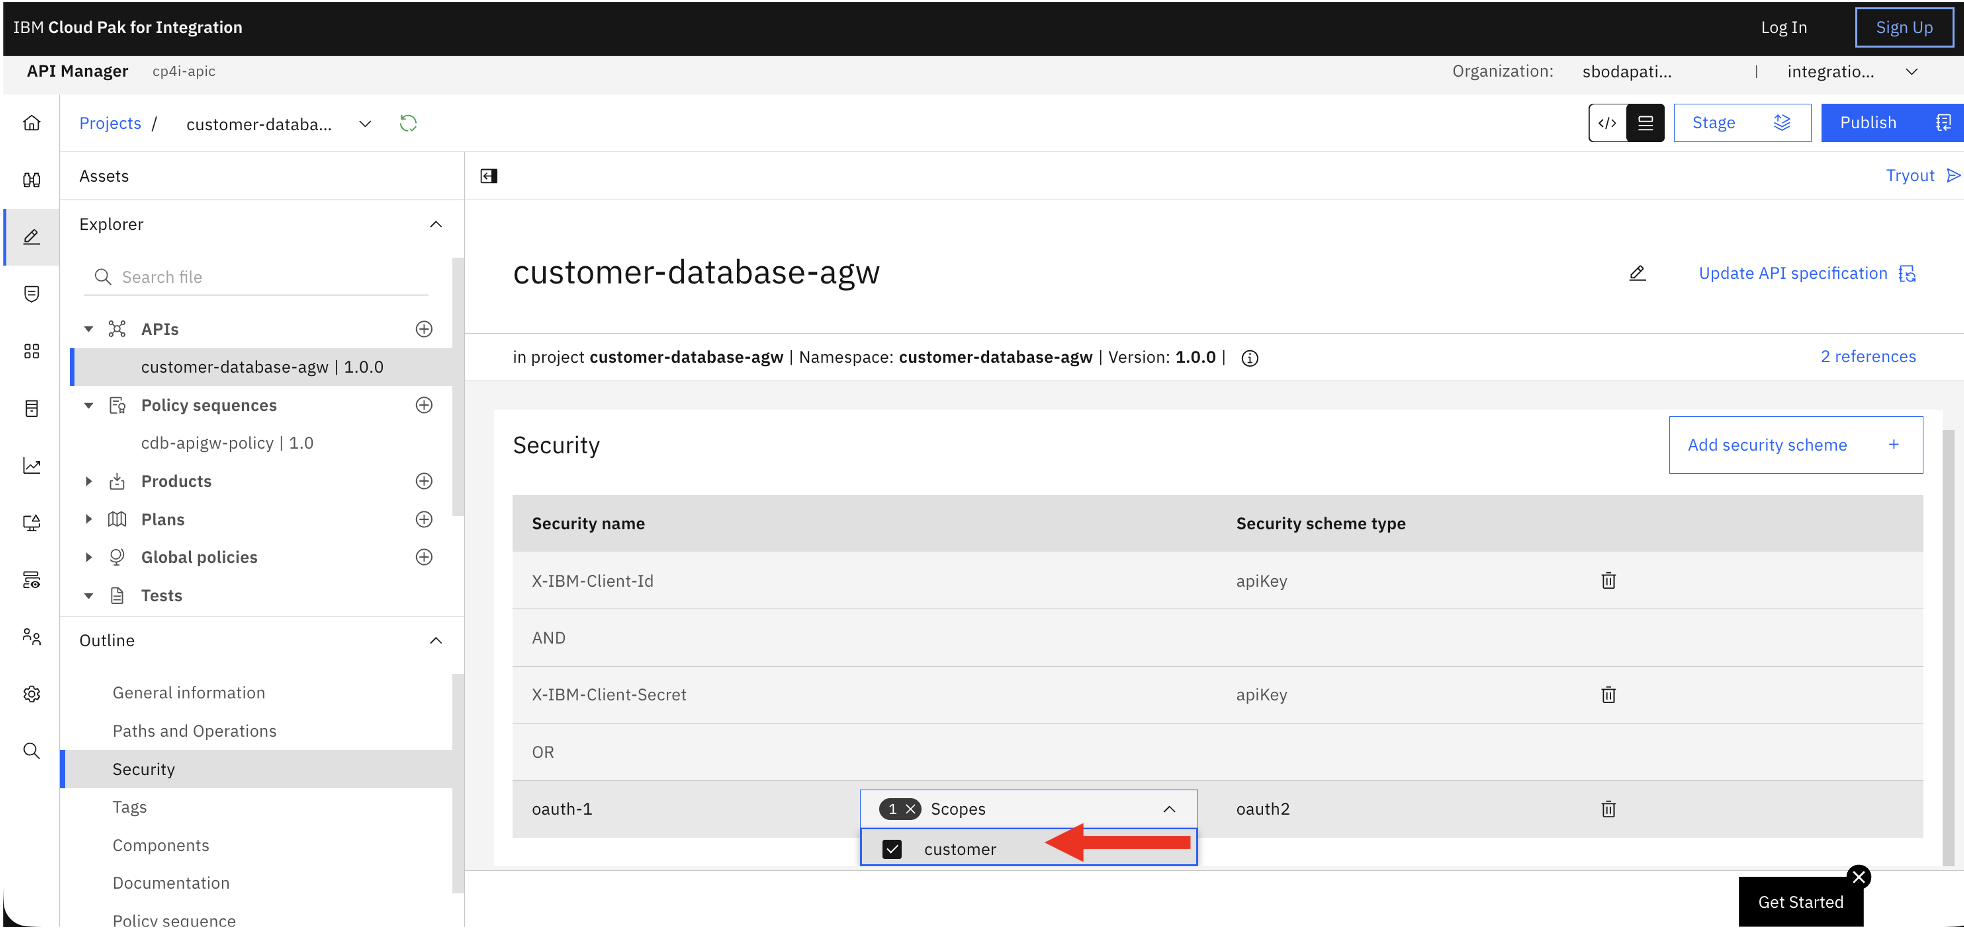
Now, select customer scope as below.
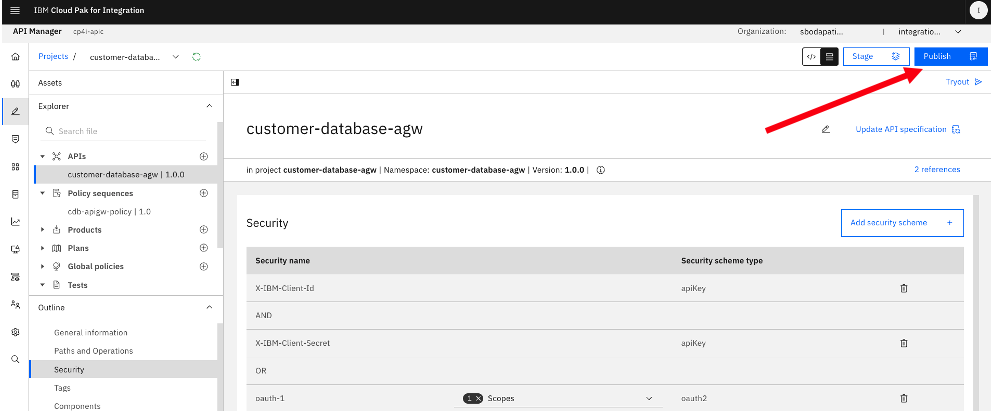
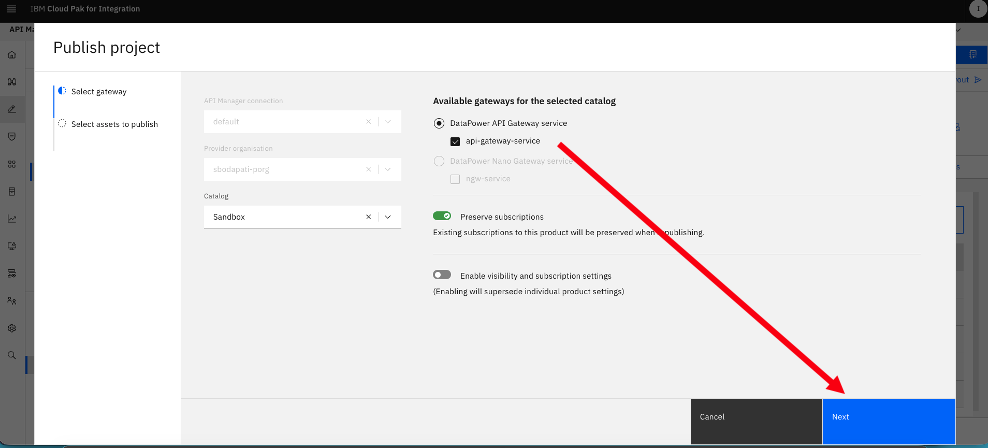
6. Publish the API
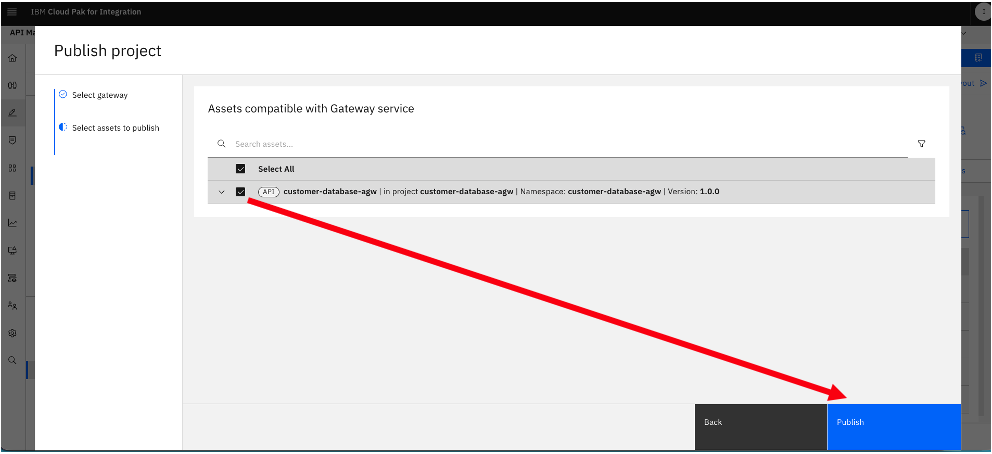
7. Test OAUTH Security
In this section, you will test the API to ensure that OAuth is working properly.
Login the Dev Portal with your studentid, and password that you created in the first lab.
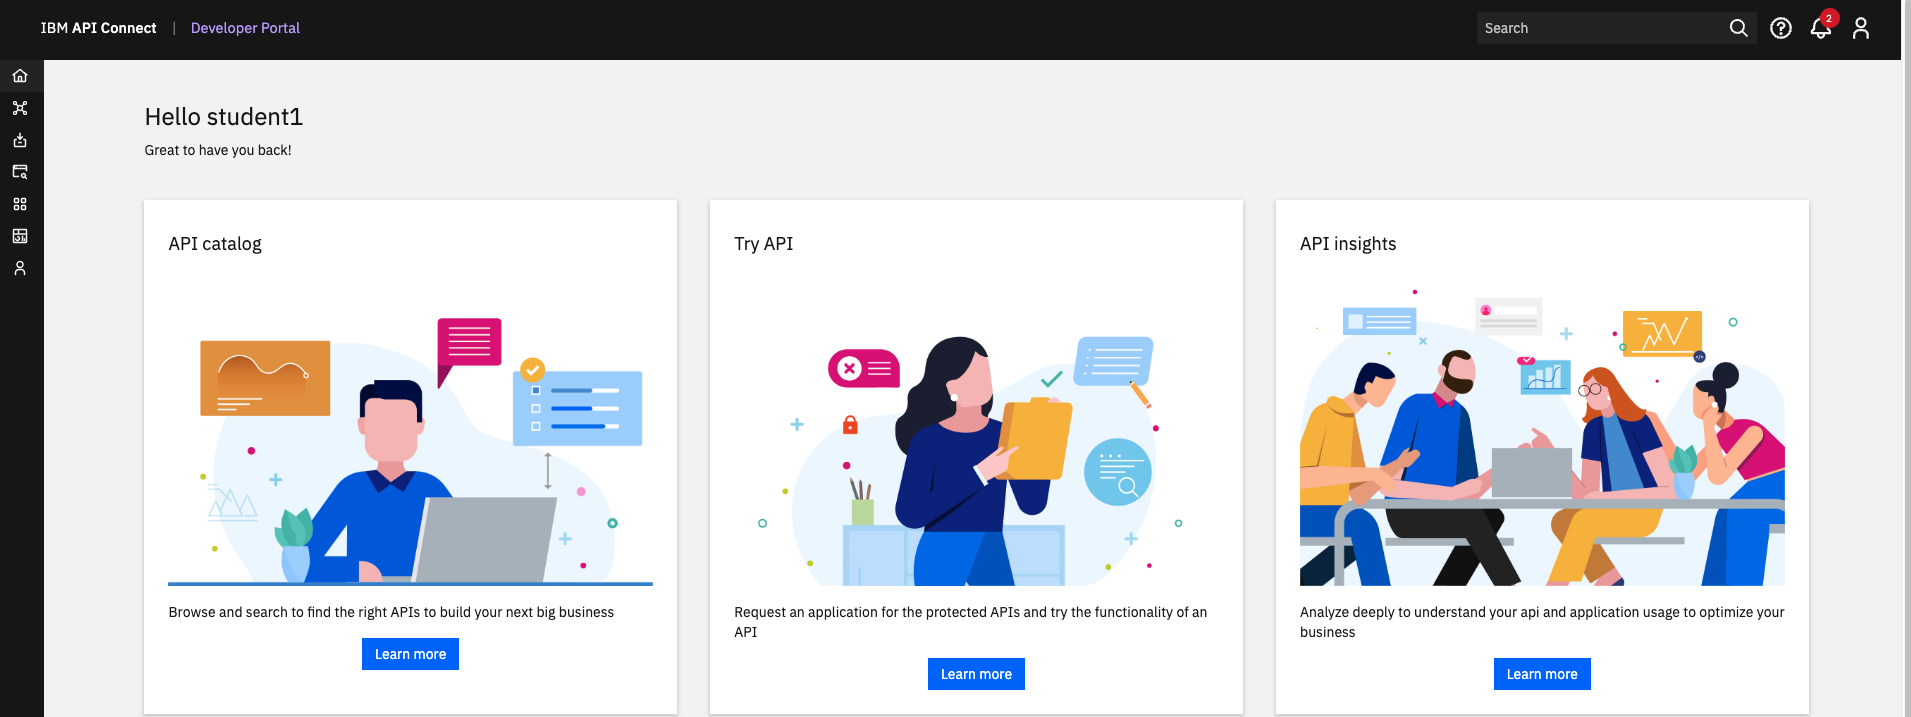
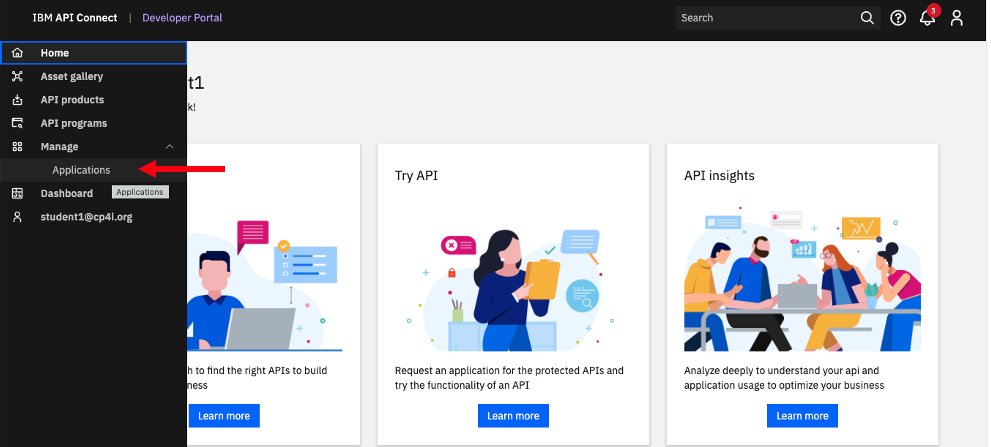
Click on Applications.
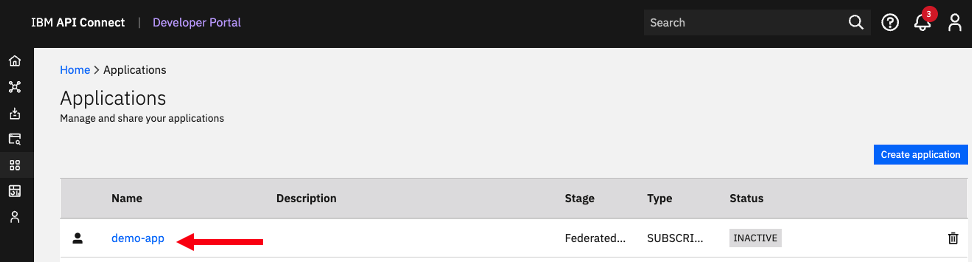
Click on the demo-app that you created and subscribed to customer-database-agw product/api.
We will use the Client Id, Client Secret next to obtain OAUTH Bearer Token.
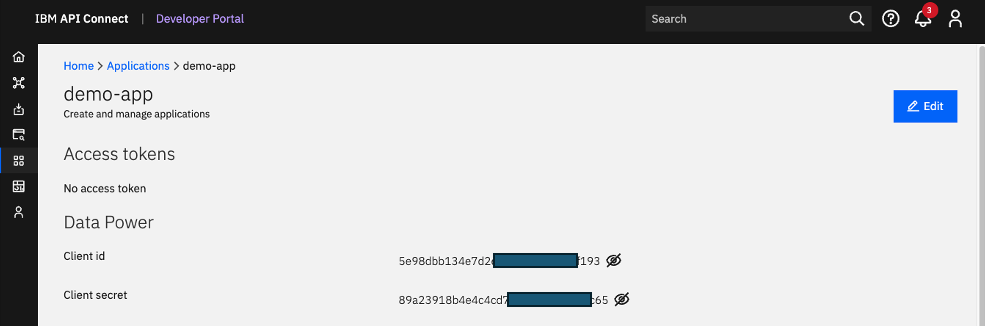
SAVE ClientID, Secret into a Notepad or Textpad.
Now, let’s capture the TOKEN URL.
Click on the API Name.
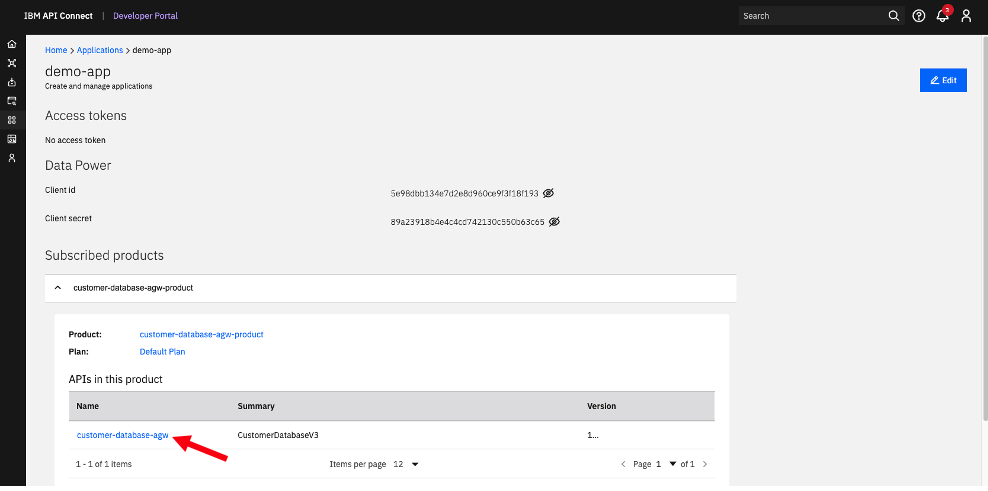
Copy the highlighted section of the Endpoint URL (upto Sanxbox) and save to Notepad.
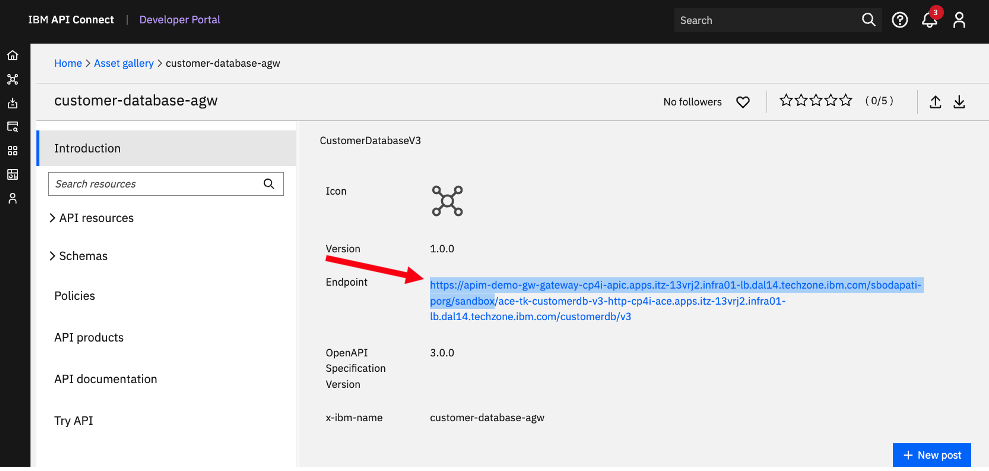
So you should have captured CLIENTID, SECRET, and part of the Endpoint URL. We will use them the below curl command
Open a Terminal or Command Line window.
Get Bearer Token:
Copy the below curl command into the Terminal, and replace Client ID, and Secret, and endpoint URL from the above.
curl -k -X POST -d "grant_type=password&client_id=REPLACE_WITH_YOUR_CLIENT_ID&client_secret=REPLACE_WITH_YOUR_CLIENT_SECRET&username=student(n))&password=passw0rd&scope=customer" REPLACE_WITH_YOUR_TOKEN_URL/student(n)-oauth/oauth2/token
EXAMPLE:
curl -k -X POST -d “grant_type=password&client_id=xxxxxx&client_secret=yyyyyy&username=student1&password=passw0rd&scope=customer” https://apim-demo-gw-gateway-cp4i-apic.apps.itz-xxxxx.infra01-lb.dal14.techzone.ibm.com/sbodapati-porg/sandbox/student1-oauth/oauth2/token
Output should look like below:

Now, from the Developer Portal, copy the customer-database-agw Endpoint basepath.
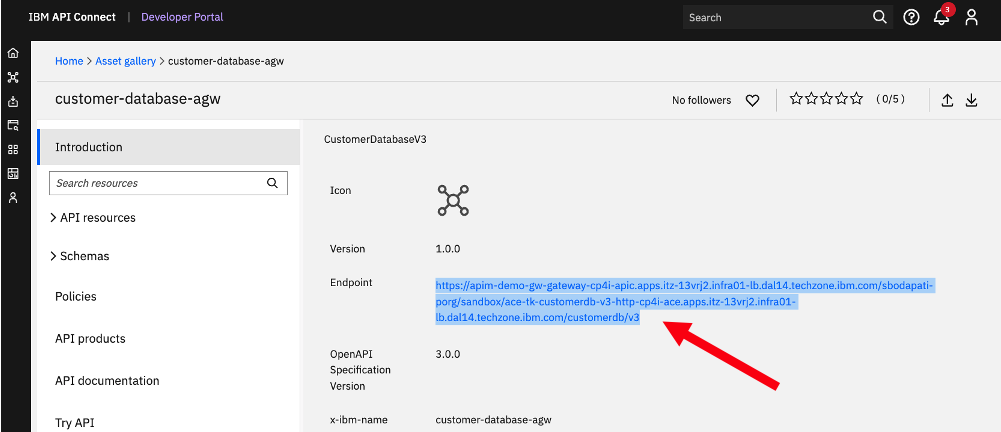
Now copy the below curl command into the Terminal window and update with the Bearer token and the endpoint url appending /customers to the endpoint URL.
curl -k -H "Authorization: Bearer REPLACE_WITH_YOUR_BEARER_TOKEN_FROM_ABOVE" REPLACE_WITH_GET_CUSTOMERS_URL
Example URL:
curl -k -H “Authorization: Bearer AAIgNWU5OGRiYjEzNGU3ZDJlOGQ5NjBjZTlgPl5hj59Dl2tuPTQ_RTfE2BjgYOa1unWWlatdflfw0SYRbX_14TiXQG_u_hPT1cWy3DtvA” https://apim-demo-gw-gateway-cp4i-apic.apps.itz-xxxxx.infra01-lb.dal14.techzone.ibm.com/sbodapati-porg/sandbox/ace-tk-customerdb-v3-http-cp4i-ace.apps.itz-xxxxxx.infra01-lb.dal14.techzone.ibm.com/customerdb/v3/customers
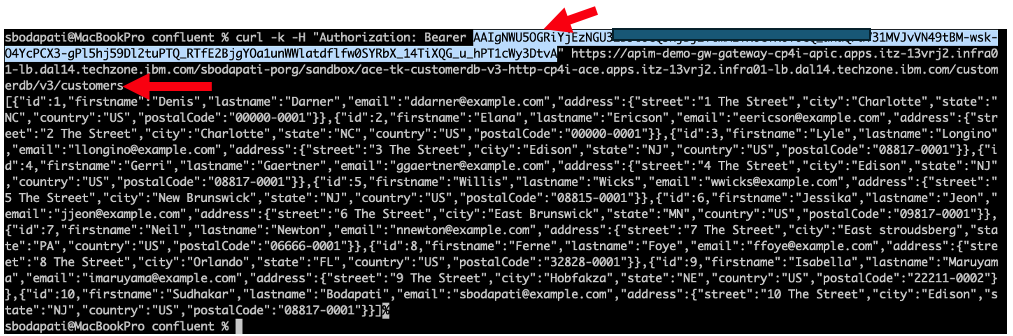
You should see the customers.
22. Feel free to test the rest of the operations. Testing will be similar to the testing that was completed in the “Create and Secure an API to Proxy an Existing REST Web Service” lab.
23. To prove that the token is being validated, you can modify the contents of the Access Token field. Click Send again and you will see an error response. Note: Modifying the beginning of the token will throw a Client id missing error. Modifying the middle or end of the token will throw the error below.
8. Summary
Congratulations, you have completed the Add OAuth Security to your API and use Lifecycle Controls to Version Your API lab. Throughout the lab, you learned how to:
-
Configure an OAuth 2.0 service with the Resource Owner Password grant type
-
Secure your API with OAUTH
-
Tested your API with OAUTH