IBM Integration PoT Labs Home page
IBM API Connect v12 - DataPower API Gateway lab
Create, Secure, Publish, Subscribe, and Test an API
Table of Contents
- 1. Introduction
- 2. IBM App Connect - Deploying the backend REST Service
- 3. Import an API into the Developer Workspace
- 4. Publish API
- 5. API Connect Developer Portal<
- 6. Test the API
- 7. Summary
1. Introduction
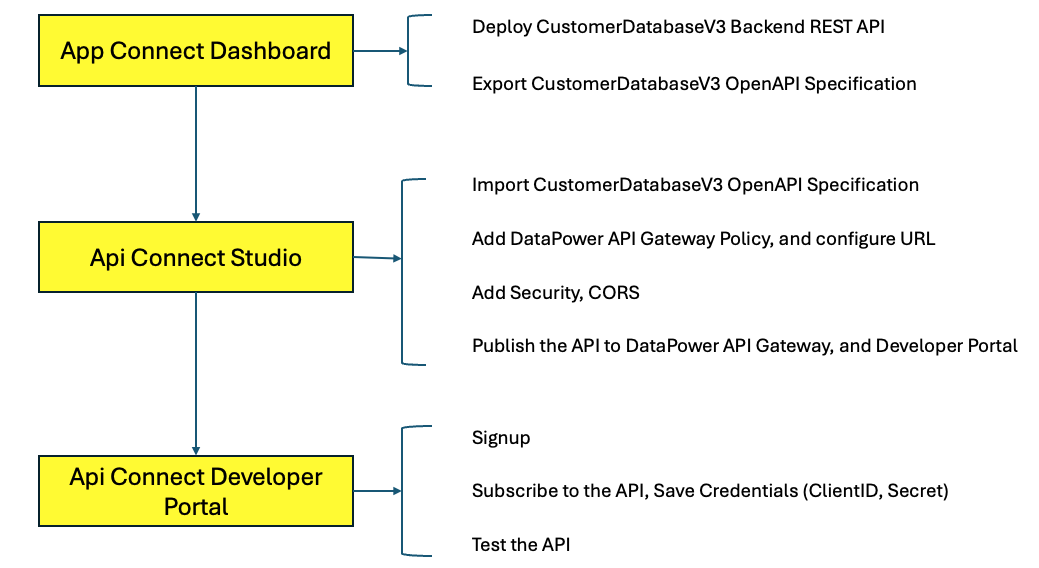
In this lab, you will get a chance to use the IBM API Connect (APIC) Studio and its intuitive interface to import and edit an API using the OpenAPI definition (YAML) of an existing Customer Database RESTful web service.
In this tutorial, you will explore the following key capabilities:
-
Creating an API by importing an OpenAPI definition for an existing backend REST service
-
Configuring ClientID/Secret Security, endpoints, CORS, and proxy to invoke an endpoint
-
Publish API to IBM DataPower API Gateway and to Developer Portal
-
Testing a REST API in the Developer Portal
What is IBM DataPower API Gateway?
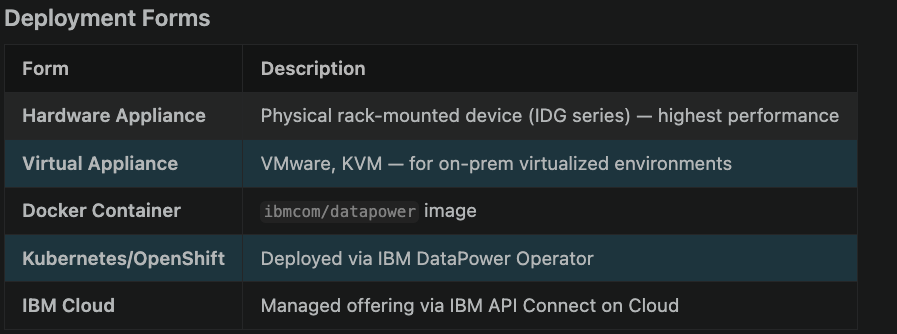
IBM DataPower API Gateway is a purpose-built, high-performance enterprise API gateway that provides security, integration, and traffic management for APIs and web services. It is one of IBM’s flagship middleware products, originally designed as a hardware appliance and now available as software and containers.
-
Core Purpose It acts as a policy enforcement point between API consumers (clients) and API providers (backend services) — handling security, transformation, routing, and monitoring without requiring changes to backend applications.
-
Typical Use Cases API Security Gateway — Protect internal services from external consumers
B2B Integration — Secure partner-facing EDI/AS2 transactions
SOA/ESB offload — Move security and transformation out of the ESB
Regulatory compliance — Financial services, healthcare (HIPAA), government
Microservices security — North-south traffic enforcement in Kubernetes
2. IBM App Connect - Deploying the backend REST Service
First, you will deploy a Customer Database REST service and then you will download the OpenAPI file for the Customer Database REST service that you deployed.
-
In a browser, enter the URL for the Platform Navigator URL that is provided by your instructor.
-
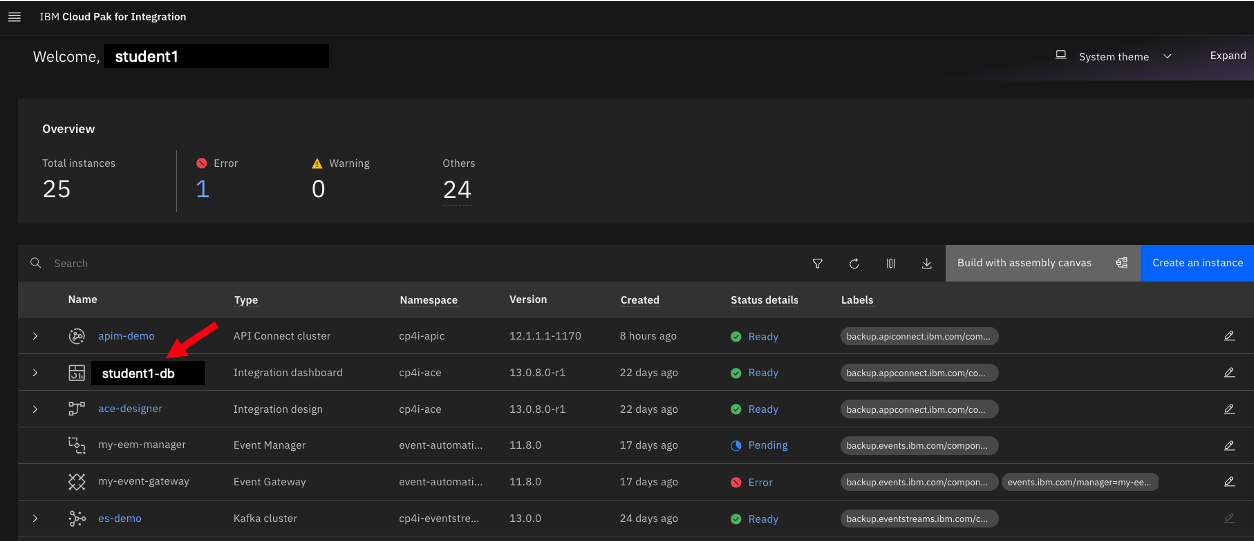
Filter instances by the student(number). You will see your instances.(br)
-
Navigate to the App Connect Dashboard.
-
Click on the Dashboard icon in the left navigation.

-
For this lab, we already have the REST service built and available as a bar file. You can download the CustomerDatabaseV3.bar file for the service **here**.
-
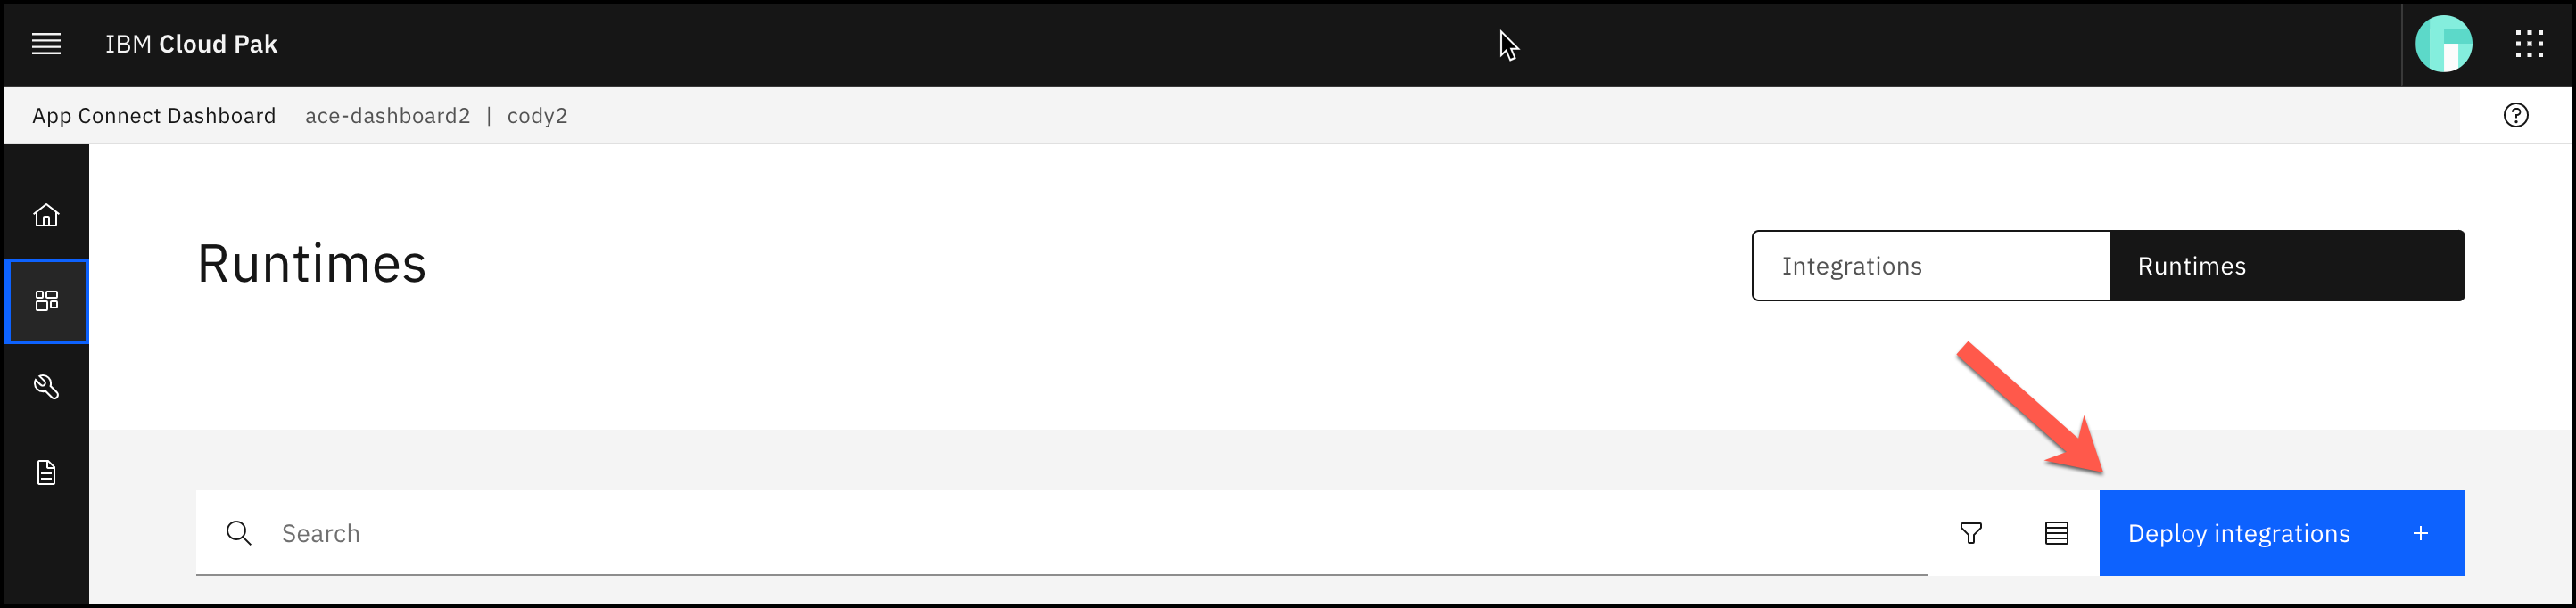
Click on Deploy integrations.
-
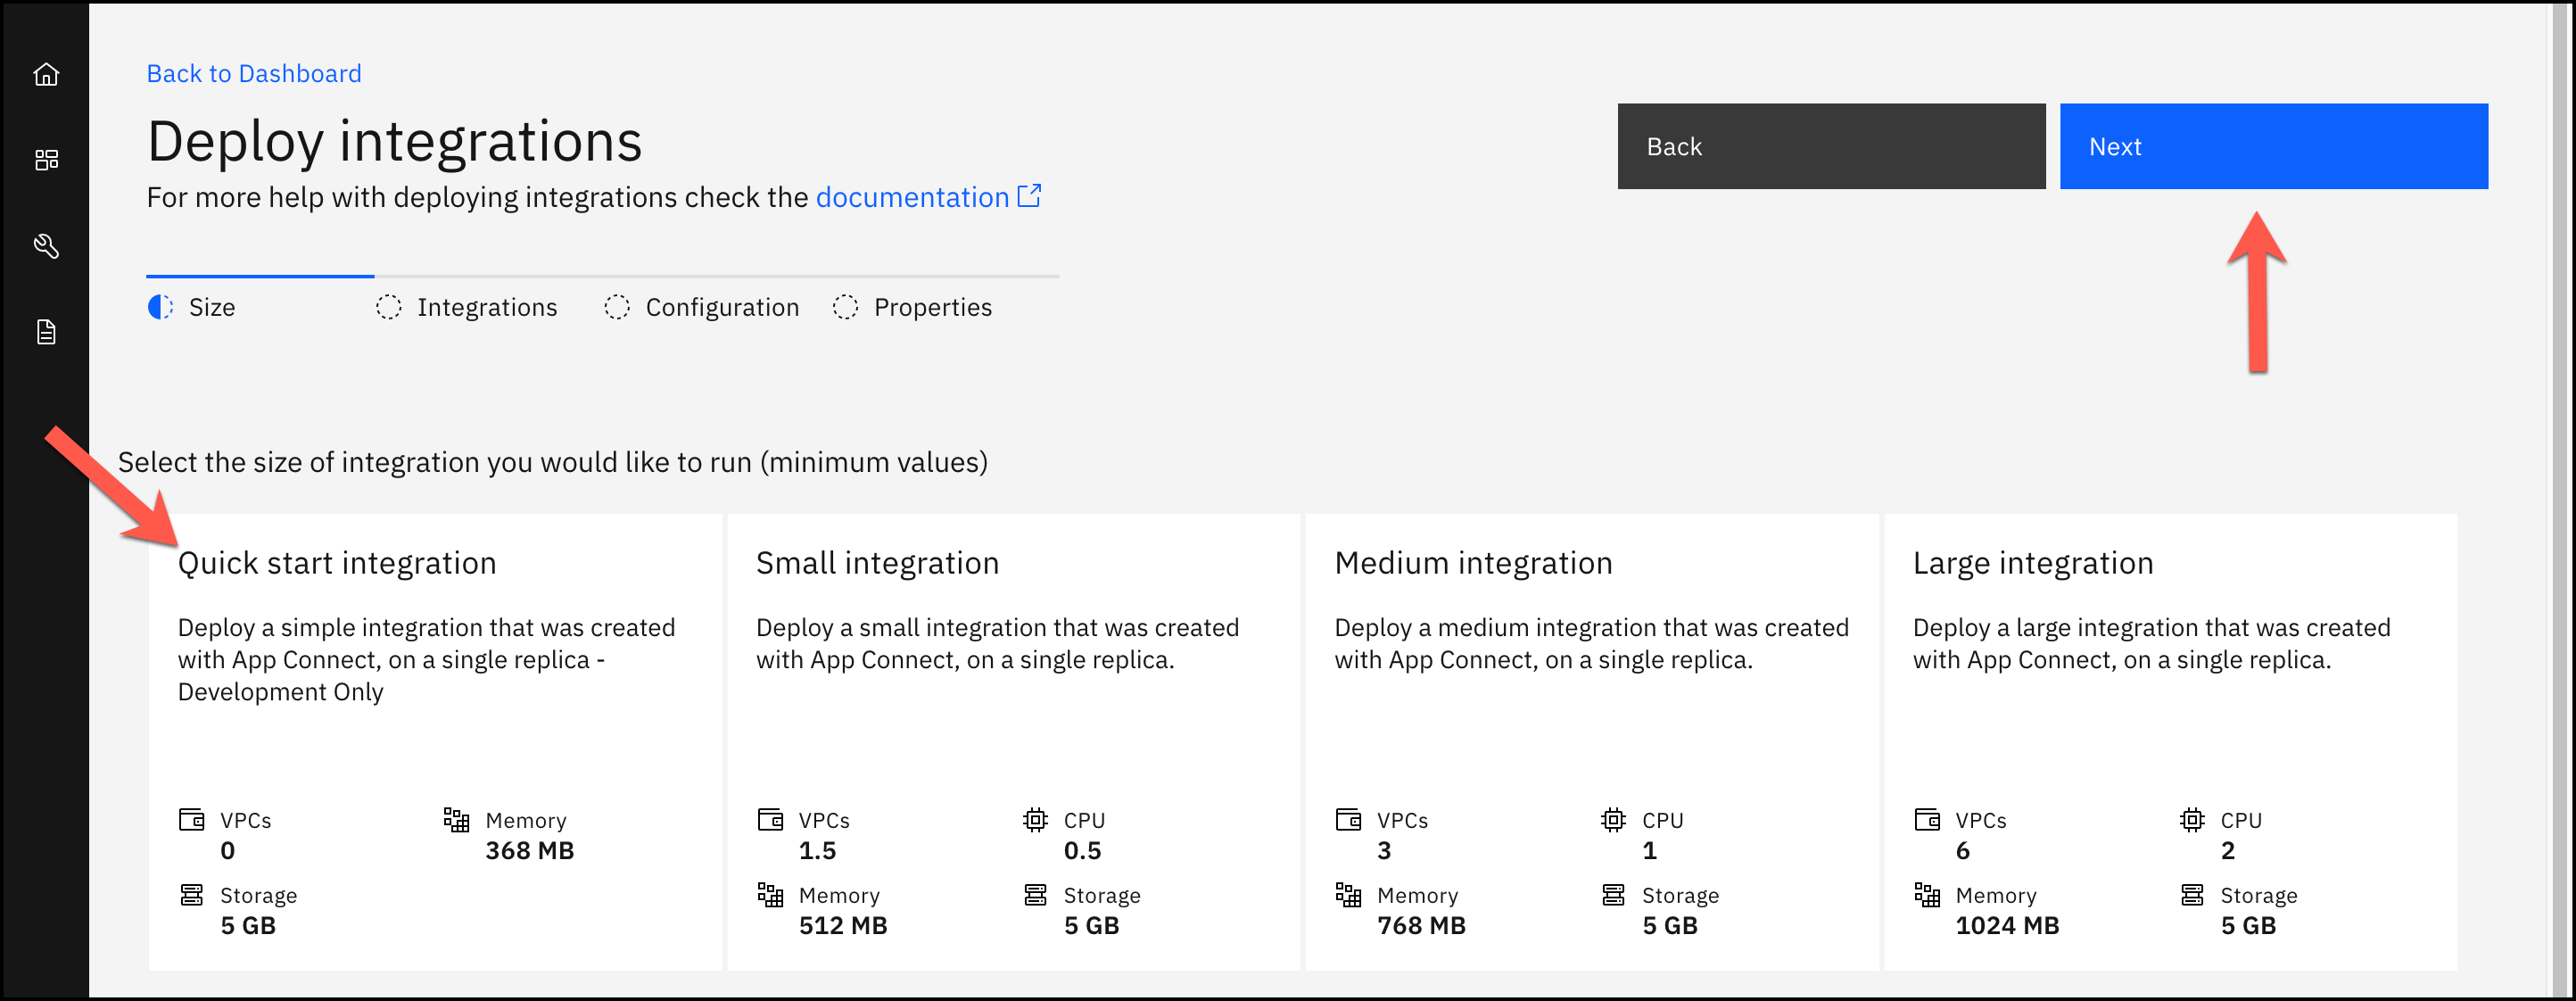
Click Quick start integration and click Next.
-
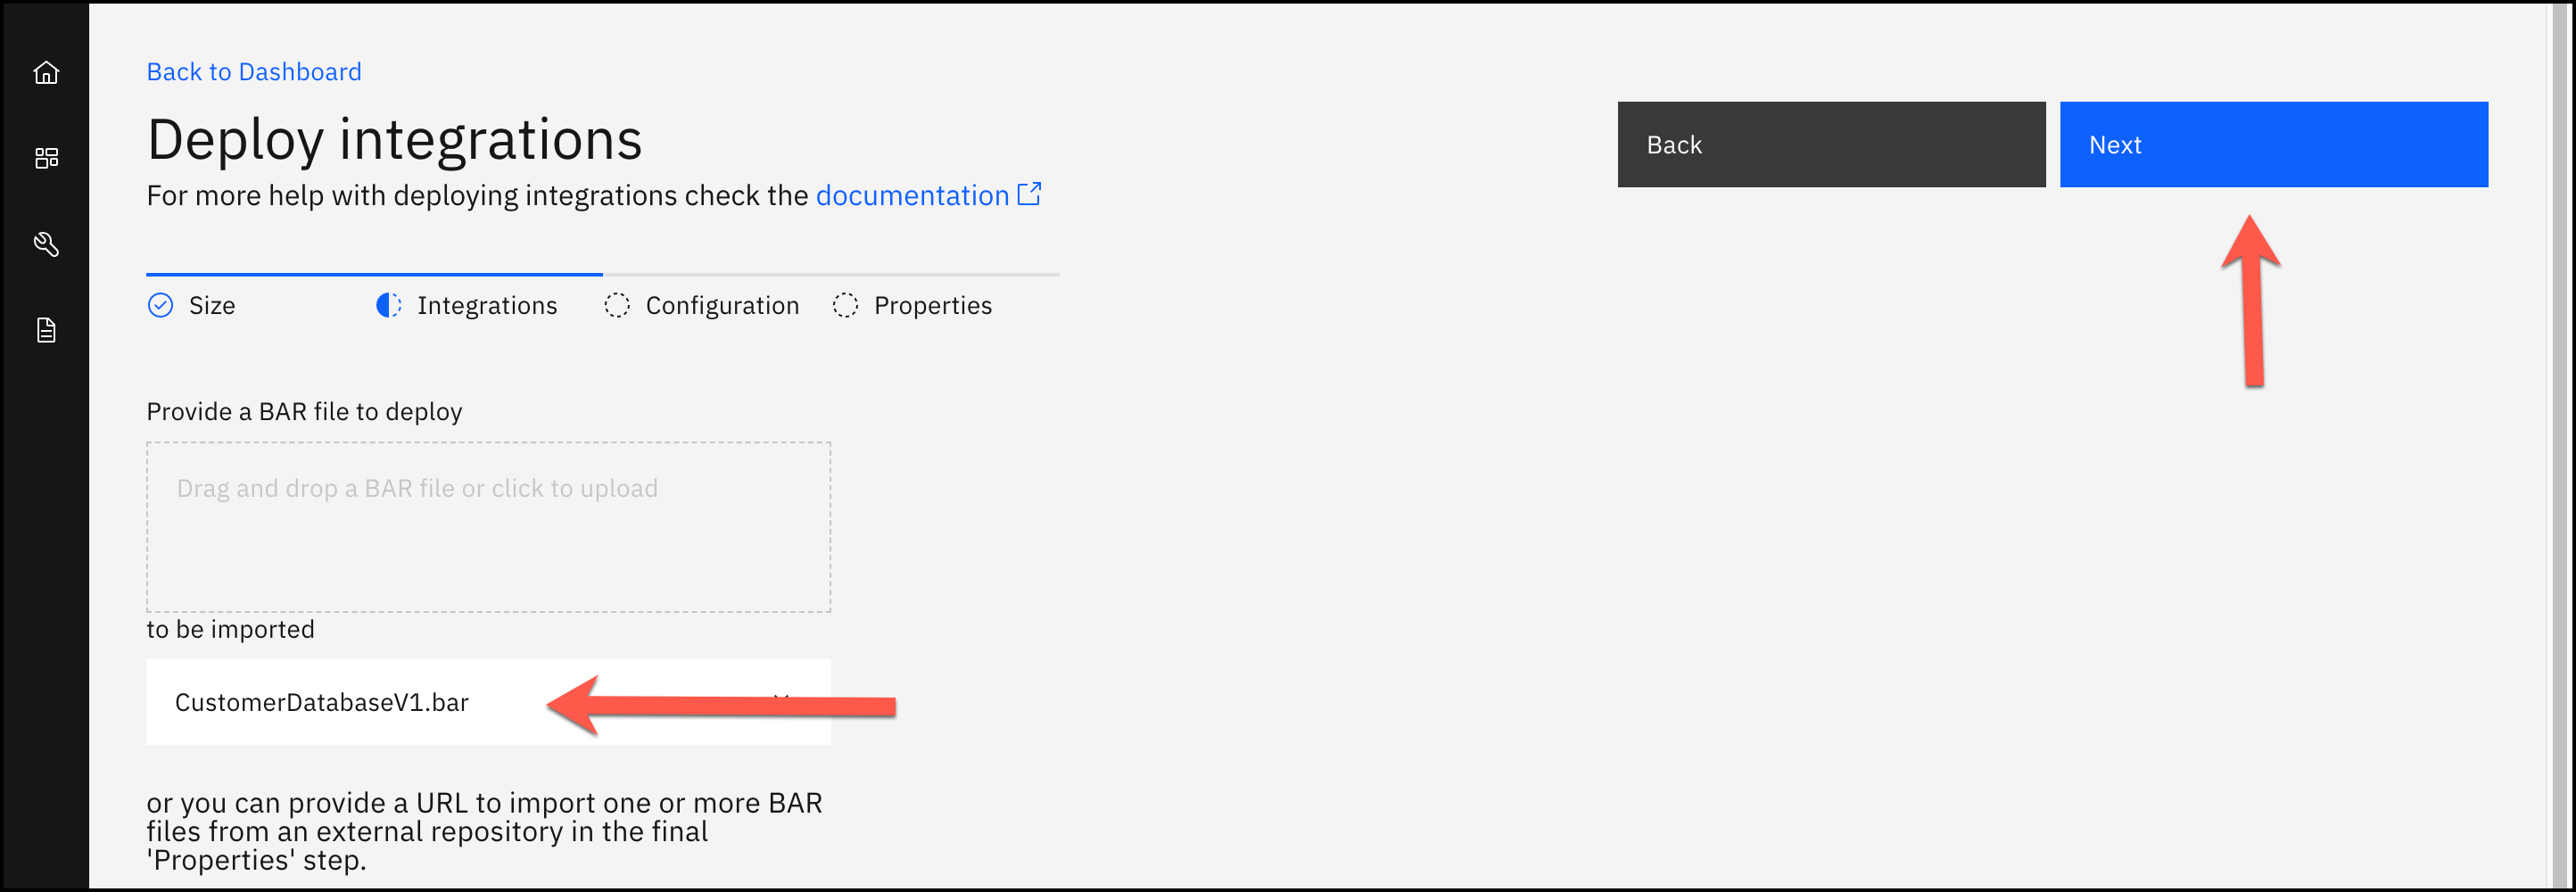
Drag and drop the BAR file that you just downloaded or click to upload. Once you have dragged and dropped or uploaded, you will see the bar file listed under to be imported. Click Next.
-
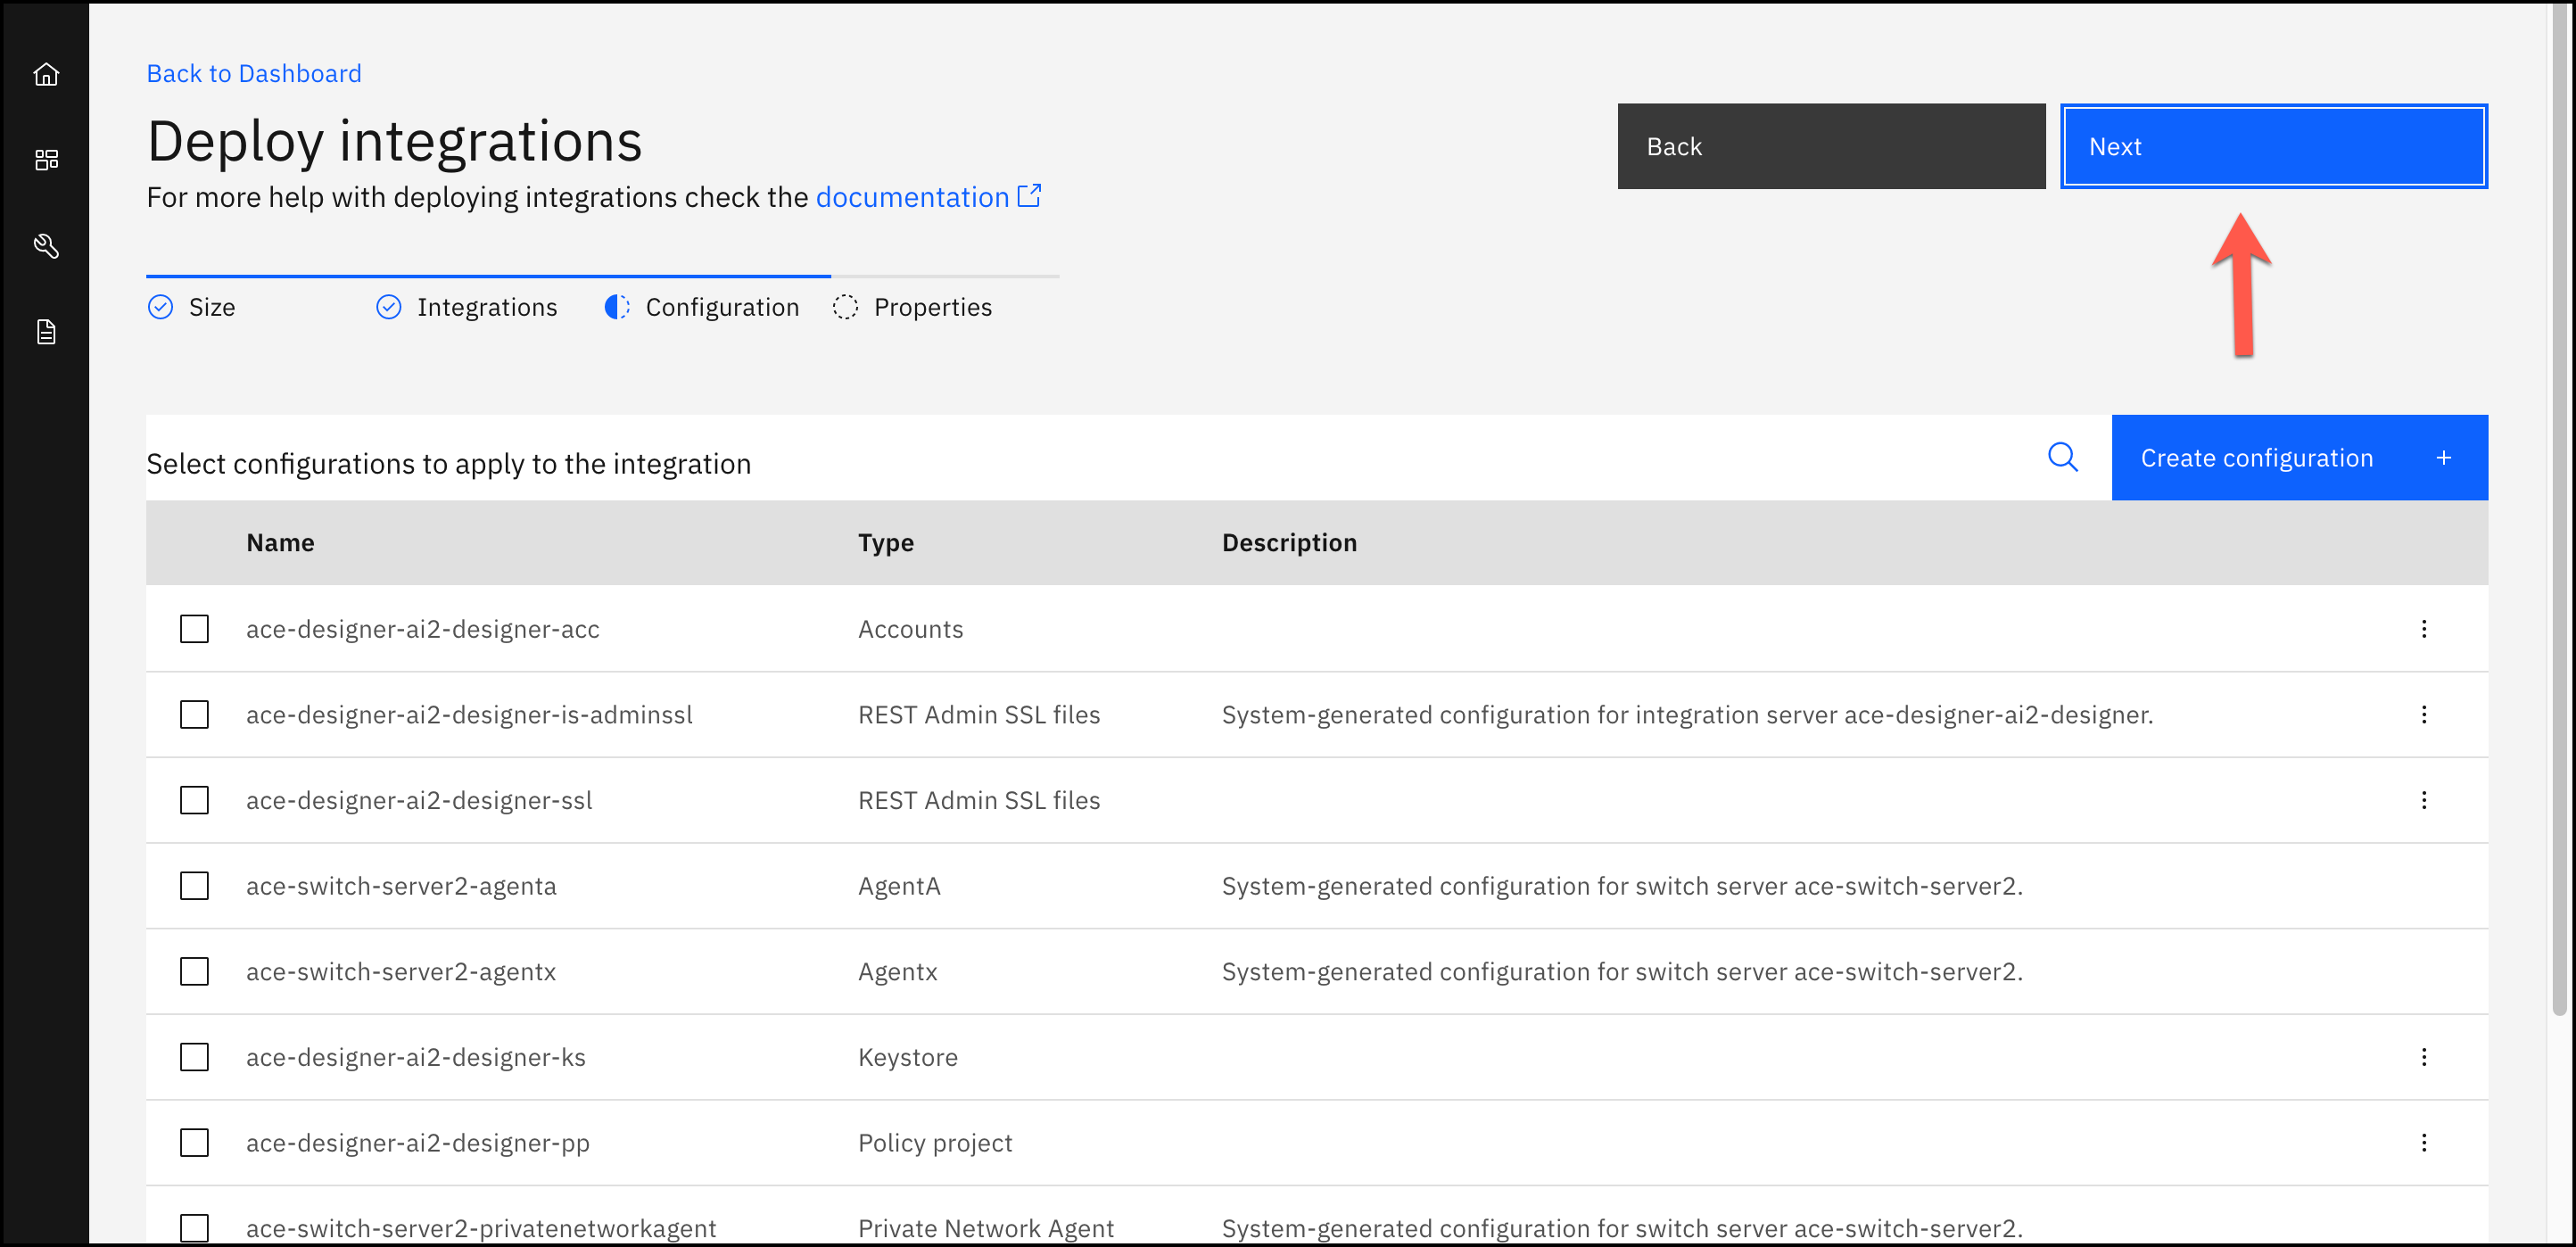
Click Next.
-
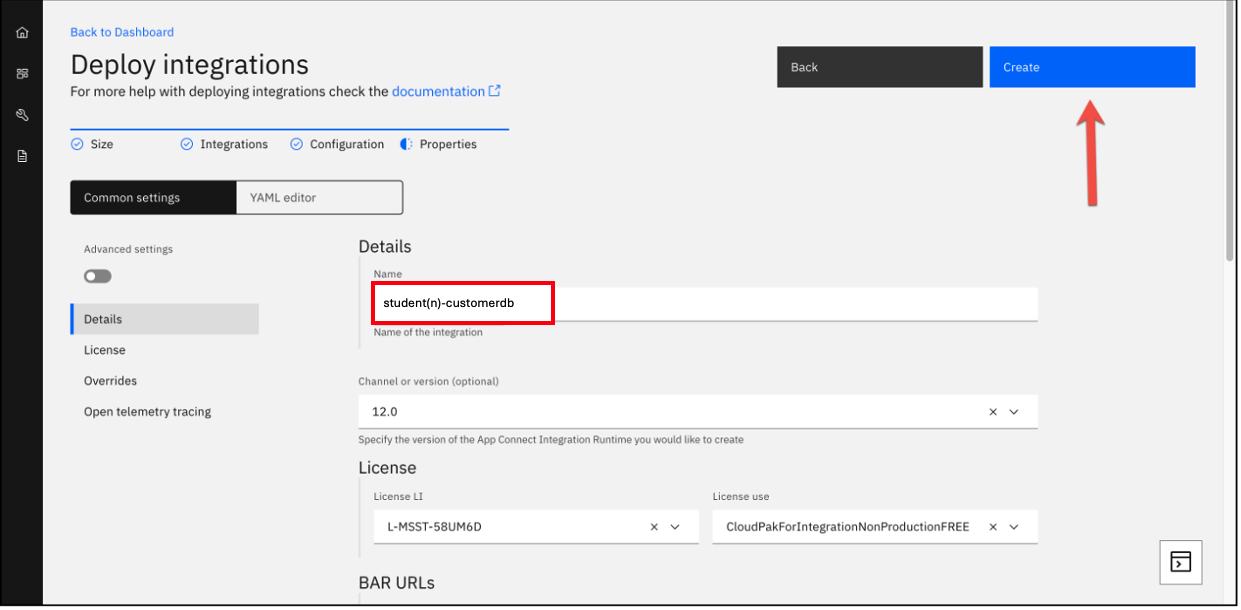
Give the Integration Server a Name (e.g., student(n)-customerdb) and click Create. Replace (n) with your student number, for example student1-customerdb.
-
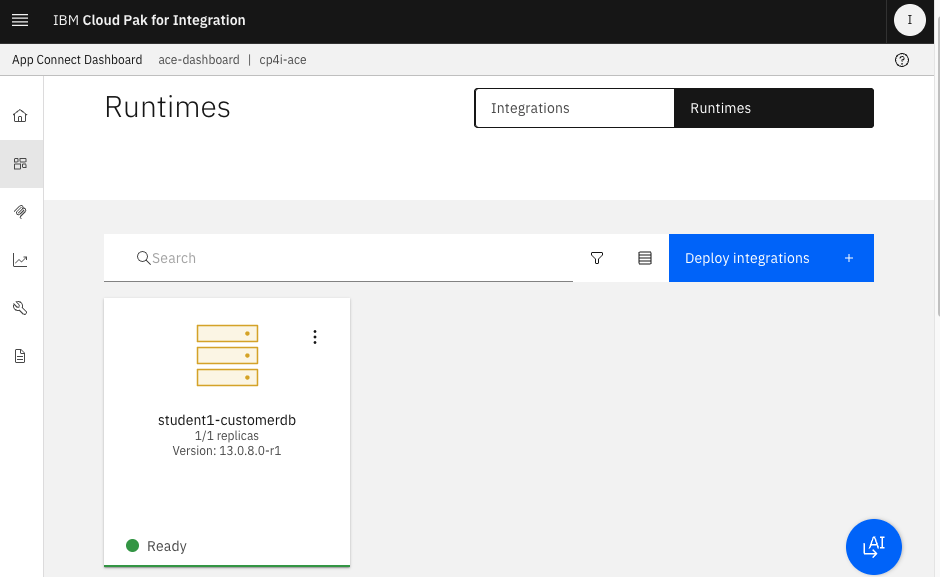
This will take you back to the Runtimes Dashboard where you will see your new server. It will likely be showing Pending while it is starting up the pod.
Note: It may take a several minutes to start up. You can refresh the page. Once it is up and running it will show the following:
Click on the newly created Runtime.
-
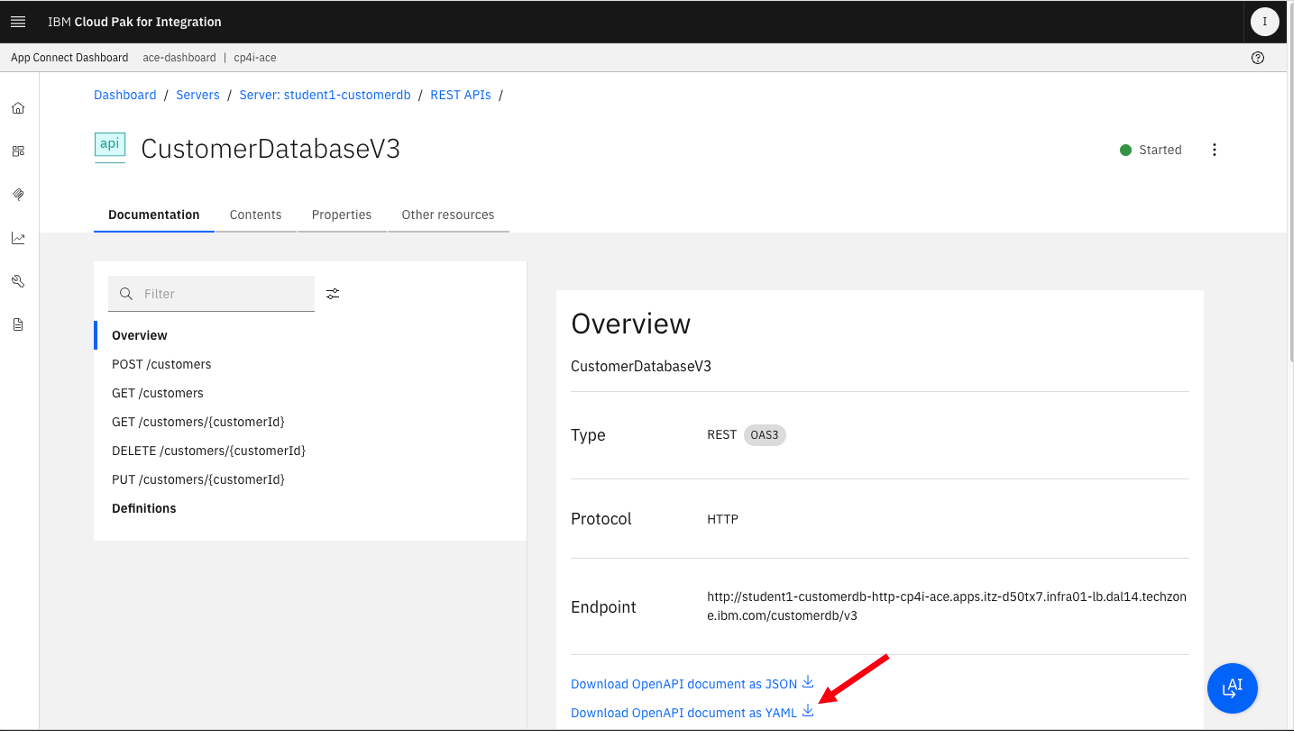
Confirm that the Overview tab is selected and click Download OpenAPI Document As JSON (or) Download OpenAPI Document As YAML. Either format can be used to import in API Connect.
3. IBM Api Connect - Import backend REST API
You will be importing the backend REST API definition into IBM API Connect Studio, then you will configure the API to enable Security, CORS, and finally publish the API to community.
-
Navigate to the API Connect instance.
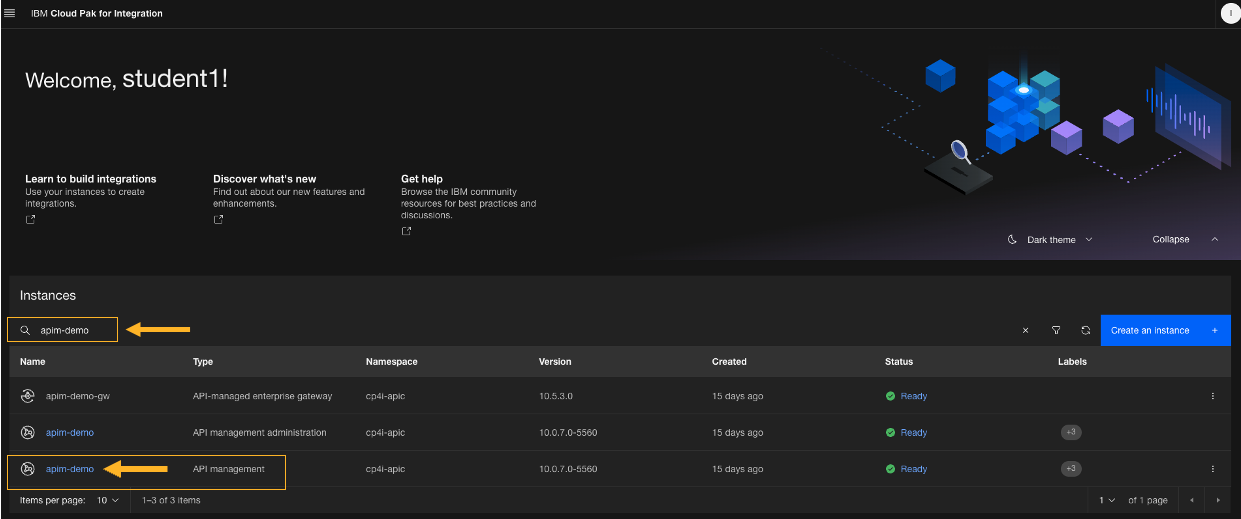
From the IBM Cloud Pak for Integration Platform Navigator, navigate to apim-demo an IBM API Connect capability.
Click on apim-demo instance.
-
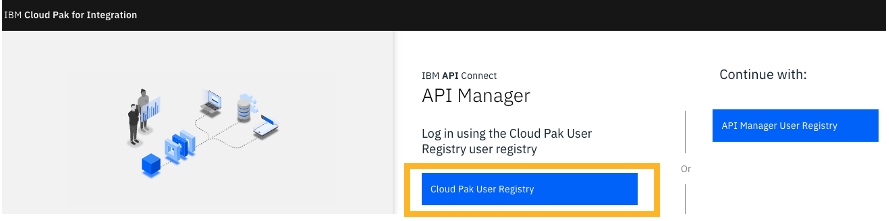
If this is your first time logging in, the login page is presented. Click Cloud Pak User Registry.
-
Confirm that you are in the provider organization for your username (upper right).
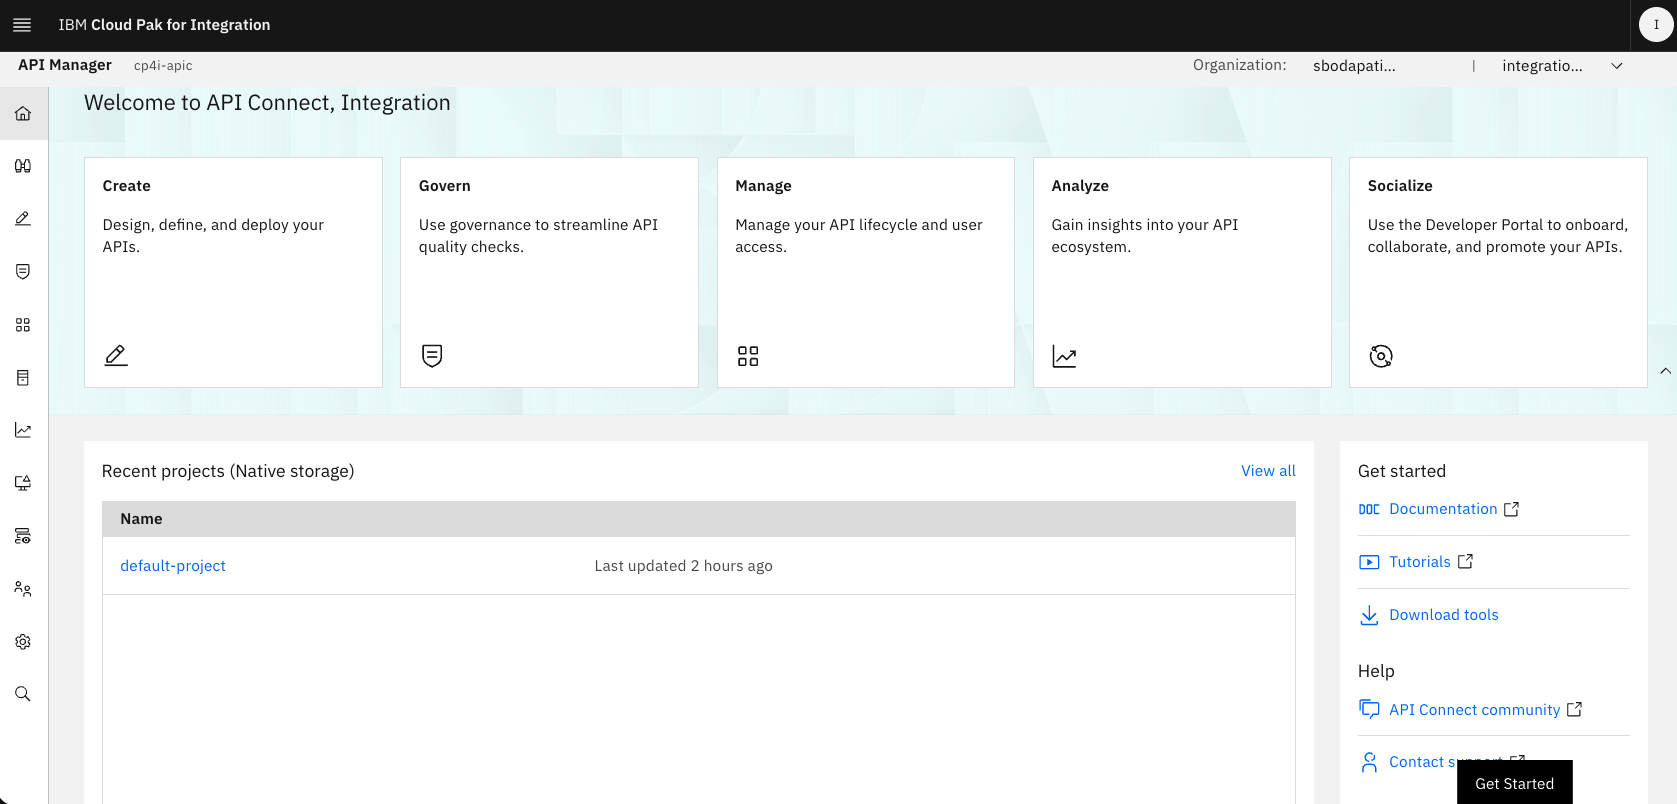
-
We are now able to begin to create APIs and Products. Click API Studio
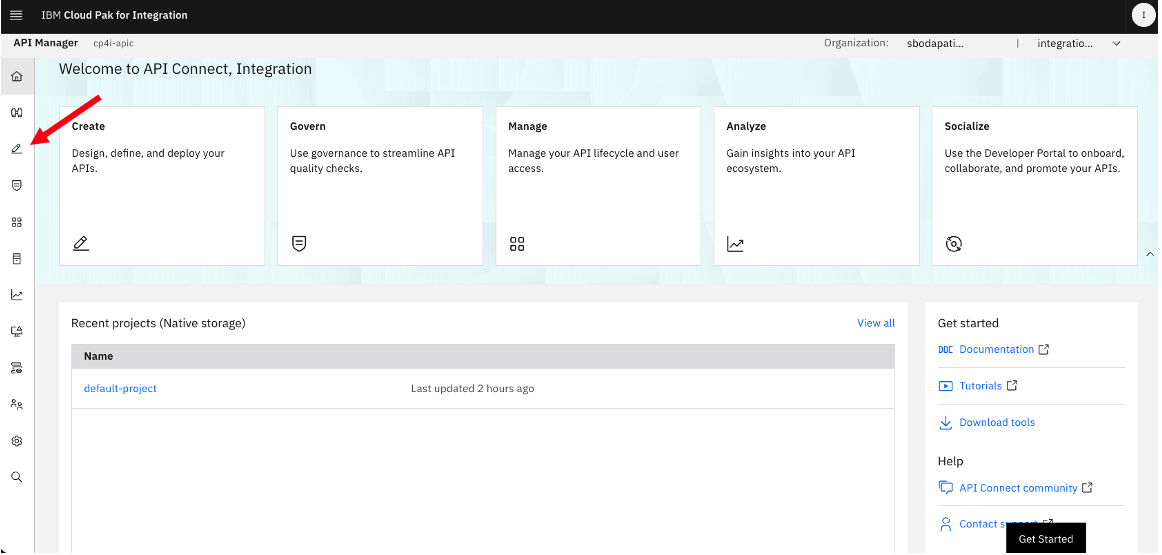
3a. Create project
-
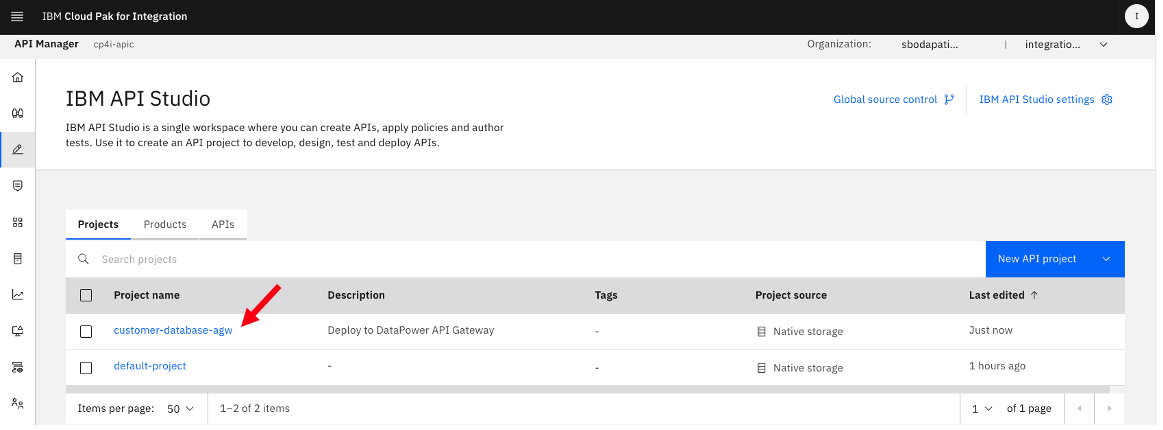
Click Create New Project.
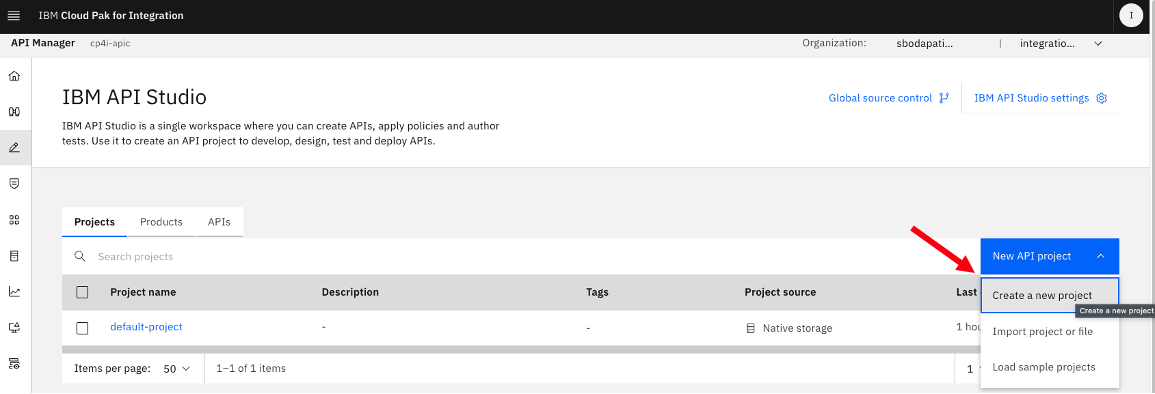
Name it customer-database-agw, where agw stands for the API Gateway.
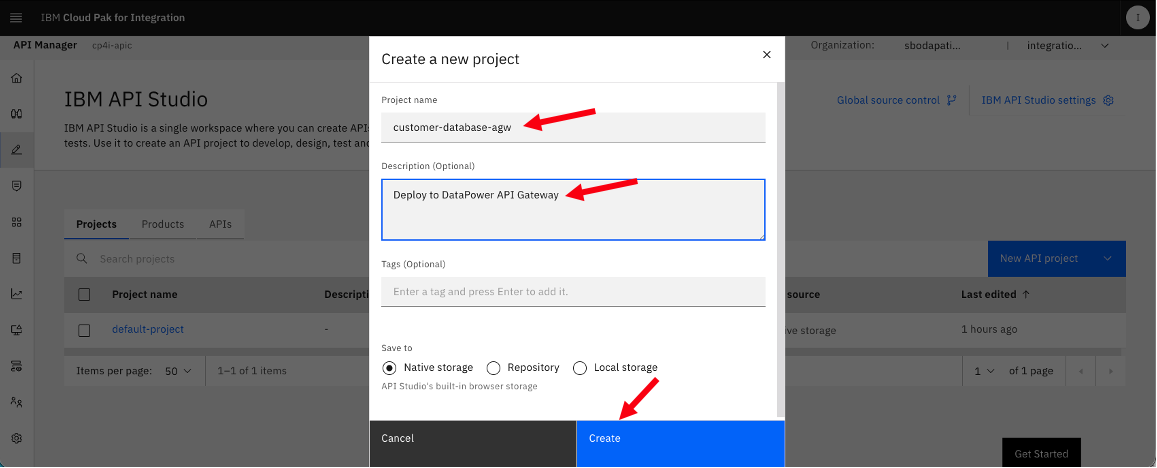
-
Open the project customer-database-agw.
3b. Add API
-
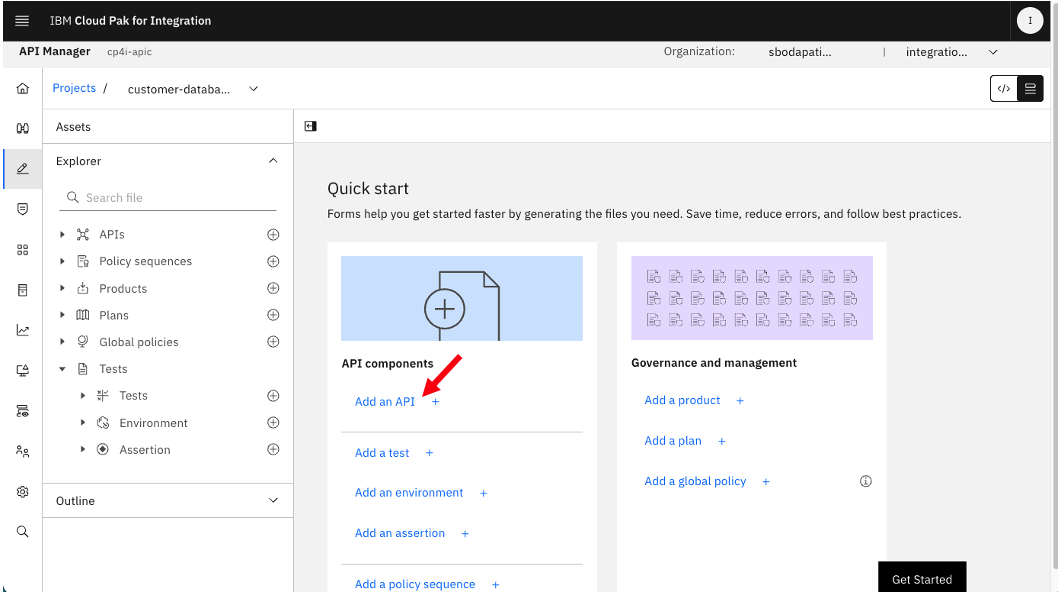
Click “Add API”
-
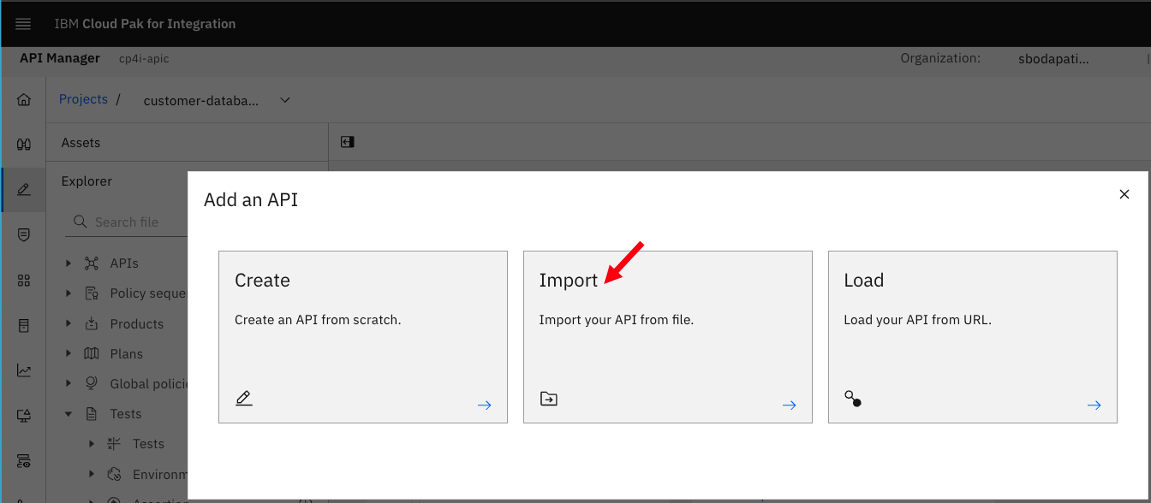
Click “Import”.
-
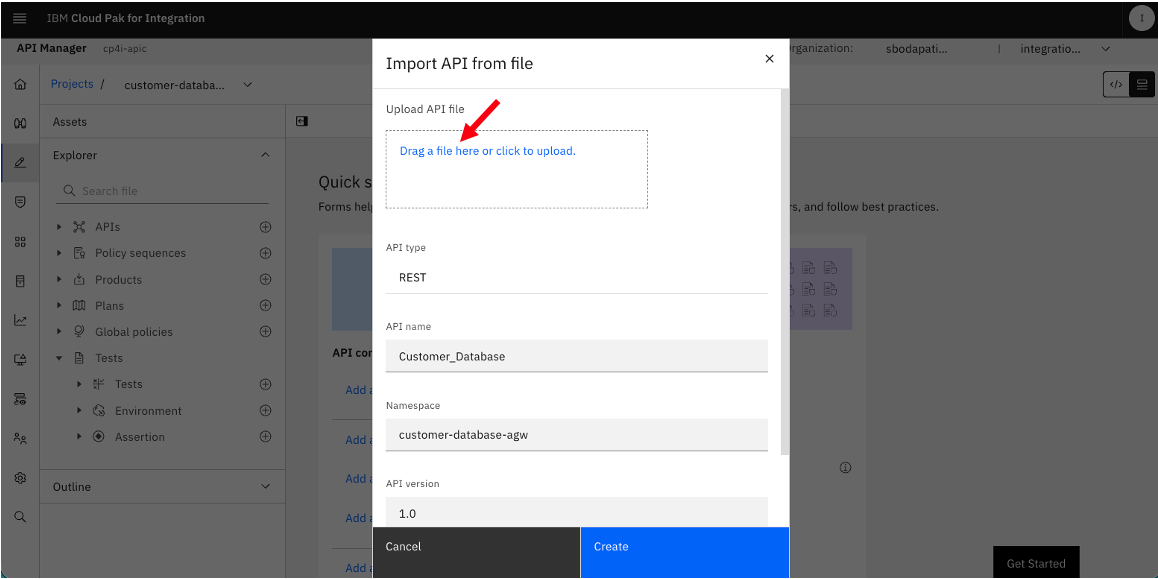
Click on “drag and drop”
-
Select Customer_Database-1.0.0.yaml

-
Click <Create>.
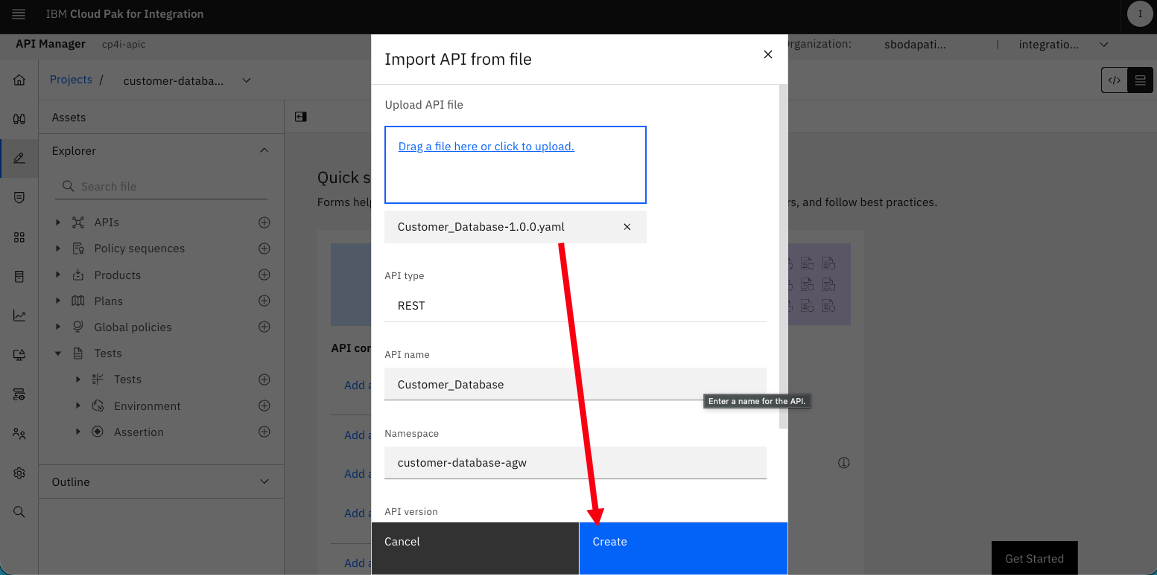
Your backend REST API has been imported successfully.
3c. Configure DataPower API Gateway Policy
-
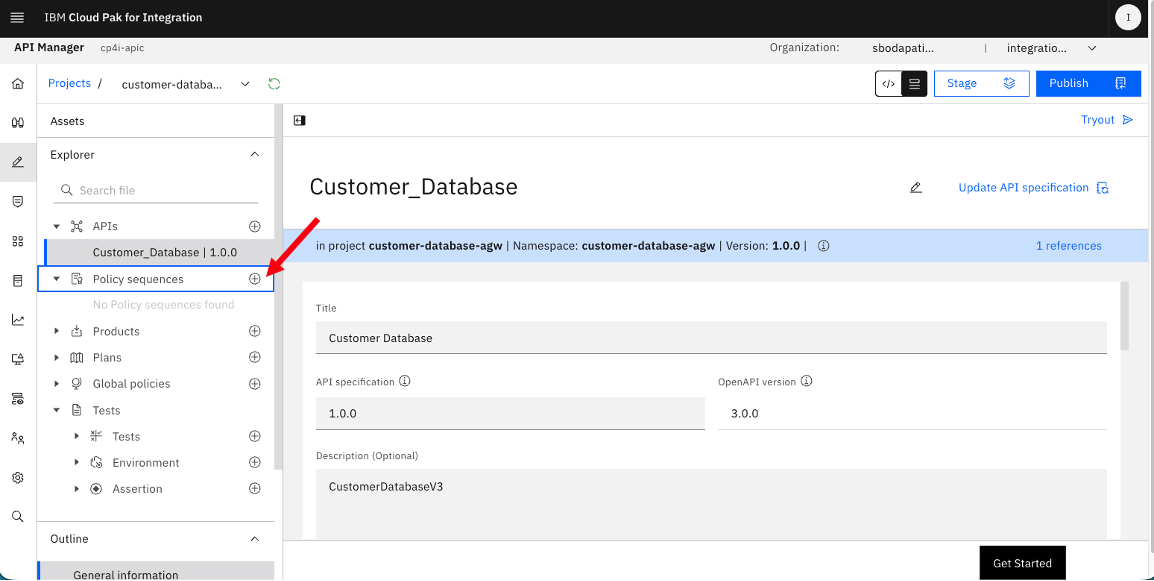
Click (+) sign next to “Policy Sequence”.
-
Select “DataPower API Gateway”, and name the policy as “customer-database-agw-policy”, then select the API using the drop-down.
Click <Add>.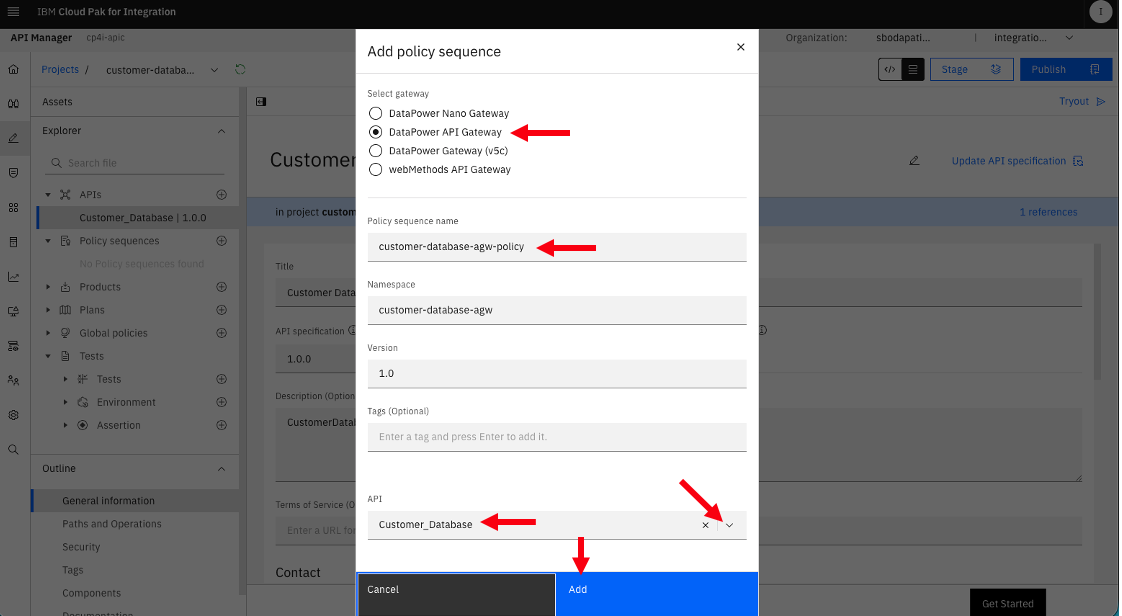
-
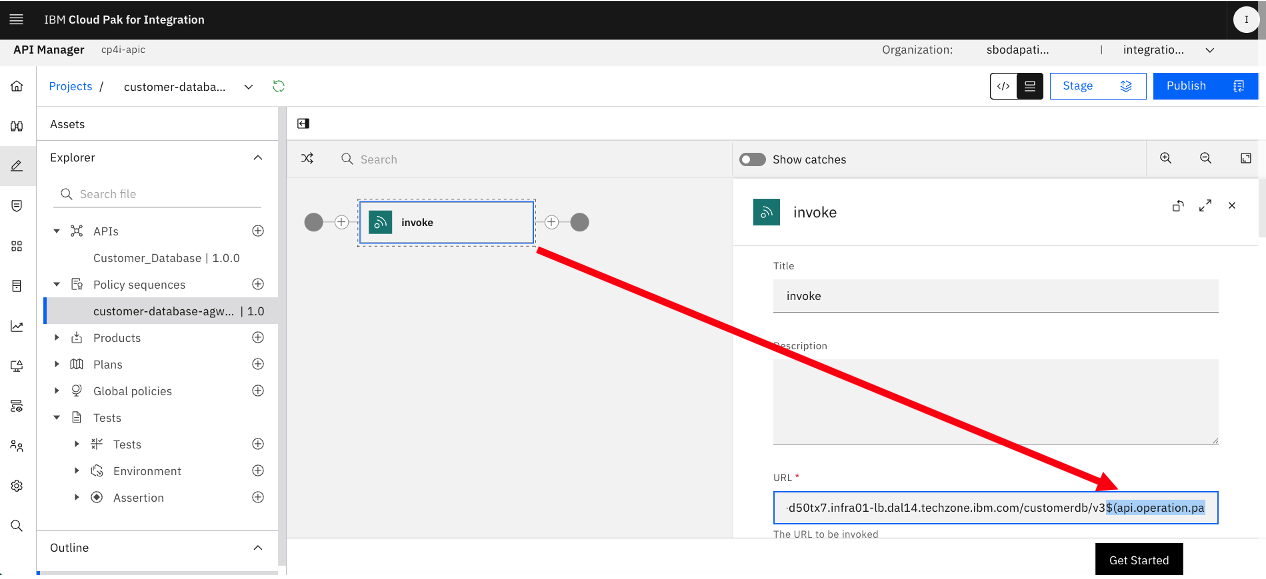
Click on “Invoke” policy.
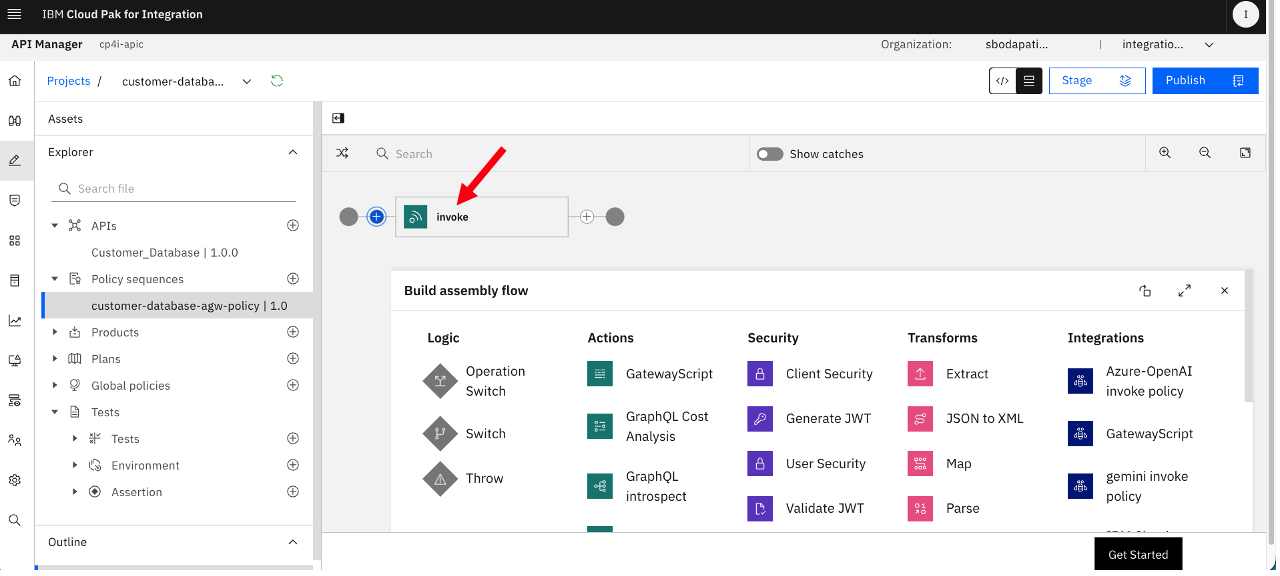
Append $(api.operation.path) at the end of the backend URL.
3d. Configure CORS
-
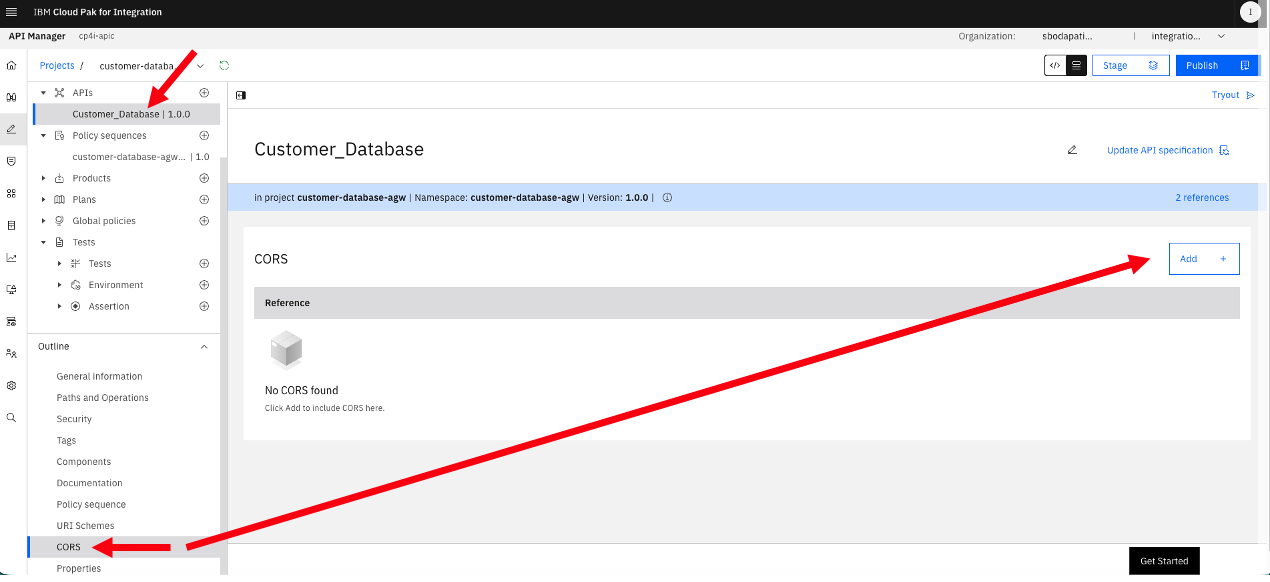
Click on the API Customer_Database under APIs section (left), then scroll down and click on CORS (Cross-Origin Resource Sharing).
-
Click <\Add>.
-
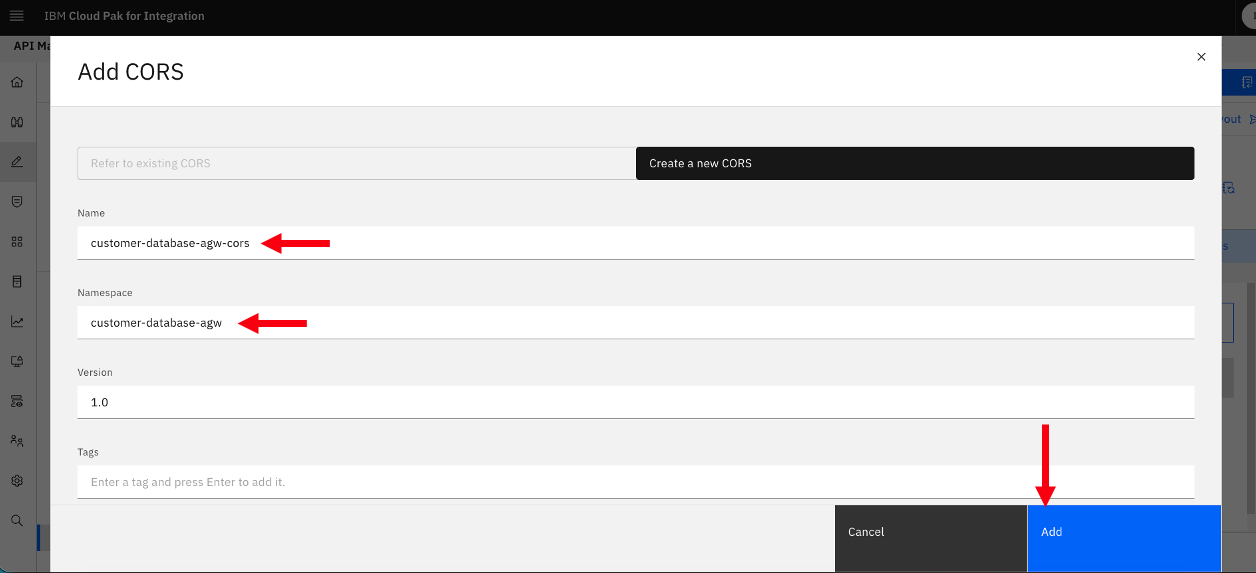
Enter name, namespace (project), then click <\Add>.
-
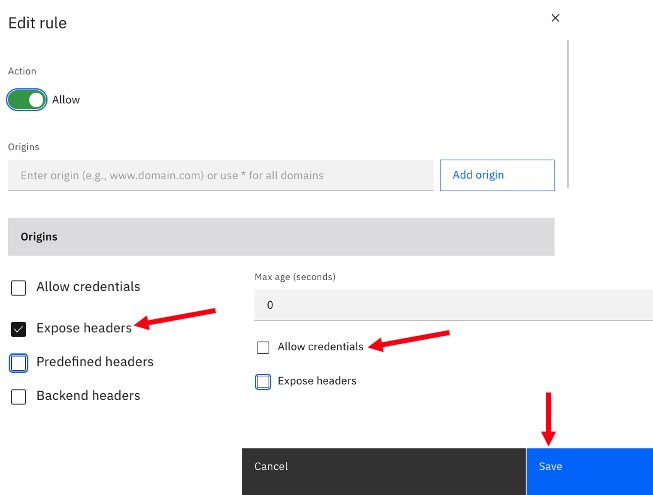
Edit CORS.
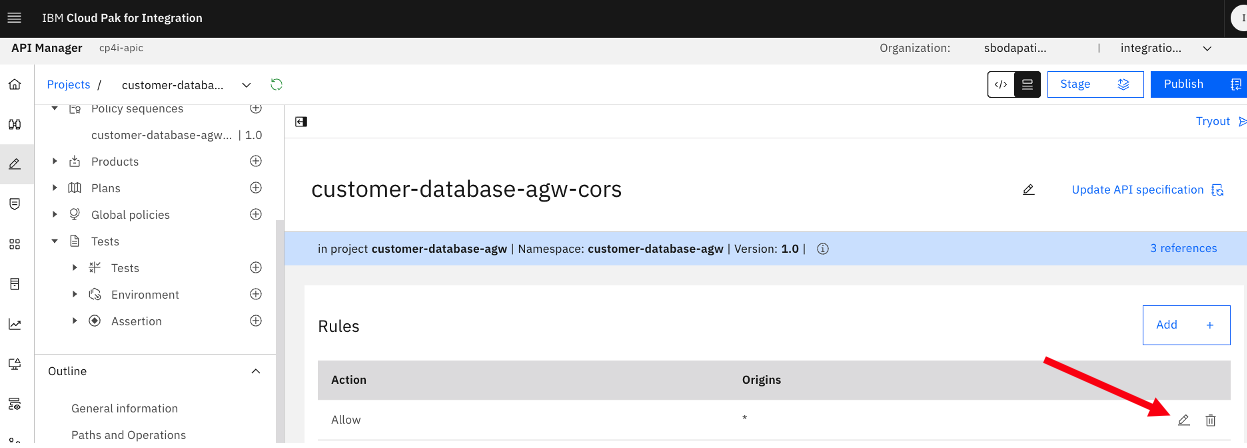
SCROLL down, and uncheck “Expose headers”, then Save.
3e. Configure Security
-
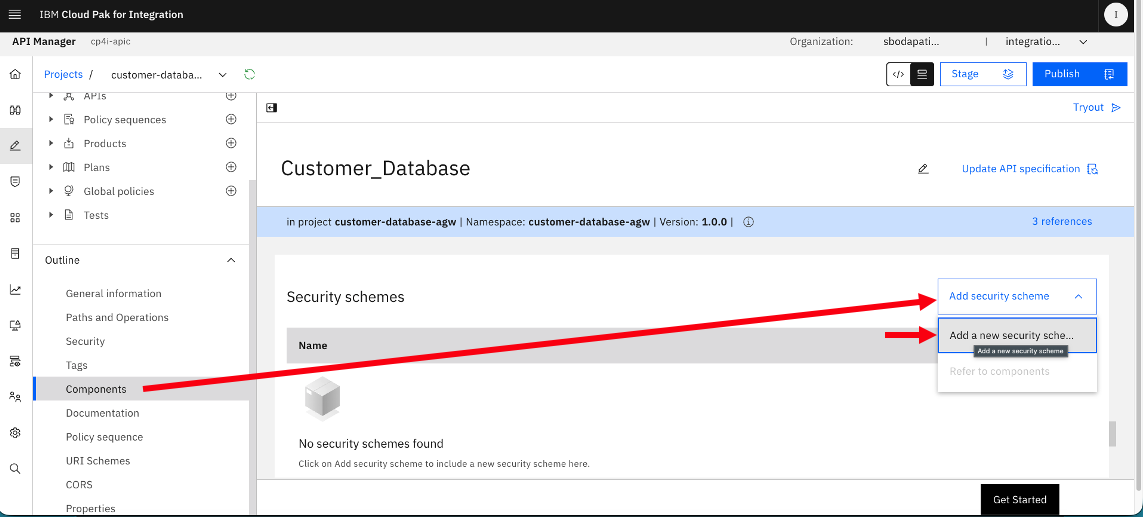
Click the Components section Scroll down to “Components” section, then on the right side again scroll down to “Security Schemas” section.
-
Click <\Add Security Schema>.
-
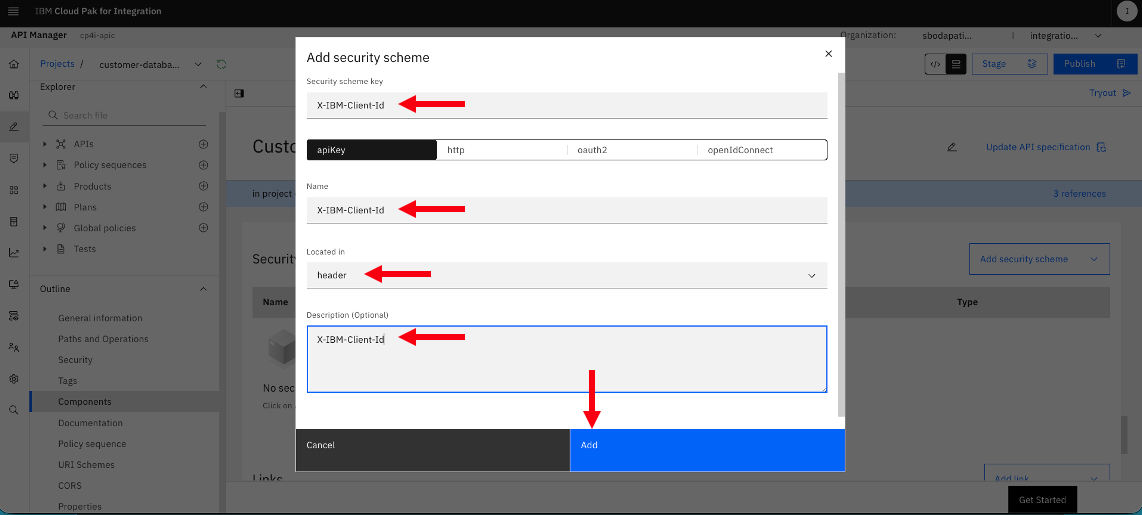
Add “X-IBM-Client-Id”.
-
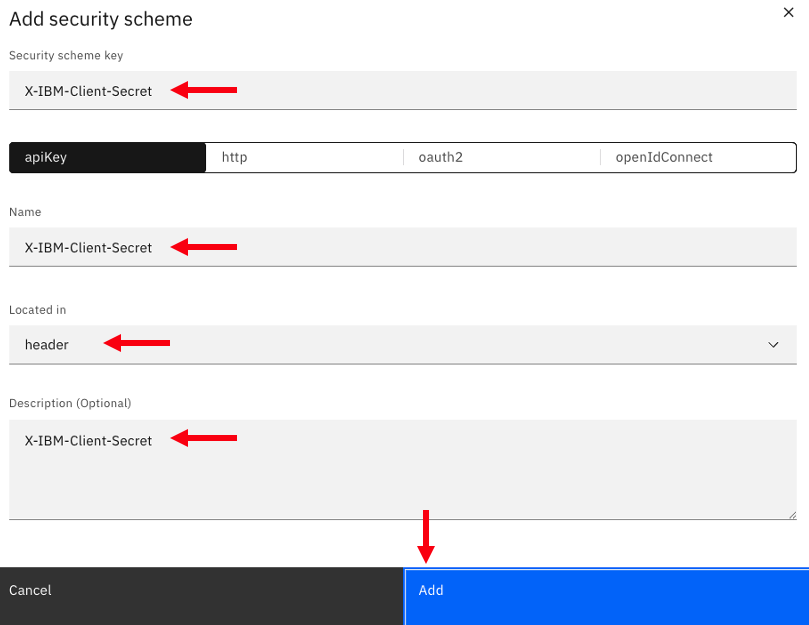
Similarly, add “X-IBM-Client-Secret”.
-
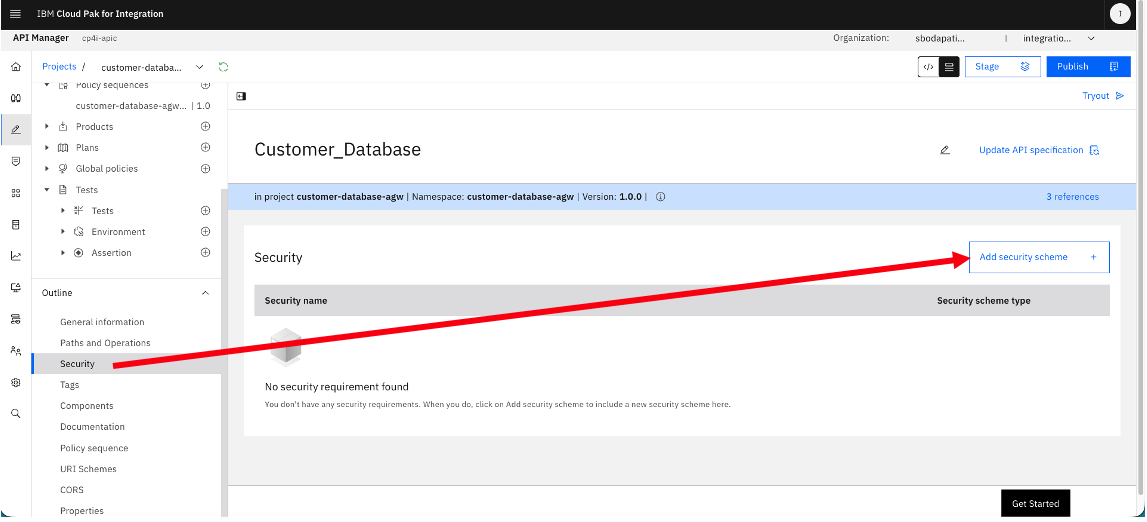
Now, click “Security” section and then click on <\Add Security Schema>.
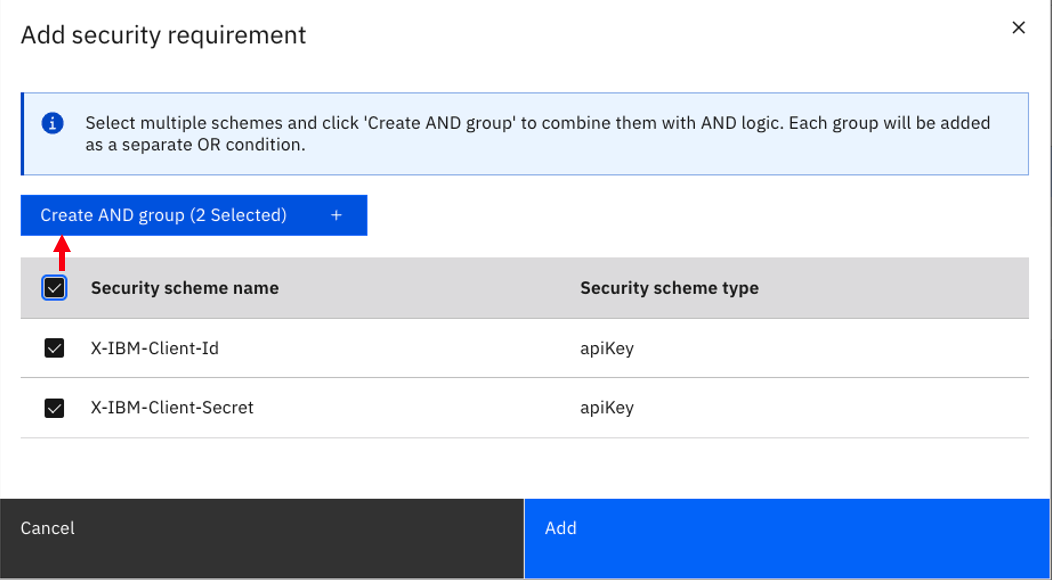
First, select both apikeys, then click on <\Create AND group (2 selected)> button.
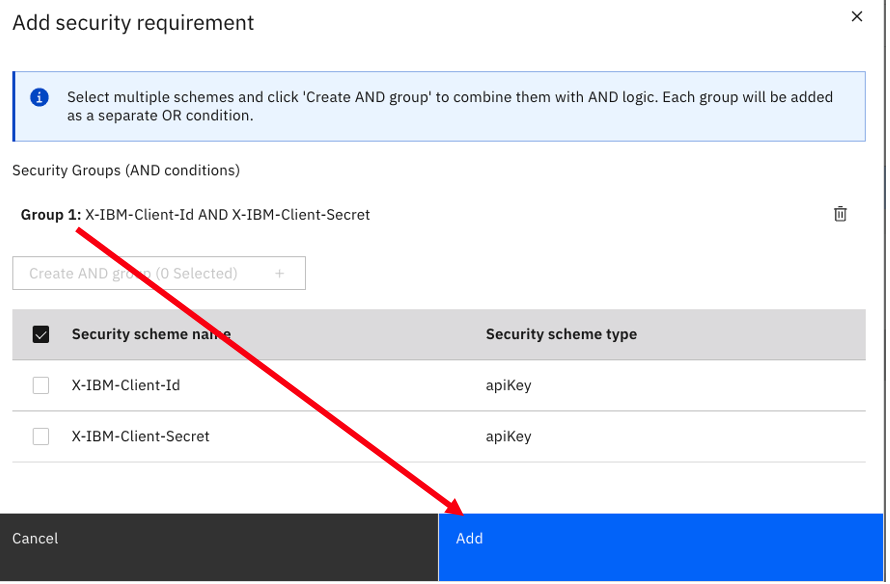
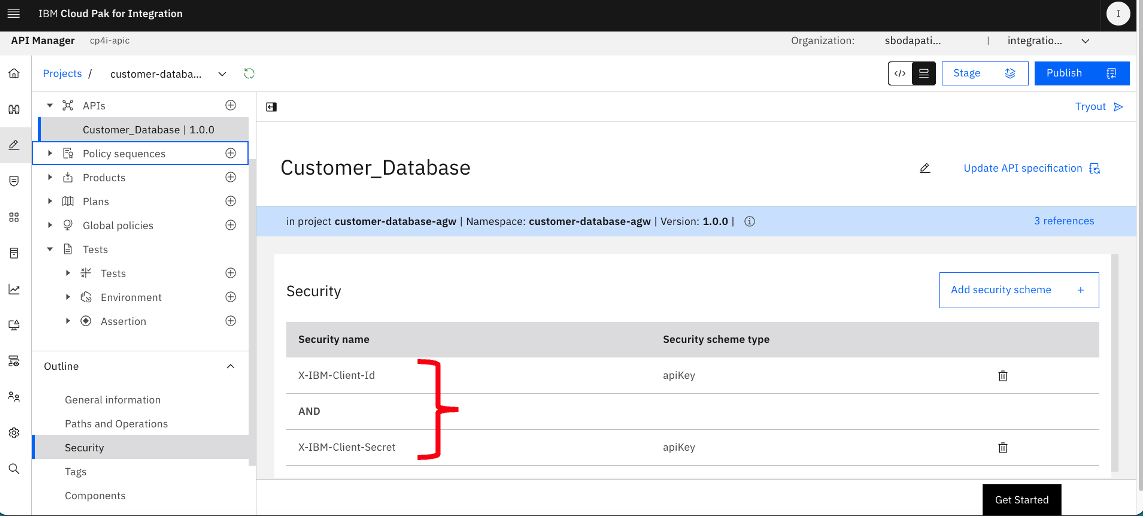
Now, click <\Add>.
4. Publish API
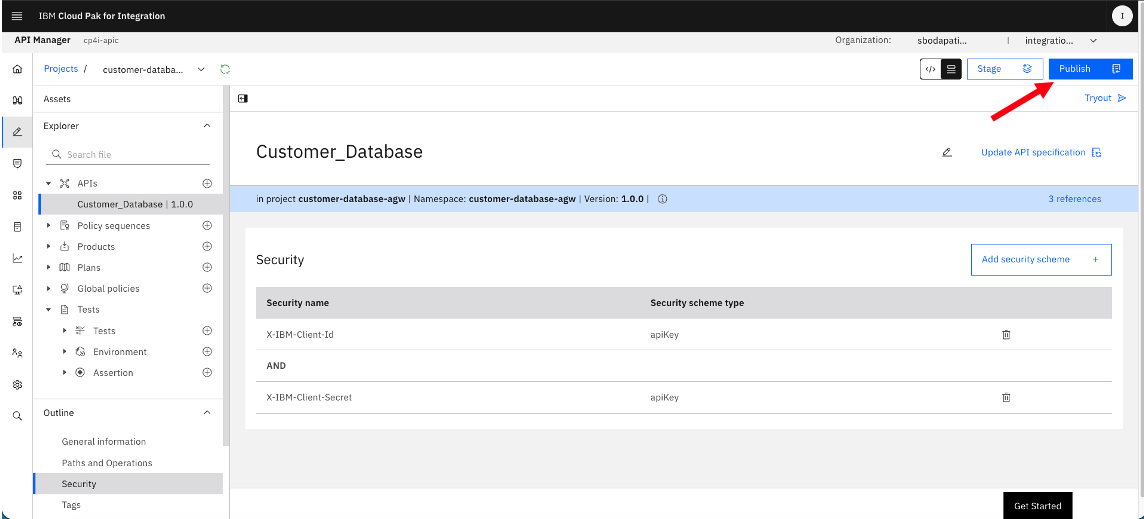
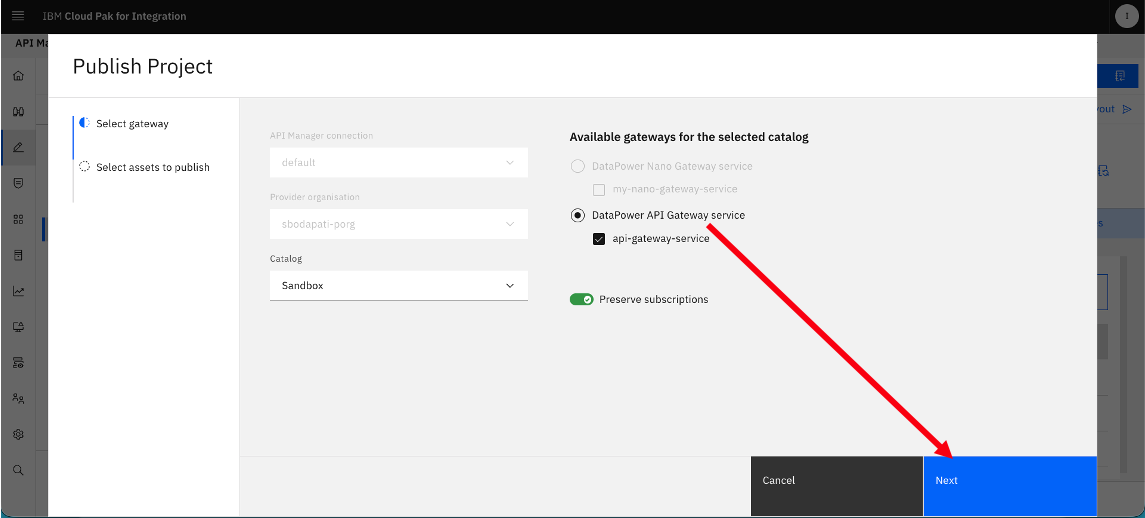
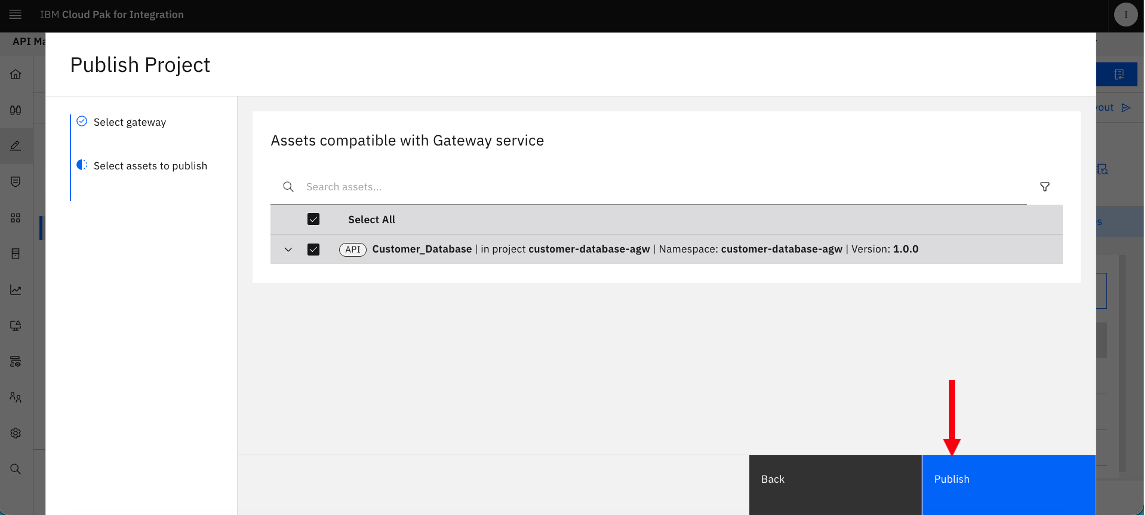
Here, you will publish the API to IBM DataPower API Gateway and Developer Portal community for consuming the API.
-
Click on “Publish”
-
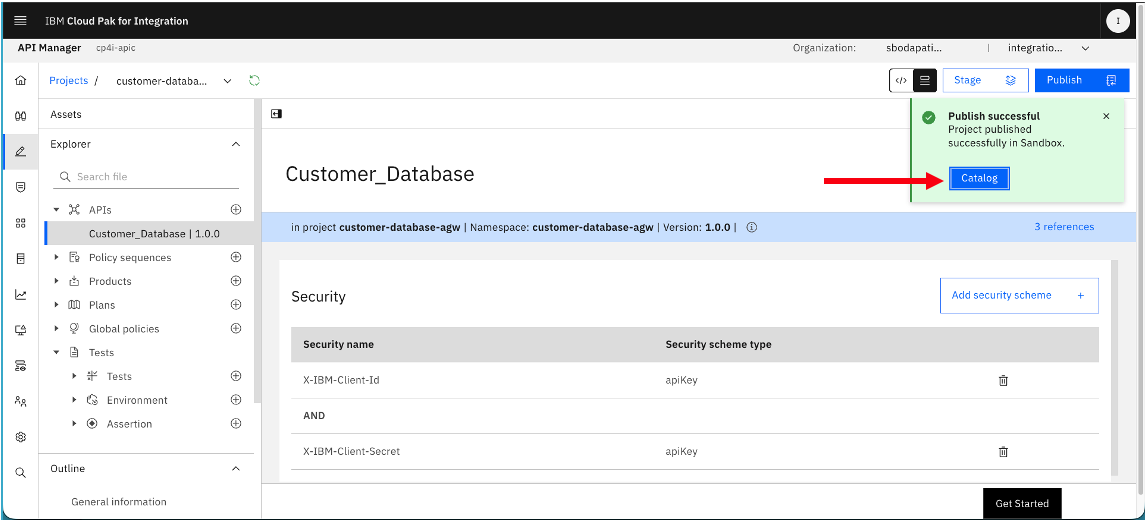
Click on Catalog button. Don’t worry if that little window disappears quickly, you should be able to access the Catalog through Manage section in the left.
-
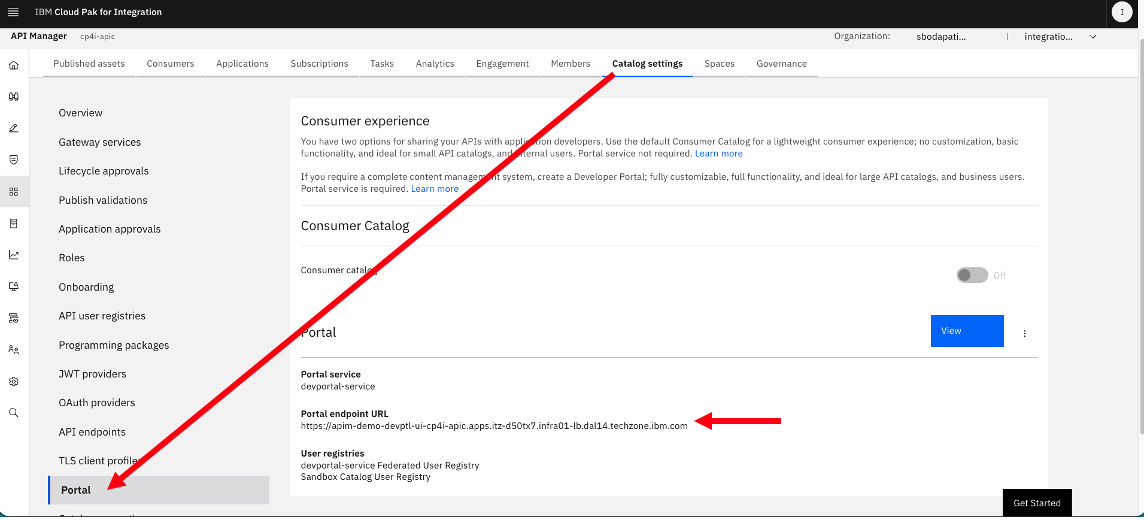
Navigate to the Portal Section under Catalog Settings, then click on the Portal URL.
5. API Connect Developer Portal
-
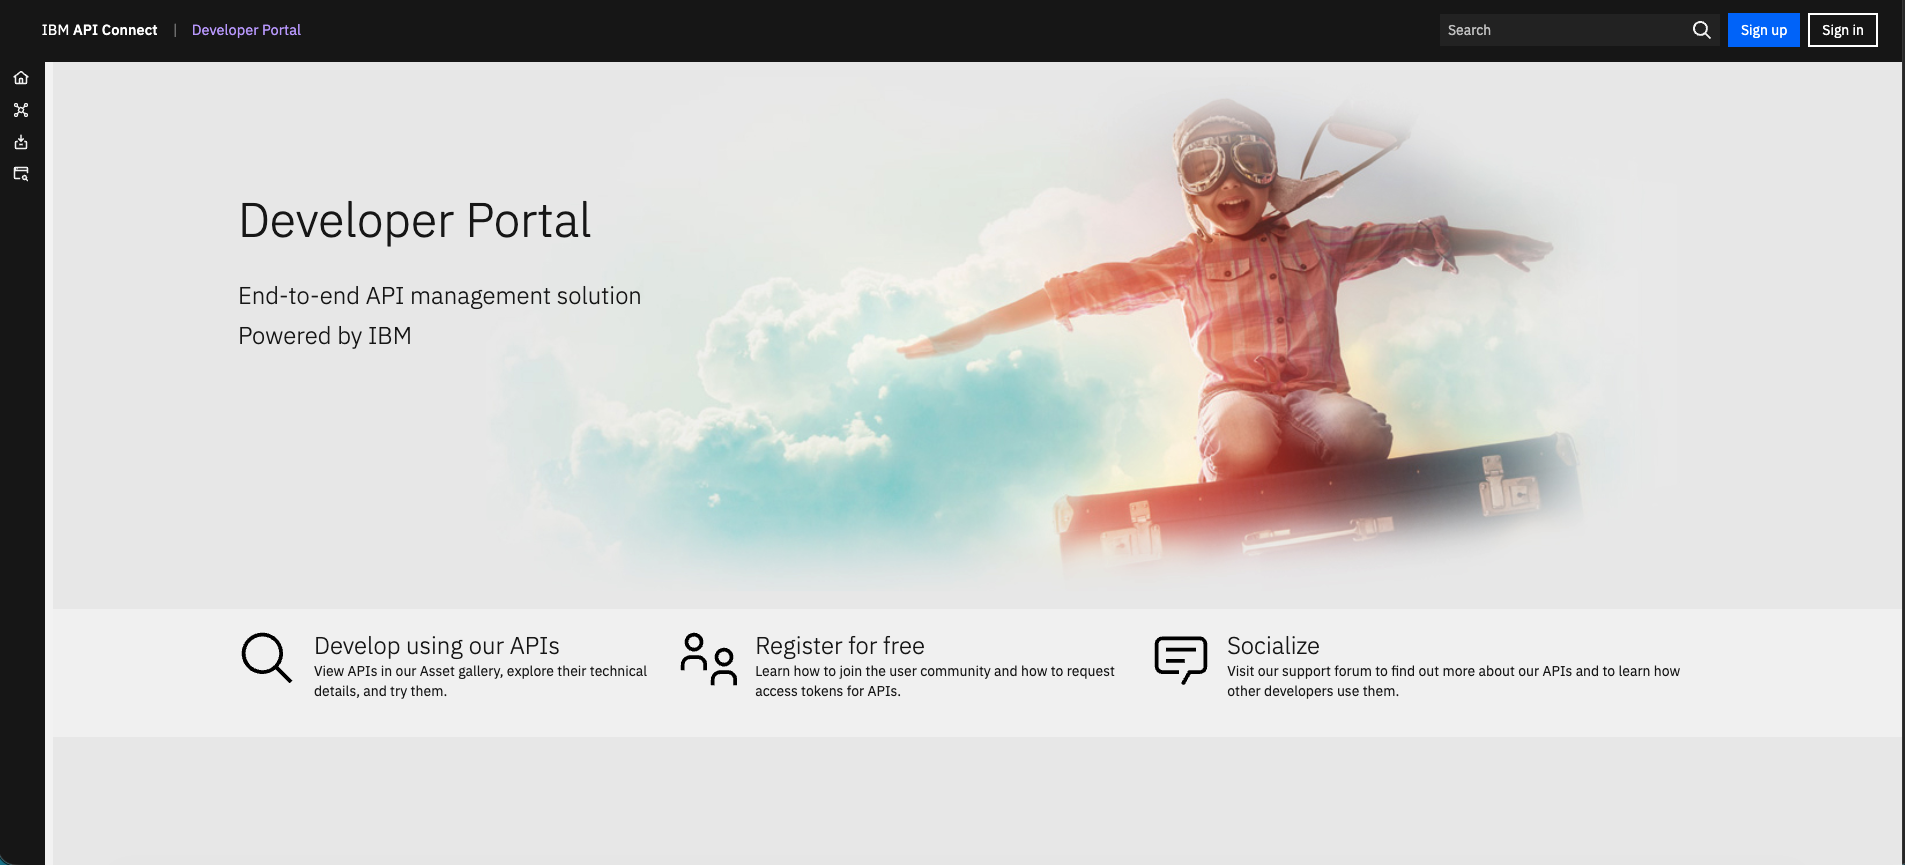
Welcome to developer portal
-
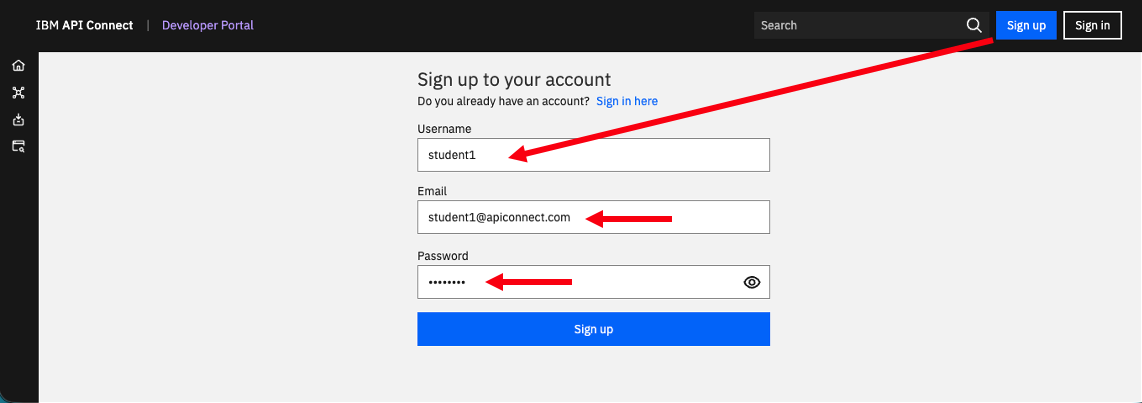
Click on <Sign up> button.

-
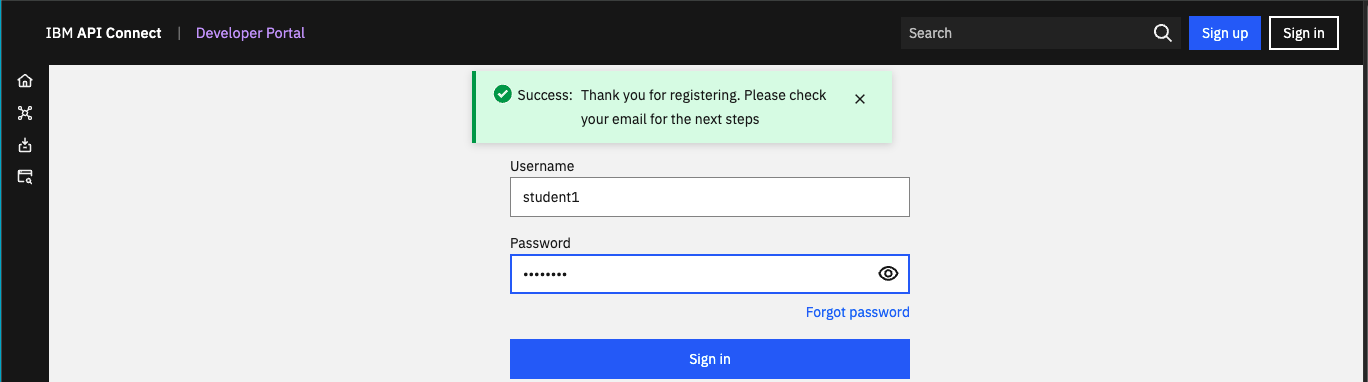
Login as student(n) now.
-
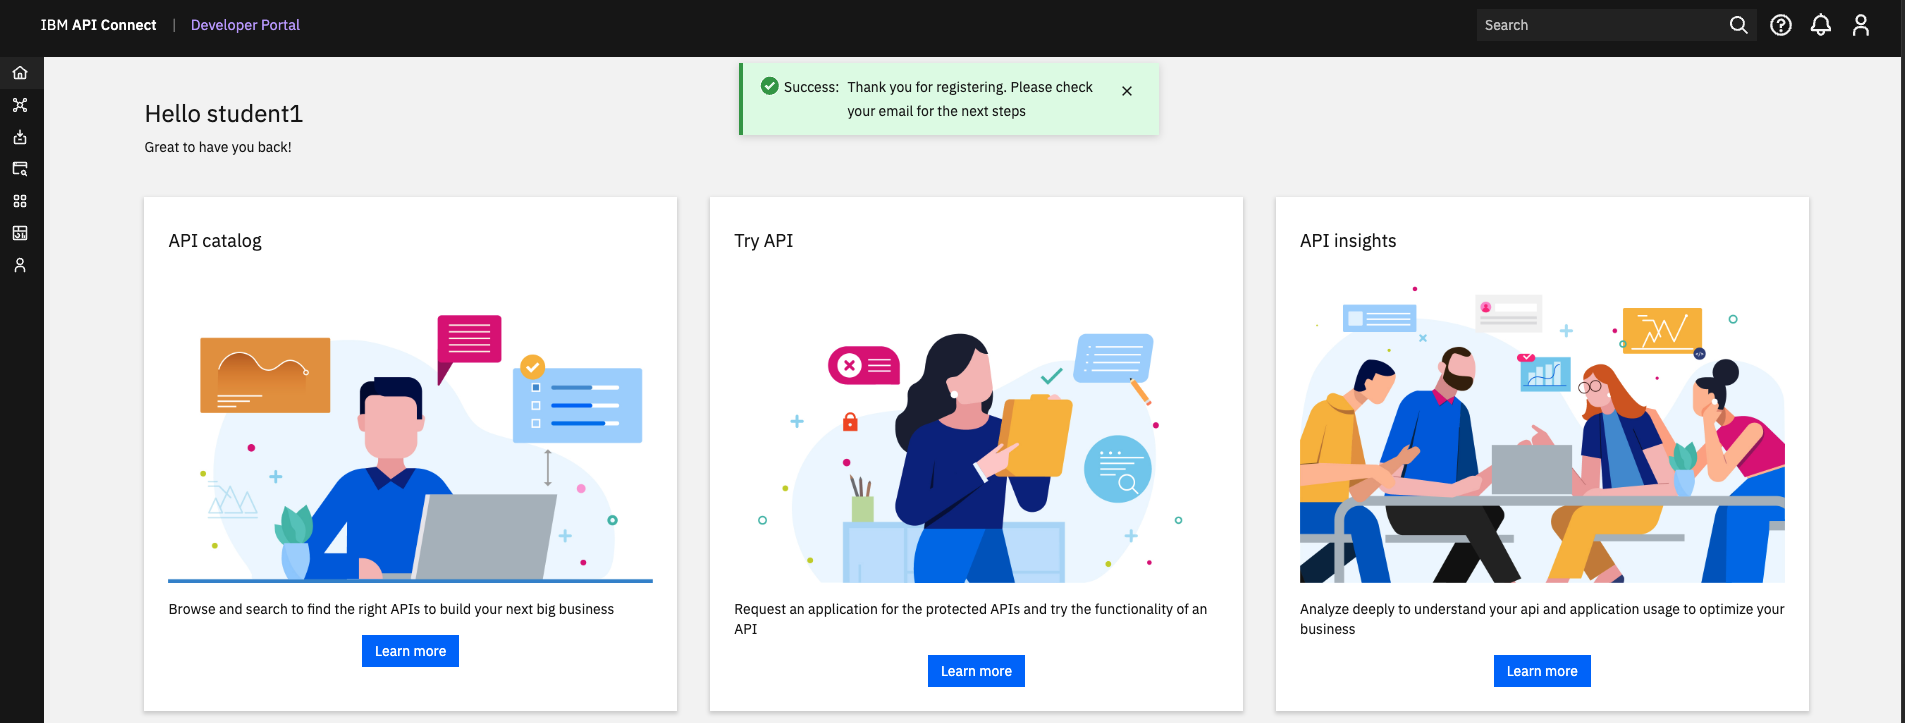
THis is the Developer Portal Welcome page.
-
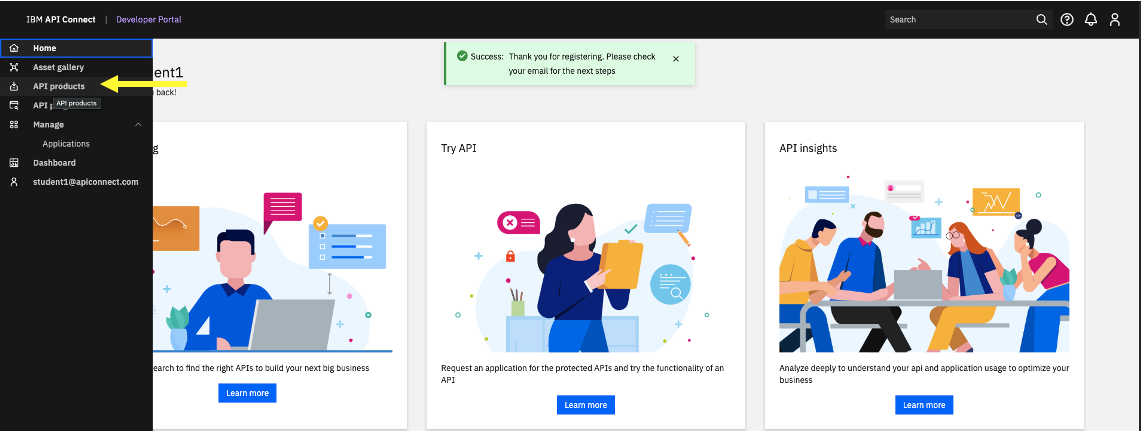
Click on “API Products”.
-
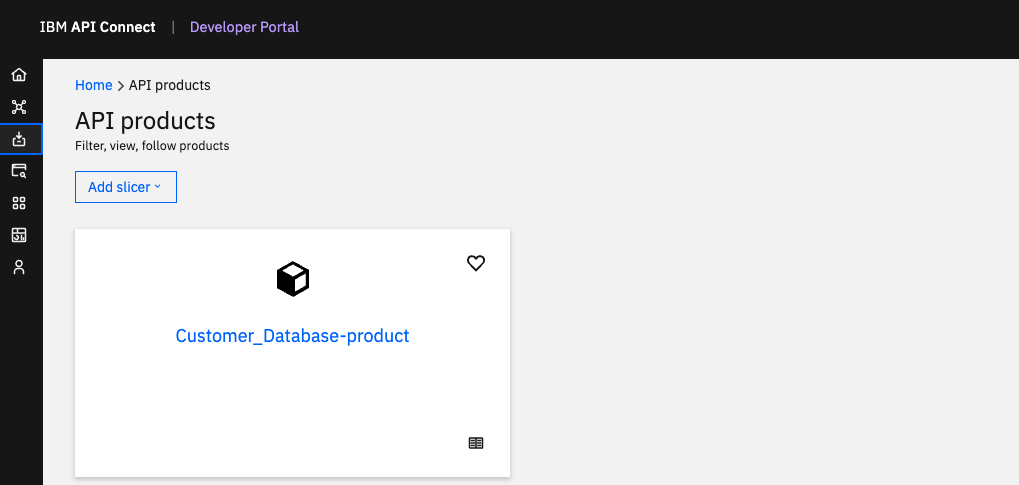
You should see Customer_Database API that was published earlier, then Click on the API.
5a. Subscribe API
-
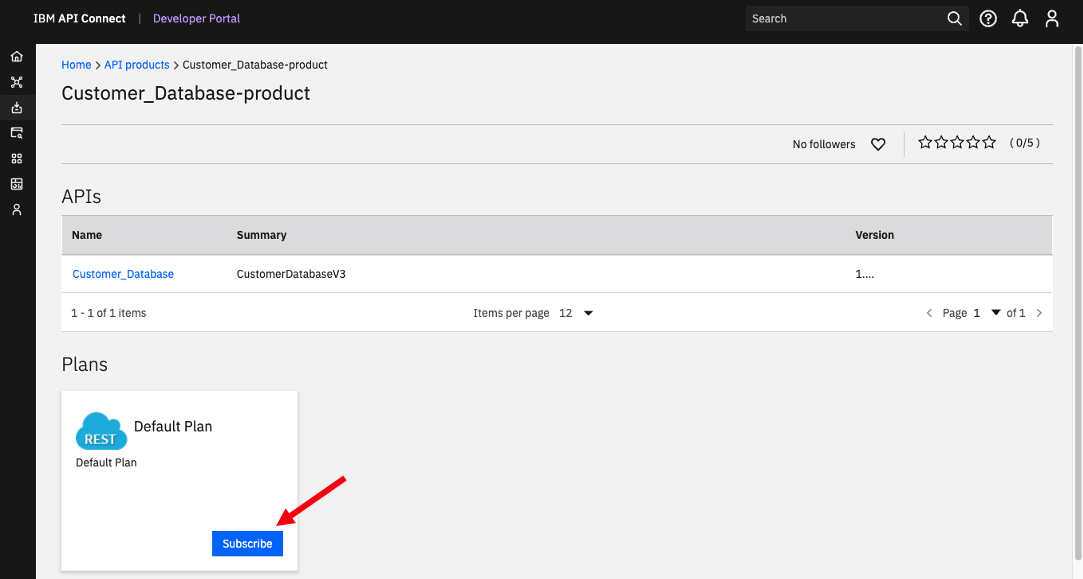
Subscribe the API
-
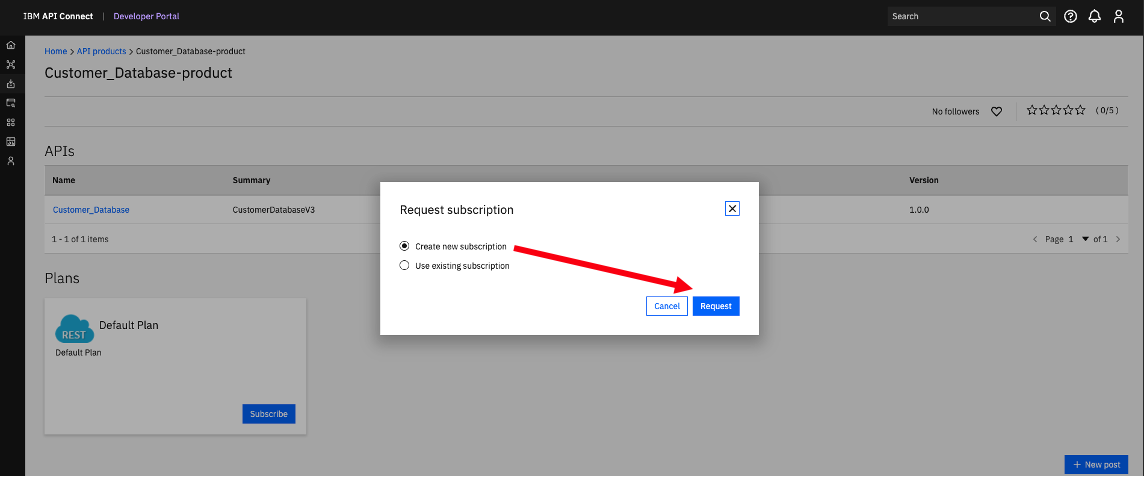
Click <\Subscribe>
-
Click “Create new subscription”, then click <\Request>.
-
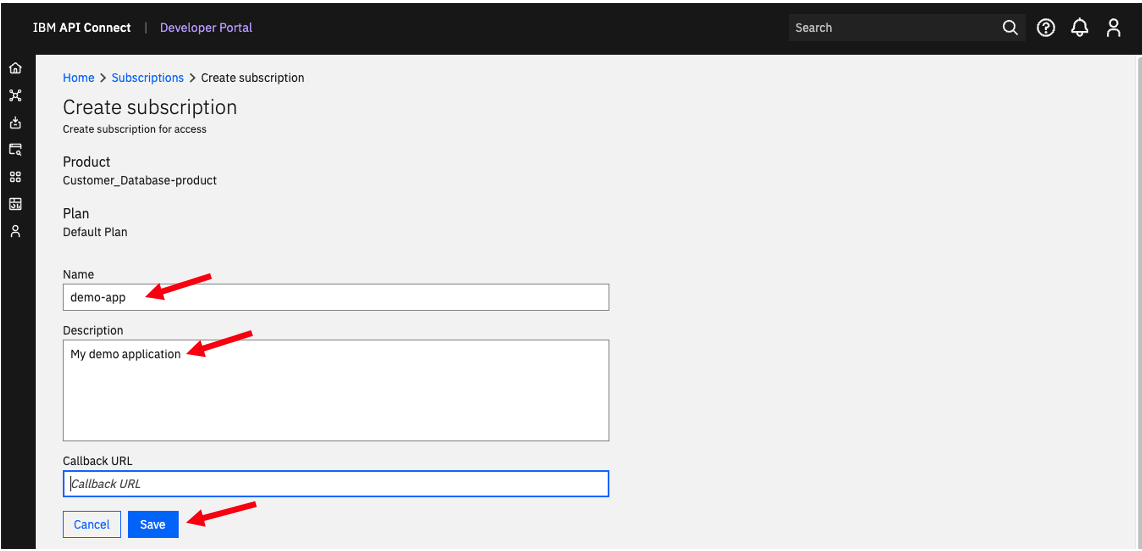
Click <\Save>.
-
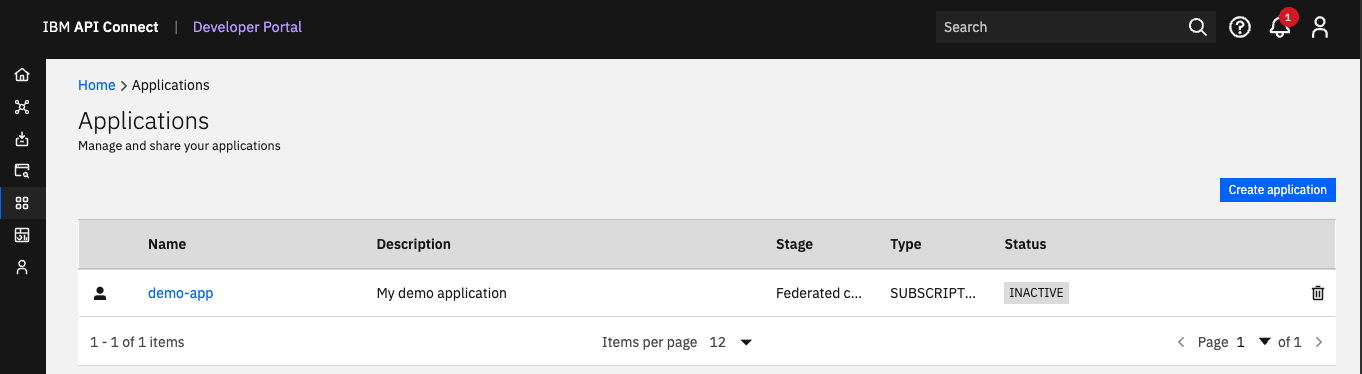
Click on the demo-app. You should see that your subscription is successful, and acknowledged by the DataPower API Gateway.
You should also see ClientID, and ClientSecret being generated.
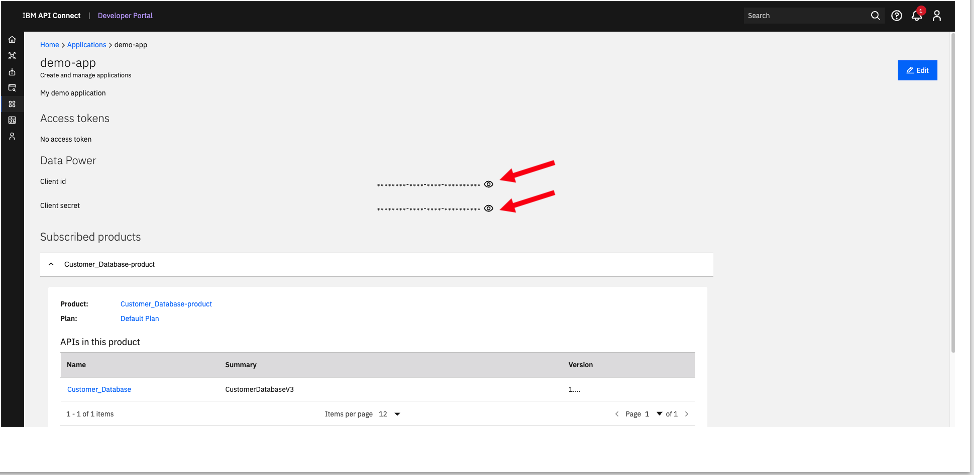
SAVE the ClientID, and ClientSecret to a NOTEPAD or TEXTPAD. You will need them when testing the API.
6. Test the API
-
Click on “API Products”.
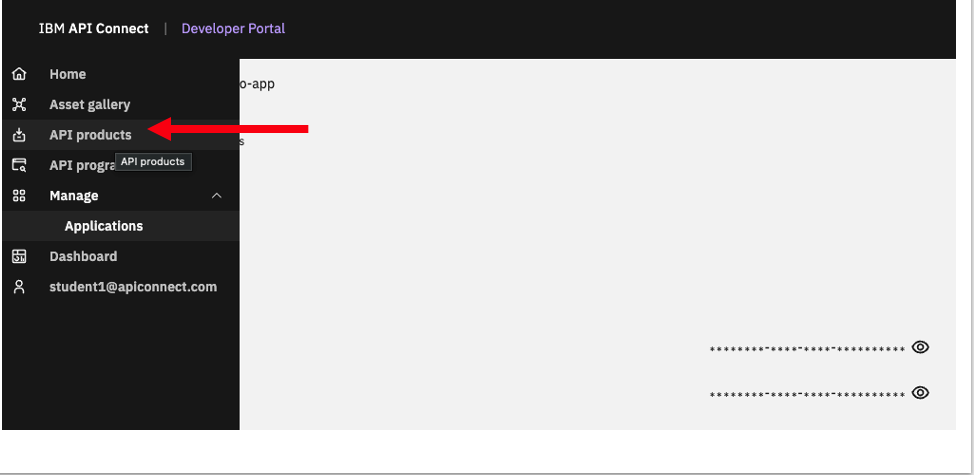
-
Click on the API Product Customer_Database-product, then click on the API.
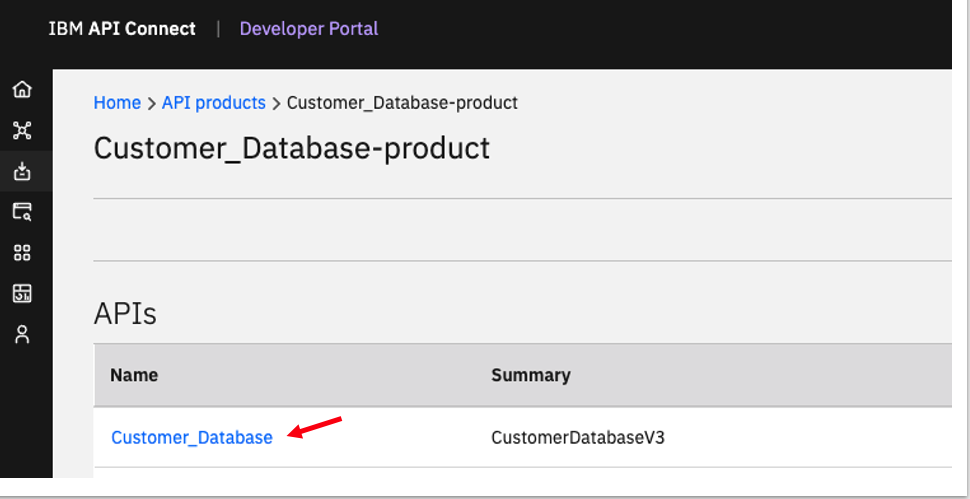
-
Expand “API Resources”.
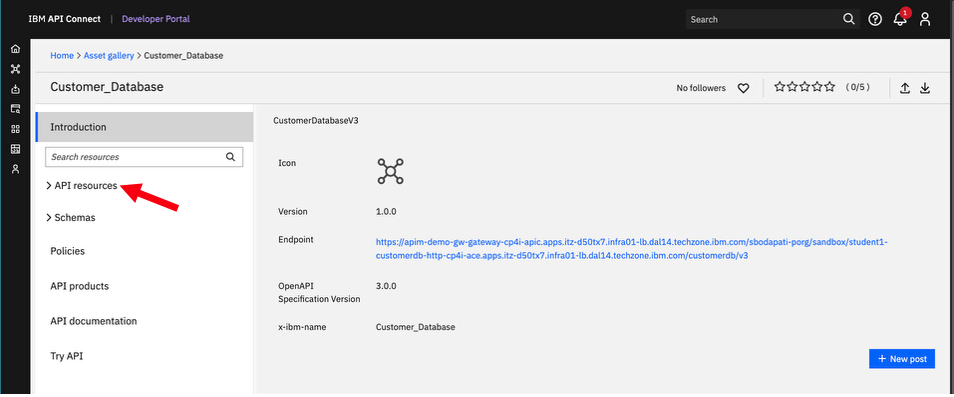
-
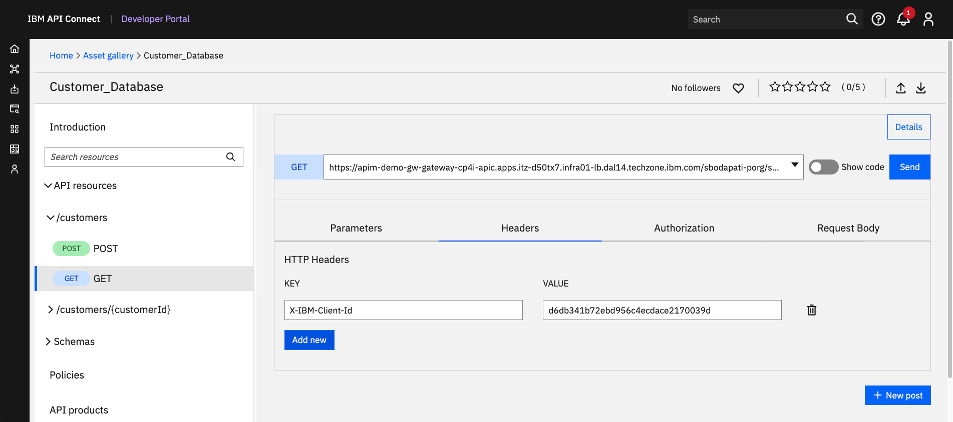
Navigate to GET under /customers operation.
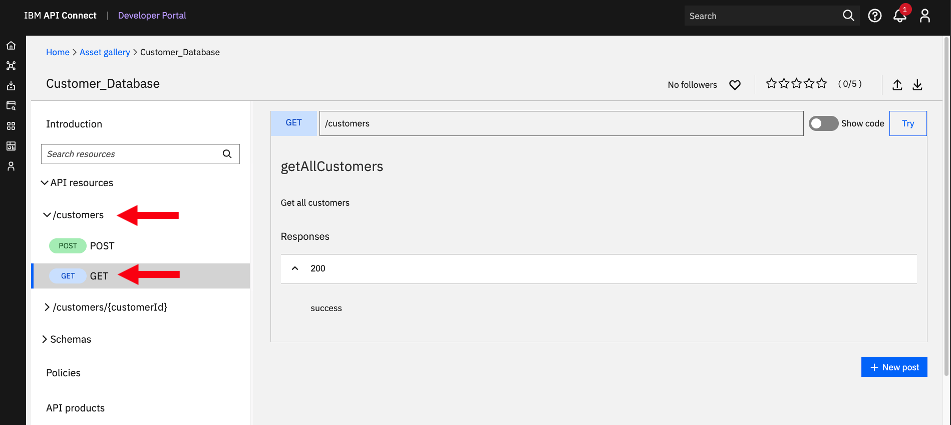
-
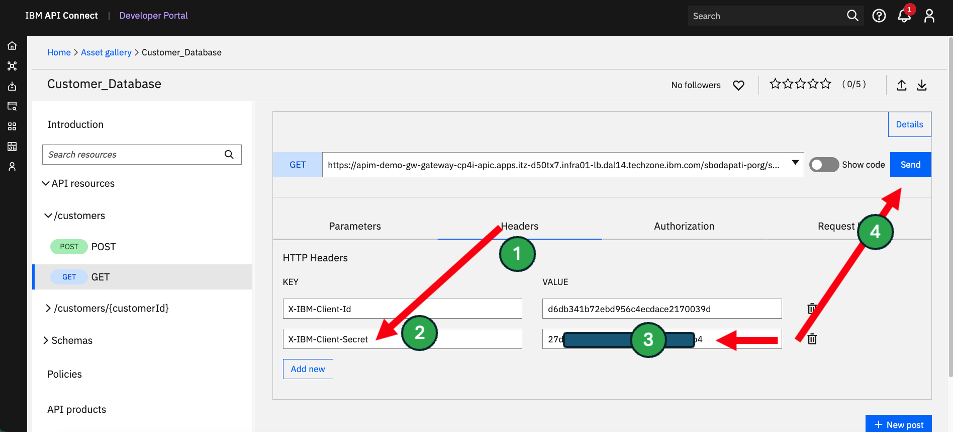
Click Headers tab to populate our ClientId, and Secret.
-
The ClientID should be populated automatically, you need to populate X-IBM-Client-Secret and its value that saved into the Notepad.
-
Click <\Send>.
-
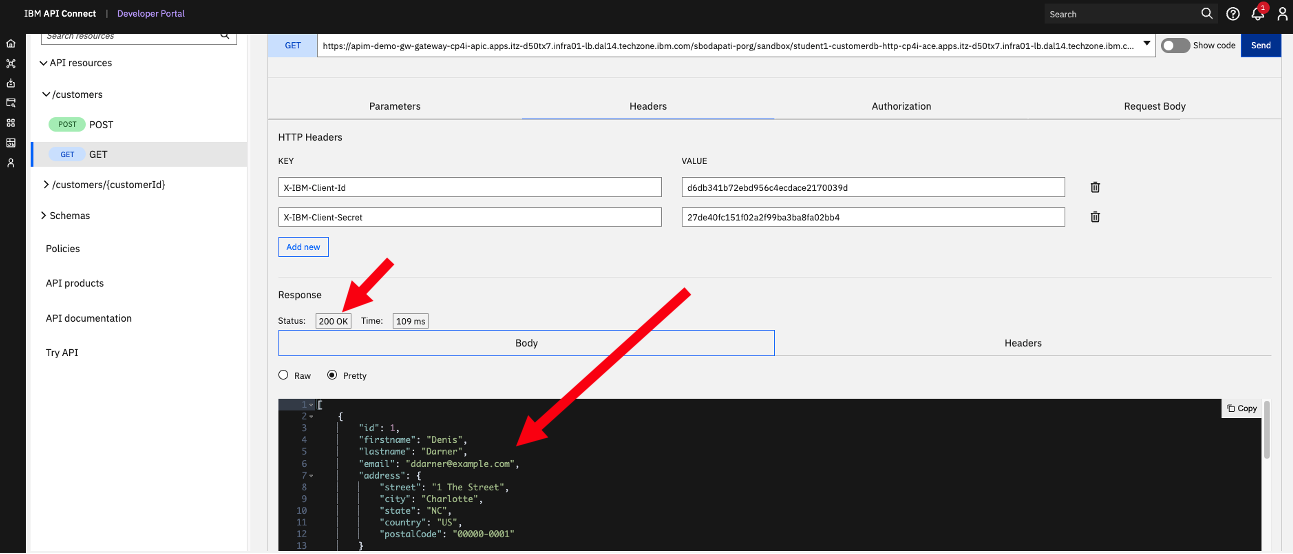
If successful, you should get “200 OK” Result.
6.Summary
Congratulations, you have completed the Create, Secure, publish, subscribe, and tested your API. Throughout the lab, you learned how to:
-
Create an API by importing an OpenAPI definition for an existing REST service
-
Configure ClientID/Secret Security, endpoints, CORS, and proxy to invoke endpoint
-
Publish an API for developers
-
Test a REST API in the Developer Portal